32、Redis 7系列:Spring Boot集成Redis
- 一、前言
- 二、集成 RedisTemplate
- 1、单机
- (1)新建项目
- (2)修改pom文件
- (3)修改yml文件
- (4)启动类
- (5)配置类
- (6)业务类
- (6)测试
- 2、集群
- (1)启动6台Redis实例(3主3从)
- (2)修改yml文件
- (3)测试(3主3从正常运行情况)
- (4)测试(3主3从其中某台master突发宕机)
- (5)拓展(根据上文测试)
一、前言
本文只有集成 RedisTemplate ,也是市面上最推荐使用的。
集成 Jedis 和集成 lettuce 已经被淘汰,所以不做过多赘述~
二、集成 RedisTemplate
1、单机
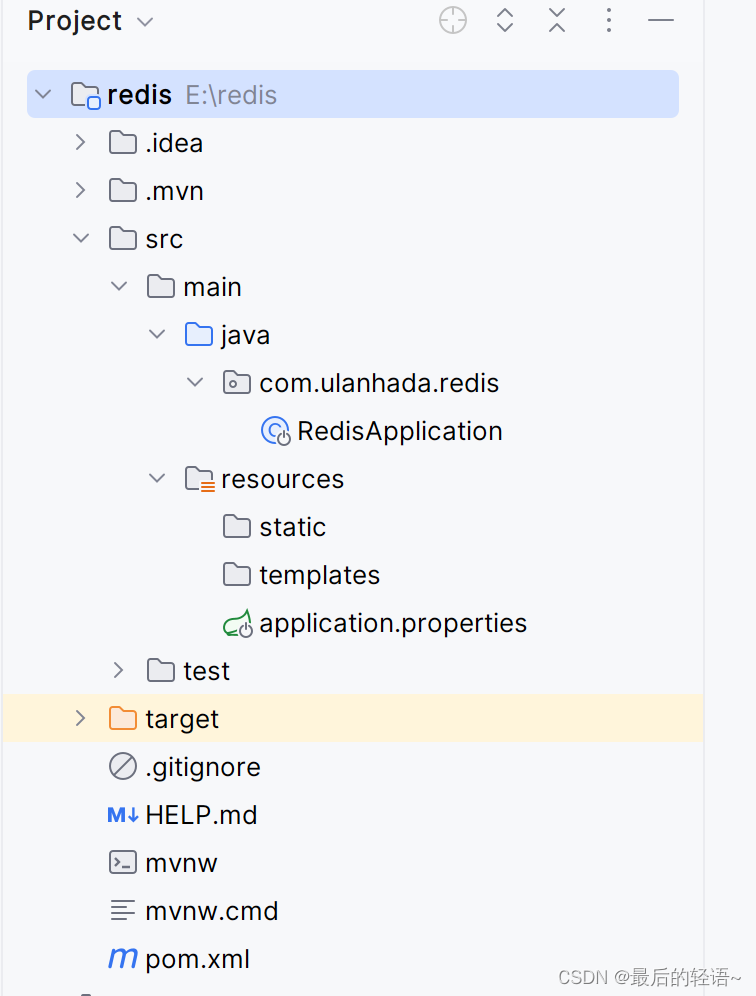
(1)新建项目
此案例新建 spring boot 项目(新建 maven 项目也可以,不过需要手动添加基础pom依赖)
(2)修改pom文件
<?xml version="1.0" encoding="UTF-8"?>
<project xmlns="http://maven.apache.org/POM/4.0.0" xmlns:xsi="http://www.w3.org/2001/XMLSchema-instance"xsi:schemaLocation="http://maven.apache.org/POM/4.0.0 https://maven.apache.org/xsd/maven-4.0.0.xsd"><modelVersion>4.0.0</modelVersion><parent><groupId>org.springframework.boot</groupId><artifactId>spring-boot-starter-parent</artifactId><version>3.2.3</version><relativePath/> <!-- lookup parent from repository --></parent><groupId>com.ulanhada</groupId><artifactId>redis</artifactId><version>0.0.1-SNAPSHOT</version><name>redis</name><description>redis</description><!-- 依赖版本 --><properties><java.version>17</java.version><project.build.sourceEncoding>UTF-8</project.build.sourceEncoding><lombok.version>1.18.30</lombok.version><log4j.version>1.2.17</log4j.version></properties><dependencies><!--SpringBoot通用依赖模块--><dependency><groupId>org.springframework.boot</groupId><artifactId>spring-boot-starter-web</artifactId></dependency><dependency><groupId>org.springframework.boot</groupId><artifactId>spring-boot-starter-test</artifactId><scope>test</scope></dependency><!--SpringBoot与Redis整合依赖--><dependency><groupId>org.springframework.boot</groupId><artifactId>spring-boot-starter-data-redis</artifactId></dependency><!-- spring boot 2.5.x后不需要引入Apache Commons Pool2 -->
<!--        <dependency>-->
<!--            <groupId>org.apache.commons</groupId>-->
<!--            <artifactId>commons-pool2</artifactId>-->
<!--        </dependency>--><dependency><groupId>org.projectlombok</groupId><artifactId>lombok</artifactId><version>${lombok.version}</version></dependency><dependency><groupId>log4j</groupId><artifactId>log4j</artifactId><version>${log4j.version}</version></dependency></dependencies><build><plugins><plugin><groupId>org.springframework.boot</groupId><artifactId>spring-boot-maven-plugin</artifactId></plugin></plugins></build>
</project>
(3)修改yml文件
server:port=8080spring:application:name: redisdata:redis:database: 0host: 192.168.250.130port: 6379password: 123456lettuce:pool:max-active: 8max-wait: -1msmax-idle: 8min-idle: 0# ========================logging=====================
logging:level:root: infocom.ulanhada.redis: infopattern:console: '%d{yyyy-MM-dd HH:mm:ss.SSS} [%thread] %-5level %logger- %msg%n'file: '%d{yyyy-MM-dd HH:mm:ss.SSS} [%thread] %-5level %logger- %msg%n'file:name: E:/redis/log/redis.log
(4)启动类
package com.ulanhada.redis;import org.springframework.boot.SpringApplication;
import org.springframework.boot.autoconfigure.SpringBootApplication;@SpringBootApplication
public class RedisApplication {public static void main(String[] args) {SpringApplication.run(RedisApplication.class, args);}
}
(5)配置类
package com.ulanhada.redis.config;import org.springframework.context.annotation.Bean;
import org.springframework.context.annotation.Configuration;
import org.springframework.data.redis.connection.lettuce.LettuceConnectionFactory;
import org.springframework.data.redis.core.RedisTemplate;
import org.springframework.data.redis.serializer.GenericJackson2JsonRedisSerializer;
import org.springframework.data.redis.serializer.StringRedisSerializer;/*** @Description: // Redis序列化配置类* @Author: chnmayan* @Date: 2024-03-05 10:30*/
@Configuration
public class RedisConfig {/*** @param lettuceConnectionFactory: 将配置文件中的redis配置,注入进工厂中。* @return*/@Beanpublic RedisTemplate<String, Object> redisTemplate(LettuceConnectionFactory lettuceConnectionFactory) {RedisTemplate<String,Object> redisTemplate = new RedisTemplate<>();redisTemplate.setConnectionFactory(lettuceConnectionFactory);//设置所有key序列化方式StringredisTemplate.setKeySerializer(new StringRedisSerializer());//设置value的序列化方式json,使用GenericJackson2JsonRedisSerializer替换默认序列化redisTemplate.setValueSerializer(new GenericJackson2JsonRedisSerializer());// 设置Hash的键(field)的序列化方式,只对Hash的field生效redisTemplate.setHashKeySerializer(new StringRedisSerializer());// 设置Hash的值(value)的序列化方式,只对Hash的value生效redisTemplate.setHashValueSerializer(new GenericJackson2JsonRedisSerializer());redisTemplate.afterPropertiesSet();return redisTemplate;}
}
(6)业务类
UserController
package com.ulanhada.redis.controller;import com.ulanhada.redis.service.UserService;
import jakarta.annotation.Resource;
import lombok.extern.slf4j.Slf4j;
import org.springframework.web.bind.annotation.PathVariable;
import org.springframework.web.bind.annotation.RequestMapping;
import org.springframework.web.bind.annotation.RequestMethod;
import org.springframework.web.bind.annotation.RestController;@RestController
@Slf4j
public class UserController {@ResourceUserService userService;@RequestMapping(value = "/user/add",method = RequestMethod.POST)public void addUser() {userService.addUser();}@RequestMapping(value = "/order/{userKey}", method = RequestMethod.GET)public String queryUserById(@PathVariable Integer userKey) {return userService.queryUserById(userKey);}
}
UserService
package com.ulanhada.redis.service;import jakarta.annotation.Resource;
import lombok.extern.slf4j.Slf4j;
import org.springframework.data.redis.core.RedisTemplate;
import org.springframework.stereotype.Service;import java.util.UUID;
import java.util.concurrent.ThreadLocalRandom;@Service
@Slf4j
public class UserService {public static final String USER_KEY = "userKey:";@Resourceprivate RedisTemplate redisTemplate;public void addUser() {int userKey = ThreadLocalRandom.current().nextInt(1000);String userValue = UUID.randomUUID().toString().replace("-", "").toUpperCase();redisTemplate.opsForValue().set(USER_KEY + userKey,"用户ID:"+ userValue);log.info("======用户key:" + userKey + "; 用户ID:" + userValue);}public String queryUserById(Integer userKey) {return (String) redisTemplate.opsForValue().get(USER_KEY + userKey);}
}
(6)测试
第一步:无Redis配置类
首先启动项目。然后输入测试 url:localhost:8080/user/add 。

控制台输出:

登录 Redis 客户端验证:
为了更清楚的看清序列化,本次登录 Redis 客户端方式采用普通登录方式(不支持中文)。用 支持中文的方式 登录 Redis 客户端,会出现乱码。

上图说明数据已经新增成功。但是数据出现了序列化问题。
出现该问题的原因:
Redis 的键(key)和值(value)都是通过 Spring 提供的 Serializer 序列化到数据库的。
RedisTemplate 默认使用的是 JdkSerializationRedisSerializer。


解决办法一:
编码中不使用 RedisTemplate ,改为 StringRedisTemplate。

由于 StringRedisTemplate 已经指定了序列化方式,所以可以正常使用。不过该方法只能 String 的数据使用,其他数据类型不能使用。
解决办法二(推荐):
新建 Redis序列化配置类 。配置类内容见本文 (5)配置类 。
手动删除上一条数据,语法:del [key]。
用 postman 重新新增一条数据,再次登录客户端验证。
# 语法:--raw: Redis客户端支持中文
redis-cli -a 123456 -p 6379 --raw

2、集群
(1)启动6台Redis实例(3主3从)
集群搭建不再赘述,不了解的小伙伴可以参考如下文章:
31、Redis 7系列:集群(cluster)
注意:登录客户端命令需要添加:-c 和 --raw 。
redis-cli -a 123456 -p 6381 -c --raw

(2)修改yml文件
yml文件Redis配置修改为集群
redis:password: 123456lettuce:pool:max-active: 8max-wait: -1msmax-idle: 8min-idle: 0cluster:max-redirects: 3 # 获取失败 最大重定向次数nodes: 192.168.250.130:6381,192.168.250.130:6382,192.168.250.131:6383,192.168.250.131:6384,192.168.250.132:6385,192.168.250.132:6386
(3)测试(3主3从正常运行情况)
启动项目,并新增一条数据。

(4)测试(3主3从其中某台master突发宕机)
上文测试虽然新增成功,实则暗藏隐患。
如果当其中一台 master宕机 ,会出现什么情况?接下来做个深度测试。
-
模拟
master-6381服务器突发宕机
执行shutdown命令 -
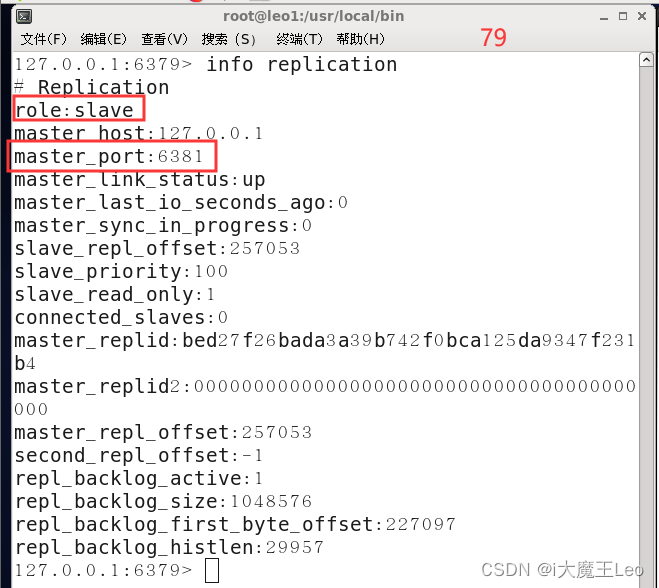
查看集群信息
发现 6384实例 原本是 6381实例 的 slave 。目前已经变成 master 。

-
验证Redis客户端
集群功能一切正常。

-
验证Spring Boot服务端
由于本案例是基于Spring Boot 3.x,所以测试一切正常。


(5)拓展(根据上文测试)
本案例 Redis Cluster 集群部署采用了 3主3从拓扑结构 。数据读写访问 master 节点, slave 节点负责备份。当 master 宕机主从切换成功,Redis客户端 操作一切正常,Spring Boot服务端 会根据Spring Boot版本 的不同出现如下问题。

- Spring Boot 1.x 版本环境
Spring Boot 1.x之前版本默认使用jedis,无需手动开启动态刷新。 - Spring Boot 2.0~2.3 版本环境
Spring Boot 2.0~2.3版本默认使用lettuce,默认不支持属性配置集群拓扑刷新。 - Spring Boot 2.3之后 版本环境
Spring Boot 2.3版本之后版本默认使用lettuce,默认支持属性配置开启集群拓扑刷新。 - Spring Boot 3.x以后 版本环境
默认动态的刷新集群拓扑感应。
解决办法:
- 排除**
lettuce** ,使用jedis。更改pom文件(不推荐) - 重写连接工厂实例。(极度不推荐)
- 动态的刷新集群拓扑感应。(推荐)
# 修改配置文件
spring:redis:lettuce:cluster:refresh-enabled: true #支持集群拓扑动态感应刷新,自适应拓扑刷新是否使用所有可用的更新,默认false关闭refresh-period: 2000 #定时刷新
到这里 Redis 7系列:Spring Boot集成Redis 就结束了!!!🎉🎉🎉
欢迎小伙伴们学习和指正!!!😊😊😊
祝大家学习和工作一切顺利!!!😎😎😎



![ubuntu_定制文件系统[2]-清理日志log](https://img-blog.csdnimg.cn/direct/be408504585f479f82cbfe1c8ffb91b8.png)

