环境准备
#>>> redis
$ yum -y install redis
$ systemctl enable --now redis
$ vim /etc/redis.conf
modify: bind <ipaddress>
$ systemctl restart redis#>>> nfs
$ yum -y install nfs-utils
$ mkdir -p /data/harbor
$ vi /etc/exports
/data/harbor	<ipsegment>/<netmask>(rw,sync,no_root_squash)
$ systemctl enable --now nfs#>>>测试:【两台harbor机器都要操作】
$ vi /etc/fstab
<nfs-server-ipaddress>:/data/harbor	/data/harbor	nfs	defaults	0 0$ mount -a
mount.nfs: mount point /data/harbor does not exist
$ mkdir -p /data/harbor
$ mount -a
$ df -Th
文件系统                             类型      容量  已用  可用 已用% 挂载点
devtmpfs                            devtmpfs  979M     0  979M    0% /dev
tmpfs                               tmpfs     991M     0  991M    0% /dev/shm
tmpfs                               tmpfs     991M  9.6M  981M    1% /run
tmpfs                               tmpfs     991M     0  991M    0% /sys/fs/cgroup
/dev/mapper/centos-root             xfs        17G  1.4G   16G    8% /
/dev/sda1                           xfs      1014M  138M  877M   14% /boot
tmpfs                               tmpfs     199M     0  199M    0% /run/user/0
<nfs-server-ipaddress>:/data/harbor nfs4       17G  1.4G   16G    9% /data/harbor#>>> postgresql
$ yum install -y https://download.postgresql.org/pub/repos/yum/reporpms/EL-7-x86_64/pgdg-redhat-repo-latest.noarch.rpm$ yum install -y postgresql13-server$ /usr/pgsql-13/bin/postgresql-13-setup initdb
$ systemctl enable --now postgresql-13$ vim /var/lib/pgsql/13/data/postgresql.conf
modify: listen_addresses = '*'$ vim /var/lib/pgsql/13/data/pg_hba.conf
host    all             all             <ipsegment>:<netmask>          md5$ systemctl restart postgresql-13$ su - postgres
bash4.2# psql#>>> 以下操作在posetgresql中进行
postgres=# CREATE DATABASE harbor;
CREATE DATABASE
postgres=# CREATE DATABASE notary_signer;
CREATE DATABASE
postgres=# CREATE DATABASE notary_server;
CREATE DATABASEpostgres=# CREATE USER harbor WITH PASSWORD 'Wyxbuke00.';
CREATE ROLE
postgres=# CREATE USER notary_signer WITH PASSWORD 'Wyxbuke00.';
CREATE ROLE
postgres=# CREATE USER notary_server WITH PASSWORD 'Wyxbuke00.';
CREATE ROLEpostgres=# GRANT ALL PRIVILEGES ON DATABASE harbor TO harbor;
GRANT
postgres=# GRANT ALL PRIVILEGES ON DATABASE notary_signer TO notary_signer;
GRANT
postgres=# GRANT ALL PRIVILEGES ON DATABASE notary_server TO notary_server;#>>> nginx
$ vim /etc/yum.repos.d/nginx.repo
[nginx-stable]
name=nginx stable repo
baseurl=http://nginx.org/packages/centos/$releasever/$basearch/
gpgcheck=1
enabled=1
gpgkey=https://nginx.org/keys/nginx_signing.key
module_hotfixes=true$ yum -y install nginx
$ cd /etc/nginx/conf.d
$ vim harbor-proxy.conf
upstream harbor-service {server <harborA_ipaddress>:80;server <harborB_ipaddress>:80;
}server {listen       80;server_name  harbor.daemon.com;access_log  /var/log/nginx/harbor-loadbalance.access.log  main;location / {proxy_set_header X-Forwarded-Proto $scheme;proxy_pass http://harbor-service;}
}$ systemctl restart nginx
harbor配置及启动
#>>> 安装harbor
#>>> 含义: 对企业内的镜像进行统一的管理,并且harbor还带有 用户管理功能, 并且还具备LDAP用户管理域接入功能;#>>> 1.事先在两台harbor机其中安装好docker, 并配置好加速器
#>>> 2.安装docker-compose
$ curl -L "https://github.com/docker/compose/releases/download/1.29.2/docker-compose-$(uname -s)-$(uname -m)" -o /usr/local/bin/docker-compose
$ chmod a+x /usr/local/bin/docker-compose
$ ln -s /usr/local/bin/docker-compose /usr/bin/docker-compose#>>> harbor 下载地址: https://github.com/goharbor/harbor/releases/download/v2.5.0/harbor-offline-installer-v2.5.0.tgz
$ tar xf harbor-offline-installer-$(VERSION).tgz -C /usr/local/
$ cd /usr/local/harbor
$ cp harbor.yml.tmpl harbor.yml
$ vim harbor.yml
# Uncomment external_database if using external database.
external_database:harbor:host: <postgresql_address>port: 5432db_name: harborusername: harborpassword: Wyxbuke00.ssl_mode: disablemax_idle_conns: 2max_open_conns: 0notary_signer:host: <postgresql_address>port: 5432db_name: notary_signerusername: notary_signerpassword:Wyxbuke00.ssl_mode: disablenotary_server:host: <postgresql_address>port: 5432db_name: notary_serverusername: notary_serverpassword: Wyxbuke00.ssl_mode: disable# Uncomment external_redis if using external Redis server
external_redis:# support redis, redis+sentinel# host for redis: <host_redis>:<port_redis># host for redis+sentinel:#  <host_sentinel1>:<port_sentinel1>,<host_sentinel2>:<port_sentinel2>,<host_sentinel3>:<port_sentinel3>host: <redis_address>:6379#password:# sentinel_master_set must be set to support redis+sentinel#sentinel_master_set:# db_index 0 is for core, it's unchangeableregistry_db_index: 1jobservice_db_index: 2chartmuseum_db_index: 3trivy_db_index: 5idle_timeout_seconds: 30#>>> harbor安装步骤
#>>> 下载所需的镜像
[root@harbor-a harbor]# ./prepare
#>>> 直接安装
[root@harbor-a harbor]# ./install.sh#>>> 上传时报错
[root@harbor-a harbor]# vim /etc/docker/daemon.json
"insecure-registries": ["harbor.hiops.com"]
或者通过xftp将提前下载好的harbor和docker-compose传到虚拟机上:

[root@service ~]# tar xf harbor-offline-installer-v2.8.4.tgz -C /usr/local
[root@service ~]# cd /usr/local
[root@service local]# ll
总用量 0
drwxr-xr-x. 2 root root   6  8月 10  2021 bin
drwxr-xr-x. 2 root root   6  8月 10  2021 etc
drwxr-xr-x. 2 root root   6  8月 10  2021 games
drwxr-xr-x. 2 root root 122  3月 10 20:47 harbor
drwxr-xr-x. 2 root root   6  8月 10  2021 include
drwxr-xr-x. 2 root root   6  8月 10  2021 lib
drwxr-xr-x. 3 root root  17  9月  7  2023 lib64
drwxr-xr-x. 2 root root   6  8月 10  2021 libexec
drwxr-xr-x. 2 root root   6  8月 10  2021 sbin
drwxr-xr-x. 5 root root  49  9月  7  2023 share
drwxr-xr-x. 2 root root   6  8月 10  2021 src[root@service local]# cd harbor
[root@service harbor]# ll\
>
总用量 597536
-rw-r--r--. 1 root root      3639  8月 15  2023 common.sh
-rw-r--r--. 1 root root 611834153  8月 15  2023 harbor.v2.8.4.tar.gz
-rw-r--r--. 1 root root     12499  8月 15  2023 harbor.yml.tmpl
-rwxr-xr-x. 1 root root      2725  8月 15  2023 install.sh
-rw-r--r--. 1 root root     11347  8月 15  2023 LICENSE
-rwxr-xr-x. 1 root root      1881  8月 15  2023 prepare
[root@service harbor]# cp harbor.yml.tmpl harbor.yml
[root@service harbor]# ./install.sh[root@service harbor]#  vim harbor.yml
#https:# https port for harbor, default is 443# port: 443# The path of cert and key files for nginx#certificate: /your/certificate/path#private_key: /your/private/key/path# # Uncomment following will enable tls communication between all harbor components
# internal_tls:
#   # set enabled to true means internal tls is enabled
#   enabled: true
#   # put your cert and key files on dir
#   dir: /etc/harbor/tls/internal# Uncomment external_url if you want to enable external proxy
# And when it enabled the hostname will no longer used
# external_url: https://reg.mydomain.com:8433# The initial password of Harbor admin
# It only works in first time to install harbor
# Remember Change the admin password from UI after launching Harbor.
harbor_admin_password: 123456[root@service harbor]# ./install.sh[Step 0]: checking if docker is installed ...Note: docker version: 25.0.3[Step 1]: checking docker-compose is installed ...Note: Docker Compose version v2.24.5[Step 2]: loading Harbor images ...
Loaded image: goharbor/harbor-jobservice:v2.8.4
Loaded image: goharbor/redis-photon:v2.8.4
Loaded image: goharbor/harbor-log:v2.8.4
Loaded image: goharbor/harbor-db:v2.8.4
Loaded image: goharbor/nginx-photon:v2.8.4
Loaded image: goharbor/prepare:v2.8.4
Loaded image: goharbor/harbor-core:v2.8.4
Loaded image: goharbor/trivy-adapter-photon:v2.8.4
Loaded image: goharbor/harbor-portal:v2.8.4
Loaded image: goharbor/registry-photon:v2.8.4
Loaded image: goharbor/notary-server-photon:v2.8.4
Loaded image: goharbor/notary-signer-photon:v2.8.4
Loaded image: goharbor/harbor-registryctl:v2.8.4
Loaded image: goharbor/harbor-exporter:v2.8.4[Step 3]: preparing environment ...[Step 4]: preparing harbor configs ...
prepare base dir is set to /usr/local/harbor
WARNING:root:WARNING: HTTP protocol is insecure. Harbor will deprecate http protocol in the future. Please make sure to upgrade to https
Generated configuration file: /config/portal/nginx.conf
Generated configuration file: /config/log/logrotate.conf
Generated configuration file: /config/log/rsyslog_docker.conf
Generated configuration file: /config/nginx/nginx.conf
Generated configuration file: /config/core/env
Generated configuration file: /config/core/app.conf
Generated configuration file: /config/registry/config.yml
Generated configuration file: /config/registryctl/env
Generated configuration file: /config/registryctl/config.yml
Generated configuration file: /config/db/env
Generated configuration file: /config/jobservice/env
Generated configuration file: /config/jobservice/config.yml
Generated and saved secret to file: /data/secret/keys/secretkey
Successfully called func: create_root_cert
Generated configuration file: /compose_location/docker-compose.yml
Clean up the input dirNote: stopping existing Harbor instance ...[Step 5]: starting Harbor ...
[+] Running 9/10? Network harbor_harbor        Created                                                                                                                               3.3s ? Container harbor-log         Started                                                                                                                               0.5s ? Container redis              Started                                                                                                                               1.9s ? Container harbor-db          Started                                                                                                                               1.6s ? Container harbor-portal      Started                                                                                                                               1.7s ? Container registry           Started                                                                                                                               1.9s ? Container registryctl        Started                                                                                                                               1.5s ? Container harbor-core        Started                                                                                                                               2.3s ? Container nginx              Started                                                                                                                               3.1s ? Container harbor-jobservice  Started                                                                                                                               3.1s
? ----Harbor has been installed and started successfully.----
[root@service harbor]# ll
总用量 597560
drwxr-xr-x. 3 root root        20  3月 10 20:49 common
-rw-r--r--. 1 root root      3639  8月 15  2023 common.sh
-rw-r--r--. 1 root root      5834  3月 10 20:51 docker-compose.yml
-rw-r--r--. 1 root root 611834153  8月 15  2023 harbor.v2.8.4.tar.gz
-rw-r--r--. 1 root root     12497  3月 10 20:51 harbor.yml
-rw-r--r--. 1 root root     12499  8月 15  2023 harbor.yml.tmpl
-rwxr-xr-x. 1 root root      2725  8月 15  2023 install.sh
-rw-r--r--. 1 root root     11347  8月 15  2023 LICENSE
-rwxr-xr-x. 1 root root      1881  8月 15  2023 prepare
.
[root@service harbor]# systemctl start docker[root@service harbor]# cd ~
[root@service ~]# ll
总用量 653920
-rw-------. 1 root root      1293  9月  7  2023 anaconda-ks.cfg
-rw-r--r--. 1 root root  61431093  3月 10 20:51 docker-compose-linux-x86_64
-rw-r--r--. 1 root root 608175520  3月 10 20:47 harbor-offline-installer-v2.8.4.tgz
[root@service ~]#  mv docker-compose-linux-x86_64 /usr/local/bin/docker-compose
[root@service ~]# chmod +x /usr/local/bin/docker-compose
[root@service ~]# docker-compose version
Docker Compose version v2.24.6
[root@service ~]# cd /usr/local/harbor
[root@service harbor]# ll
总用量 597560
drwxr-xr-x. 3 root root        20  3月 10 20:49 common
-rw-r--r--. 1 root root      3639  8月 15  2023 common.sh
-rw-r--r--. 1 root root      5834  3月 10 20:51 docker-compose.yml
-rw-r--r--. 1 root root 611834153  8月 15  2023 harbor.v2.8.4.tar.gz
-rw-r--r--. 1 root root     12497  3月 10 20:51 harbor.yml
-rw-r--r--. 1 root root     12499  8月 15  2023 harbor.yml.tmpl
-rwxr-xr-x. 1 root root      2725  8月 15  2023 install.sh
-rw-r--r--. 1 root root     11347  8月 15  2023 LICENSE
-rwxr-xr-x. 1 root root      1881  8月 15  2023 prepare
[root@service harbor]# ./install.sh[root@service harbor]# docker-cpmpose ps
bash: docker-cpmpose: command not found...
[root@service harbor]# docker-compose ps
NAME                IMAGE                                COMMAND                   SERVICE       CREATED          STATUS                             PORTS
harbor-core         goharbor/harbor-core:v2.8.4          "/harbor/entrypoint.…"   core          14 seconds ago   Up 12 seconds (health: starting)
harbor-db           goharbor/harbor-db:v2.8.4            "/docker-entrypoint.…"   postgresql    14 seconds ago   Up 12 seconds (health: starting)
harbor-jobservice   goharbor/harbor-jobservice:v2.8.4    "/harbor/entrypoint.…"   jobservice    14 seconds ago   Up 10 seconds (health: starting)
harbor-log          goharbor/harbor-log:v2.8.4           "/bin/sh -c /usr/loc…"   log           15 seconds ago   Up 13 seconds (health: starting)   127.0.0.1:1514->10514/tcp
harbor-portal       goharbor/harbor-portal:v2.8.4        "nginx -g 'daemon of…"   portal        14 seconds ago   Up 12 seconds (health: starting)
nginx               goharbor/nginx-photon:v2.8.4         "nginx -g 'daemon of…"   proxy         14 seconds ago   Up 11 seconds (health: starting)   0.0.0.0:80->8080/tcp, :::80->8080/tcp
redis               goharbor/redis-photon:v2.8.4         "redis-server /etc/r…"   redis         14 seconds ago   Up 12 seconds (health: starting)
registry            goharbor/registry-photon:v2.8.4      "/home/harbor/entryp…"   registry      14 seconds ago   Up 12 seconds (health: starting)
registryctl         goharbor/harbor-registryctl:v2.8.4   "/home/harbor/start.…"   registryctl   14 seconds ago   Up 12 seconds (health: starting)
[root@service harbor]# ip a
1: lo: <LOOPBACK,UP,LOWER_UP> mtu 65536 qdisc noqueue state UNKNOWN group default qlen 1000link/loopback 00:00:00:00:00:00 brd 00:00:00:00:00:00inet 127.0.0.1/8 scope host lovalid_lft forever preferred_lft foreverinet6 ::1/128 scope host valid_lft forever preferred_lft forever
2: ens160: <BROADCAST,MULTICAST,UP,LOWER_UP> mtu 1500 qdisc mq state UP group default qlen 1000link/ether 00:0c:29:04:e4:be brd ff:ff:ff:ff:ff:ffaltname enp3s0inet 192.168.142.139/24 brd 192.168.142.255 scope global dynamic noprefixroute ens160valid_lft 1164sec preferred_lft 1164secinet6 fe80::20c:29ff:fe04:e4be/64 scope link noprefixroute valid_lft forever preferred_lft forever
3: docker0: <NO-CARRIER,BROADCAST,MULTICAST,UP> mtu 1500 qdisc noqueue state DOWN group default link/ether 02:42:ca:d6:7d:06 brd ff:ff:ff:ff:ff:ffinet 172.17.0.1/16 brd 172.17.255.255 scope global docker0valid_lft forever preferred_lft foreverinet6 fe80::42:caff:fed6:7d06/64 scope link valid_lft forever preferred_lft forever
39: br-bb464c28b278: <BROADCAST,MULTICAST,UP,LOWER_UP> mtu 1500 qdisc noqueue state UP group default link/ether 02:42:6d:88:8a:3d brd ff:ff:ff:ff:ff:ffinet 172.19.0.1/16 brd 172.19.255.255 scope global br-bb464c28b278valid_lft forever preferred_lft foreverinet6 fe80::42:6dff:fe88:8a3d/64 scope link valid_lft forever preferred_lft forever
41: veth3205038@if40: <BROADCAST,MULTICAST,UP,LOWER_UP> mtu 1500 qdisc noqueue master br-bb464c28b278 state UP group default link/ether e6:45:10:37:aa:b0 brd ff:ff:ff:ff:ff:ff link-netnsid 0inet6 fe80::e445:10ff:fe37:aab0/64 scope link valid_lft forever preferred_lft forever
43: vethf157077@if42: <BROADCAST,MULTICAST,UP,LOWER_UP> mtu 1500 qdisc noqueue master br-bb464c28b278 state UP group default link/ether c2:d0:e0:23:f5:a7 brd ff:ff:ff:ff:ff:ff link-netnsid 1inet6 fe80::c0d0:e0ff:fe23:f5a7/64 scope link valid_lft forever preferred_lft forever
45: veth0c7a7b8@if44: <BROADCAST,MULTICAST,UP,LOWER_UP> mtu 1500 qdisc noqueue master br-bb464c28b278 state UP group default link/ether 16:c5:94:c5:96:5d brd ff:ff:ff:ff:ff:ff link-netnsid 4inet6 fe80::14c5:94ff:fec5:965d/64 scope link valid_lft forever preferred_lft forever
47: veth6610ffe@if46: <BROADCAST,MULTICAST,UP,LOWER_UP> mtu 1500 qdisc noqueue master br-bb464c28b278 state UP group default link/ether ea:12:ad:ca:7b:24 brd ff:ff:ff:ff:ff:ff link-netnsid 2inet6 fe80::e812:adff:feca:7b24/64 scope link valid_lft forever preferred_lft forever
49: veth854dad4@if48: <BROADCAST,MULTICAST,UP,LOWER_UP> mtu 1500 qdisc noqueue master br-bb464c28b278 state UP group default link/ether 26:41:3e:22:19:54 brd ff:ff:ff:ff:ff:ff link-netnsid 3inet6 fe80::2441:3eff:fe22:1954/64 scope link valid_lft forever preferred_lft forever
51: veth65c0a78@if50: <BROADCAST,MULTICAST,UP,LOWER_UP> mtu 1500 qdisc noqueue master br-bb464c28b278 state UP group default link/ether 16:8e:9f:1a:f6:e2 brd ff:ff:ff:ff:ff:ff link-netnsid 5inet6 fe80::148e:9fff:fe1a:f6e2/64 scope link valid_lft forever preferred_lft forever
53: vethdd7defd@if52: <BROADCAST,MULTICAST,UP,LOWER_UP> mtu 1500 qdisc noqueue master br-bb464c28b278 state UP group default link/ether 22:dd:3e:cf:94:a9 brd ff:ff:ff:ff:ff:ff link-netnsid 6inet6 fe80::20dd:3eff:fecf:94a9/64 scope link valid_lft forever preferred_lft forever
55: vethf476dd9@if54: <BROADCAST,MULTICAST,UP,LOWER_UP> mtu 1500 qdisc noqueue master br-bb464c28b278 state UP group default link/ether 22:34:53:96:68:af brd ff:ff:ff:ff:ff:ff link-netnsid 8inet6 fe80::2034:53ff:fe96:68af/64 scope link valid_lft forever preferred_lft forever
59: veth0016bd1@if58: <BROADCAST,MULTICAST,UP,LOWER_UP> mtu 1500 qdisc noqueue master br-bb464c28b278 state UP group default link/ether 9e:39:87:d0:0f:0f brd ff:ff:ff:ff:ff:ff link-netnsid 7inet6 fe80::9c39:87ff:fed0:f0f/64 scope link valid_lft forever preferred_lft forever
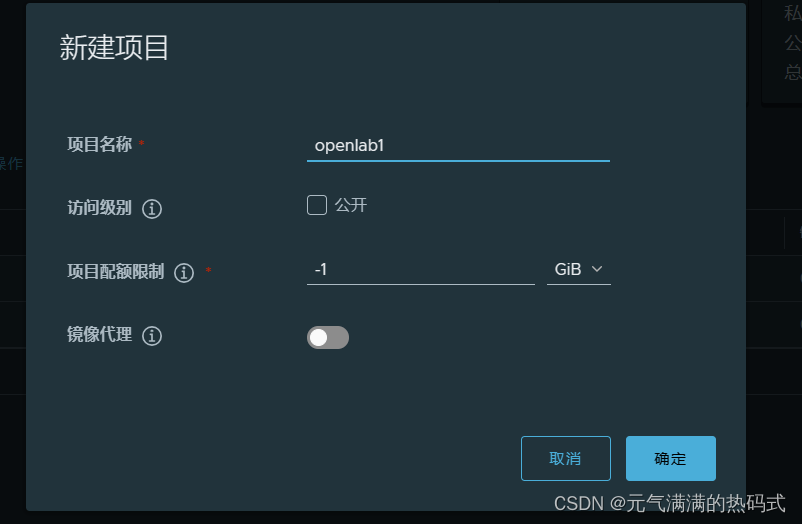
通过主机IP地址输出到浏览器,登陆harbor图形化界面

