使用nginx进行rtmp直播推流拉流
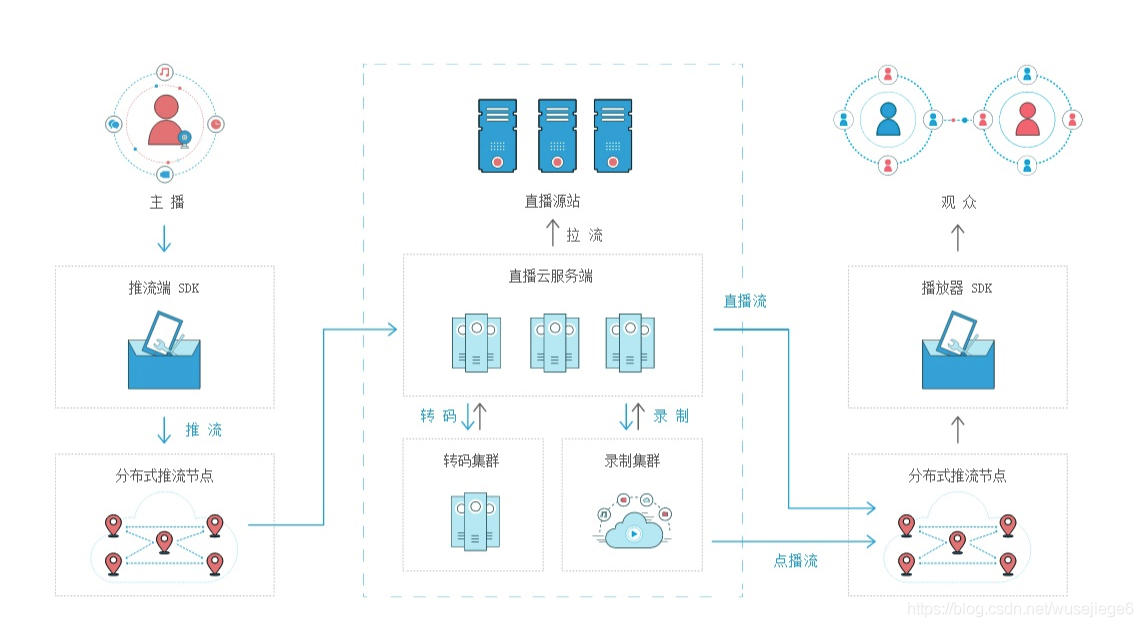
现在社会,直播越来越普通,网红流量社会,到底直播是怎么进行的呢,我们来尝试在本地搭建直播环境
搭建服务器
服务器我们选用高稳定性、高并发的web服务器nginx,利用nginx中的rtmp模块进行推流,使得nginx成为rtmp流媒体服务器
下载地址http://nginx-win.ecsds.eu/download/

解压后,在nginx 1.7.11.3 Gryphon目录下新建三个文件夹:
m3u8File
rec
vod

在conf目录下,新建一个文件“nginx.conf”
worker_processes  1;   #Nginx进程数,建议设置为等于CPU总核数events {worker_connections  1024;  #工作模式与连接数上限
}rtmp_auto_push on;#RTMP服务
rtmp{server{listen 1935;        #服务端口chunk_size 4096;    #数据传输块的大小application vod{play ./vod;   #视频文件存放位置}application live{live on;                     #   hls on;                      #开启hls直播。这个参数把直播服务器改造成实时回放服务器#wait_key on;                #对视频切片进行保护,这样就不会产生马赛克了hls_path ./html/hls;         #切片视频文件存放位置(HLS,m3u8文件存放位置)hls_fragment 2s;             #每个视频切片的时长hls_playlist_length 16s;recorder myRecord{record all manual;record_suffix _.flv;record_path ./rec;}#hls_continuous on;          #连续模式#hls_cleanup on;             #对多余的切片进行删除#hls_nested on;              #嵌套模式}}
}#HTTP服务
http {include       mime.types;default_type  application/octet-stream;sendfile        on;keepalive_timeout  65;server {listen       80;server_name  localhost;location / {root   html;index  index.html index.htm;}location /live_hls{types{#m3u8 type设置application/vnd.apple.mpegurl m3u8;#ts分片文件设置video/mp2t ts;}#指向访问m3u8文件目录alias ./html/hls;add_header Cache-Control no-cache; #禁止缓存}location /control{rtmp_control all;}location /stat{rtmp_stat all;rtmp_stat_stylesheet stat.xsl;}location /stat.xsl{root ./nginx-rtmp-module-master;}# redirect server error pages to the static page /50x.html#error_page   500 502 503 504  /50x.html;location = /50x.html {root   html;}}
}
cmd在nginx.exe所在的目录启动nginx,输入命令: start nginx
在浏览器输入127.0.0.1或者localhost

视频推流:
我们使用FFmpeg,它是一套可以用来记录、转换数字音频、视频,并能将其转化为流的开源工具
下载地址:http://ffmpeg.org/
ffmpeg -re -i test.mp4 -c copy -f flv rtmp://127.0.0.1/live

拉流测试:
将推送的服务器的视频流拉下来播放,我们使用vlc播放器。


OK,到此,我们简单的推流服务器就搭起来了,小伙伴们,开始直播吧

