文章目录
- 1. 概念
- 2. 和浮动的区别
- 3. 伸缩容器和伸缩项目
- 3.1. 伸缩容器
- 3.2. 伸缩项目
- 4. 主轴与侧轴
- 5. 主轴属性
- 6. 纵轴属性
- 6.1. align-self 示例
- 7. flex 实现水平垂直居中
- 7.1. 方法一
- 7.2. 方法二
- 8. 伸缩性
- 8.1. flex-basis
- 8.2. flex-shrink
- 8.3. flex-grow(伸)
- 8.4. flex 复合属性
- 9. 布局技巧
- 10. gap 属性
- 11. 小米模块实现
- 11.1. 演示效果
- 11.2. 分析思路
- 11.3. 代码实现
- 11.4. 补充
- 11.4.1. 第一种
- 11.4.2. 第二种
- 12. flex 实现骰子点数
- 12.1. 分析思路
- 12.2. 代码演示
- 13. 青蛙小游戏
1. 概念
flex 是一种弹性的布局方式,使用它布局页面更加的简单灵活,避免了浮动脱标的影响,提高开发效率。
2. 和浮动的区别
-
浮动的子元素脱标会导致父元素没有高度,而 flex 不会脱标,父元素的高度还是子元素撑起。
-
浮动的属性写在子元素上,flex 属性是写在父元素上。
3. 伸缩容器和伸缩项目
3.1. 伸缩容器
父元素,也称为 flex 容器。
3.2. 伸缩项目
伸缩容器所有的子元素,也称为 flex 子项/弹性元素。
4. 主轴与侧轴
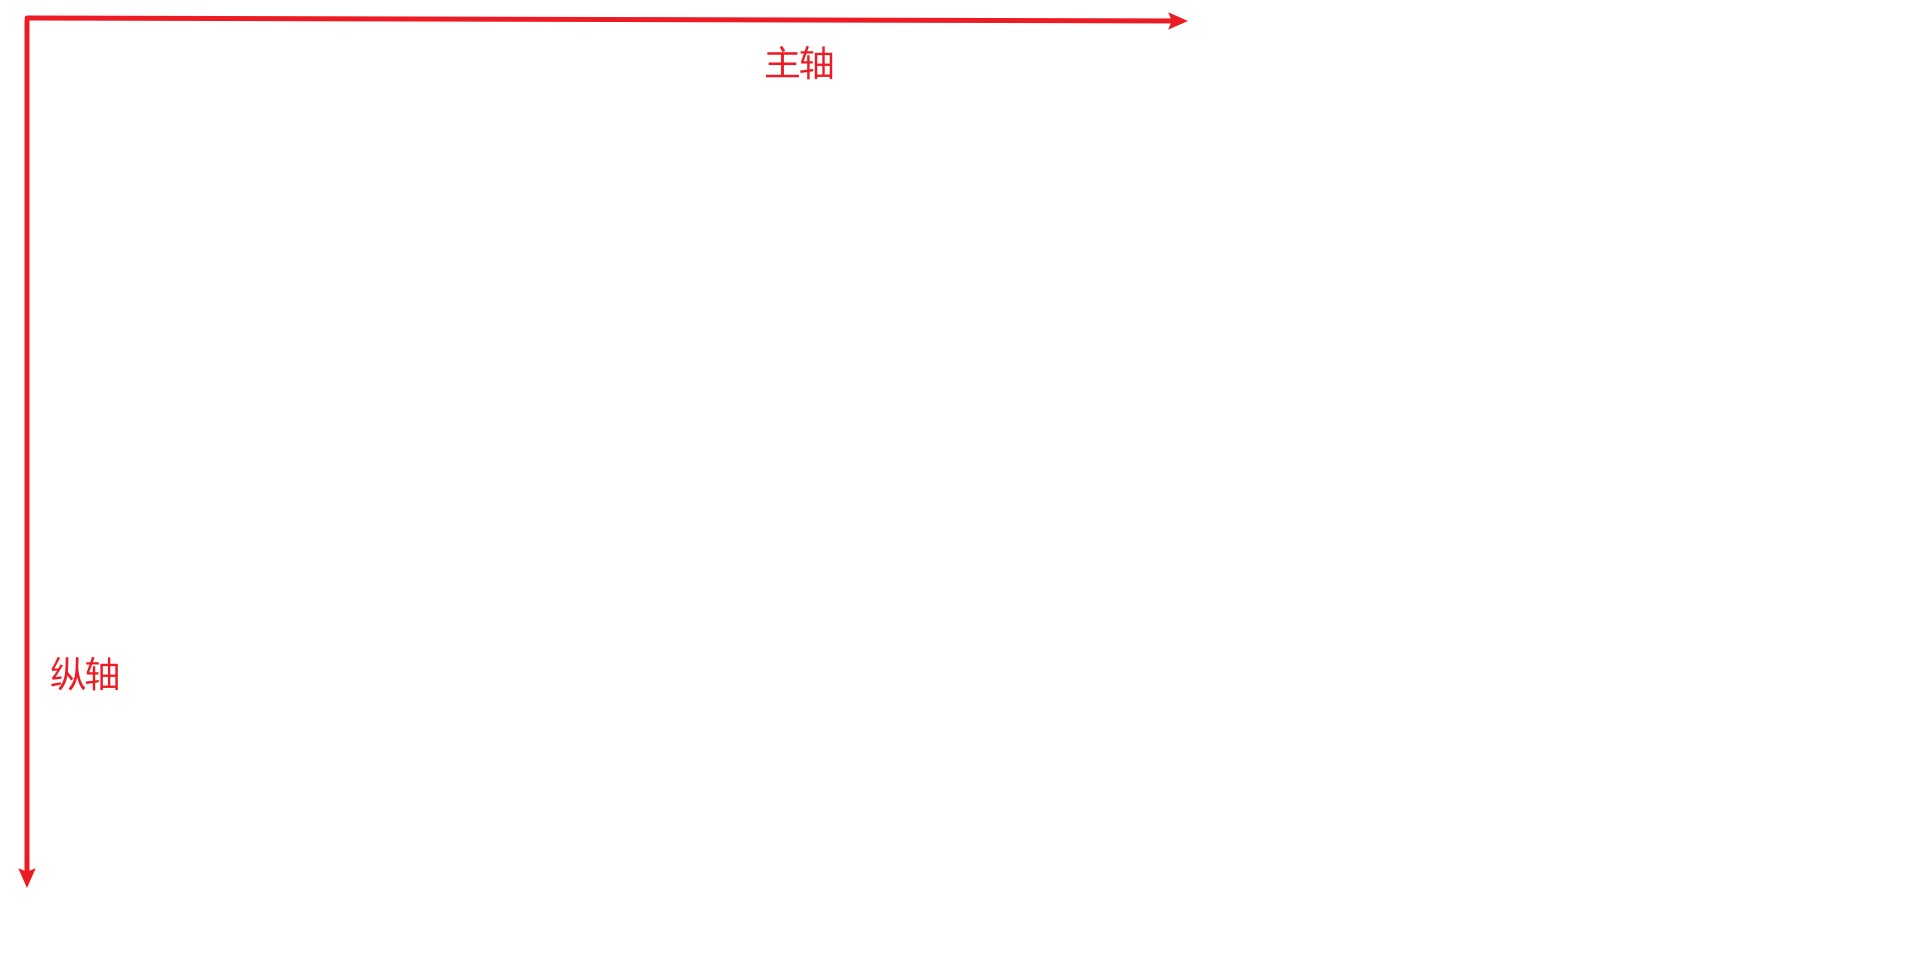
主轴:伸缩项目沿着主轴排列,主轴默认是水平方向的,默认方向是:从左到右。
纵轴:也叫侧轴,纵轴默认是垂直方向的,与主轴垂直。
5. 主轴属性
| 属性名 | 作用 |
|---|---|
| flex-direction 主轴方向 | row :主轴方向水平从左到右(默认) row-reverse :主轴方向水平从右到左 column :主轴方向垂直从上到下 column-reverse :主轴方向垂直从下到上 |
| flex-wrap 主轴换 | nowrap :不换行(默认) wrap :自动换行 wrap-reverse :反向换行 |
| flex-flow 复合属性 | flex-direction 和 flex-wrap |
| justify-content 主轴对齐 | flex-start :主轴起点对齐,从行首起始位置开始排列(默认) flex-end :主轴终点对齐,从行尾位置开始排列 center :居中对齐 space-between :均匀分布,两端对齐,首个元素放置于起点,末尾元素放置于终点(常用) space-around :均匀分布,两端距离是中间距离的一半 space-evenly :完全平分,每个元素之间的间隔相等。 |
注意:改变了主轴的方向,侧轴方向也随之改变。
6. 纵轴属性
| 属性名 | 作用 |
|---|---|
| align-items 侧轴一行对齐 | flex-start :顶端对齐 flex-end :尾端对齐 center :水平对齐 baseline : 伸缩项目的第一行文字的基线对齐 stretch :如果伸缩项目未设置高度,元素被拉伸以适应容器(默认) |
| align-content 侧轴多行对齐 | flex-start :顶端对齐 flex-end :尾端对齐 center :与侧轴的中点对齐 space-between :两端对齐,中间平均分布 space-around :均匀分布,上下两端距离是中间距离的一半 space-evenly : 完全平分 stretch :元素被拉伸以适应容器(默认) |
| align-self 单独调整某个伸缩项目的对齐方式 | 定义 flex 子项单独在纵轴方向上的对齐方式,默认值为auto,继承父元素的 align-items 属性。 |
align-self子项尺寸特点:
如果给了宽高,就按给的来,如果没给,就按内容来,如果有拉伸,就会拉伸的跟父类一样高。
6.1. align-self 示例
单独设置第二个元素跟父元素顶部对齐。

<!DOCTYPE html>
<html lang="en"><head><meta charset="UTF-8" /><meta name="viewport" content="width=device-width, initial-scale=1.0" /><title>14-flex布局-单独设置侧轴某个元素对齐方式</title><style>.father {background: pink;height: 300px;display: flex;justify-content: center;align-items: center;}.son {width: 100px;height: 100px;background: #a5ccaf;}.son:nth-child(2) {align-self: flex-start;}</style></head><body><div class="father"><div class="son">1</div><div class="son">2</div><div class="son">3</div></div></body>
</html>
7. flex 实现水平垂直居中
7.1. 方法一
父元素开启 flex 布局,随后使用 justify-content 和 align-items 实现水平垂直居中。
display: flex;
/* 设置子元素水平居中 */
justify-content: center;
/* 设置子元素垂直居中 */
align-items: center;
<!DOCTYPE html>
<html lang="en"><head><meta charset="UTF-8" /><meta name="viewport" content="width=device-width, initial-scale=1.0" /><title>12-flex布局-实现子元素水平垂直居中</title><style>.father {background: pink;height: 300px;display: flex;/* 设置子元素水平居中 */justify-content: center;/* 设置子元素垂直居中 */align-items: center;}.son {width: 100px;height: 100px;background: #a5ccaf;}</style></head><body><div class="father"><div class="son"></div></div></body>
</html>
7.2. 方法二
父容器开启 flex 布局,随后子元素 margin: auto。
.father {background: pink;height: 300px;display: flex;
}
.son {width: 100px;height: 100px;background: #a5ccaf;margin: auto;
}
8. 伸缩性
8.1. flex-basis
定义子项在分配多余空间之前,子项所占的主轴空间,默认是 auto,即子项本身的大小。
8.2. flex-shrink
定义子项的缩小比例,默认是 1,表示如果 flex 容器空间不足,子元素将会缩小。
8.3. flex-grow(伸)
flex-grow 定义伸缩项目的放大比例,默认为 0 。
- 若所有伸缩项目的 flex-grow 值都为 1 ,则:它们将等分剩余空间(如果有空间的话)。
- 若三个伸缩项目的 flex-grow 值分别为:
1 、 2 、 3,则:分别瓜分到:1/6 、 2/6 、3/6的空间。
8.4. flex 复合属性
flex 是复合属性,复合了: flex-grow 、 flex-shrink 、 flex-basis 三个属性,默认值为 0 1 auto 。
flex:1 1 auto,简写:flex:autoflex:1 1 0,简写:flex:1flex:0 0 auto,简写:flex:noneflex:0 1 auto,简写:flex:0 auto(flex 初始值)- 非负数字,等同于
flex:非负数字 1 0%,能放大也能缩小,数字代表占父级剩余尺寸份数 - 像素值,等同于
flex 1 1 像素值,能放大也能缩小,像素值代表容器在分配多余空间之前,子项所占的主轴空间。
我们一般用flex:数值来代表占父元素剩余尺寸的份数。
9. 布局技巧
修改轴向之后的对齐总结:
- 首先要明确,水平和垂直方向上是哪个轴
- 如果是主轴,对齐就是用
justify-content属性 - 如果是侧轴,对齐就是用
align-items属性
10. gap 属性
gap 属性是用来设置网格行与列之间的间隙(gutters),该属性是 row-gap 与 column-gap 的简写形式,只给一个值,代表行间隙和列间隙都是 14px。
11. 小米模块实现
11.1. 演示效果

11.2. 分析思路
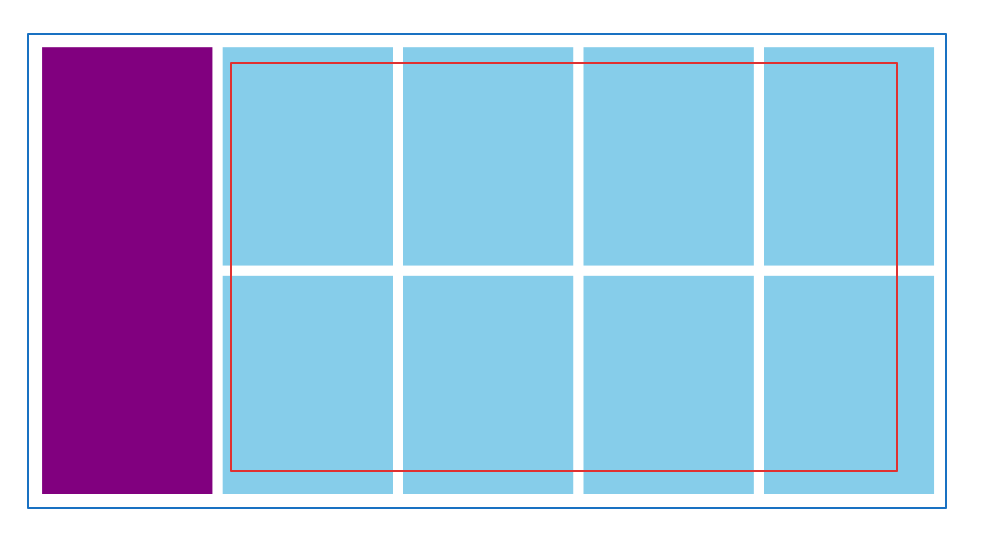
这里要用到两次 flex,一次是蓝色容器,一次是红色的容器。
红色的容器使用flex-wrap: wrap;进行换行。
11.3. 代码实现
<!DOCTYPE html>
<html lang="en"><head><meta charset="UTF-8" /><meta name="viewport" content="width=device-width, initial-scale=1.0" /><title>小米模块案例效果</title><style>* {margin: 0;padding: 0;}.container {display: flex;width: 1226px;height: 614px;margin: 100px auto;}.aside-left {width: 234px;height: 614px;background-color: #81007f;margin-right: 14px;}.aside-right {display: flex;flex-wrap: wrap;/* 推荐使用方式一 *//* 方式一使用justify-content和align-content设置水平方向和垂直方向的布局 *//* justify-content: space-between;align-content: space-between; *//* 方式二:设置间隙gap也可以实现 */gap: 14px; /* gap是一个复合属性,只给一个值,代表行间隙和列间隙都是14px */width: 978px;height: 614px;}.aside-right .banner {width: 234px;height: 300px;background-color: #86cdea;}</style></head><body><!-- 版心 --><div class="container"><!-- 左侧边栏 --><div class="aside-left"></div><!-- 右侧边栏 --><div class="aside-right"><div class="banner"></div><div class="banner"></div><div class="banner"></div><div class="banner"></div><div class="banner"></div><div class="banner"></div><div class="banner"></div><div class="banner"></div></div></div></body>
</html>
11.4. 补充
红色容器每个子元素的间隙有两种解决方案:
11.4.1. 第一种
使用justify-content和align-content设置水平方向和垂直方向的布局。
justify-content: space-between;
align-content: space-between;
11.4.2. 第二种
设置间隙 gap 也可以实现。
gap 属性是用来设置网格行与列之间的间隙(gutters),该属性是 row-gap 与 column-gap 的简写形式,只给一个值,代表行间隙和列间隙都是 14px。
gap: 14px;
12. flex 实现骰子点数
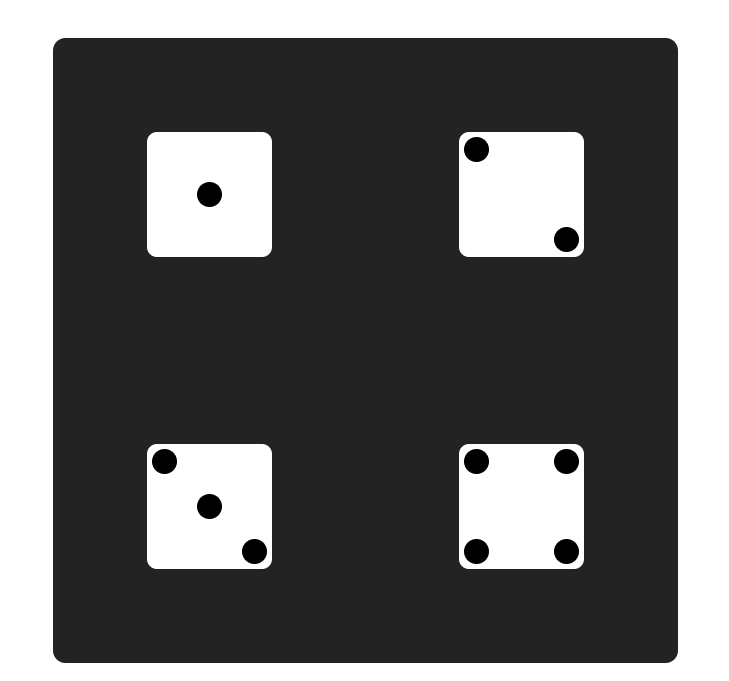
用 flex,完成骰子的点数。
12.1. 分析思路
12.2. 代码演示
<!DOCTYPE html>
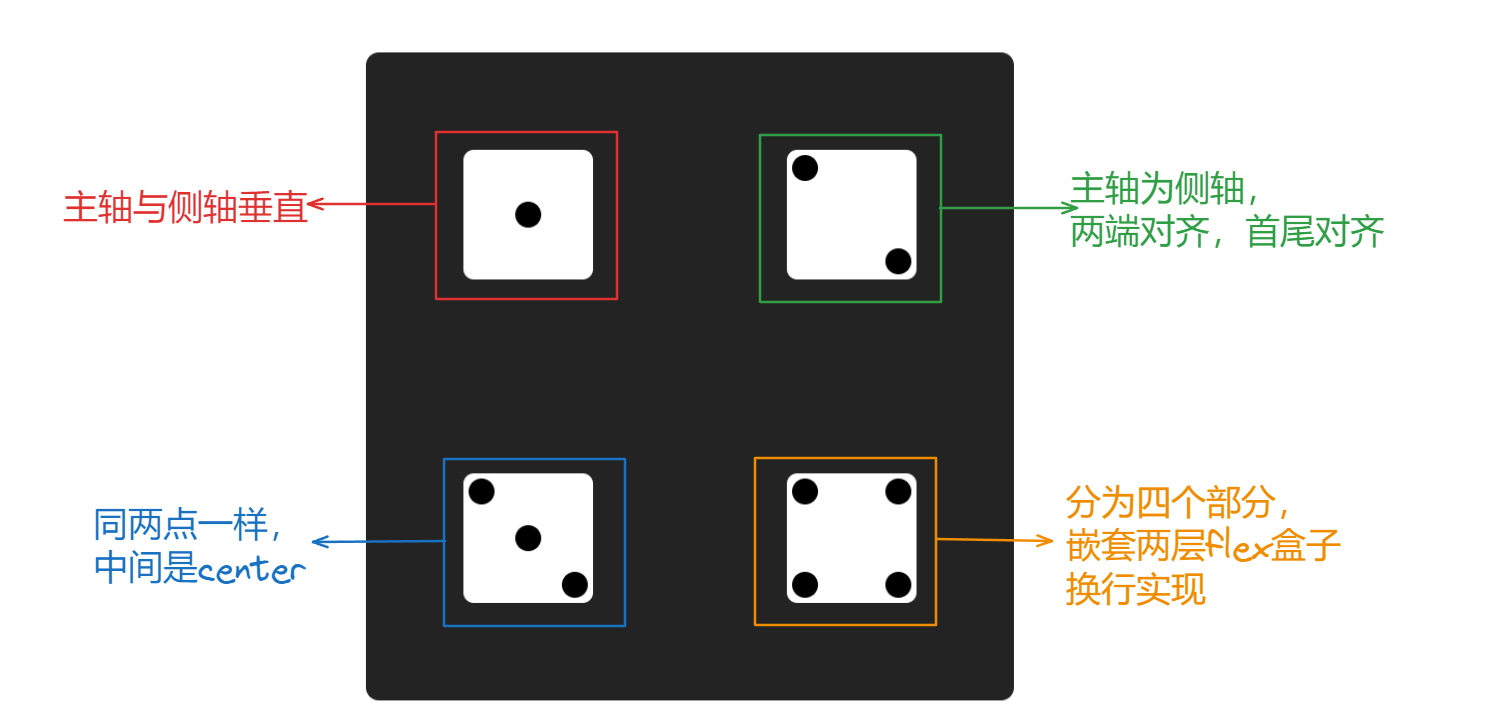
<html lang="en"><head><meta charset="UTF-8" /><meta http-equiv="X-UA-Compatible" content="IE=edge" /><meta name="viewport" content="width=device-width, initial-scale=1.0" /><title>骰子点数</title><style>* {margin: 0;padding: 0;box-sizing: border-box;}.wrapper {margin: 100px 100px;width: 500px;height: 500px;border-radius: 10px;background-color: #232323;display: flex;flex-wrap: wrap;align-items: center;justify-content: space-around;}.dot {width: 20px;height: 20px;border-radius: 50%;background-color: #000;}.box-common {width: 100px;height: 100px;display: flex;background-color: #fff;padding: 4px;margin: 60px;border-radius: 8px;}.box {align-items: center;justify-content: center;}.box2 {flex-direction: column;justify-content: space-between;align-items: center;}/* align-self子元素属性,控制自身的排列 */.dot2-1 {align-self: flex-start;}/* align-self子元素属性,控制自身的排列 */.dot2-2 {align-self: flex-end;}/* 3点的写法 */.box3 {justify-content: space-between;}.dot3-1 {align-self: flex-start;}.dot3-2 {align-self: center;}.dot3-3 {align-self: flex-end;}/* box4 */.box4 {flex-wrap: wrap;}.dot4 {width: 50%;height: 50%;display: flex;}.dot4:nth-child(2) {justify-content: flex-end;}.dot4:nth-child(3) {align-items: flex-end;}.dot4:nth-child(4) {justify-content: flex-end;align-items: flex-end;}</style></head><body><div class="wrapper"><!-- 一点 父容器,主轴居中,侧轴居中--><div class="box box-common"><div class="dot"></div></div><!-- 二点 主容器主轴为侧轴,居中,每一个子项单独控制,第一个flex-start,第二个flex-end--><div class="box2 box-common"><div class="dot dot2-1"></div><div class="dot dot2-2"></div></div><!-- 三点 同2点写法一样,只不过中间的点是center--><div class="box3 box-common"><div class="dot dot3-1"></div><div class="dot dot3-2"></div><div class="dot dot3-3"></div></div><!-- 四点 分为四个部分,嵌套两层flex盒子--><div class="box4 box-common"><div class="dot4"><div class="dot"></div></div><div class="dot4"><div class="dot"></div></div><div class="dot4"><div class="dot"></div></div><div class="dot4"><div class="dot"></div></div></div></div></body>
</html>
13. 青蛙小游戏
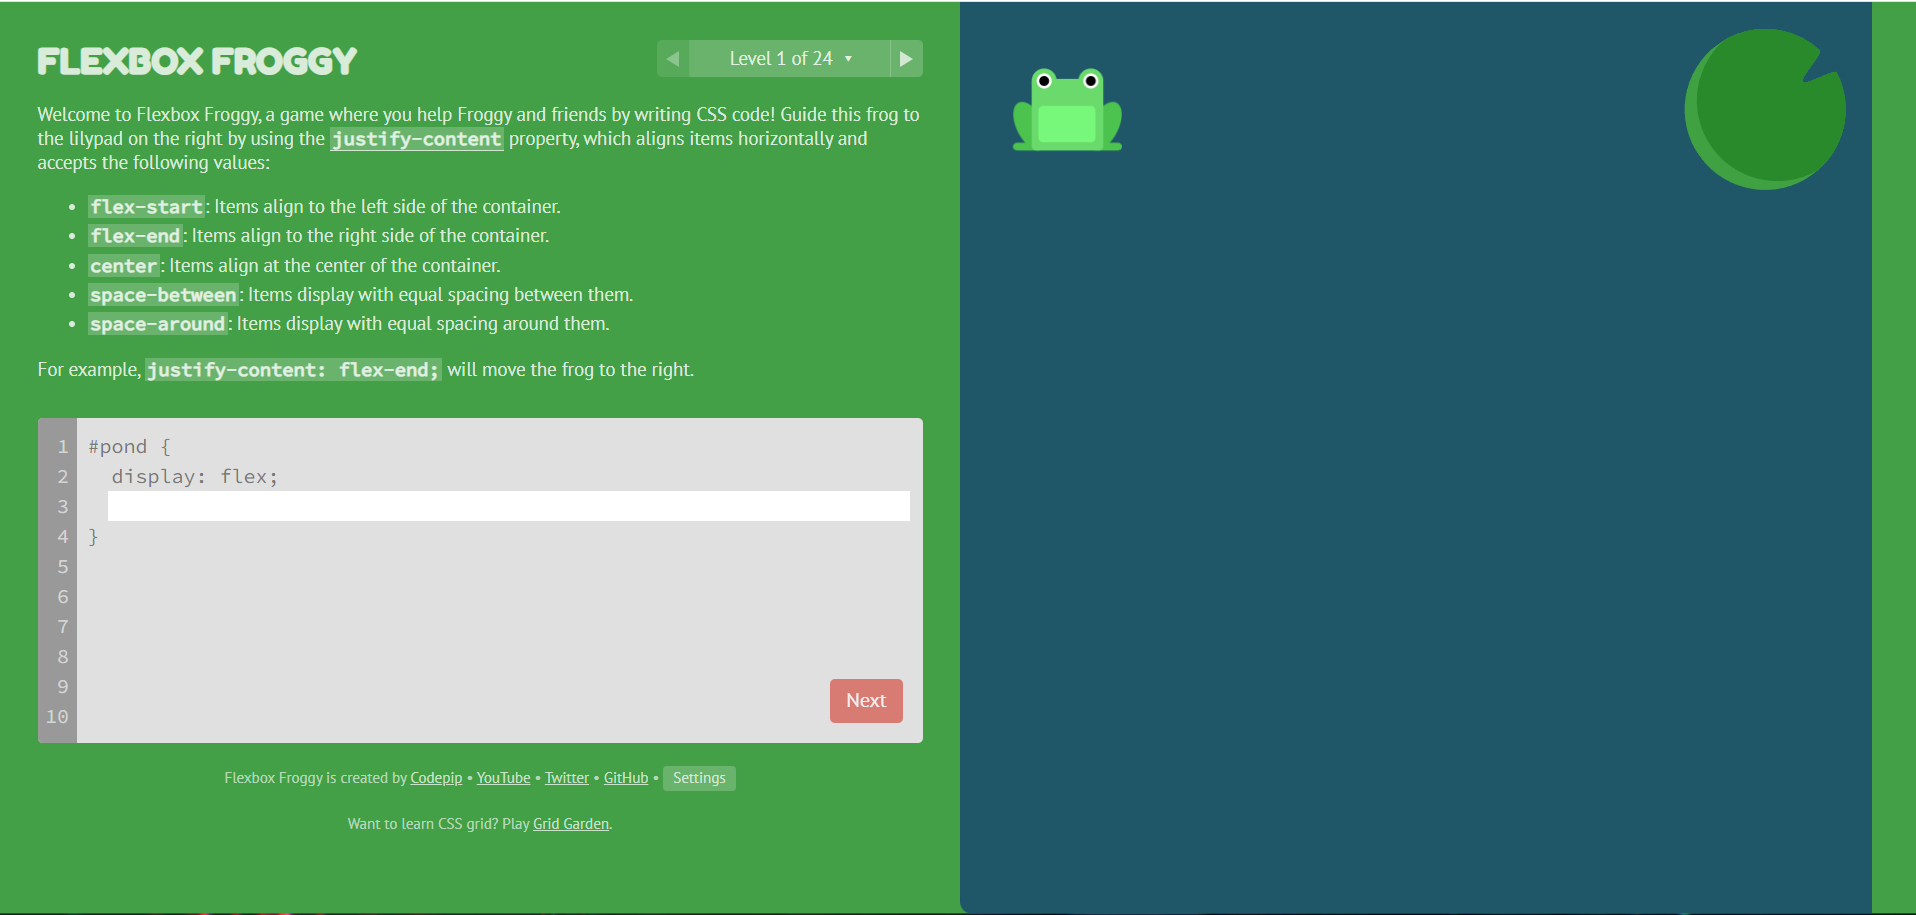
Flexbox Froggy(弹性盒小青蛙)是一个帮助你快速学习前端 Flex 布局的小游戏,可以通过玩游戏的方式进行巩固 flex 知识。
项目地址:https://flexboxfroggy.com/
