个人博客系统测试
- 一、项目背景
- 1.1 技术背景
- 1.2 功能背景
- 二、自动化测试
- 2.1 什么是自动化测试
- 2.2 通过使用selenium进行自动化测试的编写(Java实现)
- 2.3 编写测试用例,执行自动化测试
- 2.3.1 输入用户名:test,密码:123,登录成功
- 2.3.2 登录成功后,没有文章,点击写博客,发布博客
- 2.3.3 发布文章后,文章列表页文章数不为0
- 2.3.4 校验博客
- 2.4.5 在文章列表页,发布者可以进行文章修改操作
- 2.4.6 在文章列表页,发布者可以进行文章删除操作
- 2.4.7 注销账号,退出登录
- 2.4.8 输入用户名:testt,密码:123,登录失败
- 2.4.9 输入用户名:test,密码:1234,登录失败
- 三、测试用例通过
一、项目背景
1.1 技术背景
- 我的博客系统主要是通过前端HTML+后端SpringBoot实现了一个博客的基本的功能。
- 前端主要用到了HTML+CSS,通过Jquery的方式向后端请求数据。
- 后端主要用到了SpringBoot的框架,整合了MyBatis,通过MyBatis从数据库中查询数据响应给前端。
- 项目中,用户在注册保存密码的时候,后端会进行md5加盐算法进行加密处理,保证了密码的安全性。
- 相应数据的时候,封装了一个统一的返回格式,便于前后端的交互及数据的获取。
- 用户登录后,为了保持用户在线的持久化,在用户登录成功时,会将用户的身份信息存储在session中,这样在每次访问一个页面的时候,会对当前用户的身份信息进行校验,每次访问时前端会传来一个seeionId,后端通过这个sessionId拿到用户的信息,然后校验,通过后响应给前端数据,否则,提示用户登录。
1.2 功能背景
- 注册:新用户进行注册,后端会进行校验,如果注册的用户已存在,会提示用户已存在,如果两次密码不一致,会提示用户重新输入;如果注册成功,会跳转到登录页面。
- 登录:用户输入用户名和密码,登录成功,跳转到个人博客列表页,显示当前用户已发布的博客信息。
- 发布博客:点击发布博客,会跳转到博客添加页,输入博客内容,发布博客,然后跳转到博客列表页,展示刚刚发布的博客。
- 博客详情页:点击博客详情,跳转到博客详情页,展示了博客的标题、内容、发布时间、阅读量、作者信息(作者用户名、作者发布文章数)。
- 总博客列表页:显示所有用户发布的博客,会以分页的形式展示,我设置的默认是每页显示两条,会有总页数,当前所在页。
- 修改博客:在个人博客列表中,可以点击修改某一篇文章,进入博客修改页重新进行编辑,然后发布修改。
- 删除博客:在个人博客列表中,可以点击删除某一篇文章。
- 游客登录:如果用户未登录,作为游客可以访问博客列表页(主页),可以查看所有用户发布的博客内容及博客详情,但是不能发布文章。
- 注销:点击注销,会退出当前账号。
二、自动化测试
2.1 什么是自动化测试
自动化测试简单来说就是使用自动测试工具和自动测试脚本来完成指定的测试任务,测试启动过程不需要人为参与,但自动化测试之前的准备需要人工手动配置好。它是一种将重复性的、繁琐的测试任务交给计算机自身来执行,它可以大幅度提高测试效率、减少测试人员的成本、提高测试覆盖率和准确性。
2.2 通过使用selenium进行自动化测试的编写(Java实现)
-
- 添加依赖到pom.xml文件:
<!--selenium控制浏览器-->
<dependency><groupId>org.seleniumhq.selenium</groupId><artifactId>selenium-java</artifactId><version>4.7.2</version>
</dependency>
<dependency><groupId>commons-io</groupId><artifactId>commons-io</artifactId><version>2.11.0</version>
</dependency>
<!--测试-->
<dependency><groupId>org.junit.jupiter</groupId><artifactId>junit-jupiter-params</artifactId><version>5.10.1</version>
</dependency>
-
- 封装初始化浏览器驱动:
/*** 初始化浏览器驱动*/
@BeforeAll  //在所有测试方法执行之前执行
static void setUp() {//允许所有请求chromeOptions.addArguments("--remote-allow-origins=*");//取消 chrome正受到自动测试软件的控制的信息栏ChromeOptions options = new ChromeOptions();options.setExperimentalOption("excludeSwitches", new String[]{"enable-automation"});//创建浏览器驱动webDriver = new ChromeDriver(chromeOptions);
}
-
- 关闭浏览器
/*** 关闭浏览器*/
@AfterAll // 在所有测试方法执行完之后执行
static void tearDown() {webDriver.quit();
}
2.3 编写测试用例,执行自动化测试
前提说明: 我的博客是在本地运行的,如果要测试线上的某个系统,可以把获取页面的url换成相应的网址即可。
2.3.1 输入用户名:test,密码:123,登录成功
- 获取元素:

- 测试代码:
/*** 输入用户名:test,密码:123,登录成功*/
@Order(1)//设置执行顺序,但我用着好像不管用
@ParameterizedTest
@CsvFileSource(resources = "loginSuccess.csv")
void loginTest(String username,String password,String blogListUrl) {// 1. 打开博客登录页面webDriver.get("http://localhost:58081/login.html");//智能等待,如果在这次等待期间错误,则会抛出异常webDriver.manage().timeouts().implicitlyWait(3, TimeUnit.SECONDS);// 2. 输入用户名testwebDriver.findElement(By.cssSelector("#username")).sendKeys(username);webDriver.manage().timeouts().implicitlyWait(3, TimeUnit.SECONDS);// 3. 输入密码123webDriver.findElement(By.cssSelector("#password")).sendKeys(password);webDriver.manage().timeouts().implicitlyWait(3, TimeUnit.SECONDS);// 4. 点击提交按钮webDriver.findElement(By.cssSelector("#submit")).click();webDriver.manage().timeouts().implicitlyWait(3, TimeUnit.SECONDS);//可能会有弹窗webDriver.switchTo().alert().accept();// 5. 跳转到列表页//  5.1 获取当前页urlString currentUrl = webDriver.getCurrentUrl();webDriver.manage().timeouts().implicitlyWait(3, TimeUnit.SECONDS);//  5.2 与预期url("http://localhost:58081/myblog_list.html")对比,一致则测试通过Assertions.assertEquals(blogListUrl, currentUrl);// 6. 列表页展示用户名是test//  6.1 用户名是test,测试通过,否则不通过webDriver.manage().timeouts().implicitlyWait(3, TimeUnit.SECONDS);String currentUerName = webDriver.findElement(By.cssSelector("#username")).getText();Assertions.assertEquals(currentUerName,username);webDriver.manage().timeouts().implicitlyWait(3, TimeUnit.SECONDS);
}
2.3.2 登录成功后,没有文章,点击写博客,发布博客
- 点击写文章:
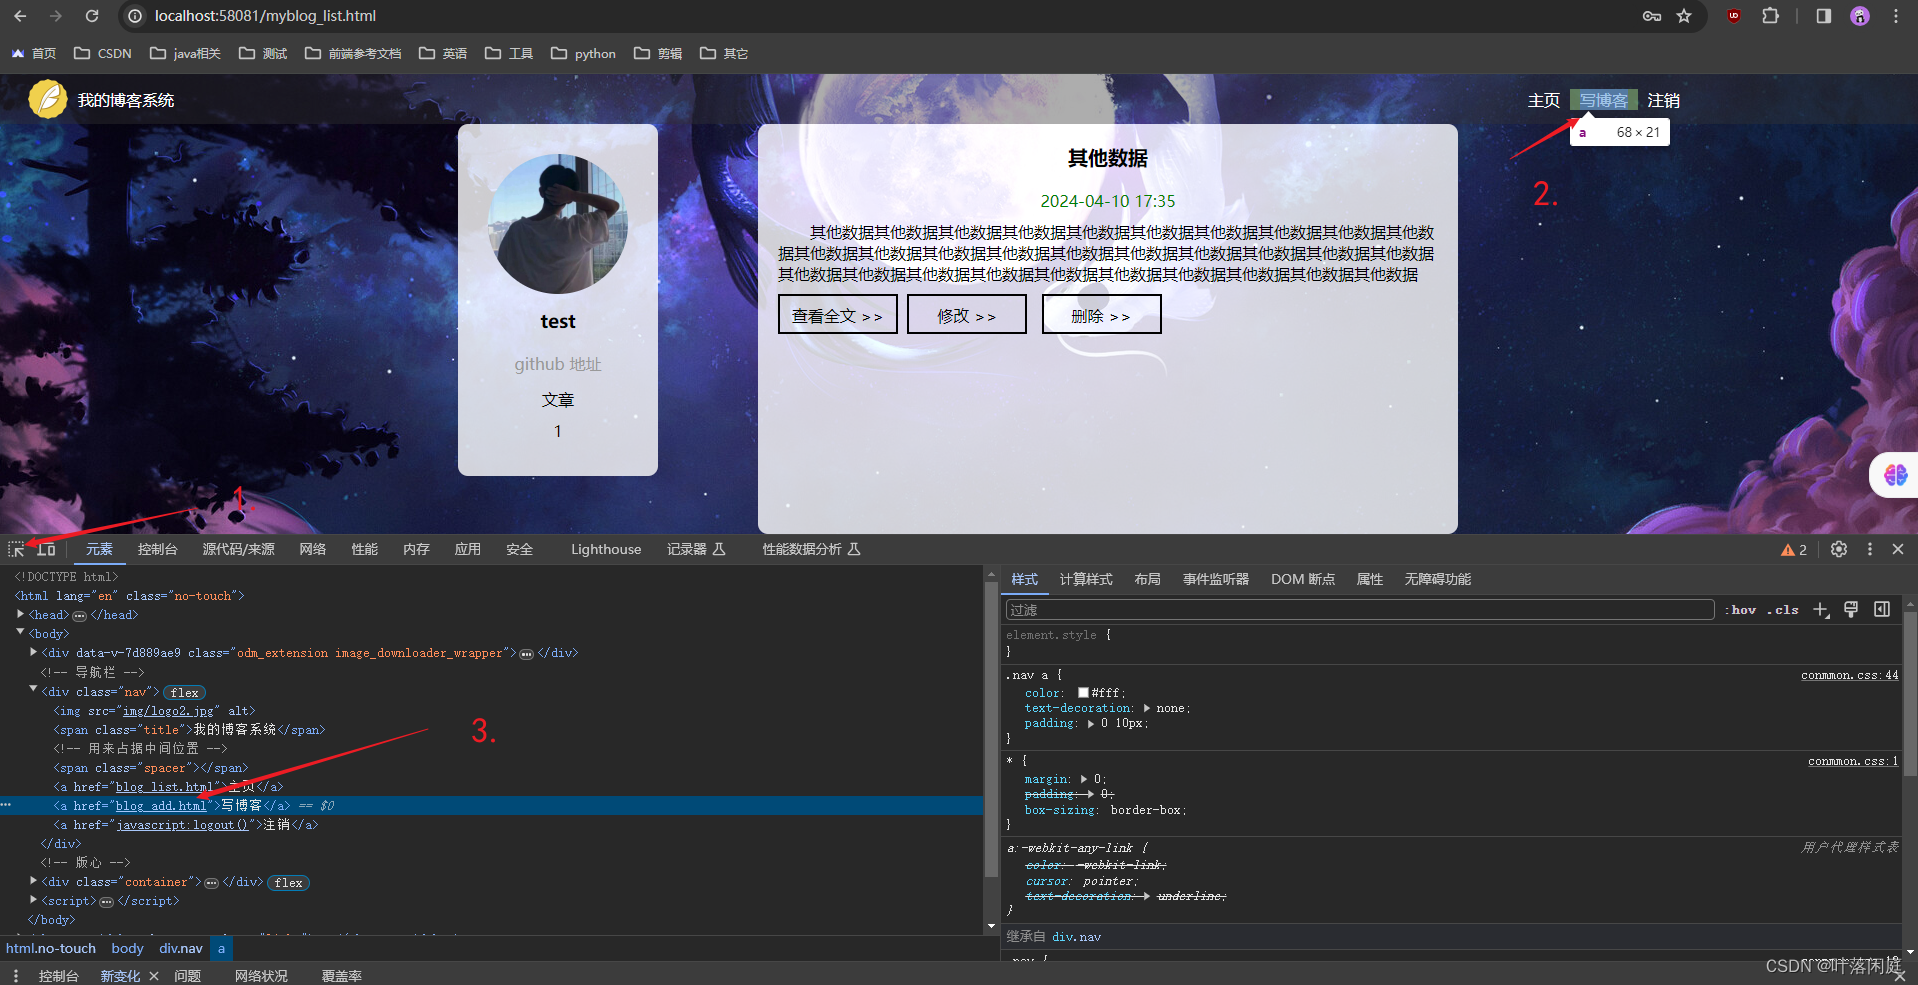
- 校验url:

- 测试代码:
@Test
void publishTest() {// 1.打开文章列表页webDriver.get("http://localhost:58081/myblog_list.html");// 2. 没有发布博客,点击添加webDriver.manage().timeouts().implicitlyWait(3,TimeUnit.SECONDS);webDriver.findElement(By.cssSelector("body > div.nav > a:nth-child(5)")).click();// 3. 添加标题 test1webDriver.findElement(By.cssSelector("#title")).sendKeys("test1");// 5. 点击发布文章webDriver.manage().timeouts().implicitlyWait(3, TimeUnit.SECONDS);webDriver.findElement(By.cssSelector("body > div.blog-edit-container > div.title > button")).click();// 6. 跳转到博客列表页  “http://localhost:58081/myblog_list.html”webDriver.manage().timeouts().implicitlyWait(3, TimeUnit.SECONDS);String currentUrl = webDriver.getCurrentUrl();webDriver.manage().timeouts().implicitlyWait(3, TimeUnit.SECONDS);Assertions.assertEquals("http://localhost:58081/myblog_list.html",currentUrl);webDriver.manage().timeouts().implicitlyWait(3, TimeUnit.SECONDS);// 7. 判断若第一条博客标题为test1,则测试通过String newTitle = webDriver.findElement(By.cssSelector("#artListDiv > div > div.title")).getText();Assertions.assertEquals("test1",newTitle);
}
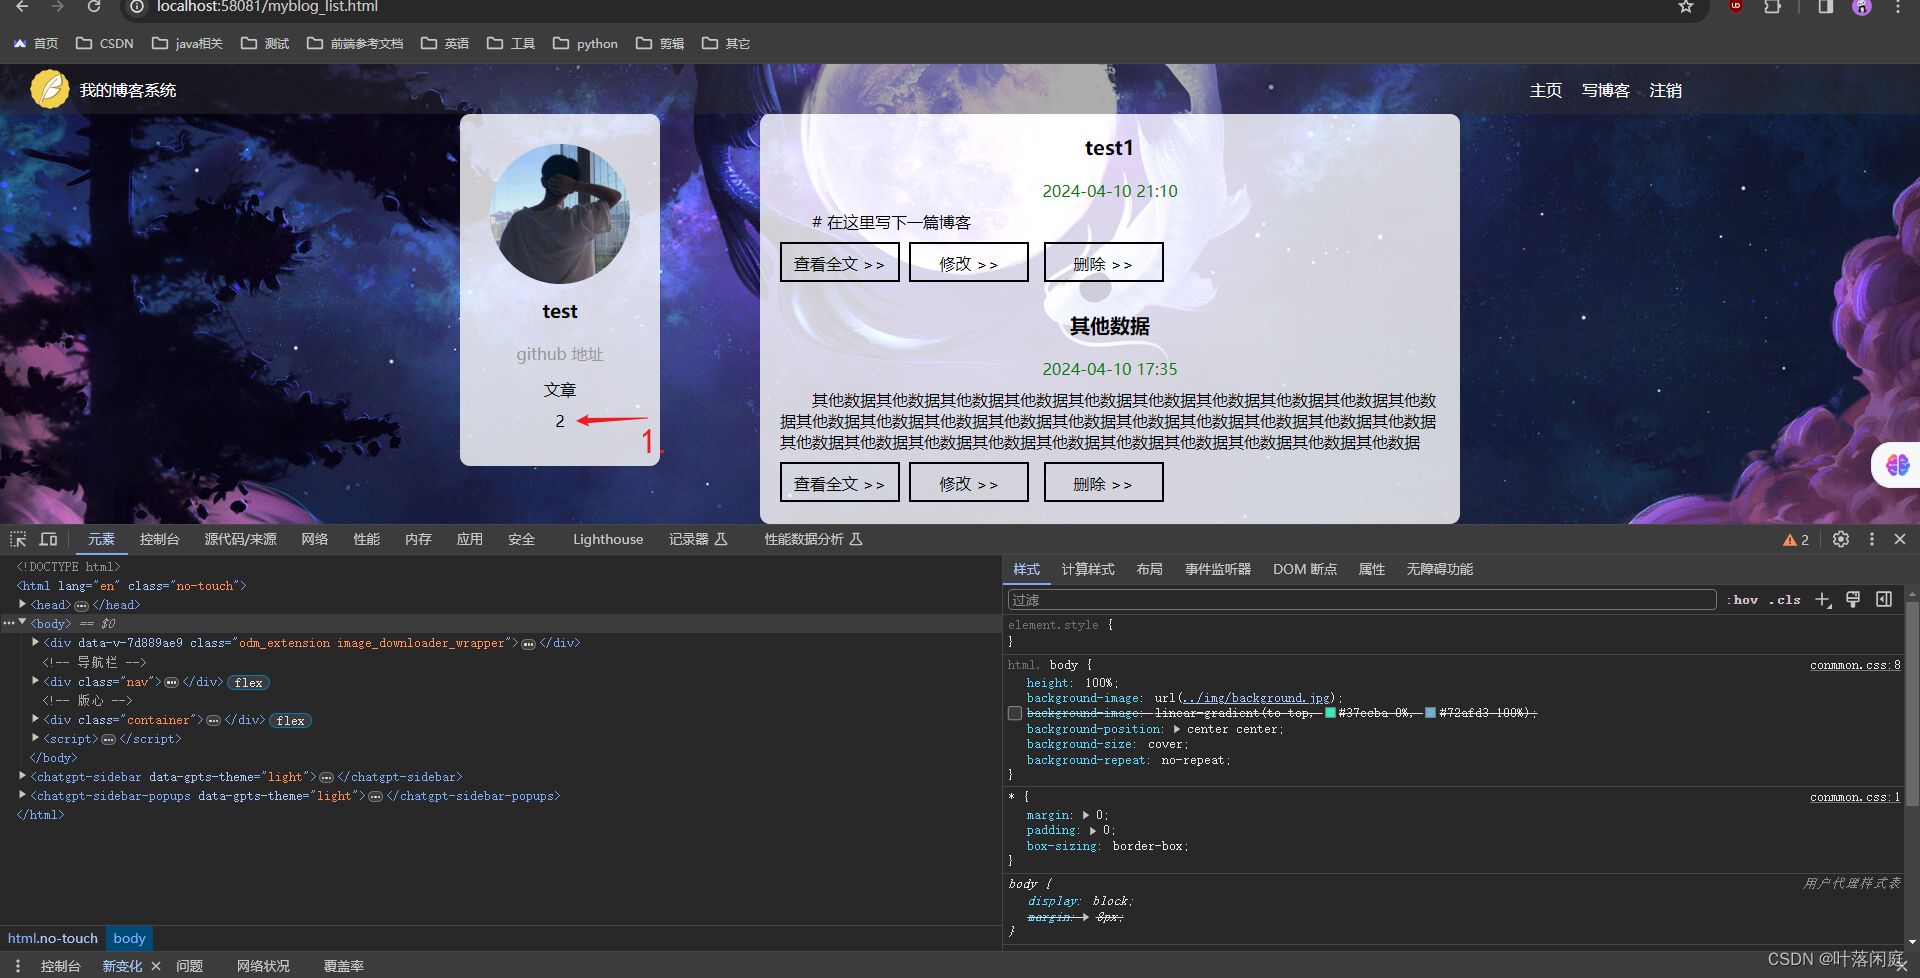
2.3.3 发布文章后,文章列表页文章数不为0
- 获取元素:
- 测试代码:
@Test
void blogCountTest() {//判断当前页文章数量int size = webDriver.findElements(By.cssSelector("#artListDiv")).size();// 不为0则测试通过webDriver.manage().timeouts().implicitlyWait(3, TimeUnit.SECONDS);Assertions.assertNotEquals(0,size);
}
2.3.4 校验博客
- 获取元素

- 测试代码
@Testvoid checkBlogTest() {// 1.打开文章列表页webDriver.get("http://localhost:58081/myblog_list.html");//博客标题String title = webDriver.findElement(By.cssSelector("#artListDiv > div:nth-child(1) > div.title")).getText();//博客发布时间String time = webDriver.findElement(By.cssSelector("#artListDiv > div:nth-child(1) > div.date")).getText();Assertions.assertEquals("test1",title);//如果是2024年发布的,则测试通过if (time.contains("2024")) {System.out.println("测试通过");} elseSystem.out.println("测试未通过");}
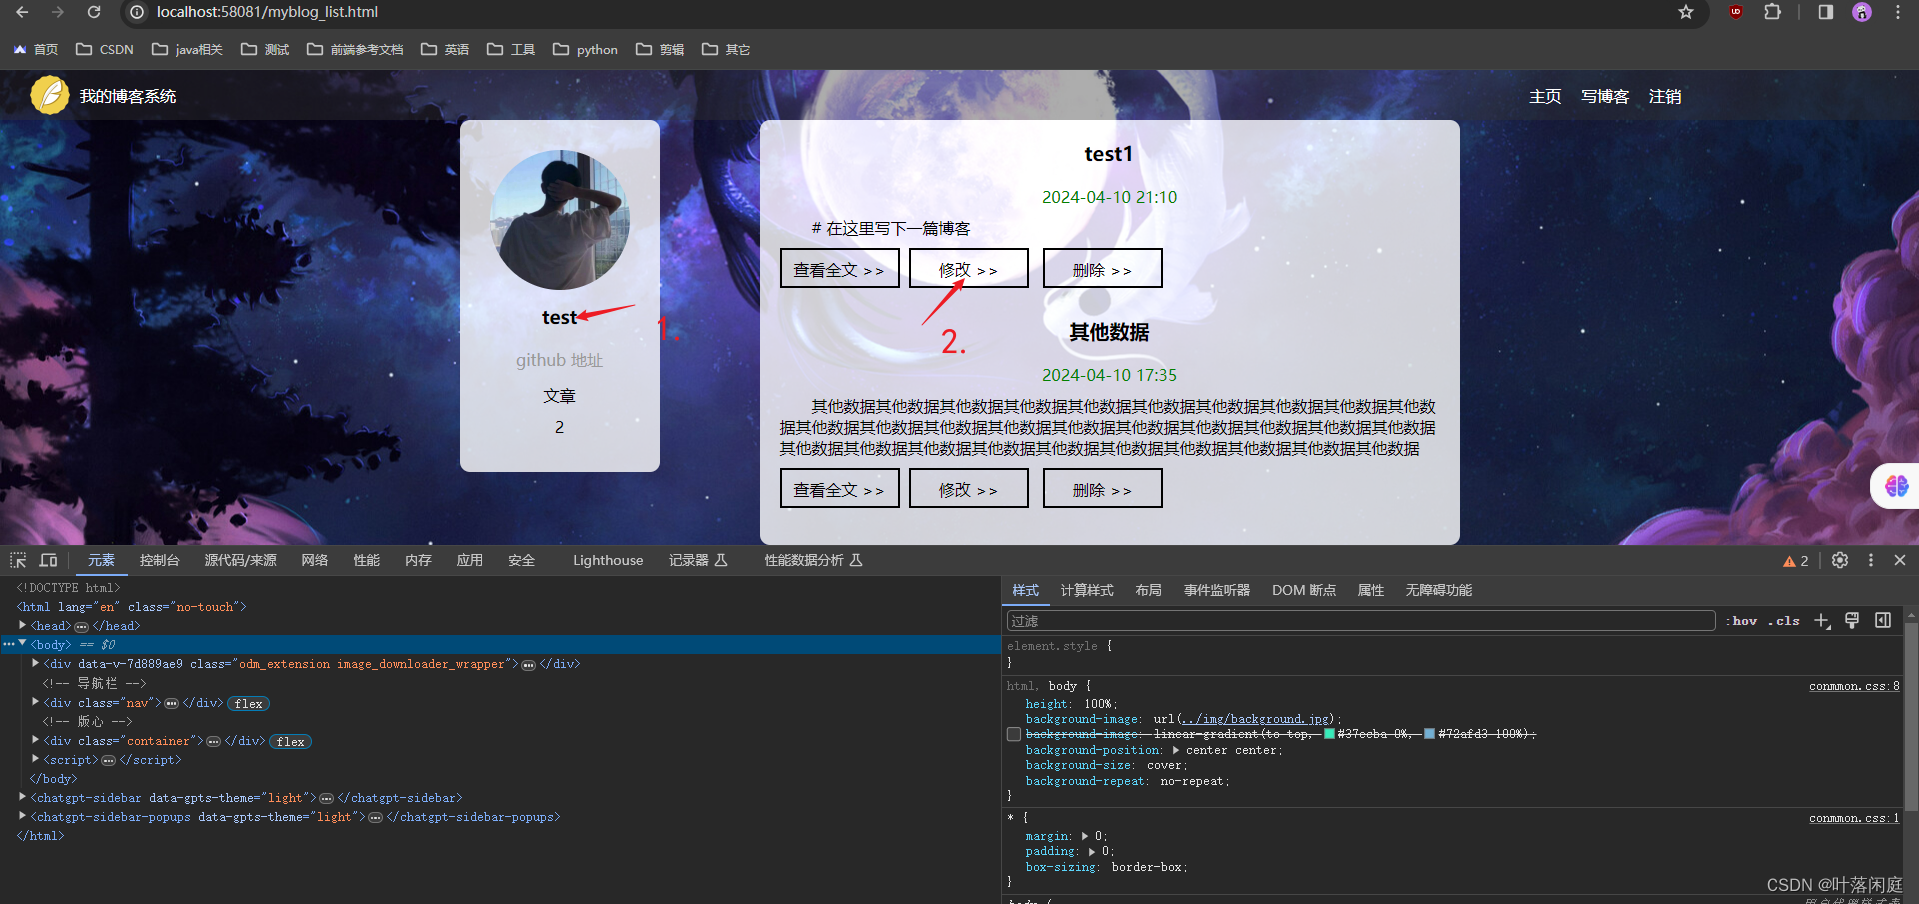
2.4.5 在文章列表页,发布者可以进行文章修改操作


- 测试代码
@Test
void updateBlogTest() throws InterruptedException {// 1.打开文章列表页webDriver.get("http://localhost:58081/myblog_list.html");// 2.判断当前登录用户是否是test//  根据列表页个人信息进行判断webDriver.manage().timeouts().implicitlyWait(3,TimeUnit.SECONDS);String currentUerName = webDriver.findElement(By.cssSelector("#username")).getText();Assertions.assertEquals("test",currentUerName);webDriver.manage().timeouts().implicitlyWait(3,TimeUnit.SECONDS);//  3.执行到这里,说明当前登录用户是test,可以进行修改操作//    点击修改,开始修改文章webDriver.findElement(By.cssSelector("#artListDiv > div:nth-child(1) > a:nth-child(5)")).click();// 4.跳转到修改文章页面  http://localhost:58081/blog_edit.html?blogId=// 获取修改页面urlwebDriver.manage().timeouts().implicitlyWait(3,TimeUnit.SECONDS);String editPageUrl = webDriver.getCurrentUrl();if (editPageUrl.contains("http://localhost:58081/blog_edit.html?blogId=")) {System.out.println("测试通过!");} else {System.out.println("测试不通过!");}webDriver.manage().timeouts().implicitlyWait(3,TimeUnit.SECONDS);// 5. 修改文章内容// 通过JS将标题进行修改((JavascriptExecutor)webDriver).executeScript("document.getElementById(\"title\").value = \"自动化测试\"");webDriver.manage().timeouts().implicitlyWait(3,TimeUnit.SECONDS);// 6. 点击修改文章webDriver.findElement(By.cssSelector("body > div.blog-edit-container > div.title > button")).click();// 7. 跳转到博客列表页  “http://localhost:58081/myblog_list.html”// 会有弹窗// 这里强制睡3s,要不然这个弹窗会检测不出来sleep(3000);webDriver.switchTo().alert().accept();webDriver.manage().timeouts().implicitlyWait(3, TimeUnit.SECONDS);String currentUrl = webDriver.getCurrentUrl();webDriver.manage().timeouts().implicitlyWait(3, TimeUnit.SECONDS);Assertions.assertEquals("http://localhost:58081/myblog_list.html",currentUrl);webDriver.manage().timeouts().implicitlyWait(3, TimeUnit.SECONDS);// 8. 判断若第一条博客标题为自动化测试,则测试通过String newTitle = webDriver.findElement(By.cssSelector("#artListDiv > div > div.title")).getText();Assertions.assertEquals("自动化测试",newTitle);
}
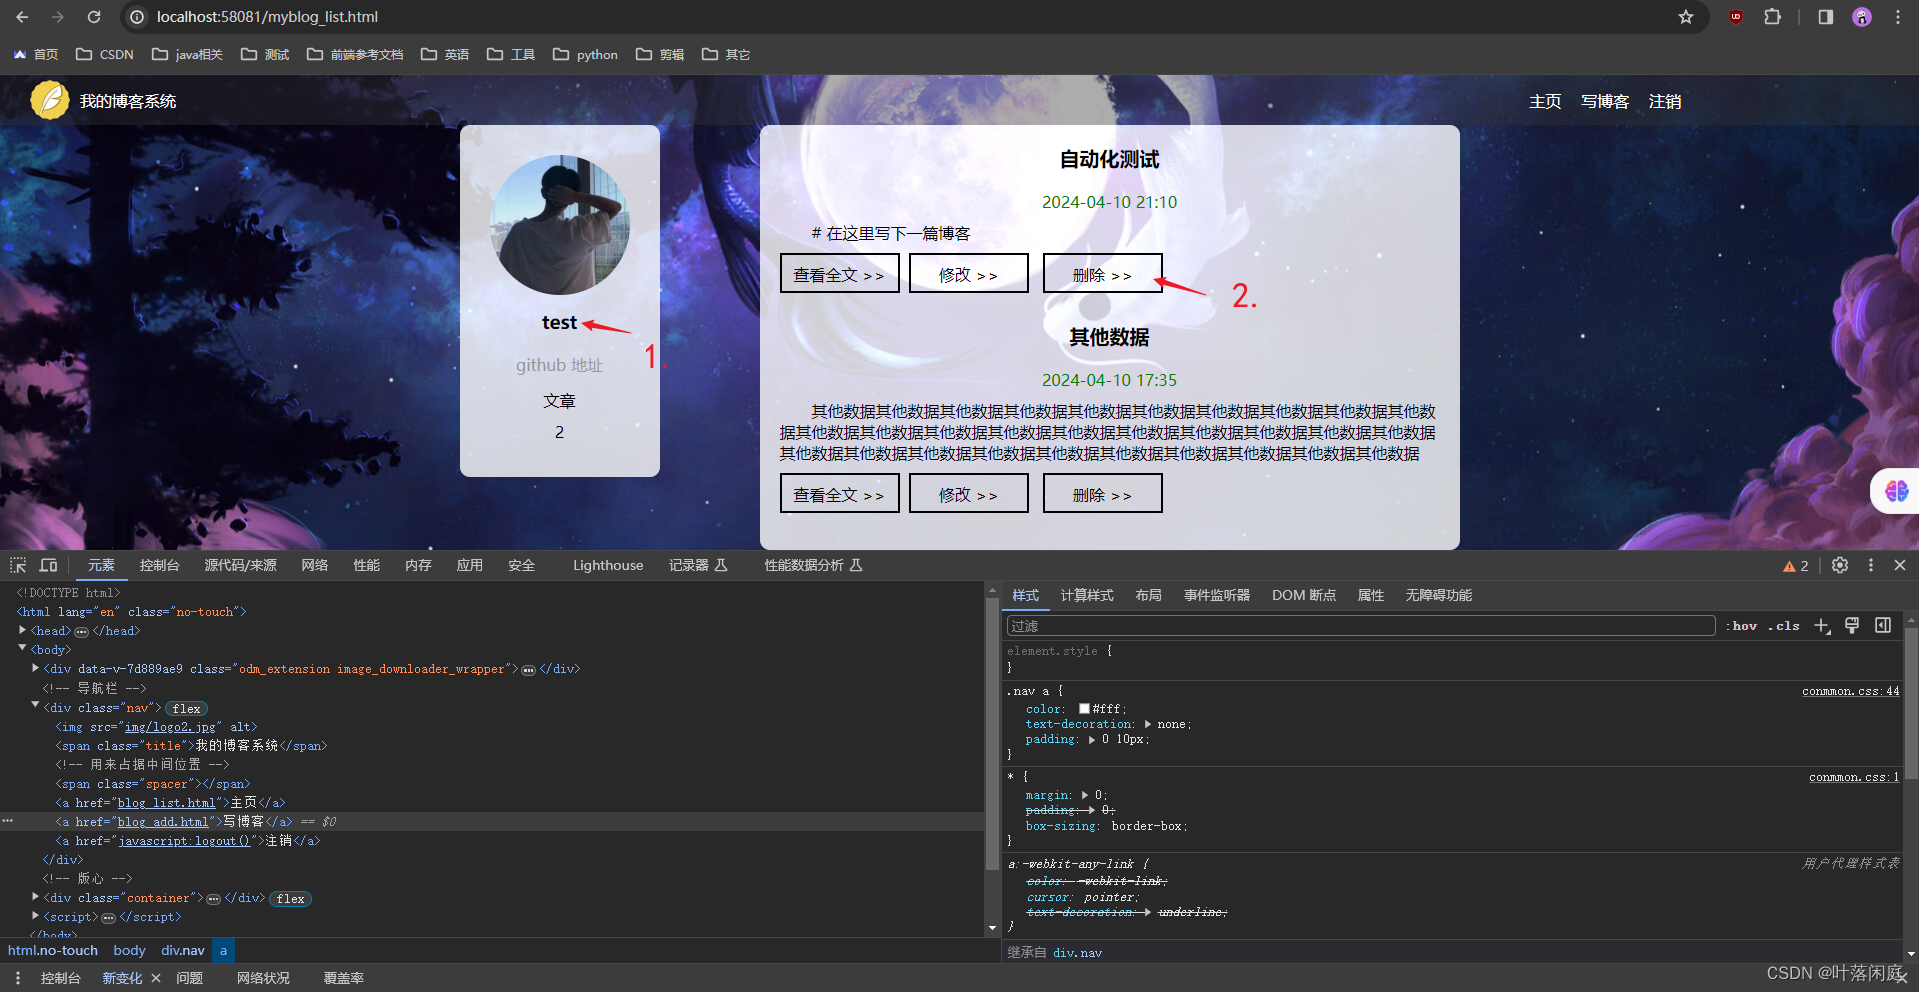
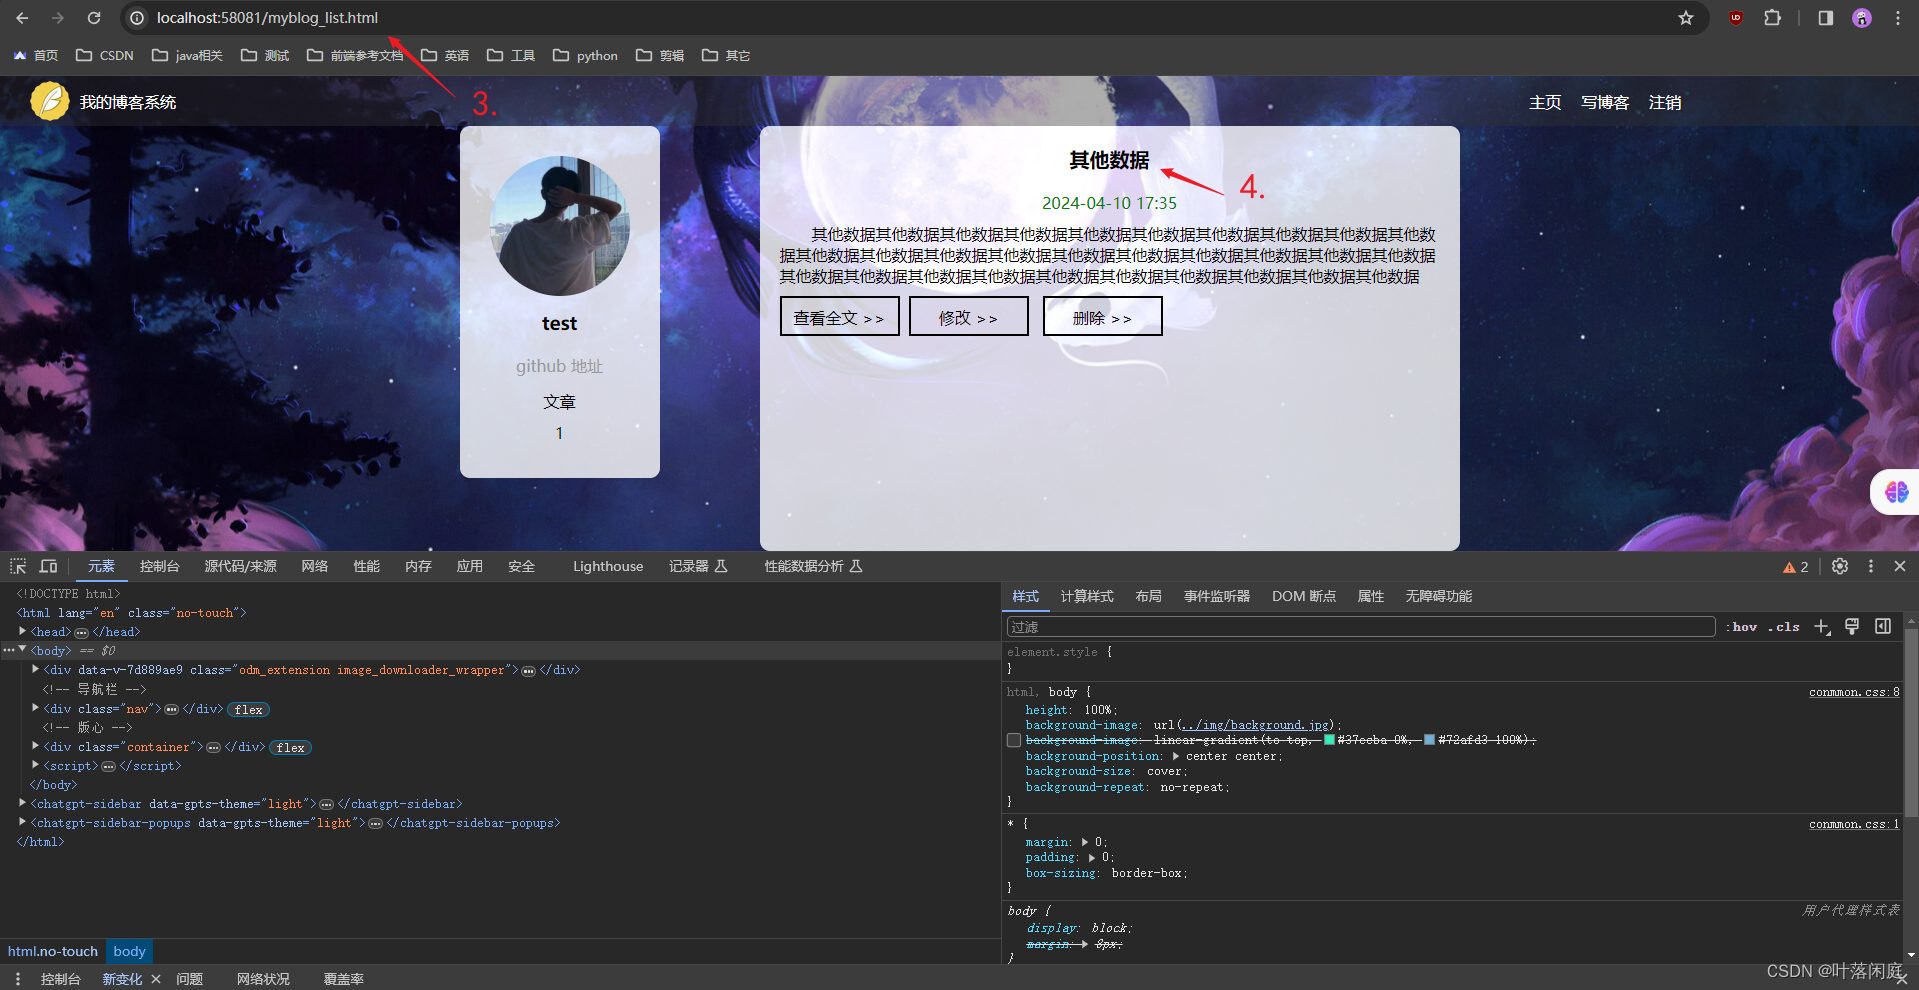
2.4.6 在文章列表页,发布者可以进行文章删除操作
- 操作步骤
@Test
void deleteBlogTest() throws InterruptedException {// 1.打开文章列表页webDriver.get("http://localhost:58081/myblog_list.html");// 2.判断当前登录用户是否是test//  根据列表页个人信息进行判断webDriver.manage().timeouts().implicitlyWait(3,TimeUnit.SECONDS);String currentUerName = webDriver.findElement(By.cssSelector("#username")).getText();Assertions.assertEquals("test",currentUerName);webDriver.manage().timeouts().implicitlyWait(3,TimeUnit.SECONDS);//  3.执行到这里,说明当前登录用户是test,可以进行删除操作//    点击修改,开始删除文章webDriver.findElement(By.cssSelector("#artListDiv > div:nth-child(1) > a:nth-child(6)")).click();webDriver.manage().timeouts().implicitlyWait(3,TimeUnit.SECONDS);//可能有弹窗sleep(3000);webDriver.switchTo().alert().accept();// 4. 校验页面 http://localhost:58081/myblog_list.htmlwebDriver.manage().timeouts().implicitlyWait(3, TimeUnit.SECONDS);String currentUrl = webDriver.getCurrentUrl();webDriver.manage().timeouts().implicitlyWait(3, TimeUnit.SECONDS);Assertions.assertEquals("http://localhost:58081/myblog_list.html",currentUrl);webDriver.manage().timeouts().implicitlyWait(3, TimeUnit.SECONDS);// 5. 判断若第一条博客标题不是自动化测试,则测试通过String newTitle = webDriver.findElement(By.cssSelector("#artListDiv > div > div.title")).getText();Assertions.assertNotEquals("自动化测试",newTitle);
}
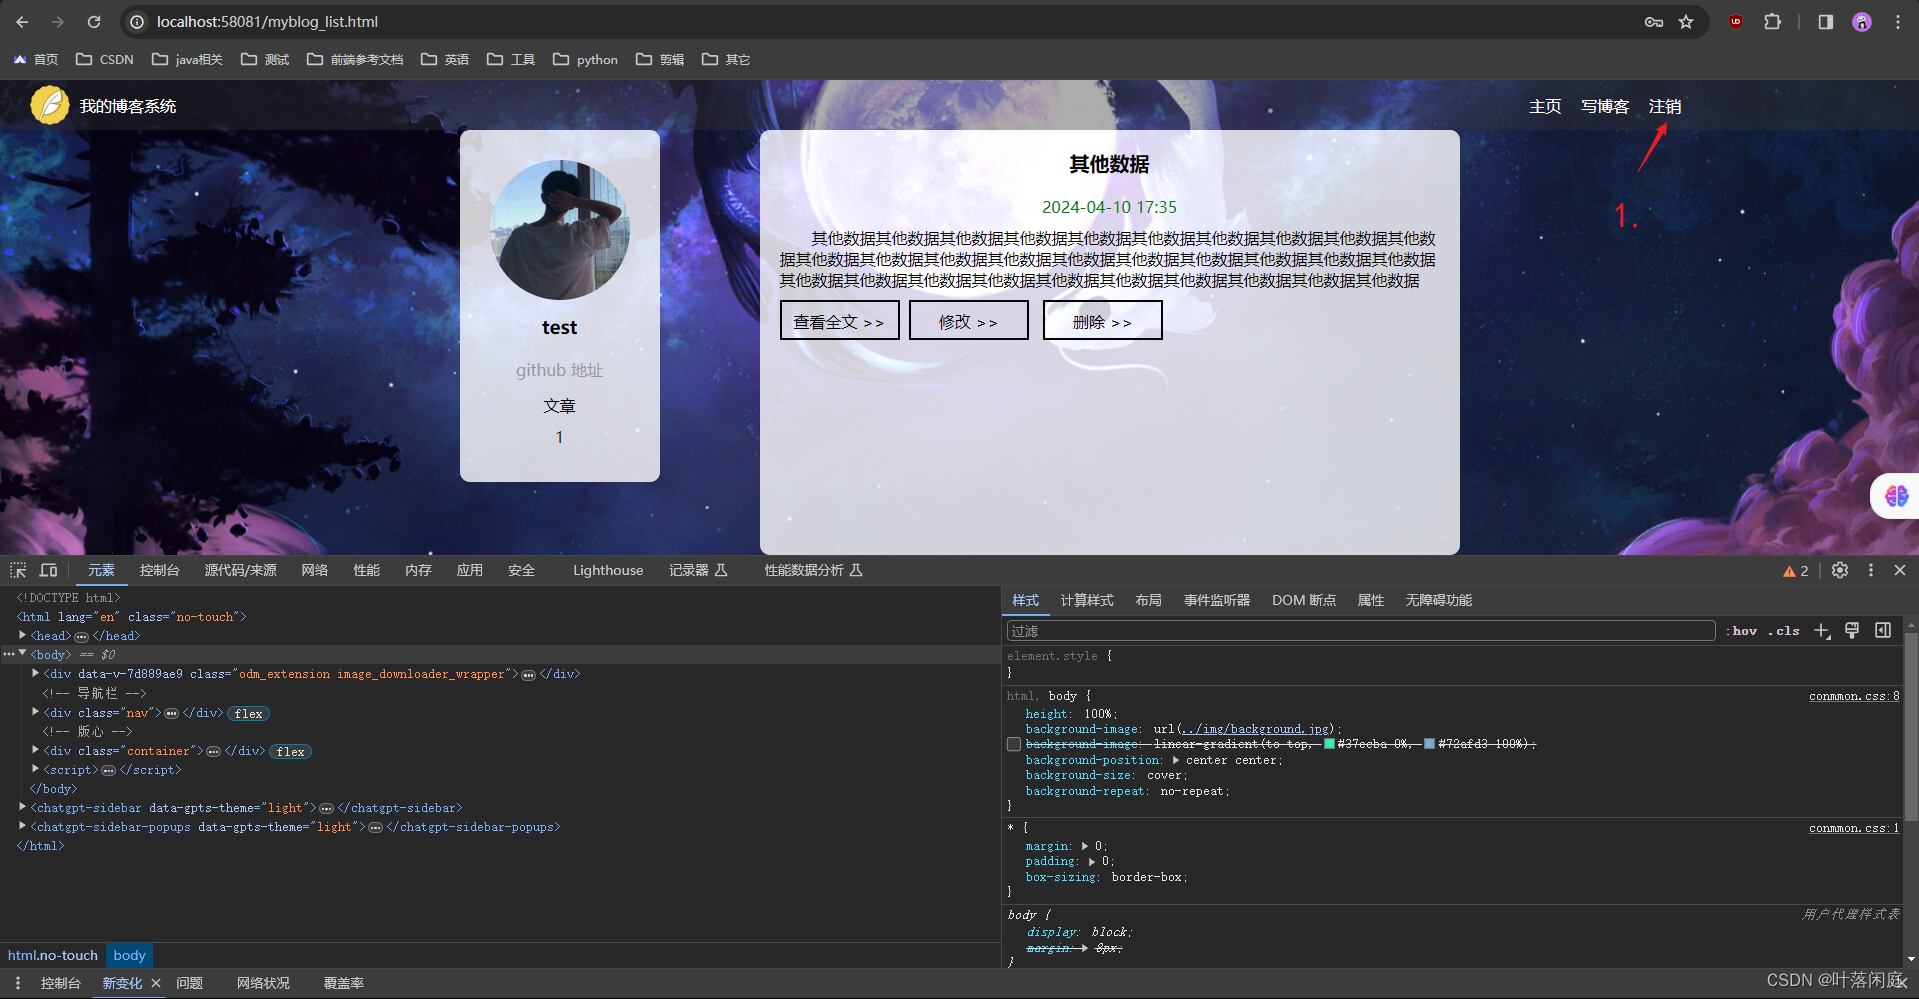
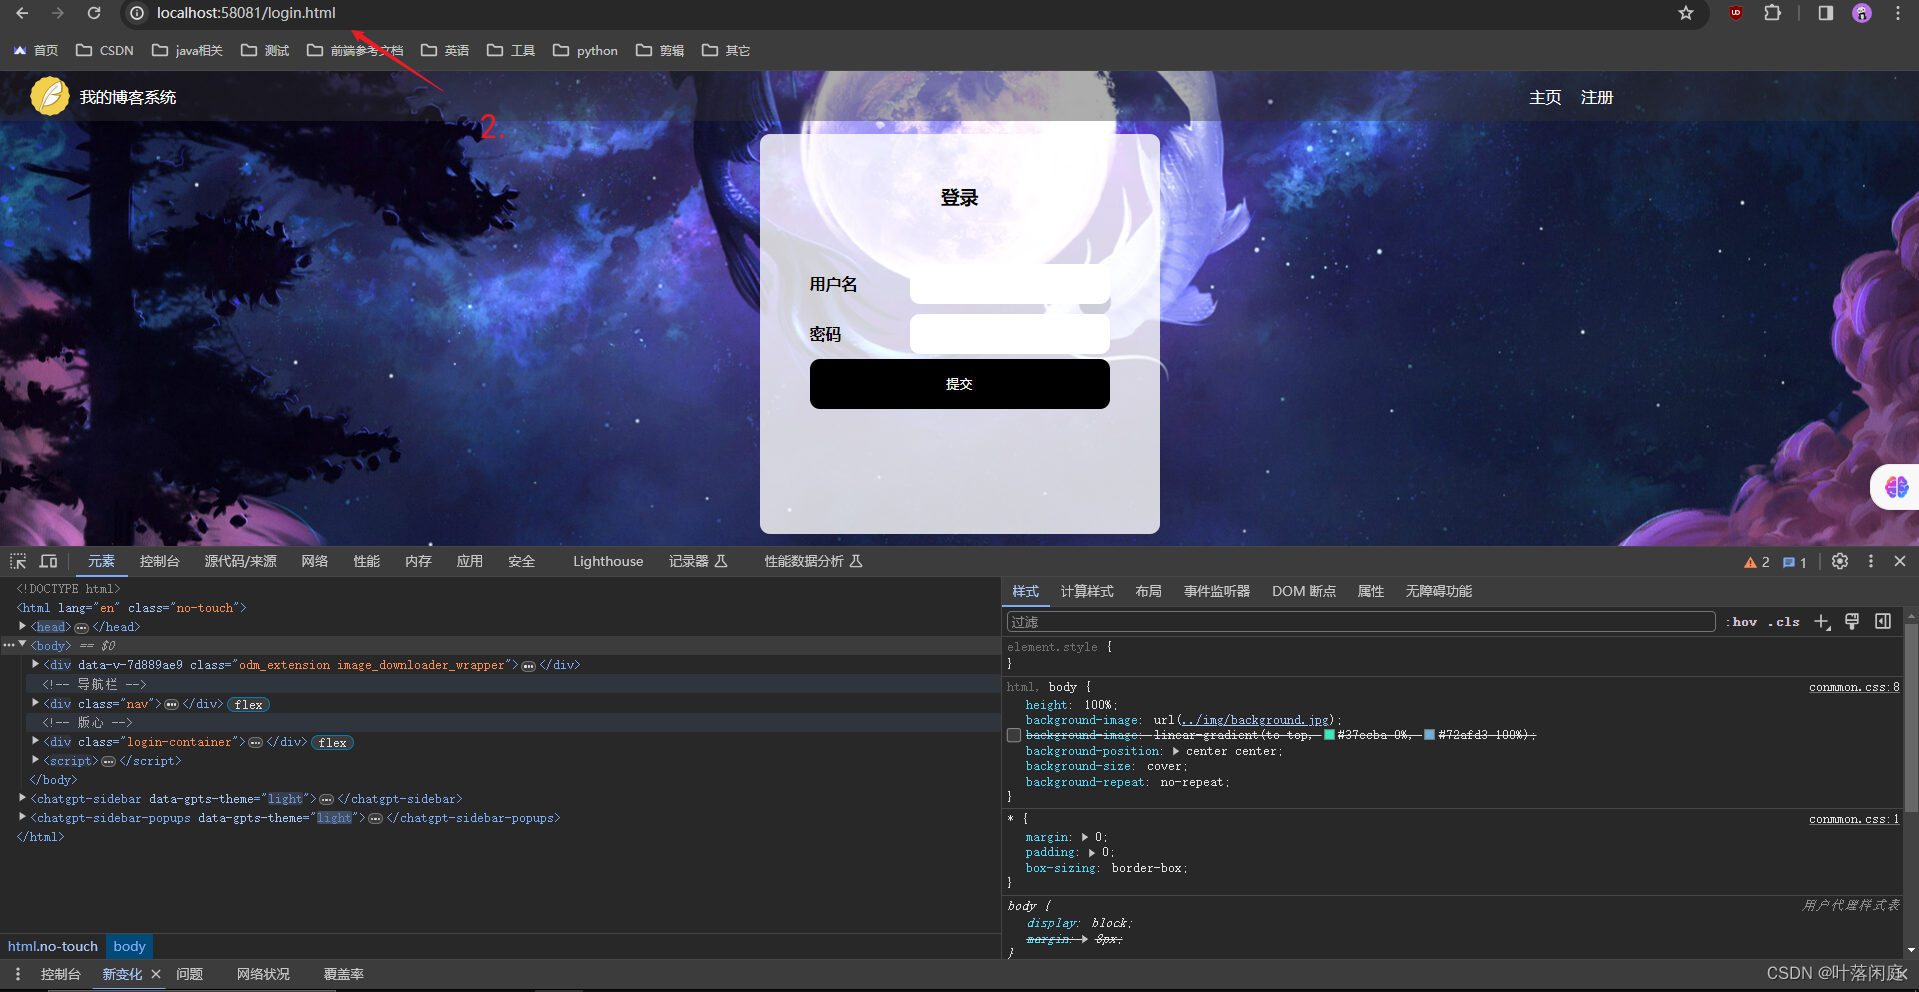
2.4.7 注销账号,退出登录
- 操作步骤
- 测试代码
@Test
void logOffTest() throws InterruptedException {// 1. 点击注销按钮,退出博客webDriver.findElement(By.cssSelector("body > div.nav > a:nth-child(6)")).click();//可能有弹窗,直接通过,跳转到登录页面sleep(3000);webDriver.switchTo().alert().accept();webDriver.manage().timeouts().implicitlyWait(3, TimeUnit.SECONDS);// 2. 判断当前页面是否是登录页面String currentUrl = webDriver.getCurrentUrl();Assertions.assertEquals("http://localhost:58081/login.html",currentUrl);
}
2.4.8 输入用户名:testt,密码:123,登录失败
- 操作步骤

- 测试代码
@ParameterizedTest
@CsvFileSource(resources = "loginFail1.csv")
void loginFail1(String username,String password,String blogListUrl) {// 1. 打开博客登录页面webDriver.get("http://localhost:58081/login.html");//智能等待webDriver.manage().timeouts().implicitlyWait(3, TimeUnit.SECONDS);// 2. 输入用户名testtwebDriver.findElement(By.cssSelector("#username")).sendKeys(username);webDriver.manage().timeouts().implicitlyWait(3, TimeUnit.SECONDS);// 3. 输入密码123webDriver.findElement(By.cssSelector("#password")).sendKeys(password);webDriver.manage().timeouts().implicitlyWait(3, TimeUnit.SECONDS);// 4. 点击提交按钮webDriver.findElement(By.cssSelector("#submit")).click();webDriver.manage().timeouts().implicitlyWait(3, TimeUnit.SECONDS);//可能会有弹窗webDriver.switchTo().alert().accept();// 5. 不进行跳转//  5.1 获取当前页urlString currentUrl = webDriver.getCurrentUrl();webDriver.manage().timeouts().implicitlyWait(3, TimeUnit.SECONDS);//  5.2 与预期url("http://localhost:58081/login.html")对比,一致则测试通过Assertions.assertEquals(blogListUrl, currentUrl);
}
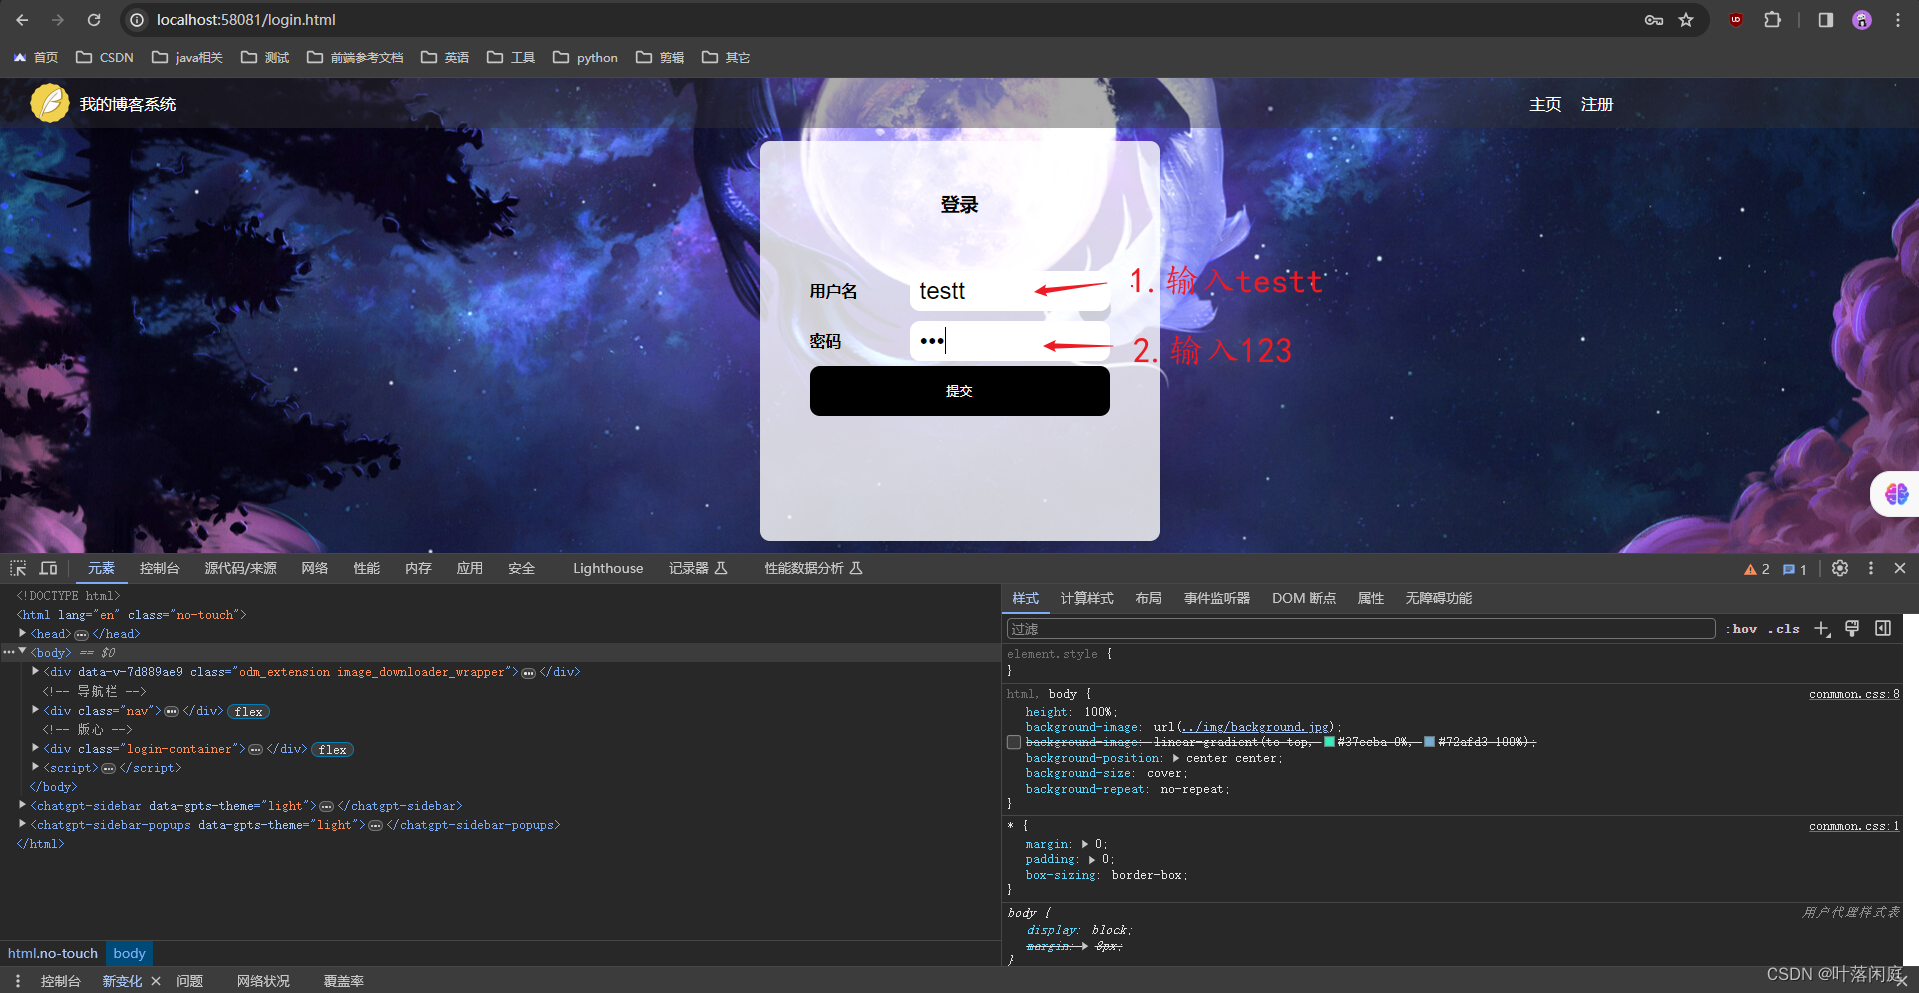
2.4.9 输入用户名:test,密码:1234,登录失败
- 操作步骤
- 测试代码
@ParameterizedTest
@CsvFileSource(resources = "loginFail2.csv")
void loginFail2(String username,String password,String blogListUrl) {// 1. 打开博客登录页面webDriver.get("http://localhost:58081/login.html");//智能等待webDriver.manage().timeouts().implicitlyWait(3, TimeUnit.SECONDS);// 2. 输入用户名testwebDriver.findElement(By.cssSelector("#username")).sendKeys(username);webDriver.manage().timeouts().implicitlyWait(3, TimeUnit.SECONDS);// 3. 输入密码1234webDriver.findElement(By.cssSelector("#password")).sendKeys(password);webDriver.manage().timeouts().implicitlyWait(3, TimeUnit.SECONDS);// 4. 点击提交按钮webDriver.findElement(By.cssSelector("#submit")).click();webDriver.manage().timeouts().implicitlyWait(3, TimeUnit.SECONDS);//可能会有弹窗webDriver.switchTo().alert().accept();// 5. 不进行跳转//  5.1 获取当前页urlString currentUrl = webDriver.getCurrentUrl();webDriver.manage().timeouts().implicitlyWait(3, TimeUnit.SECONDS);//  5.2 与预期url("http://localhost:58081/login.html")对比,一致则测试通过Assertions.assertEquals(blogListUrl, currentUrl);
}
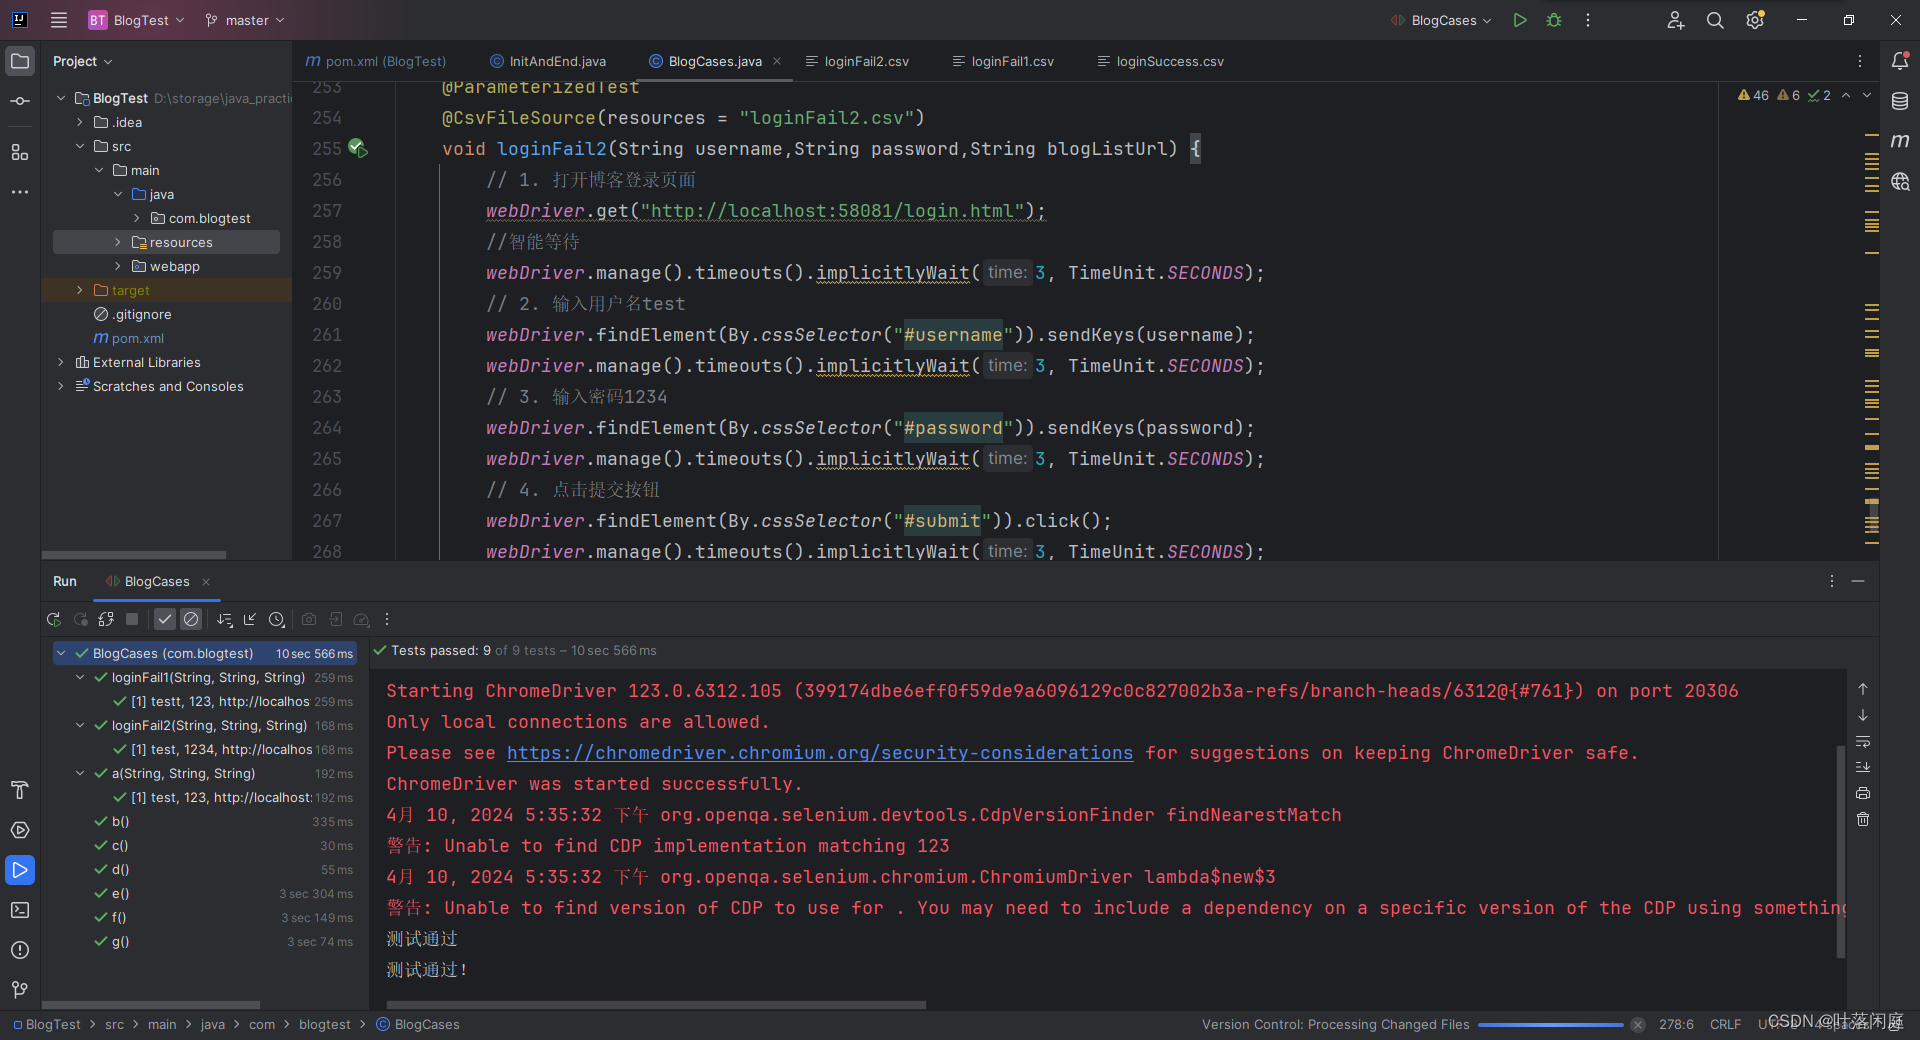
三、测试用例通过
