一、优化思路
对之前的天气预报的app进行了优化,原先的天气预报程序逻辑是这样的。
使用text和button组合了一个输入城市,并请求openweathermap对应数据,并显示的功能。
但是搜索城市的时候,可能会有错误,比如大小写,比如拼写之类的,所以打算给他升级一下。
目标:
- 在搜索的时候需要更够显示搜索的结果,然后在搜索的结果中显示符合的城市列表
- 需要有全球的城市数据,搜索结果过滤后,显示符合的城市
- 在符合搜索结果的内容中,可以点击需要的城市,并把城市的天气显示在主界面里。
二、准备城市的资料
获取城市的json压缩包
网址:https://bulk.openweathermap.org/sample/
下载链接:https://bulk.openweathermap.org/sample/city.list.json.gz
把下载文件加入进项目里,可以有两个位置一个是res/assert,一个是res/raw,它们的主要区别在于:
res/raw:- res/raw 目录用于存储原始文件,这些文件不会被
Android资源编译器进行处理或修改。 - 您可以在这个目录下放置各种类型的原始文件,例如音频文件、视频文件、文本文件等。
- 资源文件放置在
res/raw目录下会保持原始状态,不会被修改。
- res/raw 目录用于存储原始文件,这些文件不会被
res/assert:res/assert目录也用于存储原始文件,但其中的文件会被Android资源编译器进行压缩和优化处理。- 通常用于存放一些较小的非常规资源文件,例如
JSON文件、XML文件等。 - 资源文件放置在
res/assert目录下会被压缩和优化,这可能会使得访问这些资源稍微快一些。
如果希望保持资源文件的原始状态,不经过任何修改或处理,可以将它们放置在res/raw目录下。
如果资源文件较小且希望进行优化处理,可以考虑放置在res/assert目录下。
这里我们把它放在res/raw目录下,因为它是一个gz的压缩文件。
三、解压城市的gz文件
为这个文件编写代码,让软件在启动时检查是否有解压文件,如果没有解压文件就解压到files目录下。
files 文件夹通常用于存储应用的私有文件。这些文件是应用专用的,其他应用无法访问。以下是关于 files 文件夹的一些主要特点:
- 私有性:files 文件夹中的文件只能被创建它们的应用访问,其他应用无法直接访问这些文件。
- 持久性:与 cache 目录不同,files 文件夹中的文件不会因为系统资源不足而被清除。这些文件会持久保存,直到应用被卸载或明确删除。
- 文件访问:可以通过 Context 对象提供的方法,如 openFileOutput() 和 openFileInput(),来访问 files 文件夹中的文件。
- 存储位置:files 文件夹通常位于应用的私有数据目录中。具体路径通常为
/data/data/包名/files/。 - 用途:files 文件夹适用于存储各种类型的应用数据,如用户配置、日志文件、缓存数据等。
创建一个CityListDataManager的类,并在init时判断文件是否存在,如果不存在就把gz文件解压到files目录下:
class CityListDataManager(private val context: Context) {private val tag = "CityListDataManager"private val jsonFileName = "city.list.json"private val cityListJsonFile : File = File(context.filesDir, jsonFileName)private lateinit var cityDataList : Array<CityData>init {CoroutineScope(Dispatchers.IO).launch {		//使用线程执行,避免阻塞主线程if(!isExistCityListJsonFile()) {		//判断文件是否存在unzipGzFile(context)				//如果不存在就解压}}}private fun isExistCityListJsonFile() : Boolean {val isExisted = cityListJsonFile.exists()		Log.d(tag, "city list json file is existed:$isExisted")return isExisted}private suspend fun unzipGzFile(context: Context) {withContext(Dispatchers.IO) {try {context.resources.openRawResource(			//使用openRawResource打开raw目录下的文件com.example.myweather.R.raw.city_list_json).use { rawIn ->GZIPInputStream(rawIn).use { gzipIn ->		//使用GZIP来读取gz文件FileOutputStream(cityListJsonFile).use { fileOut ->		//使用FileOutputStream读取文件内容gzipIn.copyTo(fileOut)		//把文件解压到files目录下}}}} catch (ex: Exception) {ex.printStackTrace()}}}
}
四、读取所以城市数据
当我们解压了gz文件后,解压出来的文件是json格式的。包含了所有的城市数据。
这时候我需要选择解析json格式的工具,我搜索了相关的内容发现有两种方式,一种是JsonObject另一种是Gson。
我觉得Gson更简单,就选了这个
引入Gson库:
dependencies {implementation(libs.androidx.core.ktx)implementation(libs.androidx.appcompat)implementation(libs.material)implementation(libs.androidx.activity)implementation(libs.androidx.constraintlayout)testImplementation(libs.junit)androidTestImplementation(libs.androidx.junit)androidTestImplementation(libs.androidx.espresso.core)//networkimplementation(libs.com.squareup.retrofit2)implementation(libs.com.squareup.retrofit2.converterGson)implementation(libs.org.greenrobot.eventbus)implementation(libs.androidx.recyclerview)implementation(libs.com.google.code.gson)
}
对应的libs.versions.toml内容:
constraintlayout = "2.1.4"
retrofit = "2.9.0"
converter-gson = "2.9.0"
eventBus = "3.2.0"
recyclerview = "1.3.2"
gson = "2.10.1"[libraries]
androidx-core-ktx = { group = "androidx.core", name = "core-ktx", version.ref = "coreKtx" }
junit = { group = "junit", name = "junit", version.ref = "junit" }
androidx-junit = { group = "androidx.test.ext", name = "junit", version.ref = "junitVersion" }
androidx-espresso-core = { group = "androidx.test.espresso", name = "espresso-core", version.ref = "espressoCore" }
androidx-appcompat = { group = "androidx.appcompat", name = "appcompat", version.ref = "appcompat" }
material = { group = "com.google.android.material", name = "material", version.ref = "material" }
androidx-activity = { group = "androidx.activity", name = "activity", version.ref = "activity" }
androidx-constraintlayout = { group = "androidx.constraintlayout", name = "constraintlayout", version.ref = "constraintlayout" }
com-squareup-retrofit2 = { group = "com.squareup.retrofit2", name = "retrofit", version.ref = "retrofit" }
com-squareup-retrofit2-converterGson = { group = "com.squareup.retrofit2", name = "converter-gson", version.ref = "converter-gson" }
org-greenrobot-eventbus = { group = "org.greenrobot", name = "eventbus", version.ref = "eventBus" }
androidx-recyclerview = { group = "androidx.recyclerview", name = "recyclerview", version.ref = "recyclerview" }
com-google-code-gson = { group = "com.google.code.gson", name = "gson", version.ref = "gson" }[plugins]
androidApplication = { id = "com.android.application", version.ref = "agp" }
jetbrainsKotlinAndroid = { id = "org.jetbrains.kotlin.android", version.ref = "kotlin" }
为Json内容创建对应的类,两个数据类:Coord 和 CityData。Coord 类表示地理坐标,包含经度 (lon) 和纬度 (lat)。CityData 类表示城市数据,包含城市的ID (id)、名称 (name)、州/省 (state)、国家 (country) 以及该城市的地理坐标 (coord)。这也对应json文件的数据格式
data class Coord (val lon: Double,val lat: Double
)
data class CityData(val id: Int,val name: String,val state: String?=null,val country: String,val coord: Coord
)
读取json格式函数,用于逐行读取文件内容并将其解析为 CityData 对象列表。这里使用了 Gson 库来解析 JSON 数据。具体步骤如下:
- 创建 Gson 实例。
- 打开应用的文件目录,并指定要读取的文件名。
- 使用 FileInputStream 打开文件,并创建 BufferedReader 来逐行读取文件内容。
- 使用 StringBuilder 来构建完整的文件内容。
- 在 while 循环中,逐行读取文件内容,并将每行添加到 StringBuilder 中。
- 读取完成后,将 StringBuilder 中的内容转换为字符串。
- 使用 Gson 的 fromJson 方法将 JSON 字符串转换为 CityData 对象数组。
- 将解析后的 CityData 对象数组发送到事件总线(EventBus)中。
如果发生 IO 异常,将打印异常堆栈跟踪信息。
private fun readContentOneByOne(context: Context) = try {val gson = Gson()val file = File(context.filesDir, jsonFileName)val fis = FileInputStream(file)val reader = BufferedReader(InputStreamReader(fis))val stringBuilder = StringBuilder()var line : String?while (reader.readLine().also { line = it } != null) {stringBuilder.append(line).append("\n")}val fileContent = stringBuilder.toString()cityDataList = gson.fromJson(fileContent, Array<CityData>::class.java)Log.d(tag, "get city data list done and send event bus")EventBus.getDefault().post(CityDataListReadyEvent(cityDataList.toList()))} catch (e: IOException) {e.printStackTrace()
}
在CityListDataManager的init中调用它
init {CoroutineScope(Dispatchers.IO).launch {if(!isExistCityListJsonFile()) {unzipGzFile(context)}readContentOneByOne(context)}}
五、创建Material Search Bar
根据最新的Material Design的Search说明文档,可以在MainActivity里套用它的模版来使用:
<androidx.coordinatorlayout.widget.CoordinatorLayoutandroid:layout_width="match_parent"android:layout_height="match_parent"><!-- NestedScrollingChild goes here (NestedScrollView, RecyclerView, etc.). --><androidx.core.widget.NestedScrollViewandroid:layout_width="match_parent"android:layout_height="match_parent"app:layout_behavior="@string/searchbar_scrolling_view_behavior"><!-- Screen content goes here. 这里放显示的主内容 --></androidx.core.widget.NestedScrollView><com.google.android.material.appbar.AppBarLayoutandroid:layout_width="match_parent"android:layout_height="wrap_content"><com.google.android.material.search.SearchBarandroid:id="@+id/search_bar"android:layout_width="match_parent"android:layout_height="wrap_content"android:hint="@string/searchbar_hint" /></com.google.android.material.appbar.AppBarLayout><com.google.android.material.search.SearchViewandroid:layout_width="match_parent"android:layout_height="match_parent"android:hint="@string/searchbar_hint"app:layout_anchor="@id/search_bar"><!-- Search suggestions/results go here (ScrollView, RecyclerView, etc.). 这里是放搜索结果 --></com.google.android.material.search.SearchView>
</androidx.coordinatorlayout.widget.CoordinatorLayout>
遇到的问题:
我之前的项目并不是用Android Material Design设计的,只是一个简单的TextView和Button组合的搜索结果。
当我想要使用Material Design相关的控件时,发现引用相关的库后调用SerachBar和需要配置说明文档里不存在的一些属性,否则就会崩溃。
当我为SearchBar设置了属性后,SearchView加入后,仍然还是会崩溃。我搜索了各种问题都无法解决,最后我新建了一个项目,把代码重新拷贝进去后,问题消失了。
分析:可能是我之前建的工程版本较低导致的,我通过对比gradle文件发现,不会崩溃的版本sdk更高。具体我也说不上来为什么,就只能这么用了。
六、使用SearchBar和SearchView对接
当我插入上面的模版后,发现点击SearchBar并不会跳转显示SerachView。
不断尝试后发现可以这样做,让点击SearchBar后出现SearchView
binding.searchBar.apply {setOnClickListener { binding.searchView.show() }}
而在SearchView中输入了内容,点击确认进行搜索的方式是这样的:
binding.searchView.editText.setOnEditorActionListener { v, _, _ ->val filterText = v.editableText.toString()Toast.makeText(v.context, "the text: $filterText", Toast.LENGTH_SHORT).show()return@setOnEditorActionListener false}
这样我们一个基本的搜索框架就搭建好了,还需要把结果数据显示出来
七、用recycleview显示搜索结果
在SearchView中添加recycleview控件:
<com.google.android.material.search.SearchViewandroid:id="@+id/search_view"android:layout_width="match_parent"android:layout_height="match_parent"android:hint="@string/editTextCityHint"><androidx.recyclerview.widget.RecyclerViewandroid:id="@+id/cityDataRecyclerView"android:layout_width="match_parent"android:layout_height="match_parent"/></com.google.android.material.search.SearchView>
创建一个对应的CityDataAdapter类,这里我们需要添加一个itemClick事件,当有一项被点击时,可以触发一个消息:
package com.example.myweather.cityListUtilsimport android.annotation.SuppressLint
import android.view.LayoutInflater
import android.view.View
import android.view.ViewGroup
import android.widget.TextView
import androidx.recyclerview.widget.RecyclerView
import com.example.myweather.Rclass CityDataAdapter(private val originCityDataList: List<CityData>) :RecyclerView.Adapter<CityDataAdapter.ViewHolder>() {private var filterCityDataList : MutableList<CityData> = originCityDataList.toMutableList()var onItemClick: ((CityData) -> Unit)? = nullinner class ViewHolder(view: View) : RecyclerView.ViewHolder(view) {init {view.setOnClickListener {if(absoluteAdapterPosition != RecyclerView.NO_POSITION)onItemClick?.invoke(filterCityDataList[absoluteAdapterPosition])}}val cityDataId : TextView = view.findViewById<TextView>(R.id.city_data_id)val cityDataName : TextView = view.findViewById<TextView>(R.id.city_data_name)val cityDataCountry : TextView = view.findViewById<TextView>(R.id.city_data_country)val cityDataCoordinate: TextView = view.findViewById<TextView>(R.id.city_data_coordinate)}override fun onCreateViewHolder(parent: ViewGroup, viewType: Int): ViewHolder {val view = LayoutInflater.from(parent.context).inflate(R.layout.city_data_item, parent, false)return ViewHolder(view)}override fun onBindViewHolder(holder: ViewHolder, position: Int) {val cityData = filterCityDataList[position]holder.cityDataId.text = cityData.id.toString()holder.cityDataName.text = cityData.nameholder.cityDataCountry.text = cityData.countryholder.cityDataCoordinate.text = buildString {append(String.format("%.1f", cityData.coord.lon))append(",")append(String.format("%.1f", cityData.coord.lat))}}override fun getItemCount() = filterCityDataList.size@SuppressLint("NotifyDataSetChanged")fun setFilter(filterText: String) {if(filterText.isEmpty()) {filterCityDataList.clear()filterCityDataList.addAll(originCityDataList)} else {filterCityDataList.clear()for (item in originCityDataList) {if (item.name.lowercase().contains(filterText.lowercase())) {filterCityDataList.add(item)}}}notifyDataSetChanged()}
}
在MainActivity里,添加处理解析完城市json格式的所有城市数据:
在主线程中接收城市数据列表准备就绪的事件,并调用 updateCityDataList 方法更新城市数据列表。
@Subscribe(threadMode = ThreadMode.MAIN)fun onReceiveCityDataListReadyEvent(event: CityDataListReadyEvent) {Log.d(tag, "on received city data list ready event ${event.cityDataList.size}")updateCityDataList(event.cityDataList)}
当CityDataAdapter的某一项被点击时,调用OnItemClick事件来处理。需要在注册的时候就绑定相关的消息:
- 创建了一个 CityDataAdapter 的实例,并传入城市数据列表作为参数。
- 为 CityDataAdapter 设置了点击事件的回调函数 onItemClick,在点击城市数据项时执行以下操作:
- 获取点击的城市名称 cityName。
- 使用 RetrofitClient 获取该城市的天气信息和预报信息。
- 创建一个包含点击项名称的提示消息 message。
- 隐藏搜索视图(可能是搜索框之类的)。
- 弹出一个短暂的 Toast 消息显示 message。
- 将适配器设置到城市数据的 RecyclerView 中,用于显示城市数据列表。
private fun updateCityDataList(cityDataList: List<CityData>) {val adapter = CityDataAdapter(cityDataList)adapter.onItemClick = { cityData ->val cityName = cityData.nameRetrofitClient.getWeatherByCityName(cityName)RetrofitClient.getForecastByCityName(cityName)val message = "Click item name: $cityName"binding.searchView.hide()Toast.makeText(this, message, Toast.LENGTH_SHORT).show()}binding.cityDataRecyclerView.adapter = adapter}
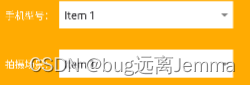
最终的效果图:


最后遇到的奔溃问题
由于json文件解析需要一点时间,如果软件启动时,就去搜索,因为adapter是空的,所以软件会崩溃。
最后我在初始化的时候先创建了一个空的队列,避免崩溃:
private fun initView() {supportFragmentManager.beginTransaction().replace(R.id.fragment_container, CityWeatherFragment()).commit()binding.forecastRecyclerView.layoutManager = LinearLayoutManager(this)binding.cityDataRecyclerView.layoutManager = LinearLayoutManager(this)binding.cityDataRecyclerView.adapter = CityDataAdapter(emptyList<CityData>())binding.searchBar.apply {setOnClickListener { binding.searchView.show() }}binding.searchView.editText.setOnEditorActionListener { v, _, _ ->val filterText = v.editableText.toString()Toast.makeText(v.context, "the text: $filterText", Toast.LENGTH_SHORT).show()val cityDataAdapter : CityDataAdapter= binding.cityDataRecyclerView.adapter as CityDataAdaptercityDataAdapter.setFilter(filterText)return@setOnEditorActionListener false}}
- 使用 supportFragmentManager 开始一个事务,并将一个 CityWeatherFragment 替换到 ID 为 fragment_container 的容器中。
- 设置 forecastRecyclerView 和 cityDataRecyclerView 的布局管理器为 LinearLayoutManager,以确保它们的布局是线性的。
- 为 cityDataRecyclerView 设置一个空的城市数据列表适配器 CityDataAdapter,以便后续更新城市数据。
- 为搜索栏 searchBar 设置点击事件监听器,点击时显示搜索视图 searchView。
- 为搜索视图的编辑文本框设置编辑动作监听器,当用户执行编辑动作时(比如按下回车键)执行以下操作:
- 获取编辑框中的文本内容。
- 弹出一个短暂的 Toast 消息,显示文本内容。
- 从 cityDataRecyclerView 的适配器中获取 CityDataAdapter 实例,并调用其 setFilter 方法,传入文本内容作为过滤条件。