话不多说,直接启动!👌🤣
目录
一、线性表😎
1、建立链表
2、插入元素
3、删除特定位置的元素
4、输出特定元素值的位置
5、输出特定位置的元素值
6、输出整个链表
实现
二、栈和队列😘
栈
顺序栈
1、建立顺序栈
2、入栈
3、出栈
4、取栈顶
5、遍历栈
6、判栈空
实现:
链栈
1、建立链栈
2、入栈
3、出栈
4、取栈顶
5、遍历栈
6、判栈空
实现:
队列
顺序队列
1、建立顺序队列
2、入队
3、出队
4、求队列长度
5、遍历队列
实现:
链式队列
1、建立链式队列
2、入队
3、出队
4、求队列长度
5、遍历队列
实现:
三、树和二叉树
实现:
四、图
实现:
五、查找和排序
折半查找实现:
快速排序实现:
一、线性表😎

1、建立链表
#include<iostream>
#include<vector>
using namespace std;
//定义单链表结点结构体
struct ListNode{int val;ListNode* next;
};
//创建链表
ListNode* CreateList(){ListNode* head = new ListNode();//创建头结点head->next = nullptr;//初始化头结点的next指针为空return head;
}
int main(){ListNode* head = CreateList();
}
2、插入元素
//在链表中插入元素
void Insert(ListNode* head, int i, int val) { // 需要链表,第i个位置,插入val值ListNode* current = head; // 初始化当前结点为头结点while (i-- > 0) { // 循环i次找插入位置current = current->next;}ListNode* newNode = new ListNode();newNode->val = val;newNode->next = current->next;current->next = newNode;
}
3、删除特定位置的元素
//删除特定位置的元素
void Delete(ListNode* head,int index){//需要链表,第i个位置if(index<0)return;ListNode* current = head;for(int i=0;i<index&¤t!=nullptr;i++){current=current->next;}if(current==nullptr)return;ListNode* toDelete = current->next;current->next = current->next->next;delete toDelete;
}4、输出特定元素值的位置
//输出特定元素值的位置
void PrintValue(ListNode* head, int index) {ListNode* current = head;int position = 0;while (current != nullptr) {if (current->val == index) {cout << "元素值:" << current->val << " 的位置是:" << position << endl;break;}current = current->next;position++;}if (current == nullptr) {cout << "索引超出链表范围" << endl;}
}
5、输出特定位置的元素值
//输出特定位置的元素值
void PrintNodeAtPosition(ListNode* head, int index) {ListNode* current = head;for (int i = 0; i < index && current != nullptr; i++) {current = current->next;}if (current != nullptr) {cout << "元素位置:" << index << ", 值:" << current->val << endl;} else {cout << "索引超出链表范围" << endl;}
}
6、输出整个链表
//输出整个链表
void PrintList(ListNode* head) {ListNode* current = head;while (current != nullptr) {cout << current->val << " --> ";current = current->next;}cout << "nullptr" << endl;
}
实现
#include<iostream>
#include<vector>
using namespace std;
//定义单链表结点结构体
struct ListNode{int val;ListNode* next;
};
//创建链表
ListNode* CreateList(){ListNode* head = new ListNode();//创建头结点head->next = nullptr;//初始化头结点的next指针为空return head;
}
//在链表中插入元素
void Insert(ListNode* head, int i, int val) { // 需要链表,第i个位置,插入val值ListNode* current = head; // 初始化当前结点为头结点while (i-- > 0) { // 循环i次找插入位置current = current->next;}ListNode* newNode = new ListNode();newNode->val = val;newNode->next = current->next;current->next = newNode;
}
//删除特定位置的元素
void Delete(ListNode* head,int index){//需要链表,第i个位置if(index<0)return;ListNode* current = head;for(int i=0;i<index&¤t!=nullptr;i++){current=current->next;}if(current==nullptr)return;ListNode* toDelete = current->next;current->next = current->next->next;delete toDelete;
}
//从输入读取链表元素并插入
void ReadInputToList(ListNode* head) {cout << "请输入你需要建立的初始链表(只允许实数):" << endl;vector<double> LinkList;double input;while (cin >> input) {LinkList.push_back(input);if(cin.peek() == '\n'){cin.ignore();break;}}int index = 0;for (double value : LinkList) {Insert(head, index++, static_cast<int>(value)); // 将读取的实数转换为整数后插入链表}
}
//输出特定元素值的位置
void PrintValue(ListNode* head, int index) {ListNode* current = head;int position = 0;while (current != nullptr) {if (current->val == index) {cout << "元素值:" << current->val << " 的位置是:" << position << endl;break;}current = current->next;position++;}if (current == nullptr) {cout << "索引超出链表范围" << endl;}
}//输出特定位置的元素值
void PrintNodeAtPosition(ListNode* head, int index) {ListNode* current = head;for (int i = 0; i < index && current != nullptr; i++) {current = current->next;}if (current != nullptr) {cout << "元素位置:" << index << ", 值:" << current->val << endl;} else {cout << "索引超出链表范围" << endl;}
}
//输出整个链表
void PrintList(ListNode* head) {ListNode* current = head;while (current != nullptr) {cout << current->val << " --> ";current = current->next;}cout << "nullptr" << endl;
}
int main(){ListNode* head = CreateList();ReadInputToList(head);cout<<"1.输出链表中的所有结点"<<endl;PrintList(head);cout<<"2.输出元素25的位置"<<endl;PrintValue(head,25);cout<<"3.输出第5个元素"<<endl;PrintNodeAtPosition(head,5);cout<<"4.在第 3 个元素前插入值为 98 的元素,然后输出链表"<<endl;Insert(head,3,98);PrintList(head);cout<<"5.输出删除第 4 个元素后的链表"<<endl;Delete(head,4);PrintList(head);return 0;
}二、栈和队列😘

栈
顺序栈
1、建立顺序栈
// 建立顺序栈
struct Stack {int *elem; // 指向动态分配的数组int top; // 栈顶指针int MaxSize; // 栈的最大容量
};// 创建栈
Stack* CreateStack(int MaxSize) {Stack* stack = new Stack();stack->elem = new int[MaxSize];stack->top = -1;stack->MaxSize = MaxSize;return stack;
}
2、入栈
// 入栈
void Push(Stack* stack, int val) {if (stack->top < stack->MaxSize - 1) { // 如果栈未满stack->elem[++stack->top] = val; // 栈顶指针后移并赋值} else {cout << "栈已满,无法入栈" << endl;}
}
3、出栈
// 出栈
int Pop(Stack* stack) {if (stack->top >= 0) { // 如果栈非空return stack->elem[stack->top--]; // 返回栈顶元素并移动栈顶指针} else {cout << "栈为空,无法出栈" << endl;return -1; // 返回-1表示栈空}
}
4、取栈顶
// 取栈顶
int GetTop(Stack* stack) {if (stack->top >= 0) { // 如果栈非空return stack->elem[stack->top]; // 返回栈顶元素} else {cout << "栈为空,无法获取栈顶元素。" << endl;return -1; // 返回-1表示栈空}
}
5、遍历栈
// 遍历栈
void TraverseStack(Stack* stack) {for (int i = 0; i <= stack->top; i++) {cout << stack->elem[i] << " ";}cout << endl;
}
6、判栈空
// 判断栈是否为空
bool IsEmpty(Stack* stack) {return stack->top < 0; // 如果栈顶指针小于0,则栈为空
}
实现:
#include <iostream>
#include <vector>
using namespace std;// 建立顺序栈
struct Stack {int *elem; // 指向动态分配的数组int top; // 栈顶指针int MaxSize; // 栈的最大容量
};// 创建栈
Stack* CreateStack(int MaxSize) {Stack* stack = new Stack();stack->elem = new int[MaxSize];stack->top = -1;stack->MaxSize = MaxSize;return stack;
}// 入栈
void Push(Stack* stack, int val) {if (stack->top < stack->MaxSize - 1) { // 如果栈未满stack->elem[++stack->top] = val; // 栈顶指针后移并赋值} else {cout << "栈已满,无法入栈" << endl;}
}// 出栈
int Pop(Stack* stack) {if (stack->top >= 0) { // 如果栈非空return stack->elem[stack->top--]; // 返回栈顶元素并移动栈顶指针} else {cout << "栈为空,无法出栈" << endl;return -1; // 返回-1表示栈空}
}// 取栈顶
int GetTop(Stack* stack) {if (stack->top >= 0) { // 如果栈非空return stack->elem[stack->top]; // 返回栈顶元素} else {cout << "栈为空,无法获取栈顶元素。" << endl;return -1; // 返回-1表示栈空}
}// 遍历栈
void TraverseStack(Stack* stack) {for (int i = 0; i <= stack->top; i++) {cout << stack->elem[i] << " ";}cout << endl;
}// 判断栈是否为空
bool IsEmpty(Stack* stack) {return stack->top < 0; // 如果栈顶指针小于0,则栈为空
}// 从输入读取元素并添加
void ReadInputToStack(Stack* stack) {cout << "请输入你需要建立的初始顺序栈(只允许实数):" << endl;vector<double> Arr;double input;while (cin >> input) {Arr.push_back(input);if (cin.peek() == '\n') {cin.ignore();break;}}int index = 0;for (double value : Arr) { // 遍历Arr而不是stackPush(stack, static_cast<int>(value));}
}int main() {int max = 0;cout << "请输入栈的最大容量:" << endl;cin >> max;Stack* stack = CreateStack(max);ReadInputToStack(stack);TraverseStack(stack);return 0;
}
链栈
1、建立链栈
// 定义链栈节点结构体
struct StackNode {int val;StackNode* next;
};// 创建链栈
StackNode* CreateStack() {StackNode* head = new StackNode(); // 创建头节点head->next = nullptr;return head;
}
2、入栈
// 入栈操作
void Push(StackNode* head, int val) {StackNode* newNode = new StackNode{val, nullptr}; // 创建新节点newNode->next = head->next; // 将新节点链接到链表head->next = newNode; // 头节点指向新节点
}
3、出栈
// 出栈操作
int Pop(StackNode* head) {if (head->next == nullptr) {cout << "栈为空,无法出栈。" << endl;return -1; // 返回-1表示栈空}StackNode* temp = head->next; // 临时节点int val = temp->val; // 保存要返回的值head->next = temp->next; // 头节点指向下一个节点delete temp; // 释放临时节点return val; // 返回栈顶元素
}
4、取栈顶
// 获取栈顶元素
int GetTop(StackNode* head) {if (head->next == nullptr) {cout << "栈为空,无法获取栈顶元素。" << endl;return -1; // 返回-1表示栈空}return head->next->val; // 返回栈顶元素
}
5、遍历栈
// 遍历链栈
void TraverseStack(StackNode* head) {if (head->next == nullptr) {cout << "栈为空。" << endl;return;}StackNode* current = head->next; // 从栈顶开始遍历cout << "链栈元素: ";while (current != nullptr) {cout << current->val << " ";current = current->next; // 移动到下一个节点}cout << endl;
}
6、判栈空
// 判断栈是否为空
bool IsEmpty(StackNode* head) {return head->next == nullptr; // 如果头节点的next指针为空,则栈为空
}
实现:
#include<iostream>
using namespace std;// 定义链栈节点结构体
struct StackNode {int val;StackNode* next;
};// 创建链栈
StackNode* CreateStack() {StackNode* head = new StackNode(); // 创建头节点head->next = nullptr;return head;
}// 入栈操作
void Push(StackNode* head, int val) {StackNode* newNode = new StackNode{val, nullptr}; // 创建新节点newNode->next = head->next; // 将新节点链接到链表head->next = newNode; // 头节点指向新节点
}// 出栈操作
int Pop(StackNode* head) {if (head->next == nullptr) {cout << "栈为空,无法出栈。" << endl;return -1; // 返回-1表示栈空}StackNode* temp = head->next; // 临时节点int val = temp->val; // 保存要返回的值head->next = temp->next; // 头节点指向下一个节点delete temp; // 释放临时节点return val; // 返回栈顶元素
}// 遍历链栈
void TraverseStack(StackNode* head) {if (head->next == nullptr) {cout << "栈为空。" << endl;return;}StackNode* current = head->next; // 从栈顶开始遍历cout << "链栈元素: ";while (current != nullptr) {cout << current->val << " ";current = current->next; // 移动到下一个节点}cout << endl;
}// 获取栈顶元素
int GetTop(StackNode* head) {if (head->next == nullptr) {cout << "栈为空,无法获取栈顶元素。" << endl;return -1; // 返回-1表示栈空}return head->next->val; // 返回栈顶元素
}// 判断栈是否为空
bool IsEmpty(StackNode* head) {return head->next == nullptr; // 如果头节点的next指针为空,则栈为空
}int main() {StackNode* stack = CreateStack(); // 创建链栈cout << "入栈元素: 10, 20, 30, 40, 50" << endl;Push(stack, 10);Push(stack, 20);Push(stack, 30);Push(stack, 40);Push(stack, 50);cout << "栈顶元素: " << GetTop(stack) << endl;cout << "出栈元素: " << Pop(stack) << endl;cout << "栈顶元素: " << GetTop(stack) << endl;TraverseStack(stack); // 调用遍历链栈的方法cout << "栈是否为空: " << (IsEmpty(stack) ? "是" : "否") << endl;return 0;
}
队列
顺序队列
1、建立顺序队列
// 定义队列结构体
struct Queue {vector<int> elements; // 使用vector来存储队列元素
};// 创建队列
Queue* CreateQueue() {return new Queue(); // 创建队列对象
}
2、入队
// 入队操作
void Enqueue(Queue* queue, int val) {queue->elements.push_back(val); // 将元素添加到队列末尾
}
3、出队
// 出队操作
int Dequeue(Queue* queue) {if (queue->elements.empty()) { // 如果队列为空cout << "队列为空,无法出队。" << endl;return -1; // 返回-1表示队空}int val = queue->elements.front(); // 获取队首元素queue->elements.erase(queue->elements.begin()); // 删除队首元素return val; // 返回队首元素
}
4、求队列长度
int GetQueueLength(Queue* queue) {return queue->elements.size(); // 返回队列中元素的数量
}
5、遍历队列
// 遍历队列
void TraverseQueue(Queue* queue) {if (queue->elements.empty()) { // 如果队列为空cout << "队列为空。" << endl;return;}cout << "队列元素: ";for (int val : queue->elements) {cout << val << " ";}cout << endl;
}
实现:
#include<iostream>
#include<vector>
using namespace std;// 定义队列结构体
struct Queue {vector<int> elements; // 使用vector来存储队列元素
};// 创建队列
Queue* CreateQueue() {return new Queue(); // 创建队列对象
}// 入队操作
void Enqueue(Queue* queue, int val) {queue->elements.push_back(val); // 将元素添加到队列末尾
}// 出队操作
int Dequeue(Queue* queue) {if (queue->elements.empty()) { // 如果队列为空cout << "队列为空,无法出队。" << endl;return -1; // 返回-1表示队空}int val = queue->elements.front(); // 获取队首元素queue->elements.erase(queue->elements.begin()); // 删除队首元素return val; // 返回队首元素
}// 获取队列长度
int GetQueueLength(Queue* queue) {return queue->elements.size(); // 返回队列中元素的数量
}// 遍历队列
void TraverseQueue(Queue* queue) {if (queue->elements.empty()) { // 如果队列为空cout << "队列为空。" << endl;return;}cout << "队列元素: ";for (int val : queue->elements) {cout << val << " ";}cout << endl;
}// 获取队首元素
int GetFront(Queue* queue) {if (queue->elements.empty()) { // 如果队列为空cout << "队列为空,无法获取队首元素。" << endl;return -1; // 返回-1表示队空}return queue->elements.front(); // 返回队首元素
}// 判断队列是否为空
bool IsEmpty(Queue* queue) {return queue->elements.empty(); // 如果队列大小为0,则队列为空
}int main() {Queue* queue = CreateQueue(); // 创建队列cout << "入队元素: 10, 20, 30, 40, 50" << endl;Enqueue(queue, 10);Enqueue(queue, 20);Enqueue(queue, 30);Enqueue(queue, 40);Enqueue(queue, 50);TraverseQueue(queue); // 遍历队列cout << "队列长度: " << GetQueueLength(queue) << endl;cout << "队首元素: " << GetFront(queue) << endl;cout << "出队元素: " << Dequeue(queue) << endl;cout << "队首元素: " << GetFront(queue) << endl;cout << "队列是否为空: " << (IsEmpty(queue) ? "是" : "否") << endl;return 0;
}
链式队列
1、建立链式队列
// 定义链队列节点结构体
struct QueueNode {int val;QueueNode* next;
};// 创建链队列
QueueNode* CreateQueue() {QueueNode* head = new QueueNode(); // 创建头节点head->next = nullptr;return head;
}
2、入队
// 入队操作
void Enqueue(QueueNode* head, int val) {QueueNode* newNode = new QueueNode{val, nullptr}; // 创建新节点newNode->next = head->next; // 将新节点链接到链表head->next = newNode; // 头节点指向新节点
}
3、出队
// 出队操作
int Dequeue(QueueNode* head) {if (head->next == nullptr) {cout << "队列为空,无法出队。" << endl;return -1; // 返回-1表示队空}QueueNode* temp = head->next; // 临时节点int val = temp->val; // 保存要返回的值head->next = temp->next; // 头节点指向下一个节点delete temp; // 释放临时节点return val; // 返回队首元素
}
4、求队列长度
// 获取队列长度
int GetQueueLength(QueueNode* head) {int length = 0;QueueNode* current = head->next;while (current != nullptr) {length++; // 计算队列中元素的数量current = current->next;}return length;
}
5、遍历队列
// 遍历队列
void TraverseQueue(QueueNode* head) {if (head->next == nullptr) { // 如果队列为空cout << "队列为空。" << endl;return;}QueueNode* current = head->next;cout << "队列元素: ";while (current != nullptr) {cout << current->val << " ";current = current->next; // 移动到下一个节点}cout << endl;
}
实现:
#include<iostream>
using namespace std;// 定义链队列节点结构体
struct QueueNode {int val;QueueNode* next;
};// 创建链队列
QueueNode* CreateQueue() {QueueNode* head = new QueueNode(); // 创建头节点head->next = nullptr;return head;
}// 入队操作
void Enqueue(QueueNode* head, int val) {QueueNode* newNode = new QueueNode{val, nullptr}; // 创建新节点QueueNode* current = head;while (current->next != nullptr) {current = current->next; // 移动到链表末尾}current->next = newNode; // 将新节点链接到链表末尾
}// 出队操作
int Dequeue(QueueNode* head) {if (head->next == nullptr) {cout << "队列为空,无法出队。" << endl;return -1; // 返回-1表示队空}QueueNode* temp = head->next; // 临时节点int val = temp->val; // 保存要返回的值head->next = temp->next; // 头节点指向下一个节点delete temp; // 释放临时节点return val; // 返回队首元素
}// 获取队列长度
int GetQueueLength(QueueNode* head) {int length = 0;QueueNode* current = head->next;while (current != nullptr) {length++; // 计算队列中元素的数量current = current->next;}return length;
}// 遍历队列
void TraverseQueue(QueueNode* head) {if (head->next == nullptr) { // 如果队列为空cout << "队列为空。" << endl;return;}QueueNode* current = head->next;cout << "队列元素: ";while (current != nullptr) {cout << current->val << " ";current = current->next; // 移动到下一个节点}cout << endl;
}// 获取队首元素
int GetFront(QueueNode* head) {if (head->next == nullptr) {cout << "队列为空,无法获取队首元素。" << endl;return -1; // 返回-1表示队空}return head->next->val; // 返回队首元素
}// 判断队列是否为空
bool IsEmpty(QueueNode* head) {return head->next == nullptr; // 如果头节点的next指针为空,则队列空
}int main() {QueueNode* queue = CreateQueue(); // 创建链队列cout << "入队元素: 10, 20, 30, 40, 50" << endl;Enqueue(queue, 10);Enqueue(queue, 20);Enqueue(queue, 30);Enqueue(queue, 40);Enqueue(queue, 50);TraverseQueue(queue); // 遍历队列cout << "队列长度: " << GetQueueLength(queue) << endl;cout << "队首元素: " << GetFront(queue) << endl;cout << "出队元素: " << Dequeue(queue) << endl;cout << "队首元素: " << GetFront(queue) << endl;cout << "队列是否为空: " << (IsEmpty(queue) ? "是" : "否") << endl;return 0;
}
三、树和二叉树

实现:
#include<iostream>
using namespace std;// 结构体
struct Bittree {char data;Bittree *lchild;Bittree *rchild;
};// 先序构建二叉树
Bittree* Creat() {char n;scanf(" %c", &n); // 注意在%c前加空格,以跳过任何前导空白if (n == '#') {return NULL;} else {Bittree* T = new Bittree();T->data = n;T->lchild = Creat();T->rchild = Creat();return T;}
}// 先序遍历
void PreOrder(Bittree *T) {if (T) {printf("%2c", T->data);PreOrder(T->lchild);PreOrder(T->rchild);}
}// 中序遍历
void InOrder(Bittree *T) {if (T) {InOrder(T->lchild);printf("%2c", T->data);InOrder(T->rchild);}
}// 后序遍历
void PostOrder(Bittree *T) {if (T) {PostOrder(T->lchild);PostOrder(T->rchild);printf("%2c", T->data);}
}// 统计叶子结点的个数
int Leaf(Bittree *T) {int LeafCount;if (T == NULL)LeafCount = 0;else if (T->lchild == NULL && T->rchild == NULL)LeafCount = 1;elseLeafCount = Leaf(T->lchild) + Leaf(T->rchild);return LeafCount;
}// 计算二叉树的深度
int TreeDepth(Bittree *T) {if (T == NULL)return 0;else {int depthleft = TreeDepth(T->lchild) + 1;int depthright = TreeDepth(T->rchild) + 1;return depthleft > depthright ? depthleft : depthright;}
}int main() {printf("先序构造一颗二叉树(左/右孩子为空用'#'表示):");Bittree *T = Creat();printf("此二叉树的先序遍历序列是:");PreOrder(T);printf("\n");printf("此二叉树的中序遍历序列是:");InOrder(T);printf("\n");printf("此二叉树的后序遍历序列是:");PostOrder(T);printf("\n");printf("这棵树叶子结点有%d个\n", Leaf(T));printf("这棵树的深度为:%d\n", TreeDepth(T));system("pause");return 0;
}
四、图

实现:
#include<iostream>
#include<stack> // 引入栈头文件
using namespace std;
#define MAX_NUM 100// 定义邻接矩阵
struct Graph{int MaxArr[MAX_NUM][MAX_NUM];int num;
}; // 初始化图
Graph* create(int n){Graph* graph=new Graph();graph->num=n;for(int i=0;i<n;i++){for(int j=0;j<n;j++){graph->MaxArr[i][j]=0;}}return graph;
} // 添加单向边
void addEdge(Graph* graph,int src,int dest){graph->MaxArr[src][dest]=1;
} // 广度优先搜索
bool bfs(Graph* graph,int start,int end,int* parent){int visited[MAX_NUM];bool inQueue[MAX_NUM];int queue[MAX_NUM];int front=0,rear=0;for(int i=0;i<graph->num;i++){visited[i]=false;inQueue[i]=false;parent[i]=-1;}queue[rear++]=start;inQueue[start]=true;visited[start]=true;while(front<rear){int current=queue[front++];for(int i=0;i<graph->num;i++){if(!visited[i]&&graph->MaxArr[current][i]==1){queue[rear++]=i;inQueue[i]=true;visited[i]=true;parent[i]=current;}}}return visited[end];
} // 输出路径
void printPath(int* parent,int end){printf("Path from start to %d: ", end);if(parent[end]==-1){printf("There is no path\n");return;}stack<int> path; // 使用栈来存储路径int current = end;while(current != -1) {path.push(current); // 将节点压入栈中current = parent[current];}// 逐个弹出栈中的元素以实现倒序输出while(!path.empty()) {printf("%d ", path.top());path.pop();if(!path.empty()) {printf("-> ");}}printf("\n");
} int main(){int Num,start,end;printf("输入结点个数:");scanf("%d",&Num);Graph* graph=create(Num);printf("输入边(以'src dest'形式,输入0 0结束):");int src,dest;while(true){cin >> src >> dest;if(src == 0 && dest == 0) break; // 如果输入是0 0,则结束循环addEdge(graph,src,dest);}printf("输入起点:");scanf("%d",&start);printf("输入终点:");scanf("%d",&end);int* parent=(int*)malloc(Num*sizeof(int));if(bfs(graph,start,end,parent)){printPath(parent,end);}else{printf("There is no path\n");}free(parent);delete graph;return 0;
}


五、查找和排序
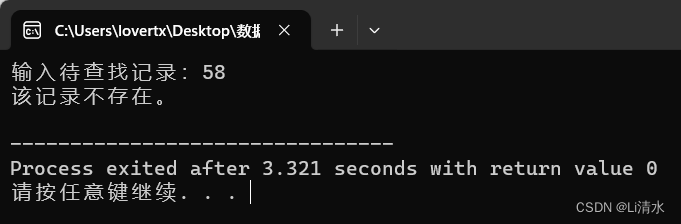
折半查找实现:
#include <stdio.h>// 折半查找函数
int binarySearch(int arr[], int l, int r, int x) {if (r >= l) {int mid = l + (r - l) / 2;// 如果中间元素正好是要找的值,返回索引if (arr[mid] == x)return mid;// 如果中间元素比要找的值小,在右半部分继续查找if (arr[mid] < x)return binarySearch(arr, mid + 1, r, x);// 如果中间元素比要找的值大,在左半部分继续查找return binarySearch(arr, l, mid - 1, x);}// 如果数组中没有找到值,返回-1return -1;
}int main() {int arr[] = {12, 23, 28, 35, 37, 39, 50, 60, 78, 90};int n = sizeof(arr) / sizeof(arr[0]);int x;printf("输入待查找记录:");scanf("%d", &x);int result = binarySearch(arr, 0, n - 1, x);if (result == -1)printf("该记录不存在。\n");elseprintf("该记录在表中位置 %d。\n", result);return 0;
}


快速排序实现:
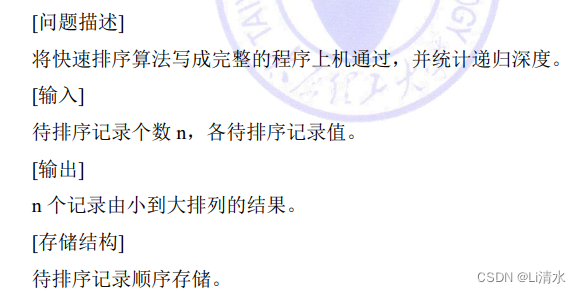
#include <stdio.h>
int partition(int arr[], int low, int high);
void swap(int *xp, int *yp);// 快速排序函数
void quickSort(int arr[], int low, int high) {if (low < high) {int pi = partition(arr, low, high);// 递归排序左半部分quickSort(arr, low, pi - 1);// 递归排序右半部分quickSort(arr, pi + 1, high);}
}// 用于快速排序的辅助函数,用于分区
int partition(int arr[], int low, int high) {int pivot = arr[high]; // 选择最后一个元素作为基准int i = (low - 1); // 初始化指向比基准小的元素的指针for (int j = low; j <= high - 1; j++) {// 如果当前元素小于或等于基准,则交换元素if (arr[j] <= pivot) {i++;swap(&arr[i], &arr[j]);}}swap(&arr[i + 1], &arr[high]); // 将基准元素放在正确的位置return (i + 1);
}// 交换两个元素
void swap(int *xp, int *yp) {int temp = *xp;*xp = *yp;*yp = temp;
}int main() {int arr[] = {12, 23, 28, 35, 37, 39, 50, 60, 78, 90};int n = sizeof(arr) / sizeof(arr[0]);quickSort(arr, 0, n - 1);printf("排序后的数组:\n");for (int i = 0; i < n; i++)printf("%d ", arr[i]);return 0;
}