1、简介
在现代 IT 基础设施中,管理大量服务器是一项复杂而繁琐的任务。特别是在检查服务器的存活状态以及 SSH 登录等任务上,手动操作非常耗时且容易出错。本文将介绍如何使用 Python 脚本实现对多台服务器的批量检查和管理,包括检查服务器是否在线,以及通过密码或 SSH 密钥登录服务器。
2、背景
在我们测试机房环境,为了方便管理和使用。需要统一 账号,登录方式,以及堡垒机安全验证。在之前架构基础上,我们需要梳理整合现有所有测试机器。
需要批量管理和监控多台服务器。例如,检查服务器是否存活、是否可以通过 SSH 登录等。手动执行这些任务效率低且容易出错。通过编写自动化脚本,可以大大提高工作效率和准确性。
3、环境介绍
1、依赖库
- paramiko:用于 SSH 登录。
- tqdm:用于显示进度条。
- concurrent.futures:用于多线程处理。
可以通过以下命令安装这些库:
pip install paramiko tqdm
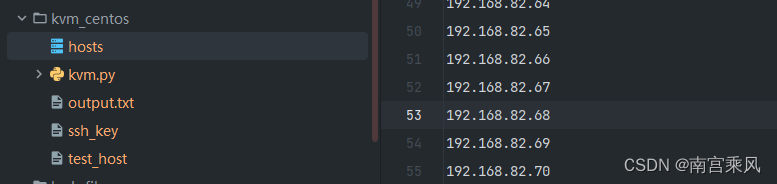
2、文件结构
hosts:包含服务器 IP 地址的文件,每行一个 IP 地址。ssh_key:SSH 私钥文件路径。script.py:主脚本文件。
4、Python实现步骤
方便统计使用,归档文件 后期整理维护
第一步:读取 IP 地址
首先,我们需要读取 hosts 文件中的 IP 地址。每行一个 IP 地址。
# 读取 IP 地址
with open('hosts', 'r') as file:ip_addresses = [line.strip() for line in file.readlines()]
第二步:检查 IP 是否存活
我们使用 ping 命令检查每个 IP 是否存活。通过 subprocess 模块执行 ping 命令,并检查返回码来判断 IP 是否存活。
import subprocessdef is_alive(ip):try: #这里注意判断# For Unix/Linux/Macresult = subprocess.run(['ping', '-c', '1', ip], stdout=subprocess.PIPE, stderr=subprocess.PIPE)except FileNotFoundError:# For Windowsresult = subprocess.run(['ping', '-n', '1', ip], stdout=subprocess.PIPE, stderr=subprocess.PIPE)return result.returncode == 0第三步:尝试 SSH 登录
我们使用 paramiko 库尝试通过密码和 SSH 密钥登录服务器。为了处理 RSA 格式的密钥,我们使用 paramiko.RSAKey.from_private_key_file 函数。
import paramiko
from paramiko import SSHClient, AutoAddPolicy, RSAKeydef ssh_login_with_password(ip, username, password):try:client = SSHClient()client.set_missing_host_key_policy(AutoAddPolicy())client.connect(ip, username=username, password=password, timeout=5)client.close()return Trueexcept Exception as e:return Falsedef ssh_login_with_key(ip, username, key_path):try:client = SSHClient()client.set_missing_host_key_policy(AutoAddPolicy())key = RSAKey.from_private_key_file(key_path)client.connect(ip, username=username, pkey=key, timeout=5)client.close()return Trueexcept Exception as e:return False
第四步:并行处理 IP 地址
为了提高效率,我们使用 concurrent.futures.ThreadPoolExecutor 实现多线程处理。每个线程会检查一个 IP 的存活状态,并尝试通过密码和 SSH 密钥登录。
from concurrent.futures import ThreadPoolExecutor, as_completed
from tqdm import tqdmdef check_ip(ip):if not is_alive(ip):return ('non_alive', ip)else:if ssh_login_with_password(ip, USERNAME, PASSWORD):return ('ssh_password_success', ip)elif ssh_login_with_key(ip, USERNAME, KEY_PATH):return ('ssh_key_success', ip)else:return ('ssh_failures', ip)with ThreadPoolExecutor(max_workers=10) as executor:futures = {executor.submit(check_ip, ip): ip for ip in ip_addresses}for future in tqdm(as_completed(futures), total=len(ip_addresses), desc="Checking IPs"):result, ip = future.result()if result == 'non_alive':non_alive_ips.append(ip)elif result == 'ssh_password_success':ssh_password_success.append(ip)elif result == 'ssh_key_success':ssh_key_success.append(ip)elif result == 'ssh_failures':ssh_failures.append(ip)
第五步:生成结果文件
最后,我们将检查结果写入一个文件中,按照指定的格式记录每个 IP 的状态。
# 写入结果到文件
with open('output.txt', 'w') as output_file:output_file.write("[no_alive]\n")output_file.write("\n".join(non_alive_ips) + "\n")output_file.write("[password]\n")output_file.write("\n".join(ssh_password_success) + "\n")output_file.write("[key]\n")output_file.write("\n".join(ssh_key_success) + "\n")output_file.write("[fail]\n")output_file.write("\n".join(ssh_failures) + "\n")print("Results have been written to output.txt")
完整的代码
# -*- coding: utf-8 -*-
# @Time : 2024-06-27 11:46
# @Author : 南宫乘风
# @Email : 1794748404@qq.com
# @File : kvm.py
# @Software: PyCharm
import os
import subprocess
from paramiko import SSHClient, AutoAddPolicy
from tqdm import tqdm
from concurrent.futures import ThreadPoolExecutor, as_completed# 读取 IP 地址
with open('hosts', 'r') as file:ip_addresses = [line.strip() for line in file.readlines()]# 初始化列表
non_alive_ips = []
ssh_password_success = []
ssh_key_success = []
ssh_failures = []# 检查 IP 存活状态
def is_alive(ip):# For Windowsresult = subprocess.run(['ping', '-n', '1', ip], stdout=subprocess.PIPE, stderr=subprocess.PIPE)return result.returncode == 0# 尝试使用密码进行 SSH 登录
def ssh_login_with_password(ip, username, password):try:client = SSHClient()client.set_missing_host_key_policy(AutoAddPolicy())client.connect(ip, username=username, password=password, timeout=5)client.close()return Trueexcept Exception as e:return False# 尝试使用 SSH 密钥进行登录
def ssh_login_with_key(ip, username, key_path):try:client = SSHClient()client.set_missing_host_key_policy(AutoAddPolicy())client.connect(ip, username=username, key_filename=key_path, timeout=5)client.close()return Trueexcept Exception as e:return False# 用户名和密码/密钥路径配置
USERNAME = 'root'
PASSWORD = 'xxxx.88'
KEY_PATH = r'E:\Code\Gitlab_Code\aliyun\kvm_centos\ssh_key'def check_ip(ip):if not is_alive(ip):return 'non_alive', ipelse:if ssh_login_with_password(ip, USERNAME, PASSWORD):return 'ssh_password_success', ipelif ssh_login_with_key(ip, USERNAME, KEY_PATH):return 'ssh_key_success', ipelse:return 'ssh_failures', ip# 检查每个 IP 地址
# 使用多线程检查 IP 地址
# 使用ThreadPoolExecutor来并发执行任务,最大工作线程数为10
with ThreadPoolExecutor(max_workers=10) as executor:# 提交检查每个IP地址的任务,并将任务对象与IP地址映射关系存储在字典futures中futures = {executor.submit(check_ip, ip): ip for ip in ip_addresses}# 遍历所有完成的任务,使用tqdm显示进度条for future in tqdm(as_completed(futures), total=len(ip_addresses), desc="Checking IPs"):# 获取任务执行结果和对应的IP地址result, ip = future.result()# 根据检查结果,将IP地址添加到相应的列表中if result == 'non_alive':non_alive_ips.append(ip)elif result == 'ssh_password_success':ssh_password_success.append(ip)elif result == 'ssh_key_success':ssh_key_success.append(ip)elif result == 'ssh_failures':ssh_failures.append(ip)# 输出结果
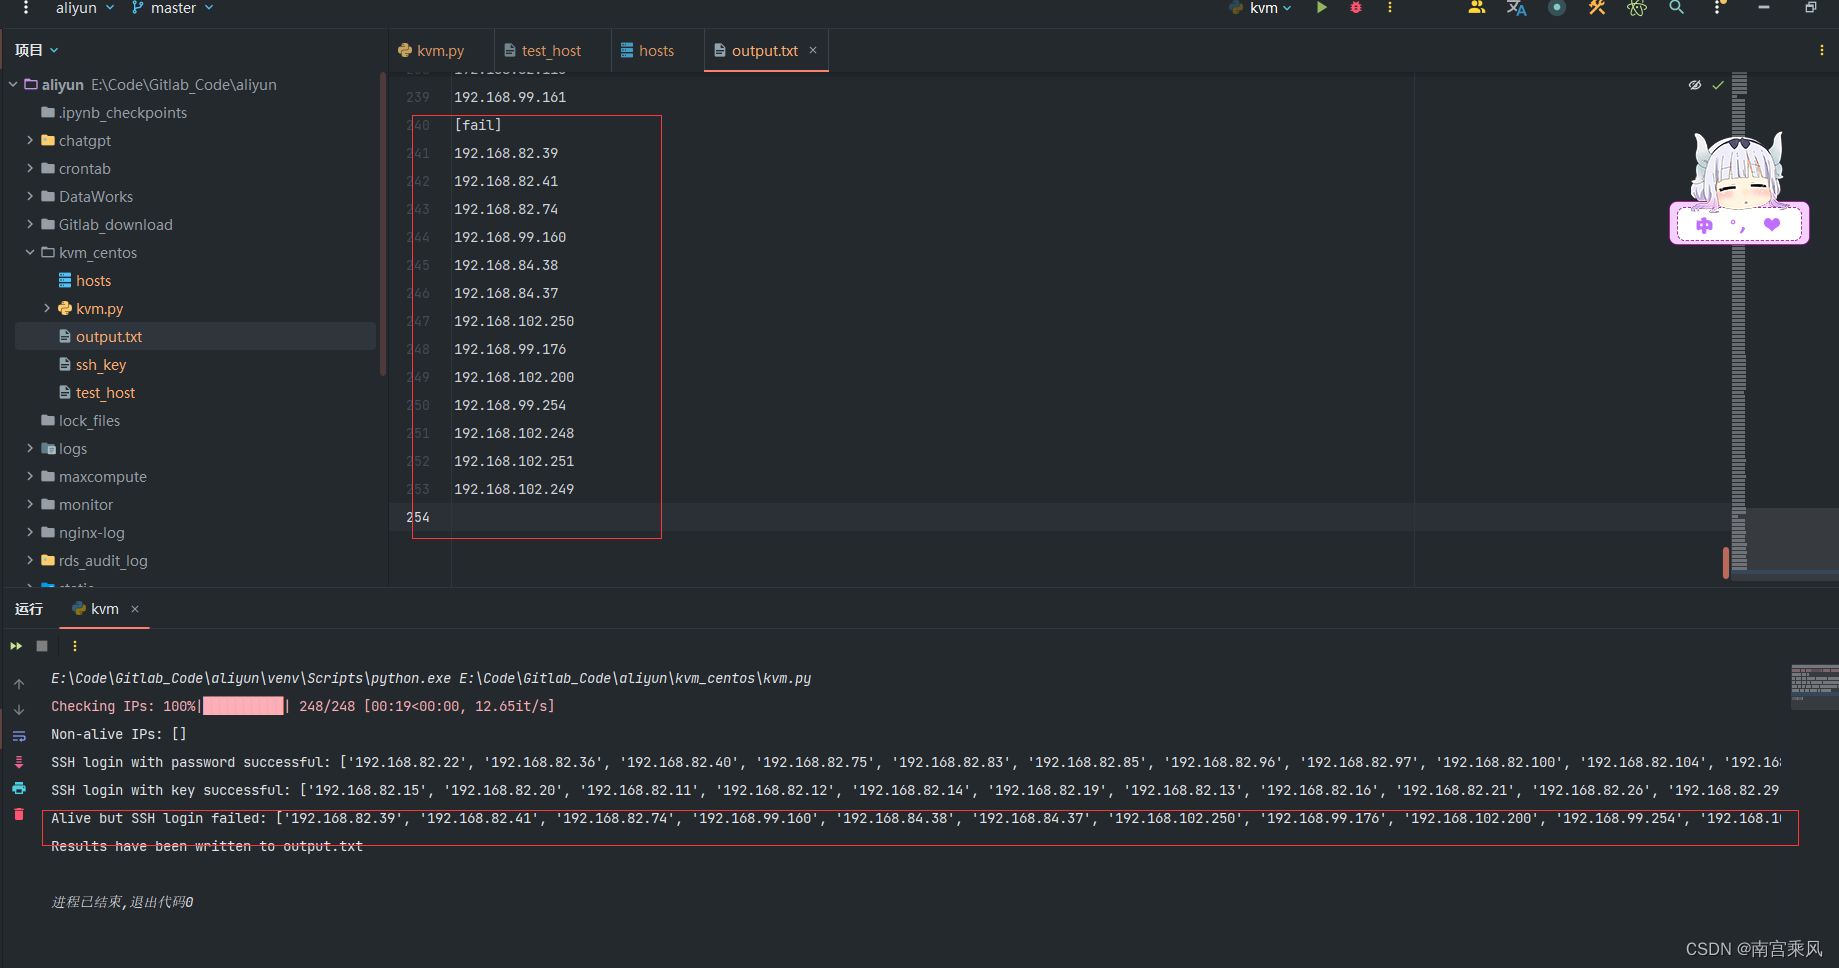
print("Non-alive IPs:", non_alive_ips)
print("SSH login with password successful:", ssh_password_success)
print("SSH login with key successful:", ssh_key_success)
print("Alive but SSH login failed:", ssh_failures)# 写入结果到文件
with open('output.txt', 'w') as output_file:output_file.write("[no_alive]\n")output_file.write("\n".join(non_alive_ips) + "\n")output_file.write("[password]\n")output_file.write("\n".join(ssh_password_success) + "\n")output_file.write("[key]\n")output_file.write("\n".join(ssh_key_success) + "\n")output_file.write("[fail]\n")output_file.write("\n".join(ssh_failures) + "\n")print("Results have been written to output.txt")
5、Ansbile实现步骤
1、上面生成的文件作为hosts使用
[fail]
192.168.84.37
192.168.84.38
192.168.99.160
192.168.99.176
192.168.99.254
192.168.102.200
192.168.102.248
192.168.102.249
192.168.102.250
192.168.102.251
#可以定义环境变量,方便登录使用
[fail:vars]
ansible_user=root
ansible_password="xxxxxx.88"
ansible_ssh_private_key_file=/opt/ansible/ssh_key
2、给密码登录的添加公钥
ansible password -i ./all_host -m authorized_key -a "user={{ ansible_user }} state=present key='{{ lookup('file', '~/.ssh/id_rsa.pub') }}'" -u root --ask-pass
作用:这条命令会提示用户输入 SSH 密码,并将运行 Ansible 以 root 用户身份连接到 all_host 文件中列出的所有主机。然后,它会将当前用户的公钥添加到这些主机上指定用户的 authorized_keys 文件中,以实现无密码 SSH 登录。
-
ansible password -i ./all_host:ansible:Ansible 命令的入口点。password:这里应该是指 Ansible 的 inventory 文件中定义的模块名称-i ./all_host:指定 Ansible inventory 文件的位置,这里是./all_host。
-
-m authorized_key:-m authorized_key:指定要使用的 Ansible 模块,这里是authorized_key模块,用于管理~/.ssh/authorized_keys文件。
-
-a "user={{ ansible_user }} state=present key='{{ lookup('file', '~/.ssh/id_rsa.pub') }}'":-
-a:为指定的模块传递参数。 -
"user={{ ansible_user }} state=present key='{{ lookup('file', '~/.ssh/id_rsa.pub') }}'"user={{ ansible_user }}:指定要在目标主机上操作的用户,这里使用了变量{{ ansible_user }},这个变量通常在 Ansible 的配置文件或命令行中定义。state=present:确保公钥存在,如果不存在就添加。key='{{ lookup('file', '~/.ssh/id_rsa.pub') }}':从本地文件~/.ssh/id_rsa.pub中读取公钥,并将其添加到目标主机的authorized_keys文件中。
-
-
-u root:-u root:以 root 用户身份连接到目标主机。
-
--ask-pass:--ask-pass:提示输入 SSH 密码。这在目标主机还没有配置无密码 SSH 登录时很有用。
6、自动化配置安全
hosts.allow 和 hosts.deny 文件是 TCP Wrappers 的一部分,用于在 Unix 和 Linux 系统上控制对服务的访问。TCP Wrappers 提供了一种通过 IP 地址、主机名或域名限制或允许访问服务的机制。
hosts.allow 和 hosts.deny 文件的作用
hosts.allow:定义允许哪些主机访问哪些服务。hosts.deny:定义拒绝哪些主机访问哪些服务。
这两个文件通常位于 /etc 目录下。
格式
这两个文件的每一行包含一条访问控制规则,格式如下:
php复制代码<服务列表> : <客户端列表> [: <选项>]
- 服务列表:要控制的服务名称,可以是单个服务名,也可以是多个服务名,以逗号分隔。
- 客户端列表:允许或拒绝访问的客户端,可以是 IP 地址、主机名或域名,也可以是多个客户端,以逗号分隔。
- 选项(可选):可以包含日志记录或执行命令等额外操作。
使用示例
假设你有一台服务器,想控制对 SSH 服务的访问。
hosts.allow
允许特定 IP 地址访问 SSH 服务:
sshd : 192.168.1.100
允许特定子网访问 SSH 服务:
sshd : 192.168.1.0/24
允许特定主机名访问 SSH 服务:
sshd : trustedhost.example.com
hosts.deny
拒绝所有其他主机访问 SSH 服务:
sshd : ALL
使用场景
- 安全控制:通过限制对某些关键服务(如 SSH、FTP、SMTP 等)的访问,可以增强系统的安全性。
- 访问管理:在多用户环境中,可以根据需求灵活控制哪些用户或主机能够访问特定服务。
- 日志记录:结合日志选项,可以记录访问尝试,以便审计和监控。
示例需求
-
在
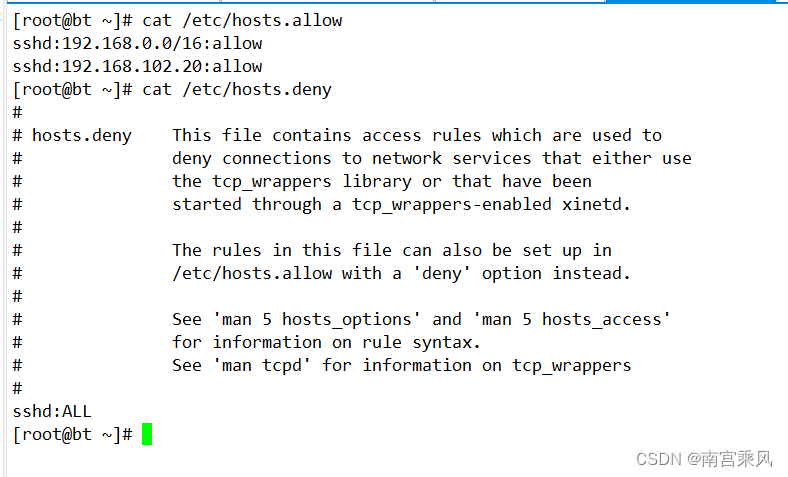
/etc/hosts.deny中写入sshd:ALL,拒绝所有主机的 SSH 访问。 -
在
/etc/hosts.allow
中允许特定 IP 地址段和单个 IP 地址的 SSH 访问:sshd:192.168.0.0/16:allowsshd:192.168.102.20:allow
-
如果文件有变动,则重启
sshd服务。
Ansible 剧本
编写一个 Ansible 剧本来自动执行上述操作。以下是完整的 Ansible 剧本代码:configure_ssh_hosts.yml
---
- name: 配置 hosts.allow 和 hosts.denyhosts: testbecome: yes  # 使用sudo权限vars:hosts_deny_content: "sshd:ALL"hosts_allow_content: |sshd:192.168.0.0/16:allowsshd:192.168.102.20:allowtasks:- name: 更新 hosts.deny 文件lineinfile:path: /etc/hosts.denyline: "{{ hosts_deny_content }}"create: yesregister: hosts_deny_result- name: 更新 hosts.allow 文件copy:content: "{{ hosts_allow_content }}"dest: /etc/hosts.allowregister: hosts_allow_result- name: 如果配置发生变化则重启 sshd 服务systemd:name: sshdstate: restartedwhen: hosts_deny_result.changed or hosts_allow_result.changed- name: 确保 sshd 服务已启用并正在运行systemd:name: sshdstate: startedenabled: yes
使用方式
定义剧本名称和目标主机:
[root@ansible-yunwei ansible]# cat hosts
[test]
192.168.102.20
192.168.102.30
[root@ansible-yunwei ansible]# ansible-playbook -i ./hosts configure_ssh_hosts.yml PLAY [配置 hosts.allow 和 hosts.deny] *******************************************************************************************************************************TASK [Gathering Facts] *******************************************************************************************************************************************
ok: [192.168.102.30]
ok: [192.168.102.20]TASK [更新 hosts.deny 文件] ******************************************************************************************************************************************
ok: [192.168.102.30]
ok: [192.168.102.20]TASK [更新 hosts.allow 文件] *****************************************************************************************************************************************
ok: [192.168.102.30]
ok: [192.168.102.20]TASK [如果配置发生变化则重启 sshd 服务] ***************************************************************************************************************************************
skipping: [192.168.102.20]
skipping: [192.168.102.30]TASK [确保 sshd 服务已启用并正在运行] ****************************************************************************************************************************************
ok: [192.168.102.30]
ok: [192.168.102.20]PLAY RECAP *******************************************************************************************************************************************************
192.168.102.20             : ok=4    changed=0    unreachable=0    failed=0    skipped=1    rescued=0    ignored=0
192.168.102.30 : ok=4 changed=0 unreachable=0 failed=0 skipped=1 rescued=0 ignored=0 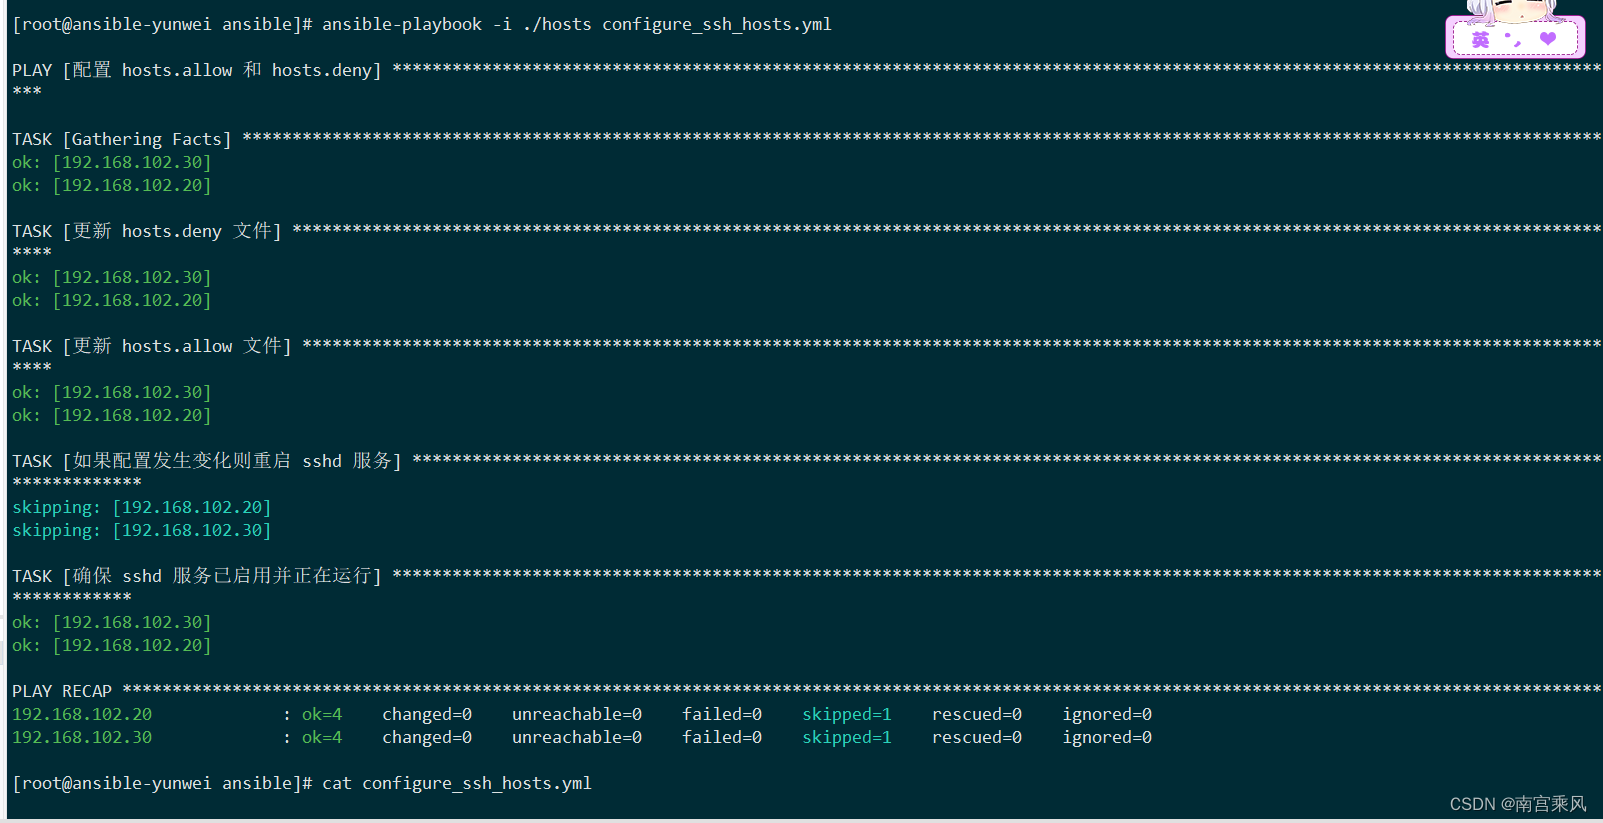
注意事项
hosts.allow文件中的规则优先于hosts.deny中的规则。如果一个主机被hosts.allow允许,则不会被hosts.deny拒绝。- 确保规则的顺序和逻辑正确,以免意外拒绝合法访问或允许非法访问。
- 这些文件适用于支持 TCP Wrappers 的服务,不适用于所有服务。
通过合理配置 hosts.allow 和 hosts.deny 文件,可以有效控制服务访问,提高系统的安全性。


![[Linux] 文件/目录命令](https://img-blog.csdnimg.cn/direct/353a1d0905964444be5b291b900c2436.png)