Kubernetes集群基于Containerd部署
文章目录
- Kubernetes集群基于Containerd部署
- 资源列表
- 基础环境
- 一、基础环境准备
- 1.1、关闭Swap分区
- 1.2、添加hosts解析
- 1.3、桥接的IPv4流量传递给iptables的链
- 二、准备Containerd容器运行时
- 2.1、安装Containerd
- 2.2、配置Containerd
- 2.3、启动Containerd
- 三、部署Kubernetes集群
- 3.1、安装Kubeadm工具
- 3.2、配置crictl工具
- 3.3、配置Containerd镜像加速器
- 3.4、测试crictl工具是否可用
- 3.5、初始化Master节点
- 3.6、Node节点加入集群
- 四、部署网络插件(CNI)
- 4.1、拉取必要镜像
- 4.2、部署网络插件
- 4.2、查看节点状态
- 4.3、查看组件状态
- 4.4、查看所有Pod状态
- 五、Containerd基本操作
- 4.1、Crictl镜像管理
- 4.2、Crictl容器管理
- 4.3、Crictl Pod管理
资源列表
| 操作系统 | 配置 | 主机名 | IP |
|---|---|---|---|
| CentOS 7.9 | 2C4G | master | 192.168.93.101 |
| CentOS 7.9 | 2C4G | node1 | 192.168.93.102 |
| CentOS 7.9 | 2C4G | node2 | 192.168.93.103 |
基础环境
- 关闭防火墙
systemctl stop firewalld
systemctl disable firewalld
- 关闭内核安全机制
setenforce 0
sed -i "s/^SELINUX=.*/SELINUX=disabled/g" /etc/selinux/config
- 修改主机名
hostnamectl set-hostname master
hostnamectl set-hostname node1
hostnamectl set-hostname node2
一、基础环境准备
- 三台主机都要操作,以master节点为例进行演示
1.1、关闭Swap分区
# 临时关闭
[root@master ~]# swapoff -a
# 永久关闭
[root@master ~]# sed -i 's/.*swap.*/#&/g' /etc/fstab
1.2、添加hosts解析
[root@master ~]# cat >> /etc/hosts << EOF
192.168.93.101 master
192.168.93.102 node1
192.168.93.103 node2
EOF
1.3、桥接的IPv4流量传递给iptables的链
# 加载 overlay 内核模块
[root@master ~]# modprobe overlay
# 加载 br_netfilter 模块
[root@master ~]# modprobe br_netfilter
[root@master ~]# cat <<EOF | sudo tee /etc/sysctl.d/99-kubernetes-cri.conf
net.bridge.bridge-nf-call-iptables  = 1
net.ipv4.ip_forward                 = 1
net.bridge.bridge-nf-call-ip6tables = 1
EOF
[root@master ~]# sysctl --system
二、准备Containerd容器运行时
- 三台主机都要操作,以master节点为例进行演示
2.1、安装Containerd
# 添加 docker 源,containerd也在docker源内的
[root@master ~]# cat <<EOF | sudo tee /etc/yum.repos.d/docker-ce.repo
[docker]
name=docker-ce
baseurl=https://mirrors.aliyun.com/docker-ce/linux/centos/7/x86_64/stable/
enabled=1
gpgcheck=1
gpgkey=https://mirrors.aliyun.com/docker-ce/linux/centos/gpg
EOF# 快速建立 yum 缓存
[root@master ~]# yum makecache fast# 安装containerd
# 列出所有containerd版本
[root@master ~]# yum list containerd.io --showduplicates
[root@master ~]# yum -y install containerd.io-1.6.6-3.1.el7.x86_64
2.2、配置Containerd
# 生成配置文件
[root@master ~]# mkdir -p /etc/containerd
[root@master ~]# containerd config default | sudo tee /etc/containerd/config.toml # 修改/etc/containerd/config.toml文件中sandbox_image的值
[root@master ~]# grep 'sandbox_image' /etc/containerd/config.toml
# 在原有的基础上进行修改,sandbox_image = "registry.aliyuncs.com/google_containers/pause:3.9"
2.3、启动Containerd
[root@master ~]# systemctl enable containerd
[root@master ~]# systemctl start containerd
三、部署Kubernetes集群
3.1、安装Kubeadm工具
- 所有节点都要操作
[root@master ~]# cat << EOF >> /etc/yum.repos.d/kubernetes.repo
[kubernetes]
name=Kubernetes
baseurl=https://mirrors.aliyun.com/kubernetes/yum/repos/kubernetes-el7-x86_64/
enabled=1
gpgcheck=1
repo_gpgcheck=1
gpgkey=https://mirrors.aliyun.com/kubernetes/yum/doc/yum-key.gpg https://mirrors.aliyun.com/kubernetes/yum/doc/rpm-package-key.gpg
EOF# 快速建立yum缓存
[root@master ~]# yum makecache fast# 安装 kubectl:命令行管理工具、kubeadm:安装K8S集群工具、kubelet管理容器工具
[root@master ~]# yum install -y kubelet-1.27.0 kubeadm-1.27.0 kubectl-1.27.0# 切记这个时候不要启动,只需要设置为开机自启
[root@master ~]# systemctl enable kubelet.service
3.2、配置crictl工具
- crictl是CRI兼容的容器运行时命令行接口。你可以使用它来检查和调试Kubernetes节点上的容器运行时和应用程序。crictl和它的源代码在 cri-tools 代码库
- 更好 Containerd后,以上我们常用的docker命令也不再使用了,取而代之恶的分别是 crictl 和 ctr 两个命令行客户端
- crictl是遵循CRI接口规范的一个命令行工具,通常用它来检查和管理kubelet节点上的容器运行时和镜像
- ctr是containerd的一个客户端工具
# 所有节点都要操作
[root@master ~]# cat << EOF >> /etc/crictl.yaml
runtime-endpoint: unix:///var/run/containerd/containerd.sock
image-endpoint: unix:///var/run/containerd/containerd.sock
timeout: 10
debug: false
EOF
3.3、配置Containerd镜像加速器
- 所有节点都要操作
# 在/etc/containerd/config.toml找到[plugins."io.containerd.grpc.v1.cri".registry.mirrors] ,默认在153行左右,在此行下面添加两行配置,阿里云的镜像加速器
[root@master ~]# vim /etc/containerd/config.toml [plugins."io.containerd.grpc.v1.cri".registry.mirrors][plugins."io.containerd.grpc.v1.cri".registry.mirrors."docker.io"]endpoint = ["https://i9h06ghu.mirror.aliyuncs.com"]# 保存退出,刷新服务
[root@master ~]# systemctl restart containerd
3.4、测试crictl工具是否可用
# 以拉取一个Nginx镜像进行演示是否可用
[root@master ~]# crictl pull nginx:latest
Image is up to date for sha256:605c77e624ddb75e6110f997c58876baa13f8754486b461117934b24a9dc3a85# 查看镜像
[root@master ~]# crictl images
IMAGE                     TAG                 IMAGE ID            SIZE
docker.io/library/nginx   latest              605c77e624ddb       56.7MB
3.5、初始化Master节点
- 在master节点上操作
# 生成配置文件
[root@master ~]# kubeadm config print init-defaults > kubeadm-init.yaml# 修改kubeadm-init.yaml文件的advertiseAddress、name、imageRepository,添加Pod网络podSubnet
[root@master ~]# vim kubeadm-init.yaml
apiVersion: kubeadm.k8s.io/v1beta3
bootstrapTokens:
- groups:- system:bootstrappers:kubeadm:default-node-tokentoken: abcdef.0123456789abcdefttl: 24h0m0susages:- signing- authentication
kind: InitConfiguration
localAPIEndpoint:advertiseAddress: 192.168.93.101bindPort: 6443
nodeRegistration:criSocket: unix:///var/run/containerd/containerd.sockimagePullPolicy: IfNotPresentname: mastertaints: null
---
apiServer:timeoutForControlPlane: 4m0s
apiVersion: kubeadm.k8s.io/v1beta3
certificatesDir: /etc/kubernetes/pki
clusterName: kubernetes
controllerManager: {}
dns: {}
etcd:local:dataDir: /var/lib/etcd
imageRepository: registry.cn-hangzhou.aliyuncs.com/google_containers
kind: ClusterConfiguration
kubernetesVersion: 1.27.0
networking:dnsDomain: cluster.localserviceSubnet: 10.96.0.0/12podSubnet: 10.244.0.0/16
scheduler: {}
# 初始化集群
[root@master ~]# kubeadm init --config=kubeadm-init.yaml
[init] Using Kubernetes version: v1.27.0
[preflight] Running pre-flight checks
[preflight] Pulling images required for setting up a Kubernetes cluster
[preflight] This might take a minute or two, depending on the speed of your internet connection
[preflight] You can also perform this action in beforehand using 'kubeadm config images pull'
W0629 11:07:42.117214    8814 images.go:80] could not find officially supported version of etcd for Kubernetes v1.27.0, falling back to the nearest etcd version (3.5.7-0)
W0629 11:08:11.311847    8814 checks.go:835] detected that the sandbox image "registry.aliyuncs.com/google_containers/pause:3.9" of the container runtime is inconsistent with that used by kubeadm. It is recommended that using "registry.cn-hangzhou.aliyuncs.com/google_containers/pause:3.9" as the CRI sandbox image.
[certs] Using certificateDir folder "/etc/kubernetes/pki"
[certs] Generating "ca" certificate and key
[certs] Generating "apiserver" certificate and key
[certs] apiserver serving cert is signed for DNS names [kubernetes kubernetes.default kubernetes.default.svc kubernetes.default.svc.cluster.local master] and IPs [10.96.0.1 192.168.93.101]
[certs] Generating "apiserver-kubelet-client" certificate and key
[certs] Generating "front-proxy-ca" certificate and key
[certs] Generating "front-proxy-client" certificate and key
[certs] Generating "etcd/ca" certificate and key
[certs] Generating "etcd/server" certificate and key
[certs] etcd/server serving cert is signed for DNS names [localhost master] and IPs [192.168.93.101 127.0.0.1 ::1]
[certs] Generating "etcd/peer" certificate and key
[certs] etcd/peer serving cert is signed for DNS names [localhost master] and IPs [192.168.93.101 127.0.0.1 ::1]
[certs] Generating "etcd/healthcheck-client" certificate and key
[certs] Generating "apiserver-etcd-client" certificate and key
[certs] Generating "sa" key and public key
[kubeconfig] Using kubeconfig folder "/etc/kubernetes"
[kubeconfig] Writing "admin.conf" kubeconfig file
[kubeconfig] Writing "kubelet.conf" kubeconfig file
[kubeconfig] Writing "controller-manager.conf" kubeconfig file
[kubeconfig] Writing "scheduler.conf" kubeconfig file
[kubelet-start] Writing kubelet environment file with flags to file "/var/lib/kubelet/kubeadm-flags.env"
[kubelet-start] Writing kubelet configuration to file "/var/lib/kubelet/config.yaml"
[kubelet-start] Starting the kubelet
[control-plane] Using manifest folder "/etc/kubernetes/manifests"
[control-plane] Creating static Pod manifest for "kube-apiserver"
[control-plane] Creating static Pod manifest for "kube-controller-manager"
[control-plane] Creating static Pod manifest for "kube-scheduler"
[etcd] Creating static Pod manifest for local etcd in "/etc/kubernetes/manifests"
W0629 11:08:41.485522    8814 images.go:80] could not find officially supported version of etcd for Kubernetes v1.27.0, falling back to the nearest etcd version (3.5.7-0)
[wait-control-plane] Waiting for the kubelet to boot up the control plane as static Pods from directory "/etc/kubernetes/manifests". This can take up to 4m0s
[apiclient] All control plane components are healthy after 6.001513 seconds
[upload-config] Storing the configuration used in ConfigMap "kubeadm-config" in the "kube-system" Namespace
[kubelet] Creating a ConfigMap "kubelet-config" in namespace kube-system with the configuration for the kubelets in the cluster
[upload-certs] Skipping phase. Please see --upload-certs
[mark-control-plane] Marking the node master as control-plane by adding the labels: [node-role.kubernetes.io/control-plane node.kubernetes.io/exclude-from-external-load-balancers]
[mark-control-plane] Marking the node master as control-plane by adding the taints [node-role.kubernetes.io/control-plane:NoSchedule]
[bootstrap-token] Using token: abcdef.0123456789abcdef
[bootstrap-token] Configuring bootstrap tokens, cluster-info ConfigMap, RBAC Roles
[bootstrap-token] Configured RBAC rules to allow Node Bootstrap tokens to get nodes
[bootstrap-token] Configured RBAC rules to allow Node Bootstrap tokens to post CSRs in order for nodes to get long term certificate credentials
[bootstrap-token] Configured RBAC rules to allow the csrapprover controller automatically approve CSRs from a Node Bootstrap Token
[bootstrap-token] Configured RBAC rules to allow certificate rotation for all node client certificates in the cluster
[bootstrap-token] Creating the "cluster-info" ConfigMap in the "kube-public" namespace
[kubelet-finalize] Updating "/etc/kubernetes/kubelet.conf" to point to a rotatable kubelet client certificate and key
[addons] Applied essential addon: CoreDNS
[addons] Applied essential addon: kube-proxyYour Kubernetes control-plane has initialized successfully!To start using your cluster, you need to run the following as a regular user:
#####################################################################mkdir -p $HOME/.kubesudo cp -i /etc/kubernetes/admin.conf $HOME/.kube/configsudo chown $(id -u):$(id -g) $HOME/.kube/config
#####################################################################
Alternatively, if you are the root user, you can run:export KUBECONFIG=/etc/kubernetes/admin.confYou should now deploy a pod network to the cluster.
Run "kubectl apply -f [podnetwork].yaml" with one of the options listed at:https://kubernetes.io/docs/concepts/cluster-administration/addons/Then you can join any number of worker nodes by running the following on each as root:
#####################################################################
kubeadm join 192.168.93.101:6443 --token abcdef.0123456789abcdef \--discovery-token-ca-cert-hash sha256:aa55ff35b12c120ff5a12098622122c77eff343d033a54d069d3e55364b4184d
#####################################################################
# 初始化成功以后要根据提示执行以下3个命令,才可以操作集群
[root@master ~]# mkdir -p $HOME/.kube
[root@master ~]# sudo cp -i /etc/kubernetes/admin.conf $HOME/.kube/config
[root@master ~]# sudo chown $(id -u):$(id -g) $HOME/.kube/config
3.6、Node节点加入集群
- 所有Node节点都要操作
# node1节点
[root@node1 ~]# kubeadm join 192.168.93.101:6443 --token abcdef.0123456789abcdef \
> --discovery-token-ca-cert-hash sha256:aa55ff35b12c120ff5a12098622122c77eff343d033a54d069d3e55364b4184d
[preflight] Running pre-flight checks
[preflight] Reading configuration from the cluster...
[preflight] FYI: You can look at this config file with 'kubectl -n kube-system get cm kubeadm-config -o yaml'
[kubelet-start] Writing kubelet configuration to file "/var/lib/kubelet/config.yaml"
[kubelet-start] Writing kubelet environment file with flags to file "/var/lib/kubelet/kubeadm-flags.env"
[kubelet-start] Starting the kubelet
[kubelet-start] Waiting for the kubelet to perform the TLS Bootstrap...This node has joined the cluster:
* Certificate signing request was sent to apiserver and a response was received.
* The Kubelet was informed of the new secure connection details.Run 'kubectl get nodes' on the control-plane to see this node join the cluster.# node2节点
[root@node2 ~]# kubeadm join 192.168.93.101:6443 --token abcdef.0123456789abcdef \
> --discovery-token-ca-cert-hash sha256:aa55ff35b12c120ff5a12098622122c77eff343d033a54d069d3e55364b4184d
[preflight] Running pre-flight checks
[preflight] Reading configuration from the cluster...
[preflight] FYI: You can look at this config file with 'kubectl -n kube-system get cm kubeadm-config -o yaml'
[kubelet-start] Writing kubelet configuration to file "/var/lib/kubelet/config.yaml"
[kubelet-start] Writing kubelet environment file with flags to file "/var/lib/kubelet/kubeadm-flags.env"
[kubelet-start] Starting the kubelet
[kubelet-start] Waiting for the kubelet to perform the TLS Bootstrap...This node has joined the cluster:
* Certificate signing request was sent to apiserver and a response was received.
* The Kubelet was informed of the new secure connection details.Run 'kubectl get nodes' on the control-plane to see this node join the cluster.
# 如果加入集群的命令找不到了可以在master节点生成一个
[root@master ~]# kubeadm token create --print-join-command
kubeadm join 192.168.93.101:6443 --token 2d6hku.7esvsdqjfrvgkewg --discovery-token-ca-cert-hash sha256:aa55ff35b12c120ff5a12098622122c77eff343d033a54d069d3e55364b4184d
四、部署网络插件(CNI)
4.1、拉取必要镜像
-
所有节点都需要拉取以下两个镜像
-
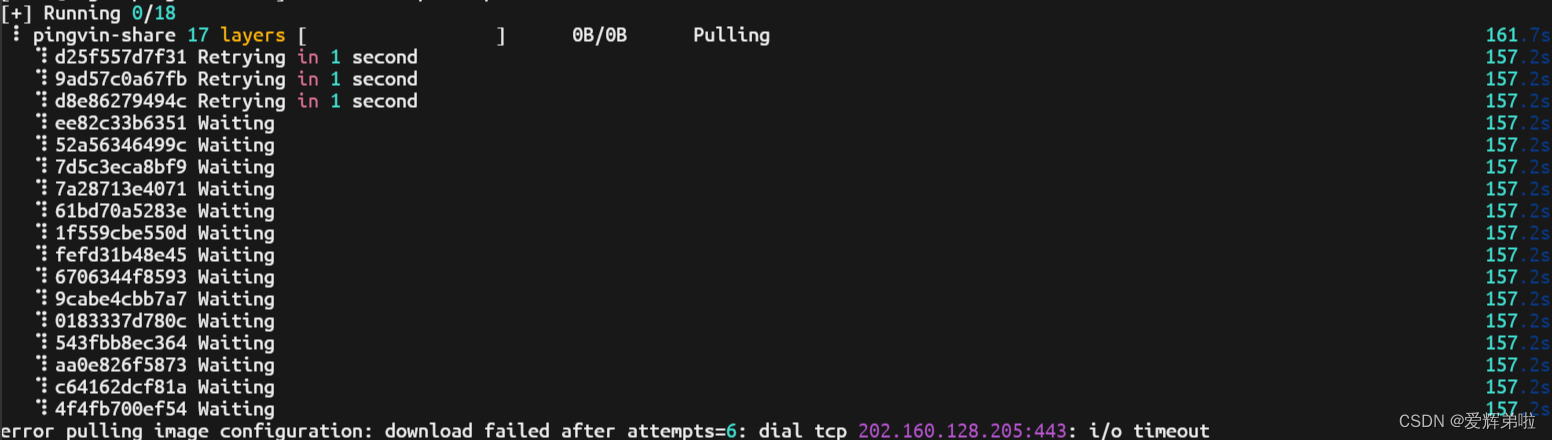
在部署网络插件的过程中,实测是可能会有两个镜像拉取不来下,所以手动拉取一下,不过要使用魔法,拉取不到了评论或私信(开源免费)
# 以下是拉取镜像的命令,所有节点都需要有这两个镜像
[root@master ~]# crictl pull docker.io/flannel/flannel-cni-plugin:v1.1.2
[root@master ~]# crictl pull docker.io/flannel/flannel:v0.21.5
- 如果有镜像的话,使用以下命令把镜像导入即可,我的镜像名字是自己打的标签
[root@master ~]# ctr -n k8s.io images import flannel.tar
unpacking docker.io/flannel/flannel:v0.21.5 (sha256:6f2d991efb758c5530e7de90761dfb29637b7604a807d431312e20189e09f9e6)...done
[root@master ~]# ctr -n k8s.io images import flannel-cni-plugin-v1.1.2.tar
unpacking docker.io/flannel/flannel-cni-plugin:v1.1.2 (sha256:539d3bf046c8581557f0747dbad9d3b78a4de112d3c0bf9d291651593060fc9f)...done# 查看镜像
[root@master ~]# crictl images | grep flannel
docker.io/flannel/flannel-cni-plugin                                          v1.1.2              7a2dcab94698c       8.25MB
docker.io/flannel/flannel                                                     v0.21.5             a6c0cb5dbd211       69.9MB
4.2、部署网络插件
-
master节点操作即可
-
没有网络插件的私信或评论(免费开源)
[root@master ~]# kubectl apply -f kube-flannel.yaml
namespace/kube-flannel created
clusterrole.rbac.authorization.k8s.io/flannel created
clusterrolebinding.rbac.authorization.k8s.io/flannel created
serviceaccount/flannel created
configmap/kube-flannel-cfg created
daemonset.apps/kube-flannel-ds created
4.2、查看节点状态
[root@master ~]# kubectl get node
NAME     STATUS   ROLES           AGE   VERSION
master   Ready    control-plane   15m   v1.27.0
node1    Ready    <none>          12m   v1.27.0
node2    Ready    <none>          12m   v1.27.0
4.3、查看组件状态
[root@master ~]# kubectl get cs
Warning: v1 ComponentStatus is deprecated in v1.19+
NAME                 STATUS    MESSAGE                         ERROR
controller-manager   Healthy   ok
scheduler            Healthy   ok
etcd-0               Healthy   {"health":"true","reason":""}
4.4、查看所有Pod状态
[root@master ~]# kubectl get pod -A
NAMESPACE      NAME                             READY   STATUS    RESTARTS   AGE
kube-flannel   kube-flannel-ds-bkp7z            1/1     Running   0          2m5s
kube-flannel   kube-flannel-ds-q2565            1/1     Running   0          2m5s
kube-flannel   kube-flannel-ds-vz72p            1/1     Running   0          2m5s
kube-system    coredns-65dcc469f7-6x74z         1/1     Running   0          16m
kube-system    coredns-65dcc469f7-j8266         1/1     Running   0          16m
kube-system    etcd-master                      1/1     Running   0          16m
kube-system    kube-apiserver-master            1/1     Running   0          16m
kube-system    kube-controller-manager-master   1/1     Running   0          16m
kube-system    kube-proxy-2npvg                 1/1     Running   0          16m
kube-system    kube-proxy-8kqps                 1/1     Running   0          13m
kube-system    kube-proxy-zbc4h                 1/1     Running   0          13m
kube-system    kube-scheduler-master            1/1     Running   0          16m
五、Containerd基本操作
4.1、Crictl镜像管理
# 下载镜像
[root@master ~]# crictl pull nginx:latest# 查看所有镜像
[root@master ~]# crictl images# 查看镜像详细信息
[root@master ~]# crictl inspecti nginx:latest# 删除镜像
[root@master ~]# crictl rmi nginx:latest
4.2、Crictl容器管理
# 列出运行中的容器,查看所有容器加-a选项
[root@master ~]# crictl ps# 查看容器的详细信息
[root@master ~]# crictl inspect 07376dc402441# 启动容器
[root@master ~]# crictl start 07376dc402441# 停止容器
[root@master ~]# crictl stop 07376dc402441# 删除容器
[root@master ~]# crictl rm 07376dc402441# 打印日志
crictl logs <container-id 或 container-name># 进入容器执行命令
crictl exec -it <container-id 或 container-name> sh
4.3、Crictl Pod管理
# 打印所有 Pod
[root@node2 ~]# crictl pods
# 根据pod名称打印pod信息
[root@master ~]# crictl pods --name kube-proxy-trnjn# 根据标签打印 Pod,crictl pods --label key=value
[root@master ~]# crictl pods --label k8s-app=kube-proxy


![[Information Sciences 2023]用于假新闻检测的相似性感知多模态提示学习](https://img-blog.csdnimg.cn/direct/0149dc1e13d84f81b8943b0fdd492d9c.png)