在客户端中不论是PC端,还是移动端主要价值之一就体现在用户交互方面,也就是用户体验了,接下来讲的是很常见的字体加粗问题
UI大找茬
- 深入浅出字体、字体库
- TextView文本渐变
- 字体阴影、文字阴影
- 字体加粗 - 定制化字体粗度
在开发中经常会遇到设计说某个文本字体粗度不对,需要重一点,或者轻一点,这时候当系统控件原属性不满足需求时,就需要我们定制化处理一下
- 基础讲解
- 系统自带 - 原始版(粗度固定,无扩展)
- 自定义控件 - 基础版(扩展不足,基本够用)
- 优化前
- 优化后
- 使用方式
- 静态设置
- 动态设置
- 自定义控件 - 进阶版(推荐:可自行扩展,定制化高)
- 仅支持动态设置
- 支持动态、静态设置
- 静态设置
- 动态设置
虽然看起来写了不少,但其实核心只在于获取当前控件的 Paint(画笔)后重新设置strokeWidth、style属性 ,然后重新绘制即可!
tip:差点忘记说了,如果通过该篇未满足你的诉求,你可以看一下设计是否使用了字体库,一般字体库也会提供常规字体和加粗字体,关于字体库方面的知识,可以直接前往 深入浅出字体、字体库
基础讲解
设计比较喜欢拿 Android 与 IOS 做对比,所以经常会遇到一些 IOS 分分钟解决的问题,Android 却需要花多倍的时间来处理,以前经常会遇到 1 IOS = 1.5||2 Android 的场景,现在这环境可能比较这样的场景也比较少咯
关于字体粗度的实际设置,主要是在体现其 字重(字体粗细),因字重等级不同,带来的效果也有所不同
Andoird 提供的字体粗度主要有俩种
- normal 默认正常字体(0)
- bold 加粗字体(1)
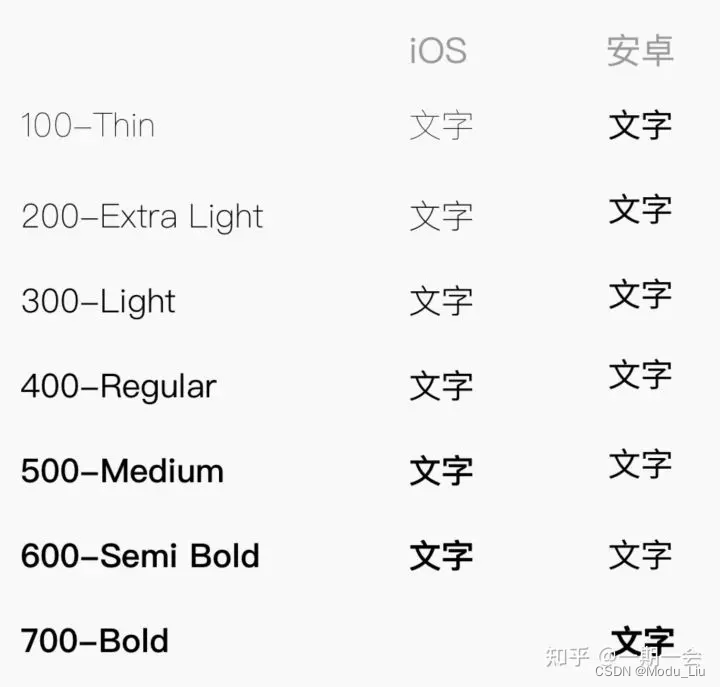
相对于Android 提供的 regular-400,bold-700 两种字重(设置600以下均以400字重效果来显示;设置700才会显示出加粗文字)- 源码中常以 0 - 1设置字重 ;iOS系统原生字体字重等级全面,从100-600都有,效果也更全一些,网上找了一个对比图如下
由于 Andoird 的开源性,在国内有着众多厂商,不同厂商有时候也会设计自已品牌的系统字体包,所以即便是相同的代码,也可能在不同的安卓手机上呈现的效果也可能不相同,因此我们往往需要通过一些自定义控件来尽量保持效果的一致性!
系统自带 - 原始版(粗度固定,无扩展)
Android 为 TextView、EditText 提供了 textStyle 属性用于设置字体粗度
<TextViewandroid:layout_width="match_parent"android:layout_height="wrap_content"android:gravity="center"android:text="字体粗度"android:textStyle="bold" />
实现效果


关于 textStyle 属性值,主要提供了以下三种类型
- normal 默认正常字体
- bold 加粗字体
- italic 斜体
<?xml version="1.0" encoding="utf-8"?>
<resources><declare-styleable name="MediumTextView"><attr name="mediumState" format="boolean" /></declare-styleable></resources>
自定义控件 - 基础版(扩展不足,基本够用)
首先在 attr/attrs 添加自定义属性
<?xml version="1.0" encoding="utf-8"?>
<resources><declare-styleable name="MediumTextView"><attr name="mediumState" format="boolean" /></declare-styleable>
</resources>
实现效果

Tip:以下俩种方式均可正常使用,建议使用优化后的减少无效逻辑
优化前
package com.example.boldtextimport android.content.Context
import android.graphics.Canvas
import android.graphics.Paint
import android.support.v7.widget.AppCompatTextView
import android.util.AttributeSetclass MediumOldTextView @JvmOverloads constructor(context: Context, attrs: AttributeSet? = null, defStyleAttr: Int = 0) : AppCompatTextView(context, attrs, defStyleAttr) {private var mediumState: Boolean = falseinit {val array = context.obtainStyledAttributes(attrs, R.styleable.MediumTextView)mediumState = array.getBoolean(R.styleable.MediumTextView_mediumState, false)array.recycle()}override fun onDraw(canvas: Canvas?) {if (mediumState) {val strokeWidth = paint.strokeWidthval style = paint.stylepaint.strokeWidth = 0.6fpaint.style = Paint.Style.FILL_AND_STROKEsuper.onDraw(canvas)paint.strokeWidth = strokeWidthpaint.style = style} else {super.onDraw(canvas)}}fun setMediumState(mediumState: Boolean) {this.mediumState = mediumStaterequestLayout()}}
优化后
去除一些无用逻辑、代码
package com.example.boldtextimport android.content.Context
import android.graphics.Canvas
import android.graphics.Paint
import android.support.v7.widget.AppCompatTextView
import android.util.AttributeSetclass MediumTextView @JvmOverloads constructor(context: Context, attrs: AttributeSet? = null, defStyleAttr: Int = 0) : AppCompatTextView(context, attrs, defStyleAttr) {private var mediumState: Boolean = falseinit {val array = context.obtainStyledAttributes(attrs, R.styleable.MediumTextView)mediumState = array.getBoolean(R.styleable.MediumTextView_mediumState, false)array.recycle()}override fun onDraw(canvas: Canvas?) {if (mediumState) {//可通过设置该数值改变加粗字重paint.strokeWidth = 0.6fpaint.style = Paint.Style.FILL_AND_STROKE}super.onDraw(canvas)}fun setMediumText(mediumText: Boolean) {this.mediumState = mediumTextrequestLayout()
//        postInvalidate()}}
使用方式
静态为 xml 设置,动态为代码设置
静态设置
<com.example.boldtext.MediumTextViewandroid:id="@+id/medium_view"android:layout_width="match_parent"android:layout_height="45dp"android:gravity="center"android:text="加粗字体"app:mediumState="true" />
动态设置
package com.example.boldtextimport android.support.v7.app.AppCompatActivity
import android.os.Bundleclass MainActivity : AppCompatActivity() {override fun onCreate(savedInstanceState: Bundle?) {super.onCreate(savedInstanceState)setContentView(R.layout.activity_main)val mediumView = findViewById<MediumTextView>(R.id.medium_view)//设置加粗mediumView.setMediumState(true)}
}
自定义控件 - 进阶版(推荐:可自行扩展,定制化高)
实现效果

仅支持动态设置
Tip:假设别的组件也有字体加粗的需求,可以尝试继承该组件
创建 - 自定义组件
package com.example.boldtextimport android.content.Context
import android.graphics.Canvas
import android.graphics.Paint
import android.support.v7.widget.AppCompatTextView
import android.util.AttributeSetopen class TypefaceTextView @JvmOverloads constructor(context: Context, attrs: AttributeSet? = null, defStyleAttr: Int = 0) :AppCompatTextView(context, attrs, defStyleAttr) {private var mTypefaceScale: Float = 0.0fenum class TypefaceScale {MEDIUM, MEDIUM_SMALL, DEFAULT,}override fun onDraw(canvas: Canvas?) {if (mTypefaceScale == 0f) {return super.onDraw(canvas)}val strokeWidth = paint.strokeWidthval style = paint.stylepaint.strokeWidth = mTypefaceScalepaint.style = Paint.Style.FILL_AND_STROKEsuper.onDraw(canvas)paint.strokeWidth = strokeWidthpaint.style = style}fun setTypefaceScale(scale: TypefaceScale = TypefaceScale.DEFAULT) {mTypefaceScale = when (scale) {TypefaceScale.DEFAULT -> 0.0fTypefaceScale.MEDIUM_SMALL -> 0.6fTypefaceScale.MEDIUM -> 1.1f}postInvalidate()}}
使用方式
package com.example.boldtextimport android.support.v7.app.AppCompatActivity
import android.os.Bundleclass MainActivity : AppCompatActivity() {override fun onCreate(savedInstanceState: Bundle?) {super.onCreate(savedInstanceState)setContentView(R.layout.activity_main)val typefaceView = findViewById<TypefaceTextView>(R.id.typeface_view)//设置加粗typefaceView.setTypefaceScale(TypefaceTextView.TypefaceScale.MEDIUM_SMALL)}
}
控件引入
<com.example.boldtext.TypefaceTextViewandroid:id="@+id/typeface_view"android:layout_width="match_parent"android:layout_height="45dp"android:gravity="center"android:text="TypefaceTextView 加粗字体" />
扩展:因为我们用的是 splitties 三方的一个布局组件,所以分享、记录一些扩展函数,逐步分析、学习
布局方式
add(lParams(), typefaceTextView {gravity = gravityEndtypefaceScale = TypefaceScale.MEDIUM_SMALLtextSize = 14ftextColor = "#333333".toColorInt()})
add函数 将子布局添加到对应ViewGroup中
import android.view.View
import android.view.ViewGroupinline fun <V : View> ViewGroup.add(lp: ViewGroup.LayoutParams, view: V): V = view.also { addView(it, lp) }
splitties - lParams 函数
inline fun LinearLayout.lParams(width: Int = wrapContent,height: Int = wrapContent,initParams: LinearLayout.LayoutParams.() -> Unit = {}
): LinearLayout.LayoutParams {contract { callsInPlace(initParams, InvocationKind.EXACTLY_ONCE) }return LinearLayout.LayoutParams(width, height).apply(initParams)
}inline fun LinearLayout.lParams(width: Int = wrapContent,height: Int = wrapContent,gravity: Int = -1,weight: Float = 0f,initParams: LinearLayout.LayoutParams.() -> Unit = {}
): LinearLayout.LayoutParams {contract { callsInPlace(initParams, InvocationKind.EXACTLY_ONCE) }return LinearLayout.LayoutParams(width, height).also {it.gravity = gravityit.weight = weight}.apply(initParams)
}
View - typefaceTextView 函数
// TypefaceTextView 防苹果系统的字体加粗------------------------------------------------------------------
inline fun Context.typefaceTextView(@IdRes id: Int = View.NO_ID,@StyleRes theme: Int = NO_THEME,initView: TypefaceTextView.() -> Unit = {}
): TypefaceTextView {return view(::TypefaceTextView, id, theme, initView)
}inline fun View.typefaceTextView(@IdRes id: Int = View.NO_ID,@StyleRes theme: Int = NO_THEME,initView: TypefaceTextView.() -> Unit = {}
): TypefaceTextView {return context.typefaceTextView(id, theme, initView)
}inline fun Ui.typefaceTextView(@IdRes id: Int = View.NO_ID,@StyleRes theme: Int = NO_THEME,initView: TypefaceTextView.() -> Unit = {}
): TypefaceTextView {return ctx.typefaceTextView(id, theme, initView)
}
// -------------------------------------------------------------------------------------------------------
typefaceTextView - typefaceScale 加粗类型函数
enum class TypefaceScale {
//    MEDIUM,MEDIUM_SMALL,DEFAULT,
}var TypefaceTextView.typefaceScale: TypefaceScale@Deprecated(NO_GETTER, level = DeprecationLevel.HIDDEN) get() = noGetterset(value) {val scale = when (value) {
//            TypefaceScale.MEDIUM -> TypefaceTextView.TypefaceScale.MEDIUMTypefaceScale.MEDIUM_SMALL -> TypefaceTextView.TypefaceScale.MEDIUM_SMALLTypefaceScale.DEFAULT -> TypefaceTextView.TypefaceScale.DEFAULT}setTypefaceScale(scale)}
支持动态、静态设置
为了方便直接在 xml 中使字体加粗,需要在控件上引入自定义属性,故需添加以下属性
<?xml version="1.0" encoding="utf-8"?>
<resources><declare-styleable name="TypefaceTextView"><attr name="fontScale" format="enum"><enum name="normal" value="0" /><enum name="medium" value="1" /><enum name="bold" value="2" /></attr></declare-styleable>
</resources>
创建 - 自定义组件
package com.example.boldtextimport android.content.Context
import android.graphics.Canvas
import android.graphics.Paint
import android.support.v7.widget.AppCompatTextView
import android.util.AttributeSetclass TypefaceTextView @JvmOverloads constructor(context: Context, attrs: AttributeSet? = null, defStyleAttr: Int = 0) :AppCompatTextView(context, attrs, defStyleAttr) {private var mTypefaceScale: Float = 0.0finit {if (attrs != null) {val array = context.obtainStyledAttributes(attrs, R.styleable.TypefaceTextView)val typefaceScale = array.getInt(R.styleable.TypefaceTextView_fontScale, 0)mTypefaceScale = when (typefaceScale) {1 -> 0.6f2 -> 1.1felse -> 0.0f}array.recycle()}}enum class TypefaceScale {MEDIUM, DEFAULT, BOLD}override fun onDraw(canvas: Canvas?) {if (mTypefaceScale == 0f) {return super.onDraw(canvas)}val strokeWidth = paint.strokeWidthval style = paint.stylepaint.strokeWidth = mTypefaceScalepaint.style = Paint.Style.FILL_AND_STROKEsuper.onDraw(canvas)paint.strokeWidth = strokeWidthpaint.style = style}internal fun setTypefaceScale(scale: TypefaceScale = TypefaceScale.DEFAULT) {mTypefaceScale = when (scale) {TypefaceScale.DEFAULT -> 0.0fTypefaceScale.MEDIUM -> 0.6fTypefaceScale.BOLD -> 1.1f}invalidate()}}
静态设置
静态设置 fontScale 属性为枚举类型中的其一
<com.example.boldtext.TypefaceTextViewandroid:layout_width="match_parent"android:layout_height="45dp"android:gravity="center"app:fontScale="bold"android:text="TypefaceTextView 加粗字体" />
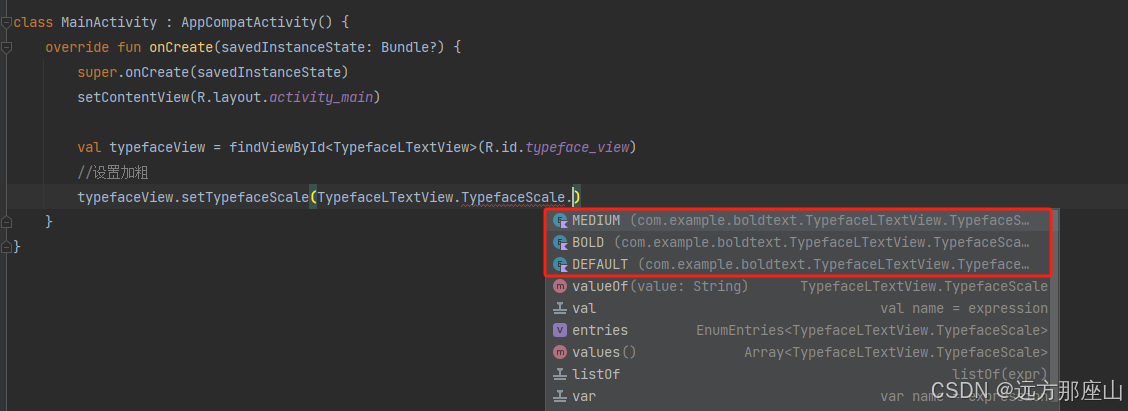
动态设置
package com.example.boldtextimport android.support.v7.app.AppCompatActivity
import android.os.Bundleclass MainActivity : AppCompatActivity() {override fun onCreate(savedInstanceState: Bundle?) {super.onCreate(savedInstanceState)setContentView(R.layout.activity_main)val typefaceView = findViewById<TypefaceLTextView>(R.id.typeface_view)//设置加粗typefaceView.setTypefaceScale(TypefaceLTextView.TypefaceScale.MEDIUM)}
}
只能设置我们声明的枚举类型,如果项目需要扩展到更多粗度的话,可以自行增加!