文章目录
- 前言
- 驱动安装
- 下载安装
- 方式一:
- 方式二:
- 相机检测
- 配置config文件
- 编译、运行程序
- 注意
- 内参标定
- 标定板
- 运行程序
- apriltag空间定位
- 标签打印
- 下载安装
- 可视化结果
前言
AprilTag是一种高性能的视觉标记系统,广泛应用于机器人导航、增强现实和自动化领域。类似于二维码,AprilTag标记由黑白图案组成,但其设计旨在提供更高的精度和更强的鲁棒性。通过相机识别和解码这些标记,可以实现精确的位置和姿态估计,从而使机器人或计算机视觉系统能够准确地感知和定位自身在环境中的位置。AprilTag因其高效性和可靠性,在现代机器人技术和自动化应用中扮演着重要角色。
本篇文章主要做了该套代码整体实现,整体架构如下:
本项目源代码在gitee1可以找到。
驱动安装
下载安装
方式一:
使用v4l2-camera2,在 ROS 2 中使用 V4L2 相机,你可以使用 v4l2_camera 包。这个包提供了对 V4L2 设备的支持,使得你可以在 ROS 2 中轻松地读取和处理来自 USB 摄像头或其他视频设备的图像。
sudo apt-get install ros-${ROS_DISTRO}-v4l2-camera
sudo apt-get install ros-${ROS_DISTRO}-rqt-image-view
方式二:
使用usb-cam3包,在 ROS 2 中使用 USB 摄像头,可以使用 usb_cam 包。usb_cam 是一个常用的 ROS 节点,用于从 USB 摄像头读取图像并发布到 ROS 2 的图像话题中。下面是如何在 ROS 2 中安装和使用 usb_cam 包的步骤。
sudo apt-get install ros-${ROS_DISTRO}-usb-cam
sudo apt-get install ros-${ROS_DISTRO}-camera-calibration-parsers
sudo apt-get install ros-${ROS_DISTRO}-camera-info-manager
sudo apt-get install ros-${ROS_DISTRO}-rqt-image-view
sudo apt-get install ros-${ROS_DISTRO}-launch-testing-ament-cmake
本文采用方式二。
相机检测
# 安装V4l2工具包
$ sudo apt install v4l-utils# 通过v4l2查看摄像头设备
$ sudo v4l2-ctl --list-devices
EP28WD (usb-fe380000.usb-1.3):/dev/video0/dev/video1# 查看当前摄像头支持的视频压缩格式
$ sudo v4l2-ctl -d /dev/video0 --list-formatsioctl: VIDIOC_ENUM_FMTIndex       : 0Type        : Video CapturePixel Format: 'YUYV'Name        : YUYV 4:2:2Index       : 1Type        : Video CapturePixel Format: 'H264' (compressed)Name        : H.264Index       : 2Type        : Video CapturePixel Format: 'MJPG' (compressed)Name        : Motion-JPEG# 查看摄像头所有参数
$ sudo v4l2-ctl -d  /dev/video0 --all
Driver Info (not using libv4l2):Driver name   : uvcvideoCard type     : EP28WDBus info      : usb-fe380000.usb-1.3Driver version: 4.4.167Capabilities  : 0x84A00001Video CaptureStreamingExtended Pix FormatDevice CapabilitiesDevice Caps   : 0x04200001Video CaptureStreamingExtended Pix Format
Priority: 2
Video input : 0 (Camera 1: ok)
Format Video Capture:Width/Height      : 640/480Pixel Format      : 'YUYV'Field             : NoneBytes per Line    : 1280Size Image        : 614400Colorspace        : DefaultTransfer Function : DefaultYCbCr Encoding    : DefaultQuantization      : DefaultFlags             :
Crop Capability Video Capture:Bounds      : Left 0, Top 0, Width 640, Height 480Default     : Left 0, Top 0, Width 640, Height 480Pixel Aspect: 1/1
Selection: crop_default, Left 0, Top 0, Width 640, Height 480
Selection: crop_bounds, Left 0, Top 0, Width 640, Height 480
Streaming Parameters Video Capture:Capabilities     : timeperframeFrames per second: 25.000 (25/1)Read buffers     : 0brightness (int)    : min=-64 max=64 step=1 default=0 value=0contrast (int)    : min=0 max=64 step=1 default=36 value=36saturation (int)    : min=0 max=128 step=1 default=64 value=64hue (int)    : min=-40 max=40 step=1 default=0 value=0white_balance_temperature_auto (bool)   : default=1 value=1gamma (int)    : min=72 max=500 step=1 default=100 value=100gain (int)    : min=0 max=100 step=1 default=0 value=0power_line_frequency (menu)   : min=0 max=2 default=1 value=1white_balance_temperature (int)    : min=2800 max=6500 step=1 default=4600 value=4600 flags=inactivesharpness (int)    : min=0 max=6 step=1 default=3 value=3backlight_compensation (int)    : min=0 max=2 step=1 default=1 value=1exposure_auto (menu)   : min=0 max=3 default=3 value=3exposure_absolute (int)    : min=1 max=5000 step=1 default=157 value=157 flags=inactiveexposure_auto_priority (bool)   : default=0 value=1# 查看摄像头所支持的分辨率sudo v4l2-ctl --list-framesizes=MJPG -d /dev/video0ioctl: VIDIOC_ENUM_FRAMESIZESSize: Discrete 640x480   # Width/HeightSize: Discrete 800x600Size: Discrete 1280x720Size: Discrete 1280x960Size: Discrete 1920x1080Size: Discrete 1600x1200Size: Discrete 2048x1536Size: Discrete 2592x1944Size: Discrete 3264x2448
配置config文件
/**:ros__parameters:video_device: "/dev/video2"framerate: 30.0io_method: "mmap"frame_id: "camera"pixel_format: "mjpeg2rgb" # see usb_cam/supported_formats for list of supported formatsav_device_format: "YUV422P"image_width: 1280image_height: 720camera_name: "camera"camera_info_url: "package://apriltag_setup/config/camera/camera_info_1.yaml"brightness: -1contrast: -1saturation: -1sharpness: -1gain: -1auto_white_balance: truewhite_balance: 4000autoexposure: trueexposure: 100autofocus: falsefocus: -1
其pixel_format有如下种类:
- rgb8:
RGB8 是最常见的彩色图像格式之一,表示每个像素由红、绿、蓝三个通道组成,每个通道占用 8 位(共 24 位)。
适用于大多数彩色图像处理任务。 - yuyv:
YUYV 是一种 YUV 格式,用于压缩视频流。其中 Y 表示亮度,U 和 V 表示色度。
通常用于视频编码和传输,因为它可以节省带宽。 - yuyv2rgb:
这是一个转换格式,表示从 YUYV 格式转换为 RGB 格式。
用于在接收 YUYV 数据后将其转换为 RGB 格式以便进一步处理。 - uyvy:
UYVY 是另一种 YUV 格式,与 YUYV 类似,但顺序不同。
也用于视频编码和传输。 - uyvy2rgb:
这是一个转换格式,表示从 UYVY 格式转换为 RGB 格式。
用于在接收 UYVY 数据后将其转换为 RGB 格式以便进一步处理。 - mono8:
Mono8 是单通道灰度图像格式,每个像素占用 8 位。
适用于灰度图像处理任务,如机器视觉和图像识别。 - mono16:
Mono16 是单通道灰度图像格式,每个像素占用 16 位。
提供更高的精度,适用于需要高动态范围的应用。 - y102mono8:
这个格式不太常见,可能表示从 Y10(10 位 YUV)格式转换为 Mono8 格式。
用于特定的图像处理任务。 - raw_mjpeg:
MJPEG(Motion JPEG)是一种基于 JPEG 的视频编码格式。
通常用于低带宽环境下传输视频,因为它可以提供较好的压缩比。 - mjpeg2rgb:
这是一个转换格式,表示从 MJPEG 格式转换为 RGB 格式。
用于在接收 MJPEG 数据后将其解码为 RGB 格式以便进一步处理。 - m4202rgb:
这个格式可能表示从 YUV420P 格式转换为 RGB 格式。
用于在接收 YUV420P 数据后将其转换为 RGB 格式以便进一步处理。
选择哪种格式取决于你的具体应用场景和需求:
- RGB8: 如果你需要彩色图像处理,可以选择 RGB8 格式。
- YUYV/UYVY: 如果你需要压缩视频流以节省带宽,可以选择 YUYV 或 UYVY 格式。
- Mono8/Mono16: 如果你需要灰度图像处理,可以选择 Mono8 或 Mono16 格式。
- MJPEG: 如果你需要在低带宽环境下传输视频,可以选择 MJPEG 格式。
其中av_device_format选择YUV422P说明如下:
{stringify(AV_PIX_FMT_YUV422P), AV_PIX_FMT_YUV422P}, ///< planar YUV 4:2:2, 16bpp,
///< (1 Cr & Cb sample per 2x1 Y
///< samples)
源码中更多种类可以看github4库中的代码。
编译、运行程序
# 编译
colcon build --packages-up-to apriltag_bringup --cmake-args -DCMAKE_BUILD_TYPE=Release# 运行
ros2 launch apriltag_bringup camera.launch.py
注意
若输出如下异常
--- stderr: image_publisher
/home/dev/workspace/cali_usb_cam/image_pipeline/image_publisher/src/image_publisher.cpp:39:10: fatal error: cv_bridge/cv_bridge.hpp: No such file or directory39 | #include "cv_bridge/cv_bridge.hpp"|          ^~~~~~~~~~~~~~~~~~~~~~~~~
compilation terminated.
则安装
sudo apt-get install ros-${ROS_DISTRO}-cv-bridge
若输出如下异常
--- stderr: depth_image_proc
In file included from /home/dev/workspace/cali_usb_cam/image_pipeline/depth_image_proc/src/conversions.cpp:32:
/home/dev/workspace/cali_usb_cam/image_pipeline/depth_image_proc/include/depth_image_proc/conversions.hpp:38:10: fatal error: image_geometry/pinhole_camera_model.hpp: No such file or directory38 | #include "image_geometry/pinhole_camera_model.hpp"|          ^~~~~~~~~~~~~~~~~~~~~~~~~~~~~~~~~~~~~~~~~
compilation terminated.
则安装
sudo apt-get install ros-${ROS_DISTRO}-image-geometry
内参标定
标定板
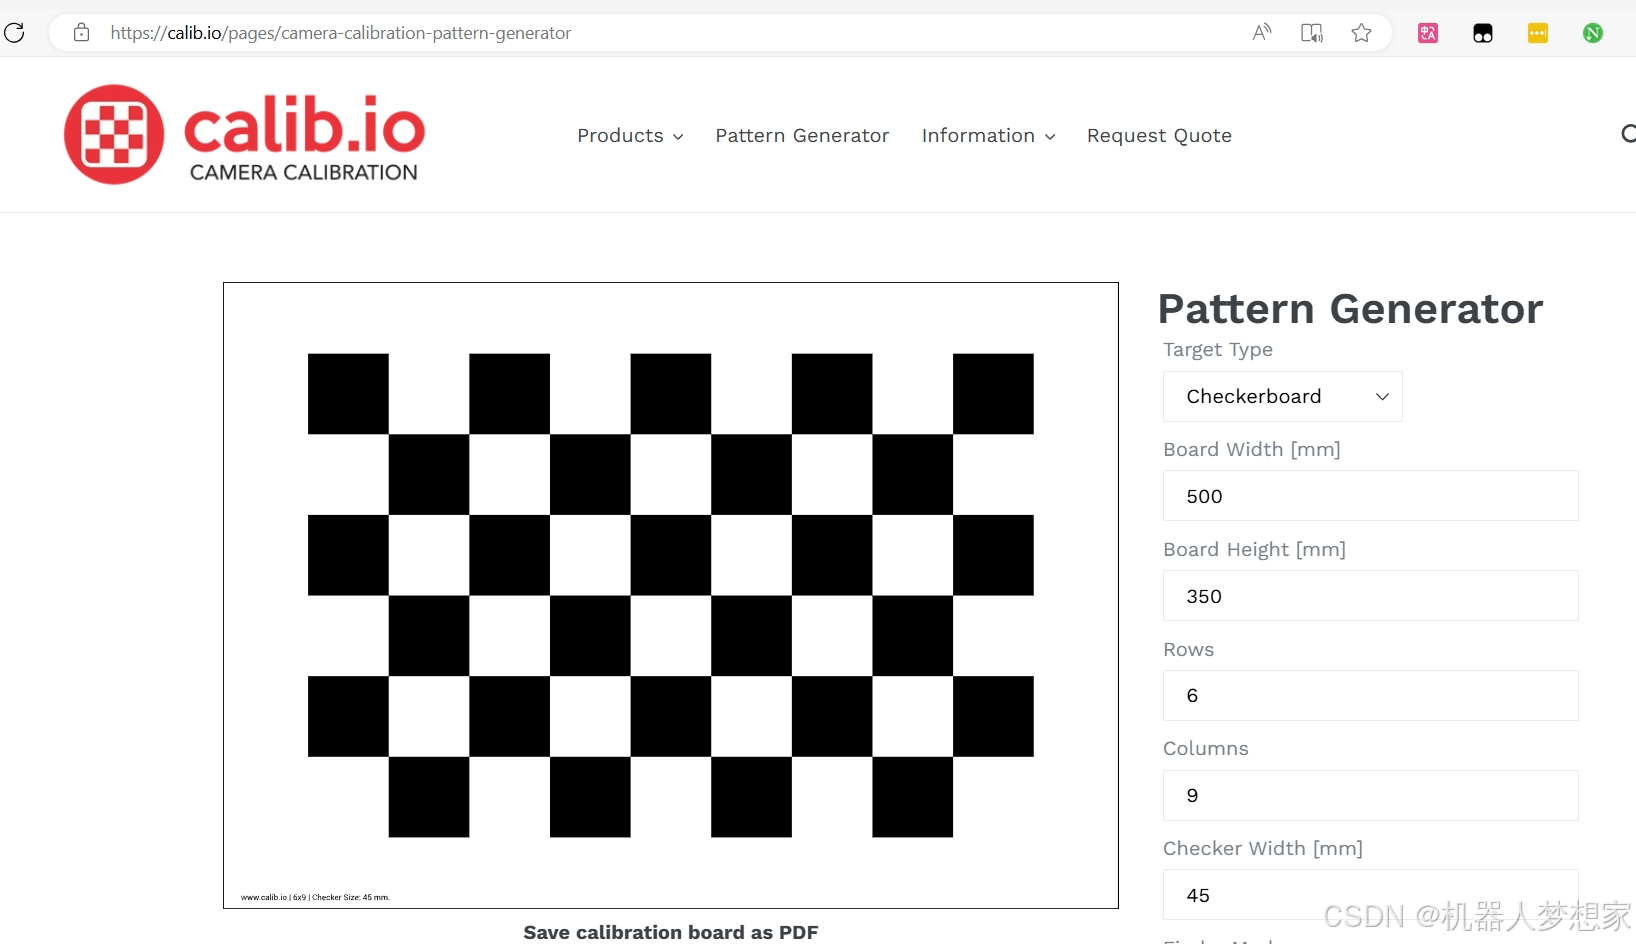
根据自己的标定板下载,博主这里通过官网在线生成6x9边长45mm的棋盘格

运行程序
棋盘格虽然为6x9但是在launch时–size写5x8,在launch usb camera的基础上,运行标定节点:
ros2 run camera_calibration cameracalibrator --size 5x8 --square 0.045 --ros-args --remap /image:=/camera1/image_raw --ros-args --remap /camera:=/camera1
移动到不同的位置,采集足够的图片,后点击CALIBRATE后生成如下:

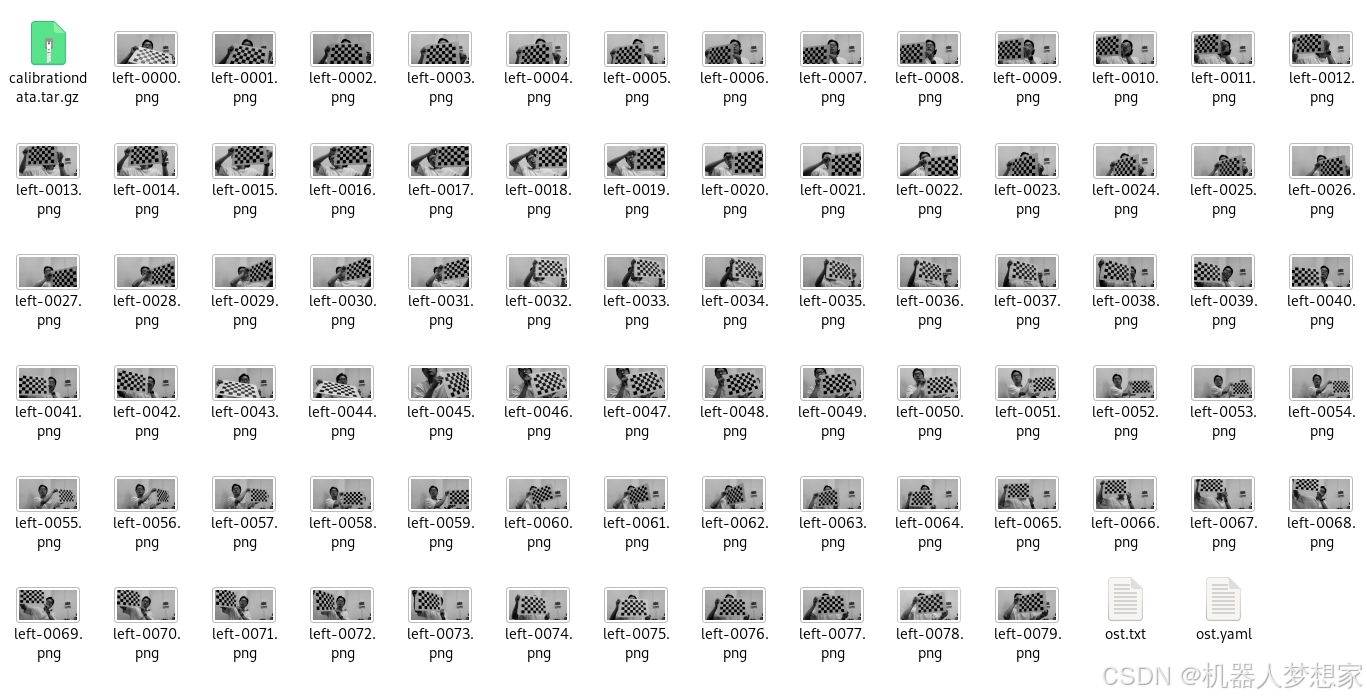
点击SAVE保存文件到/tmp/calibrationdata.tar.gz,解压后如下:

*** Added sample 80, p_x = 0.571, p_y = 0.386, p_size = 0.294, skew = 0.260
**** Calibrating ****
mono pinhole calibration...
D = [0.02255013468344289, -0.0068047149118532135, -0.013297997856020293, -0.0029520999960376574, 0.0]
K = [1252.9399874377705, 0.0, 717.7071690172635, 0.0, 1255.0889798056107, 296.7735944722159, 0.0, 0.0, 1.0]
R = [1.0, 0.0, 0.0, 0.0, 1.0, 0.0, 0.0, 0.0, 1.0]
P = [1268.94091796875, 0.0, 713.5385965108289, 0.0, 0.0, 1264.5770263671875, 288.0021457495968, 0.0, 0.0, 0.0, 1.0, 0.0]
None
# oST version 5.0 parameters[image]width
1280height
720[narrow_stereo]camera matrix
1252.939987 0.000000 717.707169
0.000000 1255.088980 296.773594
0.000000 0.000000 1.000000distortion
0.022550 -0.006805 -0.013298 -0.002952 0.000000rectification
1.000000 0.000000 0.000000
0.000000 1.000000 0.000000
0.000000 0.000000 1.000000projection
1268.940918 0.000000 713.538597 0.000000
0.000000 1264.577026 288.002146 0.000000
0.000000 0.000000 1.000000 0.000000('Wrote calibration data to', '/tmp/calibrationdata.tar.gz')
其中ost.yaml是最终标定的结果,内容如下:
image_width: 1280
image_height: 720
camera_name: narrow_stereo
camera_matrix:rows: 3cols: 3data: [1252.93999,    0.     ,  717.70717,0.     , 1255.08898,  296.77359,0.     ,    0.     ,    1.     ]
distortion_model: plumb_bob
distortion_coefficients:rows: 1cols: 5data: [0.022550, -0.006805, -0.013298, -0.002952, 0.000000]
rectification_matrix:rows: 3cols: 3data: [1., 0., 0.,0., 1., 0.,0., 0., 1.]
projection_matrix:rows: 3cols: 4data: [1268.94092,    0.     ,  713.5386 ,    0.     ,0.     , 1264.57703,  288.00215,    0.     ,0.     ,    0.     ,    1.     ,    0.     ]
保存该数据到apriltag_setup/config/camera/camera_info_1.yaml中。
apriltag空间定位
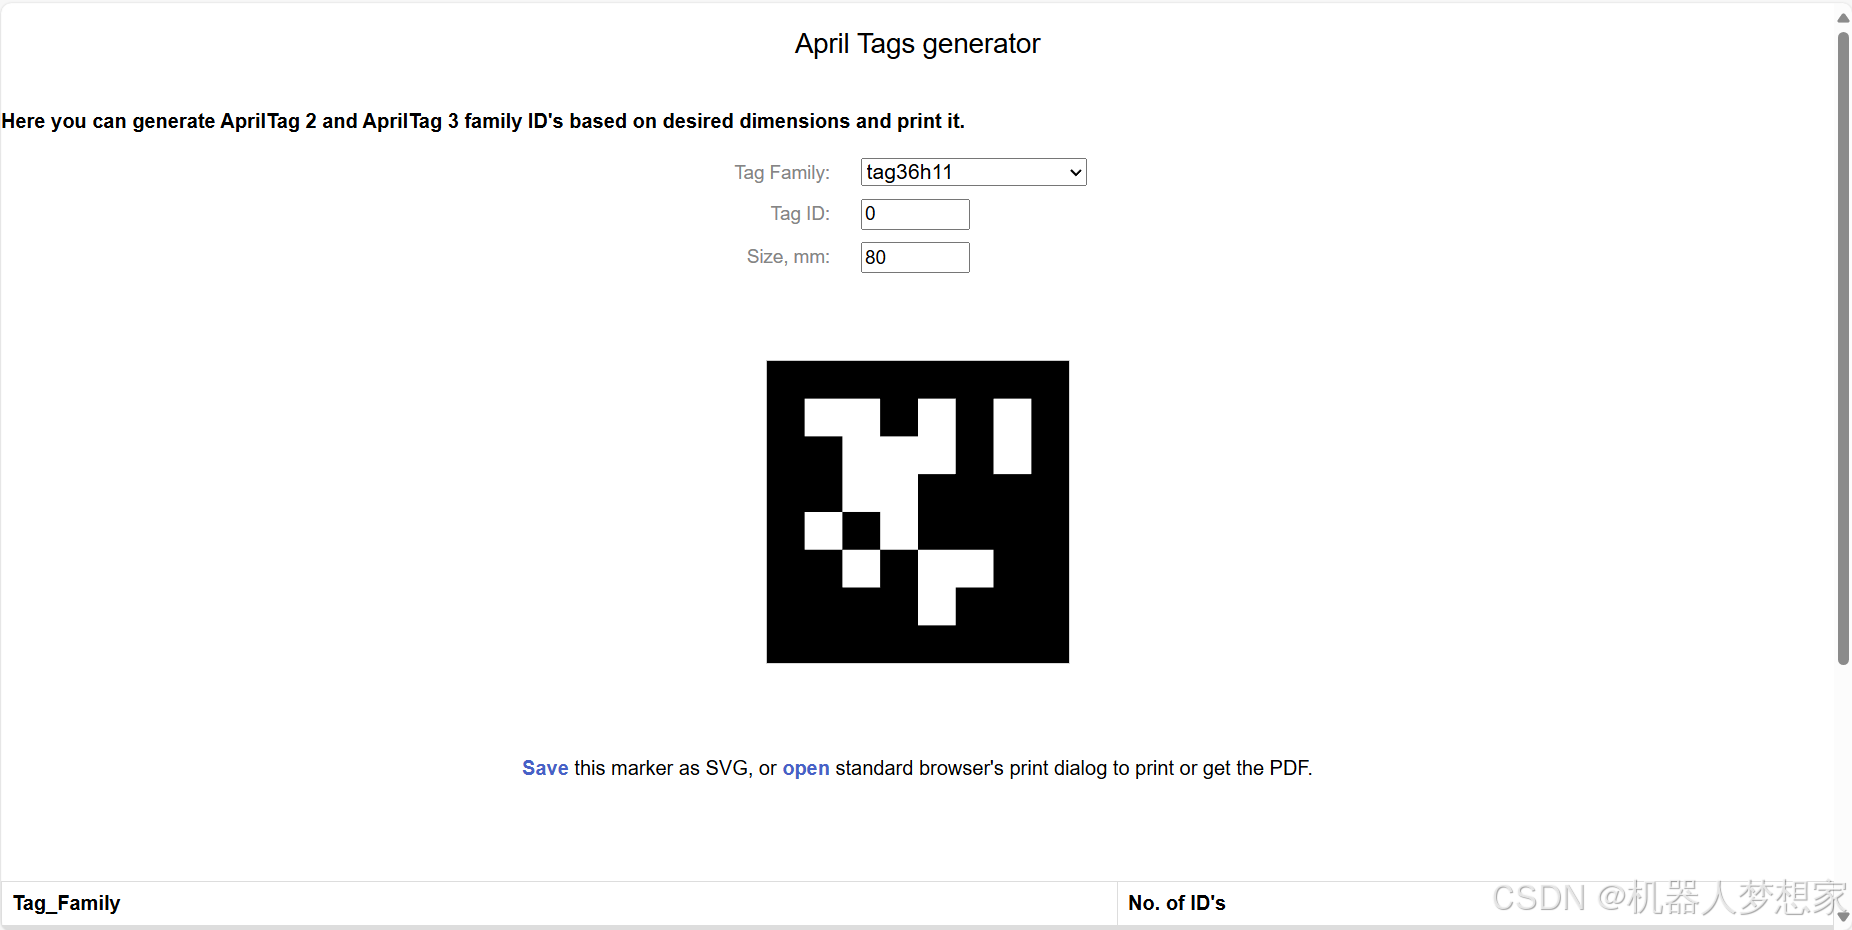
标签打印
April Tag generator (chaitanyantr.github.io)


下载安装
git clone https://github.com/AprilRobotics/apriltag.git# 编译
cmake -B build -DCMAKE_BUILD_TYPE=Release
# 安装
sudo cmake --build build --target install
git clone https://github.com/Adlink-ROS/apriltag_ros.git
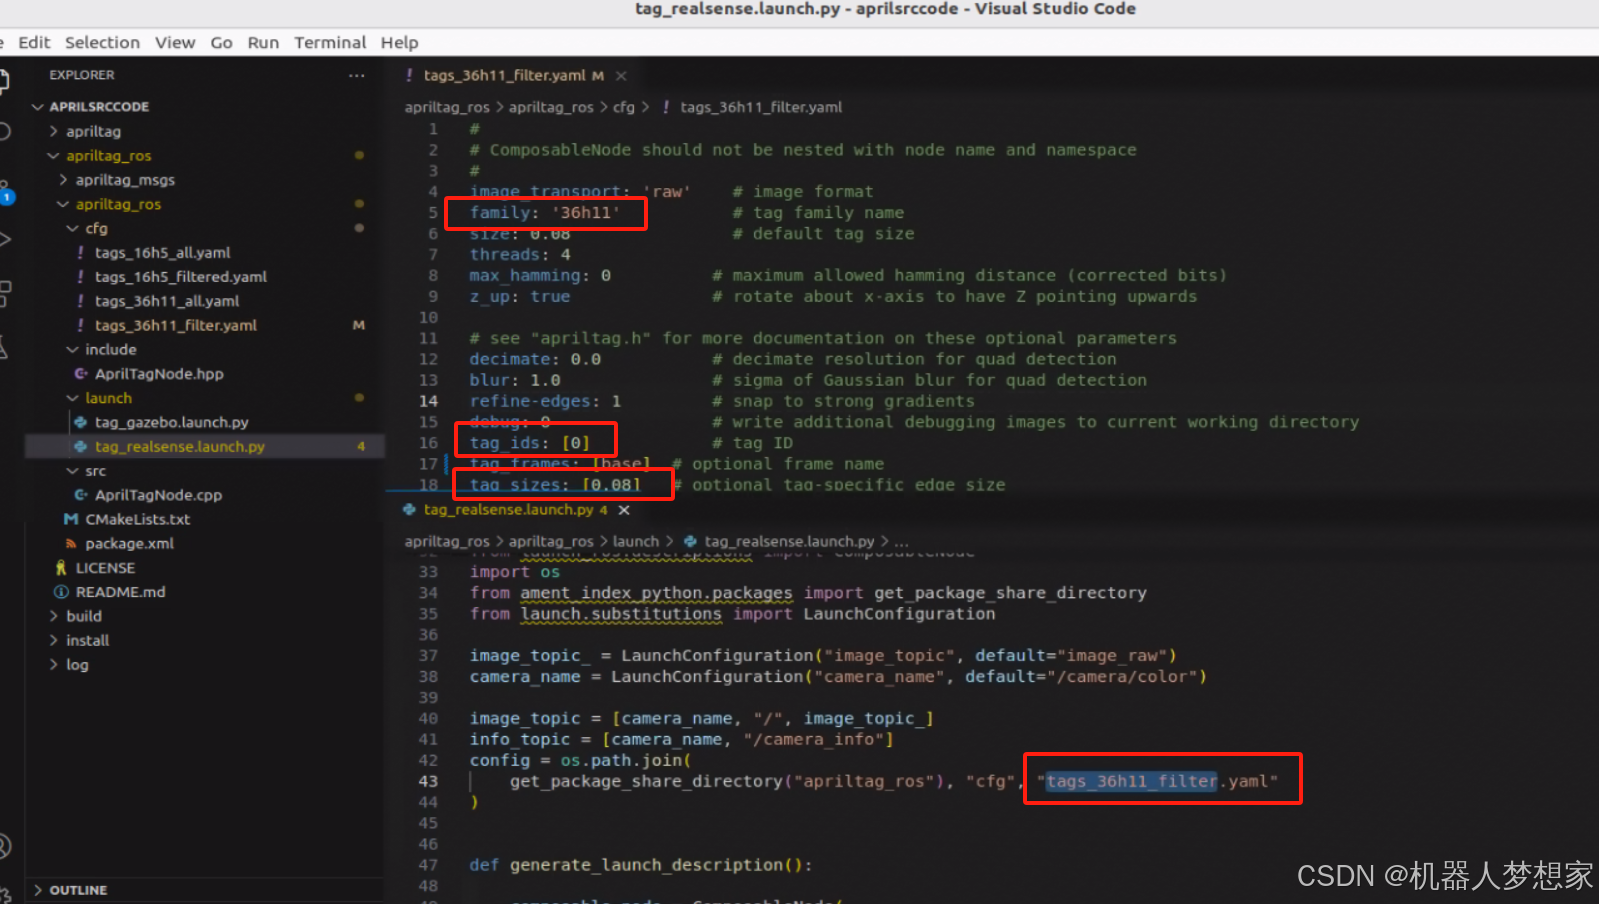
colcon build --symlink-install --cmake-args -DCMAKE_BUILD_TYPE=Releaseros2 launch apriltag_ros tag_realsense.launch.py camera_name:=/camera1 image_topic:=image_raw
ros2-gbp/apriltag_msgs-release at release/humble/apriltag_msgs (github.com)
此文章包含对于定位精度的分析:ROS学习笔记(实践二)–AprilTag_ros包的使用_apriltag ros-CSDN博客
可视化结果

AprilTag usb cam: 本文用来记录全套配置usb相机如何实现连接,标定,apriltag空间定位全流程。 (gitee.com) ↩︎
ROS2下进行单目相机标定_海康 humble-CSDN博客 ↩︎
GitHub - ros-drivers/usb_cam: A ROS Driver for V4L2 USB Cameras ↩︎
usb_cam/include/usb_cam/formats/av_pixel_format_helper.hpp at ros2 · ros-drivers/usb_cam · GitHub ↩︎


