一、前言
基于之前创建的基础工程,接下来我们完成登录页面的开发。
https://blog.csdn.net/qq_34709175/article/details/143426433?spm=1001.2014.3001.5501
这里需要交代一下,项目里的文件命名规则,以及文件结构,views下存放所有业务相关的页面,根据不同逻辑,分为不同的文件夹,页面组件的命名方式为首字母大写驼峰式命名,并且必须为 2 个单词以上组成。比如我这里的登录页面,对应的就是 views/login/LoginPage.vue。我见过还有一种方式是通过文件夹区分逻辑,所有的页面都命名为 index.vue,这种方式就是 views/login/index.vue。我觉得这种方式不太好的地方在于,全部叫 index.vue,虽然组件名称短了,但是可读性较差。我更倾向于第一种,单词长点无所谓,清晰最重要。
二、删除默认生成的案例代码
- 删除
src/components下所有文件 - 删除
App.vue所有组件,样式,以及引用,只留下 Vue 基础模板。 - 删除
src/assets/base.css、src/assets/logo.svg,并且删除main.css对其的引用
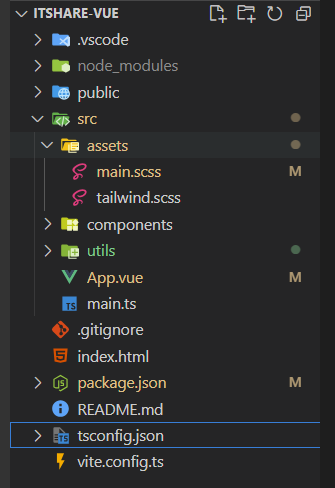
如果你按照我之前的文章一步步走到这里,文件目录结构应该如下图
三、构建登录页面
万丈高楼平地起,一个完整的项目不是一蹴而就的,我们按照自己的规划,一点点来实现。就和盖楼打地基一样,在当前这个阶段我们要明确自己的目标,完成当前目标即可。首先我们要明确我们当前阶段要完成的事情有哪些?
- 提供一个登录表单,输入用户名和密码。
- 提交表单,将请求发送给服务端,如果成功返回请求令牌 token。** **
- 为了防止暴力破解,加上验证码功能。
这就是我们的初期目标,至于页面长成啥样,怎么排版,这不是当前需要关注的,先把毛胚搭起来,后面再精装修。
3.1 创建 views/login/LoginPage.vue 文件
<script setup lang="ts"></script>
<template><div>登录页</div>
</template>
<style scoped lang="scss"></style>
3.2 配置路由
Vue Router 是 Vue 的官方路由。它与 Vue.js 核心深度集成,让用 Vue.js 构建单页应用变得轻而易举。官方脚手架已经帮我们引入了,直接使用就可以了,详情参考官方文档:router.vuejs.org
3.2.1 安装依赖
npm install vue-router@4
3.2.2 创建路由
- 新建 router/index.ts
import { createRouter, createWebHashHistory } from 'vue-router'
import Login from '@/views/login/LoginPage.vue'const routes = [{ path: '/', name: 'login', component: Login }]const router = createRouter({history: createWebHashHistory(import.meta.env.BASE_URL),routes,
})export default router
- 注册插件
import './assets/main.scss'import { createApp } from 'vue'
import App from './App.vue'
import router from './router/index'createApp(App).use(router).mount('#app')- App.vue 中配置
<RouterView />
<script setup lang="ts"></script><template><RouterView />
</template><style scoped></style>
启动项目,访问可以看到进入了我们的登录页面。

四、登录表单
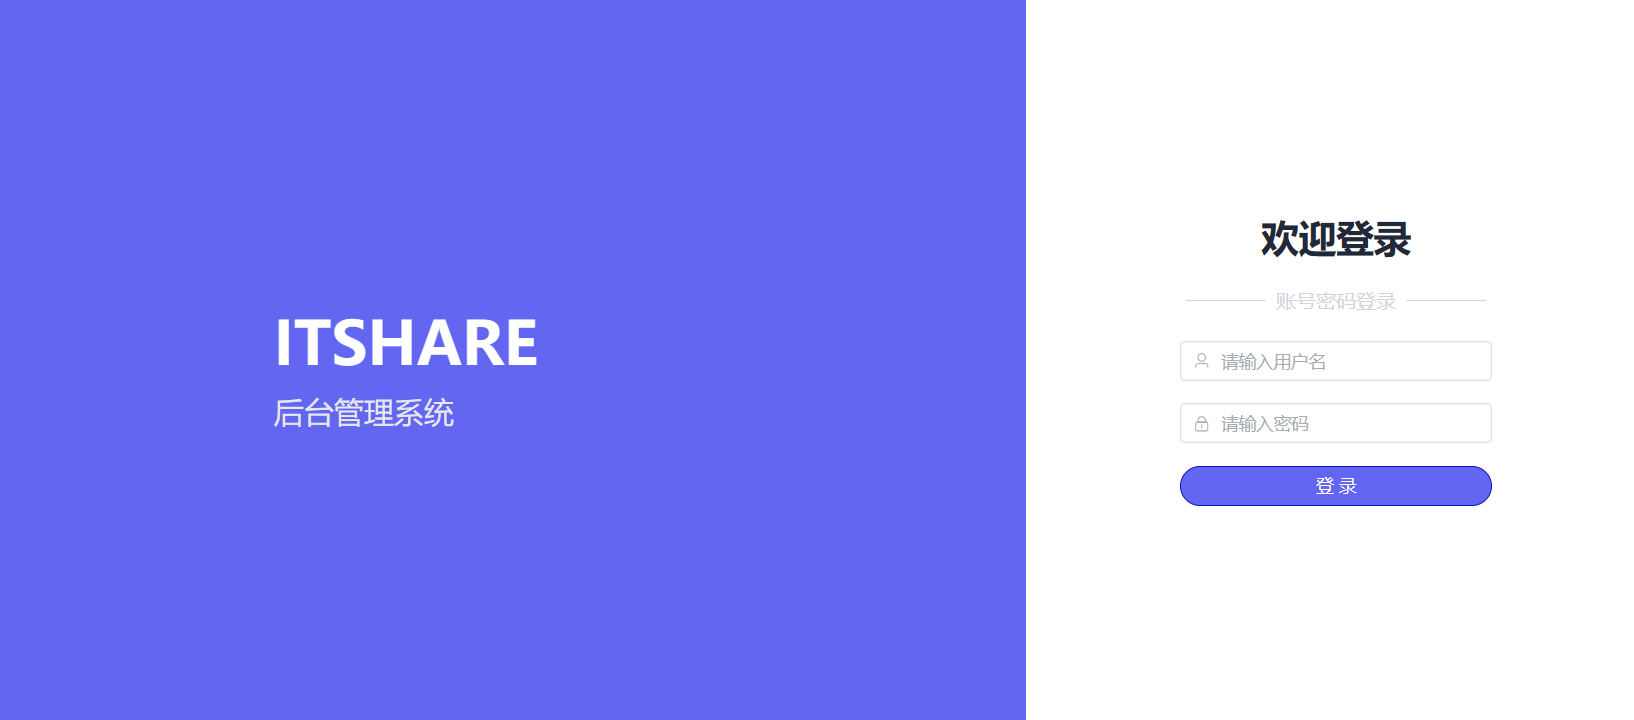
这里我们使用的 ElementPlus UI,为了让我们的页面不至于太 low,简单写了一些样式,大家可以直接复制我的代码,或者自己写可以。最终样式如下图
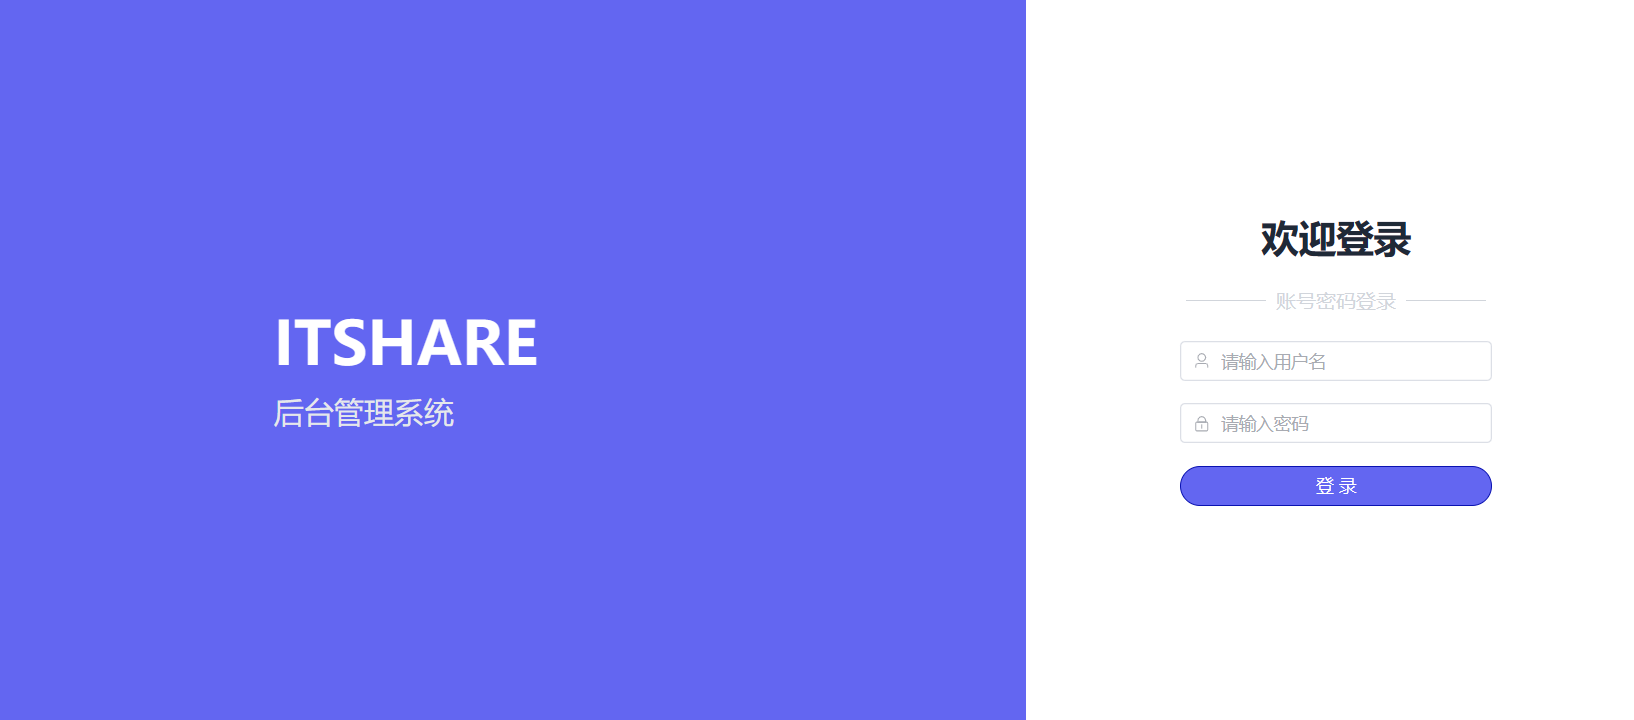
这里会用到一些图标,我们暂时用 element-plus 提供的 ICON
- 下载依赖
npm install @element-plus/icons-vue
- 修改 main.ts
// main.ts// 如果您正在使用CDN引入,请删除下面一行。
import * as ElementPlusIconsVue from '@element-plus/icons-vue'const app = createApp(App)
for (const [key, component] of Object.entries(ElementPlusIconsVue)) {app.component(key, component)
}
4.1 类型定义
因为我们使用的是 Ts ,所以表单对应的数据对象需要给它定义一个类型,这里为了方便后期管理,我们新建一个 /src/types 文件夹,集中管理类型。
新建 login.d.ts,后续和登录有关对象的类型都放这里。
新建登录用户对象类型
// 登录用户对象
export interface LoginDTO {username: stringpassword: string
}
4.2 页面代码编写
这里我就不赘述了,文章结尾我会附上完整代码,主要就是一些样式,表单数据绑定,校验。
<script setup lang="ts">
import type { LoginDTO } from '@/types/login'
import request from '@/utils/request'
import type { FormInstance, FormRules } from 'element-plus'
import { reactive, ref } from 'vue'// 数据绑定对象
const loginDTO = reactive<LoginDTO>({username: 'admin',password: 'admin123456',
})// 加载动画
const loading = ref(false)// 验证规则
const rules = reactive<FormRules>({username: [{ required: true, message: '用户名不能为空', trigger: 'blur' }],password: [{ required: true, message: '密码不能为空', trigger: 'blur' }],
})// 定义表单校验实例 -> 会去匹配 template 中 ref="xxxformRef" 指定的表单元素,拿到指定的对象
const loginFormRef = ref<FormInstance>()const handleLogin = async () => {// 1.加载 loadingloading.value = true// 验证通过后,提交表单const valid = await loginFormRef.value?.validate()// 校验不成功直接 returnif (!valid) {return false}// 请求后端接口request.post('/auth/login', loginDTO).then(res => {console.log(res)}).catch(() => {// 验证失败,重新加载验证码}).finally(() => {// 验证结束,隐藏loadingloading.value = false})
}
</script>
<template><el-row class="login-container"><el-col :span="16" class="left"><div><div>ITSHARE</div><div>后台管理系统</div></div></el-col><el-col :span="8" class="right"><h2 class="title">欢迎登录</h2><div><span class="line"></span><span>账号密码登录</span><span class="line"></span></div><el-form ref="loginFormRef" :model="loginDTO" :rules="rules"><el-form-item prop="username"><el-input v-model="loginDTO.username" placeholder="请输入用户名"><template #prefix><el-icon><user /></el-icon></template></el-input></el-form-item><el-form-item prop="password"><el-inputv-model="loginDTO.password"type="password"placeholder="请输入密码"show-password><template #prefix><el-icon><lock /></el-icon></template></el-input></el-form-item><el-form-item><el-button @click="handleLogin" class="login-button" color="#6366f1" :loading="loading">登 录</el-button></el-form-item></el-form></el-col></el-row>
</template>
<style scoped lang="scss">
.login-container {@apply min-h-screen bg-indigo-500;
}
.login-container .left,
.login-container .right {@apply flex items-center justify-center;
}.login-container .right {@apply bg-white flex-col;
}
.left > div > div:first-child {@apply font-bold text-5xl text-white mb-4;
}
.left > div > div:last-child {@apply text-gray-200 text-2xl;
}.right .title {@apply font-bold text-3xl text-gray-800;
}.right > div {@apply flex items-center justify-center my-5 text-gray-300 space-x-2;
}.right .line {@apply h-[1px] w-16 bg-gray-300;
}
.right > el-form {@apply w-[250px];
}
.login-button {@apply w-[250px];
}
</style>
4.3 测试
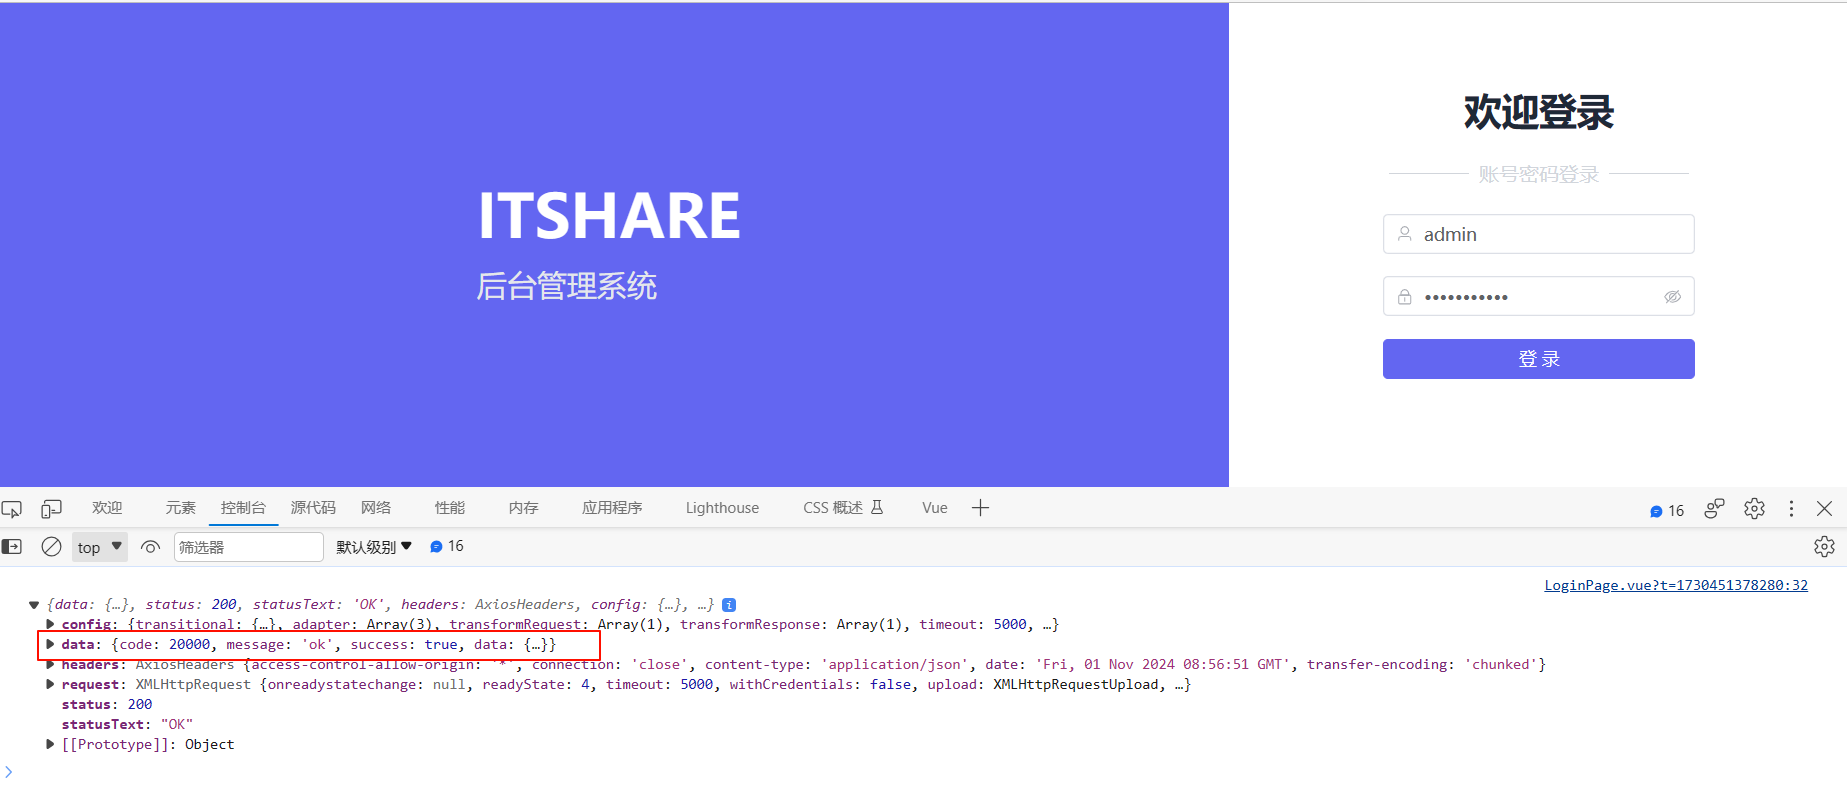
五、总结
首先感谢你能看到这里,你会发现请求的是本地后端接口,你无法测试。你可以私信我,给你完整后端代码,并且如果需要,我可以帮你本地部署,甚至我可以给你开一个远程访问的接口权限。O(∩_∩)O


