目录
自定义导航栏
静态结构
安全区域
通用轮播组件
静态结构
自动导入全局组件
全局组件类型声明
.d.ts文件
注册组件
@vue/runtime-core
首页 – 轮播图指示点
首页 – 获取轮播图数据
首页 – 轮播图数据类型并渲染
首页 – 轮播图总结
首页分类
首页 – 前台分类组件
首页 – 获取前台分类数据
首页 – 前台分类数据类型并渲染
自定义导航栏
参考效果:自定义导航栏的样式需要适配不同的机型。

操作步骤
-
准备组件
-
隐藏默认导航栏,修改文字颜色
-
样式适配 -> 安全区域
静态结构
新建业务组件:src/pages/index/componets/CustomNavbar.vue
<script setup lang="ts">
//
</script><template><view class="navbar"><!-- logo文字 --><view class="logo"><image class="logo-image" src="@/static/images/logo.png"></image><text class="logo-text">新鲜 · 亲民 · 快捷</text></view><!-- 搜索条 --><view class="search"><text class="icon-search">搜索商品</text><text class="icon-scan"></text></view></view>
</template><style lang="scss">
/* 自定义导航条 */
.navbar {background-image: url(@/static/images/navigator_bg.png);background-size: cover;position: relative;display: flex;flex-direction: column;padding-top: 20px;.logo {display: flex;align-items: center;height: 64rpx;padding-left: 30rpx;.logo-image {width: 166rpx;height: 39rpx;}.logo-text {flex: 1;line-height: 28rpx;color: #fff;margin: 2rpx 0 0 20rpx;padding-left: 20rpx;border-left: 1rpx solid #fff;font-size: 26rpx;}}.search {display: flex;align-items: center;justify-content: space-between;padding: 0 10rpx 0 26rpx;height: 64rpx;margin: 16rpx 20rpx;color: #fff;font-size: 28rpx;border-radius: 32rpx;background-color: rgba(255, 255, 255, 0.5);}.icon-search {&::before {margin-right: 10rpx;}}.icon-scan {font-size: 30rpx;padding: 15rpx;}
}
</style>安全区域
不同手机的安全区域不同,适配安全区域能防止页面重要内容被遮挡。
可通过 uni.getSystemInfoSync() 获取屏幕边界到安全区的距离。

核心代码参考
自定义导航配置
// src/pages.json
{"path": "pages/index/index","style": {"navigationStyle": "custom", // 隐藏默认导航"navigationBarTextStyle": "white","navigationBarTitleText": "首页"}
}
组件安全区适配
<!-- src/pages/index/componets/CustomNavbar.vue -->
<script>
// 获取屏幕边界到安全区域距离
const { safeAreaInsets } = uni.getSystemInfoSync()
</script><template><!-- 顶部占位 --><view class="navbar" :style="{ paddingTop: safeAreaInsets?.top + 'px' }"><!-- ...省略 --></view>
</template>
通用轮播组件
参考效果
小兔鲜儿项目中总共有两处广告位,分别位于【首页】和【商品分类页】。
轮播图组件需要在首页和分类页使用,需要封装成通用组件。

静态结构
首页广告布局为独立的组件 XtxSwiper ,位于的 src/components 目录中。
该组件定义了 list 属性接收外部传入的数据,内部通过小程序内置组件 swiper 展示首页广告的数据。
轮播图组件
静态结构:src/components/XtxSwiper.vue
<script setup lang="ts">
import { ref } from 'vue'const activeIndex = ref(0)
</script><template><view class="carousel"><swiper :circular="true" :autoplay="false" :interval="3000"><swiper-item><navigator url="/pages/index/index" hover-class="none" class="navigator"><imagemode="aspectFill"class="image"src="https://pcapi-xiaotuxian-front-devtest.itheima.net/miniapp/uploads/slider_1.jpg"></image></navigator></swiper-item><swiper-item><navigator url="/pages/index/index" hover-class="none" class="navigator"><imagemode="aspectFill"class="image"src="https://pcapi-xiaotuxian-front-devtest.itheima.net/miniapp/uploads/slider_2.jpg"></image></navigator></swiper-item><swiper-item><navigator url="/pages/index/index" hover-class="none" class="navigator"><imagemode="aspectFill"class="image"src="https://pcapi-xiaotuxian-front-devtest.itheima.net/miniapp/uploads/slider_3.jpg"></image></navigator></swiper-item></swiper><!-- 指示点 --><view class="indicator"><textv-for="(item, index) in 3":key="item"class="dot":class="{ active: index === activeIndex }"></text></view></view>
</template><style lang="scss">
:host {display: block;height: 280rpx;
}
/* 轮播图 */
.carousel {height: 100%;position: relative;overflow: hidden;transform: translateY(0);background-color: #efefef;.indicator {position: absolute;left: 0;right: 0;bottom: 16rpx;display: flex;justify-content: center;.dot {width: 30rpx;height: 6rpx;margin: 0 8rpx;border-radius: 6rpx;background-color: rgba(255, 255, 255, 0.4);}.active {background-color: #fff;}}.navigator,.image {width: 100%;height: 100%;}
}
</style>
自动导入全局组件
参考配置
{// 组件自动引入规则"easycom": {// 是否开启自动扫描 @/components/$1/$1.vue 组件"autoscan": true,// 以正则方式自定义组件匹配规则"custom": {// uni-ui 规则如下配置"^uni-(.*)": "@dcloudio/uni-ui/lib/uni-$1/uni-$1.vue",// 以 Xtx 开头的组件,在 components 目录中查找"^Xtx(.*)": "@/components/Xtx$1.vue"}}
}
全局组件类型声明
.d.ts文件
在 TypeScript 中,.d.ts 文件是用来描述 JavaScript 模块或库的声明文件。这些声明文件用于提供类型信息,使得 TypeScript 在引用外部 JavaScript 库时可以获得类型检查和代码提示的支持。
声明文件通常以.d.ts为扩展名,并与相应的 JavaScript 文件相对应。它们用于描述库的类型定义和类型推断规则,以及函数、类、接口和变量的声明。
下面是一个用于声明一个简单 JavaScript 模块的 .d.ts 文件的示例:
// myModule.d.ts// 导出一个函数的声明
export function myFunction(param: string): void;// 导出一个类的声明
export class MyClass {constructor(name: string);sayHello(): void;
}// 导出一个接口的声明
export interface MyInterface {id: number;name: string;
}// 导出一个变量的声明
export const myVariable: number;
在上述例子中,我们声明了一个名为myModule的模块,其中包含一个导出函数myFunction,一个导出类MyClass,一个导出接口MyInterface和一个导出变量myVariable。
这个声明文件可以被其他 TypeScript 文件引入和使用:
// index.tsimport { myFunction, MyClass, MyInterface, myVariable } from './myModule';myFunction('Hello'); // 类型检查
const instance = new MyClass('John'); // 类型检查
instance.sayHello(); // 类型检查
const obj: MyInterface = { id: 1, name: 'John' }; // 类型检查
console.log(myVariable); // 类型检查
通过引入声明文件,TypeScript 可以提供类型检查和自动补全的功能,从而帮助开发者在编写代码过程中减少错误,并提高代码的可维护性。
总结来说,.d.ts 文件是用来提供 JavaScript 模块或库的类型信息的。它们描述了函数、类、接口和变量的声明,使得 TypeScript 能够对外部 JavaScript 代码进行类型检查和代码提示。
注册组件
Volor 插件说明:Vue Language Tools![]() https://github.com/vuejs/language-tools
https://github.com/vuejs/language-tools
这段代码是一个声明模块的代码,它引入了一个名为XtxSwiper的Vue组件,并将其注册为全局组件。具体来说,代码的功能如下:
-
import XtxSwiper from './XtxSwiper.vue':这行代码引入了一个名为XtxSwiper的Vue组件,该组件可能是一个图片轮播组件或其他类型的组件。 -
declare module '@vue/runtime-core':这行代码声明了一个模块,并指定其名称为"@vue/runtime-core"。 -
{ export interface GlobalComponents { XtxSwiper: typeof XtxSwiper } }:这行代码在声明的模块中定义了一个接口GlobalComponents,该接口包含了一个XtxSwiper属性。这个XtxSwiper属性的类型是typeof XtxSwiper,表示它与之前引入的XtxSwiper组件具有相同的类型。
// src/types/components.d.ts
import XtxSwiper from './XtxSwiper.vue’
declare module '@vue/runtime-core' {export interface GlobalComponents {XtxSwiper: typeof XtxSwiper}
}
@vue/runtime-core
@vue/runtime-core 是 Vue.js 框架的运行时核心库。在 Vue.js 中,有两个主要的库:编译时(compiler)和运行时(runtime)。编译时负责将模板转换为渲染函数,而运行时则负责实际的渲染、组件管理等。
@vue/runtime-core 是 Vue 3 中运行时的核心部分,它包含了实际执行渲染、响应式系统、虚拟 DOM 和其他运行时相关的功能。Vue 3 使用了模块化的方式来组织这些功能,因此你会在代码中看到像 @vue/runtime-core 这样的模块引用。
在你的代码示例中,通过声明模块 @vue/runtime-core,你可以扩展 Vue 运行时的全局类型和功能,以便让类型检查器和编辑器能够正确地理解和处理这些扩展。具体到你的代码,它在全局注册了一个名为 XtxSwiper 的组件,使得在整个应用中都可以直接使用这个组件,而不需要在每个单独的组件中都进行导入和注册。
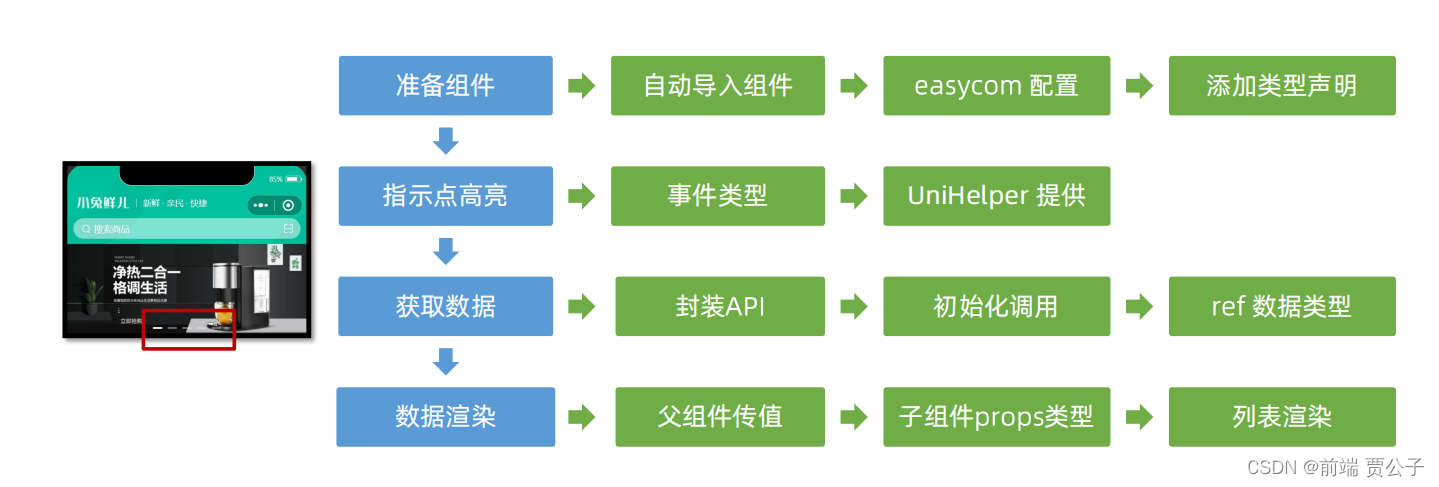
首页 – 轮播图指示点
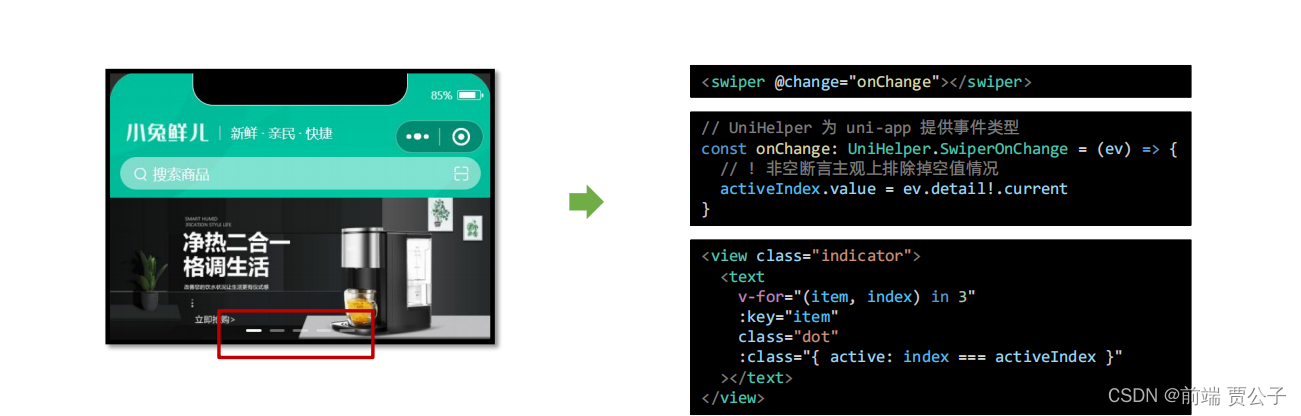
- UniHelper 提供事件类型,文档说明
- ?(可选链) 允许前面表达式为空值
- !(非空断言) 主观上排除掉空值情况
    <view class="indicator"><textv-for="(item, index) in 3":key="item"class="dot":class="{ active: index === activeIndex }"></text></view>
const activeIndex = ref(0);
const onChange: UniHelper.SwiperOnChange = (ev) => {// ! 非空断言,主观上排除掉空值情况activeIndex.value = ev.detail!.current;
};
首页 – 获取轮播图数据

export const getHomeBannerAPI = (distributionSite = 1) => {return http<BannerItem[]>({method: 'GET',url: '/home/banner',data: {distributionSite,},})
}import { onLoad } from '@dcloudio/uni-app'
import { getHomeBannerAPI } from '@/services/home'
import type { BannerItem } from '@/types/home'
import { ref } from 'vue'
const bannerList = ref<BannerItem[]>([])
const getHomeBannerData = async () => {const res = await getHomeBannerAPI()console.log(res)bannerList.value = res.resultconsole.log(bannerList.value)
}
onLoad(() => {getHomeBannerData()
})首页 – 轮播图数据类型并渲染

/** 首页-广告区域数据类型 */
export type BannerItem = {/** 跳转链接 */hrefUrl: string/** id */id: string/** 图片链接 */imgUrl: string/** 跳转类型 */type: number
}
<XtxSwiper :list="bannerList" />3. 渲染轮播图数据
defineProps<{list: BannerItem[]
}>()<swiper:circular="true":autoplay="false":interval="3000"@change="onChange"><swiper-item v-for="item in list" :key="item.id"><navigatorurl="/pages/index/index"hover-class="none"class="navigator"><image mode="aspectFill" class="image" :src="item.imgUrl"></image></navigator></swiper-item></swiper>
首页 – 轮播图总结
首页分类
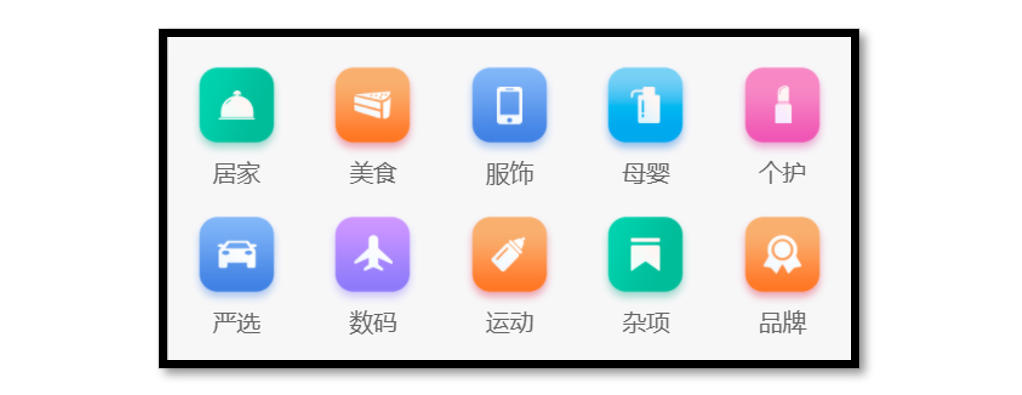
首页 – 前台分类组件
准备工作
- 准备组件,只有首页使用
前台类目布局为独立的组件 CategoryPanel属于首页的业务组件,存放到首页的 components 目录中。
<script setup lang="ts">
//
</script><template><view class="category"><navigatorclass="category-item"hover-class="none"url="/pages/index/index"v-for="item in 10":key="item"><imageclass="icon"src="https://pcapi-xiaotuxian-front-devtest.itheima.net/miniapp/images/nav_icon_1.png"></image><text class="text">居家</text></navigator></view>
</template><style lang="scss">
/* 前台类目 */
.category {margin: 20rpx 0 0;padding: 10rpx 0;display: flex;flex-wrap: wrap;min-height: 328rpx;.category-item {width: 150rpx;display: flex;justify-content: center;flex-direction: column;align-items: center;box-sizing: border-box;.icon {width: 100rpx;height: 100rpx;}.text {font-size: 26rpx;color: #666;}}
}
</style>- 导入并使用组件
import CategoryPanel from "./componets/CategoryPanel.vue";<CategoryPanel />- 设置首页底色为
#F7F7F7
<style lang="scss">
page {background-color: #f7f7f7;
}
</style>
首页 – 获取前台分类数据
1. 封装获取前台分类数据API
/*** 首页-前台分类-小程序*/
export const getHomeCategoryAPI = () => {return http<CategoryItem[]>({method: 'GET',url: '/home/category/mutli',})
}
2. 页面初始化调用API
import type {  CategoryItem } from "@/types/home";
import { getHomeCategoryAPI } from "@/services/home";
import { onLoad } from "@dcloudio/uni-app";
import { ref } from "vue";
const categoryList = ref<CategoryItem[]>([]);
const getHomeCategoryData = async () => {const res = await getHomeCategoryAPI();categoryList.value = res.result;console.log(res);
};
onLoad(() => {getHomeCategoryData();
});
首页 – 前台分类数据类型并渲染
1. 定义前台分类数据类型
export type CategoryItem = {/** 图标路径 */icon: string/** id */id: string/** 分类名称 */name: string
}
2. 指定类型并传值给子组件
<CategoryPanel :list="categoryList" />
import type { CategoryItem } from "@/types/home";
defineProps<{list: CategoryItem[];
}>();
3. 渲染前台分类数据
<view class="category"><navigator class="category-item" v-for="item in list" :key="item.id"><image class="icon" :src="item.icon" mode="aspectFit"></image><text class="text">{{ item.name }}</text></navigator></view>