文章目录
- Available Plugins
- 开源项目中的使用
- 插件介绍
- maven-jar-plugin
- maven-assembly-plugin
- maven-shade-plugin
- Shade 插件 - 标签
- artifactSet
- relocations
- filters
- 完整配置
Available Plugins
https://maven.apache.org/plugins/index.html
Maven 是一个开源的软件构建工具,它支持多种插件,用于帮助开发人员更方便地管理构建过程中所需的各种资源。以下是一些常用的 Maven 插件:
- Maven-clean-plugin:用于清除项目目录中的垃圾文件和临时文件。
- Maven-compile-plugin:用于编译项目源代码,生成目标代码。
- Maven-dependency-plugin:用于管理项目依赖关系,可以自动下载依赖库,并解决依赖冲突。
- Maven-jar-plugin:用于打包项目,生成 JAR 文件。
- Maven-javadoc-plugin:用于生成项目 Javadoc 文档。
- Maven-install-plugin:用于安装项目依赖库,可以将依赖库安装到本地仓库中。
- Maven-deploy-plugin:用于部署项目,可以将项目打包成可执行的包,并上传到远程仓库中。
- Maven-site-plugin:用于生成项目网站,可以自动生成 HTML 文档,并上传到远程仓库中。
- Maven-scm-plugin:用于管理项目版本,可以与版本控制系统集成,实现代码的版本控制。
- Maven-release-plugin:用于发布项目,可以将项目打包成可执行的包,并上传到远程仓库中,同时发布版本更新信息。
这些插件可以帮助开发人员更方便地管理构建过程中所需的各种资源,提高软件构建的效率和质量。
开源项目中的使用
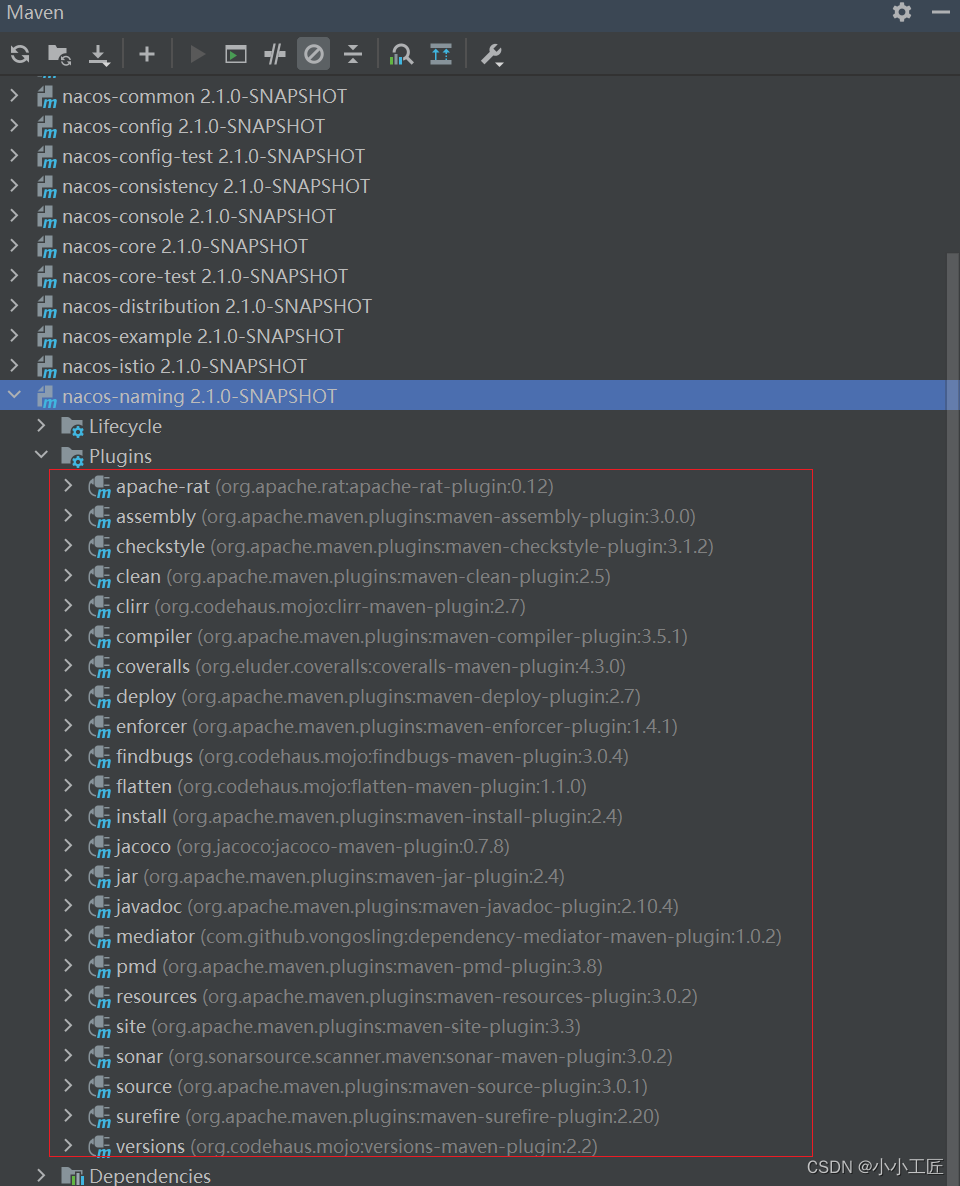
我们来看下nacos这个开源项目的plugin是如何使用的。 不得不说还是非常丰富的 。
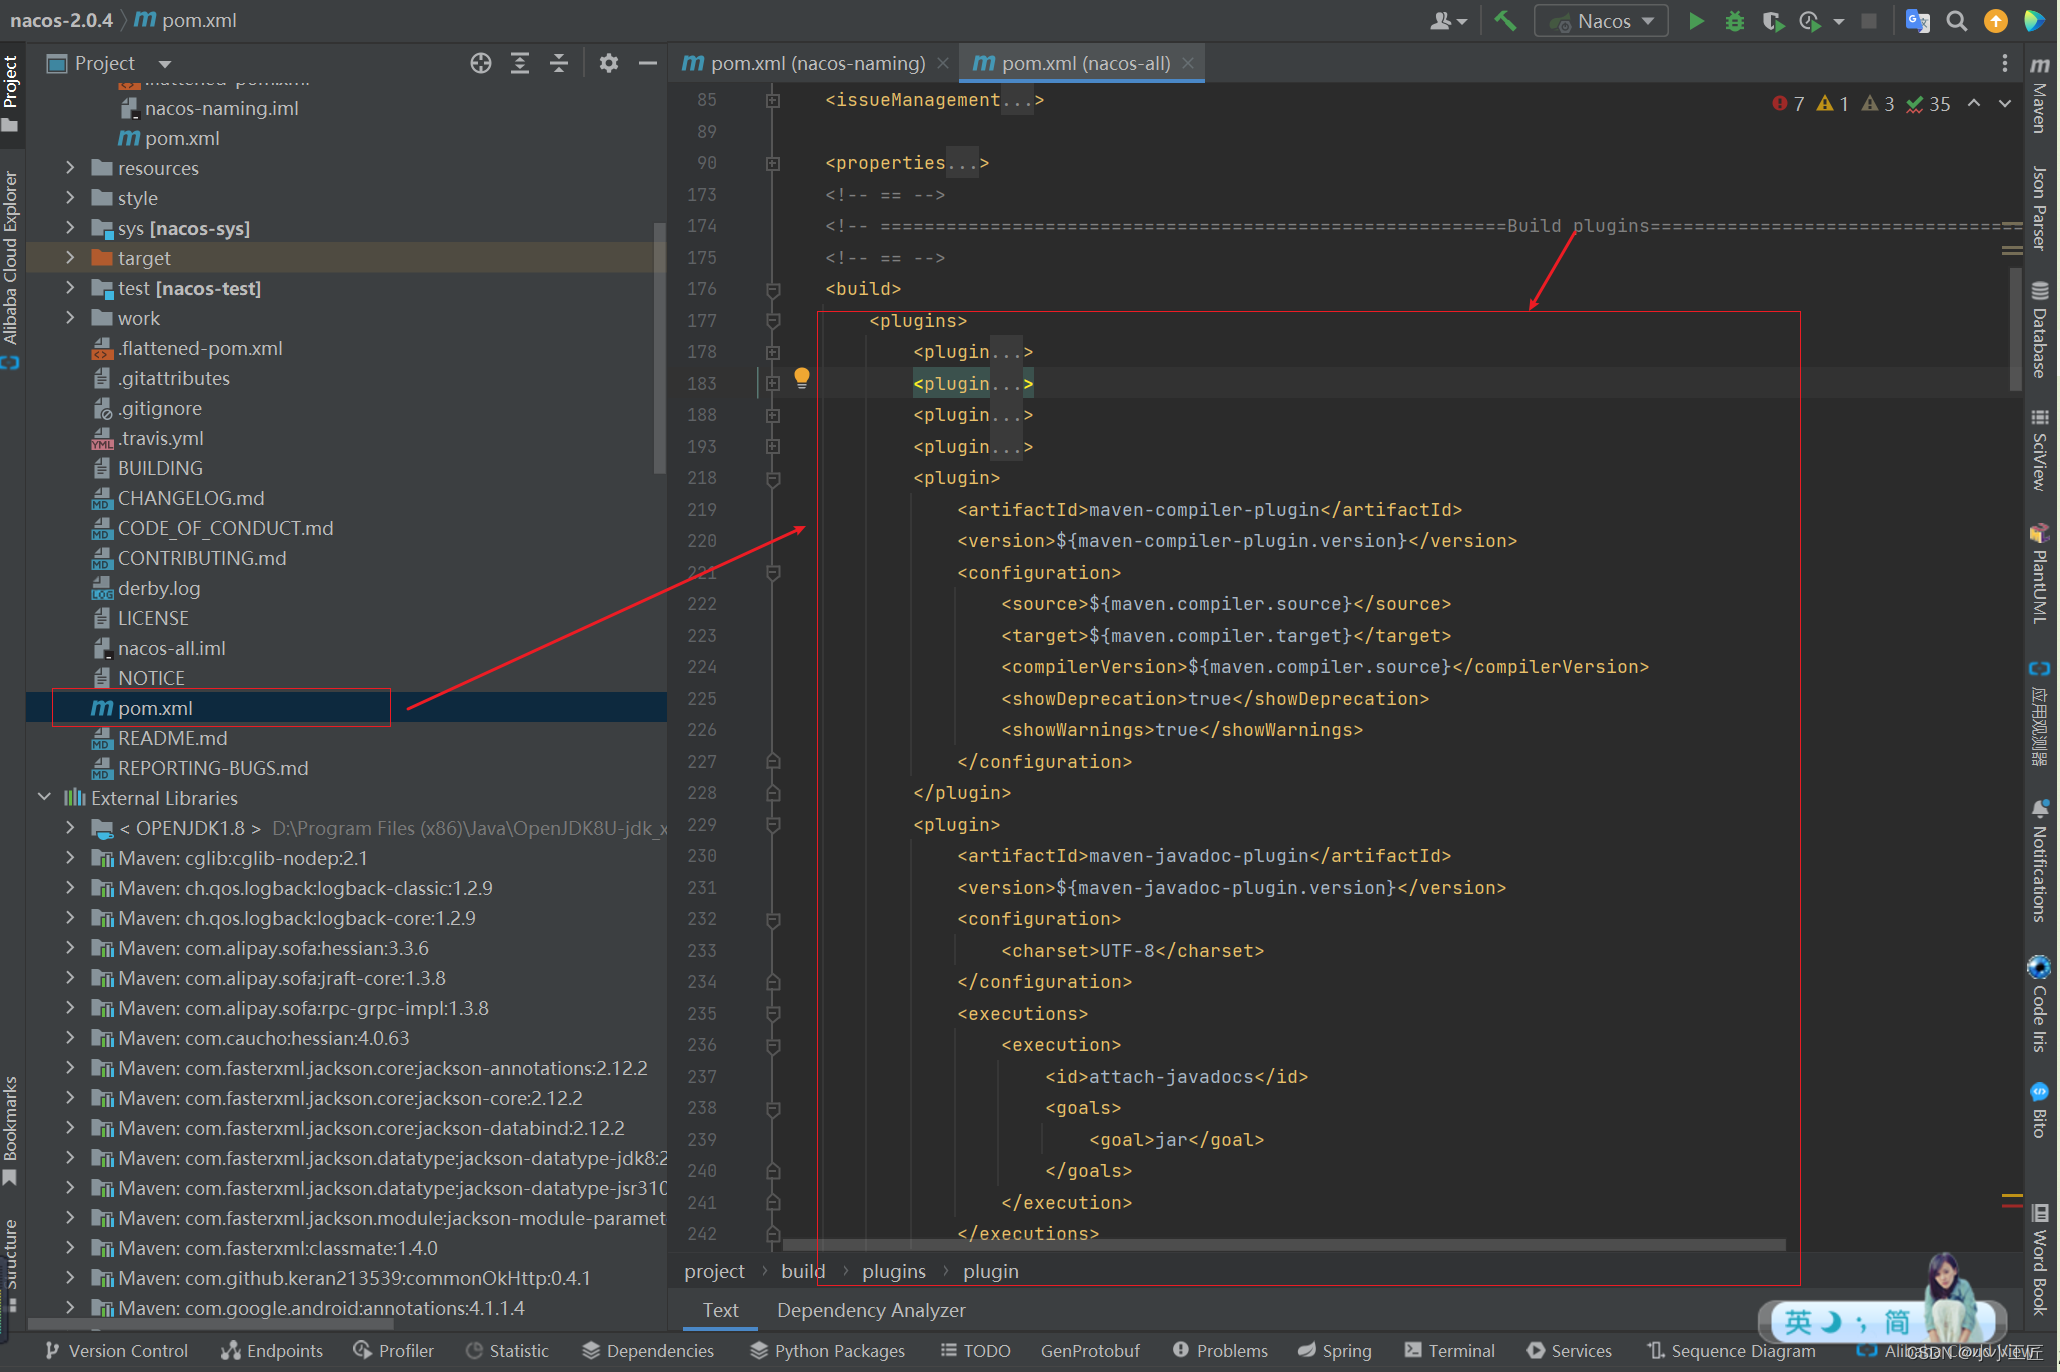
<!-- =========================================================Build plugins================================================ --><!-- == --><build><plugins><plugin><groupId>org.codehaus.mojo</groupId><artifactId>versions-maven-plugin</artifactId><version>${versions-maven-plugin.version}</version></plugin><plugin><groupId>com.github.vongosling</groupId><artifactId>dependency-mediator-maven-plugin</artifactId><version>${dependency-mediator-maven-plugin.version}</version></plugin><plugin><groupId>org.codehaus.mojo</groupId><artifactId>clirr-maven-plugin</artifactId><version>${clirr-maven-plugin.version}</version></plugin><plugin><artifactId>maven-enforcer-plugin</artifactId><version>${maven-enforcer-plugin.version}</version><executions><execution><id>enforce-ban-circular-dependencies</id><goals><goal>enforce</goal></goals></execution></executions><configuration><rules><banCircularDependencies/></rules><fail>true</fail></configuration><dependencies><dependency><groupId>org.codehaus.mojo</groupId><artifactId>extra-enforcer-rules</artifactId><version>${extra-enforcer-rules.version}</version></dependency></dependencies></plugin><plugin><artifactId>maven-compiler-plugin</artifactId><version>${maven-compiler-plugin.version}</version><configuration><source>${maven.compiler.source}</source><target>${maven.compiler.target}</target><compilerVersion>${maven.compiler.source}</compilerVersion><showDeprecation>true</showDeprecation><showWarnings>true</showWarnings></configuration></plugin><plugin><artifactId>maven-javadoc-plugin</artifactId><version>${maven-javadoc-plugin.version}</version><configuration><charset>UTF-8</charset></configuration><executions><execution><id>attach-javadocs</id><goals><goal>jar</goal></goals></execution></executions></plugin><plugin><artifactId>maven-source-plugin</artifactId><version>${maven-source-plugin.version}</version><executions><execution><id>attach-sources</id><goals><goal>jar</goal></goals></execution></executions></plugin><plugin><groupId>org.apache.maven.plugins</groupId><artifactId>maven-pmd-plugin</artifactId><version>${maven-pmd-plugin.version}</version><configuration><rulesets><ruleset>rulesets/java/ali-comment.xml</ruleset><ruleset>rulesets/java/ali-concurrent.xml</ruleset><ruleset>rulesets/java/ali-constant.xml</ruleset><ruleset>rulesets/java/ali-exception.xml</ruleset><ruleset>rulesets/java/ali-flowcontrol.xml</ruleset><ruleset>rulesets/java/ali-naming.xml</ruleset><ruleset>rulesets/java/ali-oop.xml</ruleset><ruleset>rulesets/java/ali-orm.xml</ruleset><ruleset>rulesets/java/ali-other.xml</ruleset><ruleset>rulesets/java/ali-set.xml</ruleset></rulesets><printFailingErrors>true</printFailingErrors><excludes><exclude>**/consistency/entity/*.java</exclude><exclude>**/istio/model/mcp/*.java</exclude><exclude>**/istio/model/naming/*.java</exclude><exclude>**/istio/model/*.java</exclude><exclude>**/api/grpc/auto/*.java</exclude><exclude>**/istio/mcp/**</exclude><exclude>**/istio/networking/**</exclude><exclude>**/google/protobuf/**</exclude></excludes></configuration><executions><execution><goals><goal>check</goal></goals></execution></executions><dependencies><dependency><groupId>com.alibaba.p3c</groupId><artifactId>p3c-pmd</artifactId><version>${p3c-pmd.version}</version></dependency></dependencies></plugin><plugin><groupId>org.apache.maven.plugins</groupId><artifactId>maven-checkstyle-plugin</artifactId><version>${maven-checkstyle-plugin.version}</version><configuration><configLocation>style/NacosCheckStyle.xml</configLocation><includeTestSourceDirectory>true</includeTestSourceDirectory><encoding>UTF-8</encoding><consoleOutput>true</consoleOutput><failsOnError>true</failsOnError><excludes>**/consistency/entity/**,**/nacos/test/**,**/api/grpc/auto/**,**/istio/**,**/protobuf/**</excludes></configuration><executions><execution><id>validate</id><phase>validate</phase><goals><goal>check</goal></goals></execution></executions></plugin><plugin><groupId>org.apache.rat</groupId><artifactId>apache-rat-plugin</artifactId><version>${apache-rat-plugin.version}</version><configuration><excludes><exclude>.editorconfig</exclude><exclude>.travis.yml</exclude><exclude>CONTRIBUTING.md</exclude><exclude>CODE_OF_CONDUCT.md</exclude><exclude>CHANGELOG.md</exclude><exclude>style/codeStyle.md</exclude><exclude>REPORTING-BUGS.md</exclude><exclude>README.md</exclude><exclude>.github/**/*</exclude><exclude>doc/*</exclude><exclude>derby.log</exclude><exclude>logs/*</exclude><exclude>src/main/resources/static/**</exclude><exclude>**/istio/model/**</exclude><exclude>**/consistency/entity/**</exclude><exclude>**/*.txt</exclude><exclude>**/*.factories</exclude><exclude>/console-ui/**</exclude><exclude>**/gogo.proto</exclude><exclude>**/any.proto</exclude></excludes></configuration><executions><execution><phase>verify</phase><goals><goal>check</goal></goals></execution></executions></plugin><plugin><artifactId>maven-resources-plugin</artifactId><version>${maven-resources-plugin.version}</version><configuration><!-- We are not suppose to setup the customer resources here --><encoding>${project.build.sourceEncoding}</encoding></configuration></plugin><plugin><groupId>org.eluder.coveralls</groupId><artifactId>coveralls-maven-plugin</artifactId><version>${coveralls-maven-plugin.version}</version></plugin><plugin><groupId>org.jacoco</groupId><artifactId>jacoco-maven-plugin</artifactId><version>${jacoco-maven-plugin.version}</version><executions><execution><id>default-prepare-agent</id><goals><goal>prepare-agent</goal></goals><configuration><destFile>${project.build.directory}/jacoco.exec</destFile></configuration></execution><execution><id>default-prepare-agent-integration</id><phase>pre-integration-test</phase><goals><goal>prepare-agent-integration</goal></goals><configuration><destFile>${project.build.directory}/jacoco-it.exec</destFile><propertyName>failsafeArgLine</propertyName></configuration></execution><execution><id>default-report</id><goals><goal>report</goal></goals></execution><execution><id>default-report-integration</id><goals><goal>report-integration</goal></goals></execution></executions></plugin><plugin><artifactId>maven-surefire-plugin</artifactId><version>${maven-surefire-plugin.version}</version></plugin><plugin><groupId>org.codehaus.mojo</groupId><artifactId>findbugs-maven-plugin</artifactId><version>${findbugs-maven-plugin.version}</version></plugin><plugin><groupId>org.sonarsource.scanner.maven</groupId><artifactId>sonar-maven-plugin</artifactId><version>${sonar-maven-plugin.version}</version></plugin><plugin><groupId>org.apache.maven.plugins</groupId><artifactId>maven-assembly-plugin</artifactId><version>${maven-assembly-plugin.version}</version></plugin><plugin><groupId>org.codehaus.mojo</groupId><artifactId>flatten-maven-plugin</artifactId><version>${maven-flatten-version}</version><configuration><updatePomFile>true</updatePomFile><flattenMode>resolveCiFriendliesOnly</flattenMode><pomElements><dependencies>expand</dependencies></pomElements></configuration><executions><execution><id>flatten</id><phase>process-resources</phase><goals><goal>flatten</goal></goals></execution><execution><id>flatten.clean</id><phase>clean</phase><goals><goal>clean</goal></goals></execution></executions></plugin></plugins></build>
插件介绍
maven-jar-plugin
https://maven.apache.org/plugins/maven-jar-plugin/
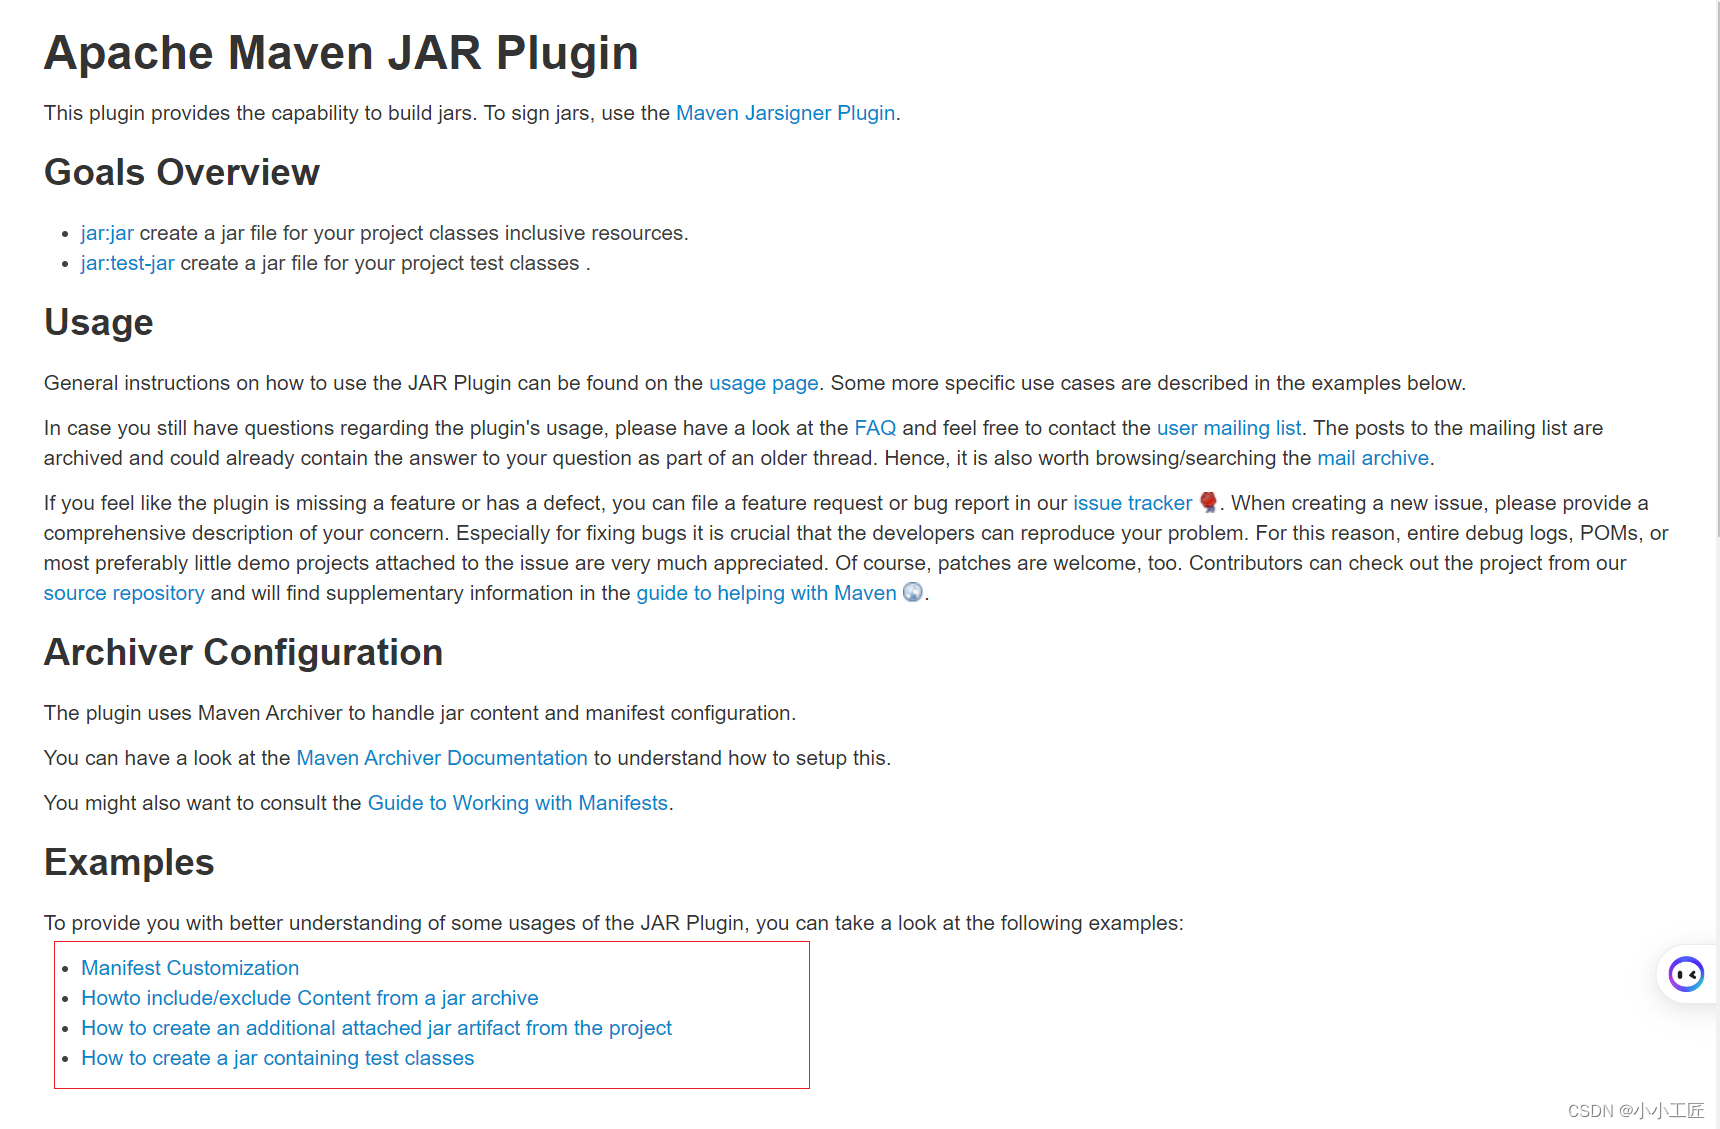
maven-jar-plugin 是 Maven 的一个插件,用于创建 JAR 文件。它可以将项目的源代码、依赖项和配置文件打包成一个 JAR 文件,以便在应用程序中使用。该插件使用 Apache Maven 的默认构建系统,因此可以使用 Maven 的所有功能,如依赖项管理、构建脚本等。
使用 maven-jar-plugin 的主要优点是可以轻松地创建 JAR 文件,而不必手动编写 Ant 脚本或使用其他工具。此外,该插件还支持一些高级功能,如资源过滤、代码混淆和 Javadoc 文档生成等。这些功能可以使 JAR 文件更加强大和易于使用。
maven-jar-plugin 通常与 Maven 的其他插件一起使用,如 maven-compiler-plugin 和 maven-resources-plugin,以构建复杂的应用程序。例如,可以使用 maven-jar-plugin 将编译后的源代码打包成 JAR 文件,并使用 maven-resources-plugin 将资源文件打包成 JAR 文件。
这些插件可以一起使用,以构建具有各种功能和依赖项的应用程序。
假设我们要创建一个名为my-project的 JAR 文件,其中包含项目中的源代码、依赖项和一些资源文件。我们可以使用 maven-jar-plugin 来完成这个任务。以下是一个具体的使用案例:
- 首先,在 Maven 项目中添加 maven-jar-plugin 插件。在
pom.xml文件中的<build>标签内添加以下内容:
<build>  <plugins>  <plugin>  <groupId>org.apache.maven.plugins</groupId>  <artifactId>maven-jar-plugin</artifactId>  <version>3.2</version>  <executions>  <execution>  <goals>  <goal>jar</goal>  </goals>  </execution>  </executions>  </plugin>  </plugins>
</build>
- 配置
maven-jar-plugin的参数。在<execution>标签内,我们可以添加以下内容:
<execution>  <goals>  <goal>jar</goal>  </goals>  <configuration>  <artifactId>my-project</artifactId>  <version>1.0</version>  <includes>  <include>src/main/java/**</include>  <include>src/main/resources/**</include>  </includes>  </configuration>
</execution>
在这个例子中,我们设置了artifactId为my-project,version为1.0。此外,我们还指定了要包含的源代码和资源文件的路径。
- 执行 Maven 构建。在项目根目录下运行以下命令:
mvn clean package
这将清理项目目录并构建 JAR 文件。
- 查看生成的 JAR 文件。在
target目录下,你应该会看到生成的my-project-1.0.jar文件。
通过这个案例,我们已经成功地使用 maven-jar-plugin 创建了一个 JAR 文件,其中包含项目的源代码和资源文件。这个例子展示了如何简单地使用 maven-jar-plugin 来打包 Maven 项目。在实际项目中,你可能还需要配置其他参数以满足不同的需求。
看个 nacos的类似的配置
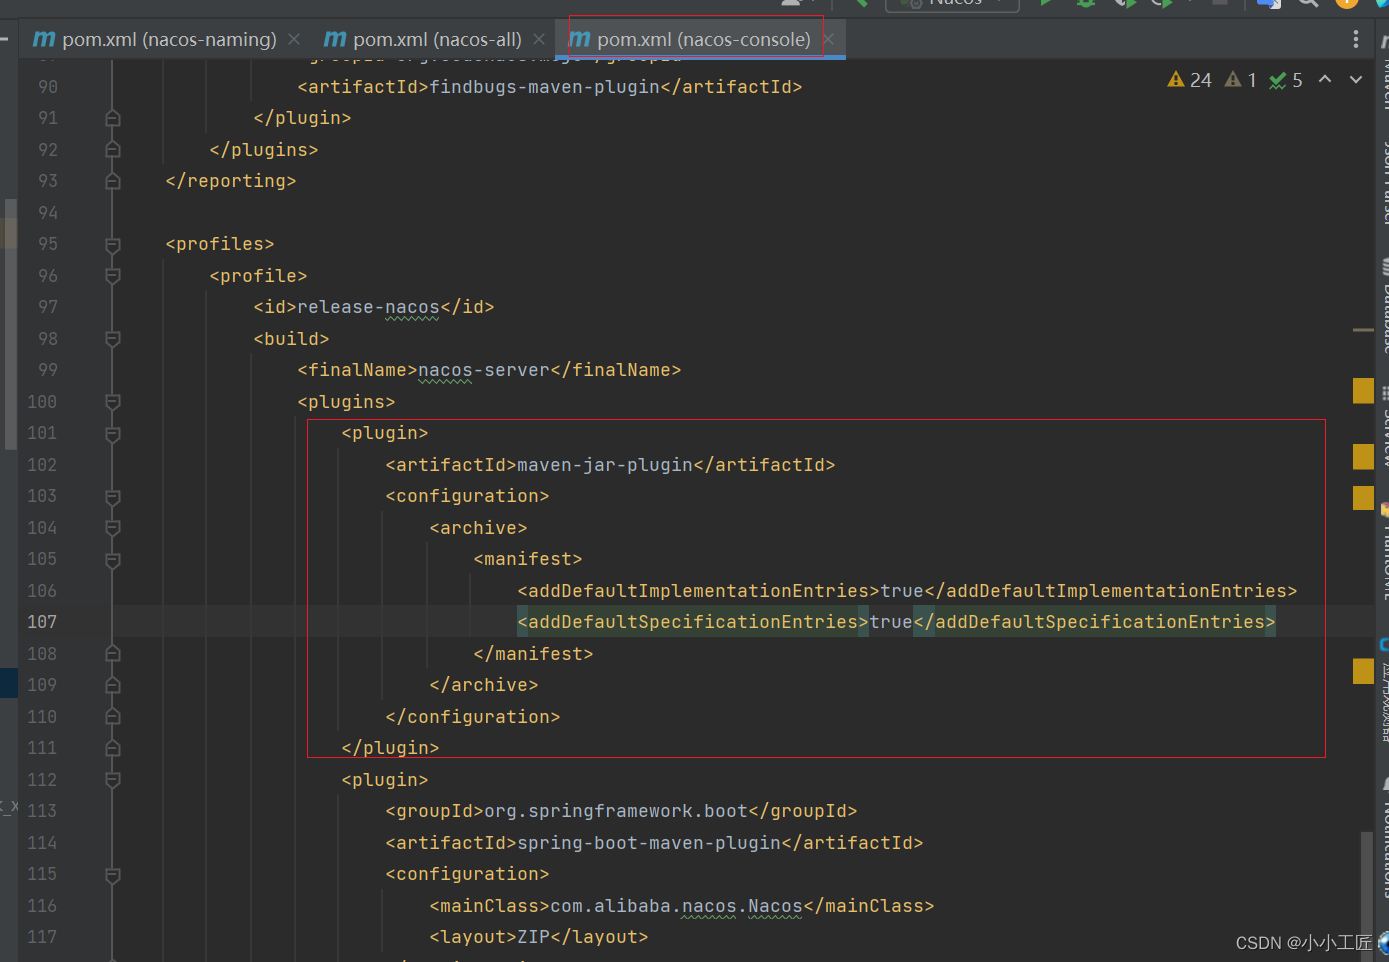
这段代码是在pom.xml中的<build>标签内添加了一个maven-jar-plugin插件的配置。以下是各个部分的解释:
<plugin>:开始定义一个插件。<artifactId>maven-jar-plugin</artifactId>:指定插件的 artifactId 为maven-jar-plugin`。<configuration>:开始定义插件的配置。<archive>:开始定义归档(archive)配置。<manifest>:开始定义 manifest 配置。<addDefaultImplementationEntries>true</addDefaultImplementationEntries>:设置为true以在 manifest 中添加默认实现入口。这将告诉 Java 运行时使用指定的类(通常是main` 类)作为应用程序的入口点。<addDefaultSpecificationEntries>true</addDefaultSpecificationEntries>:设置为true以在 manifest 中添加默认规范入口。这将告诉 Java 运行时使用指定的类(通常是main` 类)作为应用程序的入口点,同时还会添加一些额外的规范信息。- :结束 manifest 配置。
- :结束归档(archive)配置。
- :结束插件的配置。
- :结束插件的定义。
这个插件配置的主要目的是设置 JAR 文件的 manifest,以便在运行时使用指定的类作为应用程序的入口点。通过添加默认实现入口和默认规范入口,可以确保应用程序能够正确地运行并提供一些额外的规范信息。这通常用于创建可执行 JAR 文件,其中包含应用程序的主类。
再看个类似的配置
<plugin>  <groupId>org.apache.maven.plugins</groupId>  <artifactId>maven-jar-plugin</artifactId>  <version>2.3.1</version>  <configuration>  <archive>  <manifest>  <mainClass>com.artisan.MyTest</mainClass> <addDefaultSpecificationEntries>true</addDefaultSpecificationEntries><addDefaultImplementationEntries>true</addDefaultImplementationEntries> </manifest><!-- 配置额外属性信息 --><manifestEntries>  <Plugin-Id>demo-plugin</Plugin-Id>  <Plugin-Version>1.0.0</Plugin-Version>  </manifestEntries>  </archive>  </configuration>
</plugin>
在之前的工程 POM 文件中添加上述构建插件重新进行打包,可以看到 MANIFEST.MF 文件中即添加了我们配置的额外属性。
Manifest-Version: 1.0
Archiver-Version: Plexus Archiver
Created-By: Apache Maven
Built-By: great
Build-Jdk: 1.8.0_202
# Specification entries
Specification-Title: maven-v1
Specification-Version: 1.0-SNAPSHOT
# Implementation entries
Implementation-Title: maven-v1
Implementation-Version: 1.0-SNAPSHOT
Implementation-Vendor-Id: com.artisan
# Manifest
Main-Class: com.artisan.MyTest
# ManifestEntries
Plugin-Id: demo-plugin
Plugin-Version: 1.0.0
maven-assembly-plugin
https://maven.apache.org/plugins/maven-assembly-plugin/

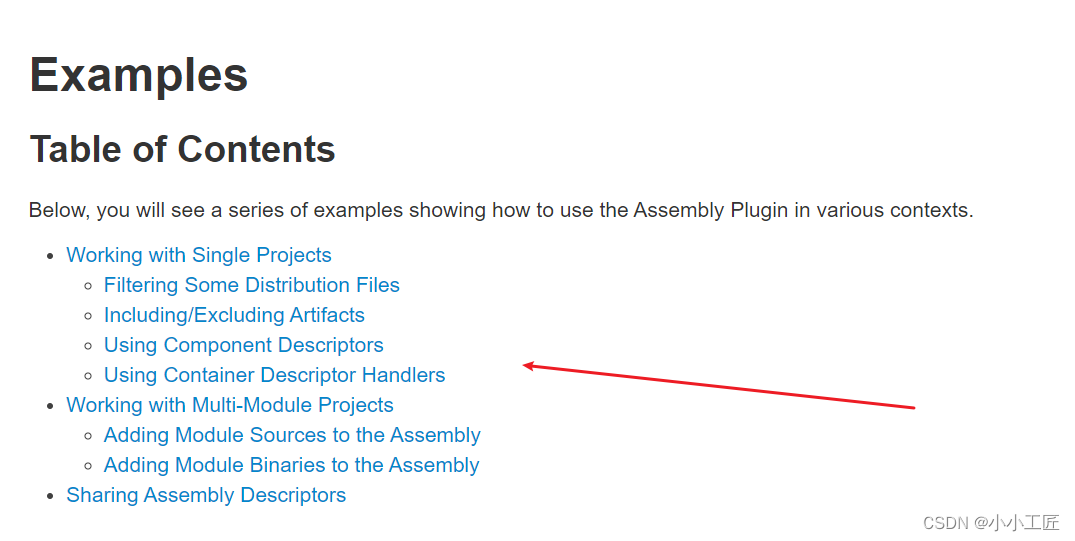
https://maven.apache.org/plugins/maven-assembly-plugin/examples/index.html
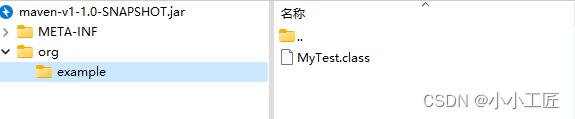
在普通 Maven 工程打包时默认仅会编译工程中新建的 java 文件并存储其 .class 文件,对于 POM 文件中引用的第三方依赖并不会一同打包。
如新建一个 Maven 工程并在依赖中导入 Jackson 依赖库并进行打包编译,可以看到下图编译后的 JAR 文件中只有工程中新建的 MyTest.class 文件,项目中所导入的依赖并没有被一起打包 .
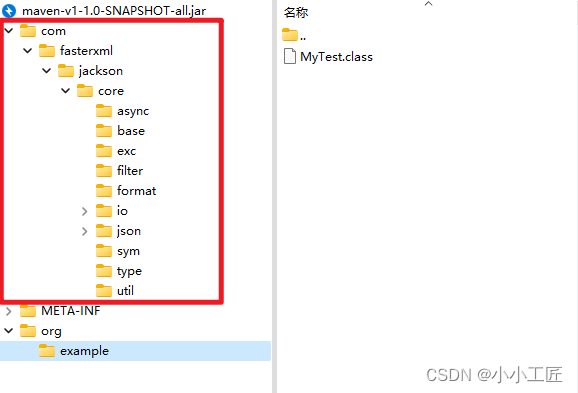
而通过 assembly 插件即可将 POM 配置中的所有依赖一同打包编译至 JAR 文件中。
其中 execution 标签定义了 assembly 插件的作用阶段,如这里设置了在 Maven package 即打包阶段生效
<plugin>  <groupId>org.apache.maven.plugins</groupId>  <artifactId>maven-assembly-plugin</artifactId>  <version>3.1.0</version>  <configuration>  <descriptorRefs>  <descriptorRef>jar-with-dependencies</descriptorRef>  </descriptorRefs>  <!-- Set jar file name --><finalName>${project.artifactId}-${project.version}-all</finalName>  <appendAssemblyId>false</appendAssemblyId>  <attach>false</attach>  <archive>  <manifest>  <mainClass>fully.qualified.MainClass</mainClass> <addDefaultSpecificationEntries>true</addDefaultSpecificationEntries><addDefaultImplementationEntries>true</addDefaultImplementationEntries> </manifest>   </archive>  </configuration>  <executions>  <execution>  <!-- Set effect phase --><id>make-assembly</id>  <phase>package</phase>  <goals>  <goal>single</goal>  </goals>  </execution>  </executions>
</plugin>
在工程 POM 配置中添加上述信息并重新编译打包工程,可以看到此时 JAR 文件中除了自定义创建的 MyTest.clss 文件外同时包含了依赖的第三方库。
另外一个Demo : Creating fat JARs using the Maven Assembly plugin
- Go to the pom.xml file and make sure the main application class is specified:
<properties><main.class>com.example.ApplicationKt</main.class>
</properties>
- If you use EngineMain without the explicit main function, the application’s main class depends on the used engine and might look as follows: io.ktor.server.netty.EngineMain.
Add maven-assembly-plugin to the plugins block as follows:
<plugin><groupId>org.apache.maven.plugins</groupId><artifactId>maven-assembly-plugin</artifactId><version>2.6</version><configuration><descriptorRefs><descriptorRef>jar-with-dependencies</descriptorRef></descriptorRefs><archive><manifest><addClasspath>true</addClasspath><mainClass>${main.class}</mainClass></manifest></archive></configuration><executions><execution><id>assemble-all</id><phase>package</phase><goals><goal>single</goal></goals></execution></executions>
</plugin>
- Build an assembly
To build an assembly for the application, open the terminal and execute the following command:
mvn package
When this build completes, you should see the tutorial-server-get-started-maven-0.0.1-jar-with-dependencies.jar file in the target directory.
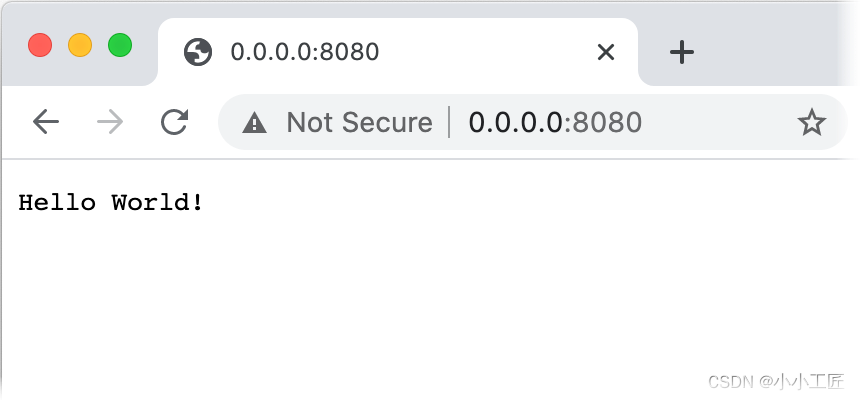
- Run the application
To run the built application:
Open the terminal and execute the following command to run the application:
java -jar target/tutorial-server-get-started-maven-0.0.1-jar-with-dependencies.jar
Wait until the following message is shown:
[main] INFO Application - Responding at http://0.0.0.0:8080
You can click the link to open the application in a default browser:
maven-shade-plugin
https://maven.apache.org/plugins/maven-shade-plugin/
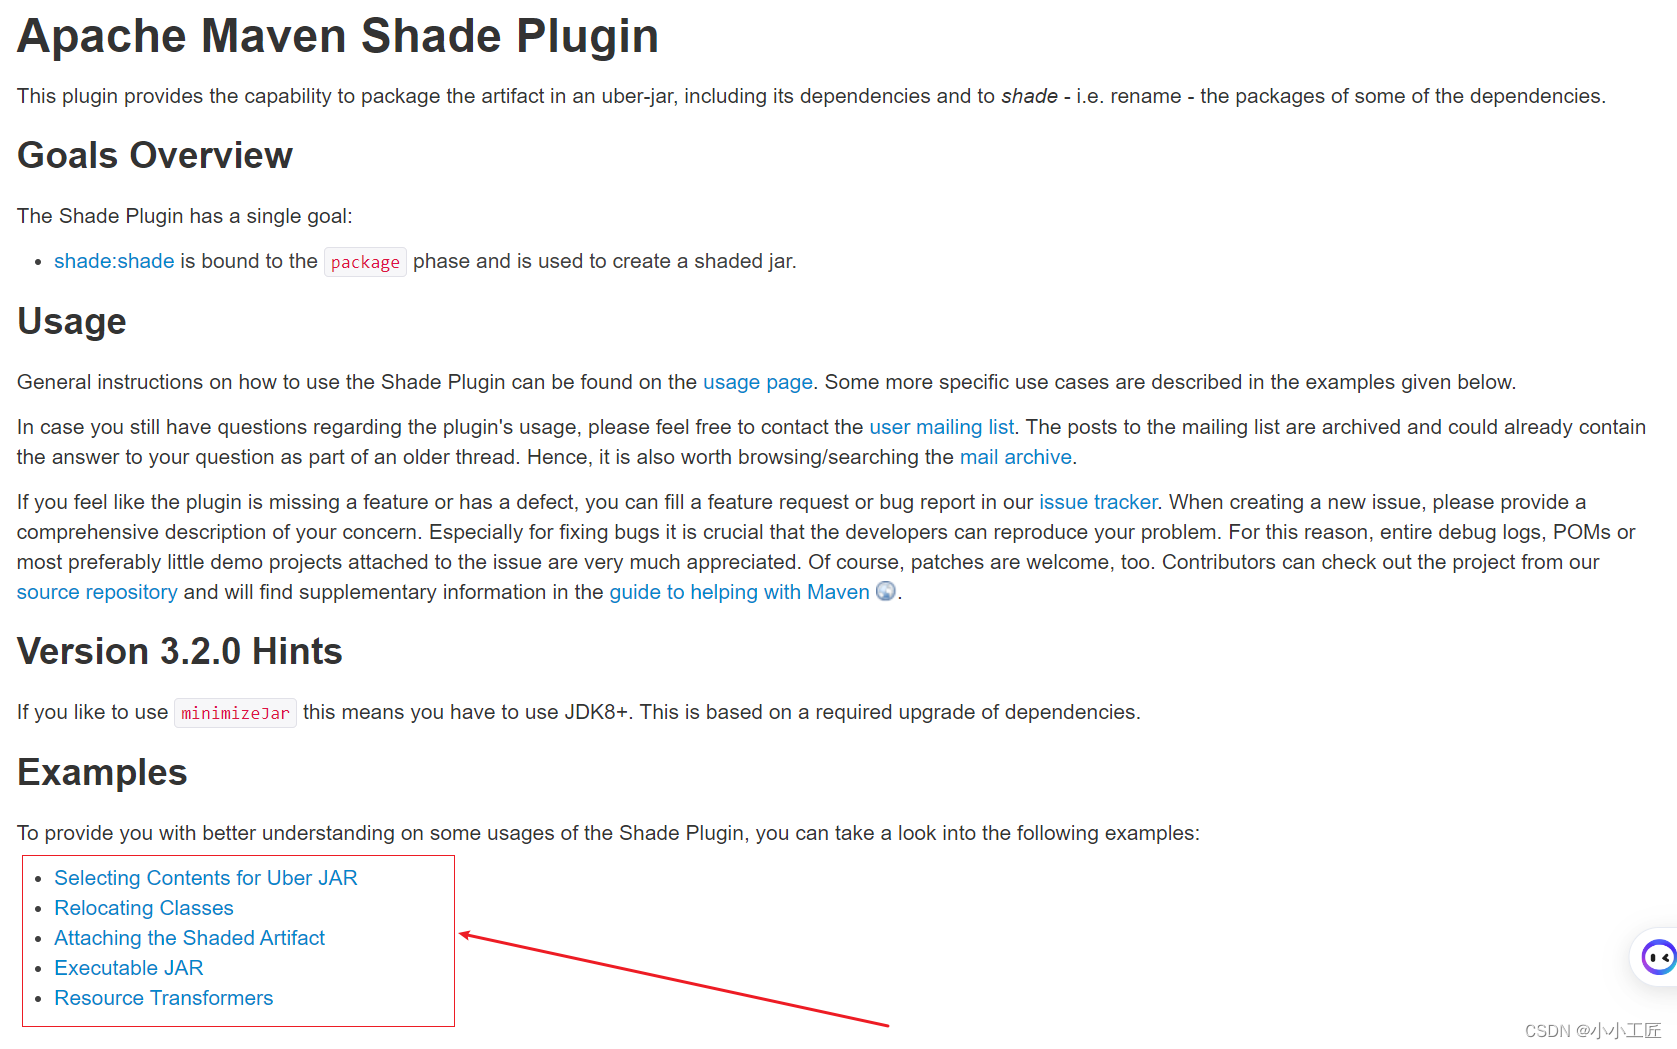
Shade 插件的功能更为强大,其提供了两个功能:
-
第一个即与 assembly 类似可实现依赖的打包编译,与 assembly 不同的是 Shade 提供了更灵活的执行策略,可指定需要打包编译的依赖集合。
-
另一个即实现包的重命名功能,我们都知道 Maven 并不允许在一共工程中同时引入单个依赖的不同版本,而通过 Shade 插件即可实现二次包装从而绕开该限制。
Shade 插件 - 标签
下面介绍一下 Shade 插件中各标签的使用。
artifactSet
通过 includes 标签可以指定需要一同打包编译的第三方依赖。
定义的格式为:groupId:artifactId。
<artifactSet>  <includes>  <include>groupId:artifactId</include>  </includes>
</artifactSet>
relocations
通过 relocations 标签即可实现模块的重命名功能。
其中 pattern 为需要重命名的模块包, shadedPattern 为重命名后的模块名。
<relocations>  <relocation>  <pattern>old.package.name</pattern>  <shadedPattern>new.package.name</shadedPattern>  </relocation>
</relocations>
filters
通过 filters 标签可以实现非必要文件的排除,如常见的协议文件等,可通过文件名或类型实现匹配。
<filters>  <filter>  <artifact>*:*</artifact>  <excludes>  <exclude>filename</exclude>  <exclude>file pattern</exclude>  </excludes>  </filter>
</filters>
完整配置
Shade 同样可以通过 execution 设置作用阶段,上述介绍标签的完整配置内容如下:
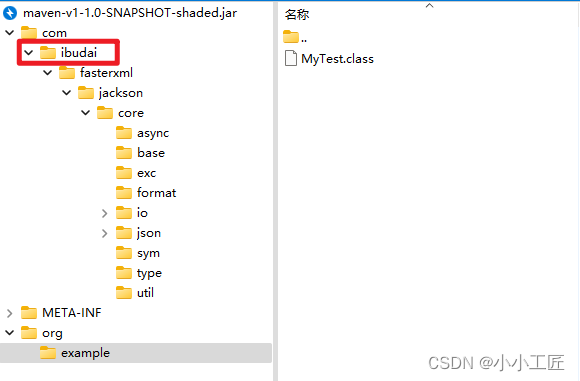
<plugins>  <plugin>  <groupId>org.apache.maven.plugins</groupId>  <artifactId>maven-shade-plugin</artifactId>  <version>3.2.0</version>  <executions>  <!-- Working phase -->  <execution>  <phase>package</phase>  <goals>  <goal>shade</goal>  </goals>  </execution>  </executions>  <configuration>  <minimizeJar>true</minimizeJar>  <!-- Defined what dependencies to pull into the uber JAR -->  <artifactSet>  <includes>  <include>com.fasterxml.jackson.core:jackson-core</include>  </includes>  </artifactSet>  <!-- Rename the package -->  <relocations>  <relocation>  <!-- Old name -->  <pattern>com.fasterxml.jackson.core</pattern>  <!-- New name -->  <shadedPattern>com.ibudai.fasterxml.jackson.core</shadedPattern>  </relocation>   </relocations>  <!-- Exclude the file that didn't want -->  <filters>  <filter>  <artifact>*:*</artifact>  <excludes>  <exclude>META-INF/license/**</exclude>  <exclude>META-INF/*</exclude>  <exclude>LICENSE</exclude>  <exclude>NOTICE</exclude>  </excludes>  </filter>  </filters>  </configuration>  </plugin>
</plugins>
在之前的工程中添加上述配置并重新打包,可以看到编译后的 Jackson 模块包层级已经变成我们自定义的内容,而 Java 的类加载即通过类的完成限定名(包名+类名)来区分是否为同一个类,因此通过 Shade 插件即可实现 Maven 的单一工程多版本引入。
官方文档
https://maven.apache.org/plugins/maven-shade-plugin/examples/class-relocation.html


![[ MySQL ] — 常见函数的使用](https://img-blog.csdnimg.cn/8039b9ae158b43a7a34ff8a79088bf00.png)
![C国演义 [第十二章]](https://img-blog.csdnimg.cn/ef799b9f95114cb197c9eb1e1143b2e6.png)