一般生产环境中最耗时的其实是业务逻辑处理。所以,是不是可以将处理业务逻辑的代码给拆出来丢到线程池中去执行。
比如像下面这样:

我们事先创建好一堆worker线程,主线程accepter拿到一个连接上来的套接字,就从线程池中取出一个线程将这个套接字交给它。这样,我们就将accept和对套接字的操作解耦了,不会因为业务逻辑处理得慢而导致客户端不能及时和服务端建立连接。
当然,整个流程还可以被再被拆分。比如,可以使用专门的线程来注册读写事件,专门的线程来处理业务逻辑
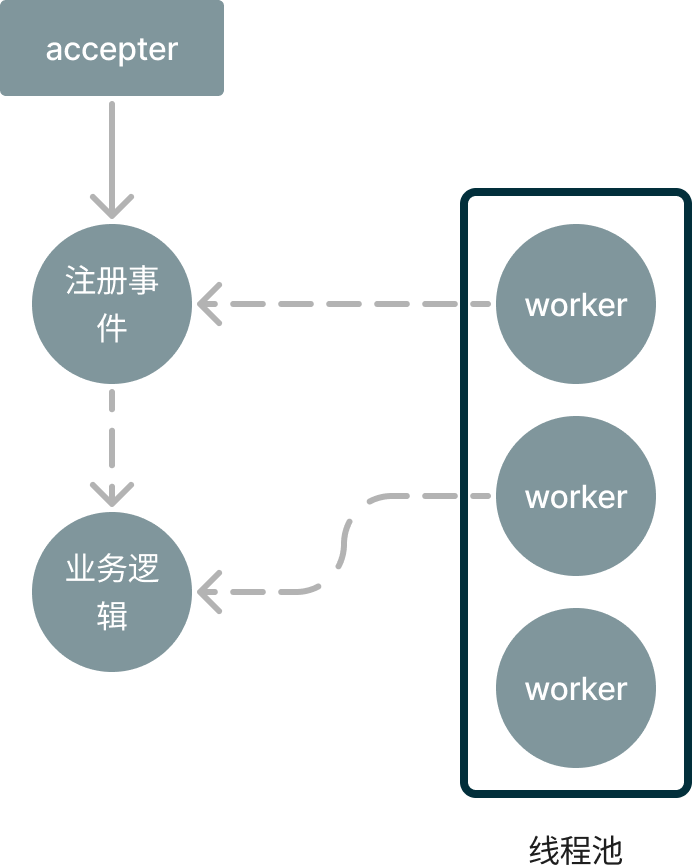
本文中的实现和上面基本差不多,主线程不断accept出来新的套接字,然后交给专门负责事件注册的线程,业务逻辑的处理交给另外专门负责处理业务逻辑的线程,处理流程如下:

为了实现上面构想的流程,设计了几个核心的对象,上图中event_loop就是其中最重要的一个对象。
相关视频推荐
epoll的原理与使用,epoll比select/poll强在哪里?
手把手实现线程池(120行),实现异步操作,解决项目性能问题
通过10道经典网络面试题,搞懂tcp/ip协议栈所有知识点
免费学习地址:c/c++ linux服务器开发/后台架构师
需要C/C++ Linux服务器架构师学习资料加qun812855908获取(资料包括C/C++,Linux,golang技术,Nginx,ZeroMQ,MySQL,Redis,fastdfs,MongoDB,ZK,流媒体,CDN,P2P,K8S,Docker,TCP/IP,协程,DPDK,ffmpeg等),免费分享

event_loop
event_loop实际是一个无限循环,还记得在讲epoll的时候,我们将各种套接字使用epoll监听起来,然后在一个循环里阻塞在epoll_wait函数,当它返回的时候说明有事件发生。event_loop本质上也是阻塞在epoll,但event_loop和我们之前的实现不一样的地方在于,它连接了我们设计的各种对象,比如buffer、channel、tcp_connection等,这些我们后面会一一展开。
event_loop对象定义如下
struct event_loop {int quit;     // 用来标识是否退出const struct event_dispatcher *ev_dispatcher;  // 可以理解为poll、epoll实现void *event_dispatcher_data;  // 声明为void*,可以灵活的保存不同的实现struct channel_map *chan_map; // 套接字和channel的映射关系int is_handle_pending;         struct channel_element *pending_head;struct channel_element *pending_tail;pthread_t owner_thread_id;   // 当前event_loop线程IDpthread_mutex_t mutex;pthread_cond_t cond;int socket_pair[2];         char *thread_name;
};
可以看到,event_loop中除了定义了当前线程相关的资源还定义了一个socket_pair,这个我们在讲poll的时候有详细讲过,如果没印象了可以回过头去看一下。
event_loop对象定义了以下几个核心方法:
// 初始化一个event_loop对象
struct event_loop *event_loop_init();// 真正初始化event_loop对象的方法
struct event_loop *event_loop_init_with_name(char *thread_name);// 使event_loop运行起来,也就是阻塞在epoll/poll函数
int event_loop_run(struct event_loop *ev_loop);// 唤醒epoll,使得新加入的套接字可以初poll/epoll监听起来
void event_loop_wakeup(struct event_loop *ev_loop);// 添加一个套接字到poll/epoll中
int event_loop_add_channel_event(struct event_loop *ev_loop, int fd, struct channel *chan);// 从poll/epoll中删除套接字
int event_loop_remove_channel_event(struct event_loop *ev_loop, int fd, struct channel *chan);// 修改套接字事件
int event_loop_update_channel_event(struct event_loop *ev_loop, int fd, struct channel *chan);// 调用套接字的读/写回调函数
int channel_event_activate(struct event_loop *ev_loop, int fd, int res);// 扫描所有的套接字进行新增/删除/修改操作
int event_loop_handle_pending_channel(struct event_loop *ev_loop);
这里我们挑其中几个比较核心的方法来分析一下,首先是event_loop的初始化,event_loop_init实际上调用的是event_loop_init_with_name方法,所以我们主要看event_loop_init_with_name
struct event_loop *event_loop_init_with_name(char *thread_name) {struct event_loop *ev_loop = malloc(sizeof(struct event_loop));pthread_mutex_init(&ev_loop->mutex, NULL);pthread_cond_init(&ev_loop->cond, NULL);if (thread_name != NULL) {ev_loop->thread_name = thread_name;} else {ev_loop->thread_name = "main thread";}ev_loop->quit = 0;ev_loop->chan_map = malloc(sizeof(struct channel_map));map_init(ev_loop->chan_map);#ifdef EPOLL_ENABLEev_loop->ev_dispatcher = &epoll_dispatcher;
#elseev_loop->event_dispatcher = &poll_dispatcher;
#endifev_loop->event_dispatcher_data = ev_loop->ev_dispatcher->init(ev_loop);ev_loop->owner_thread_id = pthread_self();if (socketpair(AF_UNIX, SOCK_STREAM, 0, ev_loop->socket_pair) < 0) {perror("socketpair set failed.");}ev_loop->is_handle_pending = 0;ev_loop->pending_head = NULL;ev_loop->pending_tail = NULL;struct channel *chan = channel_new(ev_loop->socket_pair[1], EVENT_READ, handle_wakeup, NULL, ev_loop);event_loop_add_channel_event(ev_loop, ev_loop->socket_pair[1], chan);return ev_loop;
}
初始化主要做了以下几件事
-
初始化当前event_loop线程的相关信息,包含条件变量cond和锁mutex
-
给channel_map分配内存
-
初始化dispatcher,如果检测到支持epoll就使用epoll,否则使用poll
-
初始化socket_pair,并立即监听
添加事件event_loop_do_channel_event
int event_loop_do_channel_event(struct event_loop *ev_loop, int fd, struct channel *chan, int type) {pthread_mutex_lock(&ev_loop->mutex);assert(ev_loop->is_handle_pending == 0);event_loop_channel_buffer_nolock(ev_loop, fd, chan, type);pthread_mutex_unlock(&ev_loop->mutex);if (!is_in_same_thread(ev_loop)) {event_loop_wakeup(ev_loop);} else {event_loop_handle_pending_channel(ev_loop);}
}
这里要注意可能出现多个线程同时处理一个套接字的情况,所以加锁。接着将对应的套接字添加到当前event_loop的channel_element链表中,channel_element是为了方便快速找到注册到当前event_loop中的所有套接字,方便在后续操作。
接着,会判断传进来的event_loop对应的线程是否是当前线程,如果是说明是accept添加套接字到事件监听列表。因为需要让监听生效,这里需要再次调用epoll/poll函数,所以需要唤醒一次epoll/poll,唤醒的方式是向socket_pair的一端发送一个字符,这个操作是在event_loop_wakeup函数中实现的,我们在讲poll那篇文件有详细解释,如果没印象了可以回头再去看一下。
如果不是同一个线程,会遍历一次所有注册在当前event_loop上的套接字,根据type进行相应的操作,调用event_loop_handle_pending_channel方法,这个方法如下:
int event_loop_handle_pending_channel(struct event_loop *ev_loop) {pthread_mutex_lock(&ev_loop->mutex);ev_loop->is_handle_pending = 1;struct channel_element *chan_elem = ev_loop->pending_head;while(chan_elem != NULL) {struct channel *chan = chan_elem->channel;int fd = chan->fd;if (chan_elem->type == 1) {event_loop_handle_pending_add(ev_loop, fd, chan);} else if (chan_elem->type == 2) {event_loop_handle_pending_remove(ev_loop, fd, chan);} else if (chan_elem->type == 3) {event_loop_handle_pending_update(ev_loop, fd, chan);}chan_elem = chan_elem->next;}ev_loop->pending_head = ev_loop->pending_tail = NULL;ev_loop->is_handle_pending = 0;pthread_mutex_unlock(&ev_loop->mutex);return 0;
}
这个方法进来就将当前event_loop状态置为pending,接着遍历channel_element链表,其中type有3种类型分别是1-添加 2-删除 3-修改,这个类型是在添加event_loop事件的时候传进去的。下面我们依次来看一下这三种类型的处理。
添加event_loop_handle_pending_add
int event_loop_handle_pending_add(struct event_loop *ev_loop, int fd, struct channel *chan) {struct channel_map *map = ev_loop->chan_map;if (fd < 0) {return 0;}if (fd >= map->nentries) {if (map_make_space(map, fd, sizeof(struct channel *)) == -1) {return -1;}}if (map->entries[fd] == NULL) {map->entries[fd] = chan;struct event_dispatcher *ev_dispatcher = ev_loop->ev_dispatcher;ev_dispatcher->add(ev_loop, chan);return 1;}return 0;
}
添加主要做了两件事
-
将套接字对应的channel添加到channel_map中,这样当有事件发生的时候就可以通过套接字找到对应的channel
-
将套接字添加到dispatcher中监听起来(实际上就是epoll/poll)
删除event_loop_handle_pending_remove
int event_loop_handle_pending_remove(struct event_loop *ev_loop, int fd, struct channel *chan) {struct channel_map *map = ev_loop->chan_map;assert(fd == chan->fd);if (fd < 0) {return 0;}if (fd >= map->nentries) {return -1;}struct channel *ch = map->entries[fd];struct event_dispatcher *ev_dispatcher = ev_loop->ev_dispatcher;int retval = 0;if (ev_dispatcher->del(ev_loop, ch) == -1) {retval = -1;} else {retval = 1;}map->entries[fd] = NULL;return retval;
}
删除也比较简单,首先将套接字从channel_map中删除,然后从dispatcher中删除(epoll/poll)
修改event_loop_handle_pending_update
int event_loop_handle_pending_update(struct event_loop *ev_loop, int fd, struct channel *chan) {struct channel_map *map = ev_loop->chan_map;if (fd < 0) {return 0;}if (map->entries[fd] == NULL) {return -1;}struct event_dispatcher *ev_dispatcher = ev_loop->ev_dispatcher;ev_dispatcher->update(ev_loop, chan);
}
修改其实就是修改dispatcher的监听事件(epoll/poll)
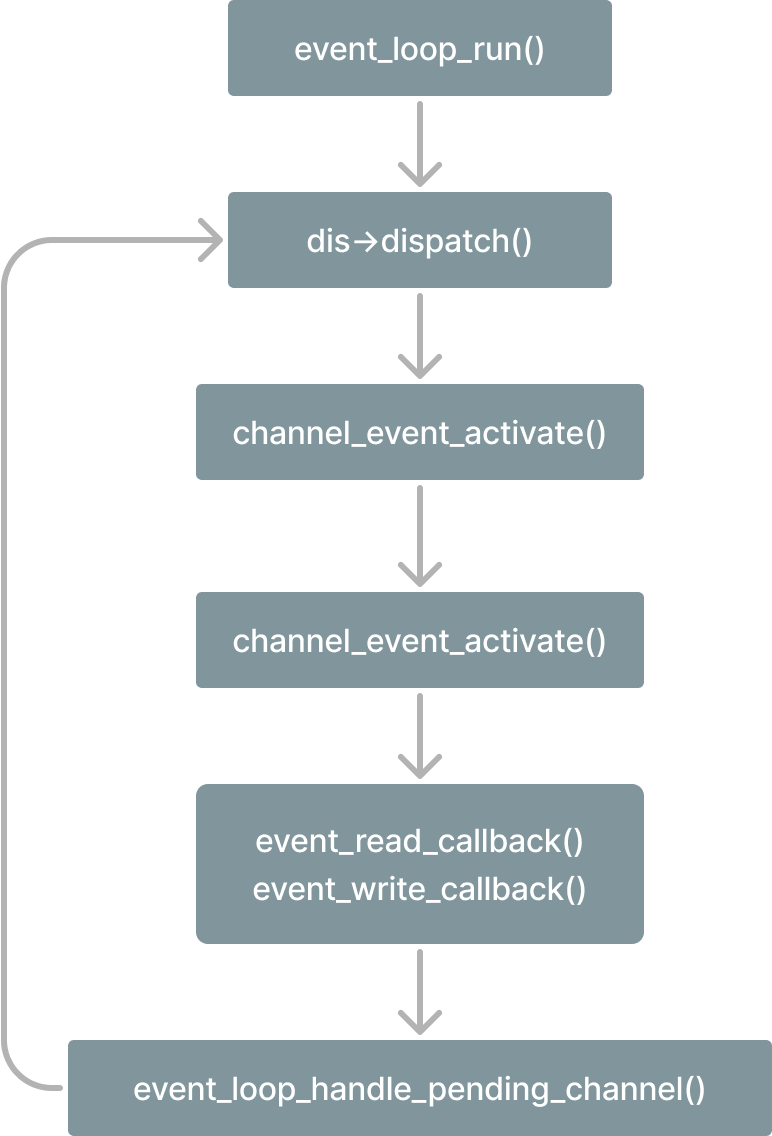
当事件添加好了之后,就可以将event_loop跑起来了,如下:
int event_loop_run(struct event_loop *ev_loop) {assert(ev_loop != NULL);struct event_dispatcher *dispatcher = ev_loop->ev_dispatcher;if (ev_loop->owner_thread_id != pthread_self()) {exit(1);}struct timeval tv;tv.tv_sec = 1;while(!ev_loop->quit) {dispatcher->dispatch(ev_loop, &tv);event_loop_handle_pending_channel(ev_loop);}return 0;}在event_loop_run方法中,核心就是一个死循环,其中dispatcher->dispatch(ev_loop, &tv)可以理解为调用epoll/poll方法。
channel
channel的本质是套接字的上下文,它的结构如下:
struct channel {int fd;int events;event_read_callback ev_read_callback;event_write_callback ev_write_callback;void *data;
};
从结构定义上来看,每一个套接字都对应一个channel,这个channel里除了包含套接字本身(也就是fd)还有它关注的事件events和读、写回调函数。
channel的操作也比较简单,就3个方法,如下:
int channel_write_event_is_enabled(struct channel *chan) {return chan->events & EVENT_WRITE;
}int channel_write_event_enable(struct channel *chan) {struct event_loop *ev_loop = (struct event_loop *) chan->data;chan->events = chan->events | EVENT_WRITE;event_loop_update_channel_event(ev_loop, chan->fd, chan);
}int channel_write_event_disable(struct channel *chan) {struct event_loop *ev_loop = (struct event_loop *) chan->data;chan->events = chan->events & ~EVENT_WRITE;event_loop_update_channel_event(ev_loop, chan->fd, chan);
}
它们分别是判断套接字是否可写,开启写事件以及关闭写事件。
channel_map
当有事件发生,我们需要通过套接字找到对应的channel,就需要使用到channel_map,它的定义如下:
struct channel_map {void **entries;int nentries;
};
定义也非常简单,就是一个二维数组entries,可以用来表示套接字到channel的映射关系,nentries表示二维数组的长度。
event_dispatcher
dispatcher是对I/O复用模型的抽象,可以理解为是一个接口,select、poll、epoll都可以实现它,定义如下:
struct event_dispatcher {const char *name;void *(*init)(struct event_loop *ev_loop);int  (*add) (struct event_loop *ev_loop, struct channel *chan);int (*del) (struct event_loop *ev_loop, struct channel *chan);int (*update) (struct event_loop *ev_loop, struct channel *chan);int (*dispatch)(struct event_loop * eventLoop, struct timeval * tv);void (*clean) (struct event_loop *ev_loop);
};
可以看到,event_dispatcher中包含了一组函数指针,这组函数覆盖了事件的增、删、改、查。
上面讲event_loop跑起来最终会阻塞在dispatcher->dispatch(ev_loop, &tv)这一行,这里的dispatch实际上就是event_dispatcher中的dispatch方法,我们以epoll为例,其实现如下:
int epoll_dispatch(struct event_loop *ev_loop, struct timeval *tv) {epoll_dispatcher_data *ep_dis_data = (epoll_dispatcher_data *) ev_loop->event_dispatcher_data;int i, n;n = epoll_wait(ep_dis_data->efd, ep_dis_data->events, MAXEVENTS, -1);for (i = 0; i < n; i++) {if ((ep_dis_data->events[i].events & EPOLLERR) || (ep_dis_data->events[i].events & EPOLLHUP)) {perror("epoll error");close(ep_dis_data->events[i].data.fd);continue;}if (ep_dis_data->events[i].events & EPOLLIN) {channel_event_activate(ev_loop, ep_dis_data->events[i].data.fd, EVENT_READ);}if (ep_dis_data->events[i].events & EPOLLOUT) {channel_event_activate(ev_loop, ep_dis_data->events[i].data.fd, EVENT_WRITE);}}return 0;
}
可以看到,dispatch就是调用了epoll_wait方法,如果有事件发生,n就是发生事件的套接字的数量。接下来的for循环会依次处理所有的套接字。最后又会调用channel_event_activate方法,这个方法是在event_loop对像里,其实现如下:
int channel_event_activate(struct event_loop *ev_loop, int fd, int res) {struct channel_map *map = ev_loop->chan_map;if (fd < 0) {return 0;}if (fd >= map->nentries) {return -1;}struct channel *chan = map->entries[fd];assert(fd == chan->fd);if (res & EVENT_READ) {if (chan->ev_read_callback != NULL) {chan->ev_read_callback(chan->data);}}if (res & EVENT_WRITE) {if (chan->ev_write_callback) {chan->ev_write_callback(chan->data);}}return 0;
}
在这个方法里面,我们可以清楚的看到channel_map的作用,通过套接字描述符找到对应的channel对象,找到channel,从而调用channel对象中事先创建好的用于读和写的回调函数。
thread_pool
thread_pool维护了一个线程池的基础信息,比如线程池的大小,其定义如下:
struct thread_pool {struct event_loop *main_loop;int started;int thread_number;struct event_loop_thread *ev_loop_threads;int position;
};
thread_pool中也有一个event_loop,这个事件循环是用来监听是否有accept发生的,它还有3个方法,分别是:
创建线程池thread_pool_new
struct thread_pool *thread_pool_new(struct event_loop *main_loop, int thread_number) {struct thread_pool *th_pool = malloc(sizeof(struct thread_pool));th_pool->main_loop = main_loop;th_pool->position = 0;th_pool->thread_number = thread_number;th_pool->started = 0;th_pool->ev_loop_threads = NULL;return th_pool;
}
这个方法用来分配线程池需要的资源,以及设置线程池的大小
让线程跑起来thread_pool_start
void thread_pool_start(struct thread_pool *th_pool) {assert(!th_pool->started);assert_in_same_thread(th_pool->main_loop);th_pool->started = 1;void *tmp;if (th_pool->thread_number <= 0) {return;}th_pool->ev_loop_threads = malloc(th_pool->thread_number * sizeof(struct event_loop_thread));for (int i = 0; i < th_pool->thread_number; ++i) {event_loop_thread_init(&th_pool->ev_loop_threads[i], i);event_loop_thread_start(&th_pool->ev_loop_threads[i]);}
}
这里,如果线程池大小小于等于0,就会退化成主线程处理套接字事件的注册。如果大于0,就会分配对应大小的线程资源,并将线程跑起来。
event_loop_thread
event_loop_thread是线程池真正初始化和创建的地方
struct event_loop_thread {struct event_loop *ev_loop;pthread_t thread_id;pthread_mutex_t mutex;pthread_cond_t cond;char *thread_name;long thread_count;
};
在thread_pool中,将线程运行起来调用了两个方法,event_loop_thread_init和event_loop_thread_start。这两个方法就是在event_loop_thread对象中,分别用于初始化线程和创建线程,下面我们分别来看一下它们的实现
event_loop_thread_init
int event_loop_thread_init(struct event_loop_thread *ev_loop_thread, int i) {pthread_mutex_init(&ev_loop_thread->mutex, NULL);pthread_cond_init(&ev_loop_thread->cond, NULL);ev_loop_thread->ev_loop = NULL;ev_loop_thread->thread_count = 0;ev_loop_thread->thread_id = 0;char *buf = malloc(16);ev_loop_thread->thread_name = buf;return 0;
}
这个方法主要是初始化线程相关的资源,比如条件变量cond和互斥锁mutex
event_loop_thread_start
struct event_loop *event_loop_thread_start(struct event_loop_thread *ev_loop_thread) {pthread_create(&ev_loop_thread->thread_id, NULL, &event_loop_thread_run, ev_loop_thread);assert(pthread_mutex_lock(&ev_loop_thread->mutex) == 0);while(ev_loop_thread->ev_loop == NULL) {assert(pthread_cond_wait(&ev_loop_thread->cond, &ev_loop_thread->mutex) == 0);}assert(pthread_mutex_unlock(&ev_loop_thread->mutex) == 0);return ev_loop_thread->ev_loop;
}
这个方法主要的功能就是调用pthread_create创建出一个线程。这里的代码似曾相识,在while循环里调用pthread_cond_wait,这个我们在C语言最最最核心语法那篇文章中介绍过。
当线程初始化和创建都完成了之后,我们就可以把对应的event_loop运行起来了,如下:
void *event_loop_thread_run(void *arg) {struct event_loop_thread *ev_loop_thread = (struct event_loop_thread *) arg;pthread_mutex_lock(&ev_loop_thread->mutex);ev_loop_thread->ev_loop = event_loop_init_with_name(ev_loop_thread->thread_name);pthread_cond_signal(&ev_loop_thread->cond);pthread_mutex_unlock(&ev_loop_thread->mutex);event_loop_run(ev_loop_thread->ev_loop);
}
event_loop_thread_run这个方法是线程的入口函数,传入的参数是一个是event_loop_thread对象,首先初始化event_loop_thread对象中的event_loop对象。初始化完成就可以让event_loop跑起来了,调用event_loop_run方法,这个方法是在event_loop对象中,在上面已经讲过了,你可以回过头再去看一下。
tcp_connection
tcp_connection是已连接的套接字,它包含了接收和发送缓冲区,channel对象等。它的作用是避免应用程序直接操作channel对象。应用程序对套接字的操作只能通过tcp_connection对象,它的定义如下:
struct tcp_connection {struct event_loop *ev_loop;struct channel *channel;char *name;struct buffer *input_buffer;struct buffer *output_buffer;connection_completed_callback conn_completed_callback;message_callback msg_callback;write_completed_callback w_completed_callback;connection_closed_callback conn_closed_callback;void *data;void *request;void *response;
};
创建tcp_connection_new
struct tcp_connection *tcp_connection_new(int fd, struct event_loop *ev_loop, connection_completed_callback conn_completed_callback,message_callback msg_callback,write_completed_callback w_completed_callback,connection_closed_callback conn_closed_callback) {struct tcp_connection *tcp_conn = malloc(sizeof(struct tcp_connection));tcp_conn->w_completed_callback = w_completed_callback;tcp_conn->msg_callback = msg_callback;tcp_conn->conn_completed_callback = conn_completed_callback;tcp_conn->conn_closed_callback = conn_closed_callback;tcp_conn->ev_loop = ev_loop;tcp_conn->input_buffer = buffer_new();tcp_conn->output_buffer = buffer_new();char *buf = malloc(16);sprintf(buf, "connection-%d\\0", fd);tcp_conn->name = buf;struct channel *chan = channel_new(fd, EVENT_READ, handle_read, handle_write, tcp_conn);tcp_conn->channel = chan;if (tcp_conn->conn_completed_callback != NULL) {tcp_conn->conn_completed_callback(tcp_conn);}event_loop_add_channel_event(tcp_conn->ev_loop, fd, tcp_conn->channel);return tcp_conn;}pleted_callback,创建一个tcp_connection对象,包含了各个回调函数,读和写buffer,channnel,最后将当前套接字添加到epoll/poll中监听起来。
tcp_connection对象主要还是负责套接字中数据的读写,提供了相应的方法
// tcp_connection_send_buffer方法最终也是调用这个方法
int tcp_connection_send_data(struct tcp_connection *tcp_conn, void *data, int size);// 通过buffer发送数据
int tcp_connection_send_buffer(struct tcp_connection *tcp_conn, struct buffer *buffer);// 关闭套接字
int tcp_connection_shutdown(struct tcp_connection *tcp_conn);// 读数据
int handle_read(void *data);// 写数据
int handle_write(void *data);
上面各个方法的实现都比较简单,你可以把代码下载下来自己去看一下。总结起来它们的执行流程大致如下图:
实例
最后,我们来看一下怎么将上面说的各个对象给串起来,看一个例子
int main(int argc, char *argv[]) {struct event_loop *ev_loop = event_loop_init();struct acceptor *acceptor = acceptor_init(SERV_PORT);struct TCPServer *tcp_server = tcp_server_init(ev_loop, acceptor, onConnectionCompleted, onMessage,onWriteCompleted, onConnectionClosed, 4);tcp_server_start(tcp_server);event_loop_run(ev_loop);
}
在这个例子中,我们先初始化event_loop、accepter、TCPServer对象,event_loop我们已经很熟悉了,这里我们来看一下,acceptor和TCPServer
acceptor实际上就是创建一个服务端的套接字
struct acceptor *acceptor_init(int port) {struct acceptor *acc = malloc(sizeof(struct acceptor));acc->listen_port = port;acc->listen_fd = socket(AF_INET, SOCK_STREAM, 0);make_nonblocking(acc->listen_fd);struct sockaddr_in serv_addr;bzero(&serv_addr, sizeof(serv_addr));serv_addr.sin_family = AF_INET;serv_addr.sin_port = htons(acc->listen_port);serv_addr.sin_addr.s_addr = htonl(INADDR_ANY);int on = 1;setsockopt(acc->listen_fd, SOL_SOCKET, SO_REUSEADDR, &on, sizeof(on));int rt1 = bind(acc->listen_fd, (struct sockaddr*)&serv_addr, sizeof(serv_addr));if (rt1 < 0) {perror("bind error");}int ret2 = listen(acc->listen_fd, 1024);if (ret2 < 0) {perror("listen error");}x_msgx("server start at: %d", acc->listen_port);return acc;
}
TCPServer对象是整个网络框架的入口,它的声明如下:
struct TCPServer {int port;struct event_loop *ev_loop;struct acceptor *acceptor;connection_completed_callback conn_completed_callback;message_callback msg_callback;write_completed_callback w_completed_callback;connection_closed_callback conn_close_callback;int thread_num;struct thread_pool *th_pool;void *data;
};
这个对象中包含了acceptor对象,也就是创建好的服务端套接字、各个回调函数以及线程池
这三个对象初始化完了之后,会调用tcp_server_start将服务运行起来,这个方法实现如下:
void tcp_server_start(struct TCPServer *tcp_server) {struct acceptor *acceptor = tcp_server->acceptor;struct event_loop *ev_loop = tcp_server->ev_loop;thread_pool_start(tcp_server->th_pool);struct channel *chan = channel_new(acceptor->listen_fd, EVENT_READ, handle_connection_established, NULL, tcp_server);event_loop_add_channel_event(ev_loop, chan->fd, chan);return;
}
这个方法里首先就调用了thead_pool对象中的thread_pool_start方法,用来创建处理注册事件的线程池。然后会将当前服务端的套接字放到一个channel里并调用event_loop_add_channel_event方法将自己监听起来。所以,我们可以发现,服务端套接字实际上也是使用了event_loop来管理的,通过一个event_loop不断的去监听accept事件。
上面的示例中最后还调用了event_loop_run方法,这个方法是event_loop对象中的方法,前面我们已经提到过了,这里调用event_loop_run方法是为了监听当前服务端套接字是否有客户端连接上来,也是整个框架的核心部分,可以理解为poll和epoll中的epoll_wait和poll函数。
在初始化TCPServer对象的时候,还传入了四个参数onConnectionCompleted、onMessage、onWriteCompleted、onConnectionClosed,它们分别对应连接建立完成时,读数据,写数据和连接关闭时的回调函数。
onConnectionCompoleted
int onConnectionCompleted(struct tcp_connection *tcpConnection) {printf("Connection completed\\n");return 0;
}
连接建立完成回调函数我们只打印了一条消息,没有任务其它操作
onMessage
int onMessage(struct buffer *input, struct tcp_connection *tcpConnection) {printf("get message from tcp connection %s\\n", tcpConnection->name);printf("%s", input->data);struct buffer *output = buffer_new();int size = buffer_readable_size(input);for (int i = 0; i < size; i++) {buffer_append_char(output, rot13_char(buffer_read_char(input)));}tcp_connection_send_buffer(tcpConnection, output);return 0;
}
onMessage中,我们创建了一个output的buffer,并往里面写入发接收到的数据,最后调用tcp_connection_send_buffer将数据发送出去,
onWriteCompleted
int onWriteCompleted(struct tcp_connection *tcpConnection) {printf("write completed\\n");return 0;
}
写完之后的回调我们也什么都没干
onConnectionClosed
int onConnectionClosed(struct tcp_connection *tcpConnection) {printf("connection closed\\n");return 0;
}
整个示例的大致流程最终如下图所示

上文我们搞定了一个自己的网络框架,基于这个框架我们已经可以实现很多应用层的程序了。比如,我们可以实现一个简单的KV存储数据库,实现一个消息队列,实现一个HTTP服务。
下面我们就尝试实现一个HTTP服务,关于HTTP协议的细节这里就不展开了,我们直接进入到代码的实现中。
我们知道,一个HTTP请求包含了请求(Request)和返回(Response),在本文的实现中抽象出了对应的http_request和http_response对象。
当然,HTTP请求/返回还包含了报文协议的解析,这部分内容我们抽象出了http_server对象,下面我们就来分别看一下这几个对象的实现
http_request
http_request对象包含了当前请求的各种报文信息,其定义如下:
struct http_request {char *version;char *method;char *url;enum http_request_state current_state;struct request_header *request_headers;  int request_headers_number;
};
在这个对象中,我们定义了HTTP协议的版本号,Method,URL,HTTP状态码以及Header头。Header头是一个key=>val的结构,其定义如下:
struct request_header {char *key;char *value;
};
http_request对象包含了下面一组方法
// 创建一个新的http_request对象
struct http_request *http_request_new();// 清理资源
void http_request_clear(struct http_request *http_req);// 重置http_request对象
void http_request_reset(struct http_request *http_req);// 添加header
void http_request_add_header(struct http_request *http_req, char *key, char *value);// 获取header
char *http_request_get_header(struct http_request *http_req, char *key);// 获取当前http请求的状态
enum http_request_state http_request_current_state(struct http_request *http_req);// 关闭连接
int http_request_close_connection(struct http_request *http_req);
这几个方法都比较简单,这里就不展开了,你可以把代码下载下来自己去看一下。
http_response
http_response定义了http请求返回的相关信息,其定义如下:
struct http_response {enum http_status_code status_code;char *status_message;char *content_type;char *body;struct response_header *response_headers;int response_headers_number;int keep_connected;
};
http_response同样也有Header头,除此之外还包含了HTTP状态信息,比如status_code和status_messagae。除此之外,还包含了一个body字符数组,用于保存返回body体里的内容。
http_response对象只有两个方法,它们分别是:
// 创建一个新的http_response对象
struct http_response *http_response_new();// 对返回内容编码,比如加上\r\n分隔符
void http_response_encode_buffer(struct http_response *http_req, struct buffer *buffer);
我们看一下http_response_encode_buffer方法的实现
void http_response_encode_buffer(struct http_response *http_reply, struct buffer *output) {char buf[32];snprintf(buf, sizeof buf, "HTTP/1.1 %d ", http_reply->status_code);buffer_append_string(output, buf);buffer_append_string(output, http_reply->status_message);buffer_append_string(output, "\\r\\n");if (http_reply->keep_connected) {buffer_append_string(output, "Connection: close\\r\\n");} else {snprintf(buf, sizeof buf, "Content-Length: %zd\\r\\n", strlen(http_reply->body));buffer_append_string(output, buf);buffer_append_string(output, "Connection: Keep-Alive\\r\\n");}if (http_reply->response_headers != NULL && http_reply->response_headers_number >0) {for (int i = 0; i < http_reply->response_headers_number; i++) {buffer_append_string(output, http_reply->response_headers[i].key);buffer_append_string(output, ": ");buffer_append_string(output, http_reply->response_headers[i].value);buffer_append_string(output, "\\r\\n");}}buffer_append_string(output, "\\r\\n");buffer_append_string(output, http_reply->body);
}
可以看到,这个方法其实就是将http_response里的内容转成符合http协议的报文,加上HTTP协议版本号,各个header之间使用\r\n分隔。
http_server
这个对象是整个http服务的核心,里面包含了对请求报文的解析,处理报文以及回复报文,它的定义如下:
struct http_server {struct TCPServer *tcp_serv;request_callback req_callback;
};
http_server对象中包含了一个TCPServer对象和request_callback的回调函数,TCPSever我们在上一篇文章中已经介绍过了。request_callback回调函数定义如下:
typedef int (*request_callback)(struct http_request *http_req, struct http_response *http_reply);从定义上我们基本可以判断这是整个HTTP请求的业务逻辑处理函数。接收http_request和http_response作为参数。它的具体实现我们先放一放,后面再说。
http_server对象有3个方法,它们分别是:
// 创建一个http_server对象
struct http_server *http_server_new(struct event_loop *ev_loop, int port, request_callback req_callback, int thread_num);// 启动http服务
void http_server_start(struct http_server *http_serv);// 解析请求报文
int parse_http_request(struct buffer *input, struct http_request *http_req);
http_server_new实现如下:
struct http_server *http_server_new(struct event_loop *ev_loop, int port, request_callback req_callback, int thread_num) {struct http_server *http_serv = malloc(sizeof(struct http_server));http_serv->req_callback = req_callback;struct acceptor *acceptor = acceptor_init(SERV_PORT);http_serv->tcp_serv = tcp_server_init(ev_loop, acceptor, http_on_connection_completed, http_on_message,http_on_write_completed,http_on_connection_closed, thread_num);http_serv->tcp_serv->data = http_serv;return http_serv;
}
是不是有点似曾相识,这里和我们前一篇文章中示例程序初始化TCP服务是一样的。这里的http_on_connection_completed、http_on_message、http_on_write_completed、http_on_connection_closed和我们上一篇文章介绍的套接字每个阶段的回调函数作用也是一样的。只不过这里处理的是http的请求。
到这里,你应该有一种感觉,就是我们上一篇文章中实现的网络框架,只需要实现这几个回调方法就能衍生出各种各样的应用程序。
下面我们分别看一下这个几个方法的实现
http_on_connection_completed
int http_on_connection_completed(struct tcp_connection *tcp_conn) {x_msgx("connection completed");struct http_request *http_req = http_request_new();tcp_conn->request = http_req;return 0;
}
当连接建立完成的时候,先把http_request对象创建出来。
http_on_message
int http_on_message(struct buffer *input, struct tcp_connection *tcp_conn) {x_debugx("get message from tcp connection %s", tcp_conn->name);struct http_request *http_req = (struct http_request *) tcp_conn->request;struct http_server *http_serv = (struct http_server *) tcp_conn->data;if (parse_http_request(input, http_req) == 0) {char *error_response = "HTTP/1.1 400 Bad Request\\r\\n\\r\\n";tcp_connection_send_data(tcp_conn, error_response, sizeof(error_response));tcp_connection_shutdown(tcp_conn);}if (http_request_current_state(http_req) == REQUEST_DONE) {struct http_response *http_reply = http_response_new();if (http_serv->req_callback != NULL) {http_serv->req_callback(http_req, http_reply);}struct buffer *buf = buffer_new();http_response_encode_buffer(http_reply, buf);tcp_connection_send_buffer(tcp_conn, buf);if (http_request_close_connection(http_req)) {tcp_connection_shutdown(tcp_conn);}http_request_reset(http_req);}
}
这个方法是接收处理客户端发送过来的报文,如果解析出错返回400,如果请求已经发完了,先创建http_response对象,用于组装HTTP返回报文,接着调用req_callback方法处理HTTP请求,这里的req_callback就是我们前面提到过的那个request_callback,然后将http_response翻译成HTTP协议报文发出去。最后关闭连接并重置http_request对象。
http_on_write_completed
int http_on_write_completed(struct tcp_connection *tcp_conn) {x_msgx("write completed");return 0;
}
这个方法啥也没干
http_on_connection_closed
int http_on_connection_closed(struct tcp_connection *tcp_conn) {x_msgx("connection closed");if (tcp_conn->request != NULL) {http_request_clear(tcp_conn->request);tcp_conn->request = NULL;}return 0;
}
这个方法在连接关闭之后会清理http_request资源。
http_server_start实现如下:
void http_server_start(struct http_server *http_serv) {tcp_server_start(http_serv->tcp_serv);
}
可以看到它实际是调用了tcp_server_start这个方法,它就是我们上一篇文章里有介绍过的TCPServer这个对象里的方法。
在http_on_message中有几个方法这里我们要拎出来讲一下,一个是parse_http_request
int parse_http_request(struct buffer *input, struct http_request *http_req) {int ok = 1;while (http_req->current_state != REQUEST_DONE) {if (http_req->current_state == REQUEST_STATUS) {char *crlf = buffer_find_CRLF(input);if (crlf) {int request_line_size = process_status_line(input->data + input->read_index, crlf, http_req);if (request_line_size) {input->read_index += request_line_size;input->read_index += 2;http_req->current_state = REQUEST_HEADERS;}}} else if (http_req->current_state == REQUEST_HEADERS) {char *crlf = buffer_find_CRLF(input);if (crlf) {char *start = input->data + input->read_index;int request_line_size = crlf - start;char *colon = memmemx(start, request_line_size, ": ", 2);if (colon != NULL) {char *key = malloc(colon - start + 1);strncpy(key, start, colon - start);key[colon - start] = '\\0';char *value = malloc(crlf - colon - 2 +1);strncpy(value, colon + 2, crlf - colon -2);value[crlf - colon -2] = '\\0';http_request_add_header(http_req, key, value);input->read_index += request_line_size;input->read_index += 2;} else {input->read_index += 2;http_req->current_state = REQUEST_DONE;}}}}return ok;
}
从名字上看,它就是解析http请求报文的,在一个循环中,不断的一行一行读。这里的行与行之间的分隔就是http协议中的\r\n,我们在buffer中实现了一个buffer_find_CRLF方法用来解析出HTTP报文中的一行,它的实现如下:
char *buffer_find_CRLF(struct buffer *buf) {int readable_size = buffer_readable_size(buf);if (readable_size < 0 || readable_size > buf->total_size) {perror("readable_size error");return NULL;}char *crlf = memmemx(buf->data + buf->read_index, readable_size, CRLF, 2);return crlf;
}
这里有一个陌生的方法memmemx,由于在一些操作系统中string.h中的memmem方法有一些问题。所以我自己重新写了一个方法,它的作用和memmem是一样的,都是在一个字符串中找到另一个字符串所在位置。
当我们找到一行之后,还没结束,比如HTTP协议报文的第一行就包含了版本、URI、请求Method。我们需要进一步解析每一行的内容。所以,这里又调用了另一个方法process_status_line,它的实现如下:
int process_status_line(char *start, char *end, struct http_request *http_req) {int size = end - start;// get methodchar *space = memmemx(start, end - start, " ", 1);assert(space != NULL);int method_size = space - start;http_req->method = malloc(method_size + 1);strncpy(http_req->method, start, method_size);http_req->method[method_size] = '\\0';assert(space + 1 < end);// get urlstart = space + 1;assert(start < end);space = memmemx(start, end - start, " ", 1);assert(space != NULL);int url_size = space - start;http_req->url = malloc(url_size + 1);strncpy(http_req->url, start, space - start);http_req->url[url_size + 1] = '\\0';// get versionstart = space + 1;http_req->version = malloc(end - start +1);strncpy(http_req->version, start, end - start);http_req->version[end - start + 1] = '\\0';assert(space != NULL);return size;
}
这个方法的作用就是解析http协议报文的第一行,得到请求method、URI、版本号。
到这里,整个http服务的链路就通了。剩下的就是req_callback中的处理逻辑,这个方法定义在了main.c中,它的实现如下:
int on_request(struct http_request *http_req, struct http_response *http_reply) {char *url = http_req->url;char *question = memmemx(url, strlen(url), "?", 1);char *path = NULL;if (question != NULL) {path = malloc(question - url);strncpy(path, url, question - url);} else {path = malloc(strlen(url));strncpy(path, url, strlen(url));}if (strcmp(path, "/") == 0) {http_reply->status_code = OK;http_reply->status_message = "OK";http_reply->content_type = "text/html";http_reply->body = "<html><head><title>x-net</title></head><body><h1>Hello, x-net</h1></body></html>";} else if (strcmp(path, "/network") == 0) {http_reply->status_code = OK;http_reply->status_message = "OK";http_reply->content_type = "text/plain";http_reply->body = "hello, x-net";} else {http_reply->status_code = NotFound;http_reply->status_message = "Not Found";http_reply->keep_connected = 1;}return 0;
}
如果我们请求的是根/,就返回Hello,x-net,如果我们请求的是/network也返回hello,x-net只不是content-type是text/plain,如果不是这两个路径说明没有这个url,返回404。
最后,在main函数中将服务运行起来就可以了
int main() {struct event_loop *ev_loop = event_loop_init();struct http_server *http_serv = http_server_new(ev_loop, SERV_PORT, on_request, 2);http_server_start(http_serv);event_loop_run(ev_loop);
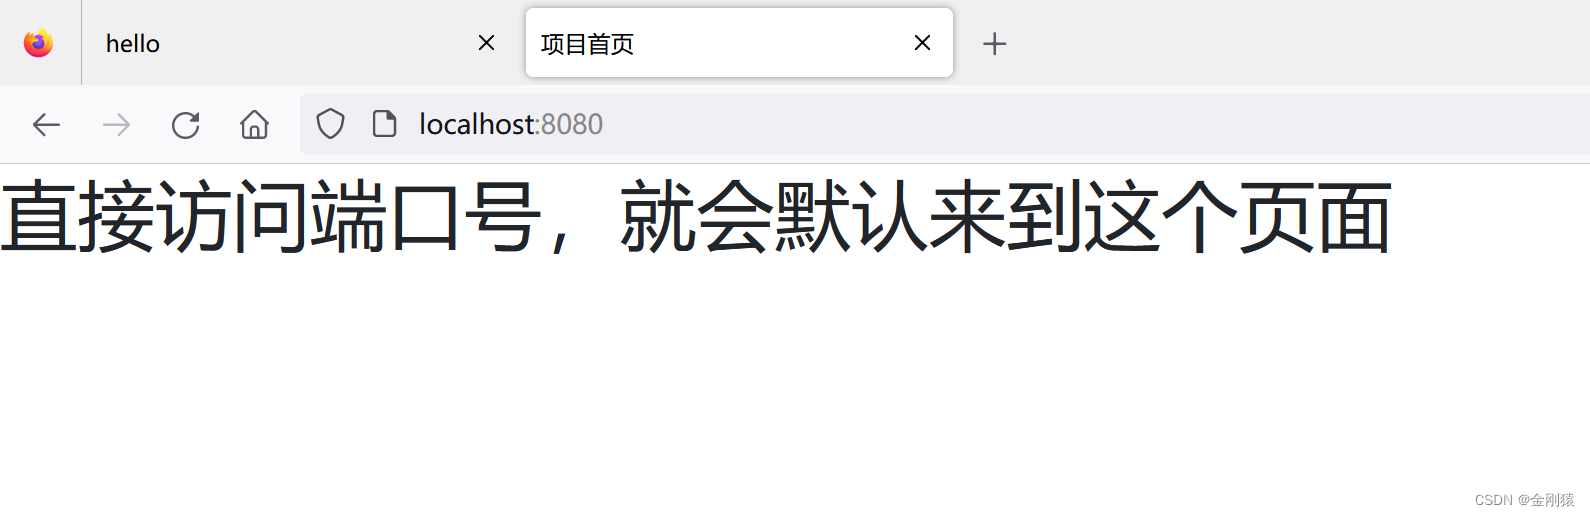
}这里的SERV_PORT我们设置的是3000,在流览器中输入localhost:3000就可以看到
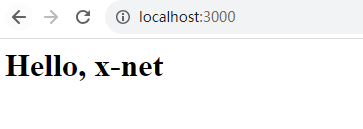
输入localhost:3000/network

代码: https://github.com/benggee/x-net