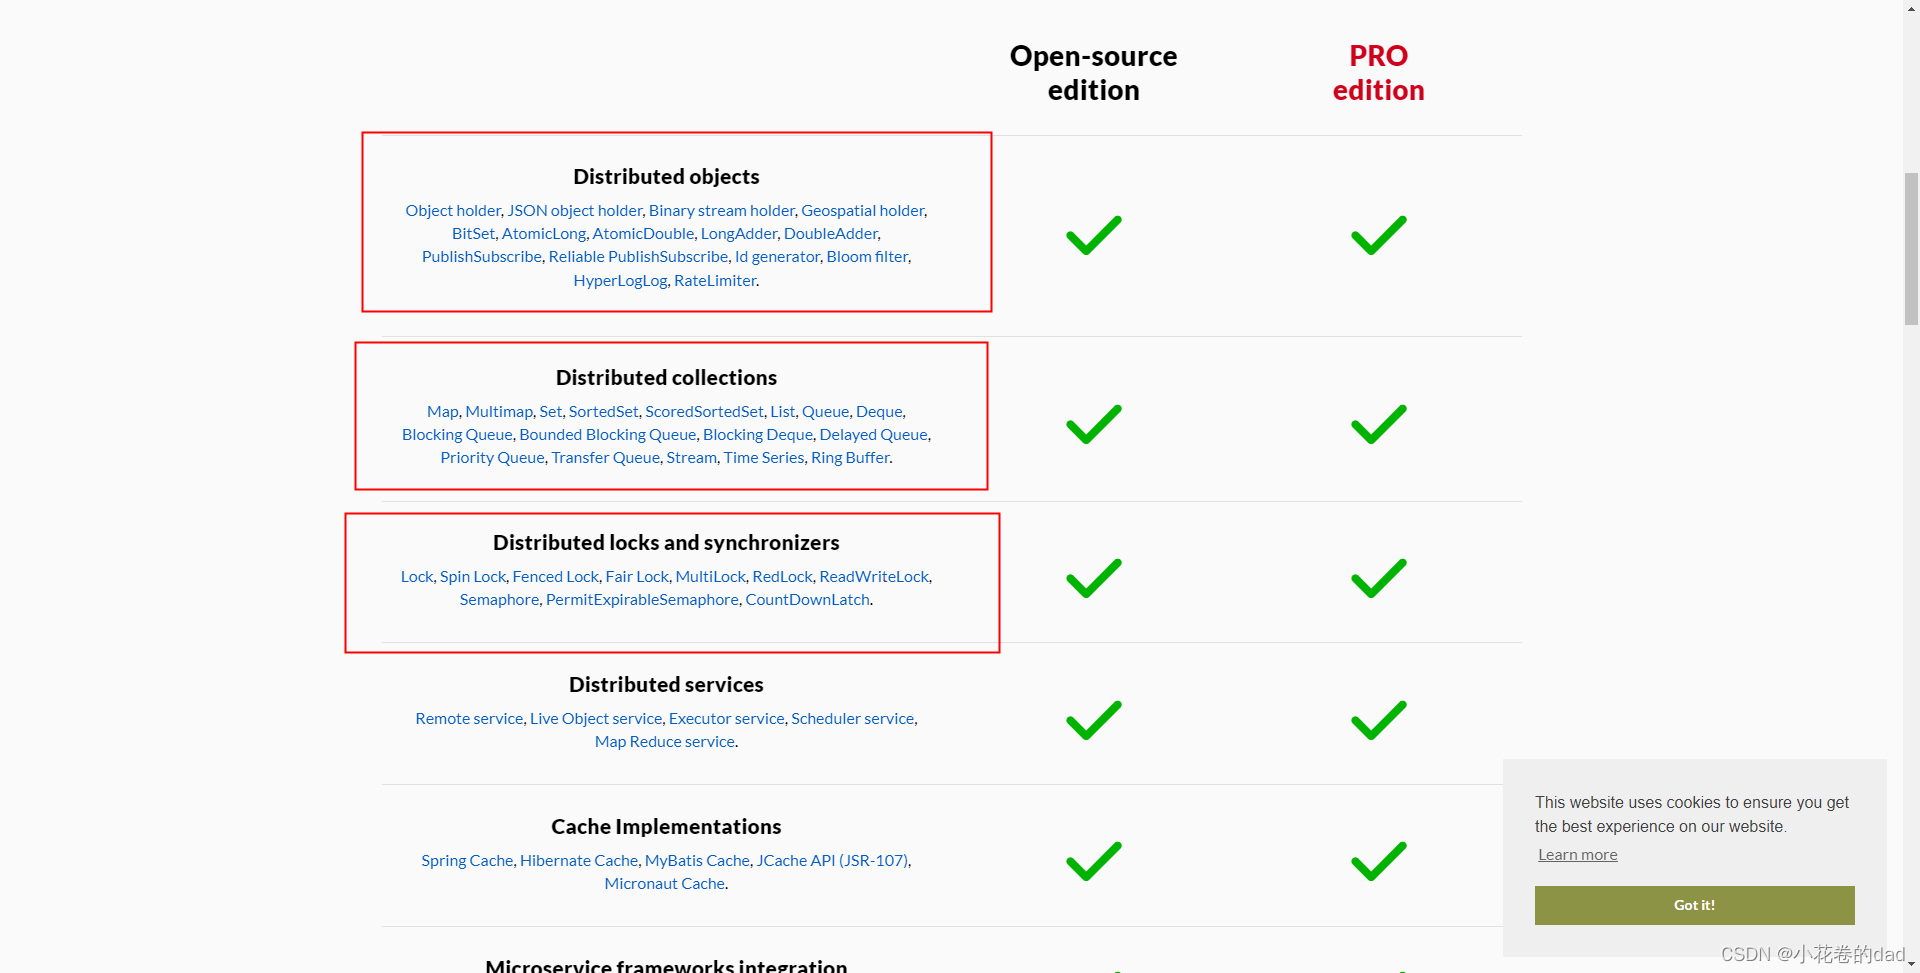
概览
虽然 SwiftUI 已为我们内置了很多常用视图,不过有时我们还是需要根据实际来进一步美化显示或增加功能。

如上图所示,在本篇博文中我们将结合敏捷哲学中一个超级实用的开发技巧:曳光弹,来一步一个脚印循序渐进的实现 ProgressView 自定义显示效果。
相信看文本后,小伙伴的武器库中又会多了一件非常犀利的神兵利器!
Let’s go!!!😉
从 ProgressViewStyle 开始
在 SwiftUI 中,大多数视图都暴露出对应的 style (以协议的方式)供我们定制它们的外观,比如 Button 的 ButtonStyle。
ProgressView 同样不例外,我们可以通过实现自己的 ProgressViewStyle 样式来完成其外观的美化。
/// A type that applies standard interaction behavior to all progress views
/// within a view hierarchy.
///
/// To configure the current progress view style for a view hierarchy, use the
/// ``View/progressViewStyle(_:)`` modifier.
@available(iOS 14.0, macOS 11.0, tvOS 14.0, watchOS 7.0, *)
public protocol ProgressViewStyle {/// A view representing the body of a progress view.associatedtype Body : View/// Creates a view representing the body of a progress view.////// - Parameter configuration: The properties of the progress view being///   created.////// The view hierarchy calls this method for each progress view where this/// style is the current progress view style.////// - Parameter configuration: The properties of the progress view, such as///  its preferred progress type.@ViewBuilder func makeBody(configuration: Self.Configuration) -> Self.Body/// A type alias for the properties of a progress view instance.typealias Configuration = ProgressViewStyleConfiguration
}
在这里,就让我们创建一个新的 IndicatorProgressViewStyle 样式来施展我们的拳脚吧!
曳光弹(Tracer)原则
在复杂项目开发中,我们一般做不到(或很难做到)一步到位。在敏捷开发哲学中有一个非常实用的秘技,我们称之为:曳(ye)光弹(或拽光弹)!
使用它我们可以由易而难,有条不紊的完成复杂目标。

关于曳光弹的详细介绍,请小伙伴们移步如下链接观赏:
- 拽光弹?曳光弹?到底是哪个?为什么能发光,不怕暴露自己吗?
简单来说:我们的开发也要像曳光弹那样不求一发入魂,而是希望通过观察弹道(曳光弹晚上发射时其尾部会拖一道长长的光迹,像彗星美丽的尾部)不断调整射击位置,迭代进步,不断接近目标,最终“征服”目标!
曳光弹的诀窍是,每次只向着目标迈一小步,最终完成一大步!
第一次”射击“
我们的任务是完成如下 ProgressView 样式:

更详细的介绍,请移步如下链接进一步了解:
- Working with ProgressView and ProgressViewStyle in SwiftUI
首先,我们先尝试搭建基本布局,当然一切都是静态的:
struct IndicatorProgressViewStyle: ProgressViewStyle {func makeBody(configuration: Configuration) -> some View {VStack {Text("30%")ZStack(alignment: .topLeading) {Capsule(style: .continuous).foregroundStyle(.gray.opacity(0.5))Capsule(style: .continuous).foregroundStyle(.teal.gradient).frame(width: 100)}.frame(height: 20)Text("Downloading...")}}
}
应用 IndicatorProgressViewStyle 样式很容易:
struct ContentView: View {@State var value = 0.3var body: some View {NavigationStack {VStack {ProgressView(value: value).progressViewStyle(IndicatorProgressViewStyle())}.padding()}}
}
运行效果如下:

我们第一发曳光弹已经射出,虽然离命中目标还差的很远,但我们起码得到了反馈,看到了希望!
希望就是正能量,希望就是黎明黑暗前那一丝曙光!!!
循序渐进
我们必须想方设法取得进度条的总长度,因为我们需要:
- 绘制当前进度对应进度条的长度;
- 让顶部指示器始终指向当前进度对应的位置;
有很多种方法可以达到该目的,这里我们选择一种最简单的方法:GeometryReader。
struct IndicatorProgressViewStyle: ProgressViewStyle {func makeBody(configuration: Configuration) -> some View {let progress = configuration.fractionCompleted ?? 0.0VStack {Text("\(String(format: "%.0f%%", progress * 100))")ZStack(alignment: .topLeading) {Capsule(style: .continuous).foregroundStyle(.gray.opacity(0.5)).overlay (GeometryReader { geo inCapsule(style: .continuous).foregroundStyle(.teal.gradient).frame(width: geo.size.width * progress, height: 20)})}.frame(height: 20)Text("Downloading...")}}
}
现在我们的进度条不再是静如处子,而是动如脱兔啦:

按部就班
接下来,我们再让进度条顶部指示器位置“动”起来。因为它的位置也和当前进度值有着藕断丝连的关系,所以有必要把它也放到 GeometryReader 内部去:
struct IndicatorProgressViewStyle: ProgressViewStyle {func makeBody(configuration: Configuration) -> some View {let progress = configuration.fractionCompleted ?? 0.0VStack {ZStack(alignment: .topLeading) {Capsule(style: .continuous).foregroundStyle(.gray.opacity(0.5)).overlay (GeometryReader { geo inZStack(alignment: .topLeading) {VStack {Text("\(String(format: "%.0f%%", progress * 100))")Image(systemName: "arrowtriangle.down.fill")}.offset(x: 100, y: -40)Capsule(style: .continuous).foregroundStyle(.teal.gradient).frame(width: geo.size.width * progress, height: 20)}})}.frame(height: 20)Text("Downloading...")}}
}

效果如上,随着打出越来越多的曳光弹,我们也越来越接近最终目标!
随后,我们来修正指示器的位置:
struct IndicatorProgressViewStyle: ProgressViewStyle {func makeBody(configuration: Configuration) -> some View {let progress = configuration.fractionCompleted ?? 0.0VStack {ZStack(alignment: .topLeading) {Capsule(style: .continuous).foregroundStyle(.gray.opacity(0.5)).overlay (GeometryReader { geo inZStack(alignment: .topLeading) {VStack {Text("\(String(format: "%.0f%%", progress * 100))")Image(systemName: "arrowtriangle.down.fill")}.frame(width: 40).offset(x: geo.size.width * progress - 20, y: -40)Capsule(style: .continuous).foregroundStyle(.teal.gradient).frame(width: geo.size.width * progress, height: 20)}})}.frame(height: 20)Text("Downloading...")}}
}
现在,我们的指示器也能够跟随进度条一起“如影随形”的移动啦:

一个小问题
不知细心的小伙伴们发现了吗?目前的实现有点小缺陷:当进度位于开始位置时,进度条显示的高度不太对:

这是因为我们的进度条是用 Capsule 形状来绘制的,而 Capsule 在宽度很窄时显示会趋于一个矩形,而且它被绘制在进度槽的外部。
如何解决呢?很简单,我们只需将进度条绘制限制在指定的 Capsule 内部就可以了:
struct IndicatorProgressViewStyle: ProgressViewStyle {func makeBody(configuration: Configuration) -> some View {let progress = configuration.fractionCompleted ?? 0.0VStack {ZStack(alignment: .topLeading) {// 原代码从略...}.frame(height: 20)// 限制进度条在指定形状中显示.clipShape(Capsule(style: .continuous))Text("Downloading...")}}
}

效果好多了!
不过将进度条限制为指定形状,意味着其它部分(比如指示器)都会被裁剪掉,这可不是我们想要的。
随着更多曳光弹的射出,我们也对如何解决这一问题有了更多的线索,只需调整进度条指示器的位置即可:
struct IndicatorProgressViewStyle: ProgressViewStyle {private let labelWidth = 40.0private let viewHeight = 20.0func makeBody(configuration: Configuration) -> some View {let progress = configuration.fractionCompleted ?? 0.0VStack {Capsule(style: .continuous).opacity(0.0).overlay {GeometryReader { geo inVStack {VStack {Text("\(String(format: "%.0f%%", progress * 100))")Image(systemName: "arrowtriangle.down.fill")}.font(.headline).frame(width: labelWidth).offset(x: progress * geo.size.width - labelWidth / 2, y: -40)}ZStack(alignment: .topLeading) {Capsule(style: .continuous).foregroundStyle(.gray.opacity(0.5))Capsule(style: .continuous).foregroundStyle(.teal.gradient).frame(width: progress * geo.size.width)}.clipShape(Capsule(style: .continuous))}}.frame(height: viewHeight)Text("Downloading...")}}
}
看看效果吧,我们已经快逼近最终目标了!

增加更多的定制项
现在,我们自定义进度条样式对于顶部指示器和底部描述的显示有着自己的“想法”,能不提供更多的自由让使用者决定如何显示呢?
答案是肯定的!
在 ProgressView 构造器中包含 label 和 currentValueLabel 可选参数,我可以用它们来决定进度条指示器和描述如何显示!
struct IndicatorProgressViewStyle: ProgressViewStyle {private let labelWidth = 40.0private let viewHeight = 20.0func makeBody(configuration: Configuration) -> some View {let progress = configuration.fractionCompleted ?? 0.0VStack {Capsule(style: .continuous).opacity(0.0).overlay {GeometryReader { geo inVStack {VStack {if let curLabel = configuration.currentValueLabel {curLabel}else{Text("\(String(format: "%.0f%%", progress * 100))")}Image(systemName: "arrowtriangle.down.fill")}.frame(width: labelWidth).offset(x: progress * geo.size.width - labelWidth / 2, y: -40)}ZStack(alignment: .topLeading) {Capsule(style: .continuous).foregroundStyle(.gray.opacity(0.5))Capsule(style: .continuous).foregroundStyle(.teal.gradient).frame(width: progress * geo.size.width)}.clipShape(Capsule(style: .continuous))}}.frame(height: viewHeight)configuration.label}}
}
至此,我们可以自由定制 ProgressView 的显示外观啦:
ProgressView(value: value, label: {Text(progressDetails).font(.title3.weight(.bold)).foregroundStyle(.green.gradient)
}, currentValueLabel: {Text("\(String(format: "🚴🏻♂️%.0f%%", value * 100))").font(.headline).frame(width: 60).foregroundStyle(Color.orange.gradient)
})
.progressViewStyle(IndicatorProgressViewStyle(color: AnyShapeStyle(.pink.gradient)))
.frame(width: 300)
让我们看一下美美哒的最终效果吧:

完成品
以下是细微完善过的最终源代码:
struct IndicatorProgressViewStyle: ProgressViewStyle {private let labelWidth = 40.0private let viewHeight = 20.0var color: AnyShapeStyle?func makeBody(configuration: Configuration) -> some View {let progress = configuration.fractionCompleted ?? 0.0VStack {Capsule(style: .continuous).opacity(0.0).overlay {GeometryReader { geo inVStack {VStack {if let curLabel = configuration.currentValueLabel {curLabel}else{Text("\(String(format: "%.0f%%", progress * 100))")}Image(systemName: "arrowtriangle.down.fill")}.minimumScaleFactor(0.8).font(.headline).frame(width: labelWidth).offset(x: progress * geo.size.width - labelWidth / 2, y: -40)}ZStack(alignment: .topLeading) {Capsule(style: .continuous).foregroundStyle(Color.gray.opacity(0.3))Capsule(style: .continuous).foregroundStyle(color != nil ? color! : AnyShapeStyle(.teal.gradient)).frame(width: progress * geo.size.width).shadow(radius: 3.0)}.clipShape(Capsule(style: .continuous))}}.frame(height: viewHeight)configuration.label}}
}
总结
在本篇博文中,我们利用敏捷开发中“曳光弹”原则步步为营打造了一款漂亮的进度条样式;我们最终完美的实现了目标,更重要的是:我们学到了软件工程中重要的一课!
感谢观赏,再会!!!😎
