1.按钮
QtWidgets模块提供了多种按钮类,让你可以轻松地创建各种类型的按钮
1.1 QPushButton(普通按钮)
QPushButton是PyQt5中最常见的按钮类型之一,用于触发动作或执行操作。通过信号与槽机制,你可以将按钮的点击事件与特定的函数或操作关联起来。
import sysfrom PyQt5.QtWidgets import QApplication,QWidget,QPushButtonif __name__ == '__main__':app = QApplication(sys.argv)w1 = QWidget()w1.setWindowTitle("UI-按钮")# 创建一个普通按钮btn1 = QPushButton("登录")# 将按钮添加到父级中btn1.setParent(w1)w1.show()app.exec_()

1.2 QRadioButton(单选按钮)
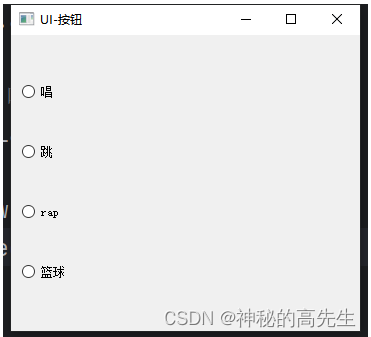
QRadioButton用于在一组选项中进行单选,用户只能选择其中一个选项。
import sysfrom PyQt5.QtWidgets import QApplication, QWidget, QRadioButton, QButtonGroup, QVBoxLayoutif __name__ == '__main__':app = QApplication(sys.argv)w1 = QWidget()w1.setWindowTitle("UI-按钮")# 1. 创建一个布局容器layout = QVBoxLayout()# 2. 创建一个按钮组(单选时使用)radioBtnGroup = QButtonGroup()# 3. 创建4个单选按钮btn1 = QRadioButton("唱")btn2 = QRadioButton("跳")btn3 = QRadioButton("rap")btn4 = QRadioButton("篮球")# 4. 将4个按钮添加到按钮组中radioBtnGroup.addButton(btn1)radioBtnGroup.addButton(btn2)radioBtnGroup.addButton(btn3)radioBtnGroup.addButton(btn4)# 5. 将每个按钮添加到布局容器中layout.addWidget(btn1)layout.addWidget(btn2)layout.addWidget(btn3)layout.addWidget(btn4)# 6. 窗口组件设置画布w1.setLayout(layout)w1.show()app.exec_()
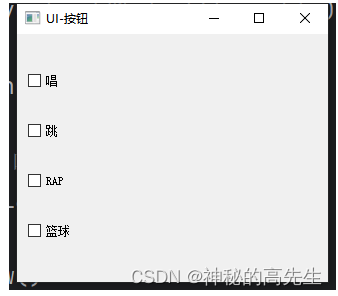
1.3 QCheckBox(复选框)
QCheckBox用于在多个选项中进行多选,用户可以选择多个选项
import sysfrom PyQt5.QtWidgets import QApplication, QWidget, QButtonGroup, QVBoxLayout, QCheckBoxif __name__ == '__main__':app = QApplication(sys.argv)w1 = QWidget()w1.setWindowTitle("UI-按钮")btnNames = ["唱","跳","RAP","篮球"]btnObjs = []# 1. 创建一个布局容器layout = QVBoxLayout()for bt_name in btnNames:# 2. 创建4个多选按钮temp_btn = QCheckBox(bt_name)# 3. 将每个按钮添加到布局容器中layout.addWidget(temp_btn)btnObjs.append(temp_btn)# 4. 窗口组件设置画布w1.setLayout(layout)w1.show()app.exec_()
注意:多选框不要使用按钮组对象,否则就变为多选框的单选效果
1.4 按钮的事件机制
在pyqt中,事件的调用过程是:
1.定义按钮或元素
2.通过事件名称.connect绑定事件
所以,我们需要定义事件的回调方法,注意,事件回调方法机制就保证事件内容是要返回回调可调用对象,建议在类中定义
1.4.1 用类的方式定义函数
import sysfrom PyQt5.QtWidgets import QApplication, QWidget, QButtonGroup, QVBoxLayout, QCheckBox, QPushButtonclass MyQtWindow():def __init__(self):self.__initUI()def __initUI(self):app = QApplication(sys.argv)w1 = QWidget()w1.setWindowTitle("UI-按钮")# 创建一个普通按钮btn1 = QPushButton("登录")# 绑定事件,单点击的时候调用say方法btn1.clicked.connect(self.say)# 将按钮添加到父级中btn1.setParent(w1)w1.show()app.exec_()def say(self):print(f"你好")if __name__ == '__main__':window = MyQtWindow()1.4.2 回调函数中传递参数
1.使用lambda表达式实现
btn1.clicked.connect(lambda x: self.say("123"))...def say(self,arg):print(f"你好:{arg}")
在这个例子中,
lambda函数将创建一个新的函数,该函数接受一个参数x,然后将这个参数和你的参数一起传递给say函数。
2.定义辅助函数实现
btn1.clicked.connect(self.fuzhu_say)...# 辅助函数def fuzhu_say(self):self.say("参数")def say(self,arg):print(f"你好:{arg}")
辅助函数传参需要在辅助函数中实现,如果你需要传递关键字参数,那么使用辅助函数可能是更好的选择
1.5 控制元素的位置和大小
对应元素使用:setGeometry(p_x,p_y,w,h) 函数
# 创建一个普通按钮btn1 = QPushButton("登录")btn1.setGeometry(300,300,300,50)
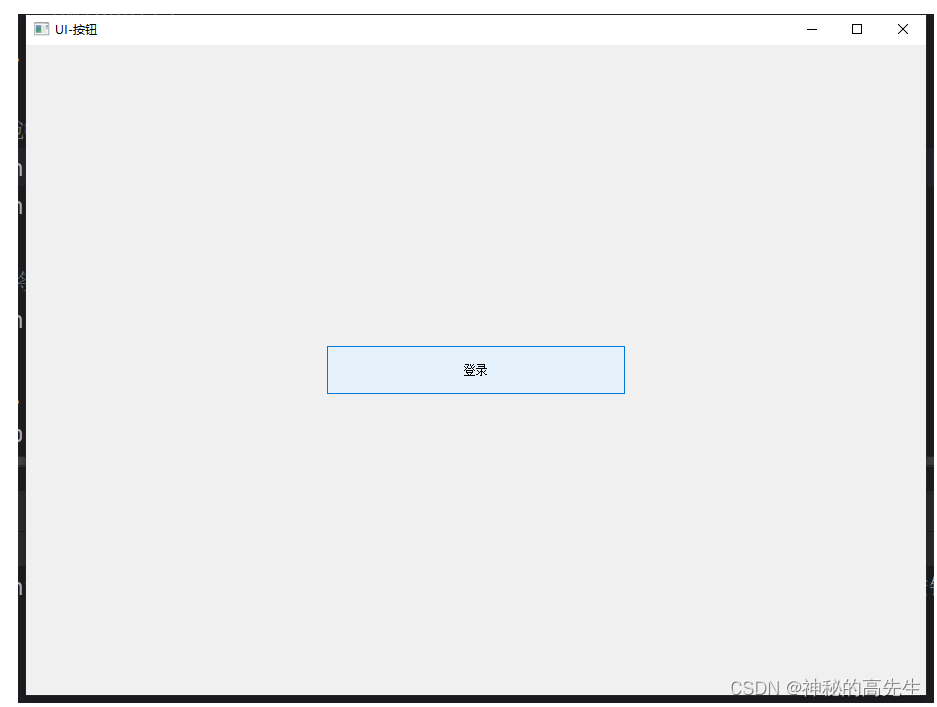
btn1.setGeometry(300,300,300,50) 是一个在编程中设置图形界面元素(例如按钮)的位置和大小的语句。具体来说,这个语句的含义如下:
btn1是一个按钮对象的引用。setGeometry是一个方法,用于设置按钮的大小和位置。(300,300,300,50)是一个四个数值的元组,分别表示按钮的左边界的x坐标、上边界的y坐标、宽度和高度。
所以,btn1.setGeometry(300,300,300,50) 的意思就是设置 btn1 这个按钮在界面上的位置为 (300,300),也就是将其左上角移动到屏幕的 (300,300) 位置,并且将其宽度设为300像素,高度设为50像素。
1.6 设置单选或多选选中或取消选中
self.male_radio.setChecked(True) # 设置选中
self.female_radio.setChecked(False) # 设置取消选中
2.文字
2.1 基础文字-QLabel
用于显示文本标签,不支持用户输入。
# 创建一个标题文字
q_label = QLabel("姓名", w)

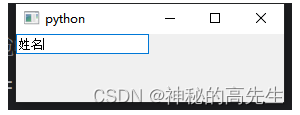
2.2 单行文本输入-QLineEdit
用于收集用户输入的单行文本,不支持多行文本。
q_label = QLineEdit("姓名", w)
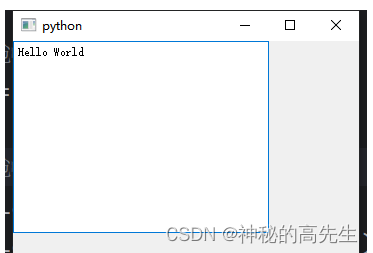
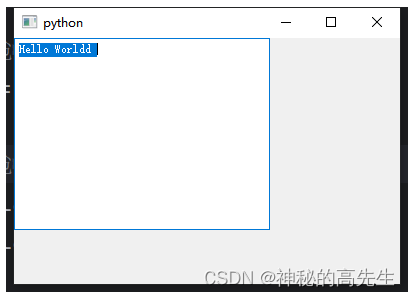
2.3 多行文本显示-QTextBrowser
用于显示多行文本,支持富文本、HTML等格式,但不支持用户编辑。
q_label = QTextBrowser(w)
q_label.append("Hello World")
2.4 多行文本编辑器-QTextEdit
用于收集用户输入的多行文本,支持富文本、HTML等格式,同时也支持用户编辑。
q_label = QTextEdit(w)
q_label.append("Hello World")
2.5 获取输入框值
(1) 单行文本输入框获取值
name = self.name_input.text()
(2) 多行文本输入框获取值
intro = self.intro_input.toPlainText()
2.6 清空输入框值
(1)单行文本输入框清空值
self.name_input.clear()
(2)多行文本输入框清空值
self.intro_input.clear()
3. 表单综合案例
import sys
from PyQt5.QtWidgets import QApplication, QWidget, QLabel, QLineEdit, QTextEdit, QVBoxLayout, QHBoxLayout, QRadioButton, QCheckBox, QPushButtonclass FormApp(QWidget):def __init__(self):super().__init__()self.init_ui()def init_ui(self):self.setWindowTitle('表单界面')self.setGeometry(100, 100, 400, 300)self.name_label = QLabel('姓名:')self.name_input = QLineEdit()self.intro_label = QLabel('自我介绍:')self.intro_input = QTextEdit()self.gender_label = QLabel('性别:')self.male_radio = QRadioButton('男')self.female_radio = QRadioButton('女')self.hobby_label = QLabel('爱好:')self.sports_checkbox = QCheckBox('体育')self.music_checkbox = QCheckBox('音乐')self.travel_checkbox = QCheckBox('旅游')self.reset_button = QPushButton('重置')self.submit_button = QPushButton('提交')self.reset_button.clicked.connect(self.reset_form)self.submit_button.clicked.connect(self.submit_form)layout = QVBoxLayout()layout.addWidget(self.name_label)layout.addWidget(self.name_input)layout.addWidget(self.intro_label)layout.addWidget(self.intro_input)layout.addWidget(self.gender_label)layout.addWidget(self.male_radio)layout.addWidget(self.female_radio)layout.addWidget(self.hobby_label)layout.addWidget(self.sports_checkbox)layout.addWidget(self.music_checkbox)layout.addWidget(self.travel_checkbox)layout.addWidget(self.reset_button)layout.addWidget(self.submit_button)self.setLayout(layout)def reset_form(self):self.name_input.clear()self.intro_input.clear()self.male_radio.setChecked(True)self.female_radio.setChecked(False)self.sports_checkbox.setChecked(False)self.music_checkbox.setChecked(False)self.travel_checkbox.setChecked(False)def submit_form(self):name = self.name_input.text()intro = self.intro_input.toPlainText()gender = '男' if self.male_radio.isChecked() else '女'hobbies = []if self.sports_checkbox.isChecked():hobbies.append('体育')if self.music_checkbox.isChecked():hobbies.append('音乐')if self.travel_checkbox.isChecked():hobbies.append('旅游')print('姓名:', name)print('自我介绍:', intro)print('性别:', gender)print('爱好:', ', '.join(hobbies))if __name__ == '__main__':app = QApplication(sys.argv)form = FormApp()form.show()sys.exit(app.exec_())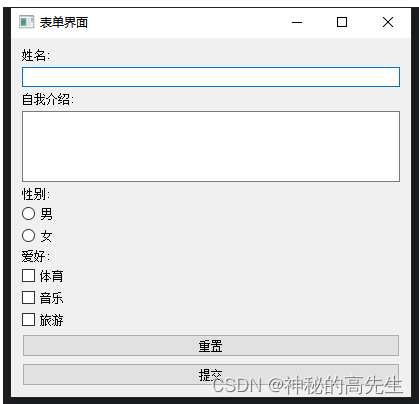
4.下拉列表
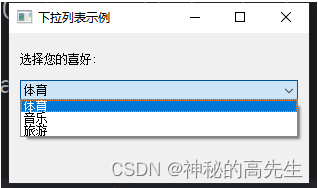
下拉列表(ComboBox)是一种常见的用户界面元素,它允许用户从预定义的选项列表中选择一个值。下拉列表通常用于提供选择,而不是自由文本输入。
self.label = QLabel('选择您的喜好:')self.combo_box = QComboBox()self.combo_box.addItem('体育')self.combo_box.addItem('音乐')self.combo_box.addItem('旅游')
4.1 下拉获取值
selected_value = self.comboBox.currentText() # 获取当前选中的文本值print("Selected Value:", selected_value)
4.2 下拉清空值
self.comboBox.clear() # 清空下拉框中的所有选项
4.3 下拉框选中值
通过下拉索引值选中(从0开始计数)
default_index = 2  # 设置默认选中的索引(从0开始计数)
self.comboBox.setCurrentIndex(default_index)
通过下拉框值选中
default_text = 'Item 2'  # 设置默认选中的文本
self.comboBox.setCurrentText(default_text)
4.4 下拉框添加元素
items = ['Item 1', 'Item 2', 'Item 3', 'Item 4']
self.comboBox.addItems(items)
5.滑块
在 PyQt5 中,滑块(QSlider)是用于在一定范围内选择数值的界面元素。它允许用户通过滑动滑块来选择一个值。
self.slider = QSlider() # 默认是水平滑块self.slider.setMinimum(0) # 设置最小值self.slider.setMaximum(100) # 设置最大值self.slider.setValue(50) # 设置默认值self.slider.setTickPosition(QSlider.TicksBelow) # 设置刻度显示在滑块下方self.slider.setTickInterval(10) # 设置刻度间隔
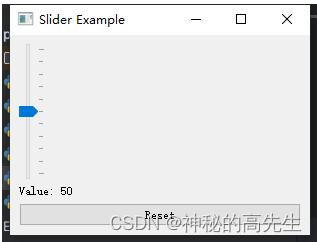
完整demo
import sys
from PyQt5.QtWidgets import QApplication, QMainWindow, QSlider, QLabel, QVBoxLayout, QWidgetclass SliderExample(QMainWindow):def __init__(self):super().__init__()self.initUI()def initUI(self):self.setWindowTitle('Slider Example')self.setGeometry(100, 100, 300, 200)layout = QVBoxLayout()self.slider = QSlider()  # 默认是水平滑块self.slider.setMinimum(0)  # 设置最小值self.slider.setMaximum(100)  # 设置最大值self.slider.setValue(50)  # 设置默认值self.slider.setTickPosition(QSlider.TicksBelow)  # 设置刻度显示在滑块下方self.slider.setTickInterval(10)  # 设置刻度间隔self.valueLabel = QLabel(f"Value: {self.slider.value()}")  # 显示当前值的标签layout.addWidget(self.slider)layout.addWidget(self.valueLabel)self.resetButton = QPushButton('Reset')self.resetButton.clicked.connect(self.resetSlider)layout.addWidget(self.resetButton)self.central_widget = QWidget()self.central_widget.setLayout(layout)self.setCentralWidget(self.central_widget)self.slider.valueChanged.connect(self.updateValueLabel)  # 连接滑块值变化的信号与槽函数def updateValueLabel(self, value):self.valueLabel.setText(f"Value: {value}")def resetSlider(self):self.slider.setValue(50)  # 将滑块值重置为默认值if __name__ == '__main__':app = QApplication(sys.argv)window = SliderExample()window.show()sys.exit(app.exec_())
5.1 获取值
self.slider.value()
5.2 重置与设置
self.slider.setValue(50) # 将滑块值重置为默认值
5.3 值变化回调更新
self.slider.valueChanged.connect(self.updateValueLabel) # 连接滑块值变化的信号与槽函数def updateValueLabel(self, value):self.valueLabel.setText(f"Value: {value}")
6.进度条
进度条(QProgressBar)是一种用于表示进度或完成度的界面元素。在 PyQt5 中,你可以使用进度条来显示操作的进度,例如文件下载、任务执行等
self.progressBar = QProgressBar() # 创建一个进度条
self.progressBar.setMinimum(0) # 设置最小值:0
self.progressBar.setMaximum(100) # 设置最大值 100
self.progressBar.setValue(0) # 设置初始值 0
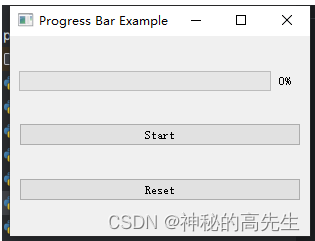
完整demo
import sys
from PyQt5.QtWidgets import QApplication, QMainWindow, QProgressBar, QPushButton, QVBoxLayout, QWidgetclass ProgressBarExample(QMainWindow):def __init__(self):super().__init__()self.initUI()def initUI(self):self.setWindowTitle('Progress Bar Example')self.setGeometry(100, 100, 300, 200)layout = QVBoxLayout()self.progressBar = QProgressBar() # 创建一个进度条self.progressBar.setMinimum(0) # 设置最小值:0self.progressBar.setMaximum(100) # 设置最大值 100self.progressBar.setValue(0) # 设置初始值 0layout.addWidget(self.progressBar)self.startButton = QPushButton('Start')self.startButton.clicked.connect(self.startProgress)layout.addWidget(self.startButton)self.resetButton = QPushButton('Reset')self.resetButton.clicked.connect(self.resetProgress)layout.addWidget(self.resetButton)self.central_widget = QWidget()self.central_widget.setLayout(layout)self.setCentralWidget(self.central_widget)def startProgress(self):self.progressBar.setValue(0)  # 开始时将进度条值重置为0for i in range(101):self.progressBar.setValue(i)QApplication.processEvents()  # 实时更新界面if i == 100:self.progressBar.setValue(100)  # 完成后将进度条值重置为0def resetProgress(self):self.progressBar.setValue(0)  # 将进度条值重置为0if __name__ == '__main__':app = QApplication(sys.argv)window = ProgressBarExample()window.show()sys.exit(app.exec_())
6.1 设置值且更新
self.progressBar.setValue(60)QApplication.processEvents() # 实时更新界面
6.2 获取值
current_value = self.progressBar.value()print("Current Value:", current_value)
7. 列表框
在 PyQt5 中,列表框(QListWidget)是用于显示一系列项目(项)的界面元素。每个项目可以包含文本、图像等内容。
self.listWidget = QListWidget() # 创建列表项items = ['Item 1', 'Item 2', 'Item 3', 'Item 4']for item_text in items:list_item = QListWidgetItem(item_text) # 创建一个列表项目self.listWidget.addItem(list_item) # 添加到列表中
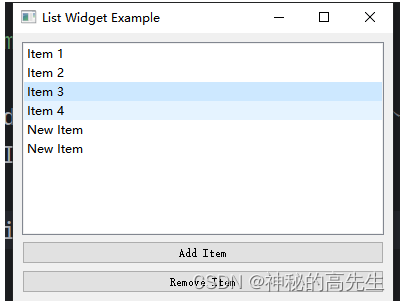
完整案例:
import sys
from PyQt5.QtWidgets import QApplication, QMainWindow, QListWidget, QListWidgetItem, QPushButton, QVBoxLayout, QWidgetclass ListWidgetExample(QMainWindow):def __init__(self):super().__init__()self.initUI()def initUI(self):self.setWindowTitle('List Widget Example')self.setGeometry(100, 100, 300, 200)layout = QVBoxLayout()self.listWidget = QListWidget() # 创建列表项items = ['Item 1', 'Item 2', 'Item 3', 'Item 4']for item_text in items:list_item = QListWidgetItem(item_text) # 创建一个列表项目self.listWidget.addItem(list_item) # 添加到列表中layout.addWidget(self.listWidget)self.addButton = QPushButton('Add Item')self.addButton.clicked.connect(self.addItem)layout.addWidget(self.addButton)self.removeButton = QPushButton('Remove Item')self.removeButton.clicked.connect(self.removeItem)layout.addWidget(self.removeButton)self.central_widget = QWidget()self.central_widget.setLayout(layout)self.setCentralWidget(self.central_widget)def addItem(self):new_item_text = 'New Item'new_item = QListWidgetItem(new_item_text)self.listWidget.addItem(new_item)def removeItem(self):selected_items = self.listWidget.selectedItems()for item in selected_items:self.listWidget.takeItem(self.listWidget.row(item))if __name__ == '__main__':app = QApplication(sys.argv)window = ListWidgetExample()window.show()sys.exit(app.exec_())
7.1 将列表项目添加到指定列表中
new_item_text = 'New Item'
new_item = QListWidgetItem(new_item_text)
self.listWidget.addItem(new_item)
7.2 移除指定项目
item_to_remove = self.listWidget.item(2)  # 获取第3个项目(索引为2)
self.listWidget.takeItem(self.listWidget.row(item_to_remove))
7.3 设置默认选中
default_row = 1  # 设置默认选中第2个项目(索引为1)
self.listWidget.setCurrentRow(default_row)
7.4 清空选中
self.listWidget.clearSelection()
8. 表格
在 PyQt5 中,表格(QTableWidget)是一个用于显示二维表格数据的界面元素。它类似于电子表格,可以在单元格中显示文本、图像等内容。
self.tableWidget = QTableWidget(4, 3)  # 创建一个4行3列的表格
# 设置3个表头
self.tableWidget.setHorizontalHeaderLabels(['Column 1', 'Column 2', 'Column 3'])
for row in range(4):for col in range(3):item = QTableWidgetItem(data[row][col]) # 创建一个表格元素 data[行][列]self.tableWidget.setItem(row, col, item) # 添加元素
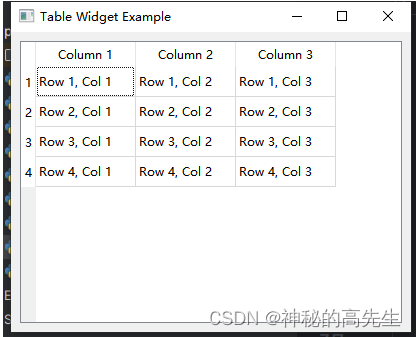
完整案例:
import sys
from PyQt5.QtWidgets import QApplication, QMainWindow, QTableWidget, QTableWidgetItem, QVBoxLayout, QWidgetclass TableWidgetExample(QMainWindow):def __init__(self):super().__init__()self.initUI()def initUI(self):self.setWindowTitle('Table Widget Example')self.setGeometry(100, 100, 400, 300)layout = QVBoxLayout()self.tableWidget = QTableWidget(4, 3)  # 创建一个4行3列的表格# 设置3个表头self.tableWidget.setHorizontalHeaderLabels(['Column 1', 'Column 2', 'Column 3'])self.populateTable()layout.addWidget(self.tableWidget)self.central_widget = QWidget()self.central_widget.setLayout(layout)self.setCentralWidget(self.central_widget)def populateTable(self):data = [['Row 1, Col 1', 'Row 1, Col 2', 'Row 1, Col 3'],['Row 2, Col 1', 'Row 2, Col 2', 'Row 2, Col 3'],['Row 3, Col 1', 'Row 3, Col 2', 'Row 3, Col 3'],['Row 4, Col 1', 'Row 4, Col 2', 'Row 4, Col 3']]for row in range(4):for col in range(3):item = QTableWidgetItem(data[row][col]) # 创建一个表格元素 data[行][列]self.tableWidget.setItem(row, col, item) # 添加元素if __name__ == '__main__':app = QApplication(sys.argv)window = TableWidgetExample()window.show()sys.exit(app.exec_())
8.1添加行
使用 insertRow(row) 方法可以在指定位置插入一行。
pythonCopy code
tableWidget.insertRow(row_index)
8.2添加列
使用 insertColumn(column) 方法可以在指定位置插入一列。
pythonCopy code
tableWidget.insertColumn(column_index)
8.3 设置单元格内容
使用 setItem(row, column, item) 方法可以将一个 QTableWidgetItem 对象放置到指定行和列的单元格中。
pythonCopy codeitem = QTableWidgetItem("Cell Value")
tableWidget.setItem(row_index, column_index, item)
8.4 获取单元格内容
使用 item(row, column) 方法可以获取指定行和列的单元格中的 QTableWidgetItem 对象。
pythonCopy codeitem = tableWidget.item(row_index, column_index)
cell_value = item.text() if item is not None else ""
8.6 合并单元格
使用 setSpan(row, column, row_span, column_span) 方法可以合并指定范围内的单元格。
pythonCopy code
tableWidget.setSpan(row_index, column_index, row_span, column_span)
8.7 清除内容
使用 clear() 方法可以清除表格中的所有内容。
pythonCopy code
tableWidget.clear()
8.8 移除行和列
使用 removeRow(row) 和 removeColumn(column) 方法可以移除指定行和列。
pythonCopy codetableWidget.removeRow(row_index)
tableWidget.removeColumn(column_index)
8.9 设置单元格对齐
使用 item(row, column).setTextAlignment(alignment) 方法可以设置指定单元格的文本对齐方式。
pythonCopy codeitem = QTableWidgetItem("Aligned Text")
item.setTextAlignment(Qt.AlignCenter)  # 或者 Qt.AlignLeft, Qt.AlignRight, Qt.AlignTop, Qt.AlignBottom 等
tableWidget.setItem(row_index, column_index, item)
8.10 综合案例-带操作列的表格
import sys
from PyQt5.QtWidgets import QApplication, QMainWindow, QTableWidget, QTableWidgetItem, QPushButton, QVBoxLayout, QWidgetclass TableWithButtonsExample(QMainWindow):def __init__(self):super().__init__()self.initUI()def initUI(self):self.setWindowTitle('Table with Buttons Example')self.setGeometry(100, 100, 600, 400)layout = QVBoxLayout()self.tableWidget = QTableWidget(4, 4)  # 创建一个4行4列的表格self.tableWidget.setHorizontalHeaderLabels(['Select', 'Name', 'Age', 'Actions'])self.populateTable()layout.addWidget(self.tableWidget)self.central_widget = QWidget()self.central_widget.setLayout(layout)self.setCentralWidget(self.central_widget)def populateTable(self):data = [{'name': 'Alice', 'age': 25},{'name': 'Bob', 'age': 30},{'name': 'Carol', 'age': 28},{'name': 'David', 'age': 22}]for row, item_data in enumerate(data):select_item = QTableWidgetItem()select_item.setFlags(select_item.flags() | Qt.ItemIsUserCheckable)select_item.setCheckState(Qt.Unchecked)self.tableWidget.setItem(row, 0, select_item)name_item = QTableWidgetItem(item_data['name'])self.tableWidget.setItem(row, 1, name_item)age_item = QTableWidgetItem(str(item_data['age']))self.tableWidget.setItem(row, 2, age_item)view_button = QPushButton('View')edit_button = QPushButton('Edit')delete_button = QPushButton('Delete')button_container = QWidget()button_layout = QHBoxLayout()button_layout.addWidget(view_button)button_layout.addWidget(edit_button)button_layout.addWidget(delete_button)button_container.setLayout(button_layout)self.tableWidget.setCellWidget(row, 3, button_container)if __name__ == '__main__':app = QApplication(sys.argv)window = TableWithButtonsExample()window.show()sys.exit(app.exec_())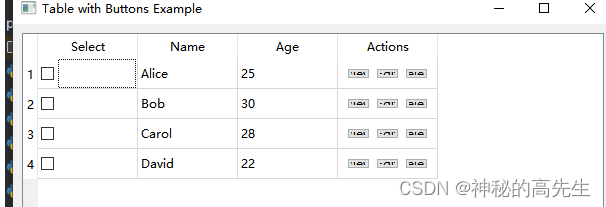
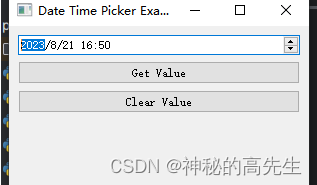
9. 时间选择器
在 PyQt5 中,可以使用 QDateTimeEdit 组件来实现日期时间选择器。
self.dateTimeEdit = QDateTimeEdit() # 创建一个时间选择器
self.dateTimeEdit.setDateTime(QDateTime.currentDateTime())  # 设置默认值为当前日期时间
import sys
from PyQt5.QtWidgets import QApplication, QMainWindow, QDateTimeEdit, QVBoxLayout, QPushButton, QLabel, QWidget
from PyQt5.QtCore import QDateTimeclass DateTimePickerExample(QMainWindow):def __init__(self):super().__init__()self.initUI()def initUI(self):self.setWindowTitle('Date Time Picker Example')self.setGeometry(100, 100, 300, 200)layout = QVBoxLayout()self.dateTimeEdit = QDateTimeEdit() # 创建一个时间选择器self.dateTimeEdit.setDateTime(QDateTime.currentDateTime())  # 设置默认值为当前日期时间layout.addWidget(self.dateTimeEdit)self.getValueButton = QPushButton('Get Value')self.getValueButton.clicked.connect(self.getValue)layout.addWidget(self.getValueButton)self.clearValueButton = QPushButton('Clear Value')self.clearValueButton.clicked.connect(self.clearValue)layout.addWidget(self.clearValueButton)self.valueLabel = QLabel()layout.addWidget(self.valueLabel)self.central_widget = QWidget()self.central_widget.setLayout(layout)self.setCentralWidget(self.central_widget)def getValue(self):selected_datetime = self.dateTimeEdit.dateTime()formatted_datetime = selected_datetime.toString("yyyy-MM-dd HH:mm:ss")self.valueLabel.setText(f"Selected Value: {formatted_datetime}")def clearValue(self):self.dateTimeEdit.clear()  # 清空日期时间选择器的值self.valueLabel.setText("Selected Value: Cleared")if __name__ == '__main__':app = QApplication(sys.argv)window = DateTimePickerExample()window.show()sys.exit(app.exec_())
9.1 设置时间
self.dateTimeEdit.setDateTime(QDateTime.currentDateTime()) # 设置默认值为当前日期时间
使用字符串日期设置:
time_str = "2023-08-21 15:30:00"datetime_value = QDateTime.fromString(time_str, "yyyy-MM-dd HH:mm:ss")self.dateTimeEdit.setDateTime(datetime_value)
9.2 获取时间
selected_datetime = self.dateTimeEdit.dateTime()
formatted_datetime = selected_datetime.toString("yyyy-MM-dd HH:mm:ss")
10. 文件选择器
import sys
from PyQt5.QtWidgets import QApplication, QMainWindow, QPushButton, QFileDialogclass FileDialogExample(QMainWindow):def __init__(self):super().__init__()self.initUI()def initUI(self):self.setGeometry(100, 100, 300, 200)self.setWindowTitle('File Dialog Example')self.button = QPushButton('Open File Dialog', self)self.button.setGeometry(100, 100, 150, 30)self.button.clicked.connect(self.showFileDialog)def showFileDialog(self):options = QFileDialog.Options()options |= QFileDialog.ReadOnly  # 可选:设置文件选择框为只读模式file_path, _ = QFileDialog.getOpenFileName(self, "Open File", "", "All Files (*);;Text Files (*.txt)", options=options)if file_path:print("Selected file:", file_path)if __name__ == '__main__':app = QApplication(sys.argv)ex = FileDialogExample()ex.show()sys.exit(app.exec_())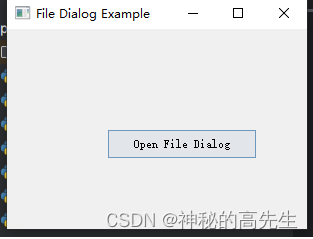
点击按钮会弹出一个文件选择框,允许你选择文件。你可以根据自己的需求进行修改和扩展。在 getOpenFileName 方法中,你可以通过调整第四个参数的字符串来指定不同的文件过滤器。这个参数使用了一种类似于 “文件类型描述 (*扩展名);;文件类型描述 (*扩展名)” 的格式。
11. 显示图片
在 PyQt5 中,你可以使用
QLabel来显示图片。要显示图片,你需要使用QPixmap创建一个图像对象,然后将它设置给QLabel的setPixmap方法。
import sys
from PyQt5.QtWidgets import QApplication, QMainWindow, QLabel, QVBoxLayout, QWidget
from PyQt5.QtGui import QPixmapclass ImageDisplayExample(QMainWindow):def __init__(self):super().__init__()self.initUI()def initUI(self):self.setGeometry(100, 100, 400, 300)self.setWindowTitle('Image Display Example')central_widget = QWidget(self)self.setCentralWidget(central_widget)layout = QVBoxLayout()central_widget.setLayout(layout)self.image_label = QLabel(self)layout.addWidget(self.image_label)self.loadImage()def loadImage(self):pixmap = QPixmap('path_to_your_image.jpg')  # 替换为你的图片路径self.image_label.setPixmap(pixmap)self.image_label.setAlignment(Qt.AlignCenter)if __name__ == '__main__':app = QApplication(sys.argv)ex = ImageDisplayExample()ex.show()sys.exit(app.exec_())
在这个案例中,你需要将
'path_to_your_image.jpg'替换为你自己的图片文件的路径。QPixmap类用于加载图片,而QLabel则用于显示图像。通过调用setPixmap方法,你可以将加载的图像设置给QLabel,然后使用setAlignment方法来设置图像在QLabel中的对齐方式。

12. 工具栏
使用
QMenu和QToolBar来创建菜单和工具栏。菜单用于创建应用程序的导航菜单,而工具栏则提供了快速访问常用功能的方式
import sys
from PyQt5.QtWidgets import QApplication, QMainWindow, QAction, QMenu, QToolBarclass MenuAndToolbarExample(QMainWindow):def __init__(self):super().__init__()self.initUI()def initUI(self):self.setGeometry(100, 100, 800, 600)self.setWindowTitle('Menu and Toolbar Example')self.createMenu()self.createToolbar()def createMenu(self):menubar = self.menuBar()file_menu = menubar.addMenu('File')edit_menu = menubar.addMenu('Edit')new_action = QAction('New', self)new_action.triggered.connect(self.newFile)file_menu.addAction(new_action)open_action = QAction('Open', self)open_action.triggered.connect(self.openFile)file_menu.addAction(open_action)exit_action = QAction('Exit', self)exit_action.triggered.connect(self.close)file_menu.addAction(exit_action)undo_action = QAction('Undo', self)edit_menu.addAction(undo_action)redo_action = QAction('Redo', self)edit_menu.addAction(redo_action)def createToolbar(self):toolbar = QToolBar(self)self.addToolBar(toolbar)new_action = QAction('New', self)new_action.triggered.connect(self.newFile)toolbar.addAction(new_action)open_action = QAction('Open', self)open_action.triggered.connect(self.openFile)toolbar.addAction(open_action)save_action = QAction('Save', self)toolbar.addAction(save_action)def newFile(self):print("New File")def openFile(self):print("Open File")if __name__ == '__main__':app = QApplication(sys.argv)ex = MenuAndToolbarExample()ex.show()sys.exit(app.exec_())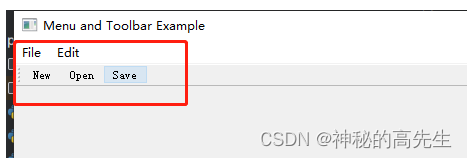
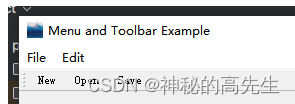
我们创建了一个具有简单菜单和工具栏的窗口。
QMenu用于创建菜单,QToolBar用于创建工具栏。我们创建了一个 “File” 菜单和一个 “Edit” 菜单,每个菜单都有相应的操作。在工具栏中,我们放置了 “New” 和 “Open” 功能的按钮。当点击菜单项或工具栏按钮时,与之相关联的槽函数将被触发。在这个案例中,点击 “New” 或 “Open” 菜单项或工具栏按钮会分别调用
newFile和openFile方法,这里我们只是打印了一些文本,但你可以在这些方法中执行自己的操作。
13. 隐藏窗口栏和设置窗口图标
13.1 隐藏窗口栏
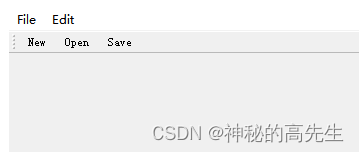
self.setWindowFlags(Qt.FramelessWindowHint) # 设置窗口标志位为无边框
13.2 设置窗口图标
要在 PyQt5 中设置窗口的小图标(窗口图标),你可以使用 QIcon 类来加载图标文件,并将其设置给窗口对象的 setWindowIcon 方法
from PyQt5.QtGui import QIconicon = QIcon('path_to_your_icon.png')  # 替换为你的图标文件路径
self.setWindowIcon(icon)
14. 网页视图
首先第一步需要安装PyQtWebEngine模块
pip install PyQtWebEngine
编写代码
import sysfrom PyQt5.QtCore import QUrl
from PyQt5.QtWidgets import QApplication, QMainWindow, QVBoxLayout, QWidget
from PyQt5.QtWebEngineWidgets import QWebEngineViewclass WebViewExample(QMainWindow):def __init__(self):super().__init__()self.init_ui()def init_ui(self):self.setWindowTitle('网页视图示例')self.setGeometry(100, 100, 800, 600)self.webview = QWebEngineView()self.webview.setUrl(QUrl('https://www.baidu.com'))  # Load the OpenAI websitelayout = QVBoxLayout()layout.addWidget(self.webview)central_widget = QWidget()central_widget.setLayout(layout)self.setCentralWidget(central_widget)if __name__ == '__main__':app = QApplication(sys.argv)example = WebViewExample()example.show()sys.exit(app.exec_())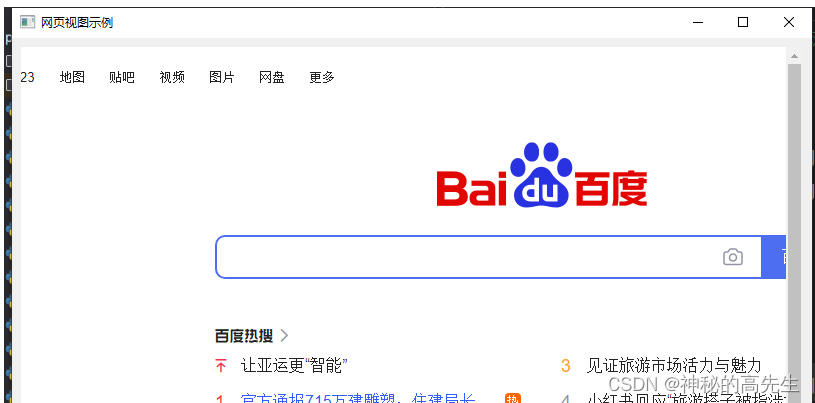
15.音频和视频播放器
QMediaPlayer 来实现音频和视频播放功能。
QMediaPlayer 是一个多媒体播放器,它可以用来播放音频和视频文件。
15.1 音乐播放器
import sysfrom PyQt5.QtCore import QUrl
from PyQt5.QtWidgets import QApplication, QMainWindow, QPushButton, QVBoxLayout, QWidget
from PyQt5.QtMultimedia import QMediaPlayer, QMediaContentclass AudioPlayerExample(QMainWindow):def __init__(self):super().__init__()self.init_ui()def init_ui(self):self.setWindowTitle('音频播放器示例')self.setGeometry(100, 100, 300, 100)self.media_player = QMediaPlayer()self.media_player.setMedia(QMediaContent(QUrl.fromLocalFile('static/msc.mp3')))  # Replace with your audio file pathself.play_button = QPushButton('播放')self.play_button.clicked.connect(self.play_audio)self.stop_button = QPushButton('暂停')self.stop_button.clicked.connect(self.stop_audio)layout = QVBoxLayout()layout.addWidget(self.play_button)layout.addWidget(self.stop_button)central_widget = QWidget()central_widget.setLayout(layout)self.setCentralWidget(central_widget)def play_audio(self):self.media_player.play()def stop_audio(self):self.media_player.pause()if __name__ == '__main__':app = QApplication(sys.argv)example = AudioPlayerExample()example.show()sys.exit(app.exec_())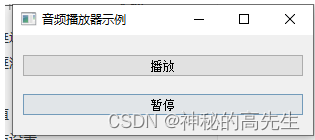
16. 弹窗
16.1 消息框
QMessageBox:用于显示各种类型的消息框,如信息、警告、错误等。
from PyQt5.QtWidgets import QApplication, QMainWindow, QPushButton, QMessageBoxclass MyWindow(QMainWindow):def __init__(self):super().__init__()button = QPushButton("Show Message Box", self)button.clicked.connect(self.show_message_box)def show_message_box(self):QMessageBox.information(self, "Information", "This is an information message.")app = QApplication([])
window = MyWindow()
window.show()
app.exec_()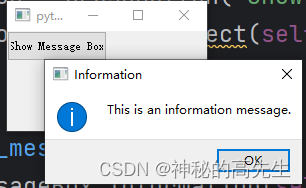
16.2 操作对话框
QInputDialog:用于获取用户输入的对话框。
from PyQt5.QtWidgets import QApplication, QMainWindow, QPushButton, QInputDialogclass MyWindow(QMainWindow):def __init__(self):super().__init__()button = QPushButton("Get Input", self)button.clicked.connect(self.get_input)def get_input(self):text, ok = QInputDialog.getText(self, "Input Dialog", "Enter your name:")if ok:print(f"Entered name: {text}")app = QApplication([])
window = MyWindow()
window.show()
app.exec_()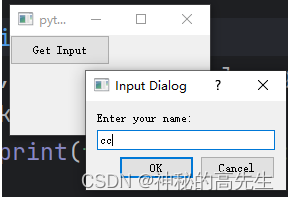
16.3 文件对话框
QFileDialog:用于打开文件对话框或保存文件对话框。
from PyQt5.QtWidgets import QApplication, QMainWindow, QPushButton, QFileDialogclass MyWindow(QMainWindow):def __init__(self):super().__init__()button = QPushButton("Open File", self)button.clicked.connect(self.open_file)def open_file(self):options = QFileDialog.Options()options |= QFileDialog.ReadOnlyfile_name, _ = QFileDialog.getOpenFileName(self, "Open File", "", "All Files (*)", options=options)if file_name:print(f"Selected file: {file_name}")app = QApplication([])
window = MyWindow()
window.show()
app.exec_()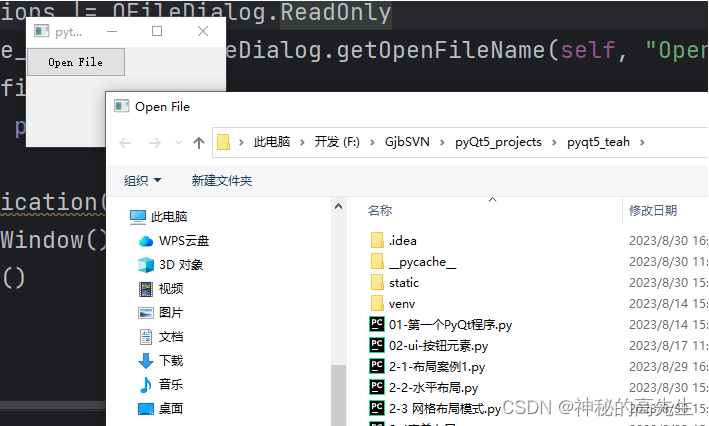
代码解释:
options |= QFileDialog.ReadOnly
这个代码的意思是将 options 变量与 QFileDialog.ReadOnly 进行按位或操作,并将结果赋值给 options 变量。
QFileDialog.ReadOnly 是一个常量,它表示一个标志,用于在 QFileDialog 中设置只读选项。当你按位或操作符 | 将这个标志与其他选项组合时,你可以在 QFileDialog 中设置多个选项。
例如,假设你有以下代码:
options = QFileDialog.Options()
options |= QFileDialog.ReadOnly
options |= QFileDialog.DontUseNativeDialog
这里,我们首先创建了一个空的 QFileDialog.Options 对象。然后,通过 options |= QFileDialog.ReadOnly,我们将只读选项添加到了 options 中。接着,通过 options |= QFileDialog.DontUseNativeDialog,我们又将不使用原生对话框的选项添加到了 options 中。
最终,options 变量会包含这两个选项的组合,你可以将其传递给 QFileDialog 的相关方法,以便按照所选的选项来打开文件对话框。
17. 打包方法
17.1 环境准备
首先安装pyinstaller,使用安装命令:pip install pyinstaller;使用清华大学镜像源加快速度
pip install pyinstaller -i https://pypi.tuna.tsinghua.edu.cn/simple
17.2 进行打包
我们写的python脚本是不能脱离python解释器单独运行的,所以在打包的时候,至少会将python解释器和脚本一起打包,同样,为了打包的exe能正常运行,会把我们所有安装的第三方包一并打包到exe。
即使我们的项目只使用的一个requests包,但是可能我们还安装了其他n个包,但是他不管,因为包和包只有依赖关系的。比如我们只装了一个requests包,但是requests包会顺带装了一些其他依赖的小包,所以为了安全,只能将所有第三方包+python解释器一起打包。
1. 单文件打包
去除控制台打包
pyinstaller -F -w 文件地址
带控制台打包
pyinstaller -F 文件地址
打包指定exe 图标打包
pyinstaller -F -i 图标 主文件
2. 多文件打包
pyinstaller [主文件] -p [其他文件1] -p [其他文件2] --hidden-import [自建模块1] --hidden-import [自建模块2]
