文章目录
- 一、赛事概述
- 1.1 OpenBookQA Dataset
- 1.2 比赛背景
- 1.3 评估方法和代码要求
- 1.4 比赛数据集
- 1.5 优秀notebook
- 二、BERT Baseline
- 2.1 数据预处理
- 2.2 定义data_collator
- 2.3 加载模型,配置trainer并训练
- 2.4 预测结果并提交
- 2.5 deberta-v3-large+ 1k Wiki(LB= 0.709)
- 2.5.1 数据预处理
- 2.5.2 配置trainer参数,开启训练
- 2.5.3 推理(略)
- 2.6 RADEK DEBERTA v3 large(`0.723→0.759`)
- 2.6.1 New dataset + DEBERTA v3 large training!
- 2.6.2 Science Exam Trained Model Weights
前言:国庆期间哪也没去,重装了win10,conda和python环境,然后重点解读Kaggle - LLM Science Exam赛事的优秀代码,希望可以学到些东西。
一、赛事概述
1.1 OpenBookQA Dataset
OpenBookQA Dataset是由美国艾伦人工智能研究院(Allen Institute for AI)发布的一个问答技术评测集,其主要目的是通过选择题考试的方式来测试和评估人工智能系统的问题回答能力,以下是更详细的介绍。
-
发布背景
许多之前的阅读理解数据集都是基于抽取式的方法,只需要从给定的上下文中抽取答案,而没必要进行更深层次的推理。OpenBookQA要求模型需要利用基础知识来回答问题,进行更复杂的推理。 -
数据集构成
OpenBookQA包含5957个四选一的科学常识问题(4,957 train, 500 dev, 500 test)。这些问题需要根据包含1326个科学事实的小“书本”来回答。问题采样自维基百科页面。 -
模型表现
回答OpenBookQA的问题不仅需要给定知识库中的科学常识,还需要额外的广泛常识知识。这些问题既不能通过检索算法回答正确,也不能通过词语共现算法回答正确。Strong neural baselines在OpenBookQA上只能达到约50%的准确率,与人类92%的准确率存在明显差距。 -
附加数据
该数据集还提供了5167个群众贡献的常识知识,以及扩展的训练集、开发集、测试集,每个问题对应其所考察的核心科学事实、人类准确率、清晰度评分等信息。 -
数据集意义
OpenBookQA推动了机器阅读理解从抽取式到推理式的发展,评估了模型在开放域知识下的深层理解和推理能力。
1.2 比赛背景
赛事地址:Kaggle - LLM Science Exam
- LLM的能力:随着大型语言模型的能力不断扩展,研究领域中出现了使用LLMs来表征自身的趋势。因为许多现有的自然语言处理基准测试已经被最先进的模型轻松解决,所以有趣的工作是利用LLMs创建更具挑战性的任务,以测试更强大的模型。
- 数据生成:比赛使用了gpt3.5模型,该模型基于从维基百科中提取的各种科学主题的文本片段,要求它编写一个多项选择问题(附带已知答案),然后过滤掉简单的问题。
- 资源受限:本次比赛是一场代码比赛,GPU和时间都受到限制。
- 挑战性:虽然量化和知识蒸馏等技术可以有效地缩小语言模型以便在更少的硬件资源上运行,但这场比赛仍旧充满挑战。目前,目前在 Kaggle 上运行的最大模型有大约 100 亿个参数,而
gpt3.5有 1750 亿个参数。如果一个问答模型能够轻松通过一个比其规模大10倍以上的模型编写的问答测试,这将是一个真正有趣的结果。另一方面,如果更大的模型能够有效地难住较小的模型,这对LLMs自我评估和测试的能力具有引人注目的影响。 - 竞赛旨在探讨比gpt3.5小10倍以上的问答模型能否有效回答gpt3.5编写的问题。结果将揭示LLM的基准测试和自我测试能力。
1.3 评估方法和代码要求
提交根据平均精度 @ 3 (MAP@3) 进行评估:

其中 ,𝑈 为测试集中的问题数量,𝑃(𝑘) 为截断值为 𝑘 时的精确度,𝑛 为每个问题的预测数量,𝑟𝑒𝑙(𝑘) 为指示函数,如果排名为 𝑘 的项目是相关的(正确的)标签,则等于1,否则为0。
另外,某个问题正确预测后,后续将跳过该标签的其他预测,以防止刷准确度。举例来说,假设有一个测试集,里面有3个问题的正确答案都是A,如果有一个模型对这3个问题给出以下答案,那么以下情况都会得到平均精确度1.0的分数:
[A, B, C, D, E] # 问题1预测
[A, A, A, A, A] # 问题2预测
[A, B, A, C, A] # 问题3预测
这意味着一旦找到正确答案(A),之后的预测不再影响平均精确度分数。
本次比赛必须以notebook提交,且CPU和GPU运行时间少于9小时。禁用互联网,但是允许使用公开的外部数据,包括预先训练的模型。另外提交文件必须命名为 submission.csv。
1.4 比赛数据集
本次比赛是回答由gpt3.5模型生成的4000道多选题组成的测试集。测试集是隐藏的,当提交notebook后,才会有实际的测试数据进行评测。
- train.csv : 200个样本,问题+答案,以显示数据格式,并大致了解测试集中的问题类型。
- test.csv : 测试集,只包含题目,答案省略。
- sample_submission.csv : 提交格式示例
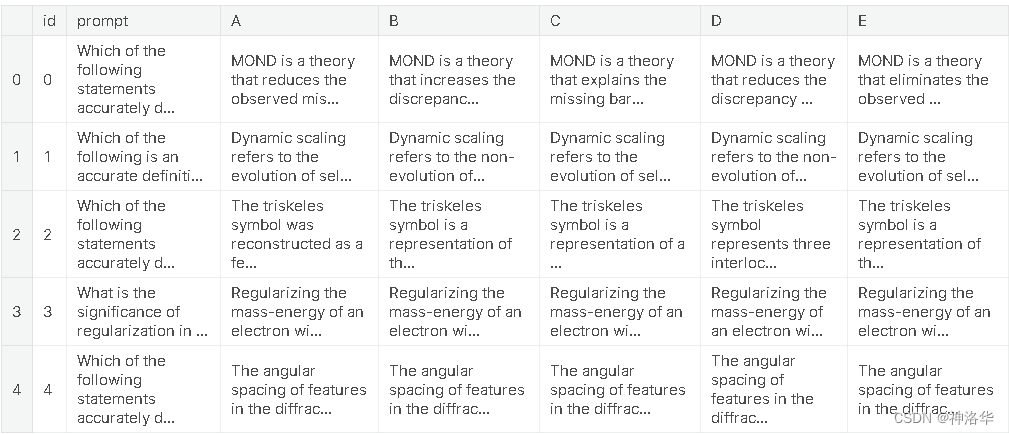
具体的训练集格式如下:
# Let's import the public training set and take a look
import pandas as pdtrain_df = pd.read_csv('/kaggle/input/kaggle-llm-science-exam/train.csv')
train_df.head()

对于测试集中的每个 id 标签,您最多可以预测 3 个标签 。submission.csv文件应包含header并具有以下格式:
id,prediction
0,	A B C
1,	B C A
2,	C A B
etc.
1.5 优秀notebook
-
《Starter Notebook: Ranked Predictions with BERT》:Bert Baseline,使用
bert-base-cased和比赛提供的200个训练集样本进行训练,Public Score=0.545。 -
《[EDA, Data gathering] LLM-SE ~ Wiki STEM | 1k DS》(制作训练数据):比赛提供的200个样本太少了,作者
LEONID KULYK先分析了比赛数据集,然后同样使用gpt3.5制作了1000个Wikipedia样本,数据集上传在Wikipedia STEM 1k。 -
《LLM-SE ~ deberta-v3-large -i | 1k Wiki》:
LEONID KULYK将自己收集的1000个Wikipedia样本和比赛训练集合并,一起训练,模型是deberta-v3-large。notebook中有最终模型权重,可直接推理,LB= 0.709。 -
《New dataset + DEBERTA v3 large training!》:
0.723→0.759-
Radek基于方法3,使用自己生成的500个额外数据训练DEBERTA v3 large,Public Score=0.723。 -
Radek后来又生成了6000条数据,跟之前的500条融合为6.5K数据集,并在此基础上进行三次训练,得到了三个模型权重,上传在Science Exam Trained Model Weights中。然后通过下面两种方法,进行推理:-
《Inference using 3 trained Deberta v3 models》:三个模型分别预测之后概率取平均,
Public Score=0.737。 -
An introduction to Voting Ensemble:作者在这个notebook中详细介绍了Voting Ensemble以及使用方法,
Public Score=0.759。
-
-
作者最后上传了15k high-quality train examples。
-
-
《Open Book LLM Science Exam》:
jjinho首次提出了Open Book方法,演示了如何在训练集中,使用faiss 执行相似性搜索,找到与问答数据最相似的context(Wikipedia数据),以增强问答效果。 -
《Open Book LLM Science Exam - Reduced RAM usage》:
quangbk改进了方法5中的内存效率。 -
《OpenBook DeBERTaV3-Large Baseline (Single Model》):
Anil将方法4和方法6结合起来。他将先测试集数据按照方法6搜索出context,然后将其与prompt合并,得到新的测试集。然后加载方法4训练的模型进行推理,Public Score=0.771。test_df["prompt"] = test_df["context"] + " #### " + test_df["prompt"] -
《Sharing my trained-with-context model》:
Mgoksu同样使用了方法7,只是使用了自己制作的数据集进行离线训练,得到一个更好的模型llm-science-run-context-2,然后进行推理,top publicLB=0.807。 -
《How To Train Open Book Model - Part 1》、《How To Train Open Book Model - Part 2》:
CHRIS DEOTTE在part1中,参照方法8在自己制作的60k数据集进行训练,得到模型model_v2;然后在part2中使用方法8中的模型llm-science-run-context-2以及model_v2分别进行推理,得到的两个概率取平均,得到最终结果(Public Score=0.819)。- 在part1中,作者使用了竞赛指标MAP@3 来评估模型,并讨论了一些训练技巧,例如使用 PEFT或冻结model embeddings&model layers来减少训练参数、增加 LR 并减少 epochs来减少计算量、 使用gradient_checkpointing(这使用磁盘来节省RAM)、使用gradient_accumlation_steps模拟更大的批次等等。
-
《LLM Science Exam Optimise Ensemble Weights》:作者首先使用了方法9训练的模型权重;另外为了增加多样性,还融合了其它几个没有使用Open Book的deberta-v3-large模型,最终
Public Score=0.837。作者还写了以下notebook:- 《Incorporate MAP@k metrics into HF Trainer》:在Trainer中加入MAP@k指标
- 《Introducing Adversarial Weight Perturbation (AWP)》、《Adversarial Weight Perturbation (AWP) Inference》:介绍对抗性权重扰动AWP,以及推理方法。
- 《Using DeepSpeed with HF🤗 Trainer》,希望可以节约内存,以便训练更大的模型。
-
《LLM-SciEx Optimise Ensemble Weights(better models)》:类似方法10,通过模型融合,
Public Score=0.846。 -
《with only 270K articles》:作者自己制作了270K Wikipedia数据,使用
LongFormer模型而不是deberta-v3-large进行训练,Public Score=0.862。 -
《Platypus2-70B with Wikipedia RAG》:
SIMJEG结合了方法8和12,最终Public Score=0.872。ALI在 《Explained Platypus2-70B + Wikipedia RAG》中对此notebook做了详细的说明。
二、BERT Baseline
此部分参考《Starter Notebook: Ranked Predictions with BERT》,作者直接使用bert_base模型对训练集中的200个样本进行3个epoch的训练,然后再进行推理。大部分代码参考的是HF官方文档《Multiple choice》
2.1 数据预处理
import pandas as pd
from datasets import Datasettrain_df = pd.read_csv('/kaggle/input/kaggle-llm-science-exam/train.csv')
train_ds = Dataset.from_pandas(train_df)
train_df.head()

from transformers import AutoTokenizermodel_dir = 'bert-base-cased'
tokenizer = AutoTokenizer.from_pretrained(model_dir)options = 'ABCDE'
indices = list(range(5))
option_to_index = {option: index for option, index in zip(options, indices)}
index_to_option = {index: option for option, index in zip(options, indices)}def preprocess(example):# AutoModelForMultipleChoice 需要的是question/answer对,所以问题被复制5次first_sentence = [example['prompt']] * 5second_sentence = []# 遍历选项(A 到 E)并将它们添加到 second_sentence 列表中for option in options:second_sentence.append(example[option])tokenized_example = tokenizer(first_sentence, second_sentence, truncation=True)# 将答案映射为索引,并将其添加到 tokenized_example 中作为标签tokenized_example['label'] = option_to_index[example['answer']]return tokenized_example# 使用数据集映射(map)预处理函数到训练数据集,同时删除不需要的列
tokenized_train_ds = train_ds.map(preprocess, batched=False, remove_columns=['prompt', 'A', 'B', 'C', 'D', 'E', 'answer'])
print(tokenized_train_ds[0])
{'id': 1, 'input_ids': [[101, 5979, ...], [101, 5979, ...], [101, 5979, ...], [101, 5979, ...], [101, 5979, ...]], 'token_type_ids': [[0, 0, ...], [0, 0, ...],[0, 0, ...],[0, 0, ...],[0, 0, ...]], 'attention_mask': [[1, 1,...],[1, 1,...],[1, 1,...],[1, 1,...],[1, 1,...]], 'label': 0}
可以看到,每个样本的问题被重复5次后和5个选项合并,解码后的结果input_ids、token_type_ids、attention_mask都是5个元素的嵌套列表,等于一个样本被拆成5个样本。
有关填充和截断的详细信息,可参考官方文档《Padding and truncation》
2.2 定义data_collator
#  datacollator 来自 https://huggingface.co/docs/transformers/tasks/multiple_choice
# 每个batch中对问答对进行动态填充(dynamically pad),所以不需要将每个问答对都填充到模型最大序列长度
from dataclasses import dataclass
from transformers.tokenization_utils_base import PreTrainedTokenizerBase, PaddingStrategy
from typing import Optional, Union
import torch@dataclass
class DataCollatorForMultipleChoice:tokenizer: PreTrainedTokenizerBasepadding: Union[bool, str, PaddingStrategy] = Truemax_length: Optional[int] = Nonepad_to_multiple_of: Optional[int] = Nonedef __call__(self, features):# features就是4个样本(batch size=4)label_name = "label" if 'label' in features[0].keys() else 'labels'# 对每个样本(feature,字典格式)使用pop删除key为label的键值对,返回被删除的值# 所以feature被删除了label键值对,而labels的值是四个样本label列表[0, 0, 1, 0]labels = [feature.pop(label_name) for feature in features] batch_size = len(features)  						# 批次大小num_choices = len(features[0]['input_ids'])			# 选项数flattened_features = [[{k: v[i] for k, v in feature.items()} for i in range(num_choices)] for feature in features]flattened_features = sum(flattened_features, [])batch = self.tokenizer.pad(flattened_features,padding=self.padding,max_length=self.max_length,pad_to_multiple_of=self.pad_to_multiple_of,return_tensors='pt',)batch = {k: v.view(batch_size, num_choices, -1) for k, v in batch.items()}batch['labels'] = torch.tensor(labels, dtype=torch.int64)return batch
-
传入数据:features为四个样本数据,每个样本格式和
tokenized_train_ds[0]的格式一样[{'input_ids': [...], 'token_type_ids': [...], 'attention_mask': [...], 'label': 0}, {'input_ids': [...], 'token_type_ids': [...], 'attention_mask': [...], 'label': 0}, {'input_ids': [...], 'token_type_ids': [...], 'attention_mask': [...], 'label': 1}, {'input_ids': [...], 'token_type_ids': [...], 'attention_mask': [...], 'label': 0}] -
去除label标签:
labels = [feature.pop(label_name) for feature in features],通过字典的pop方法,去除了每个样本中的label键值对,并将label的值取出,最终labels=[0, 0, 1, 0]。这一步之后,每个feature为:{'input_ids': [[...], [...], [...], [...], [...]], 'token_type_ids': [[...], [...], [...], [...], [...]], 'attention_mask': [[...], [...], [...], [...], [...]]} -
执行flattened操作,此时flattened_features为:
[[{'input_ids': ..., 'token_type_ids': ..., 'attention_mask': ...}, {...}, {...}, {...}, {...}], [{...}, {...}, {...}, {...}, {...}], [{...}, {...}, {...}, {...}, {...}],[{...}, {...}, {...}, {...}, {...}]] -
sum(flattened_features, [])操作后,flattened_features为:
# 加和操作后的flattened_features,成了20个样本
[{'input_ids': [...], 'token_type_ids': [...], 'attention_mask': [...]},
{'input_ids': [...], 'token_type_ids': [...], 'attention_mask': [...]},
{'input_ids': [...], 'token_type_ids': [...], 'attention_mask': [...]},
{'input_ids': [...], 'token_type_ids': [...], 'attention_mask': [...]},
{'input_ids': [...], 'token_type_ids': [...], 'attention_mask': [...]},
{'input_ids': [...], 'token_type_ids': [...], 'attention_mask': [...]},
{'input_ids': [...], 'token_type_ids': [...], 'attention_mask': [...]},
{'input_ids': [...], 'token_type_ids': [...], 'attention_mask': [...]},
{'input_ids': [...], 'token_type_ids': [...], 'attention_mask': [...]},
{'input_ids': [...], 'token_type_ids': [...], 'attention_mask': [...]},
{'input_ids': [...], 'token_type_ids': [...], 'attention_mask': [...]},
{'input_ids': [...], 'token_type_ids': [...], 'attention_mask': [...]},
{'input_ids': [...], 'token_type_ids': [...], 'attention_mask': [...]},
{'input_ids': [...], 'token_type_ids': [...], 'attention_mask': [...]}, ...]
这一步是将嵌套列表转为一维列表,方便后续解码时方便进行pad和batch操作。
- 最终结果为:
{'input_ids': tensor([[[ 101, 2627...,    0]]]),
'token_type_ids': tensor([[[0, 0, 0,  ..., 0, 0]]]),
'attention_mask': tensor([[[1, 1, 1,  ..., 0, 0]]]),
'labels': tensor([0, 0, 1, 0])}
2.3 加载模型,配置trainer并训练
from transformers import AutoModelForMultipleChoice, TrainingArguments, Trainer
model = AutoModelForMultipleChoice.from_pretrained(model_dir)output_dir = 'finetuned_bert'
training_args = TrainingArguments(output_dir=output_dir,evaluation_strategy="epoch",save_strategy="epoch",load_best_model_at_end=True,learning_rate=5e-5,per_device_train_batch_size=4,per_device_eval_batch_size=4,num_train_epochs=3,weight_decay=0.01,report_to='none')trainer = Trainer(model=model,args=training_args,train_dataset=tokenized_train_ds,eval_dataset=tokenized_train_ds,tokenizer=tokenizer,data_collator=DataCollatorForMultipleChoice(tokenizer=tokenizer))trainer.train()
Epoch	Training Loss	Validation Loss
1			No log			1.564447
2			No log			1.527968
3			No log			1.417341
2.4 预测结果并提交
- 直接使用trainer预测
test_df = pd.read_csv('/kaggle/input/kaggle-llm-science-exam/test.csv')
# 测试集没有answer列,加上这一列以保持和训练集格式一致,方便使用同样的处理方式
test_df['answer'] = 'A'
test_ds = Dataset.from_pandas(test_df)
tokenized_test_ds = test_ds.map(preprocess, batched=False, remove_columns=['prompt', 'A', 'B', 'C', 'D', 'E', 'answer'])test_predictions = trainer.predict(tokenized_test_ds) # 结果是PredictionOutput格式,包含predictions、label_ids、metrics三个字段
test_df.head()
import numpy as np
def predictions_to_map_output(predictions):# 对每一行的预测结果按照降序排列,并获取每行的前三个答案的索引# np.argsort默认是对列表中元素值进行升序排列,并返回排序后元素值对应的索引top_answer_indices = np.argsort(-predictions)[:,:3]top_answers = [' '.join([index_to_option[idx] for idx in row]) for row in top_answer_indices]return top_answers
# 获取测试集的id列,作为提交文件的id列
submission_df = test_df[['id']]
submission_df['prediction'] = predictions_to_map_output(test_predictions.predictions)
submission_df.head()
	id	prediction
0	0	D B E
1	1	B A D
2	2	A C D
3	3	C D A
4	4	E D C
- 重新加载模型预测
可参考《LLM-SE ~ deberta-v3-large -i | 1k Wiki》
如果是重新打开notebook后再预测,需要先加载模型,设置推理的trainer参数再进行预测
from transformers import AutoModelForMultipleChoice, TrainingArguments, Trainer
model_checkpoint = "finetuned_bert/checkpoint-150"
model = AutoModelForMultipleChoice.from_pretrained(model_dir)
tokenizer = AutoTokenizer.from_pretrained(model_checkpoint)
# 只进行推理
inference_args = TrainingArguments(output_dir="./inference_results",  # 推理结果的保存目录per_device_eval_batch_size=8,     # 每个设备的推理批量大小
)trainer = Trainer(model=model,                  # 已加载的模型tokenizer=tokenizer,args=inference_args,          # 推理的参数data_collator=DataCollatorForMultipleChoice(tokenizer=tokenizer)
)test_predictions = trainer.predict(tokenized_test_ds)
后面的步骤都一样了。
2.5 deberta-v3-large+ 1k Wiki(LB= 0.709)
参考《LLM-SE ~ deberta-v3-large -t | 1k Wiki》(训练)、 《LLM-SE ~ deberta-v3-large -i | 1k Wiki》(推理)
LEONID KULYK使用自己收集的1000个Wikipedia样本和比赛训练集样本一起训练,模型是deberta-v3-large。主要训练代码为:
2.5.1 数据预处理
- 合并训练集样本和1k样本,划分训练集和验证集
stem_1k_df = pd.read_csv("/kaggle/input/wikipedia-stem-1k/stem_1k_v1.csv")# 合并原训练集和1k数据集
new_train_df = pd.concat([train_df,stem_1k_df])
new_train_df.index = list(range(len(new_train_df)))
new_train_df.id = list(range(len(new_train_df)))
# 采样10%作为验证集,剩下90%为训练集,新的训练集共(1000+200)*0.9=1080条数据
eval_sampled_df = new_train_df.sample(frac=0.1, random_state=42)
train_sampled_df = new_train_df.drop(eval_sampled_df.index)train_ds = Dataset.from_pandas(train_sampled_df)
eval_ds = Dataset.from_pandas(eval_sampled_df)
- 编码数据
model_dir = "microsoft/deberta-v3-large"
tokenizer = AutoTokenizer.from_pretrained(model_dir)
tokenized_train_ds = train_ds.map(preprocess, batched=False, remove_columns=['prompt', 'A', 'B', 'C', 'D', 'E', 'answer'])
tokenized_eval_ds = eval_ds.map(preprocess, batched=False, remove_columns=['prompt', 'A', 'B', 'C', 'D', 'E', 'answer'])
2.5.2 配置trainer参数,开启训练
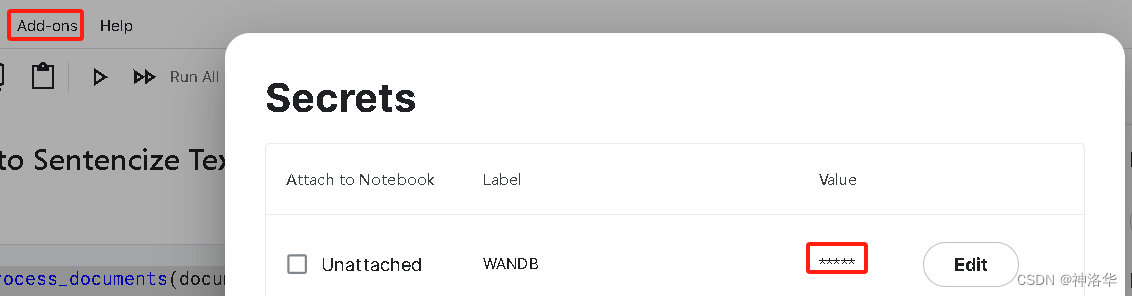
- 配置wandb,跟踪训练
import os
from kaggle_secrets import UserSecretsClient
user_secrets = UserSecretsClient()		# 访问 存储在Kaggle Secrets 中的wandb KEY
# 将wandb KEY存储在环境变量 "WANDB_API_KEY" 中,方便后续创建wandb进程
os.environ['WANDB_API_KEY'] = user_secrets.get_secret("wandb_api")
2. 配置trainer参数,开启训练
model = AutoModelForMultipleChoice.from_pretrained(model_dir)output_dir = 'finetuned_bert'
training_args = TrainingArguments(output_dir=output_dir,evaluation_strategy ="steps",eval_steps = 50, # Evaluation and Save happens every 5 stepssave_steps = 50,save_total_limit = 3, # Only last 3 models are saved. Older ones are deletedlogging_steps=1,load_best_model_at_end=True,learning_rate=3e-6,per_device_train_batch_size=2,per_device_eval_batch_size=2,num_train_epochs=4,warmup_steps=50,report_to='wandb')trainer = Trainer(model=model,args=training_args,train_dataset=tokenized_train_ds,eval_dataset=tokenized_eval_ds,tokenizer=tokenizer,data_collator=DataCollatorForMultipleChoice(tokenizer=tokenizer))trainer.train()
Step	Training Loss	Validation Loss
50		1.497800		1.607024
100		1.611300		1.604378
......
2100	1.110600		1.366213
2150	0.012100		1.371677
TrainOutput(global_step=2160, training_loss=1.018808510694308, metrics={'train_runtime': 1660.1988, 'train_samples_per_second': 2.602, 'train_steps_per_second': 1.301, 'total_flos': 1340019889268400.0, 'train_loss': 1.018808510694308, 'epoch': 4.0})
# 在当前目录保持模型
trainer.save_model(f'.')
2.5.3 推理(略)
2.6 RADEK DEBERTA v3 large(0.723→0.759)
2.6.1 New dataset + DEBERTA v3 large training!
《New dataset + DEBERTA v3 large training!》、
Radek 基于上一节的deberta-v3-large+ 1k Wiki,使用自己生成的500个额外数据训练DEBERTA v3 large,Public Score=0.723。下面是主要方法:
# 拼接原训练集和自己的500条数据
df_train = pd.concat([df_train,pd.read_csv('/kaggle/input/additional-train-data-for-llm-science-exam/extra_train_set.csv'),
])
df_train.reset_index(inplace=True, drop=True)
df_train.shape
(700, 7)
model = AutoModelForMultipleChoice.from_pretrained(deberta_v3_large)
tokenizer = AutoTokenizer.from_pretrained(deberta_v3_large)dataset = Dataset.from_pandas(df_train)
tokenized_dataset = dataset.map(preprocess, remove_columns=['prompt', 'A', 'B', 'C', 'D', 'E', 'answer'])
training_args = TrainingArguments(warmup_ratio=0.8,learning_rate=5e-6,per_device_train_batch_size=2,per_device_eval_batch_size=4,num_train_epochs=3,report_to='none',output_dir='.',)trainer = Trainer(model=model,args=training_args,tokenizer=tokenizer,data_collator=DataCollatorForMultipleChoice(tokenizer=tokenizer),train_dataset=tokenized_dataset,
)trainer.train()
Step	Training Loss
500		1.614600
1000	1.517300
TrainOutput(global_step=1050, training_loss=1.545968751453218, metrics={'train_runtime': 392.5617, 'train_samples_per_second': 5.349, 'train_steps_per_second': 2.675, 'total_flos': 1004851100338920.0, 'train_loss': 1.545968751453218, 'epoch': 3.0})
可以看出,没有划分验证集,且使用了更小的学习率,Training Loss比2.5中更高,但是分数高一些。推理过程略。
2.6.2 Science Exam Trained Model Weights
Radek后来又生成了6000条数据,跟之前的500条融合为6.5K数据集,并在此基础上进行三次训练,得到了三个模型权重,上传在Science Exam Trained Model Weights中。然后通过下面两种方法,进行推理:
-
《Inference using 3 trained Deberta v3 models》:三个模型分别预测之后概率取平均,
Public Score=0.737。 -
An introduction to Voting Ensemble:作者在这个notebook中详细介绍了Voting Ensemble以及使用方法,
Public Score=0.759。
作者最后上传了15k high-quality train examples。