前言:
三年前鄙人有幸在现已几乎报废的Window的
DELL中搭建过Spring源码环境,今天,Mac版的搭建,来了。
本篇文章环境搭建:Spring5.2.1 + Gradle5.6.3-all + jdk8 + IDEA2022.3版本
文章目录
- 1、Spring源码下载
- 2、Gradle下载
- 3、配置Gradle环境变量
- 4、配置Gradle镜像等
- 5、编译Spring源码
- 6、新建自己的模块用来学习Debug源码
- 7、编写Demo代码运行测试
1、Spring源码下载
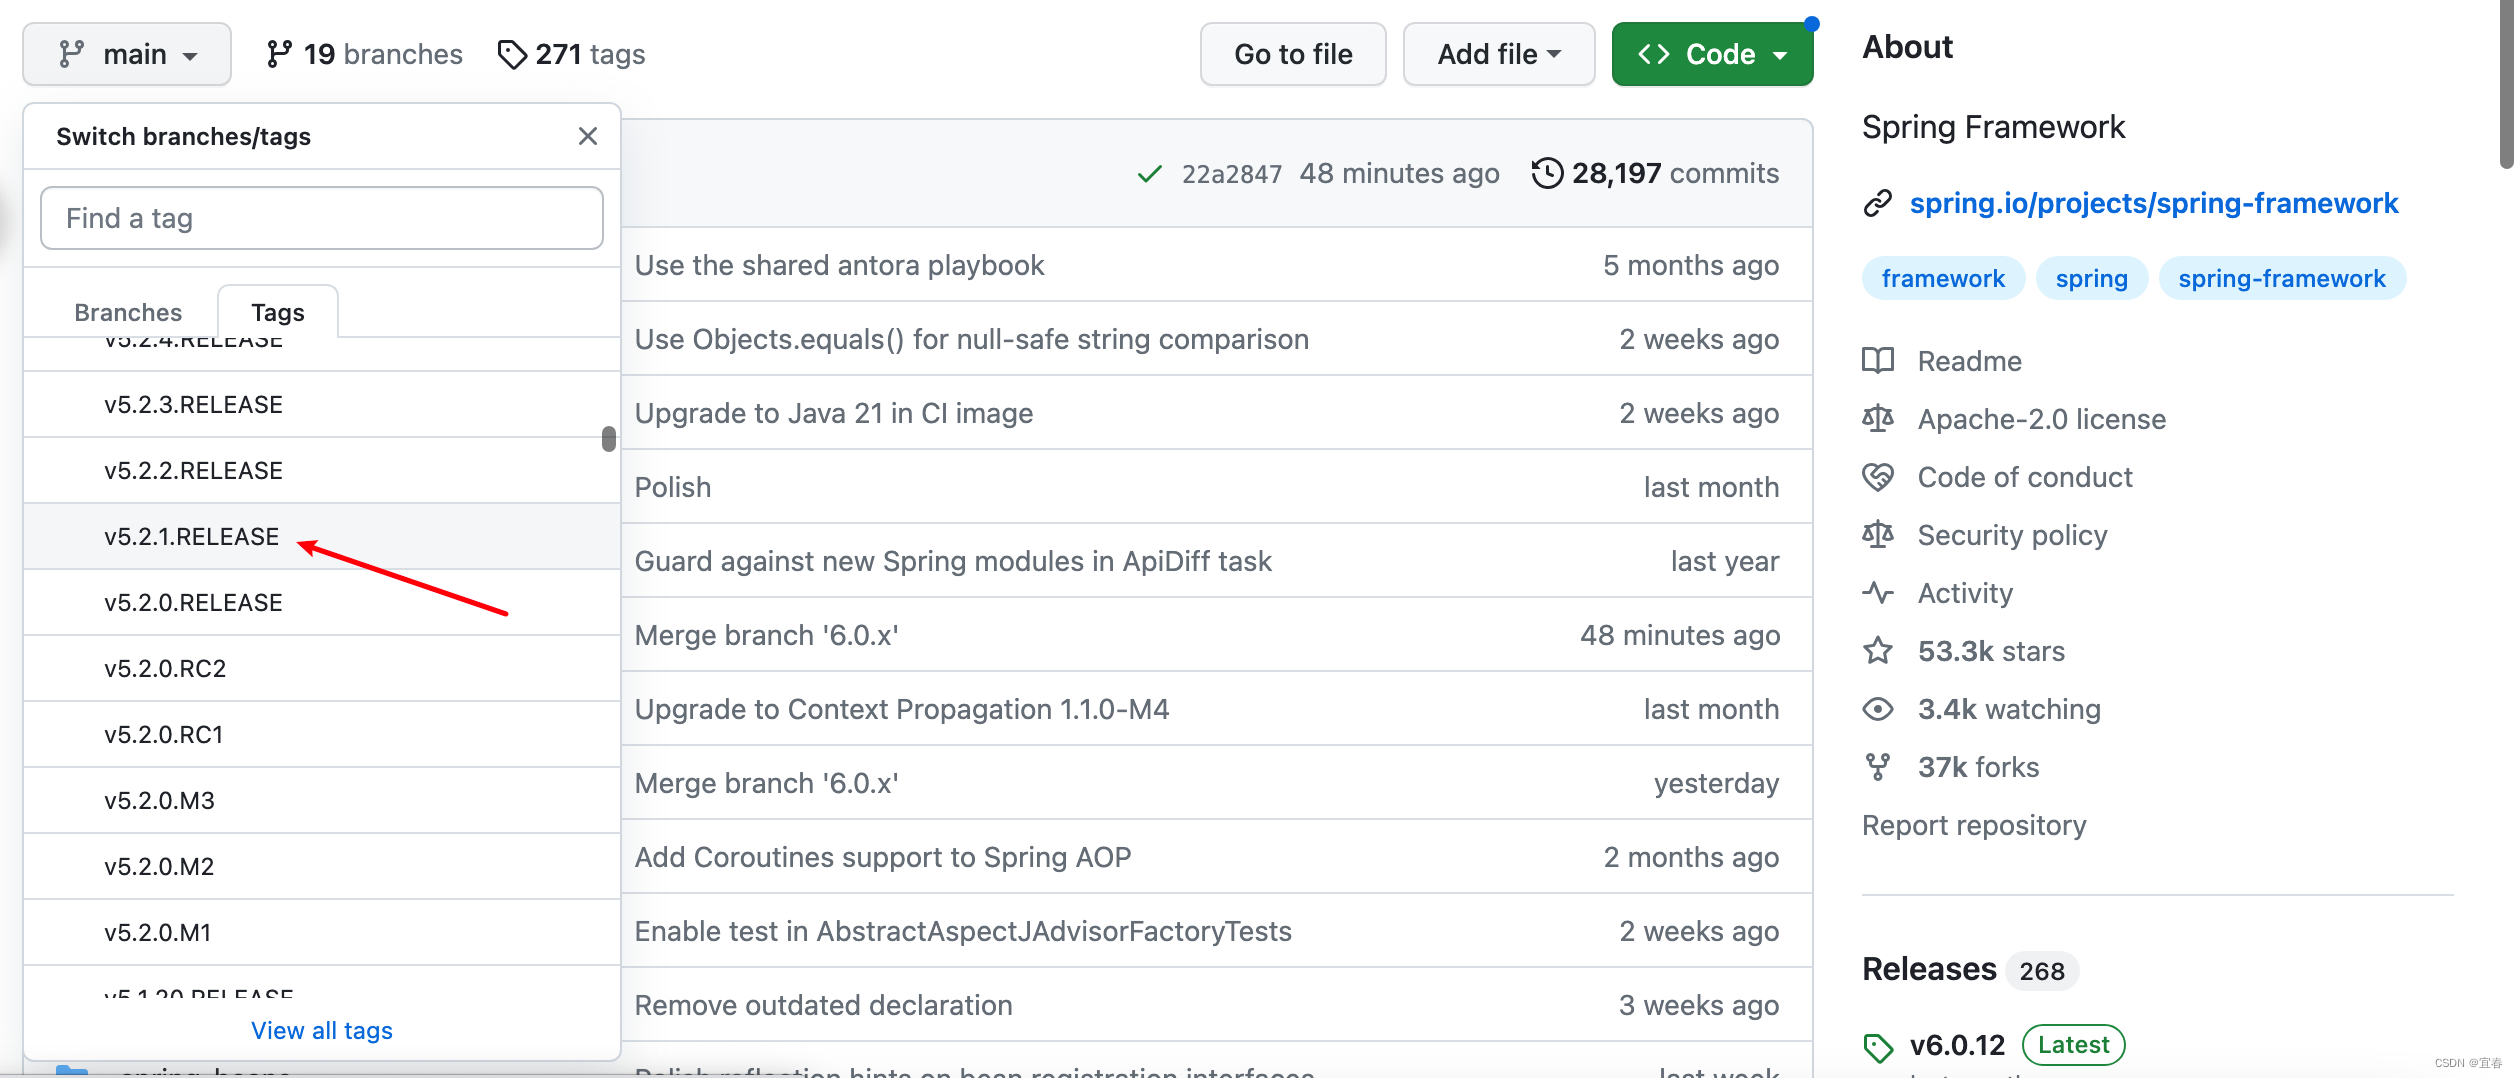
官方下载spring源码
https://github.com/spring-projects/spring-framework
记得下载RELEASE版本!!!
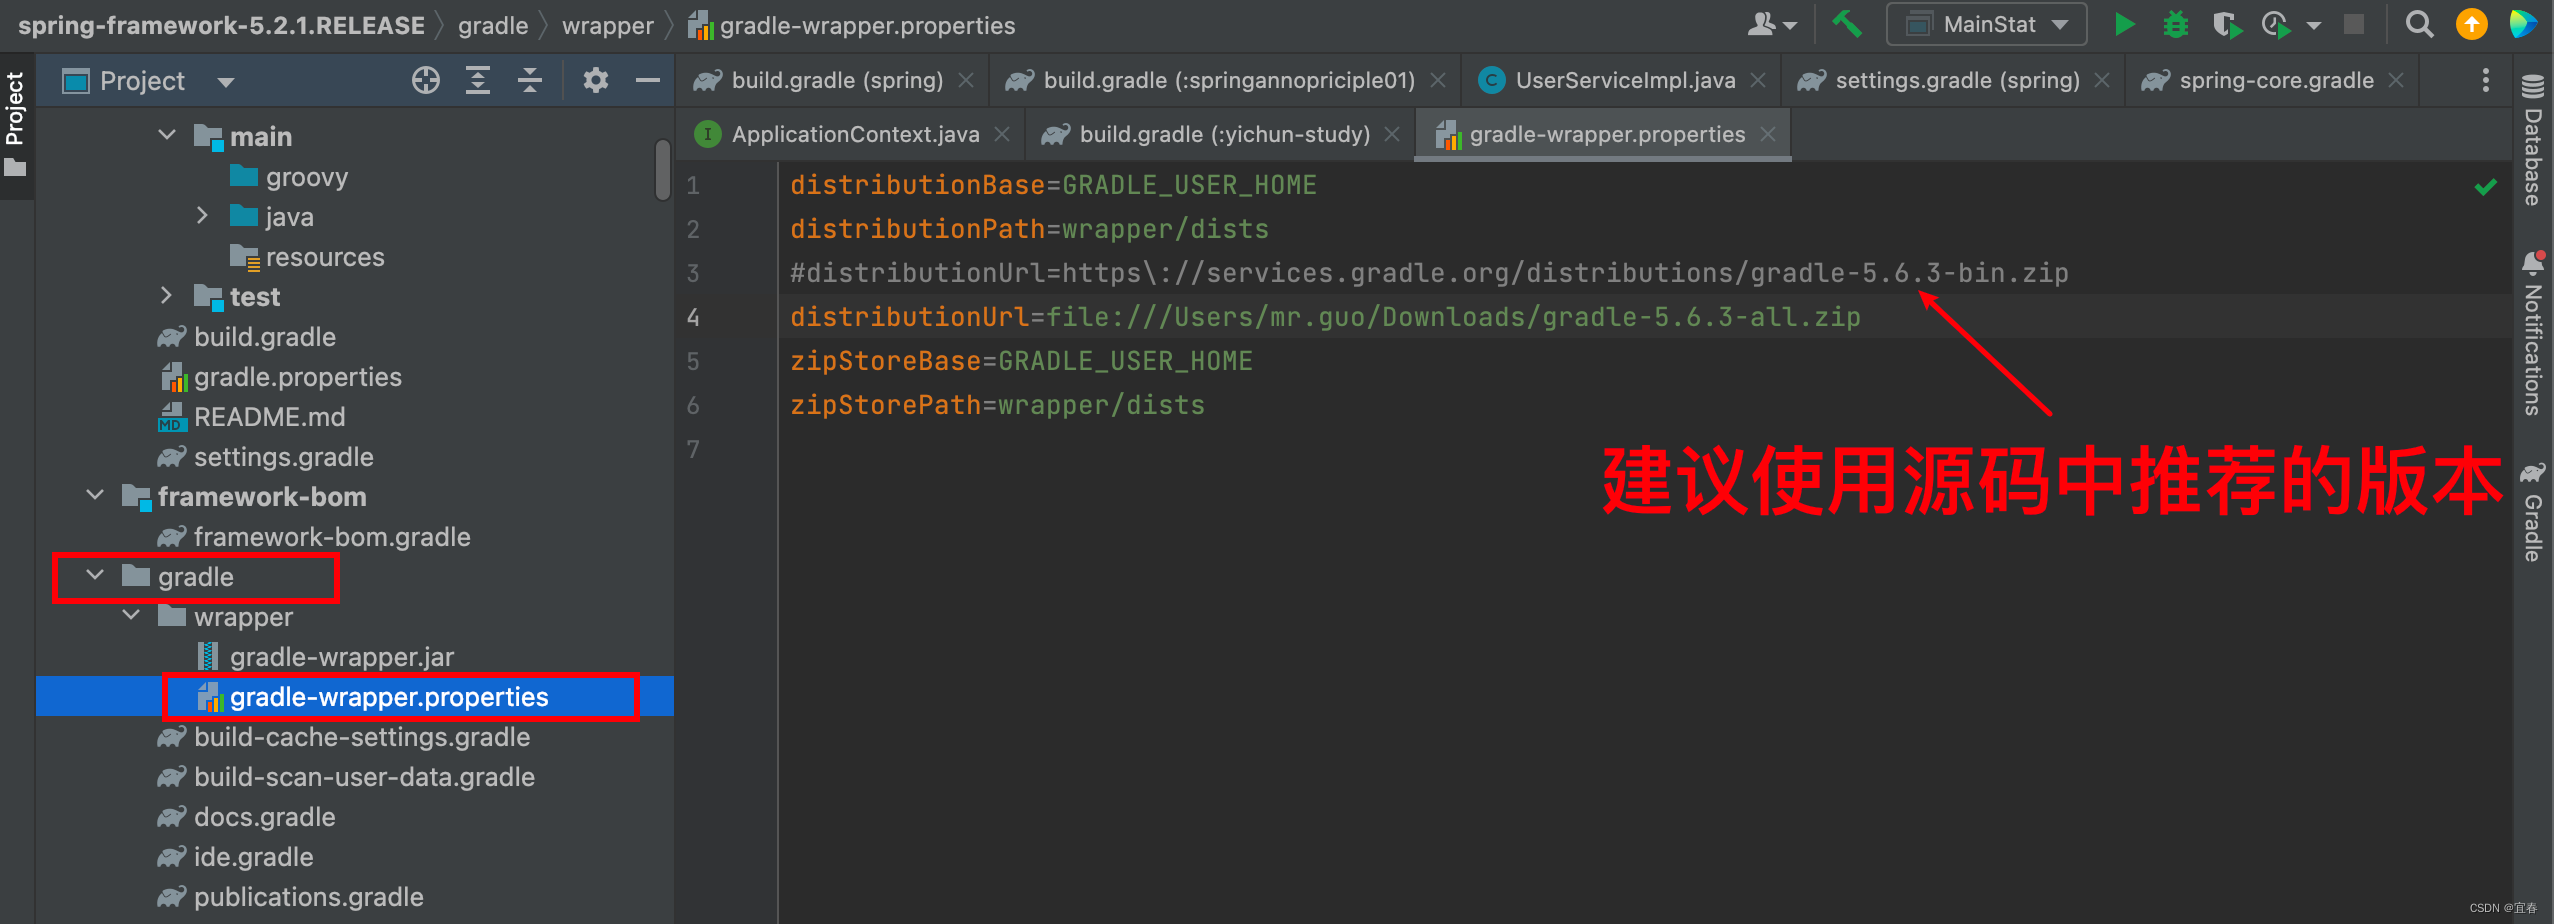
2、Gradle下载
gradle下载地址
https://services.gradle.org/distributions/
3、配置Gradle环境变量
终端运行
open -e ~/.bash_profile
内容如下
GRADLE_HOME=/Users/mr.guo/gradle-5.6.3
export GRADLE_HOME
export PATH=${PATH}:/Users/mr.guo/gradle-5.6.3/bin
刷新环境变量
source ~/.bash_profile
执行
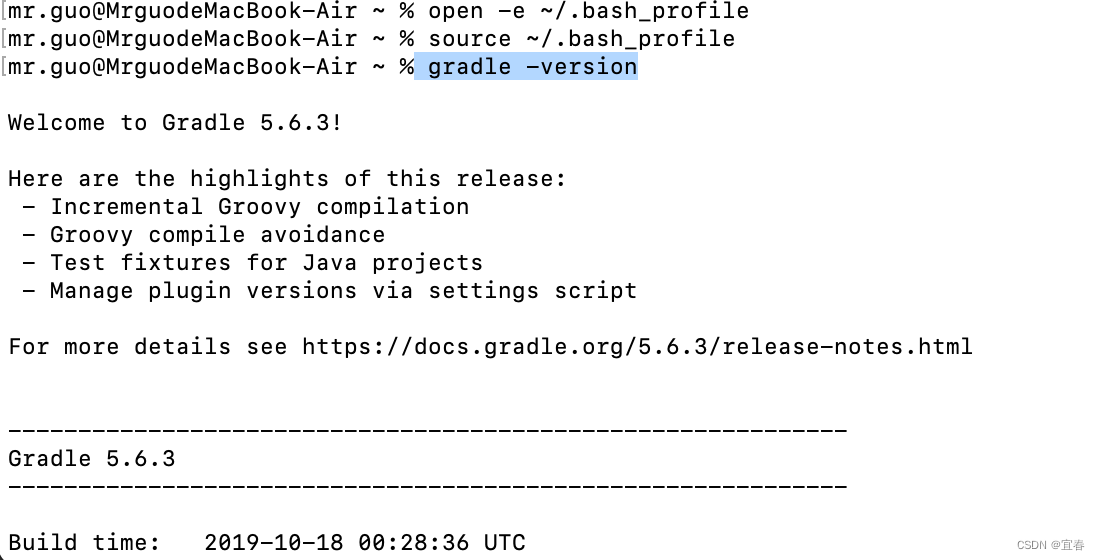
gradle -version
如下则成功
4、配置Gradle镜像等

打开
build.gradle文件(这个就相当于是maven的pom文件),在文件头部加上如下两个地方
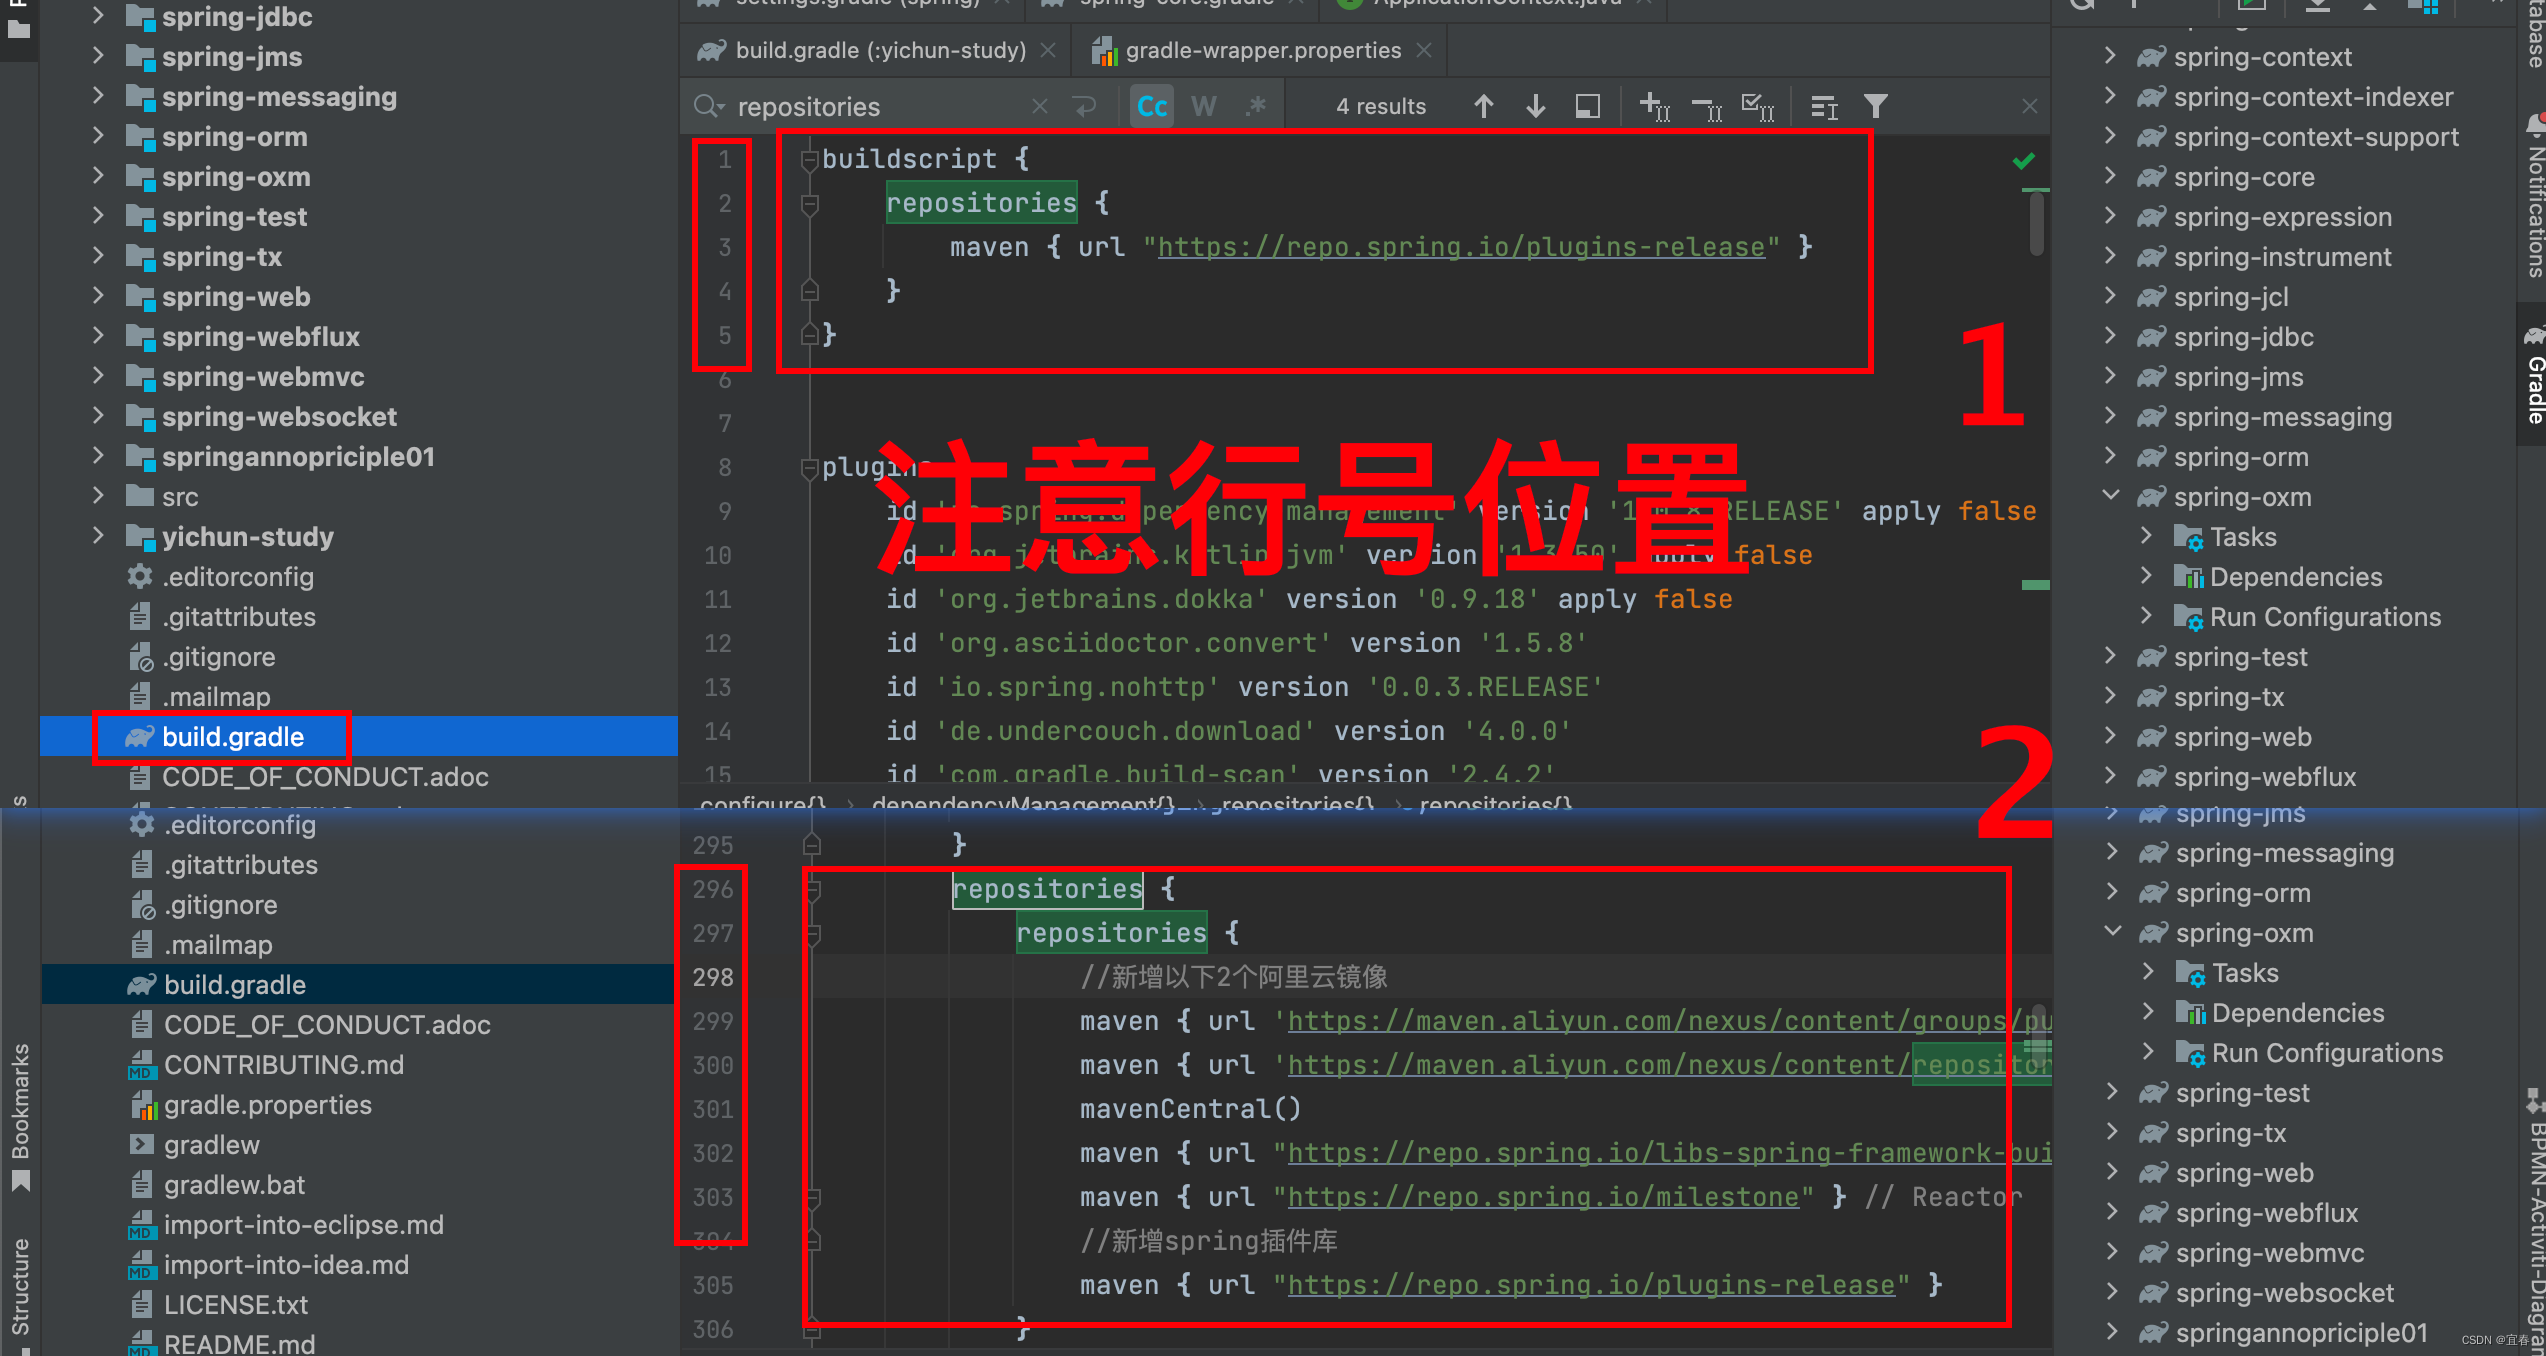
buildscript {repositories {maven { url "https://repo.spring.io/plugins-release" }}
}
repositories {//新增以下2个阿里云镜像maven { url 'https://maven.aliyun.com/nexus/content/groups/public/' }maven { url 'https://maven.aliyun.com/nexus/content/repositories/jcenter' }mavenCentral()maven { url "https://repo.spring.io/libs-spring-framework-build" }maven { url "https://repo.spring.io/milestone" } // Reactor//新增spring插件库maven { url "https://repo.spring.io/plugins-release" }
}
以上完成后刷新开始构建,等待一定时间后,如果构建失败重新refresh几次就行了,一般就是包下载超时之类的错误。
以上只是Gradle下载依赖,如下才是真正的编译源码
5、编译Spring源码

根据官方的import-into-idea.md文档可以得知,我们需要如下的操作
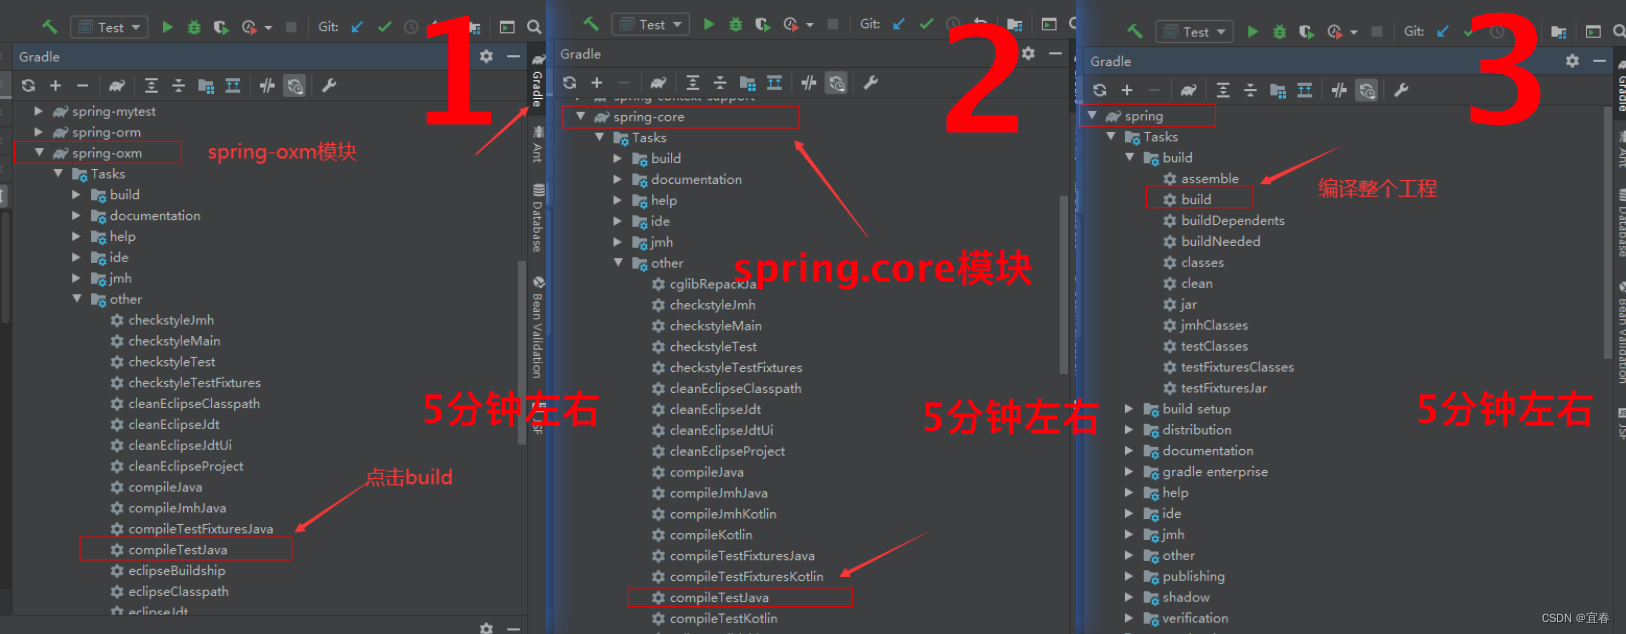
经过一段时间编译,每个人电脑的性能不一样,所需时间也不一样。
编译过程中会出现好几次失败,非常正常,多刷新几次编译,不排除有别的异常确实需要自行goole解决。
6、新建自己的模块用来学习Debug源码
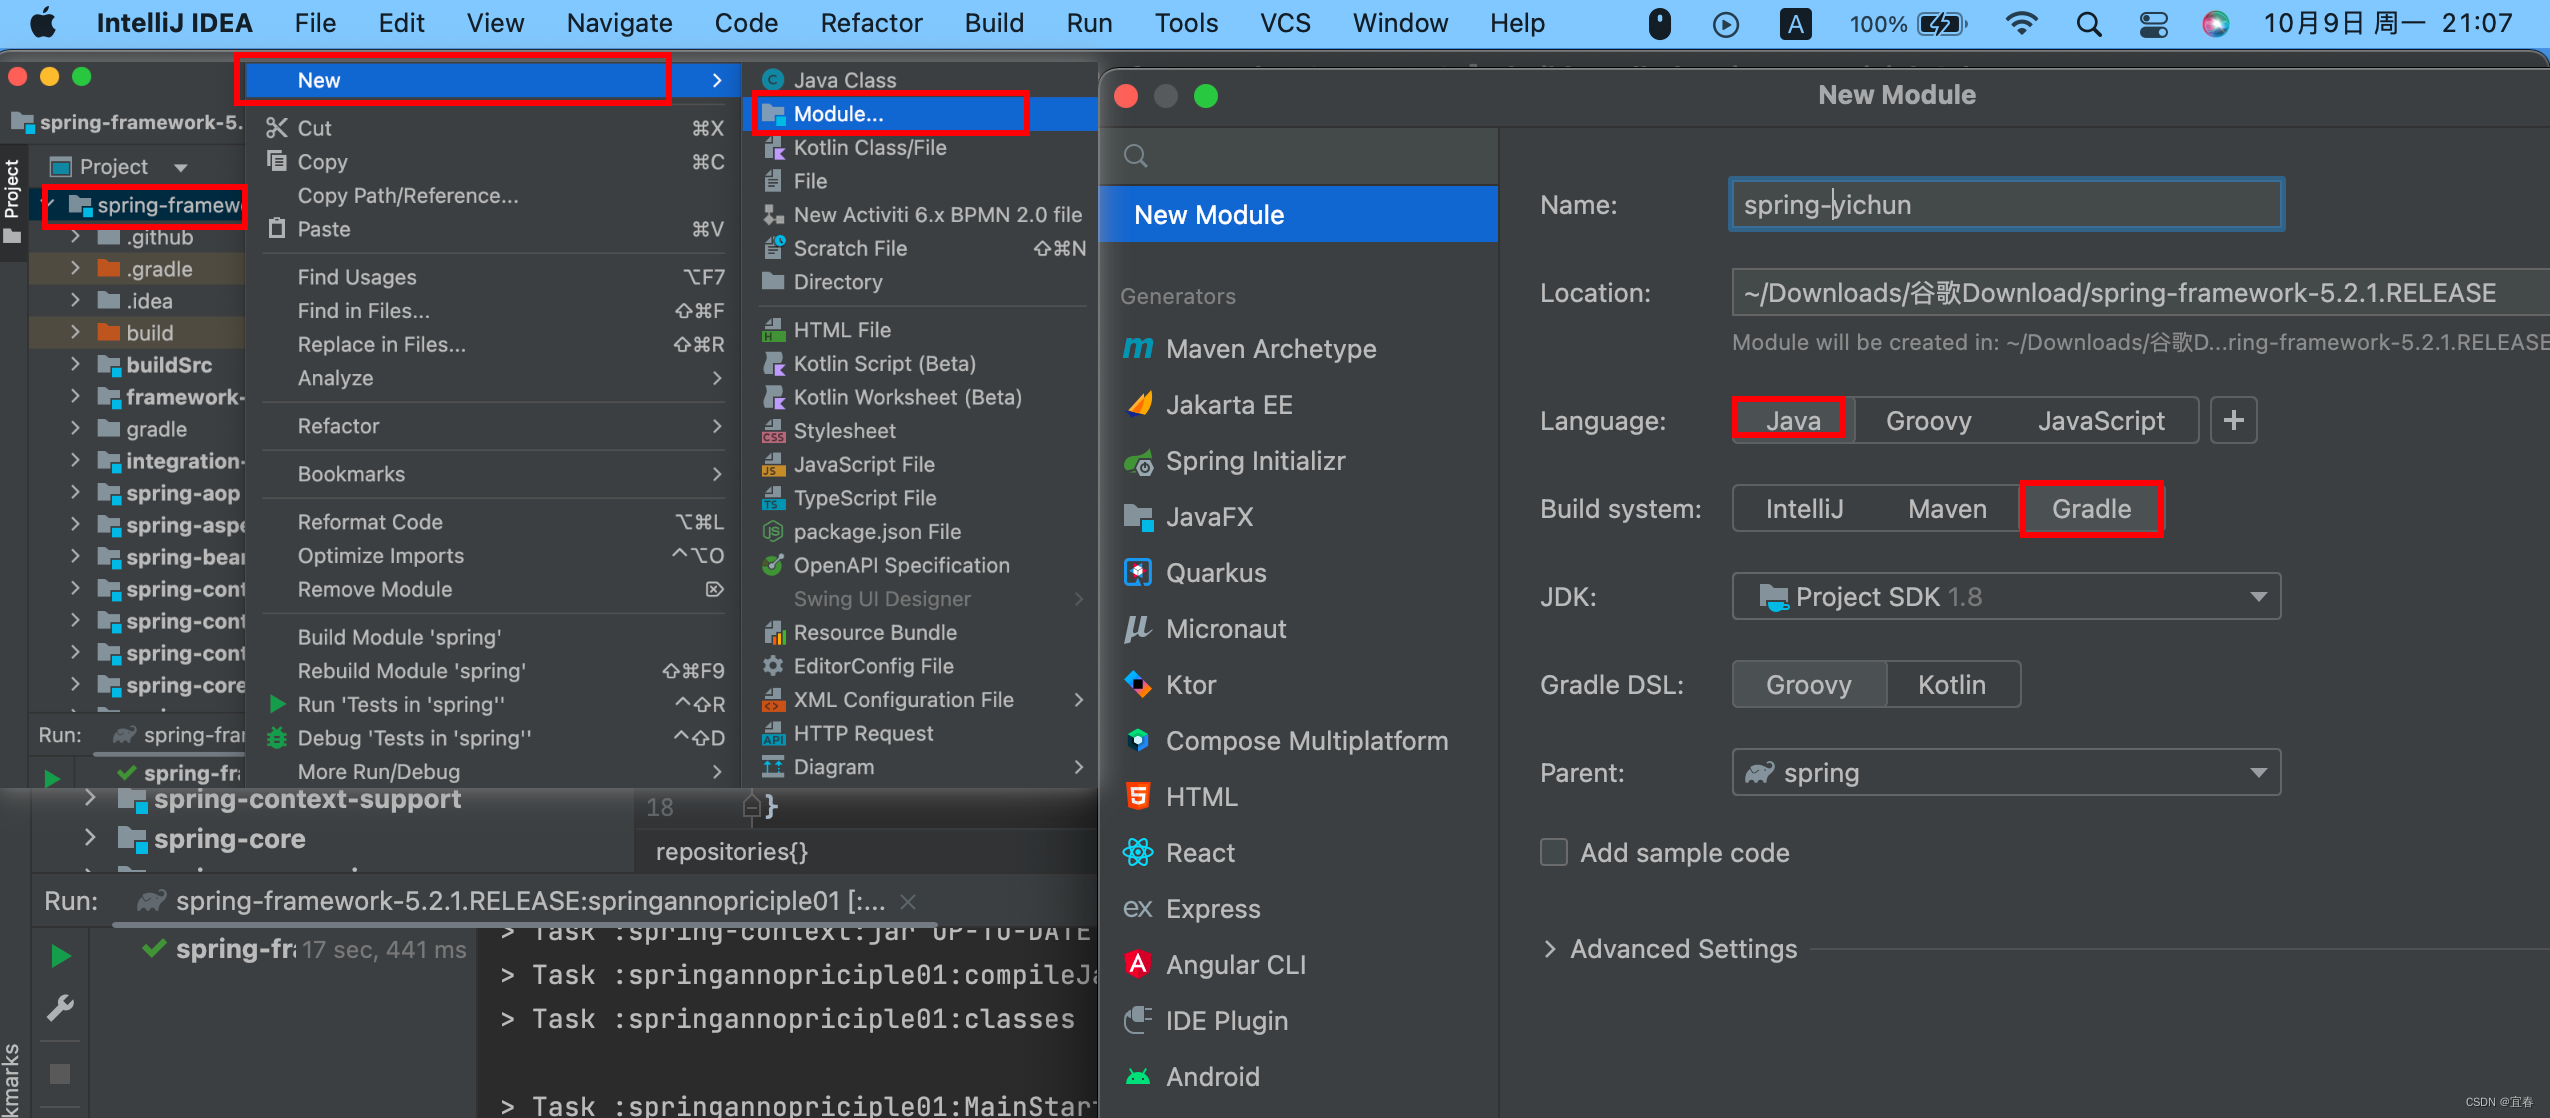

然后,需要手工添加spring-context,spring-beans,spring-core,spring-aop这4个核心模块
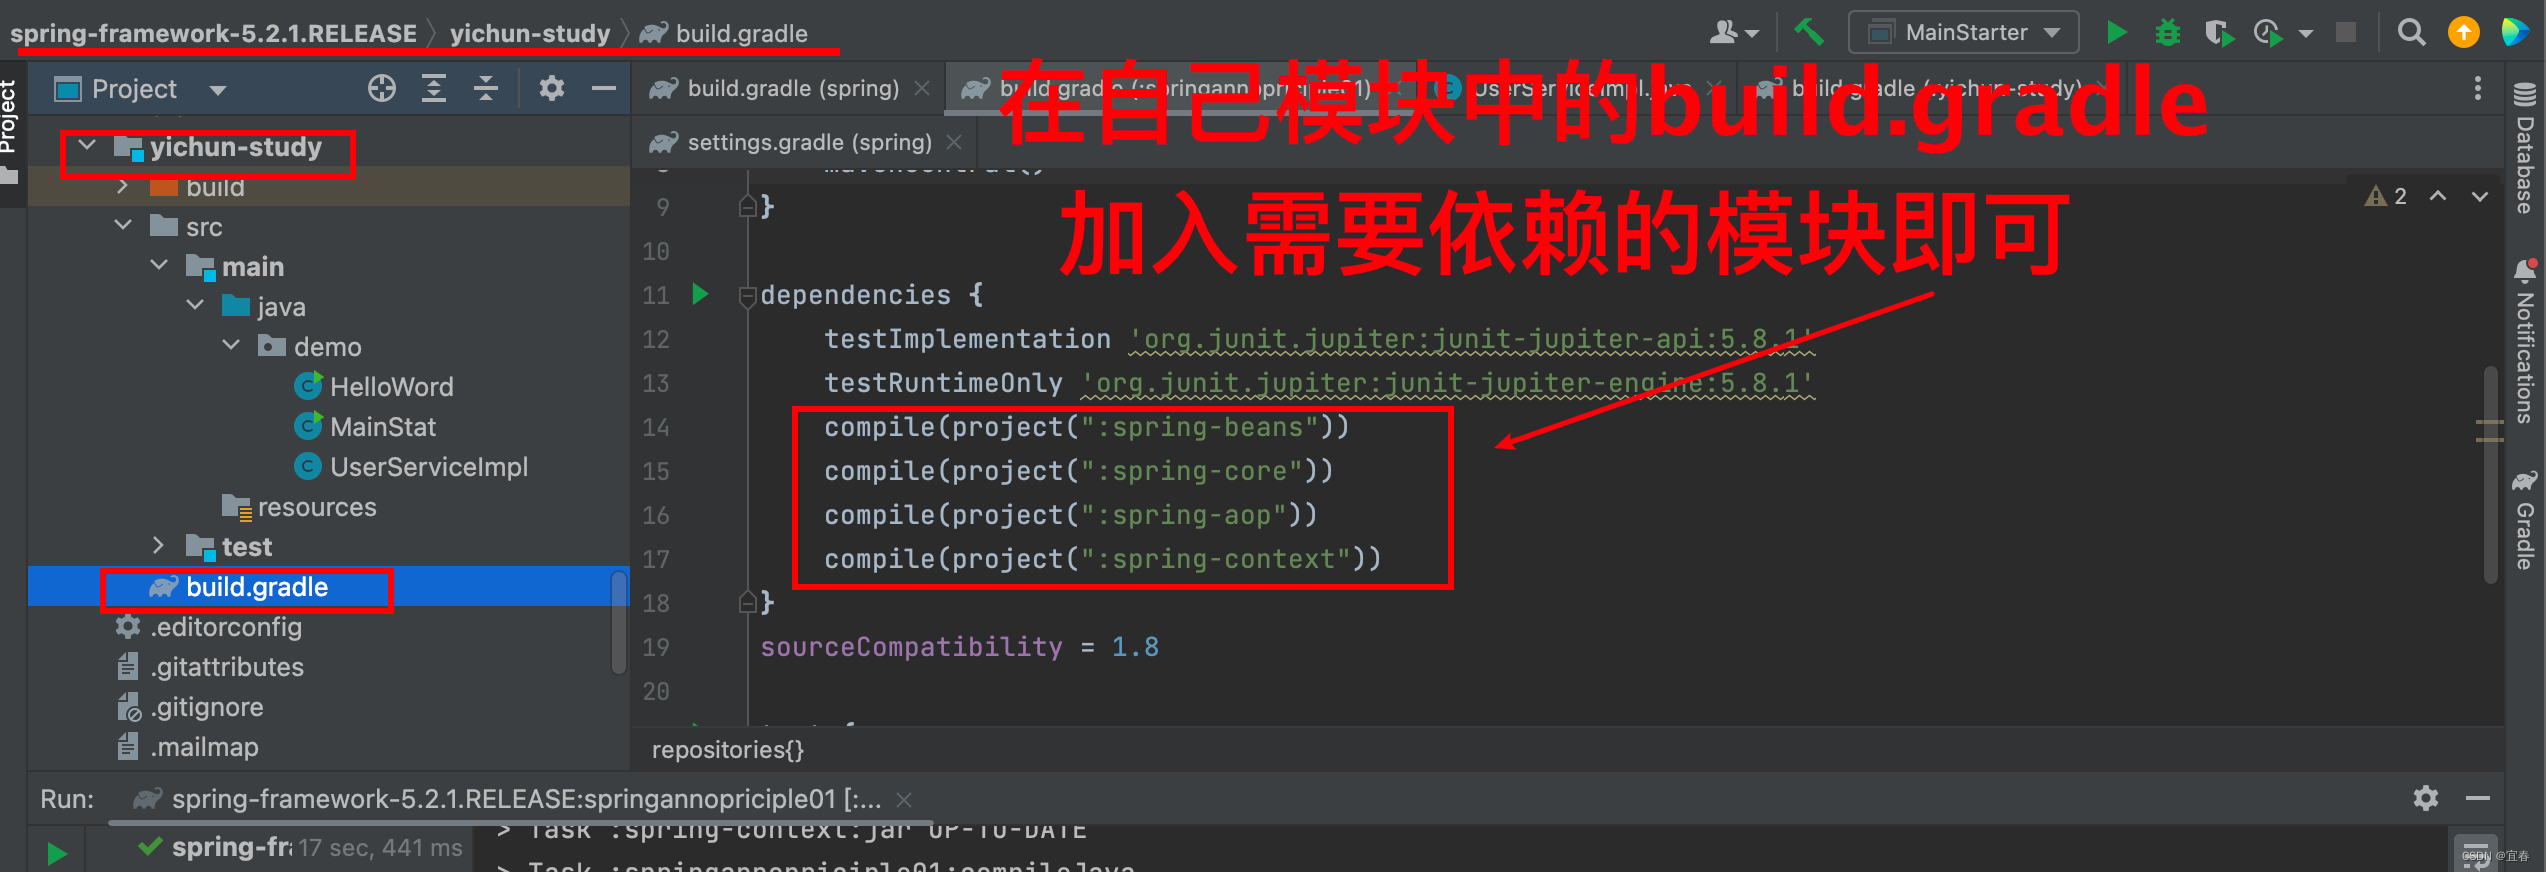
7、编写Demo代码运行测试

package demo;
import org.springframework.stereotype.Service;@Service
public class UserServiceImpl {public void sayHiSpring(){System.out.println("Hello Spring!");}
}
package demo;import org.springframework.context.ApplicationContext;
import org.springframework.context.annotation.AnnotationConfigApplicationContext;
import org.springframework.context.annotation.ComponentScan;
import org.springframework.context.annotation.Configuration;@Configuration
@ComponentScan("demo")
public class MainStat {public static void main(String[] args) {ApplicationContext context=new AnnotationConfigApplicationContext(MainStat.class);UserServiceImpl bean = context.getBean(UserServiceImpl.class);bean.sayHiSpring();}}
完成如下:

end…


