源码编译安装部署lnmp
文章目录
- 源码编译安装部署lnmp
- 1.简介:
- 2.环境说明:
- 3.部署前的准备工作
- 4.安装nginx
- 4.1.进入官网拉取nginx源码包
- 4.2.通过IP地址访问nginx的web页面
- 5.安装mysql
- 5.1.安装依赖包
- 5.2.创建用户和组
- 5.3.下载源码包并解压到/usr/local/
- 5.4.配置mysql头文件并告知库文件路径
- 5.5.生成配置文件
- 5.6.配置服务启动脚本
- 5.7.链接库文件
- 5.8.修改mysql密码,先用临时密码登录(临时密码只能使用一次)
- 6.安装PHP
- 6.1.安装所需依赖包
- 6.2.下载解压php源码包
- 6.3.编译安装php
- 6.4.配置php-fpm
- 6.5.启动php-fpm
- 修改nginx配置文件中php部分配置
- 访问测试
1.简介:
LNMP 是一种常见的网站服务器架构,它的名称代表了四个核心组件:Linux、Nginx、MySQL、PHP。下面是对各个组件的简要介绍:
- Linux:LNMP 架构的基础是 Linux 操作系统。Linux 是一种开源的、免费的操作系统,它提供了稳定、安全的环境来运行服务器和应用程序。
- Nginx:Nginx 是一款高性能的 Web 服务器软件。它具有占用资源少、并发处理能力强的特点。Nginx 可以作为反向代理服务器,负责接收客户端的请求并将其分发给后端的应用服务器。
- MySQL:MySQL 是一种流行的关系型数据库管理系统。它具有高性能、可靠性和可扩展性,适合用于存储和管理网站的数据。
- PHP:PHP 是一门开源的服务器端脚本语言,用于开发动态网站和网页应用。PHP 可以与 Nginx 和 MySQL 配合使用,使网站能够动态生成内容并与数据库交互。
LNMP 架构的优点包括高性能、稳定性、安全性和扩展性强。它常被用于搭建高访问量的网站和应用程序。对于开发者和运维团队来说,LNMP 提供了一种简单、有效的方式来搭建和管理网站服务器。
2.环境说明:
| 主机名 | IP地址 | 安装服务 | 系统版本 |
|---|---|---|---|
| lnmp | 192.168.195.133 | nginx 、mysql 、php | centos 8 |
3.部署前的准备工作
1.配置yum源,建议使用阿里云源(此处我附加了一个有大量依赖包的源)
[root@lnmp ~]# rm -rf /etc/yum.repos.d/*
[root@lnmp ~]# curl -o /etc/yum.repos.d/CentOS-Base.repo https://mirrors.aliyun.com/repo/Centos-vault-8.5.2111.repo% Total    % Received % Xferd  Average Speed   Time    Time     Time  CurrentDload  Upload   Total   Spent    Left  Speed
100  2495  100  2495    0     0  13271      0 --:--:-- --:--:-- --:--:-- 13271
[root@lnmp ~]# vim /etc/yum.repos.d/server.repo
[root@lnmp ~]# cat /etc/yum.repos.d/server.repo
[Everything]
name=everything
baseurl=https://dl.fedoraproject.org/pub/epel/8/Everything/x86_64/
enabled=1
gpgcheck=0[good]
name=good
baseurl=http://rpms.remirepo.net/enterprise/8/remi/x86_64/
enabled=1
gpgcheck=0
[root@lnmp ~]# yum clean all
12 files removed
[root@lnmp ~]# yum makecache
2.永久关闭防火墙和selinux
[root@lnmp ~]# systemctl disable --now firewalld.service
Removed /etc/systemd/system/multi-user.target.wants/firewalld.service.
Removed /etc/systemd/system/dbus-org.fedoraproject.FirewallD1.service.
[root@lnmp ~]# sed -i 's/^SELINUX=enforcing/SELINUX=disabled/g' /etc/selinux/config
[root@lnmp ~]# cat /etc/selinux/config | grep '^SELINUX='
SELINUX=disabled
[root@lnmp ~]# reboot
4.安装nginx
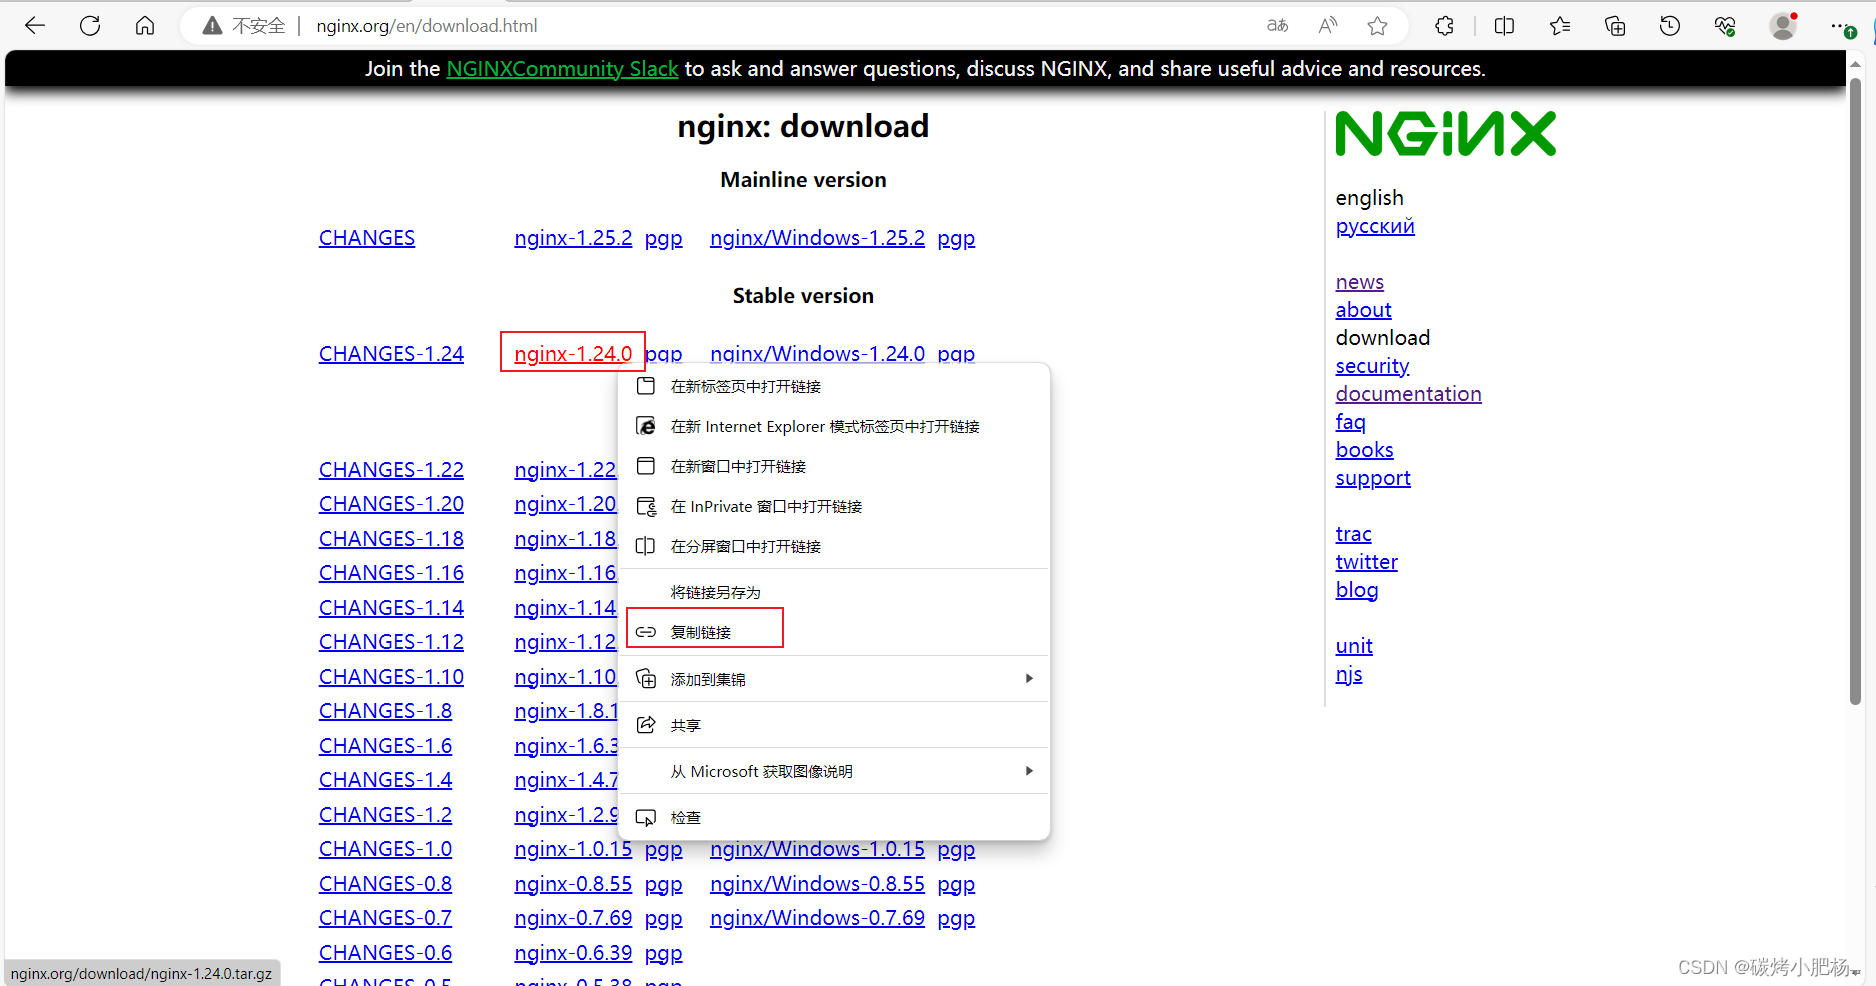
4.1.进入官网拉取nginx源码包
源码包地址:nginx: download
//先安装源码编译所需的软件包,编译工具
[root@lnmp ~]# yum -y install openssl-devel pcre-devel expat-devel libtool gcc gcc-c++ gd-devel make wget vim
省略 . . . //安装开发工具包
[root@lnmp ~]# yum -y groups mark install 'Development Tools'//创建nginx用户
[root@lnmp ~]# useradd -r -M -s /sbin/nologin nginx//创建日志存放目录
[root@lnmp ~]# mkdir /var/log/nginx
[root@lnmp ~]# chown -R nginx:nginx /var/log/nginx
[root@lnmp ~]# ll -d /var/log/nginx
drwxr-xr-x 2 nginx nginx 6 Oct 16 15:38 /var/log/nginx//下载nginx
[root@lnmp ~]# wget http://nginx.org/download/nginx-1.24.0.tar.gz
--2023-10-18 13:41:50--  http://nginx.org/download/nginx-1.24.0.tar.gz
Resolving nginx.org (nginx.org)... 52.58.199.22, 3.125.197.172, 2a05:d014:edb:5704::6, ...
Connecting to nginx.org (nginx.org)|52.58.199.22|:80... connected.
HTTP request sent, awaiting response... 200 OK
Length: 1112471 (1.1M) [application/octet-stream]
Saving to: ‘nginx-1.24.0.tar.gz’nginx-1.24.0.tar.gz         100%[==========================================>]   1.06M   476KB/s    in 2.3s    2023-10-18 13:41:52 (476 KB/s) - ‘nginx-1.24.0.tar.gz’ saved [1112471/1112471][root@lnmp ~]# ls
anaconda-ks.cfg  nginx-1.24.0.tar.gz//解压并编译安装
[root@lnmp ~]# tar xf nginx-1.22.1.tar.gz -C /usr/local/
[root@lnmp ~]# ls /usr/local/ && cd /usr/local/
bin  etc  games  include  lib  lib64  libexec  nginx-1.22.1  sbin  share  src
[root@lnmp local]# cd nginx-1.22.1/
[root@lnmp nginx-1.22.1]# ./configure \--prefix=/usr/local/nginx \--user=nginx \--group=nginx \--with-debug \--with-http_ssl_module \--with-http_realip_module \--with-http_image_filter_module \--with-http_gunzip_module \--with-http_gzip_static_module \--with-http_stub_status_module \--http-log-path=/var/log/nginx/access.log \--error-log-path=/var/log/nginx/error.log省略 . . . nginx path prefix: "/usr/local/nginx"nginx binary file: "/usr/local/nginx/sbin/nginx"nginx modules path: "/usr/local/nginx/modules"nginx configuration prefix: "/usr/local/nginx/conf"nginx configuration file: "/usr/local/nginx/conf/nginx.conf"nginx pid file: "/usr/local/nginx/logs/nginx.pid"nginx error log file: "/var/log/nginx/error.log"nginx http access log file: "/var/log/nginx/access.log"nginx http client request body temporary files: "client_body_temp"nginx http proxy temporary files: "proxy_temp"nginx http fastcgi temporary files: "fastcgi_temp"nginx http uwsgi temporary files: "uwsgi_temp"nginx http scgi temporary files: "scgi_temp"[root@lnmp nginx-1.24.0]# make && make install   //编译安装//添加环境变量
[root@lnmp nginx-1.24.0]# cd ..
[root@lnmp local]# ls nginx
conf  html  logs  sbin
[root@lnmp local]# echo 'export PATH=/usr/local/nginx/sbin:$PATH' > /etc/profile.d/nginx.sh
[root@lnmp local]# source /etc/profile.d/nginx.sh
[root@lnmp local]# echo $PATH
/usr/local/nginx/sbin:/usr/local/sbin:/usr/local/bin:/usr/sbin:/usr/bin:/root/bin//此时我们就可以直接使用/usr/local/nginx/sbin/下面的执行命令开启nginx服务了
[root@lnmp local]# which nginx
/usr/local/nginx/sbin/nginx
[root@lnmp local]# ss -antlp
State     Recv-Q    Send-Q       Local Address:Port       Peer Address:Port
LISTEN    0         128                0.0.0.0:22              0.0.0.0:*       users:(("sshd",pid=983,fd=4))
LISTEN    0         128                   [::]:22                 [::]:*       users:(("sshd",pid=983,fd=6))
[root@lnmp local]# nginx     //直接使用nginx命令开启nginx服务
[root@lnmp local]# ss -antlp
State         Recv-Q        Send-Q                 Local Address:Port                 Peer Address:Port
LISTEN        0             128                          0.0.0.0:80                        0.0.0.0:*            users:(("nginx",pid=38692,fd=9),("nginx",pid=38691,fd=9))
LISTEN        0             128                          0.0.0.0:22                        0.0.0.0:*            users:(("sshd",pid=983,fd=4))
LISTEN        0             128                             [::]:22                           [::]:*            users:(("sshd",pid=983,fd=6))//服务控制方式,使用nginx命令-t  //检查配置文件语法,当我们修改完配置文件后先使用nginx -t检查配置文件语法是否存在错误-v  //输出nginx的版本-c  //指定配置文件的路径-s  //发送服务控制信号,可选值有{stop|quit|reopen|reload}//由于服务控制方式种没有开机自启的选项,而我们又需要服务能够开机自启,这时就需要我们去编写nginx的service文件
[root@lnmp ~]# cp /usr/lib/systemd/system/sshd.service /usr/lib/systemd/system/nginx.service
[root@lnmp ~]# vim /usr/lib/systemd/system/nginx.service
[root@lnmp ~]# cat /usr/lib/systemd/system/nginx.service
[Unit]
Description=OpenSSH server daemon
After=network.target[Service]
Type=forking
ExecStart=/usr/local/nginx/sbin/nginx
ExecStop=/usr/local/nginx/sbin/nginx -s stop
ExecReload=/usr/local/nginx/sbin/nginx -s reload[Install]
WantedBy=multi-user.target
[root@lnmp ~]# systemctl daemon-reload   //重新加载//因为上述我们是使用nginx服务控制方式开启的nginx服务,所以我们使用systemctl命令无法查看状态,需要我们先使用服务控制方式将服务关闭后用systemctl命令开启服务
[root@lnmp ~]# systemctl status nginx.service
● nginx.service - OpenSSH server daemonLoaded: loaded (/usr/lib/systemd/system/nginx.service; disabled; vendor preset: disabled)Active: inactive (dead)
[root@lnmp ~]# nginx -s stop
[root@lnmp ~]# ss -antl
State        Recv-Q        Send-Q                  Local Address:Port                 Peer Address:Port
LISTEN       0             128                           0.0.0.0:22                        0.0.0.0:*
LISTEN       0             128                              [::]:22                           [::]:*
[root@lnmp ~]# systemctl enable --now nginx.service     //开启自启
Created symlink /etc/systemd/system/multi-user.target.wants/nginx.service → /usr/lib/systemd/system/nginx.service.
[root@lnmp ~]# systemctl is-active nginx.service
active            //服务处于开启状态
[root@lnmp ~]# ss -antl
State        Recv-Q        Send-Q                  Local Address:Port                 Peer Address:Port
LISTEN       0             128                           0.0.0.0:80                        0.0.0.0:*
LISTEN       0             128                           0.0.0.0:22                        0.0.0.0:*
LISTEN       0             128                              [::]:22                           [::]:*
4.2.通过IP地址访问nginx的web页面
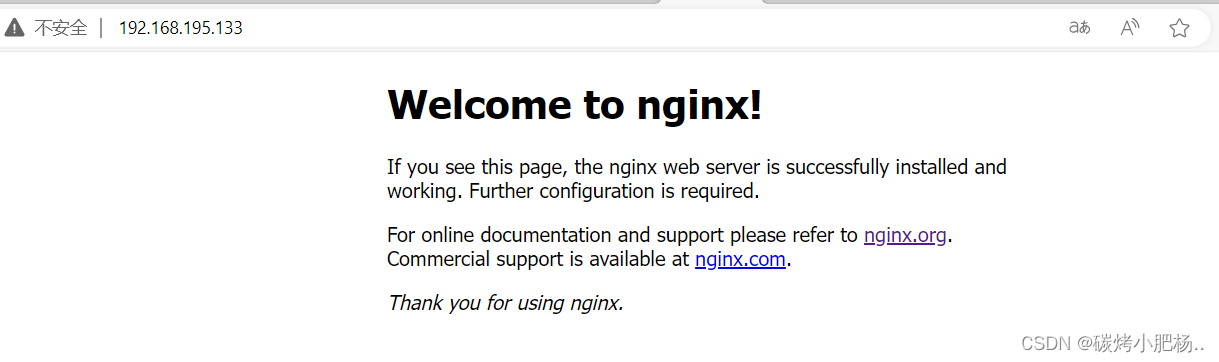
访问成功
5.安装mysql
5.1.安装依赖包
[root@lnmp ~]# yum -y install ncurses-devel openssl-devel openssl make mariadb-devel libtool
Updating Subscription Management repositories.
Unable to read consumer identity
This system is not registered to Red Hat Subscription Management. You can use subscription-manager to register.
Last metadata expiration check: 0:43:51 ago on Wed 18 Oct 2023 01:18:30 PM CST.
Package openssl-devel-1:1.1.1k-5.el8_5.x86_64 is already installed.
Package openssl-1:1.1.1k-5.el8_5.x86_64 is already installed.
Package make-1:4.2.1-10.el8.x86_64 is already installed.
Package libtool-2.4.6-25.el8.x86_64 is already installed.
Dependencies resolved.
===============================================================================================================Package                         Arch        Version                                      Repository      Size
===============================================================================================================
Installing:mariadb-devel                   x86_64      3:10.3.28-1.module_el8.3.0+757+d382997d      AppStream      1.1 Mncurses-devel                   x86_64      6.1-9.20180224.el8                           base           528 k
Upgrading:ncurses                         x86_64      6.1-9.20180224.el8                           base           387 kncurses-base                    noarch      6.1-9.20180224.el8                           base            81 kncurses-libs                    x86_64      6.1-9.20180224.el8                           base           334 k
Installing dependencies:mariadb-connector-c             x86_64      3.1.11-2.el8_3                               AppStream      200 kmariadb-connector-c-config      noarch      3.1.11-2.el8_3                               AppStream       15 kmariadb-connector-c-devel       x86_64      3.1.11-2.el8_3                               AppStream       68 kncurses-c++-libs                x86_64      6.1-9.20180224.el8                           base            58 k
Enabling module streams:mariadb                                     10.3                                                             Transaction Summary
===============================================================================================================
Install  6 Packages
Upgrade  3 PackagesTotal download size: 2.7 M
省略 . . .
[root@lnmp ~]#
5.2.创建用户和组
[root@lnmp ~]# groupadd -r -g 306 mysql
[root@lnmp ~]# useradd -r -M -s /sbin/nologin -g 306 -u 306 mysql
5.3.下载源码包并解压到/usr/local/
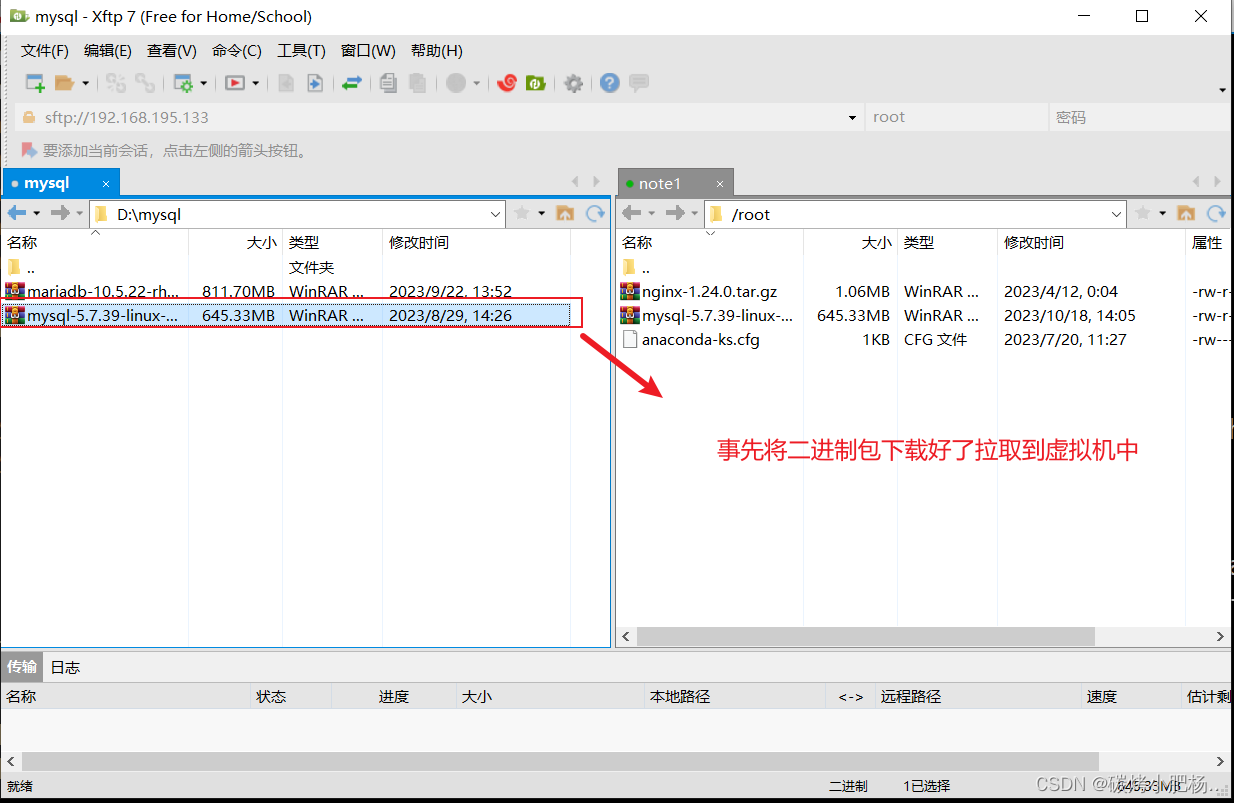
[root@lnmp ~]# ls
anaconda-ks.cfg  mysql-5.7.39-linux-glibc2.12-x86_64.tar.gz  nginx-1.24.0.tar.gz
[root@lnmp ~]# tar xf mysql-5.7.39-linux-glibc2.12-x86_64.tar.gz -C /usr/local/
[root@lnmp ~]# ls /usr/local/
bin  games    lib    libexec                              nginx         sbin   src
etc  include  lib64  mysql-5.7.39-linux-glibc2.12-x86_64  nginx-1.24.0  share//创建软链接
[root@lnmp ~]# cd /usr/local/
[root@lnmp local]# ln -sv mysql-5.7.39-linux-glibc2.12-x86_64/ mysql
'mysql' -> 'mysql-5.7.39-linux-glibc2.12-x86_64/'
[root@lnmp local]# ll -d mysql
lrwxrwxrwx 1 root root 36 Oct 18 14:12 mysql -> mysql-5.7.39-linux-glibc2.12-x86_64///修改目录/usr/local/mysql的属主属组
[root@lnmp local]# chown -R mysql:mysql /usr/local/mysql
[root@lnmp local]# ll -d /usr/local/mysql
lrwxrwxrwx 1 mysql mysql 36 Oct 18 14:12 /usr/local/mysql -> mysql-5.7.39-linux-glibc2.12-x86_64///添加环境变量
[root@lnmp local]# echo 'export PATH=/usr/local/mysql/bin:$PATH' > /etc/profile.d/mysql.sh
[root@lnmp local]# source /etc/profile.d/mysql.sh
[root@lnmp local]# echo $PATH
/usr/local/mysql/bin:/usr/local/nginx/sbin:/usr/local/sbin:/usr/local/bin:/usr/sbin:/usr/bin:/root/bin//建立数据存放目录
[root@lnmp local]# mkdir /opt/data
[root@lnmp local]# chown -R mysql:mysql /opt/data/
[root@lnmp local]# ll /opt/
total 0
drwxr-xr-x 2 mysql mysql 6 Oct 18 14:14 data//初始化数据库
[root@lnmp local]# /usr/local/mysql/bin/mysqld --initialize --user=mysql --datadir=/opt/data/
2023-10-18T06:15:51.482389Z 0 [Warning] TIMESTAMP with implicit DEFAULT value is deprecated. Please use --explicit_defaults_for_timestamp server option (see documentation for more details).
2023-10-18T06:15:51.611930Z 0 [Warning] InnoDB: New log files created, LSN=45790
2023-10-18T06:15:51.635375Z 0 [Warning] InnoDB: Creating foreign key constraint system tables.
2023-10-18T06:15:51.689501Z 0 [Warning] No existing UUID has been found, so we assume that this is the first time that this server has been started. Generating a new UUID: c9abfadd-6d7d-11ee-b887-000c291f2f75.
2023-10-18T06:15:51.690387Z 0 [Warning] Gtid table is not ready to be used. Table 'mysql.gtid_executed' cannot be opened.
2023-10-18T06:15:51.892262Z 0 [Warning] A deprecated TLS version TLSv1 is enabled. Please use TLSv1.2 or higher.
2023-10-18T06:15:51.892286Z 0 [Warning] A deprecated TLS version TLSv1.1 is enabled. Please use TLSv1.2 or higher.
2023-10-18T06:15:51.892601Z 0 [Warning] CA certificate ca.pem is self signed.
2023-10-18T06:15:52.048312Z 1 [Note] A temporary password is generated for root@localhost: Qqpejg_,<2r.    //此处显示的为临时密码(‘Qqpejg_,<2r.’)
5.4.配置mysql头文件并告知库文件路径
[root@lnmp ~]# ln -sv /usr/local/mysql/include/ /usr/local/include/mysql
'/usr/local/include/mysql' -> '/usr/local/mysql/include/'
[root@lnmp ~]# echo '/usr/local/mysql/lib' > /etc/ld.so.conf.d/mysql.conf
[root@lnmp ~]# ldconfig
5.5.生成配置文件
[root@lnmp ~]# cat > /etc/my.cnf << EOF
> [mysqld]
> basedir = /usr/local/mysql
> datadir = /opt/data
> socket = /tmp/mysql.sock
> port = 3306
> pid-file = /opt/data/mysql.pid
> user = mysql
> skip-name-resolve
> EOF
[root@lnmp ~]#
5.6.配置服务启动脚本
[root@lnmp ~]# cp -a /usr/local/mysql/support-files/mysql.server /etc/init.d/mysqld
[root@lnmp ~]# sed -ri 's#^(basedir=).*#\1/usr/local/mysql#g' /etc/init.d/mysqld
[root@lnmp ~]# sed -ri 's#^(datadir=).*#\1/opt/data#g' /etc/init.d/mysqld//启动mysql
[root@lnmp ~]# service mysqld start
Starting MySQL.Logging to '/opt/data/lnmp.err'.SUCCESS!
[root@lnmp ~]# ss -antlp | grep 3306
LISTEN    0         80                       *:3306                   *:*        users:(("mysqld",pid=41579,fd=23))
5.7.链接库文件
[root@lnmp ~]# ln -s /usr/lib64/libtinfo.so.6 /usr/lib64/libtinfo.so.5
[root@lnmp ~]# ln -s /usr/lib64/libncurses.so.6 /usr/lib64/libncurses.so.5
5.8.修改mysql密码,先用临时密码登录(临时密码只能使用一次)
[root@lnmp ~]# mysql -uroot -p"Qqpejg_,<2r."
mysql: [Warning] Using a password on the command line interface can be insecure.
Welcome to the MySQL monitor.  Commands end with ; or \g.
Your MySQL connection id is 2
Server version: 5.7.39Copyright (c) 2000, 2022, Oracle and/or its affiliates.Oracle is a registered trademark of Oracle Corporation and/or its
affiliates. Other names may be trademarks of their respective
owners.Type 'help;' or '\h' for help. Type '\c' to clear the current input statement.mysql> set password = password('12345678');
Query OK, 0 rows affected, 1 warning (0.00 sec)mysql> quit
Bye
[root@lnmp ~]#
6.安装PHP
6.1.安装所需依赖包
[root@lnmp ~]# yum -y install libxml2 libxml2-devel openssl openssl-devel bzip2 bzip2-devel libtool libcurl libcurl-devel libicu-devel libjpeg libjpeg-devel libpng libpng-devel openldap-devel  pcre-devel freetype freetype-devel gmp gmp-devel libmcrypt libmcrypt-devel readline readline-devel libxslt libxslt-devel mhash mhash-devel php72-php-mysqlnd sqlite-devel
省略安装过程 . . .//下载编译安装部署php所需要的oniguruma-6.9.4.tar.gz源码包
[root@lnmp ~]# wget https://github.com/kkos/oniguruma/archive/v6.9.4.tar.gz -O oniguruma-6.9.4.tar.gz
--2023-10-18 14:29:01--  https://github.com/kkos/oniguruma/archive/v6.9.4.tar.gz
Resolving github.com (github.com)... 20.205.243.166
Connecting to github.com (github.com)|20.205.243.166|:443... connected.
HTTP request sent, awaiting response... 302 Found
Location: https://codeload.github.com/kkos/oniguruma/tar.gz/refs/tags/v6.9.4 [following]
--2023-10-18 14:29:03--  https://codeload.github.com/kkos/oniguruma/tar.gz/refs/tags/v6.9.4
Resolving codeload.github.com (codeload.github.com)... 20.205.243.165
Connecting to codeload.github.com (codeload.github.com)|20.205.243.165|:443... connected.
HTTP request sent, awaiting response... 200 OK
Length: unspecified [application/x-gzip]
Saving to: ‘oniguruma-6.9.4.tar.gz’oniguruma-6.9.4.tar.gz          [                           <=>             ] 568.94K  30.8KB/s    in 14s     2023-10-18 14:29:17 (42.0 KB/s) - ‘oniguruma-6.9.4.tar.gz’ saved [582597][root@lnmp ~]# ls
anaconda-ks.cfg  mysql-5.7.39-linux-glibc2.12-x86_64.tar.gz  nginx-1.24.0.tar.gz  oniguruma-6.9.4.tar.gz//解压并进入oniguruma-6.9.4目录编译安装
[root@lnmp ~]# tar xf oniguruma-6.9.4.tar.gz -C /usr/local/
[root@lnmp ~]# ls /usr/local/ && cd /usr/local/
bin  games    lib    libexec  mysql-5.7.39-linux-glibc2.12-x86_64  nginx-1.24.0     sbin   src
etc  include  lib64  mysql    nginx                                oniguruma-6.9.4  share
[root@lnmp local]# cd oniguruma-6.9.4/
[root@lnmp oniguruma-6.9.4]# ./autogen.sh
省略 . . .
[root@lnmp oniguruma-6.9.4]# ./configure --prefix=/usr --libdir=/lib64
省略 . . .
[root@lnmp oniguruma-6.9.4]# make && make install
省略 . . .
6.2.下载解压php源码包
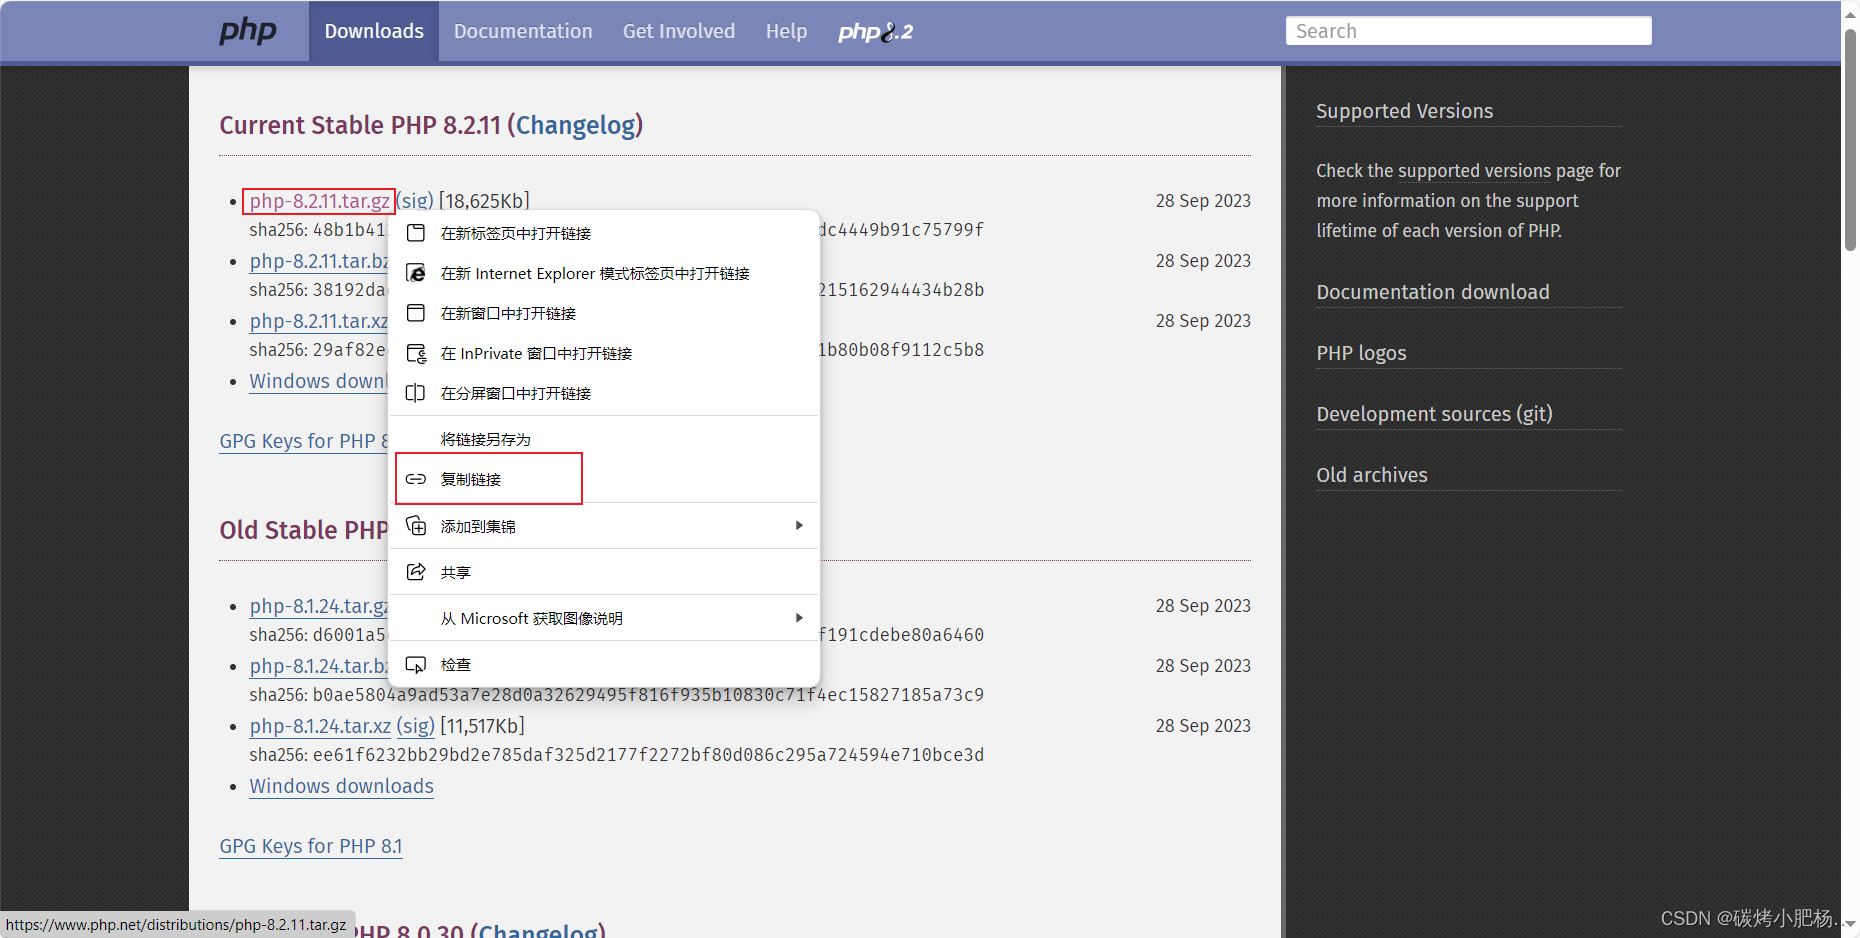
php源码包网站:PHP: Downloads
//拉取源码包
[root@lnmp ~]# wget --no-check-certificate https://www.php.net/distributions/php-8.2.11.tar.gz
[root@lnmp ~]# ls
anaconda-ks.cfg                             nginx-1.24.0.tar.gz     php-8.2.11.tar.gz
mysql-5.7.39-linux-glibc2.12-x86_64.tar.gz  oniguruma-6.9.4.tar.gz//解压至/usr/local/目录
[root@lnmp ~]# tar xf php-8.2.11.tar.gz -C /usr/local/
[root@lnmp ~]# ls /usr/local/ && cd /usr/local/
bin  games    lib    libexec  mysql-5.7.39-linux-glibc2.12-x86_64  nginx-1.24.0     php-8.2.11  share
etc  include  lib64  mysql    nginx                                oniguruma-6.9.4  sbin        src
6.3.编译安装php
[root@lnmp local]# cd php-8.2.11/
[root@lnmp php-8.2.11]# ./configure --prefix=/usr/local/php8  \--with-config-file-path=/etc \--enable-fpm \--disable-debug \--disable-rpath \--enable-shared \--enable-soap \--with-openssl \--enable-bcmath \--with-iconv \--with-bz2 \--enable-calendar \--with-curl \--enable-exif  \--enable-ftp \--with-zlib-dir \--enable-gd \--with-gettext \--with-jpeg \--with-freetype \--enable-mbstring \--enable-pdo \--with-mysqli=mysqlnd \--with-pdo-mysql=mysqlnd \--with-readline \--enable-shmop \--enable-simplexml \--enable-sockets \--enable-mysqlnd-compression-support \--with-pear \--enable-pcntl \--enable-posix
最后显示这个表示成功
+--------------------------------------------------------------------+
| License:                                                           |
| This software is subject to the PHP License, available in this     |
| distribution in the file LICENSE. By continuing this installation  |
| process, you are bound by the terms of this license agreement.     |
| If you do not agree with the terms of this license, you must abort |
| the installation process at this point.                            |
+--------------------------------------------------------------------+Thank you for using PHP.[root@lnmp php-8.2.11]# make && make install        //编译安装//添加环境变量
[root@lnmp php-8.2.11]# echo 'export PATH=/usr/local/php8/bin:$PATH' > /etc/profile.d/php8.sh
[root@lnmp php-8.2.11]# source /etc/profile.d/php8.sh
[root@lnmp php-8.2.11]# echo $PATH
/usr/local/php8/bin:/usr/local/mysql/bin:/usr/local/nginx/sbin:/usr/local/sbin:/usr/local/bin:/usr/sbin:/usr/bin:/root/bin
6.4.配置php-fpm
[root@lnmp php-8.2.11]# cp php.ini-production /etc/php.ini
[root@lnmp php-8.2.11]# cp sapi/fpm/init.d.php-fpm /etc/init.d/php-fpm
[root@lnmp php-8.2.11]# chmod +x /etc/rc.d/init.d/php-fpm
[root@lnmp php-8.2.11]# cp /usr/local/php8/etc/php-fpm.conf.default /usr/local/php8/etc/php-fpm.conf
[root@lnmp php-8.2.11]# cp /usr/local/php8/etc/php-fpm.d/www.conf.default /usr/local/php8/etc/php-fpm.d/www.conf
6.5.启动php-fpm
[root@lnmp php-8.2.11]# service php-fpm start
Starting php-fpm  done
[root@lnmp php-8.2.11]# ss -antlp | grep 9000
LISTEN    0         128              127.0.0.1:9000             0.0.0.0:*        users:(("php-fpm",pid=192558,fd=5),("php-fpm",pid=192557,fd=5),("php-fpm",pid=192556,fd=10))
修改nginx配置文件中php部分配置
[root@lnmp ~]# vim /usr/local/nginx/conf/nginx.conf
...location / {root html;index index.php index.html index.htm; //在index后面添加index.php}
...location ~ \.php$ {root html;fastcgi_pass 127.0.0.1:9000; //定义反向代理fastcgi_index index.php;fastcgi_param SCRIPT_FILENAME /scripts$fastcgi_script_nameinclude fastcgi.conf;}
...//修改配置文件后,重启nginx服务和php-fpm服务
[root@lnmp ~]# nginx -s stop
[root@lnmp ~]# nginx
[root@lnmp ~]# service php-fpm stop
Gracefully shutting down php-fpm . done
[root@lnmp ~]# service php-fpm start
Starting php-fpm done//创建php的web访问页面
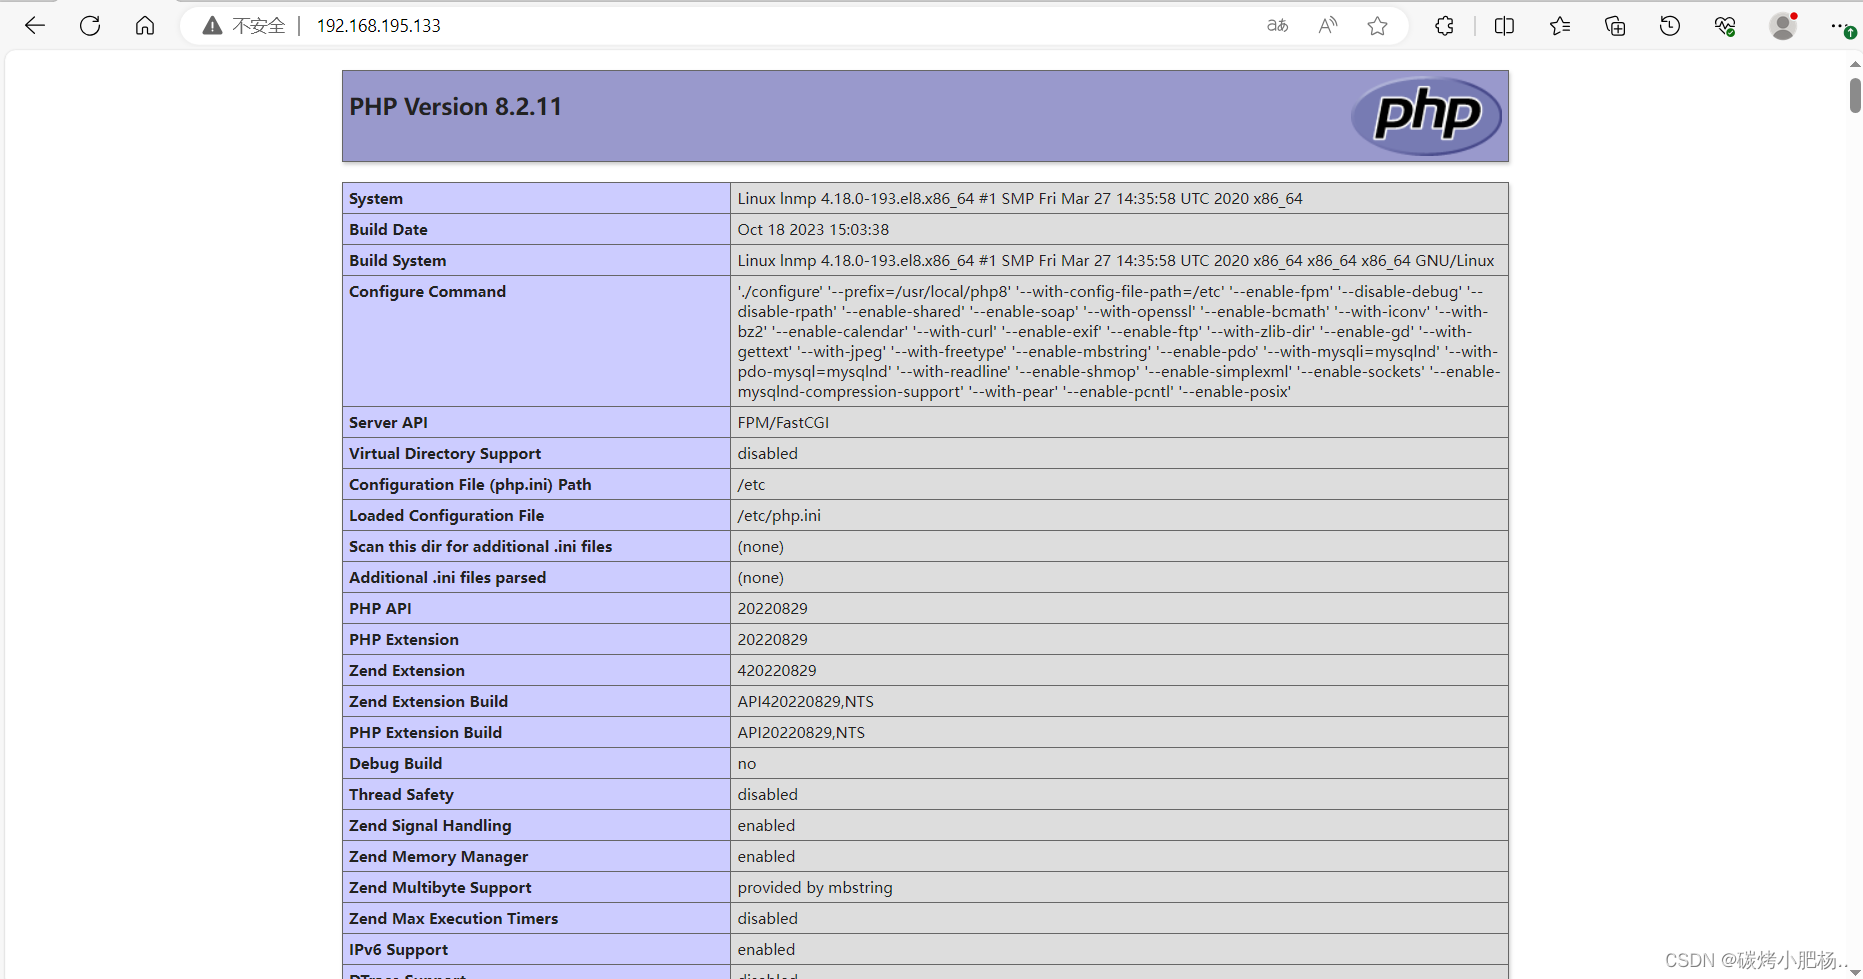
[root@lnmp ~]# vim /usr/local/nginx/html/index.php
[root@lnmp ~]# cat /usr/local/nginx/html/index.php
<?phpphpinfo();
?>
[root@lnmp ~]#
访问测试
部署lnmp完成