首先创建一个代码文件夹Scripts

从人物角色Player的基类开始 创建IPlayer类
首先我们考虑到如果不挂载MonoBehaviour需要将角色设置成预制体实例化到场景上十分麻烦,
所以我们采用继承MonoBehaviour类的角色基类方法写代码
也就是说这个脚本直接绑定在角色物体身上,就不需要实例化了,相对降低了复杂程度。
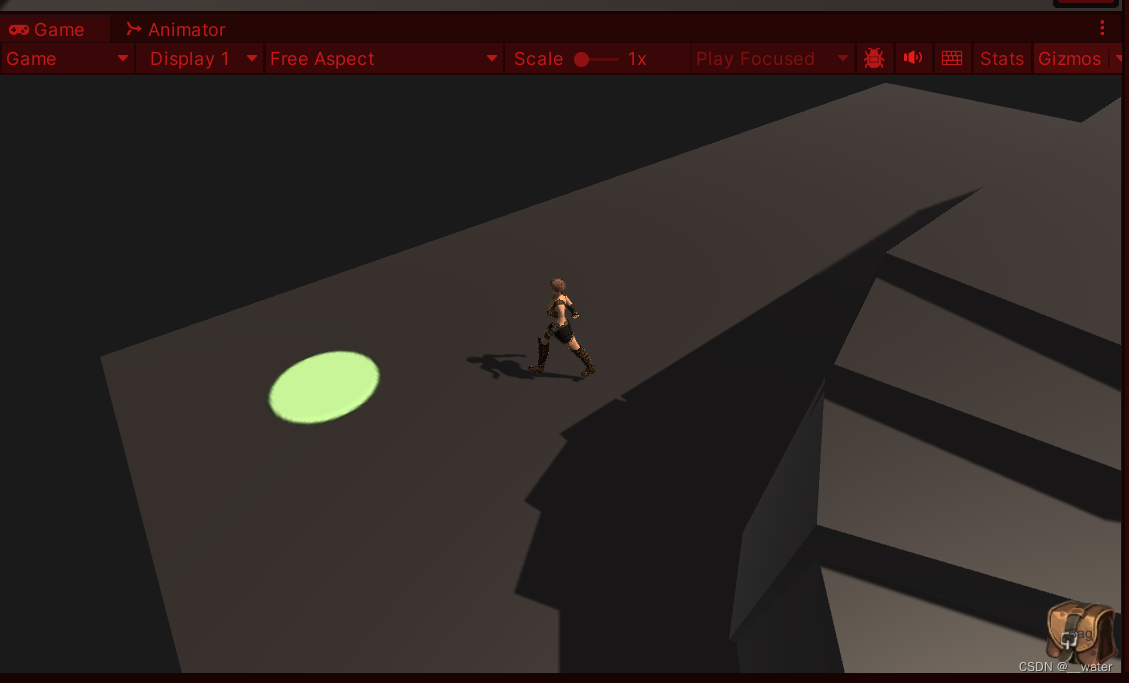
首先我们需要在unity场景制作一个Renderer类型的目标点
首先创建一个平面Plane改名为MovementTargetSign

修改位置

移除掉碰撞器

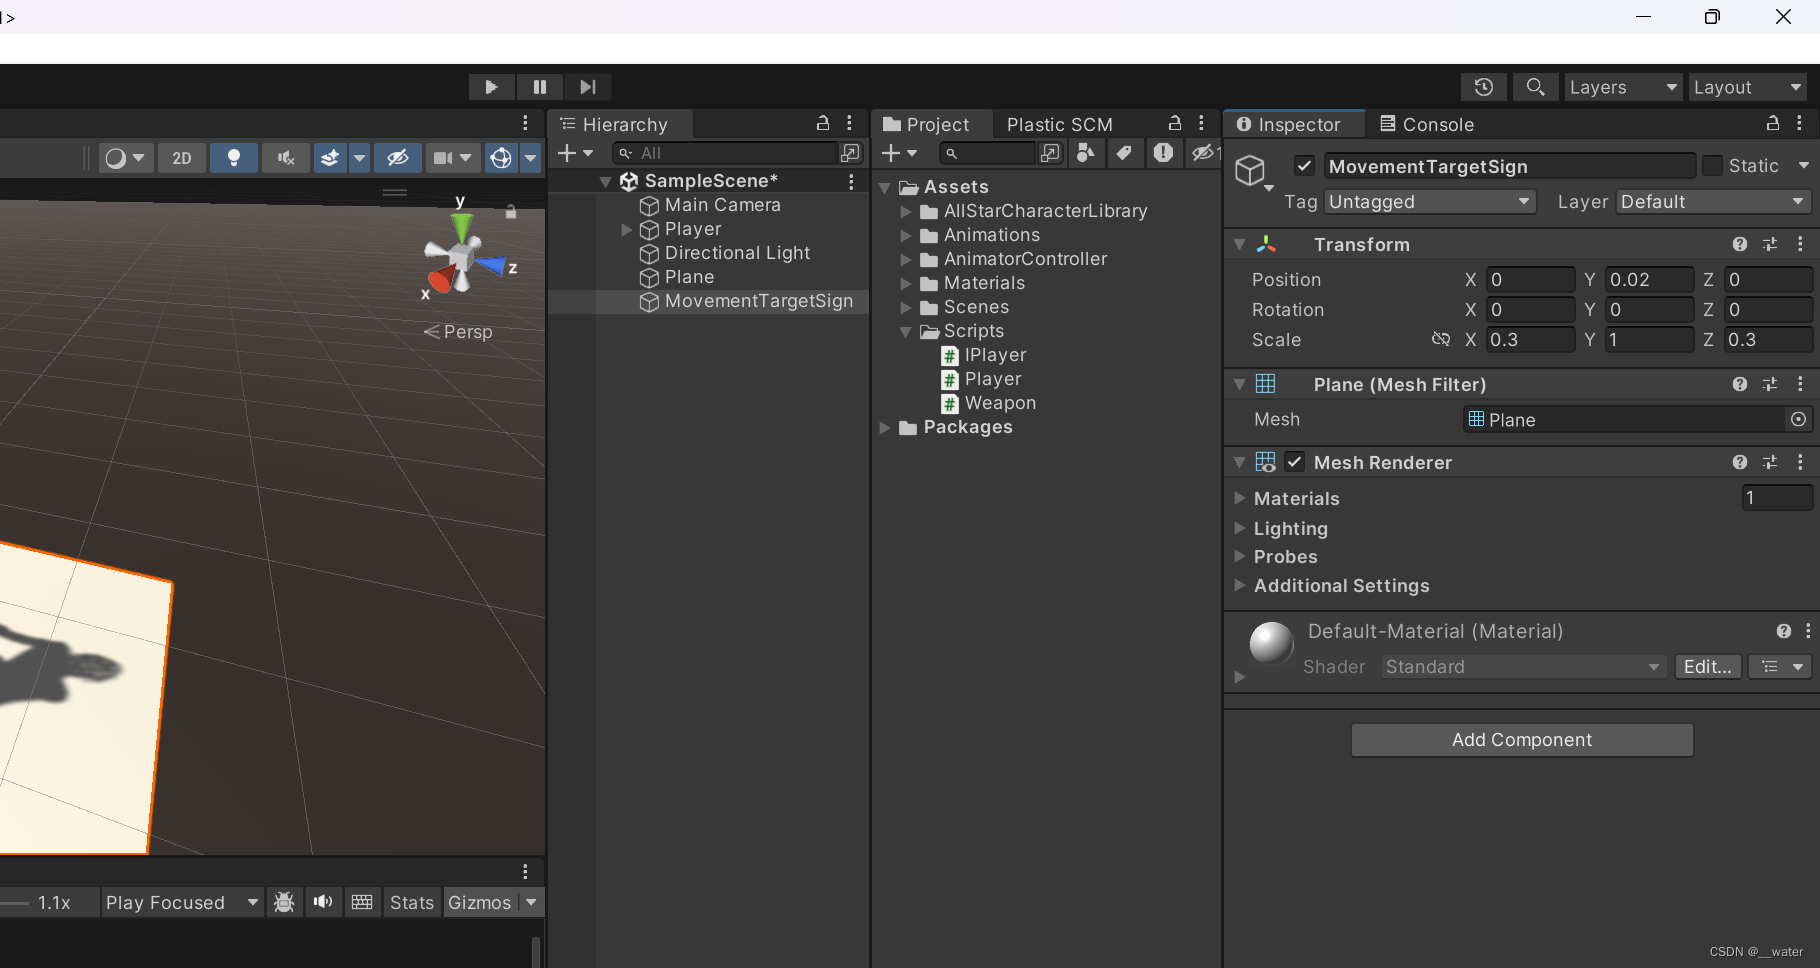
添加一个材质
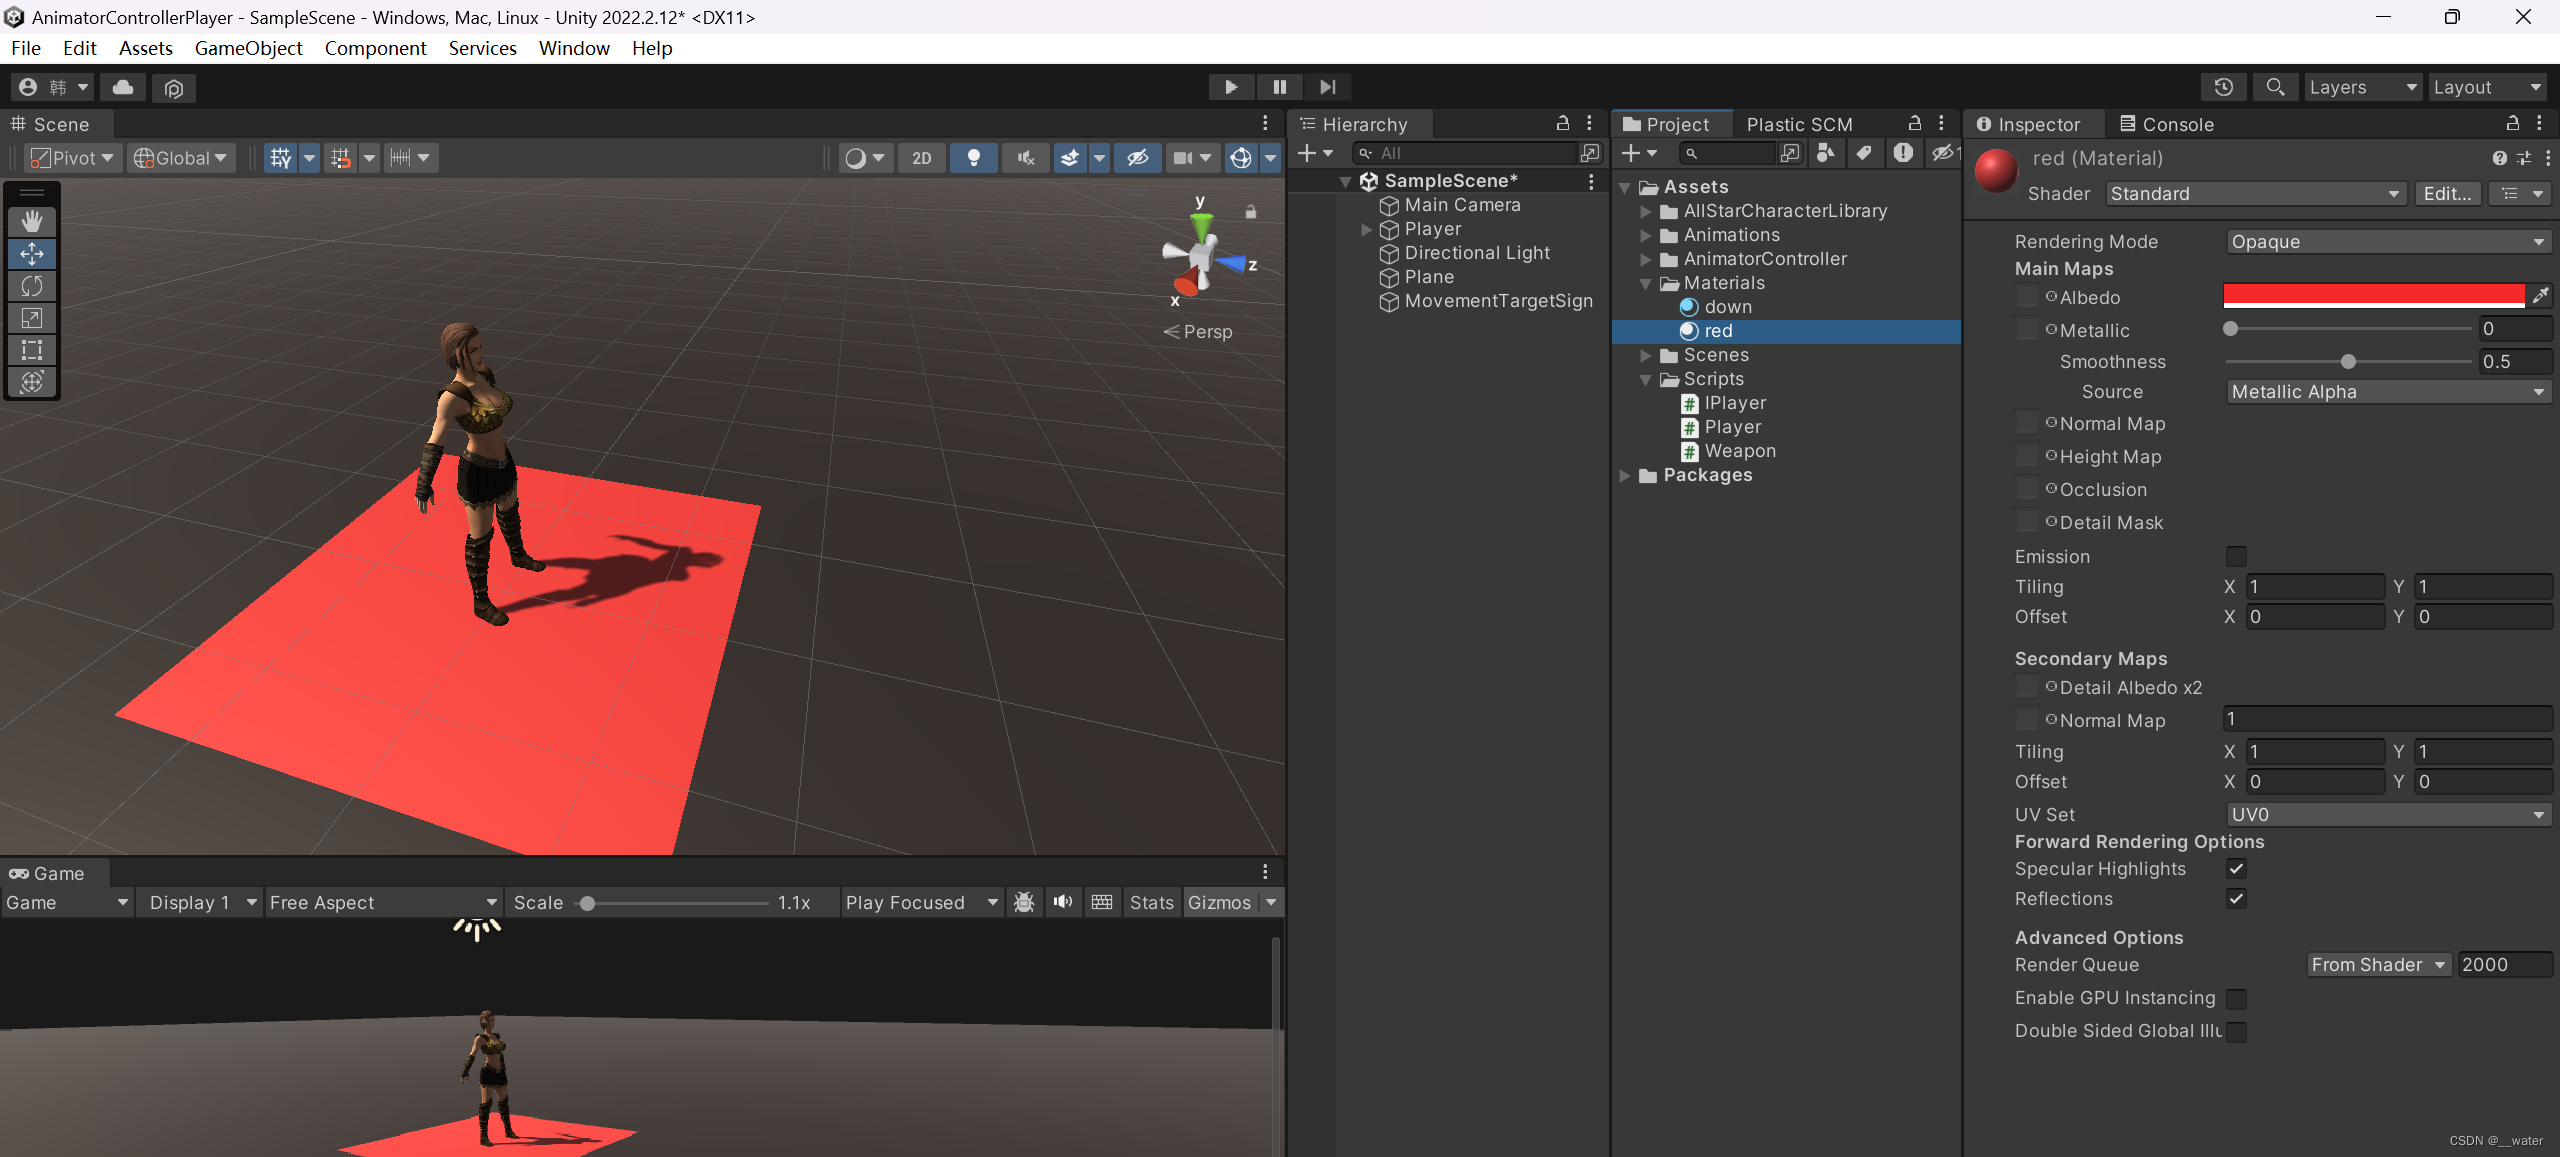
对材质进行修改 点击Shader选项

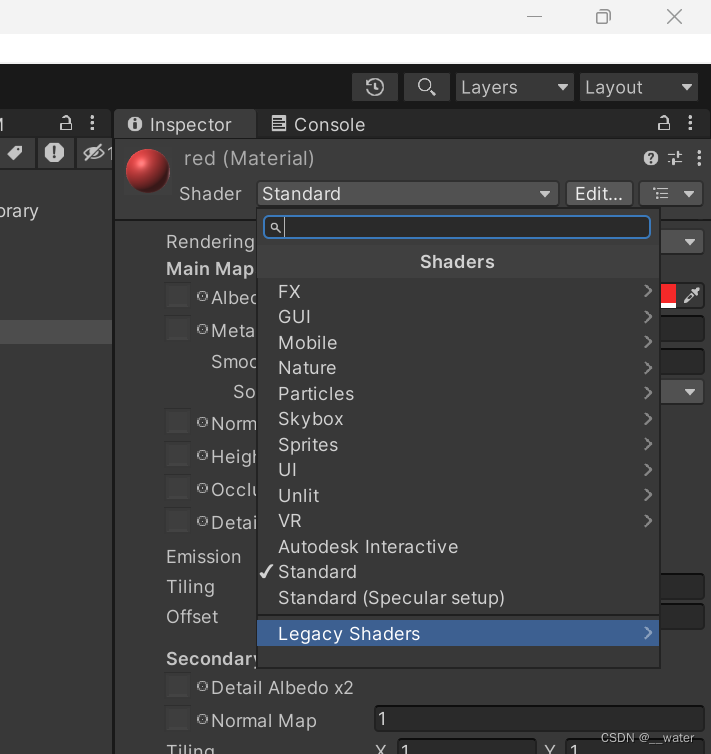


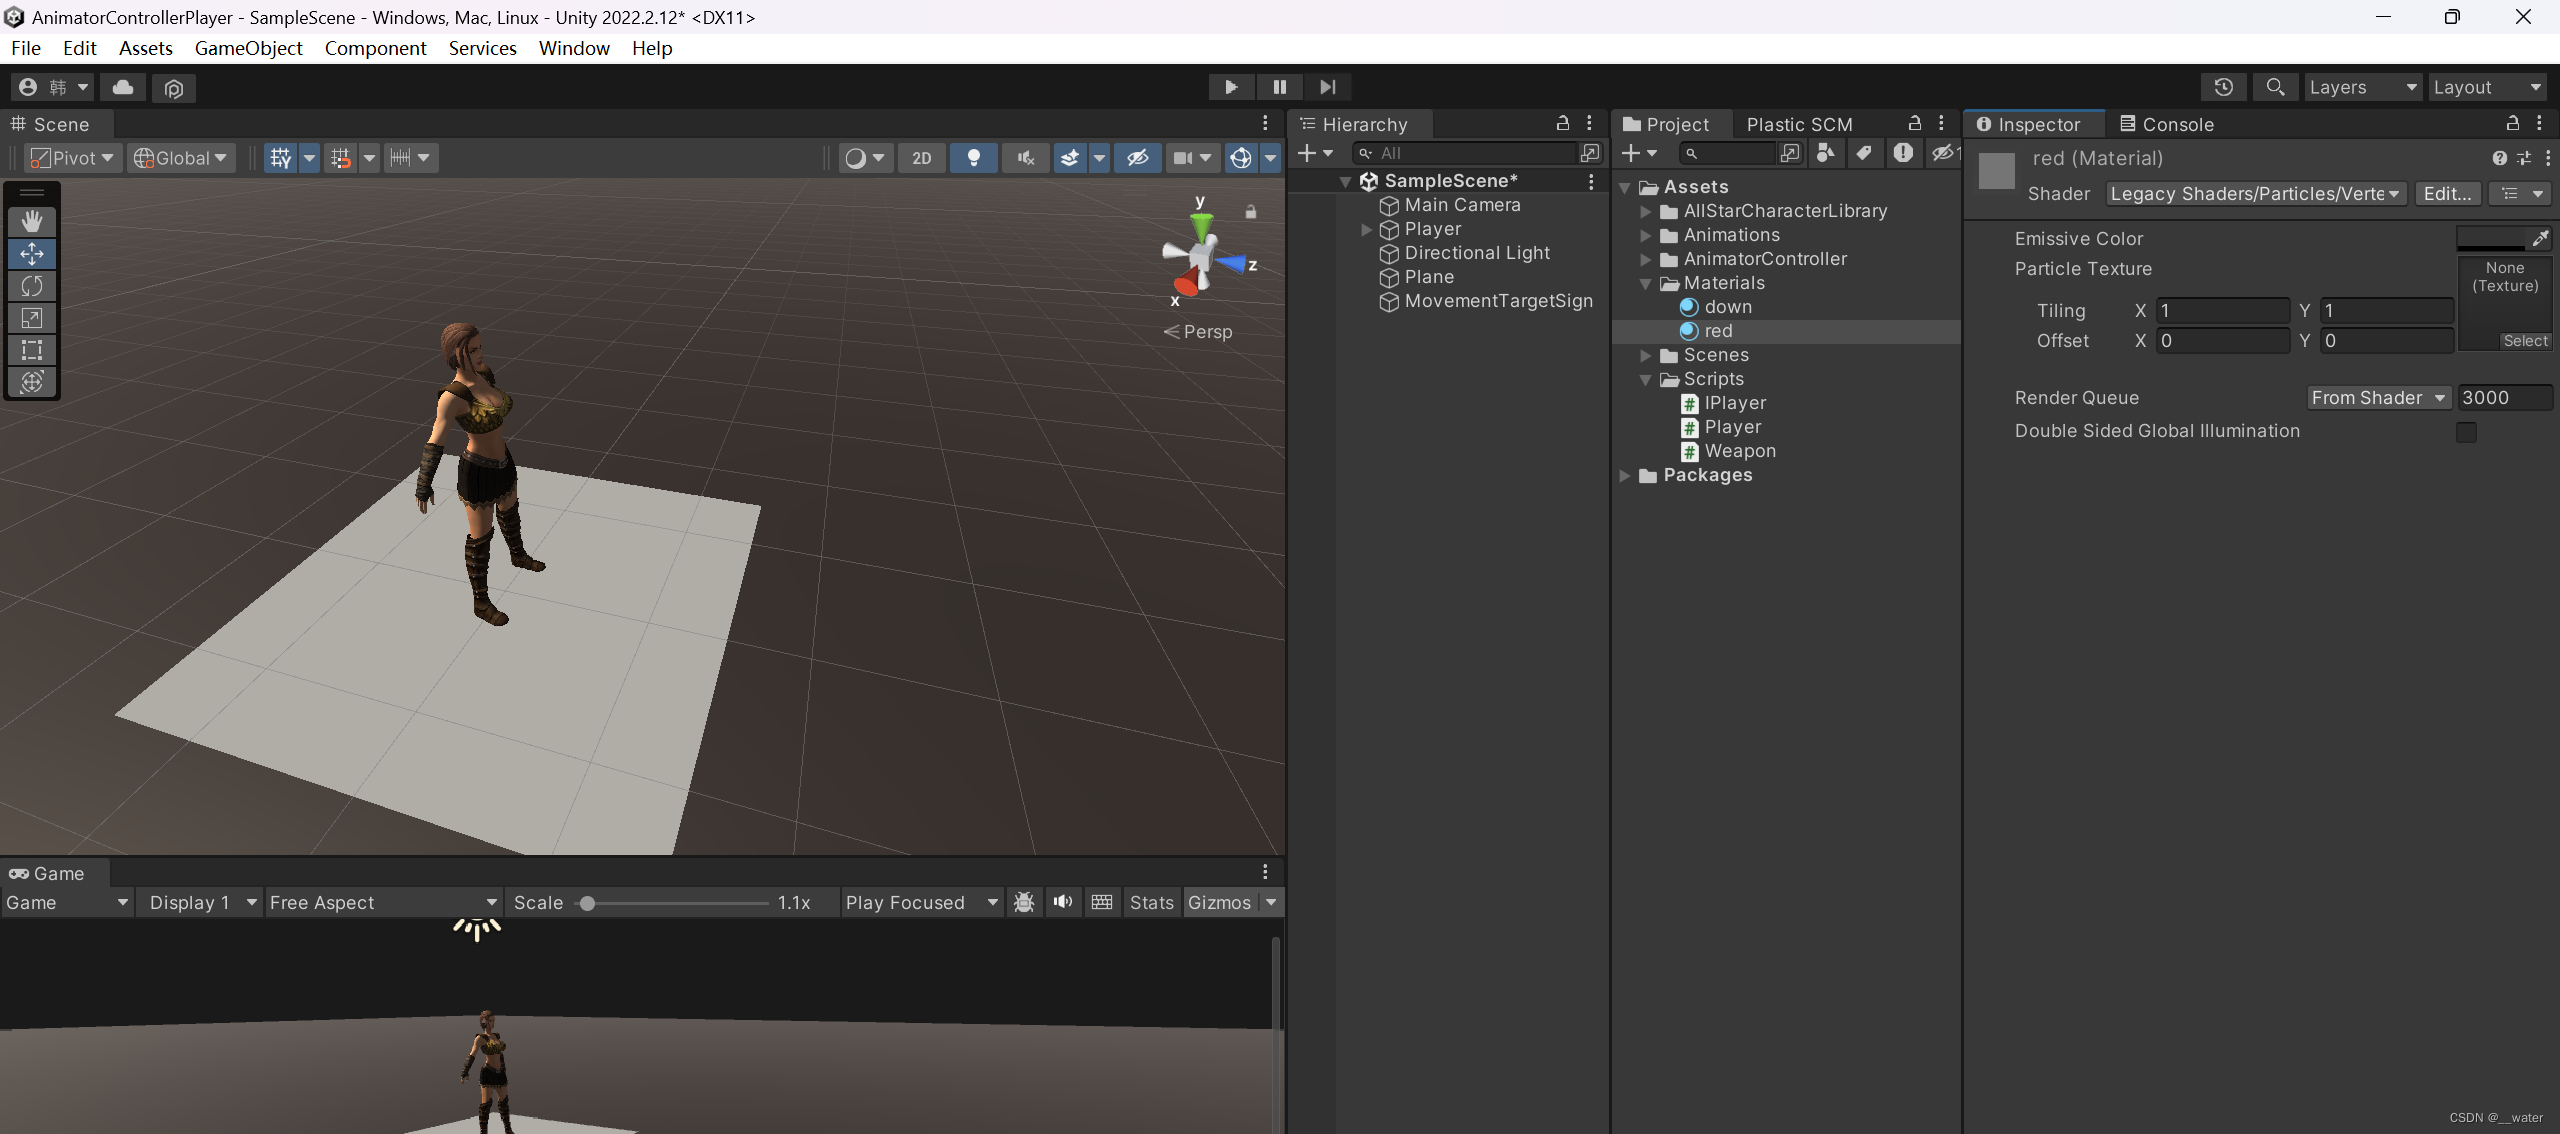
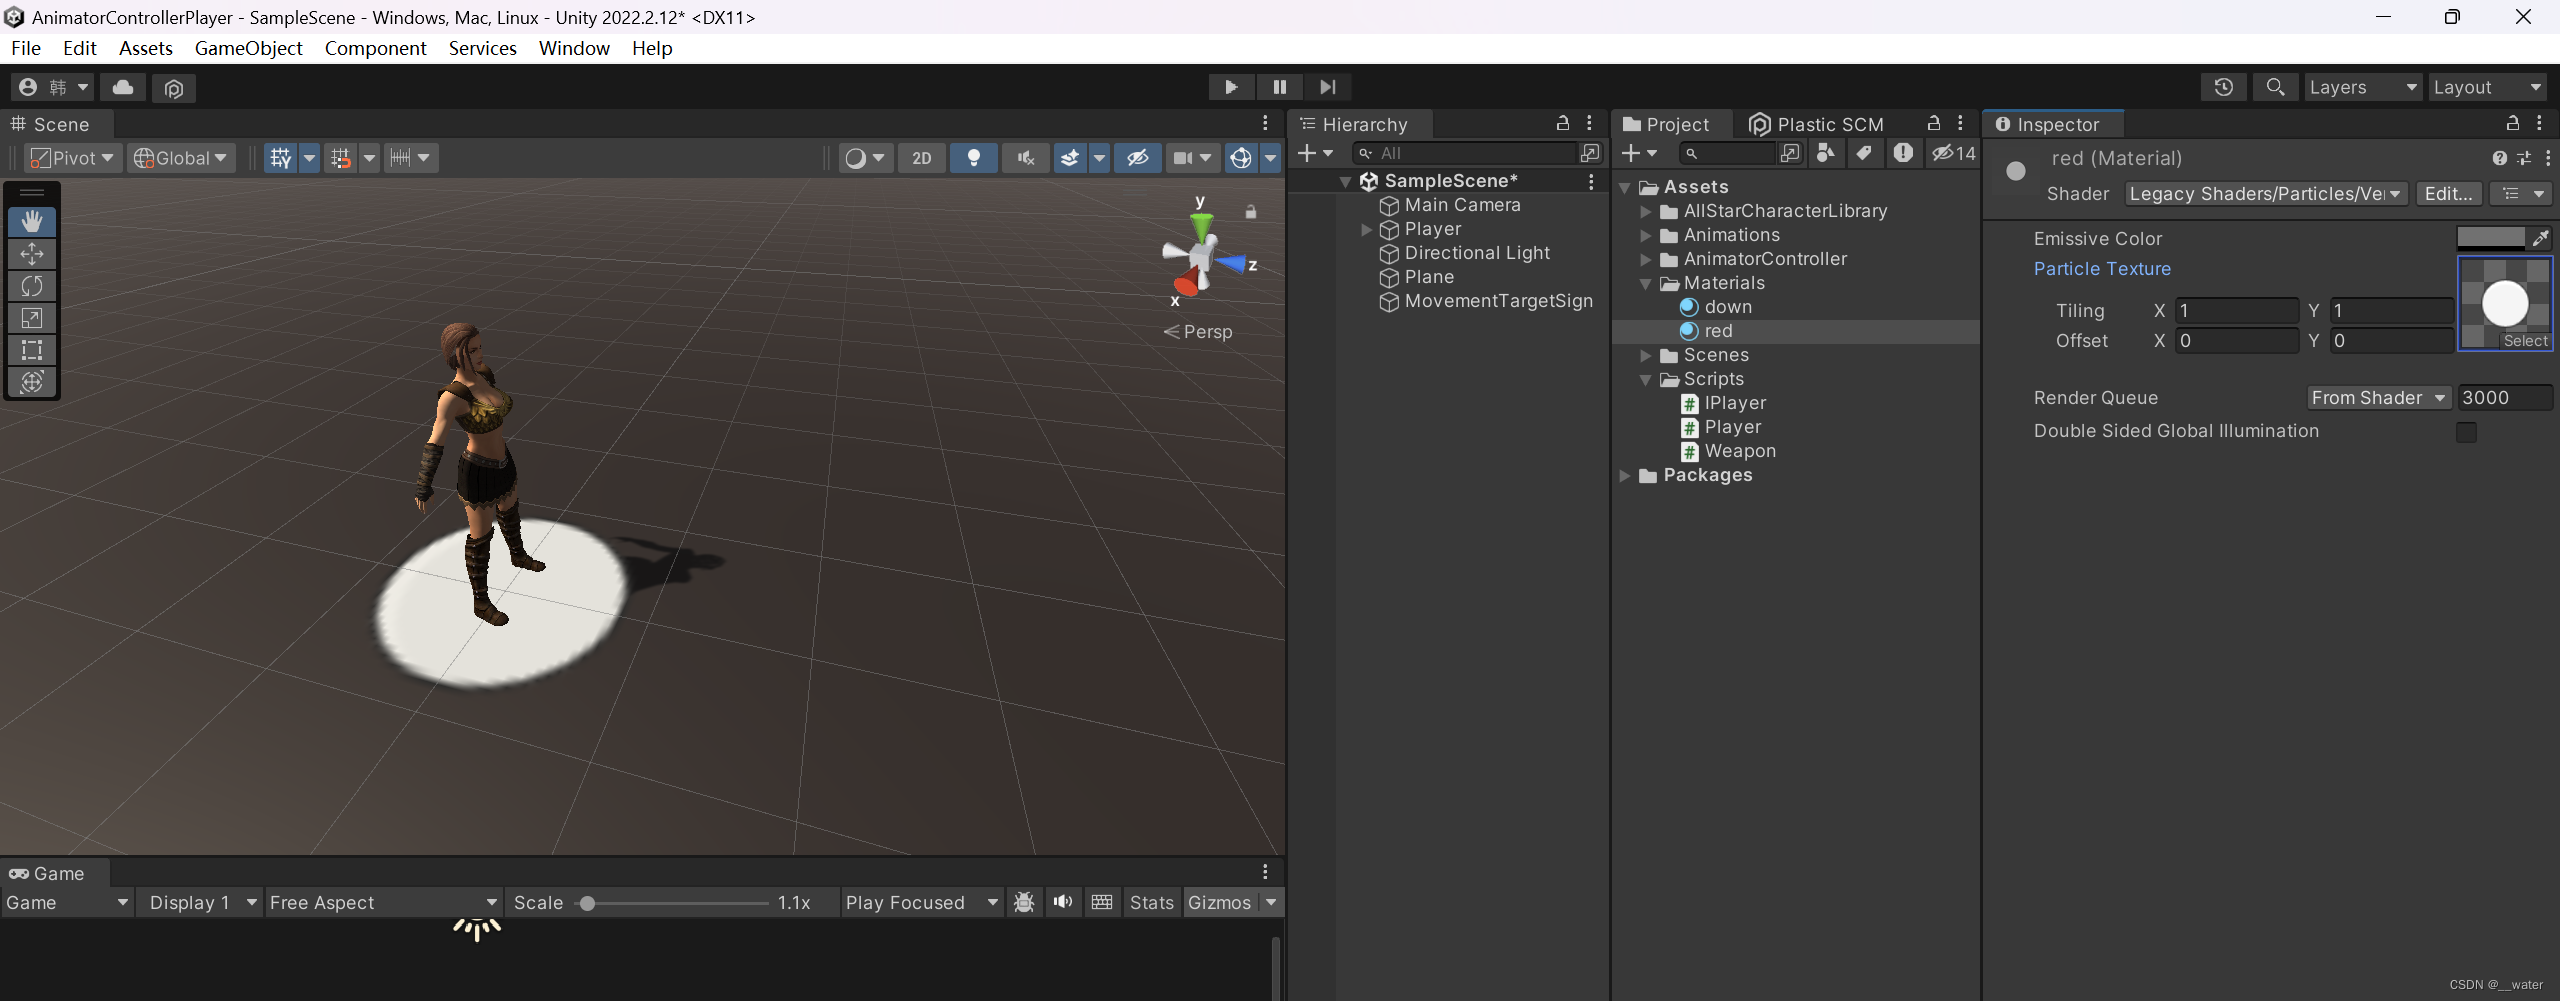
选择一个纹理


代码:

using UnityEngine;
//抽象角色类-包括玩家和NPC
public class IPlayer : MonoBehaviour{
protected Animator _animator;//动画器组件引用
private IWeapon _weapon = null;//武器的引用
}
public class IWeapon{
}
using UnityEngine;
public class Player : IPlayer{
private Renderer movementSign;//移动标志
private Collider attackPlane;//攻击区
private Collider floorPlane;//普通地面(非攻击区)
private Vector3 lookatPos;//面向位置
private float rotSpeed = 20f;//移动旋转速度
private float attackRotSpeed = 10f;//攻击旋转速度
}
public class FemaleWarrior : Player{
}
将FemaleWarrior代码挂载Player对象身上
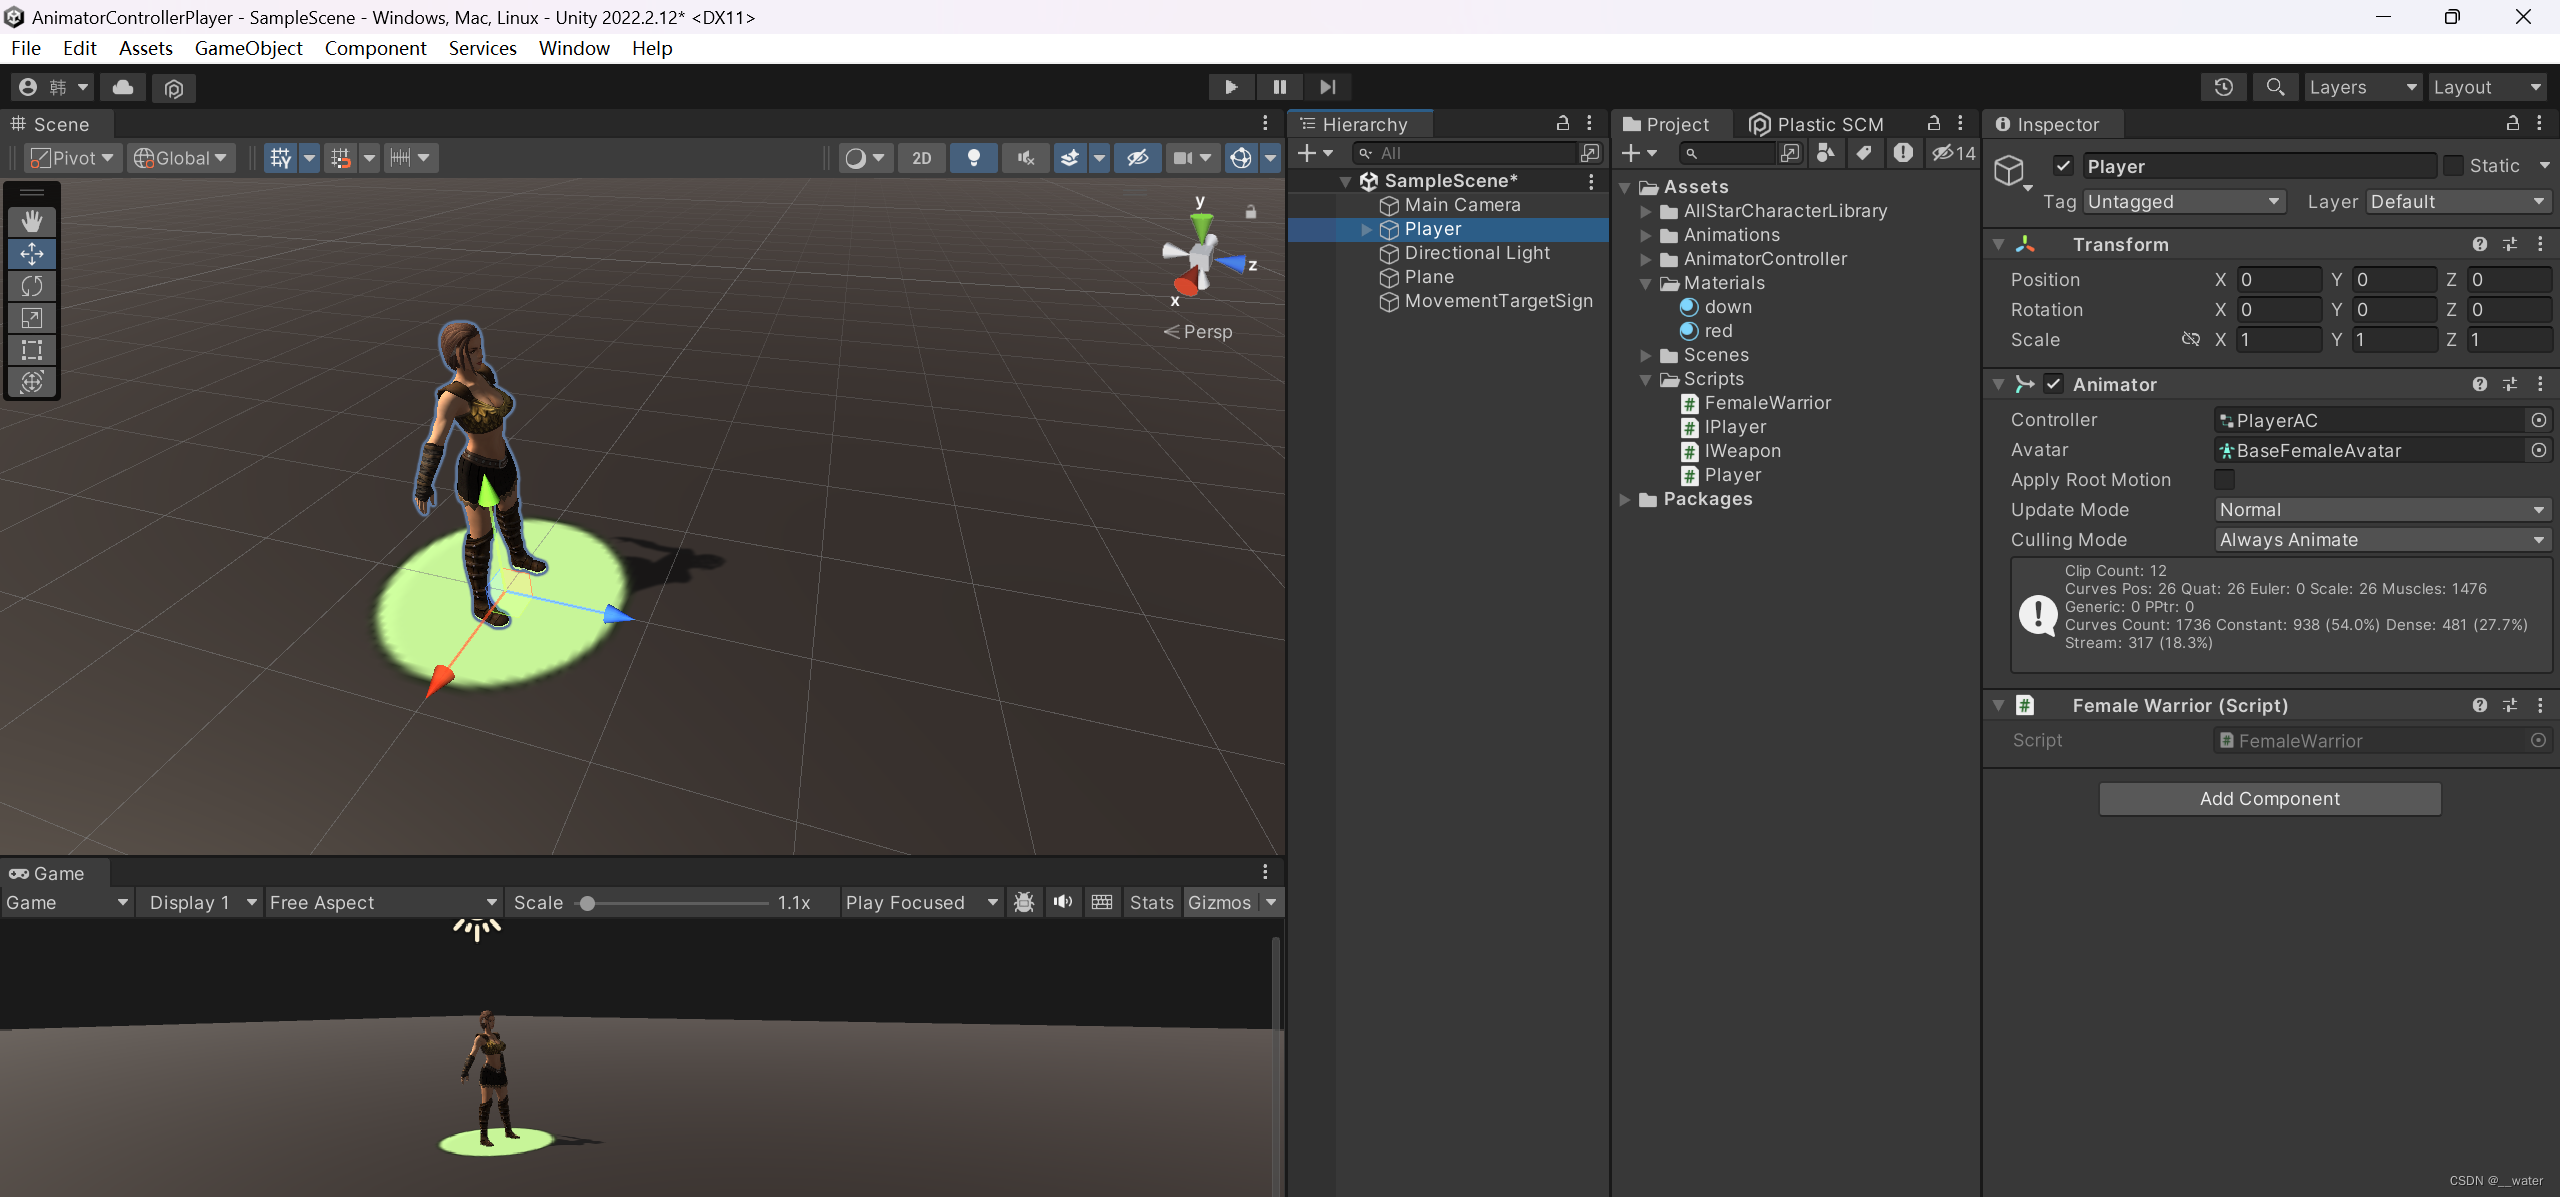
对角色Player添加胶囊碰撞器

调整胶囊碰撞器位于角色中心

再添加刚体
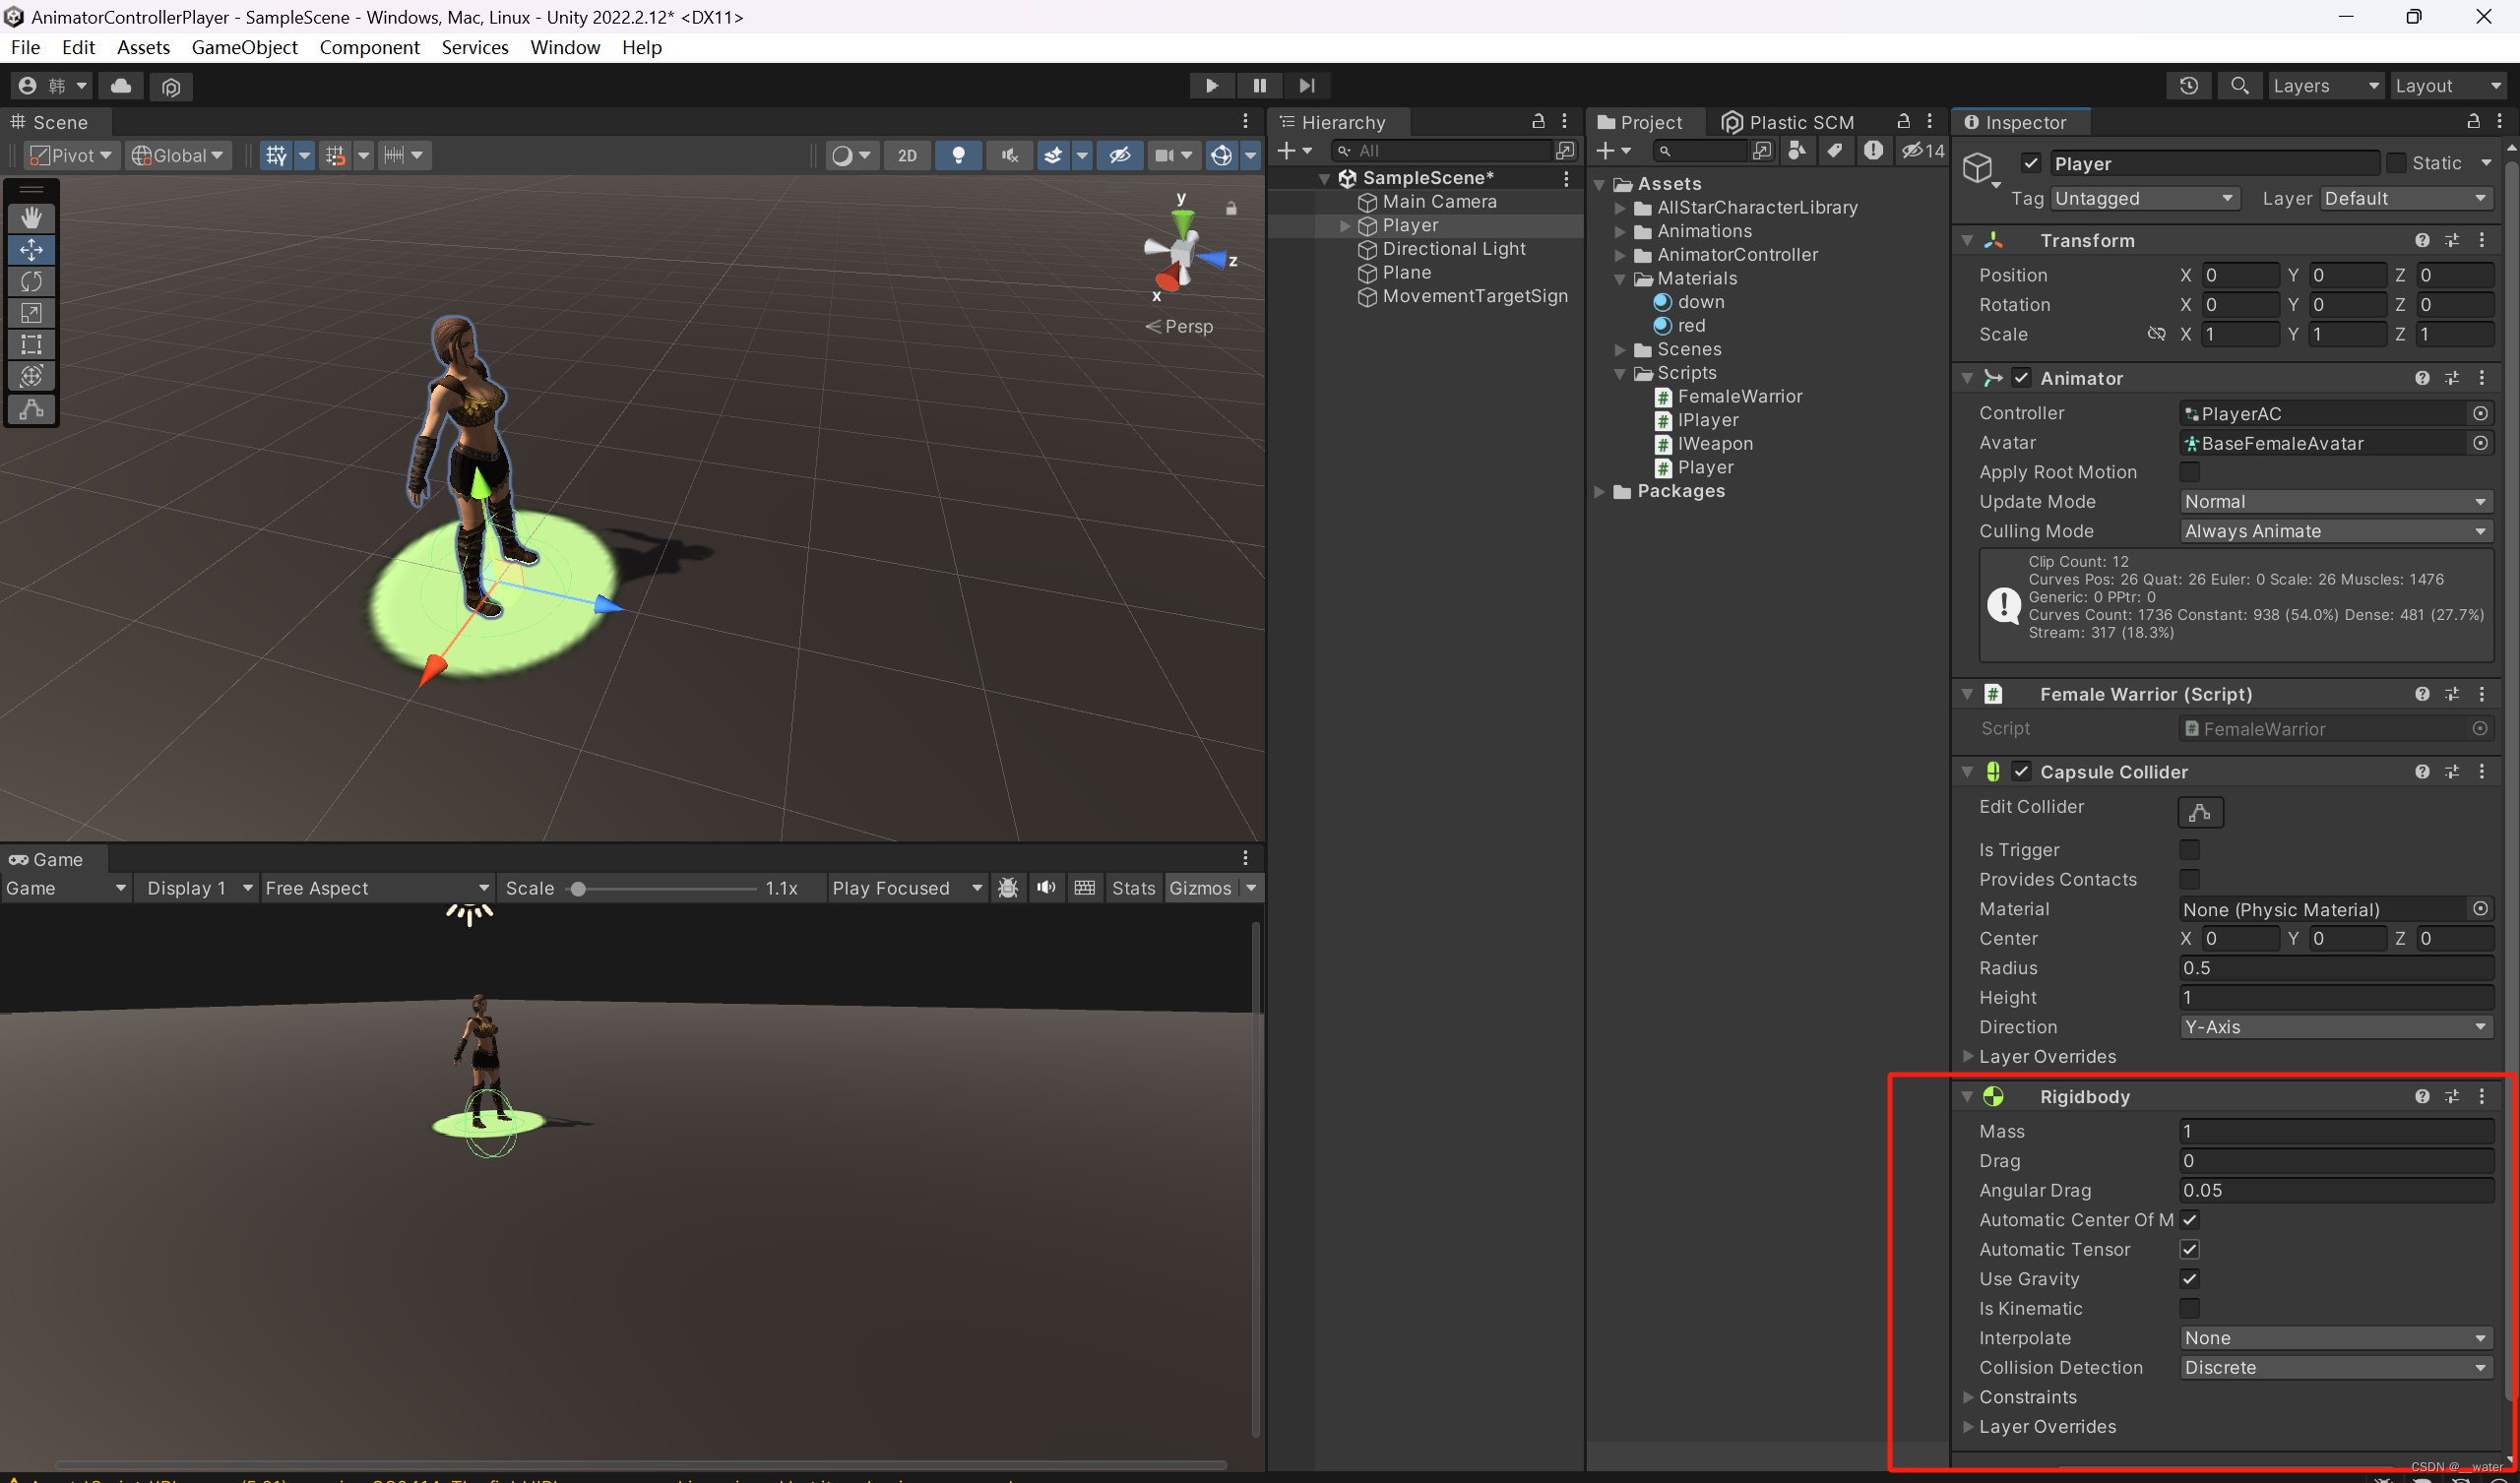
关掉 使用重力Use Gravity 勾选
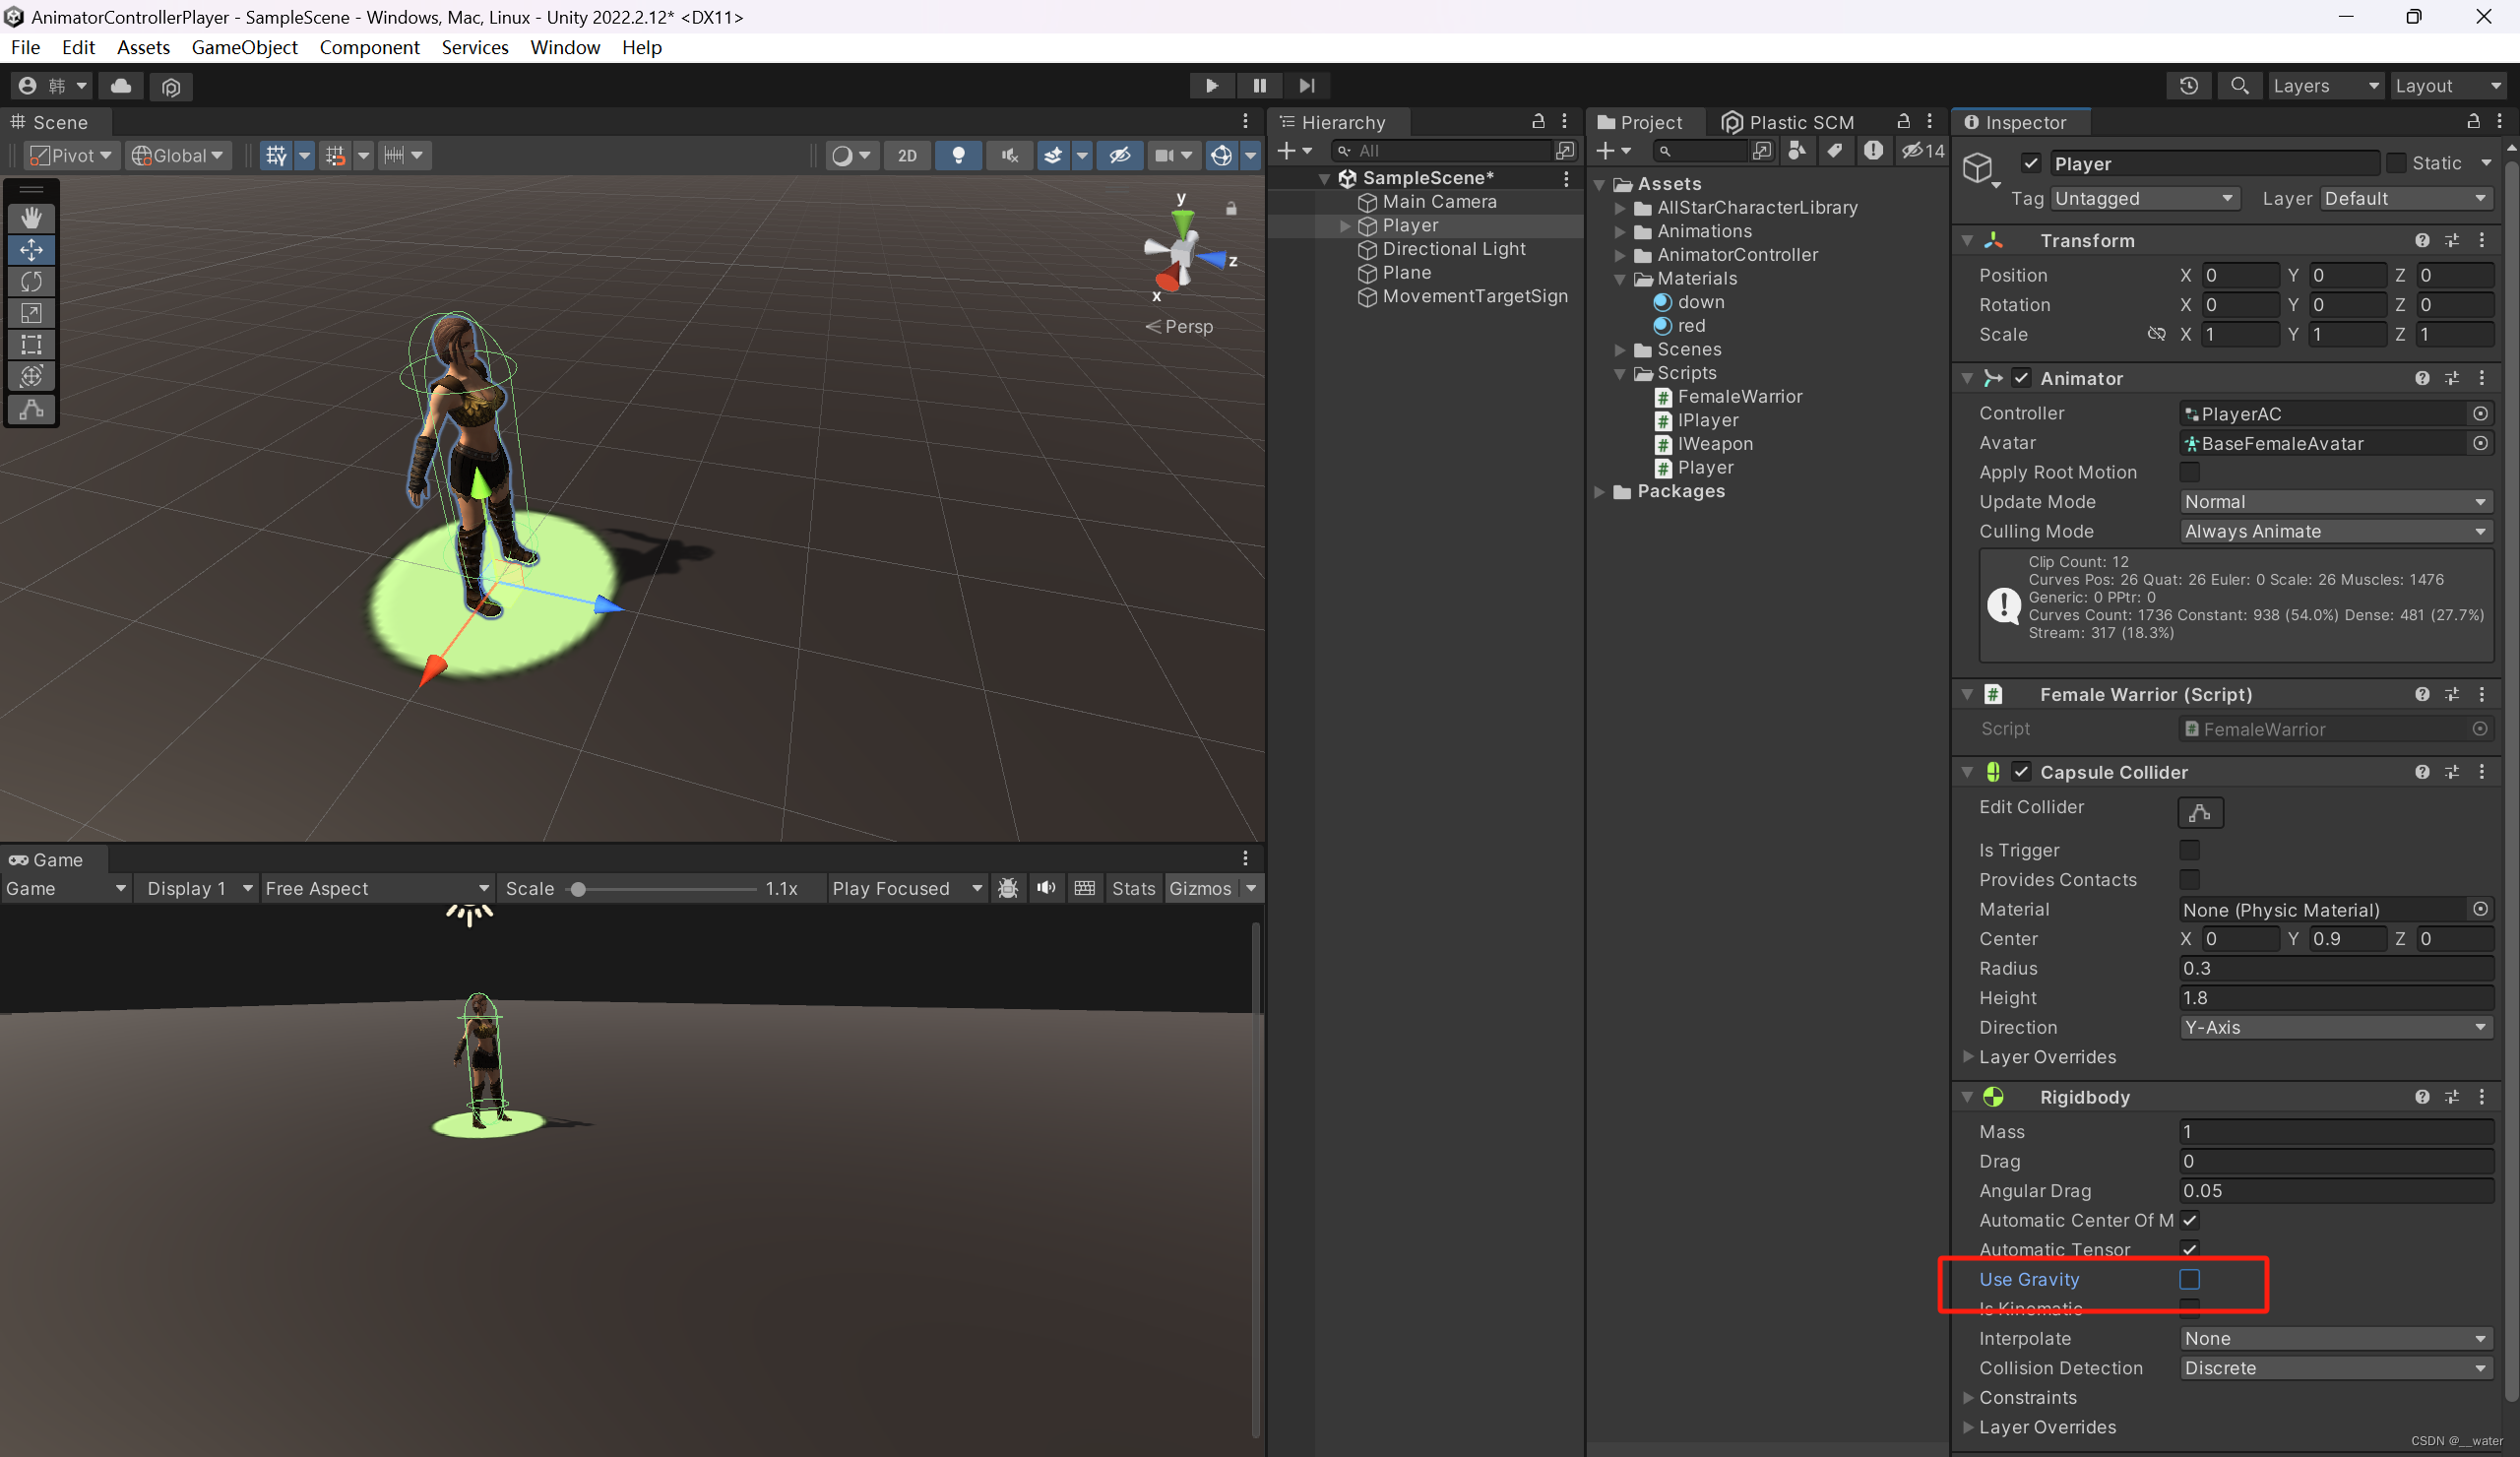
在约束上constraints 冻结旋转 x y z

如果制作的角色不需要重力则用碰撞器实现,
如果制作的角色需要重力 则用刚体 实现
先用刚体实现:
代码如下:

using UnityEngine;
//抽象角色类-包括玩家和NPC
public class IPlayer : MonoBehaviour{
protected Animator _animator;//动画器组件引用
private IWeapon _weapon = null;//武器的引用
}

public class IWeapon{
}
using UnityEngine;
public class Player : IPlayer{
private Renderer movementSign;//移动标志
private Collider attackPlane;//攻击区
private Collider floorPlane;//普通地面(非攻击区)
private Vector3 lookatPos;//面向位置
private float rotSpeed = 20f;//移动旋转速度
private float attackRotSpeed = 10f;//攻击旋转速度
protected virtual void Awake() {
//移动标志
if (movementSign == null)
movementSign = GameObject.Find("MovementTargetSign").GetComponent<Renderer>();
}
protected virtual void Start(){
//移动标志默认放在玩家脚下
movementSign.transform.position = transform.position + new Vector3(0,0.02f,0);
movementSign.enabled = false;//关闭移动标志的显示
}
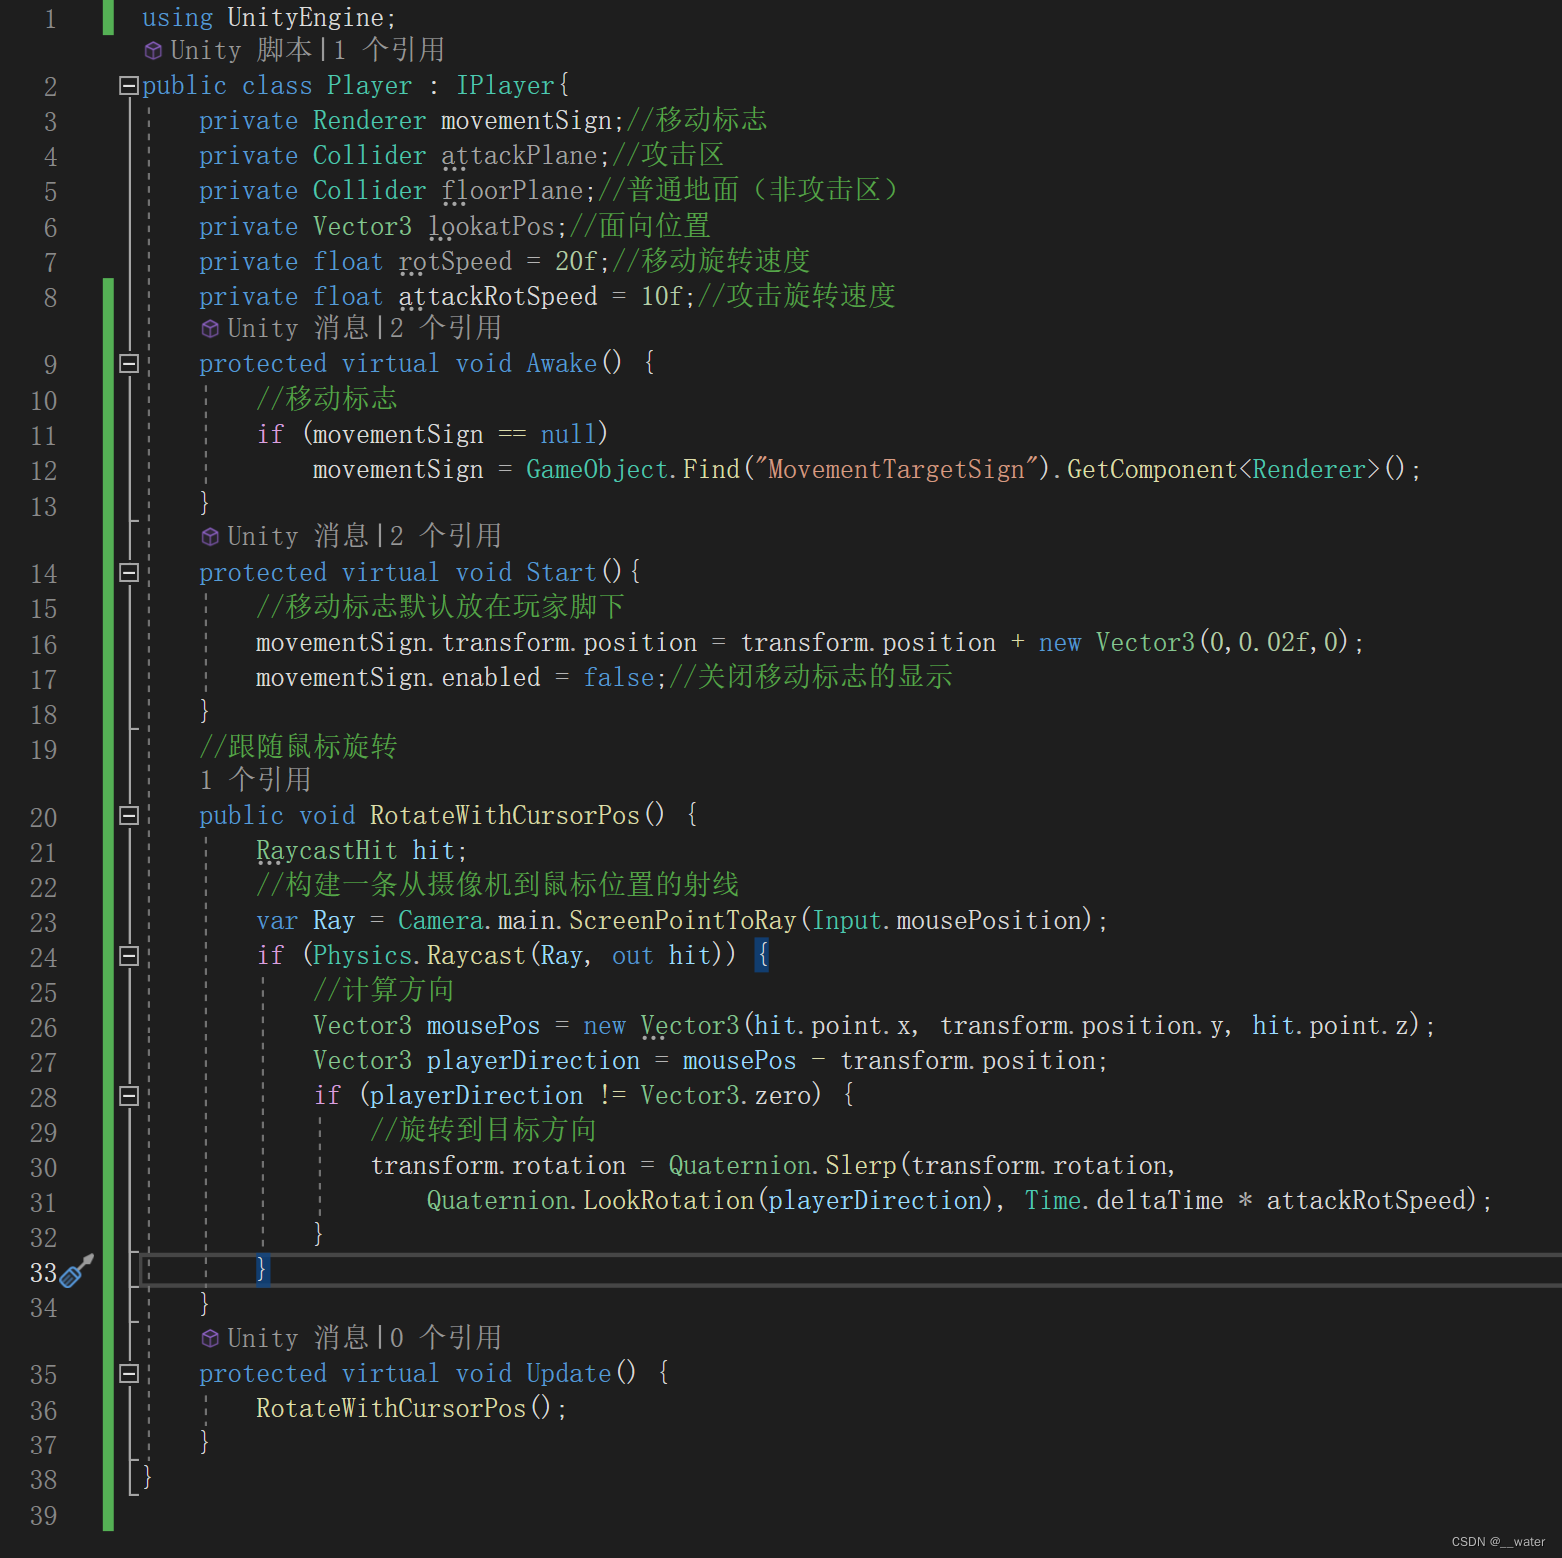
//跟随鼠标旋转
public void RotateWithCursorPos() {
RaycastHit hit;
//构建一条从摄像机到鼠标位置的射线
var Ray = Camera.main.ScreenPointToRay(Input.mousePosition);
if (Physics.Raycast(Ray, out hit)) {
//计算方向
Vector3 mousePos = new Vector3(hit.point.x, transform.position.y, hit.point.z);
Vector3 playerDirection = mousePos - transform.position;
if (playerDirection != Vector3.zero) {
//旋转到目标方向
transform.rotation = Quaternion.Slerp(transform.rotation,
Quaternion.LookRotation(playerDirection), Time.deltaTime * attackRotSpeed);
}
}
}
protected virtual void Update() {
RotateWithCursorPos();
}
}
public class FemaleWarrior : Player{
protected override void Awake(){
base.Awake();
}
protected override void Start(){
base.Start();
}
}
完成人物转向之后,开始做人物移动功能
首先添加代码,将动画机参数转换为哈希值

using UnityEngine;
public class AnimaterConsteantVelues {
public static int WeaponID = Animator.StringToHash("WeaponID");
public static int isCombat = Animator.StringToHash("isCombat");
public static int isIdle = Animator.StringToHash("isIdle");
public static int Attack = Animator.StringToHash("Attack");
}
在角色基类中添加函数

using UnityEngine;
//抽象角色类-包括玩家和NPC
public class IPlayer : MonoBehaviour{
protected Animator _animator;//动画器组件引用
private IWeapon _weapon = null;//武器的引用
public IWeapon Weapon {
get => _weapon;
set => _weapon = value;
}
public void Attack() {
if (_weapon != null)
_weapon.Attack();
}
}
修改抽象武器基类

using UnityEngine;
public abstract class IWeapon{
public string WeaponName { get; set; }
protected GameObject _weaponModel;
protected GameObject _weaponPrefab;
private int weaponID { get; set; }
protected IPlayer _player { get; set; }
public GameObject WeaponPrefab {
get => _weaponModel;
set => _weaponModel = value;
}
public virtual void Attack() { }
public virtual void RefreshLine() { }
public IWeapon(int weaponID, string name, string weaponModelPath, IPlayer player){
this.weaponID = weaponID;
WeaponName = name;
_player = player;
if (weaponModelPath != "") {
_weaponModel = Resources.Load<GameObject>(weaponModelPath);
if (_weaponModel != null) {
var weaponPos = ((Player)_player).handleWeaponPosList[weaponID];
_weaponPrefab = GameObject.Instantiate(_weaponModel, weaponPos.position, weaponPos.rotation);
_weaponPrefab.transform.SetParent(weaponPos);
_weaponPrefab.SetActive(false);
}
}
}
}
修改角色子类
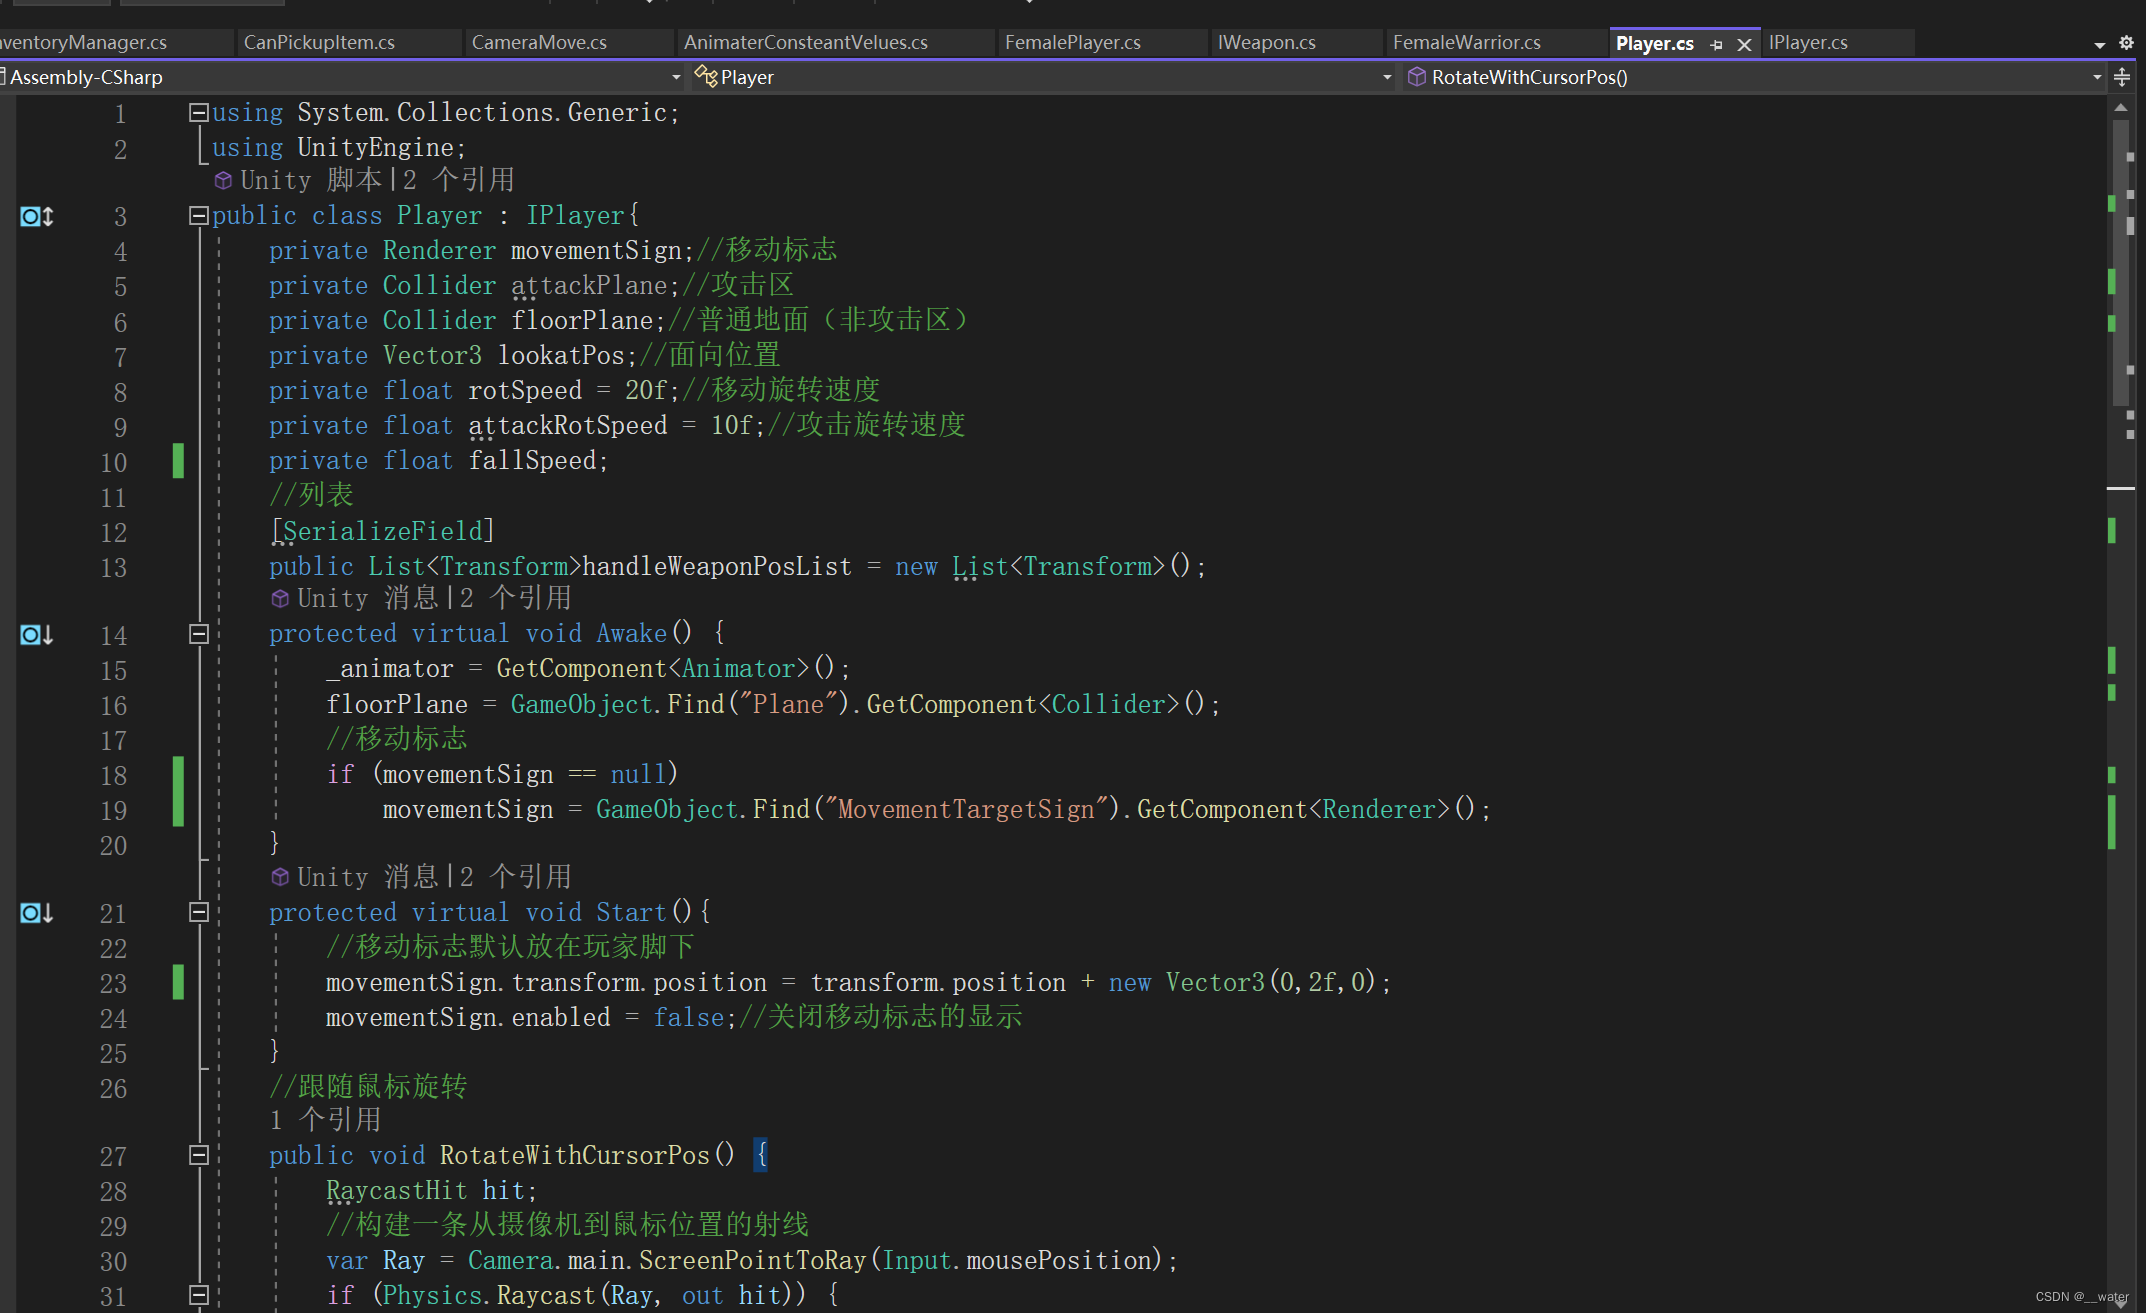
using System.Collections.Generic;
using UnityEngine;
public class Player : IPlayer{
private Renderer movementSign;//移动标志
private Collider attackPlane;//攻击区
private Collider floorPlane;//普通地面(非攻击区)
private Vector3 lookatPos;//面向位置
private float rotSpeed = 20f;//移动旋转速度
private float attackRotSpeed = 10f;//攻击旋转速度
private float fallSpeed;
//列表
[SerializeField]
public List<Transform>handleWeaponPosList = new List<Transform>();
protected virtual void Awake() {
_animator = GetComponent<Animator>();
floorPlane = GameObject.Find("Plane").GetComponent<Collider>();
//移动标志
if (movementSign == null)
movementSign = GameObject.Find("MovementTargetSign").GetComponent<Renderer>();
}
protected virtual void Start(){
//移动标志默认放在玩家脚下
movementSign.transform.position = transform.position + new Vector3(0,2f,0);
movementSign.enabled = false;//关闭移动标志的显示
}
//跟随鼠标旋转
public void RotateWithCursorPos() {
RaycastHit hit;
//构建一条从摄像机到鼠标位置的射线
var Ray = Camera.main.ScreenPointToRay(Input.mousePosition);
if (Physics.Raycast(Ray, out hit)) {
//计算方向
Vector3 mousePos = new Vector3(hit.point.x, transform.position.y, hit.point.z);
Vector3 playerDirection = mousePos - transform.position;
if (playerDirection != Vector3.zero) {
//旋转到目标方向
transform.rotation = Quaternion.Slerp(transform.rotation,
Quaternion.LookRotation(playerDirection), Time.deltaTime * attackRotSpeed);
}
}
}
public void Move(){
RaycastHit hit;
var ray = Camera.main.ScreenPointToRay(Input.mousePosition);
if (Input.GetMouseButton(0)){
if (floorPlane.Raycast(ray, out hit, 50f)){
movementSign.transform.position = hit.point + new Vector3(0, 0.01f, 0);
movementSign.enabled = true;
lookatPos = hit.point;
}
}
else if(Input.GetMouseButtonUp(1)){
_animator.SetBool(AnimaterConsteantVelues.isCombat, true);
_animator.SetTrigger(AnimaterConsteantVelues.Attack);
Attack();
}
lookatPos.y = transform.position.y;
var playerDirection = lookatPos - transform.position;
if (playerDirection != Vector3.zero)
transform.rotation = Quaternion.Slerp(transform.rotation, Quaternion.LookRotation(playerDirection), Time.deltaTime * rotSpeed);
var offset = movementSign.transform.position - transform.position;
var sqrDistance = offset.sqrMagnitude;
if (sqrDistance > 0.1f){
_animator.SetBool(AnimaterConsteantVelues.isIdle, false);
rotSpeed = 20f;
}
else {
_animator.SetBool(AnimaterConsteantVelues.isIdle,true);
movementSign.enabled = false;
movementSign.transform.position = transform.position;
rotSpeed = 0;
}
var bodyRay = new Ray(transform.position + transform.up, transform.up * -1);
if (floorPlane.Raycast(bodyRay, out hit, 1.0f)) {
if (hit.point.y > transform.position.y + 0.02f)
transform.position = hit.point + new Vector3(0, 0.02f, 0);
else if (floorPlane.Raycast(bodyRay, out hit, 1.2f))
if (hit.point.y > transform.position.y - 0.02f)
transform.position = hit.point + new Vector3(0, -0.02f, 0);
else {
fallSpeed += 0.1f;
var v = new Vector3(0, fallSpeed * Time.deltaTime, 0);
transform.position -= v;
movementSign.transform.position = transform.position + new Vector3(0, 0.01f, 0);
}
}
}
protected virtual void Update() {
RotateWithCursorPos();
Move();
}
}
回到Unity场景中拖拽填充武器刷新
人物移动完成
接下来完成背包系统


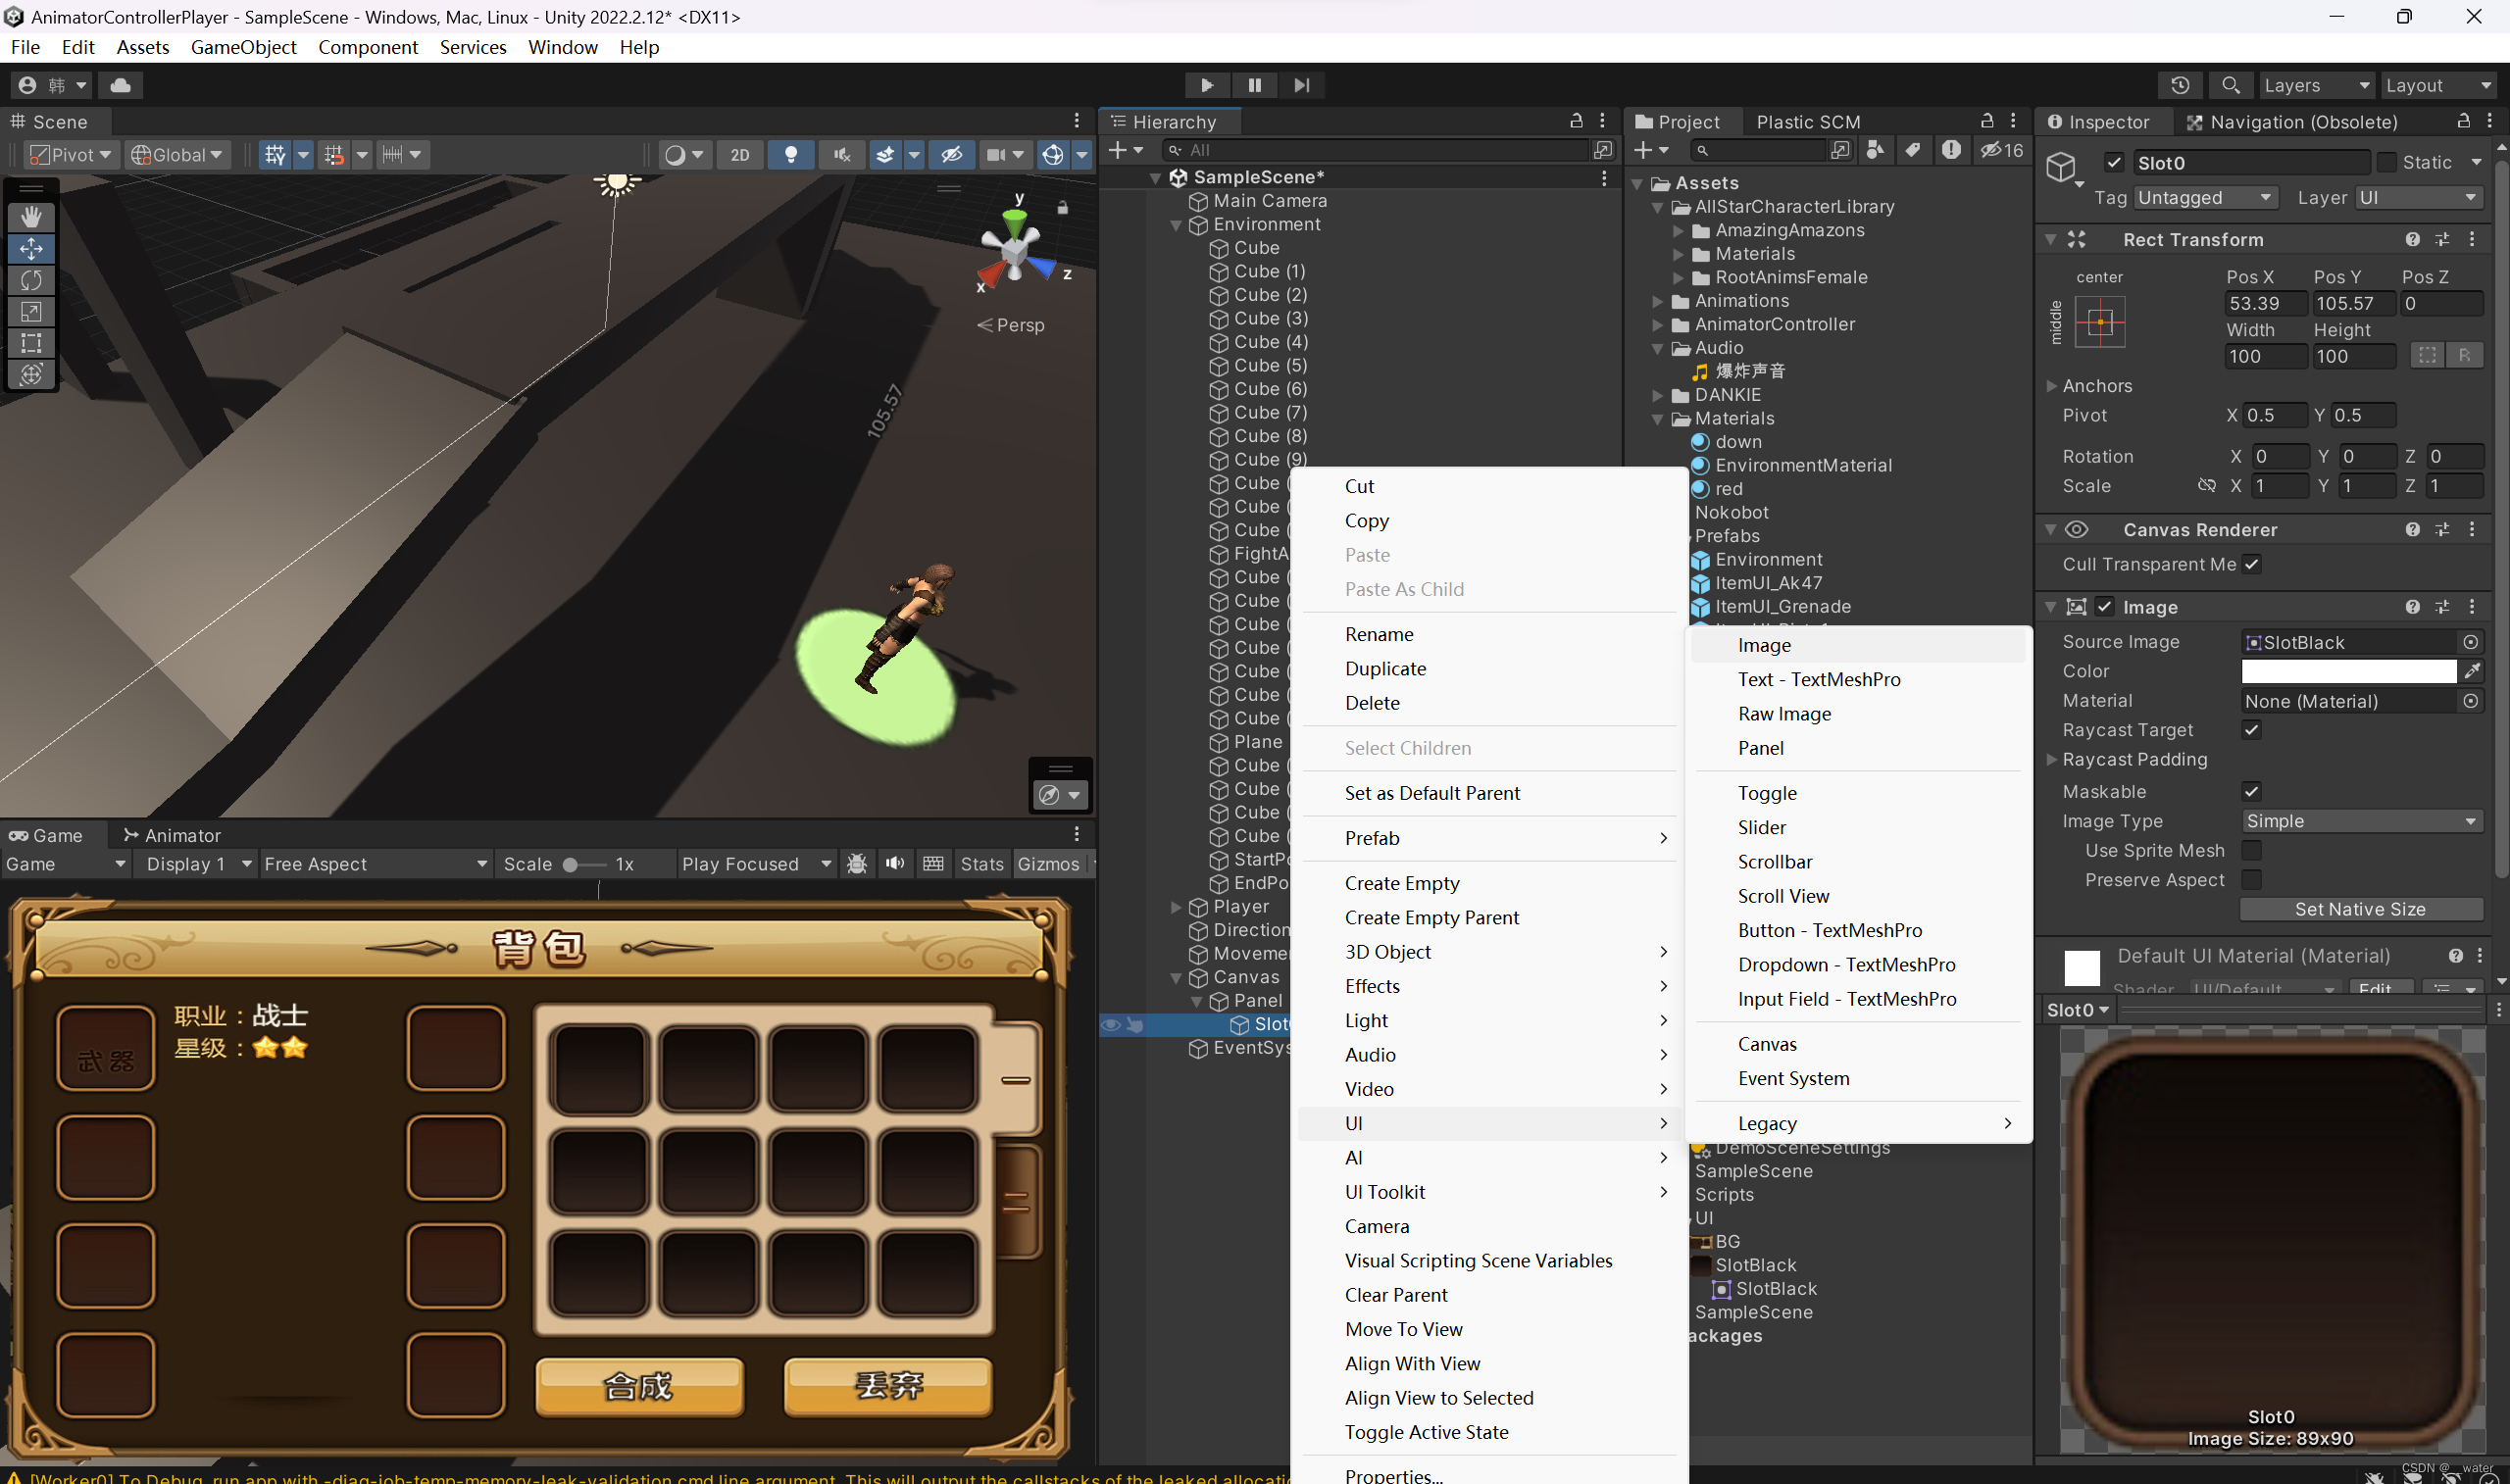


放进预制体包后完全解压缩

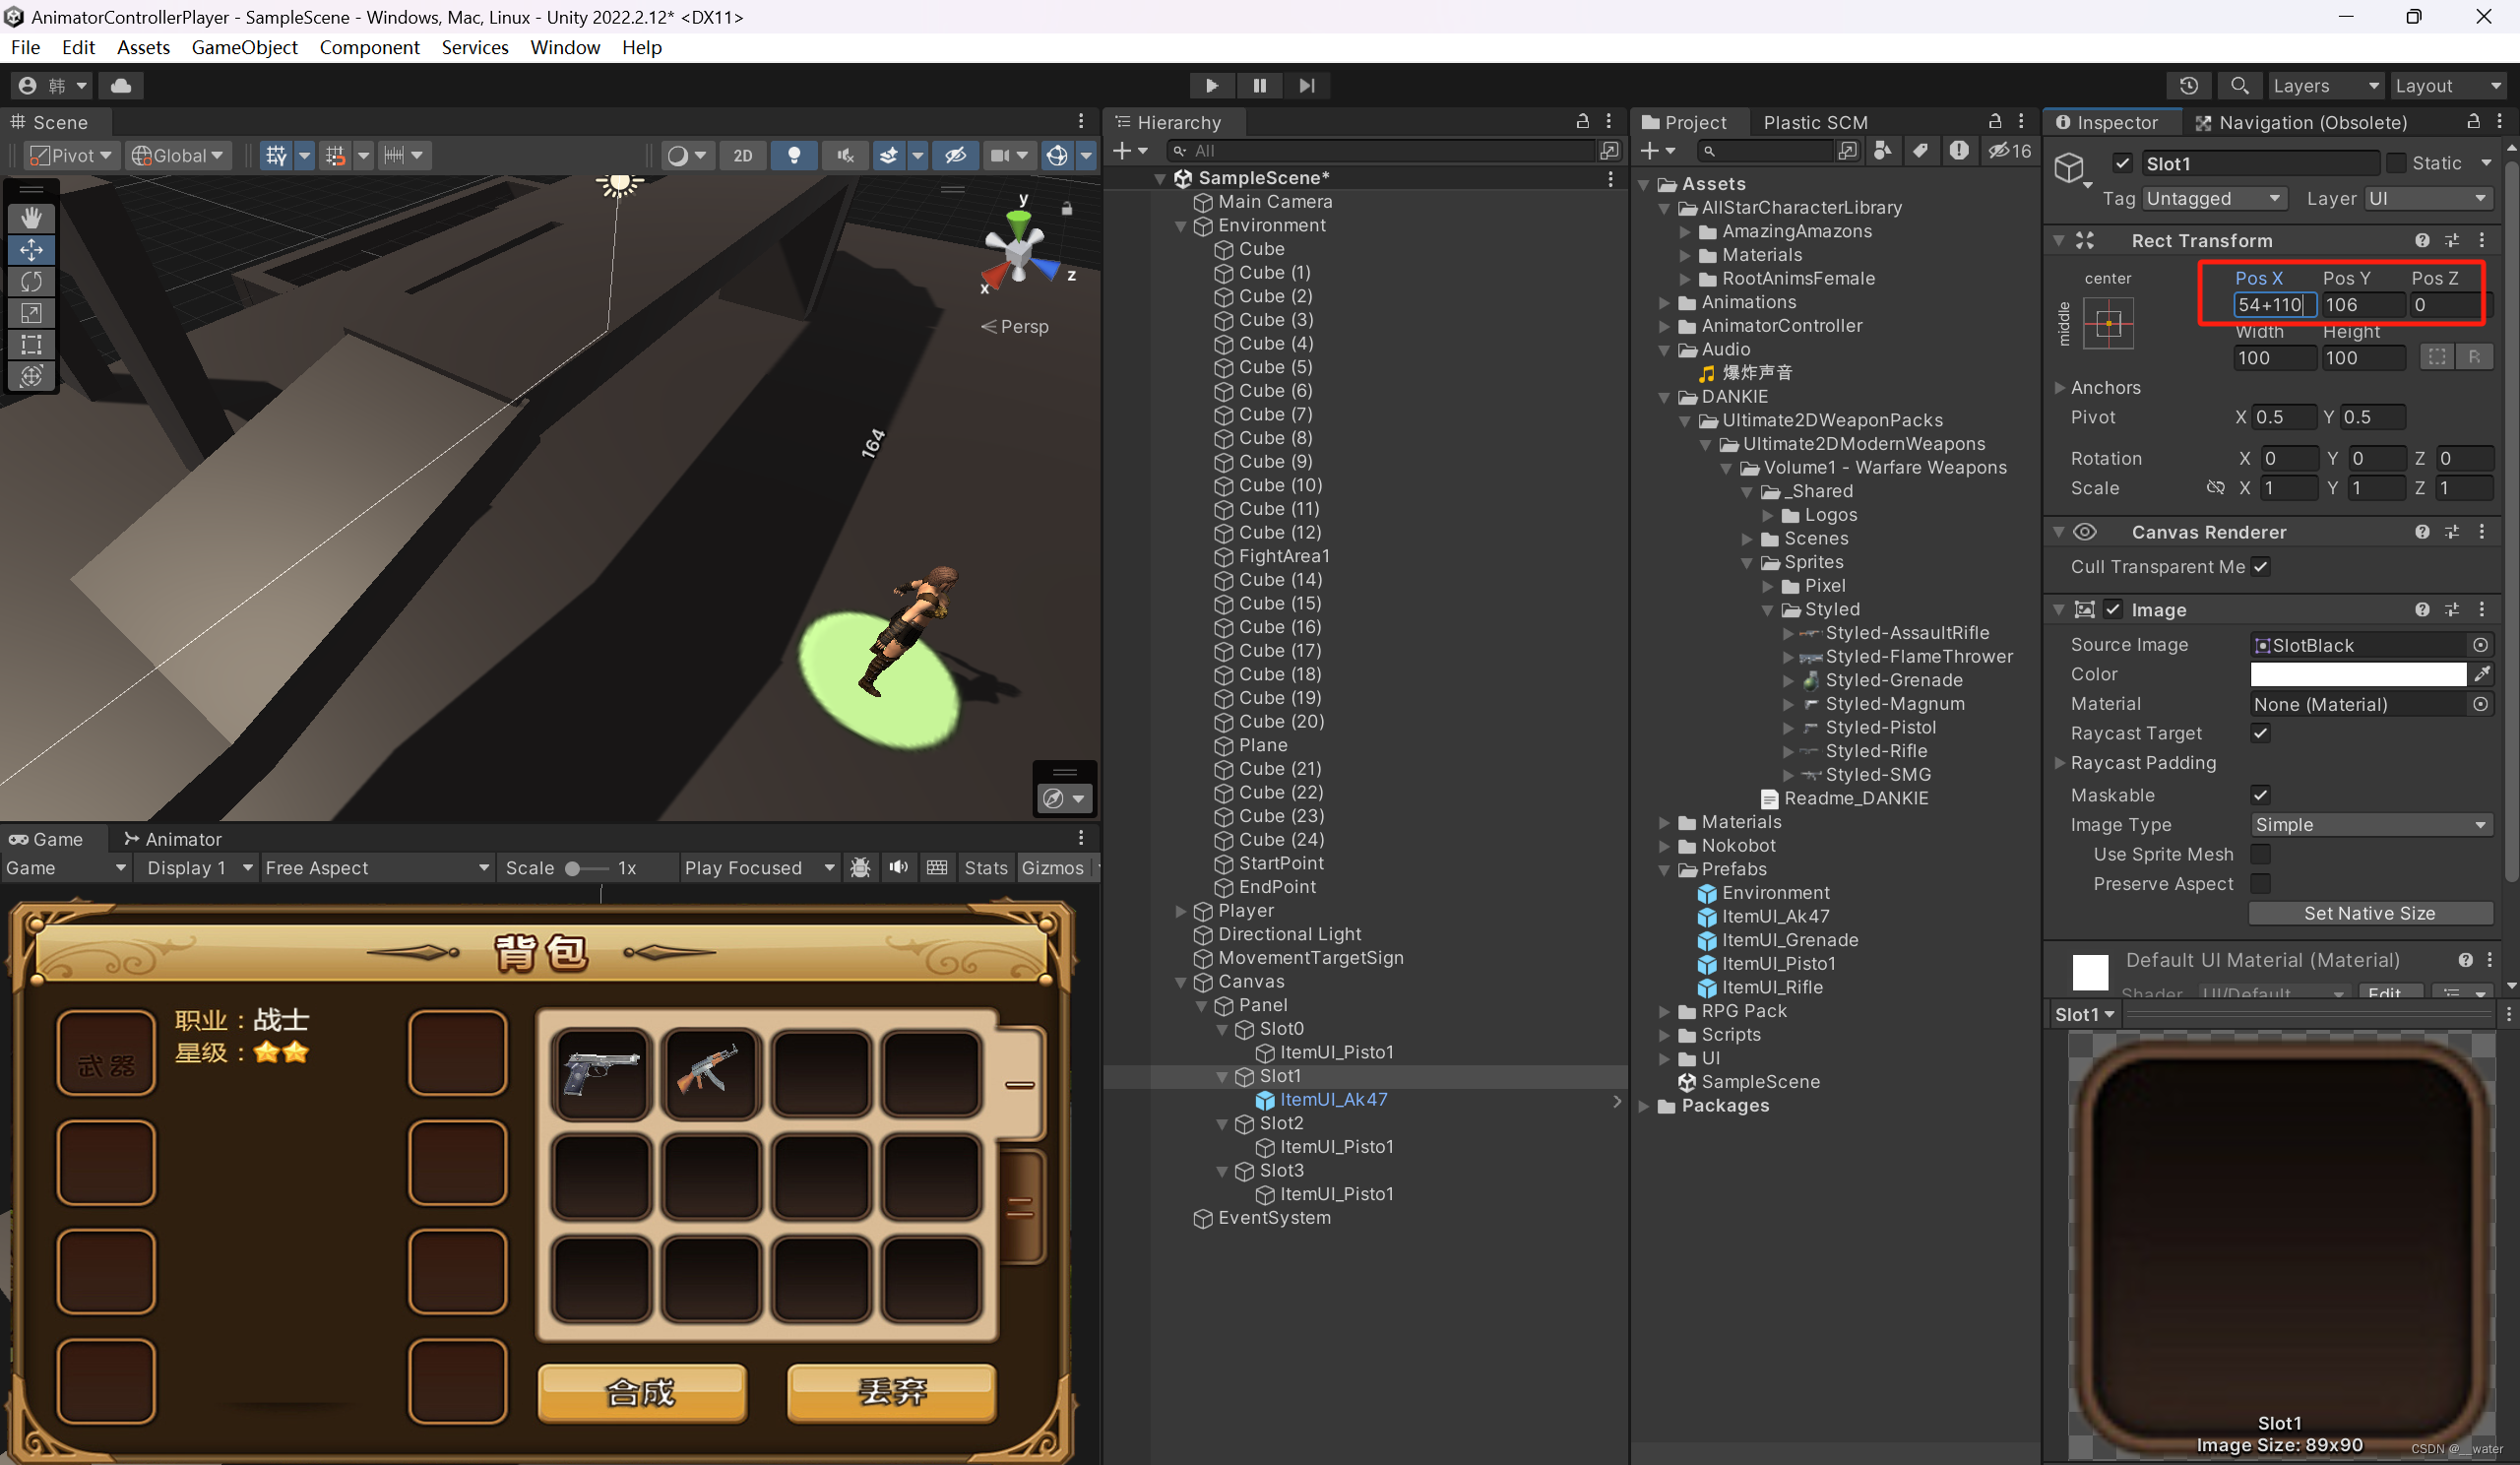


调整好Slot0-4的背景位置,将四个子物体预制体包后删除

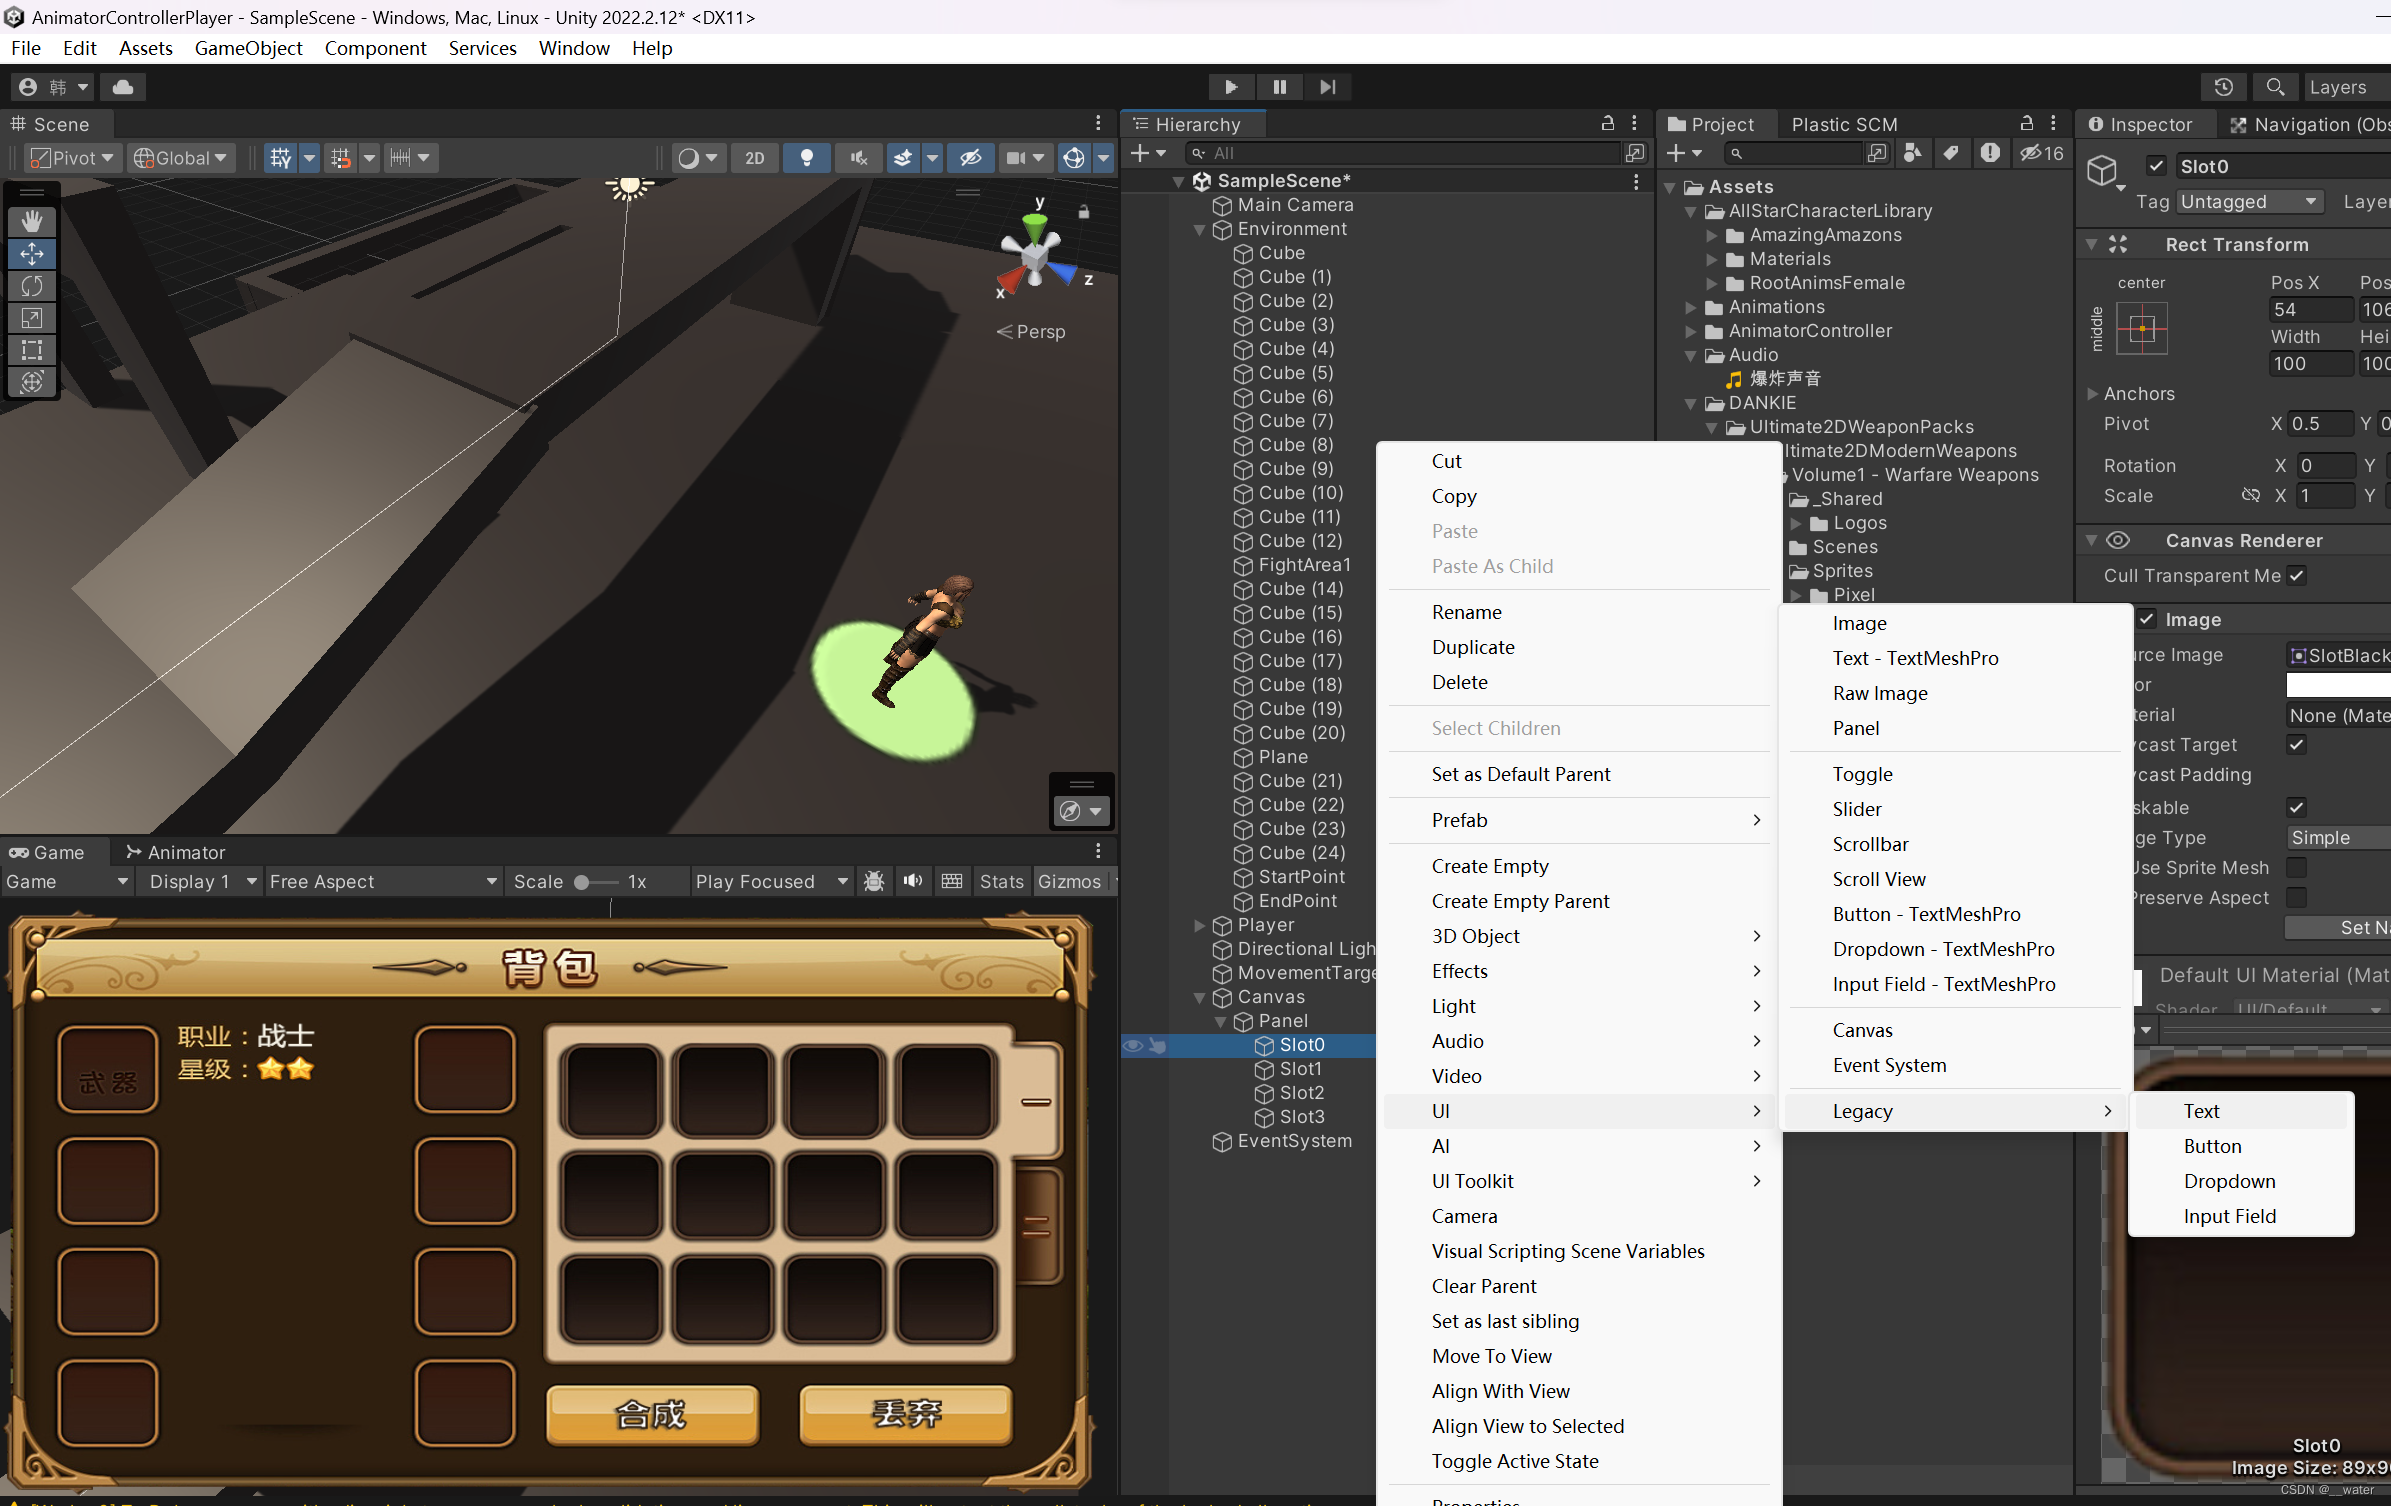


子物体位置都改成0

隐藏/取消激活

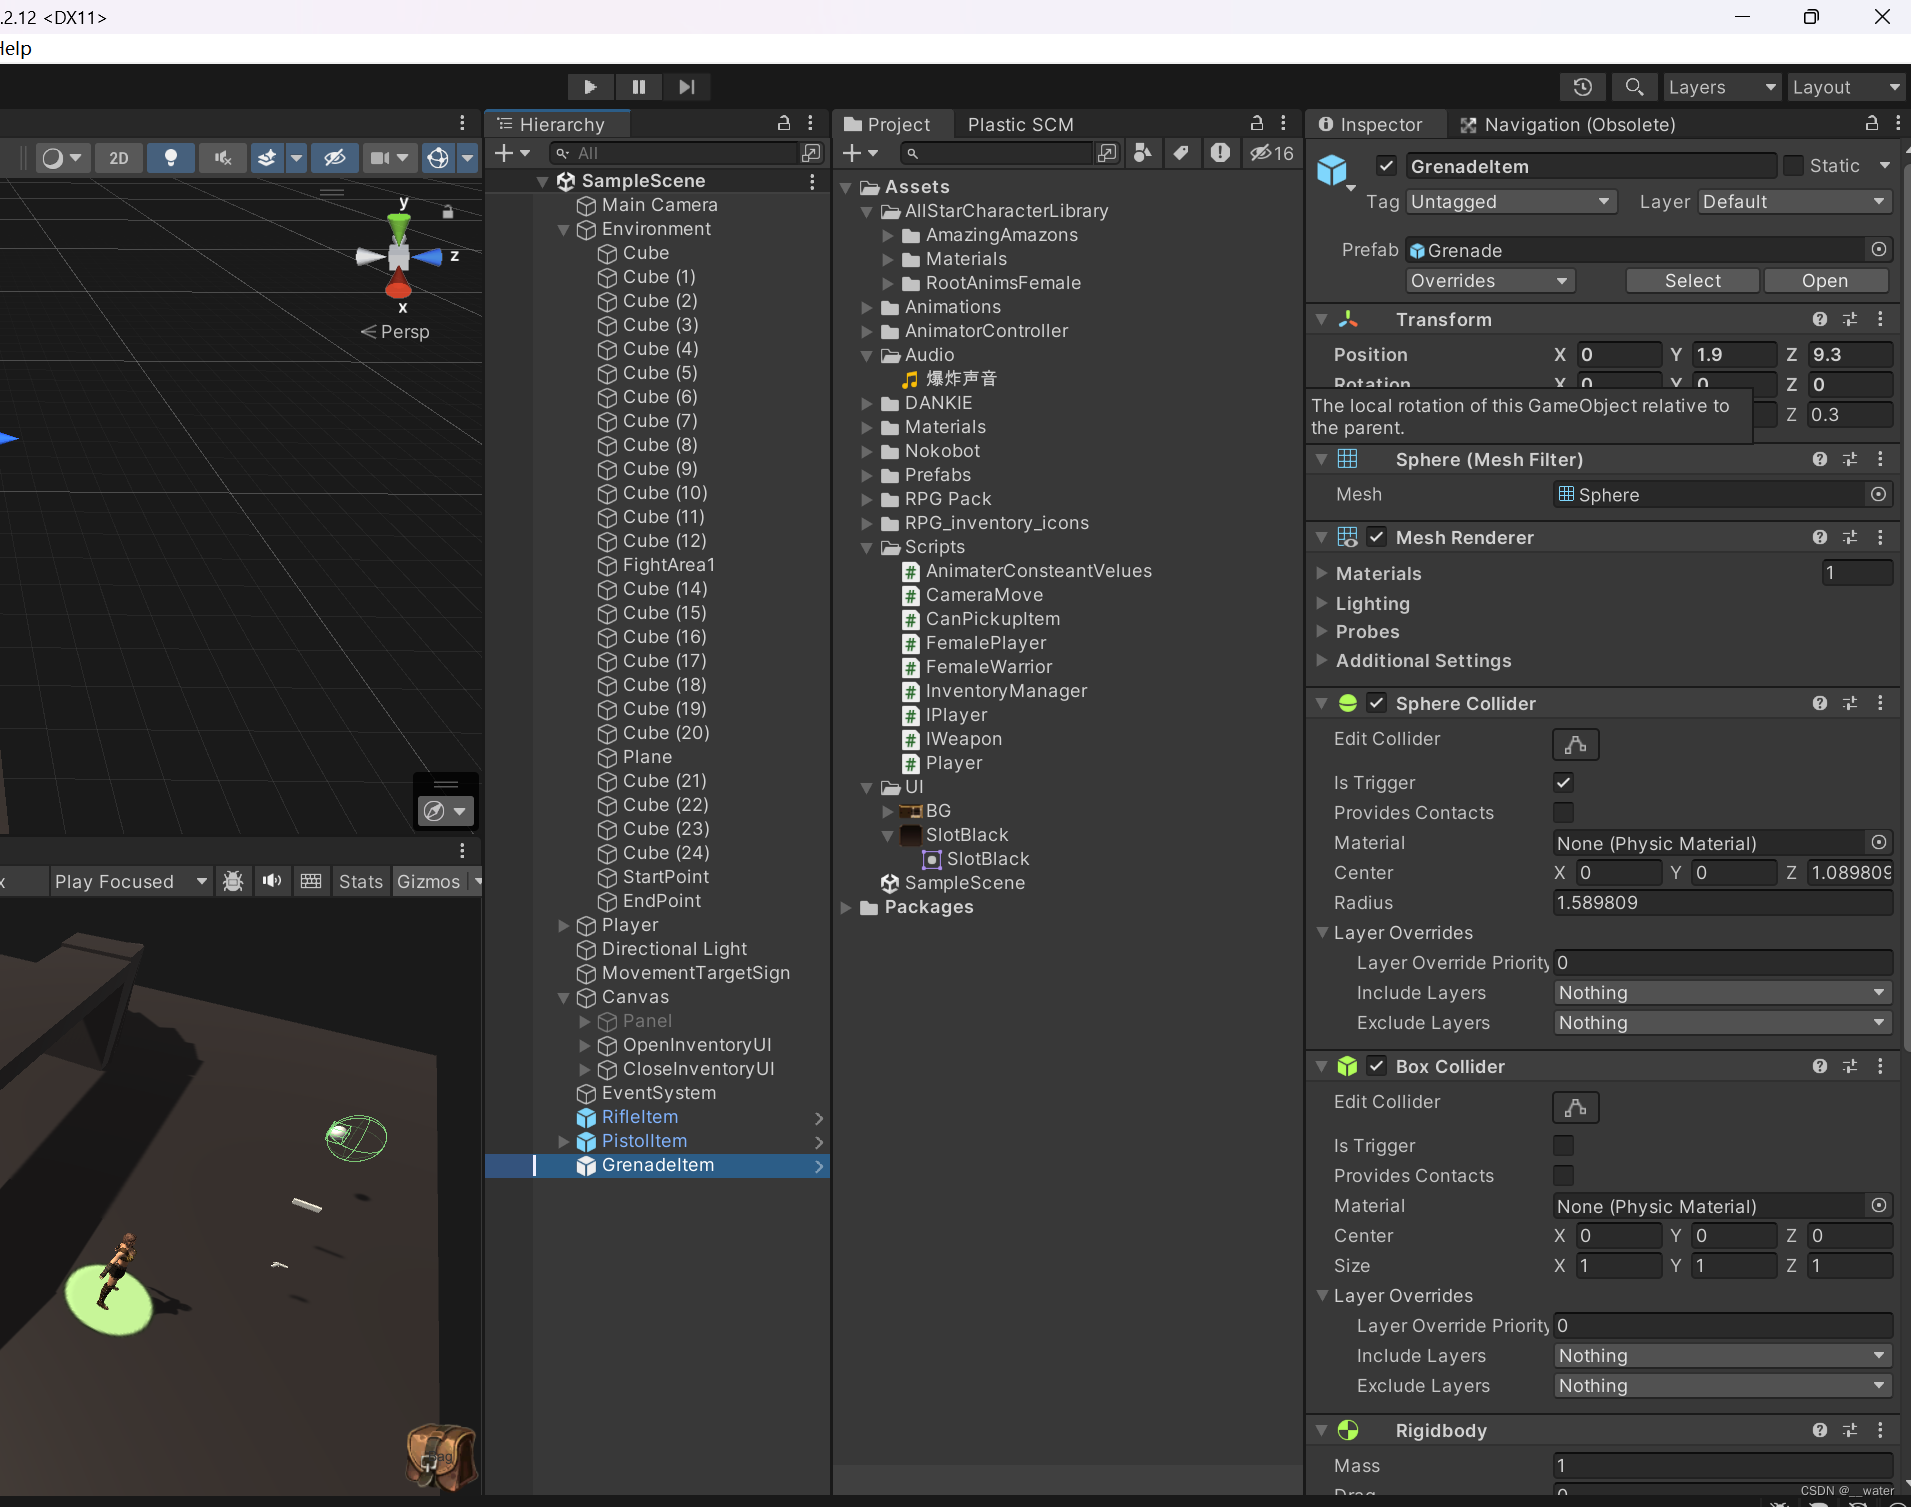
接下来完成拾取道具

加碰撞器
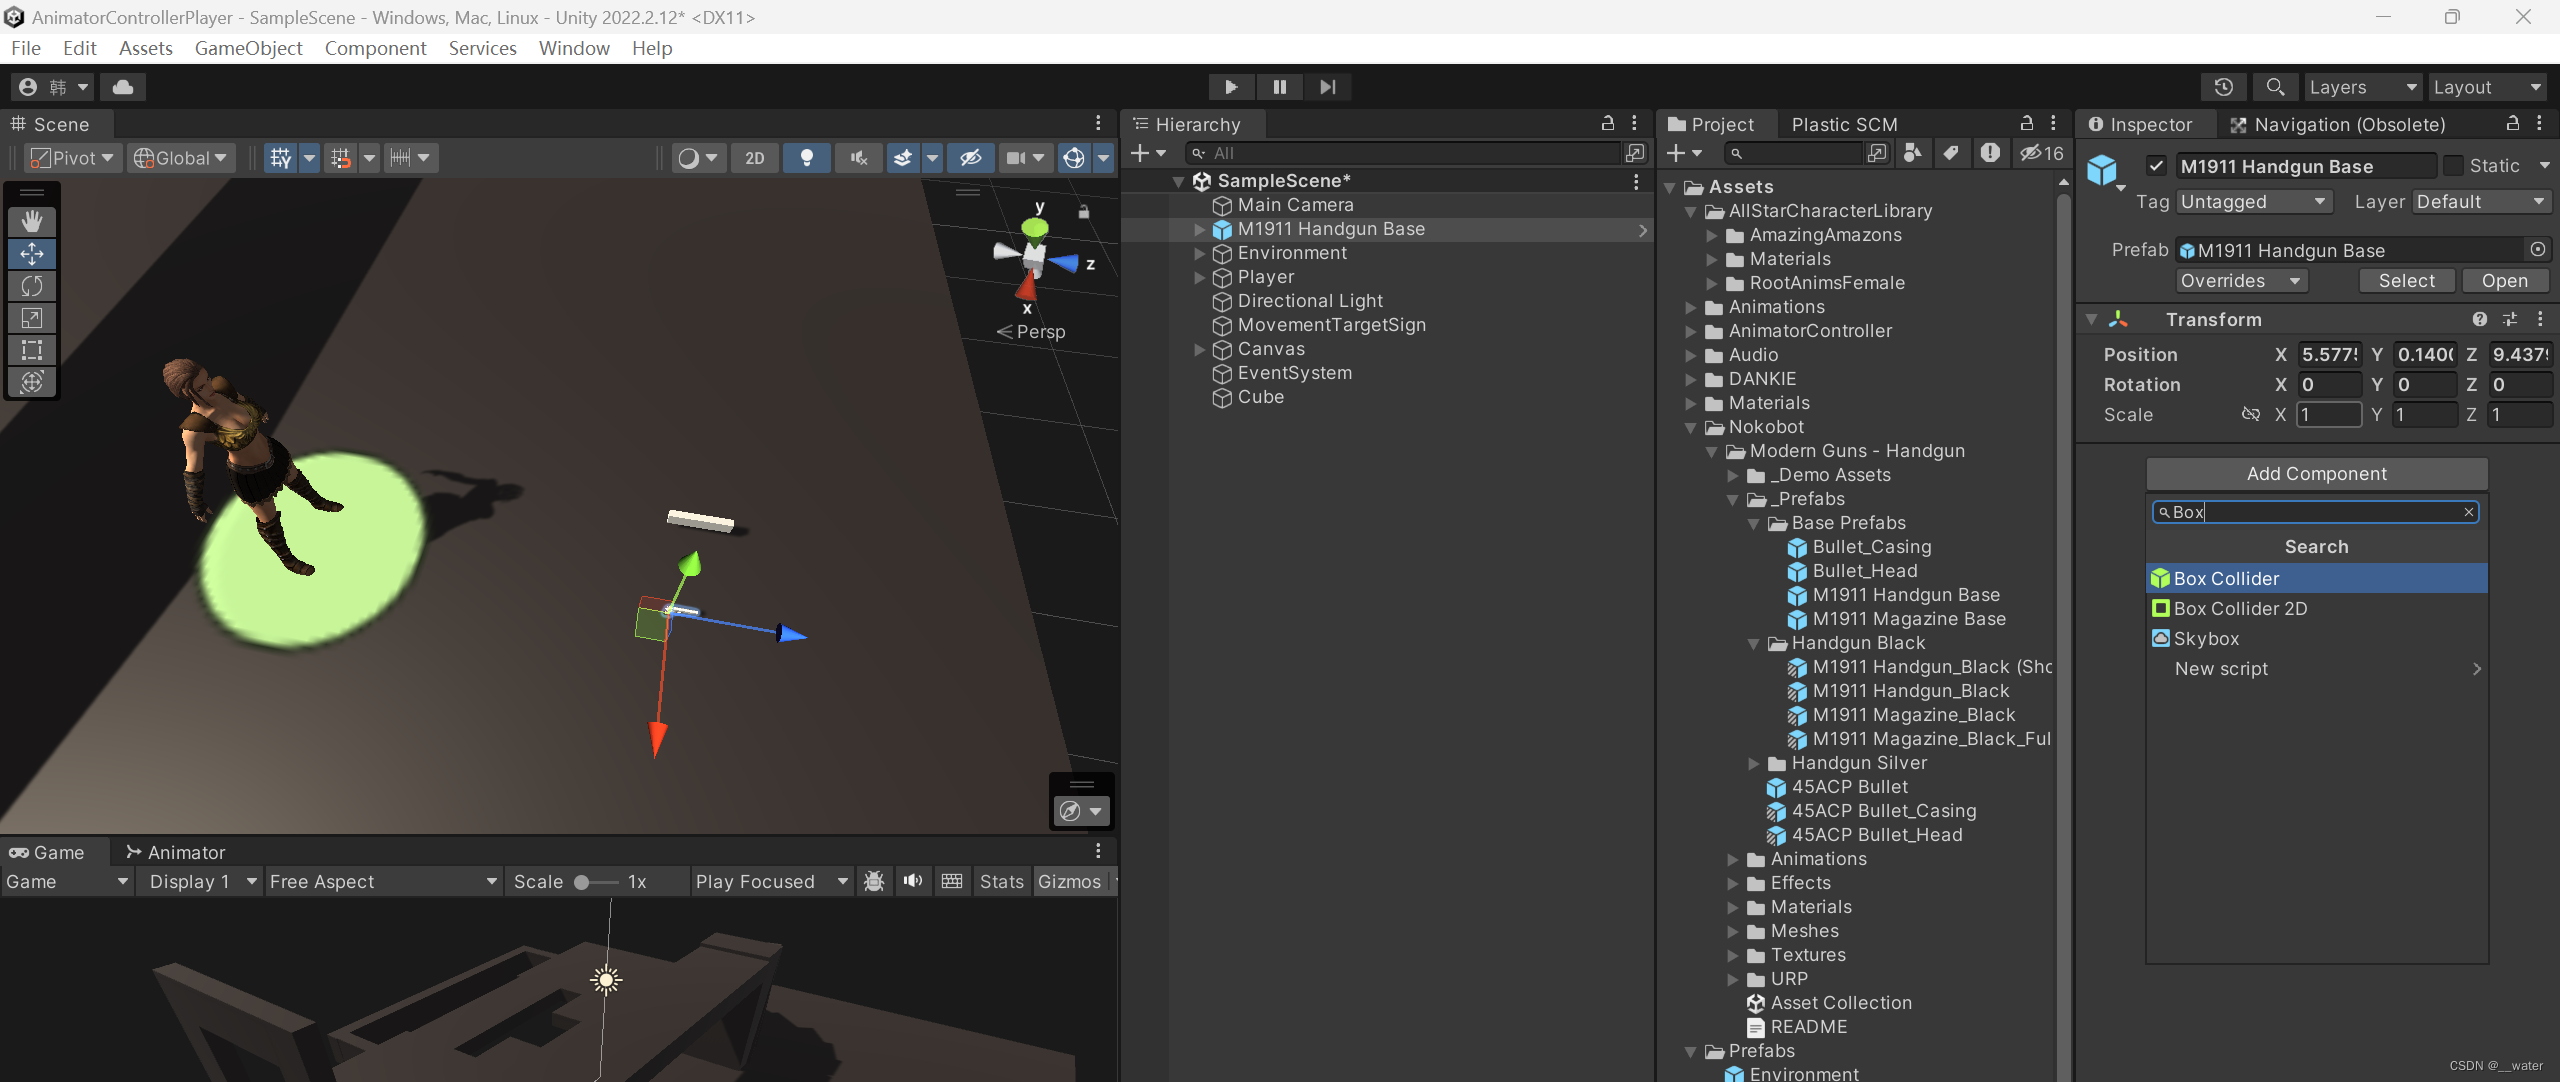
调节碰撞器

加触发器
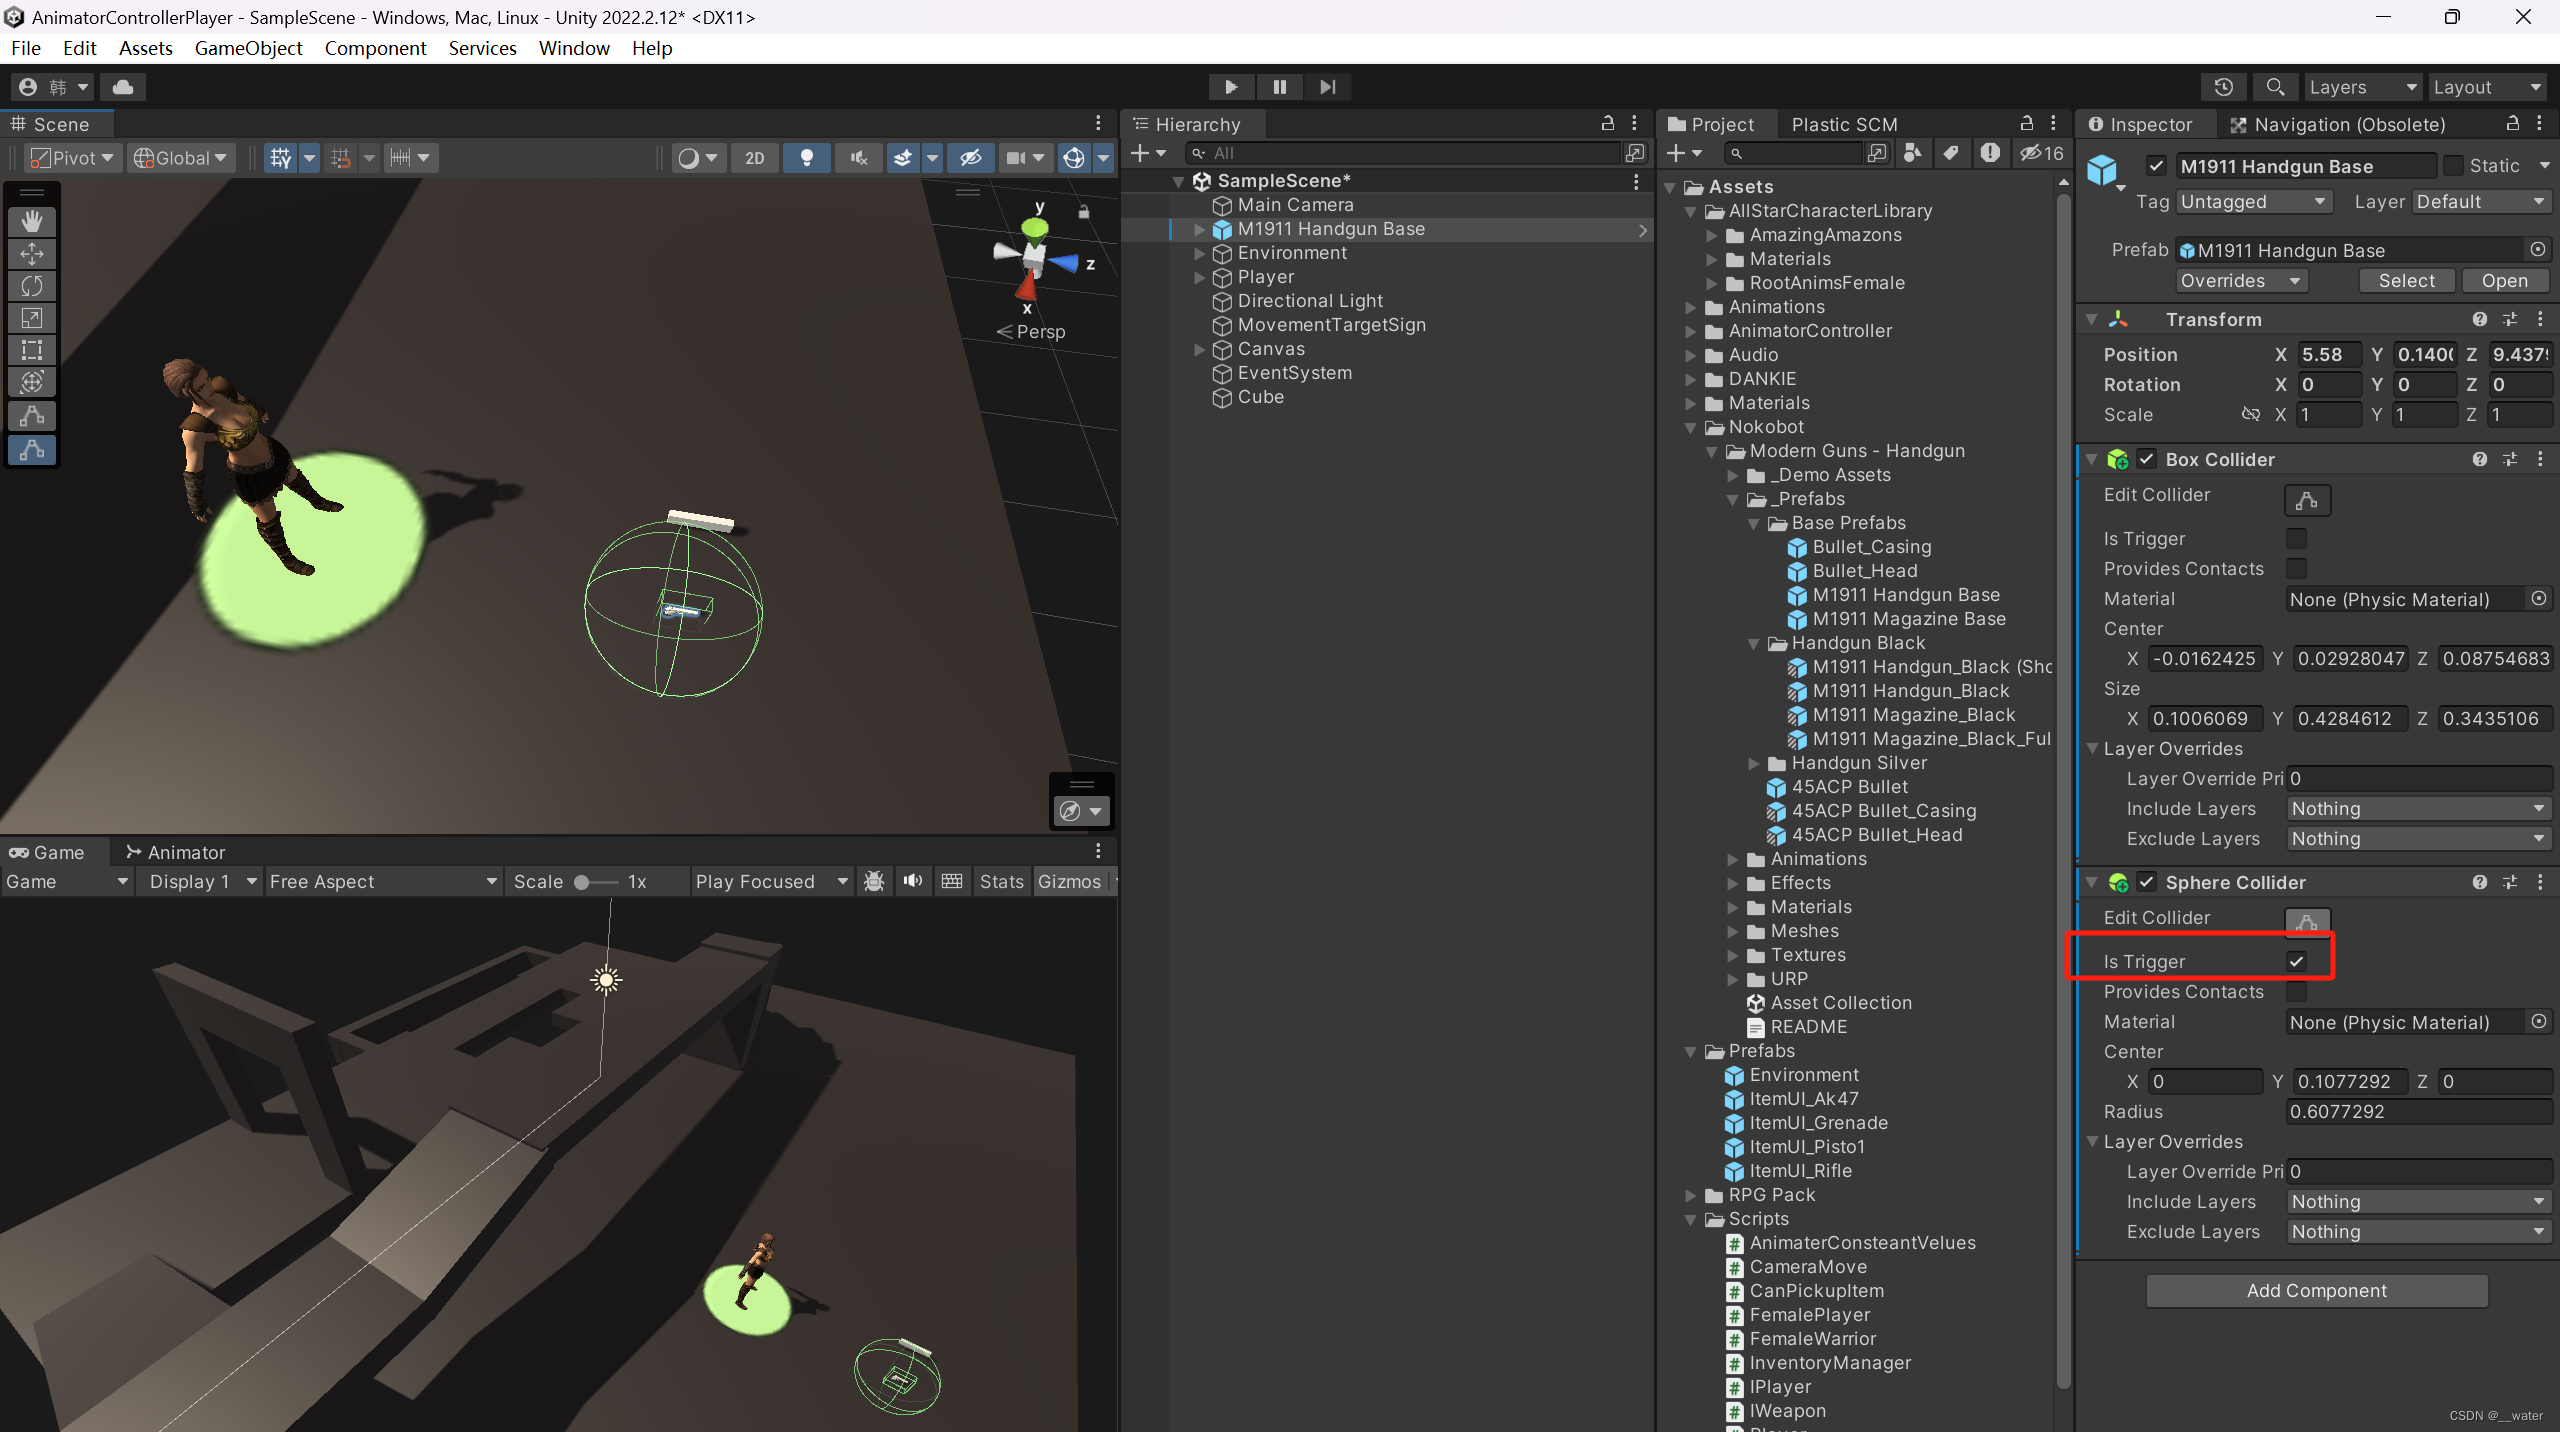
加刚体

修改名字


创建脚本
![]()

using JetBrains.Annotations;
using System.Collections;
using System.Collections.Generic;
using UnityEngine;
//可拾取道具
public class CanPickupItem : MonoBehaviour{
public AudioClip pickUpSound;//拾取声音
private void OnTriggerEnter(Collider other)
{
if (other.CompareTag("Player")) {
//播放声音
if (pickUpSound != null)
AudioSource.PlayClipAtPoint(pickUpSound,transform.position);
//将本道具更新到背包列表中
GameObject.FindGameObjectWithTag("InventoryUITag").GetComponent<InventoryManager>().ItemNames.Add(gameObject.name);
Destroy(gameObject);
}
}
}
挂载脚本

同样挂载到手枪上

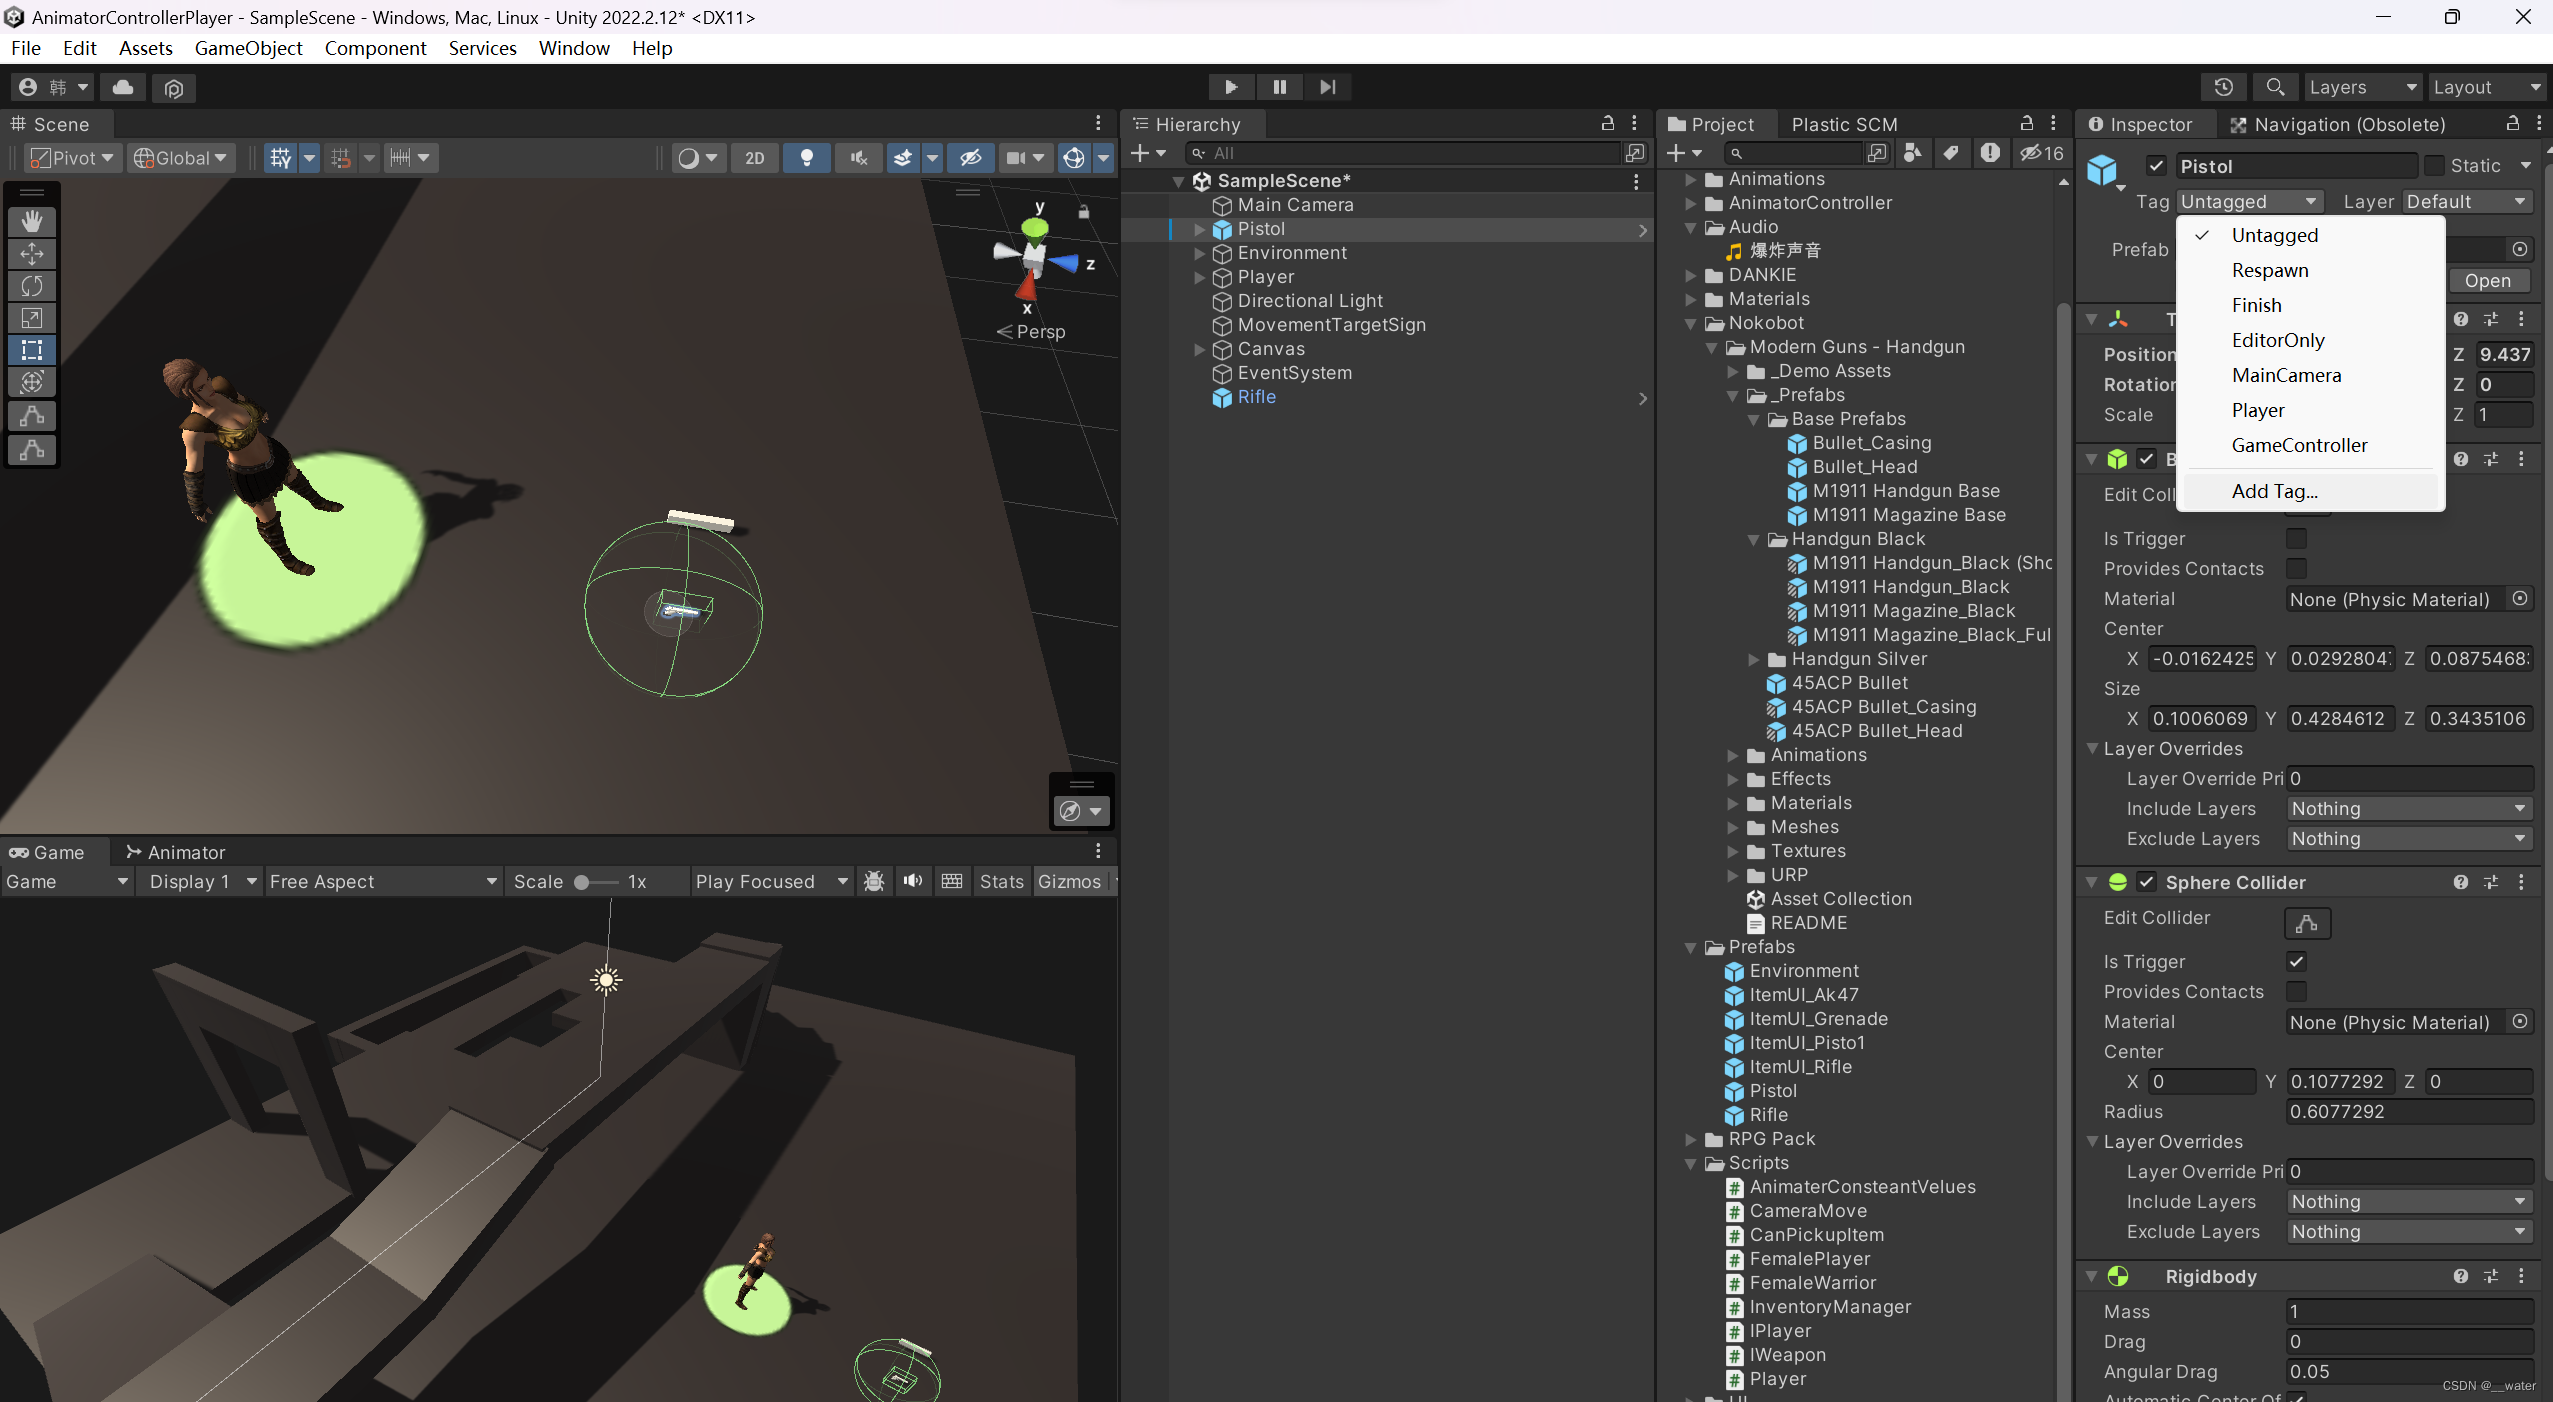
添加标签


创建脚本
![]()

using System.Collections;
using System.Collections.Generic;
using UnityEngine;
using UnityEngine.UI;
public class InventoryManager : MonoBehaviour
{
//道具名称列表
public List<string> ItemNames = new List<string>();
}


给人物标签

标签

运行即可触发拾取道具

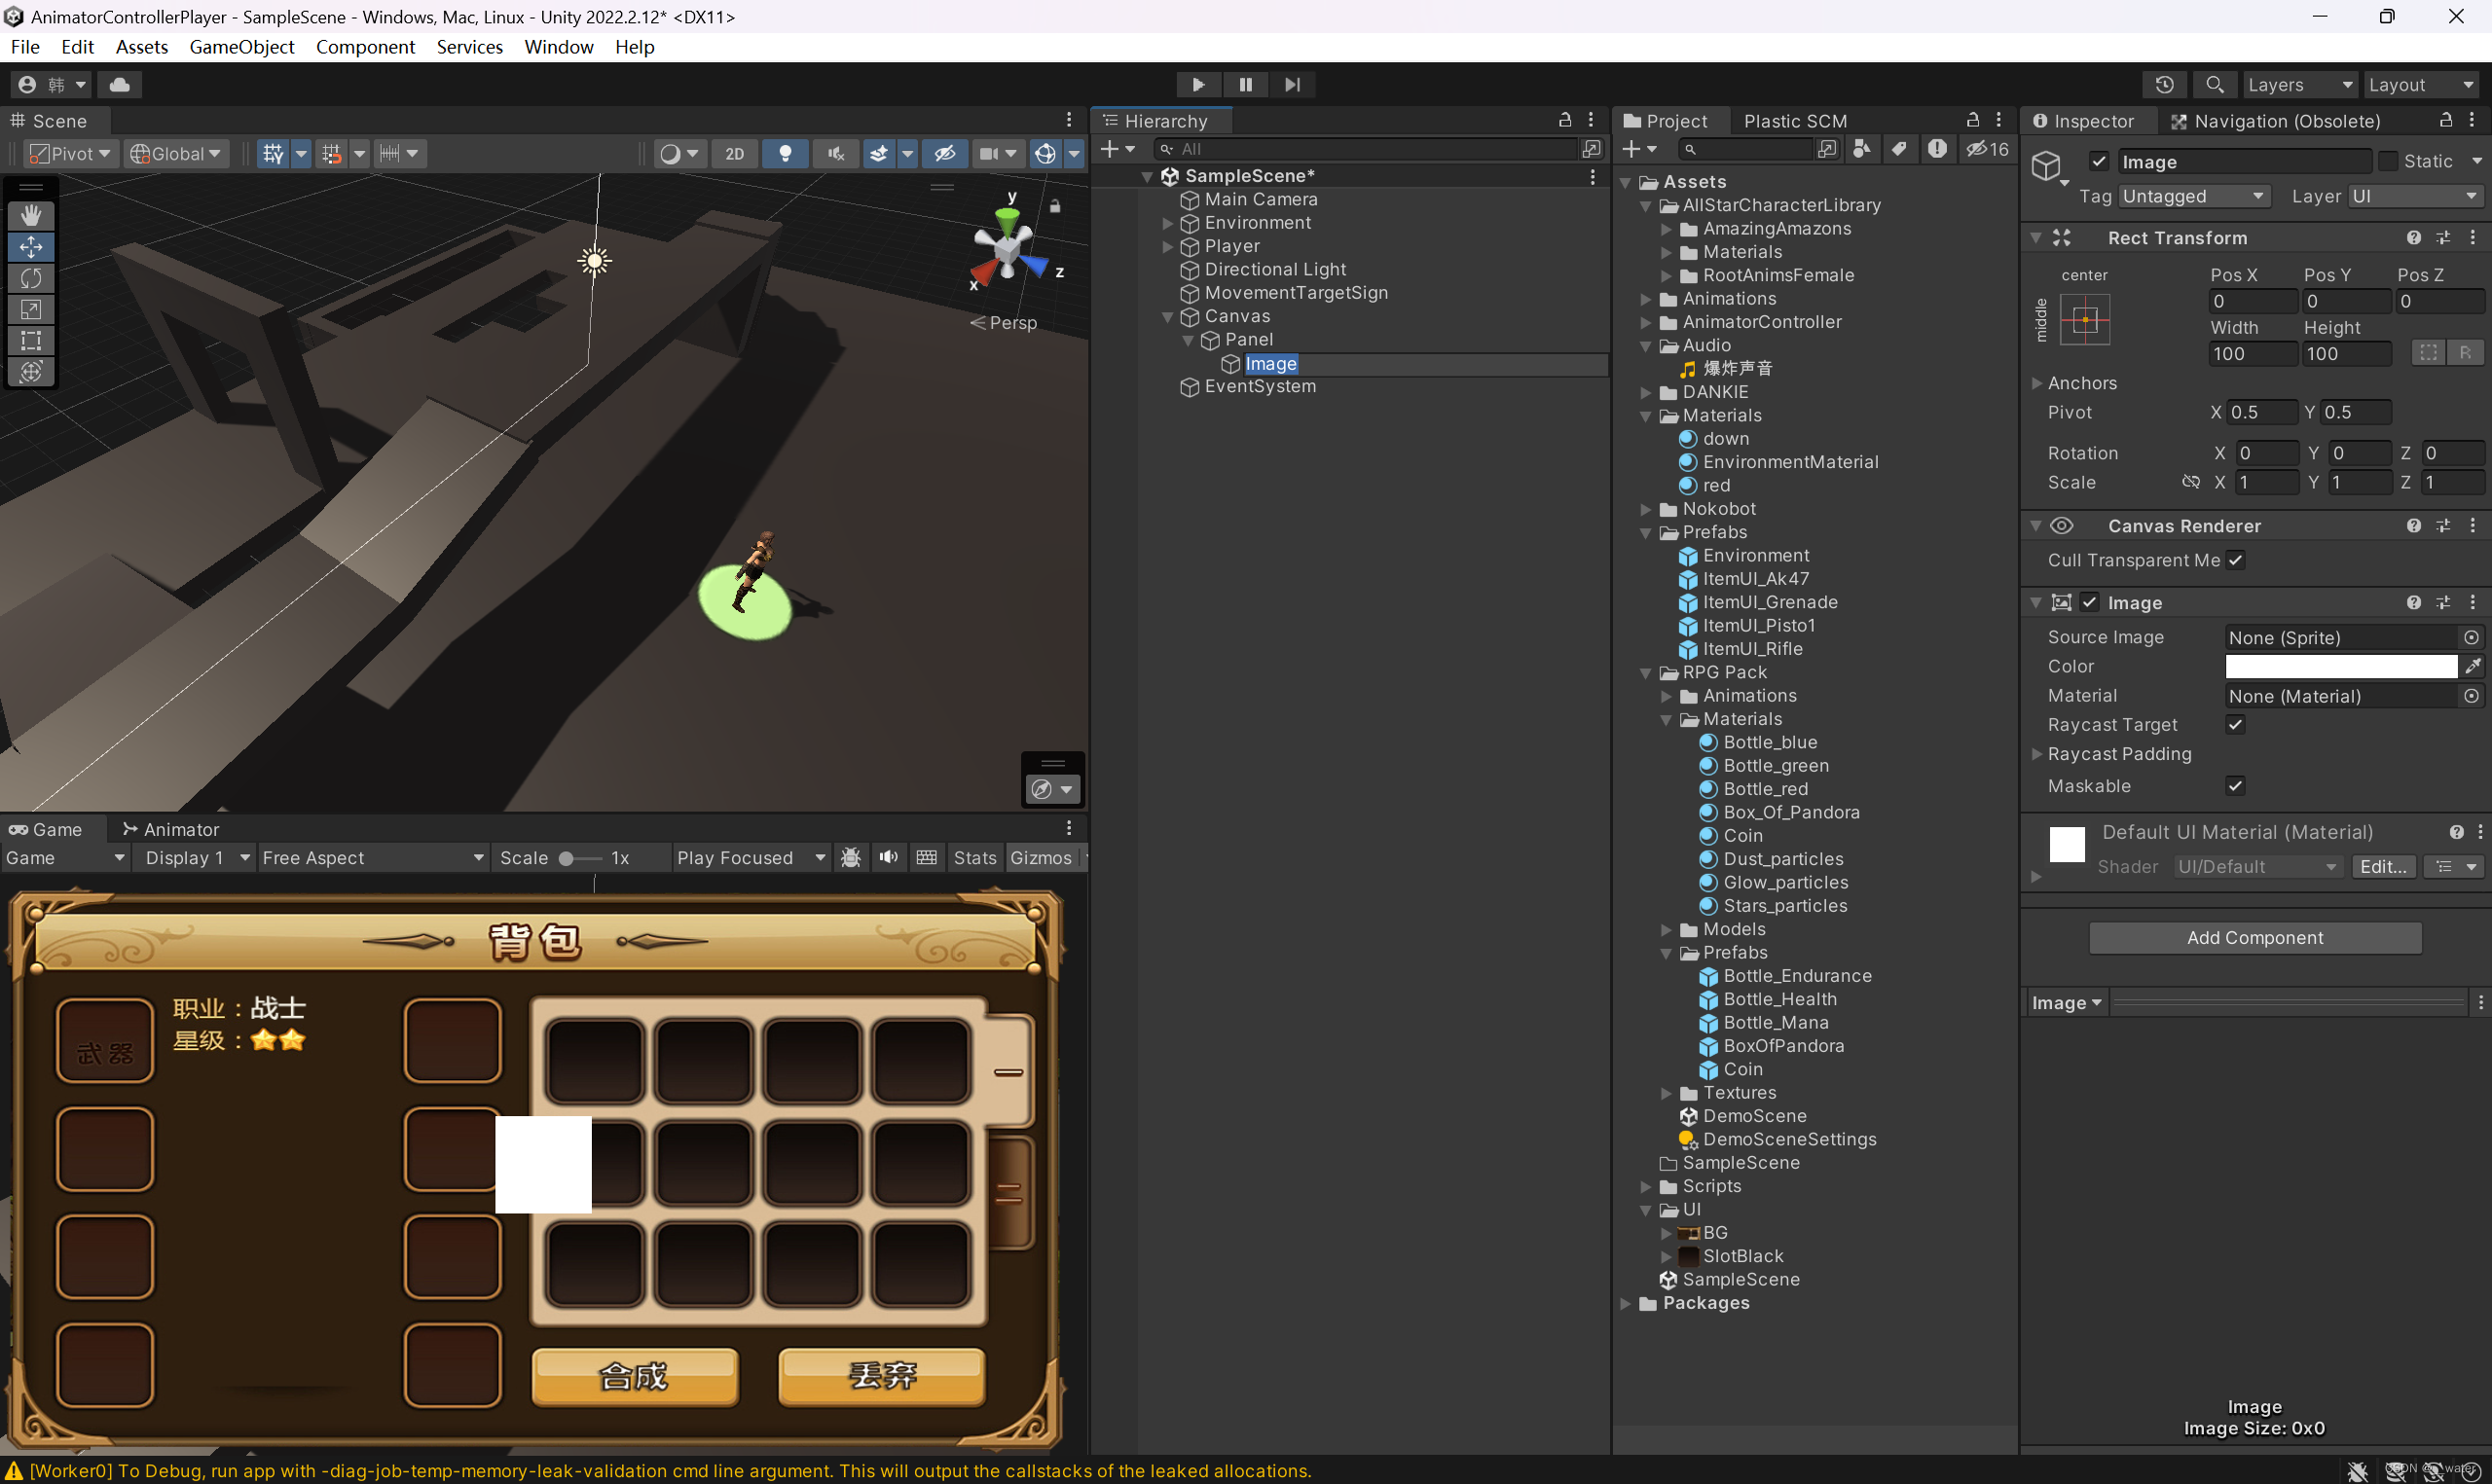
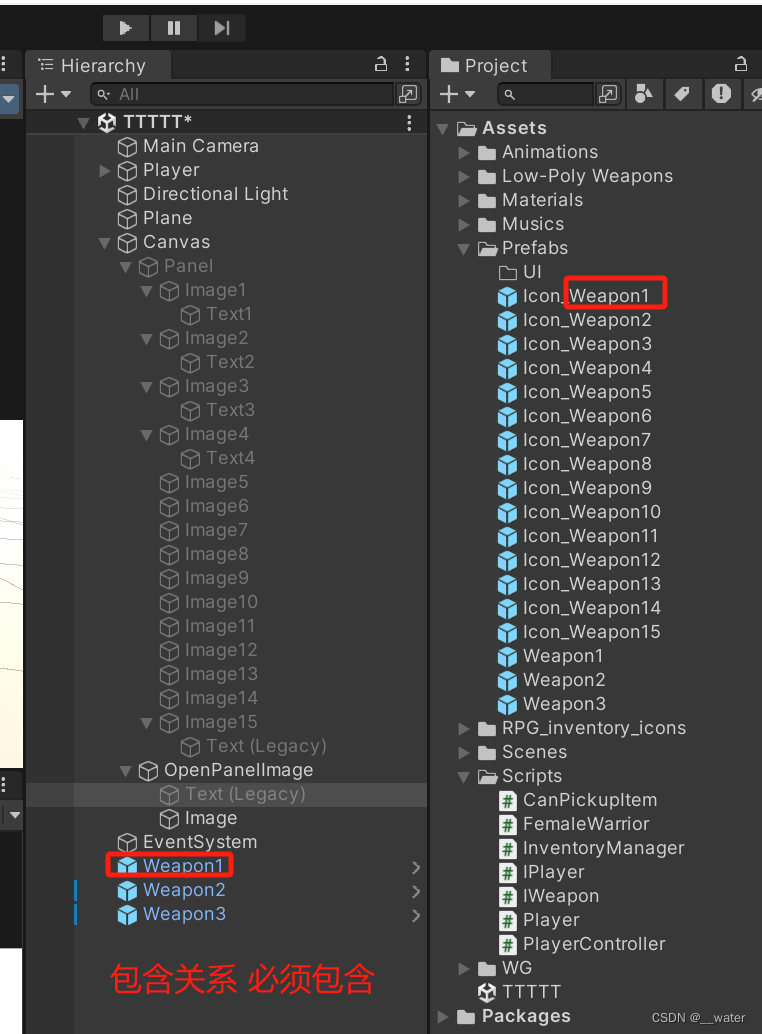
接下来做背包系统
首先这里不用字典代码,运用简单方式制作,前提必须保证道具 和 道具图片的英文名字存在包含关系


在管理类中写一个打开背包的方法

using System.Collections;
using System.Collections.Generic;
using UnityEngine;
using UnityEngine.UI;
public class InventoryManager : MonoBehaviour
{
//道具名称列表
public List<string> ItemNames = new List<string>();
//打开或关闭背包
public void OpenOrCloseInventoryUI(bool isOpen) {
transform.Find("Panel").gameObject.SetActive(isOpen);
}
}
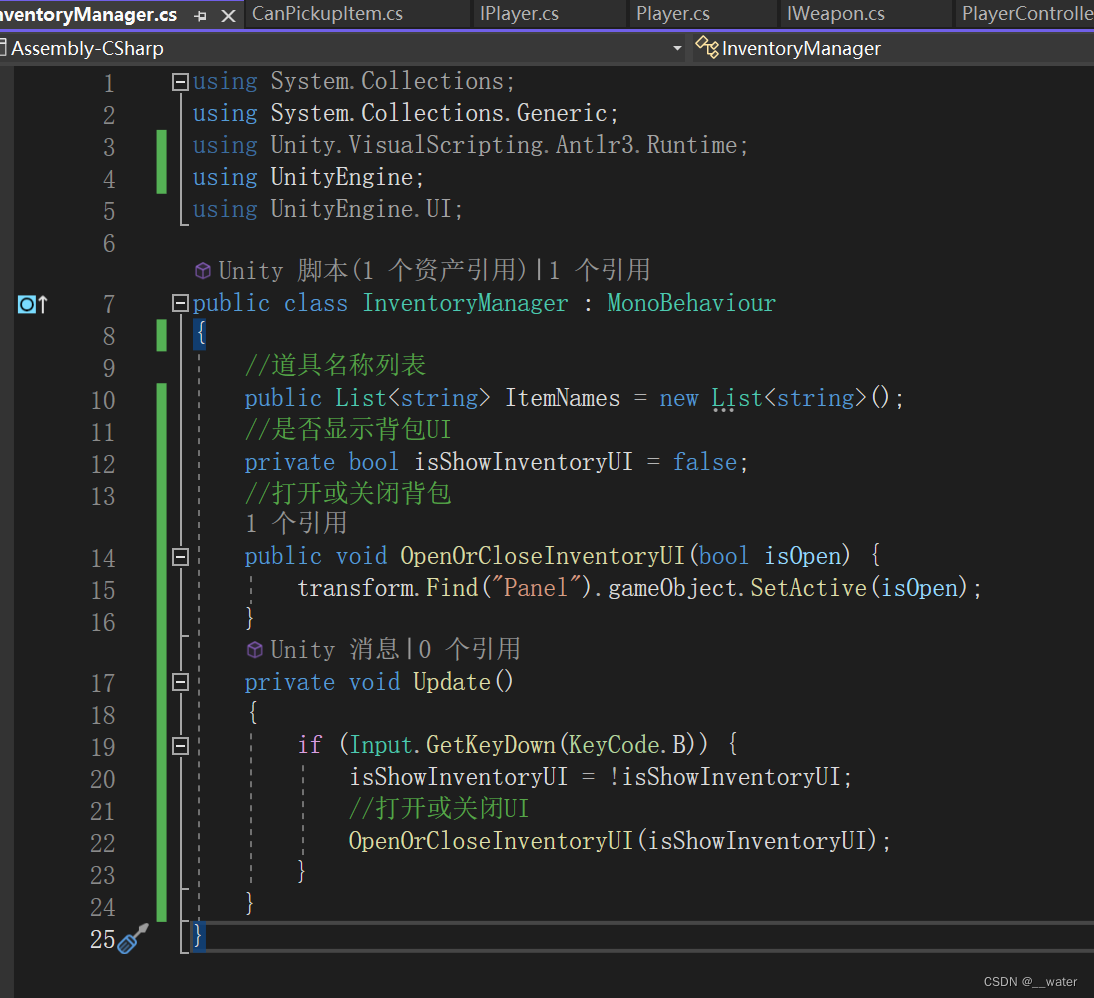
using System.Collections;
using System.Collections.Generic;
using Unity.VisualScripting.Antlr3.Runtime;
using UnityEngine;
using UnityEngine.UI;
public class InventoryManager : MonoBehaviour
{
//道具名称列表
public List<string> ItemNames = new List<string>();
//是否显示背包UI
private bool isShowInventoryUI = false;
//打开或关闭背包
public void OpenOrCloseInventoryUI(bool isOpen) {
transform.Find("Panel").gameObject.SetActive(isOpen);
}
private void Update()
{
if (Input.GetKeyDown(KeyCode.B)) {
isShowInventoryUI = !isShowInventoryUI;
//打开或关闭UI
OpenOrCloseInventoryUI(isShowInventoryUI);
}
}
}
即可实现背包按B键开关背包UI
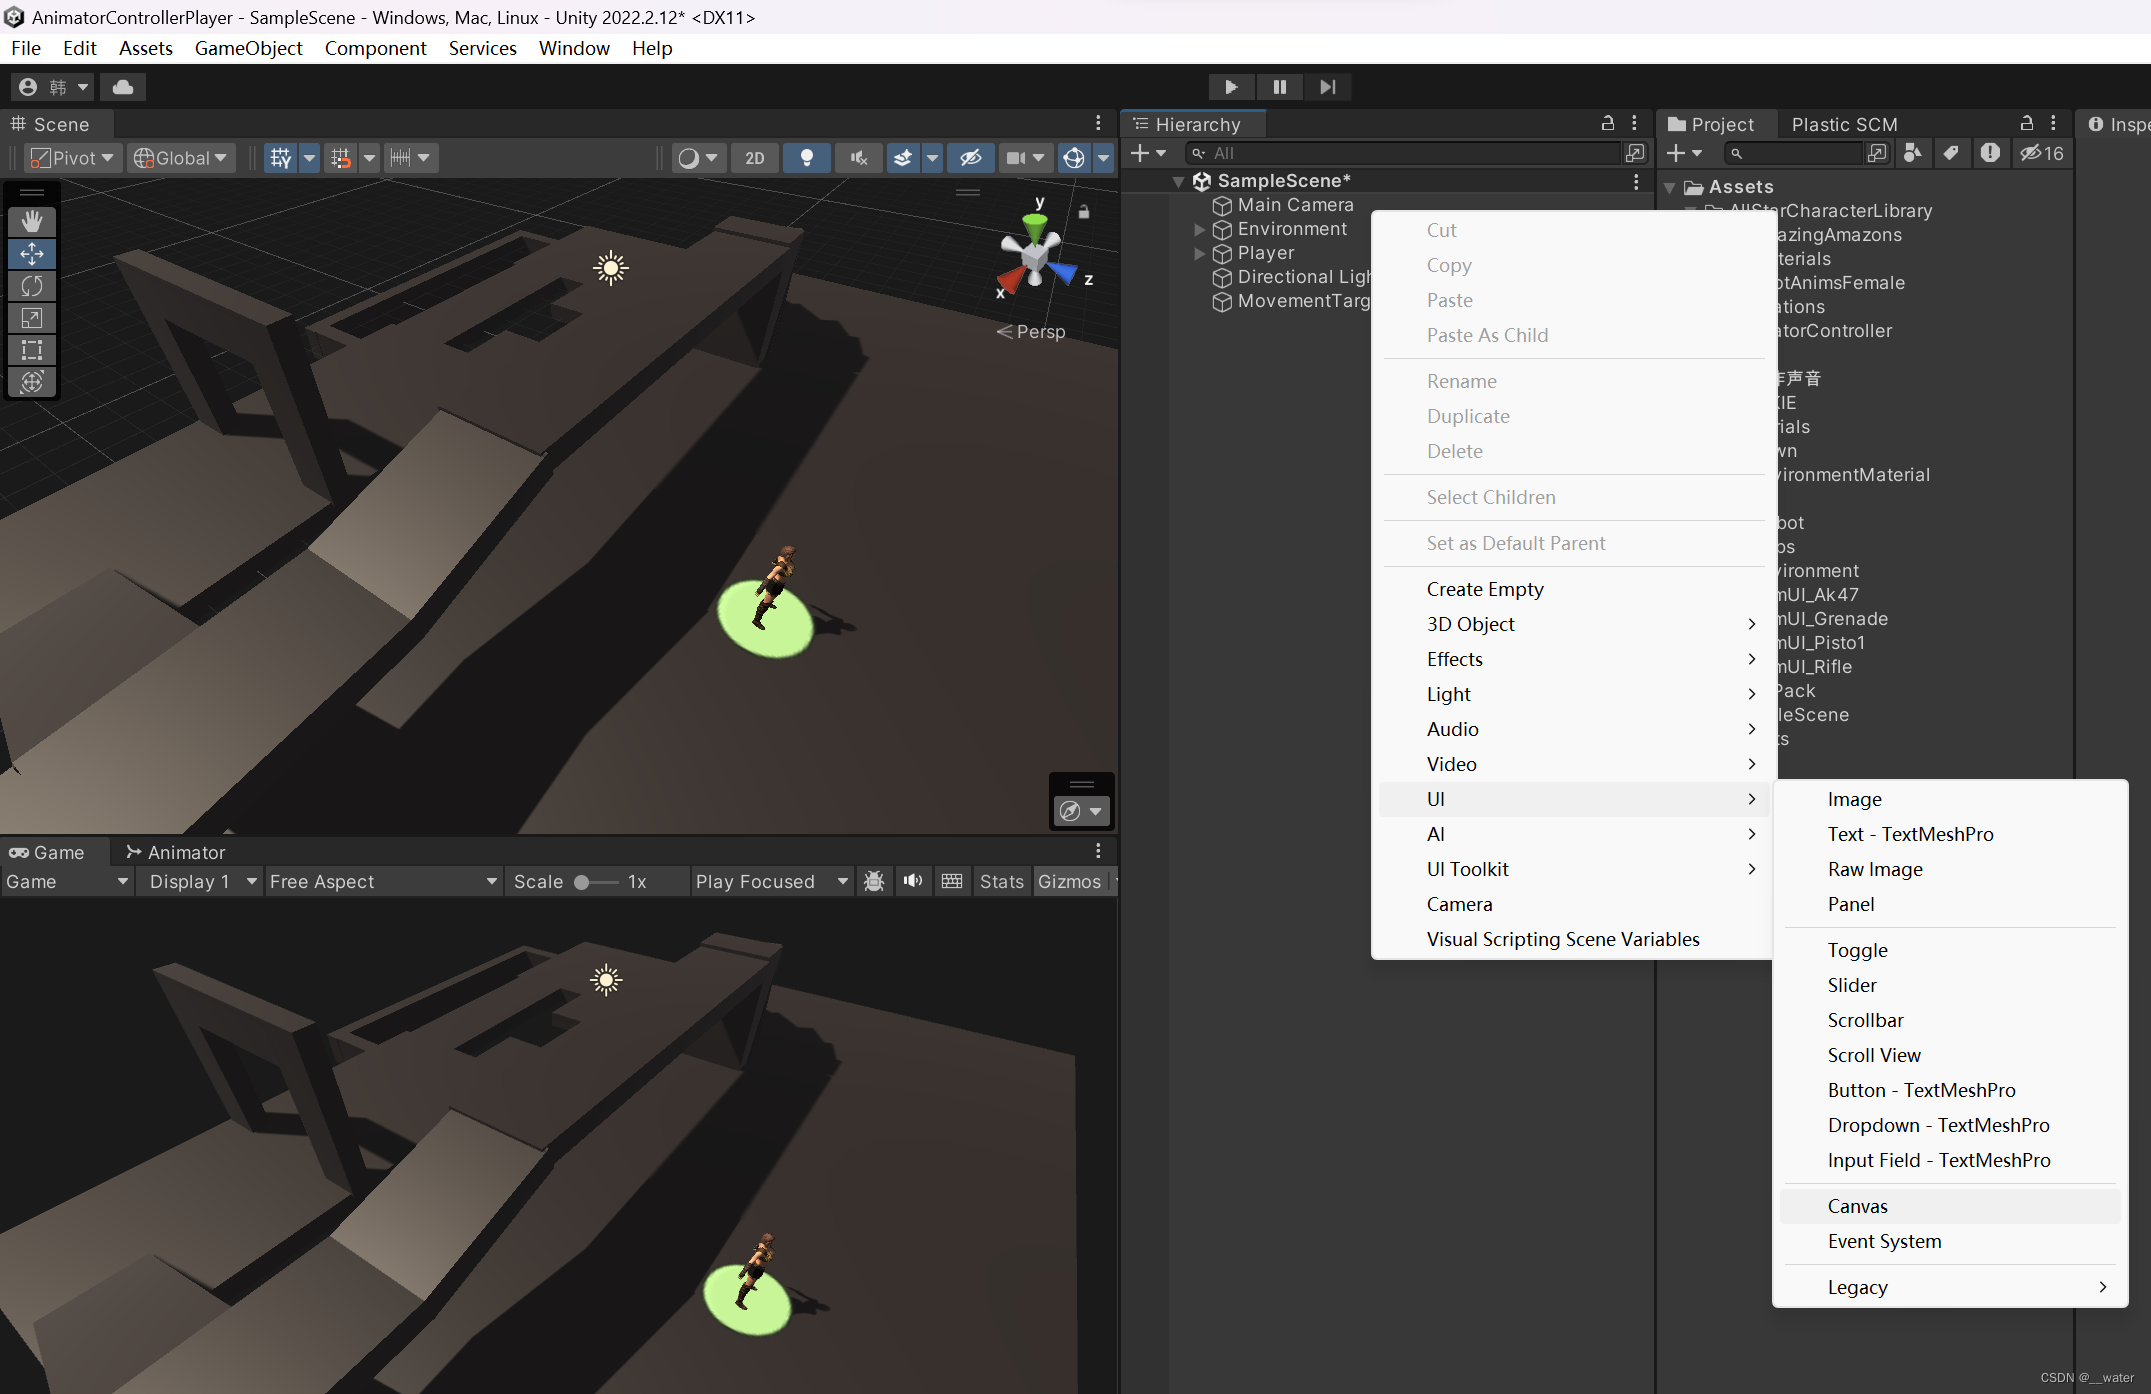
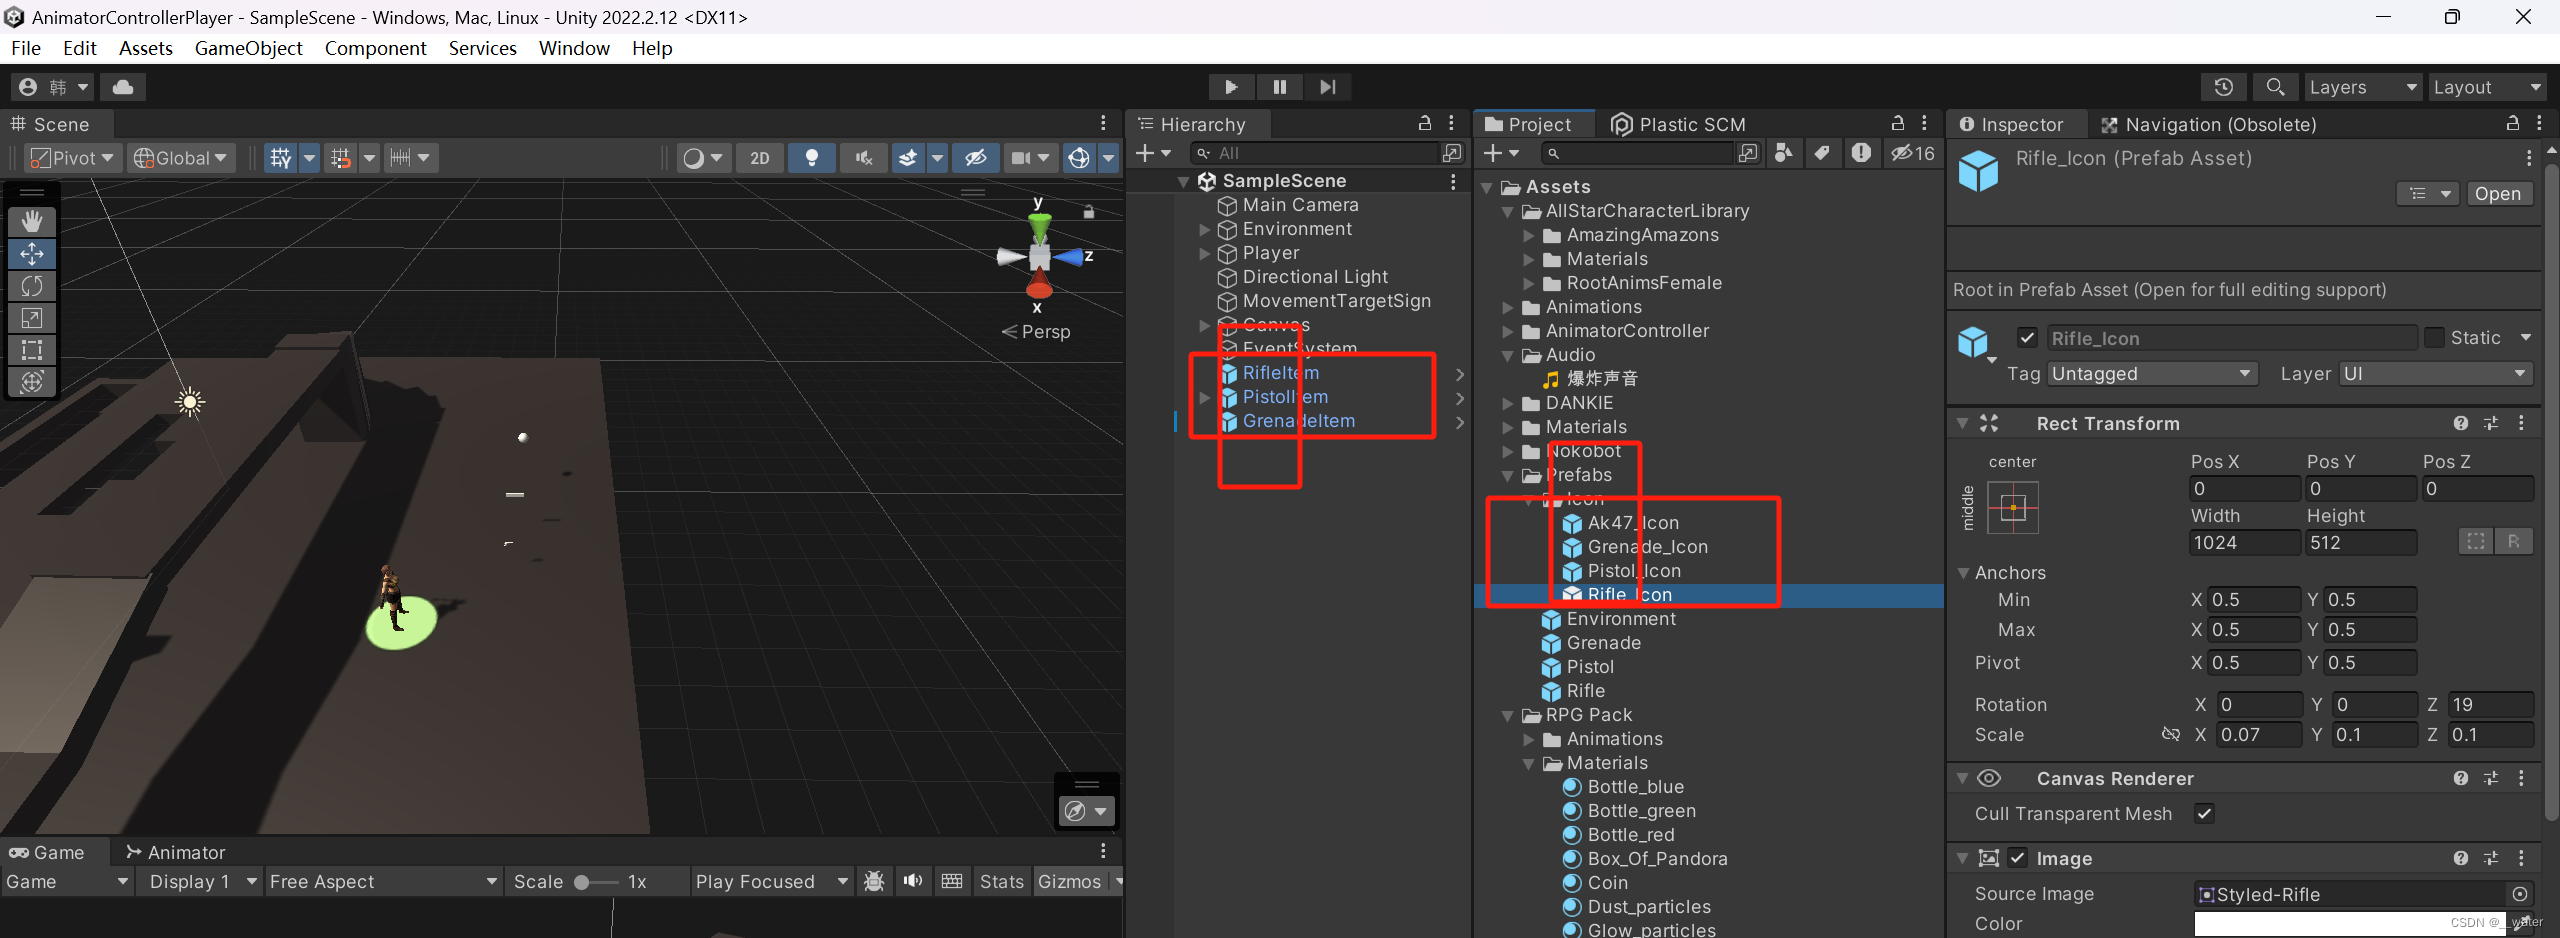
接下来我们需要做一个背包图标的UI,点击UI也能打开背包


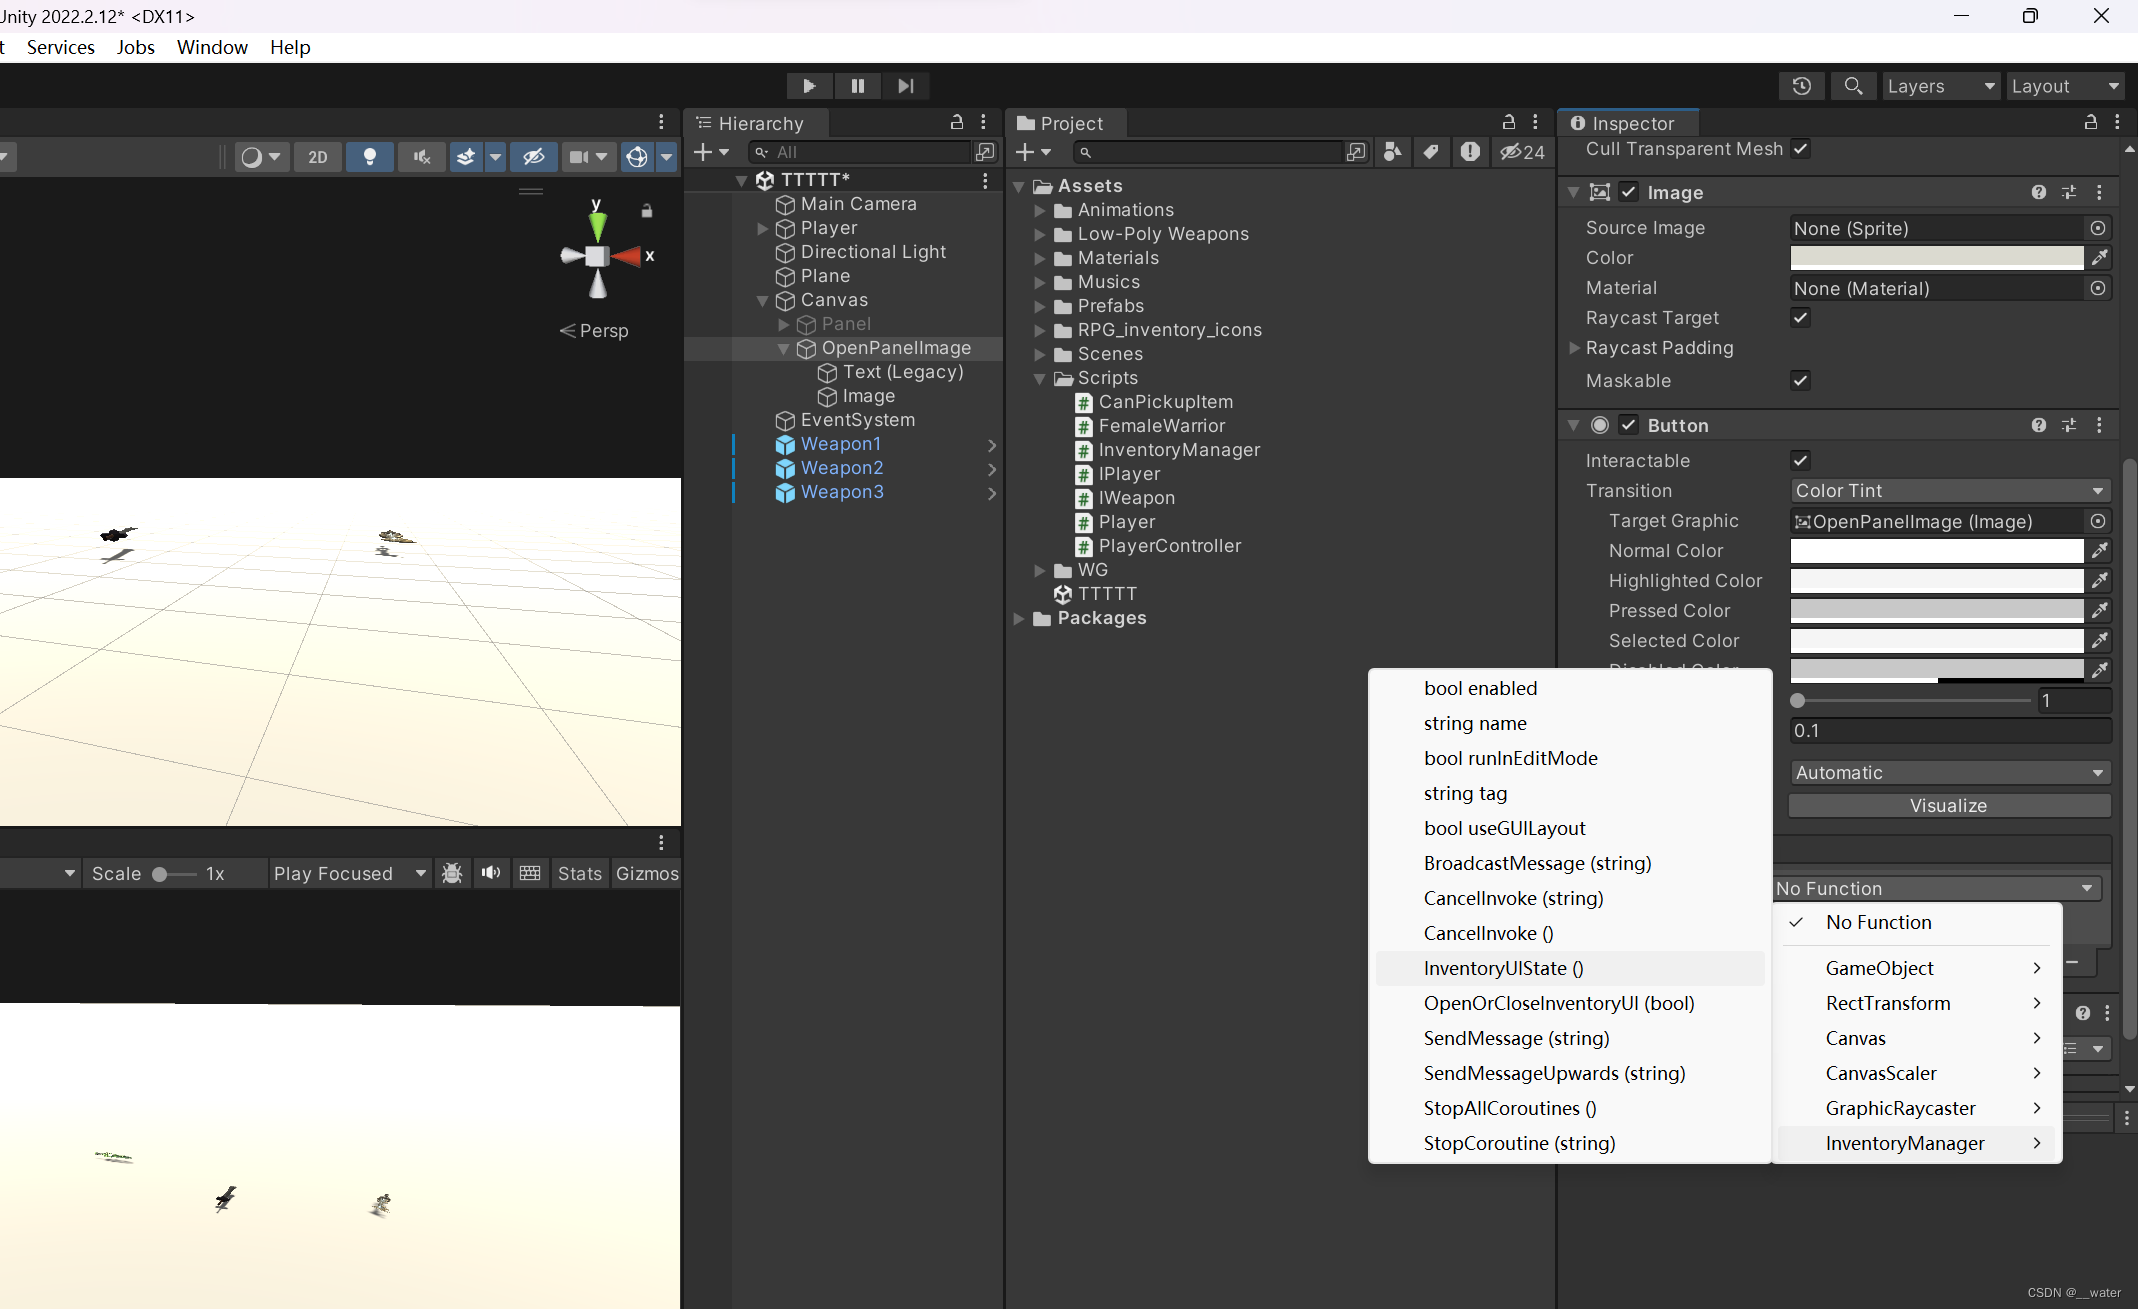
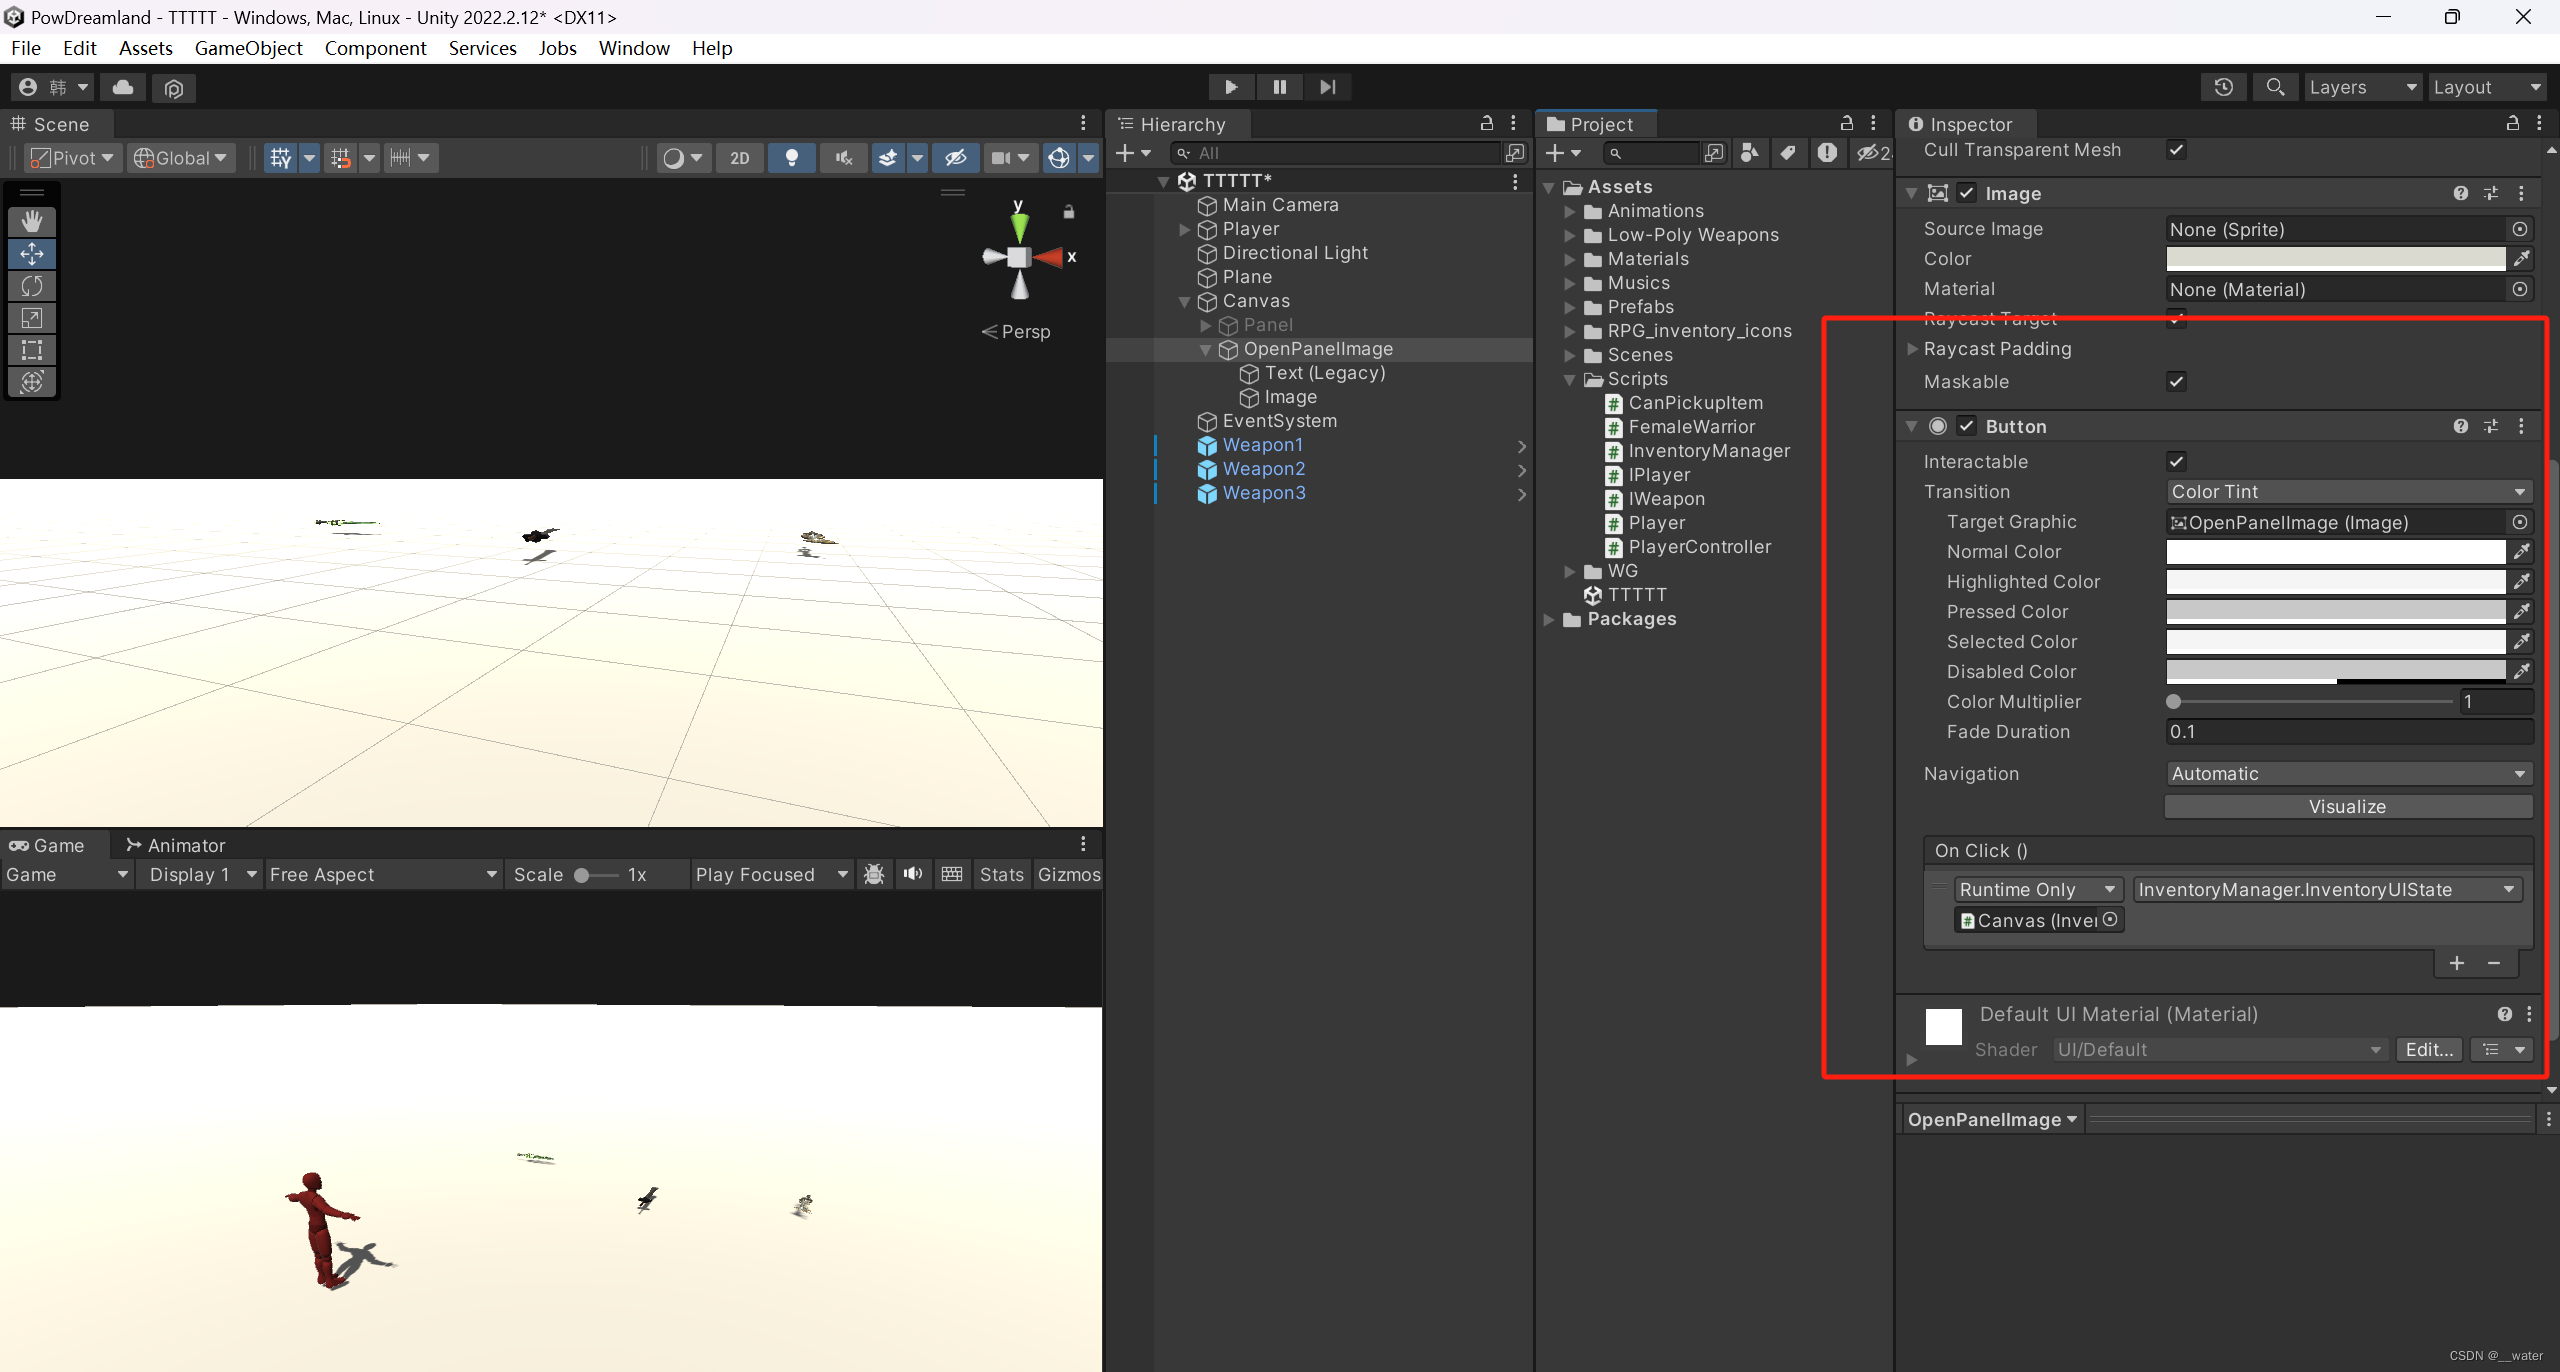
即完成鼠标点击显隐背包UI 及 键盘B键显隐背包UI
接下来做UI文本更新,意义不大可省略,存在的意义在于完善体系

using System.Collections.Generic;
using UnityEngine;
using UnityEngine.UI;
public class InventoryManager : MonoBehaviour{
//道具名称列表
public List<string> ItemNames = new List<string>();
//是否显示背包UI
private bool isShowInventoryUI = false;
//UI界面中的文本
public Text[] textUI;
//激活或关闭背包UI显示
public void OpenOrCloseInventoryUI(bool isOpen) {
transform.Find("Panel").gameObject.SetActive(isOpen);
//更新文本
UpdateInventoryTextUI();
}
private void Update(){
if (Input.GetKeyDown(KeyCode.B))
InventoryUIState();
}
//打开或关闭背包
public void InventoryUIState() {
isShowInventoryUI = !isShowInventoryUI;
//打开或关闭UI
OpenOrCloseInventoryUI(isShowInventoryUI);
}
//更新文本UI
private void UpdateInventoryTextUI(){
for(int i = 0;i< ItemNames.Count;i++)
textUI[i].text = ItemNames[i];
}
}
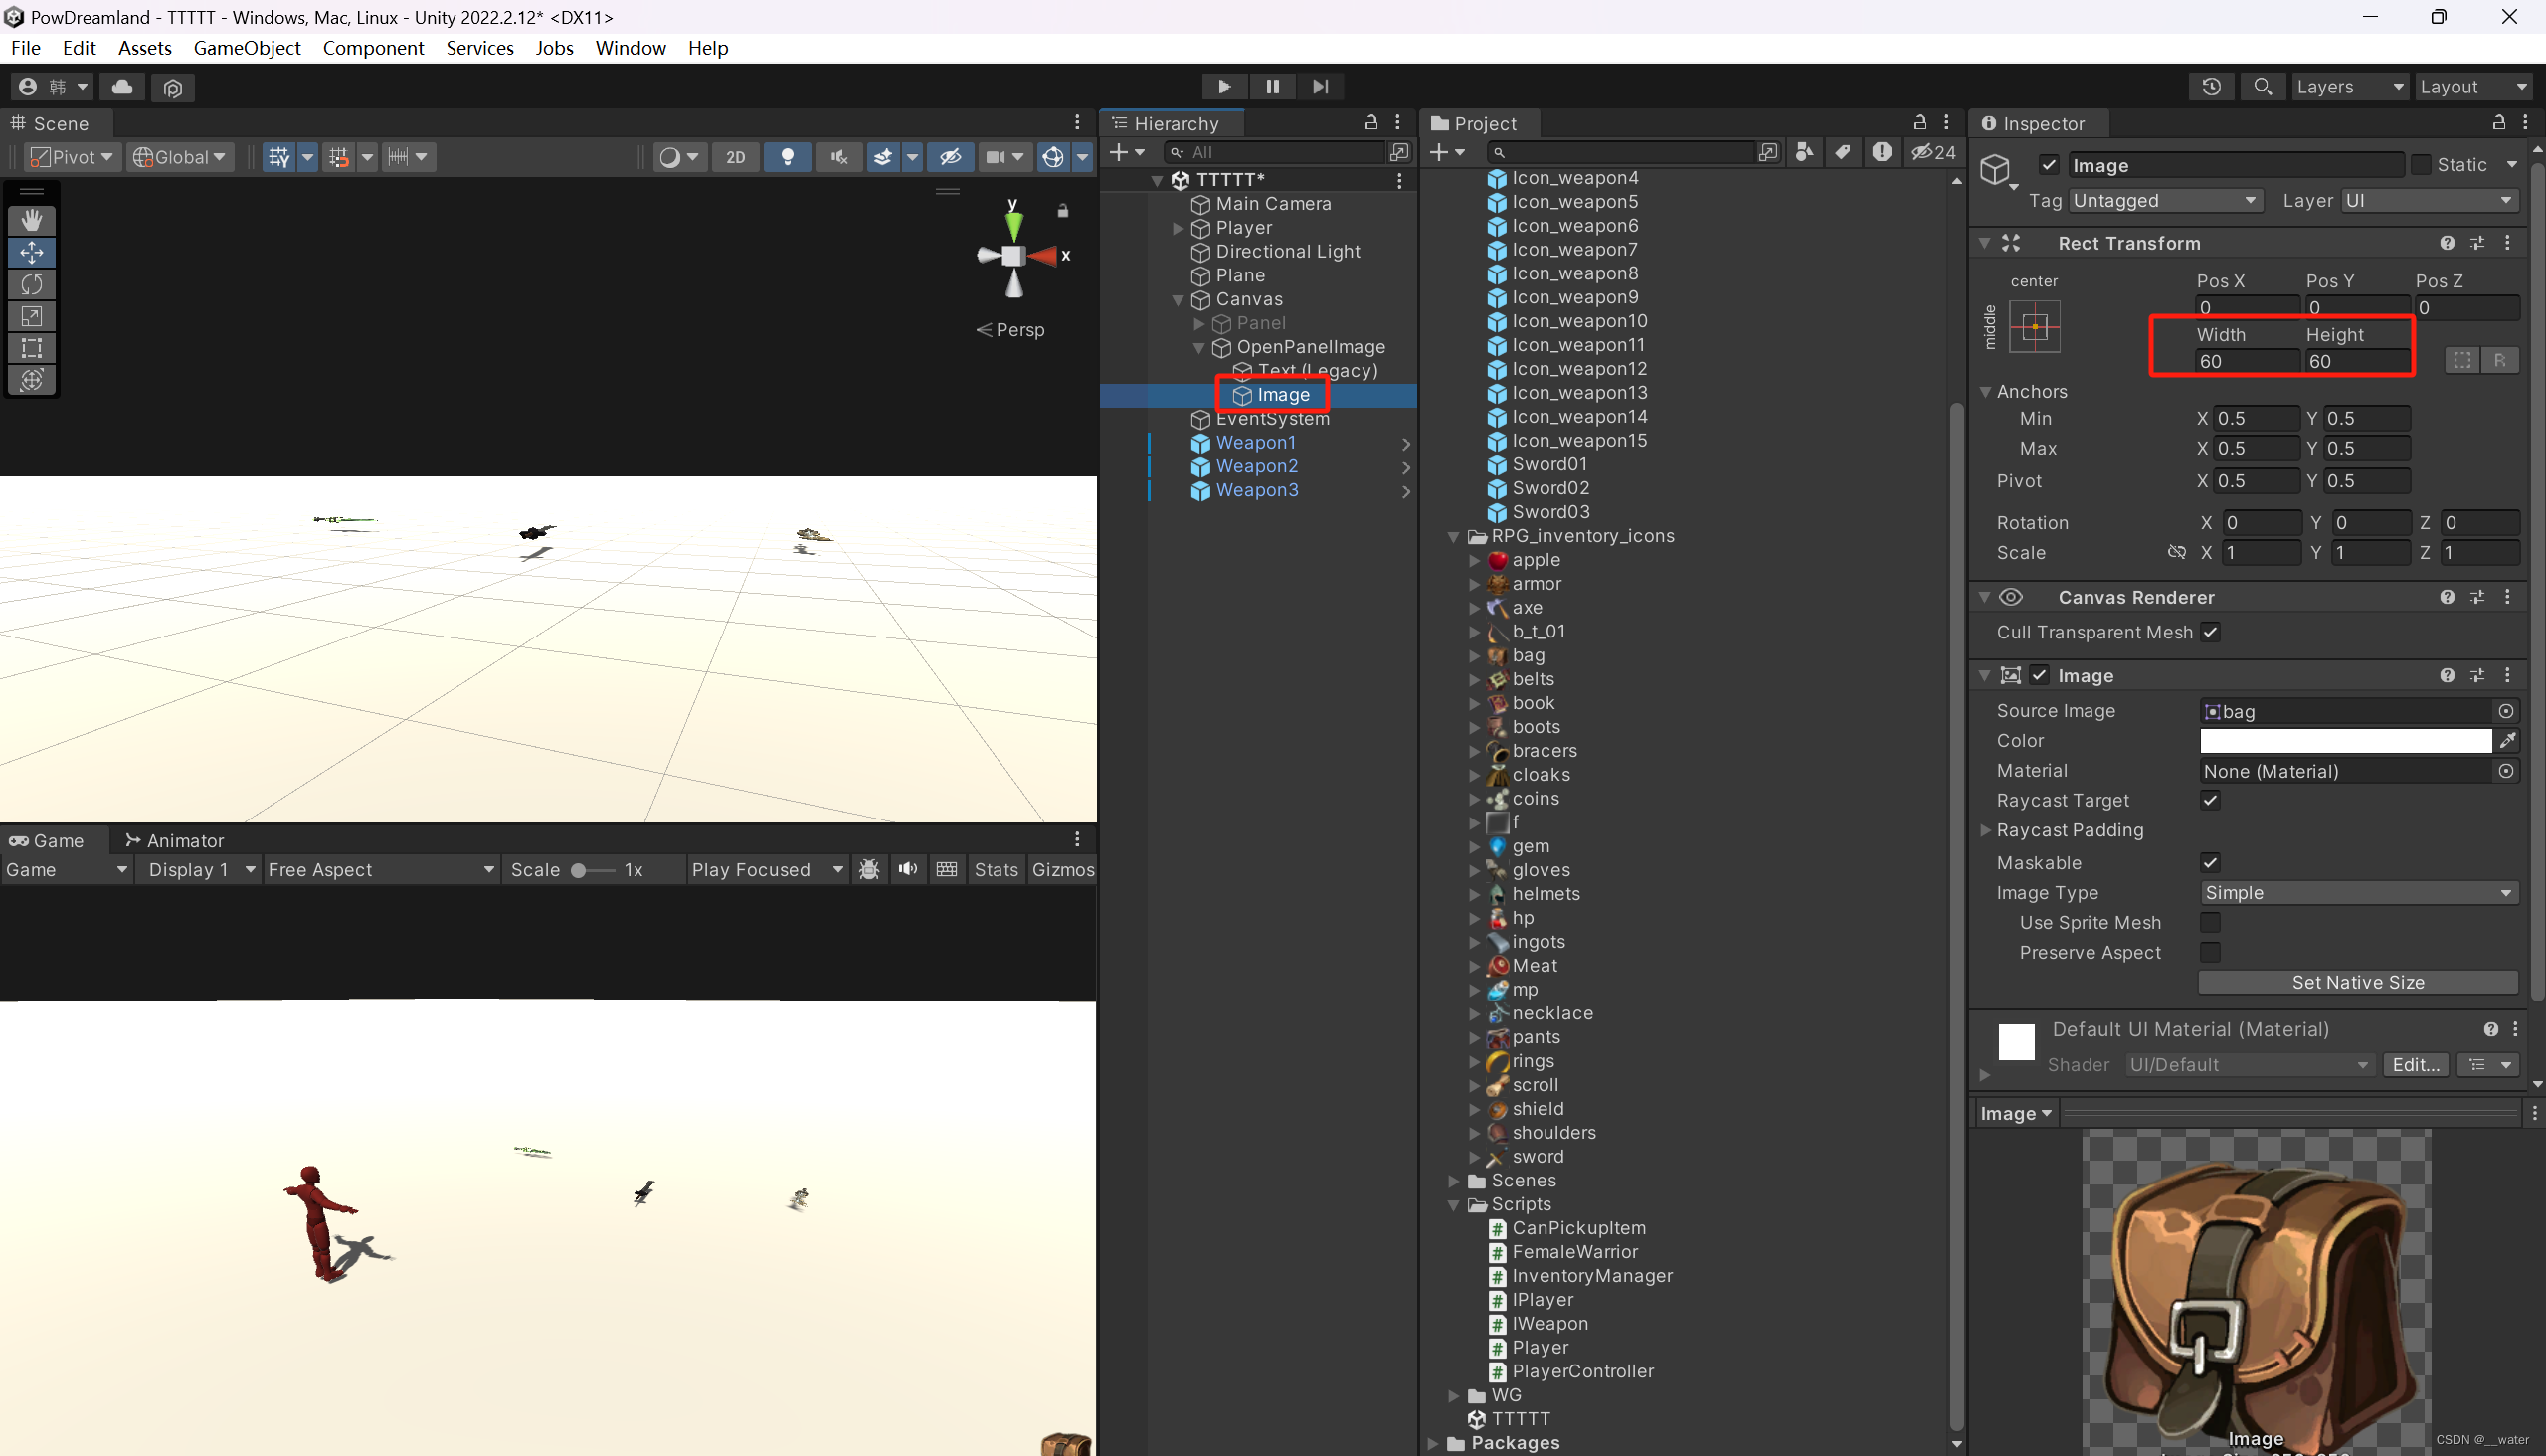
调整文本在背包UI中的位置
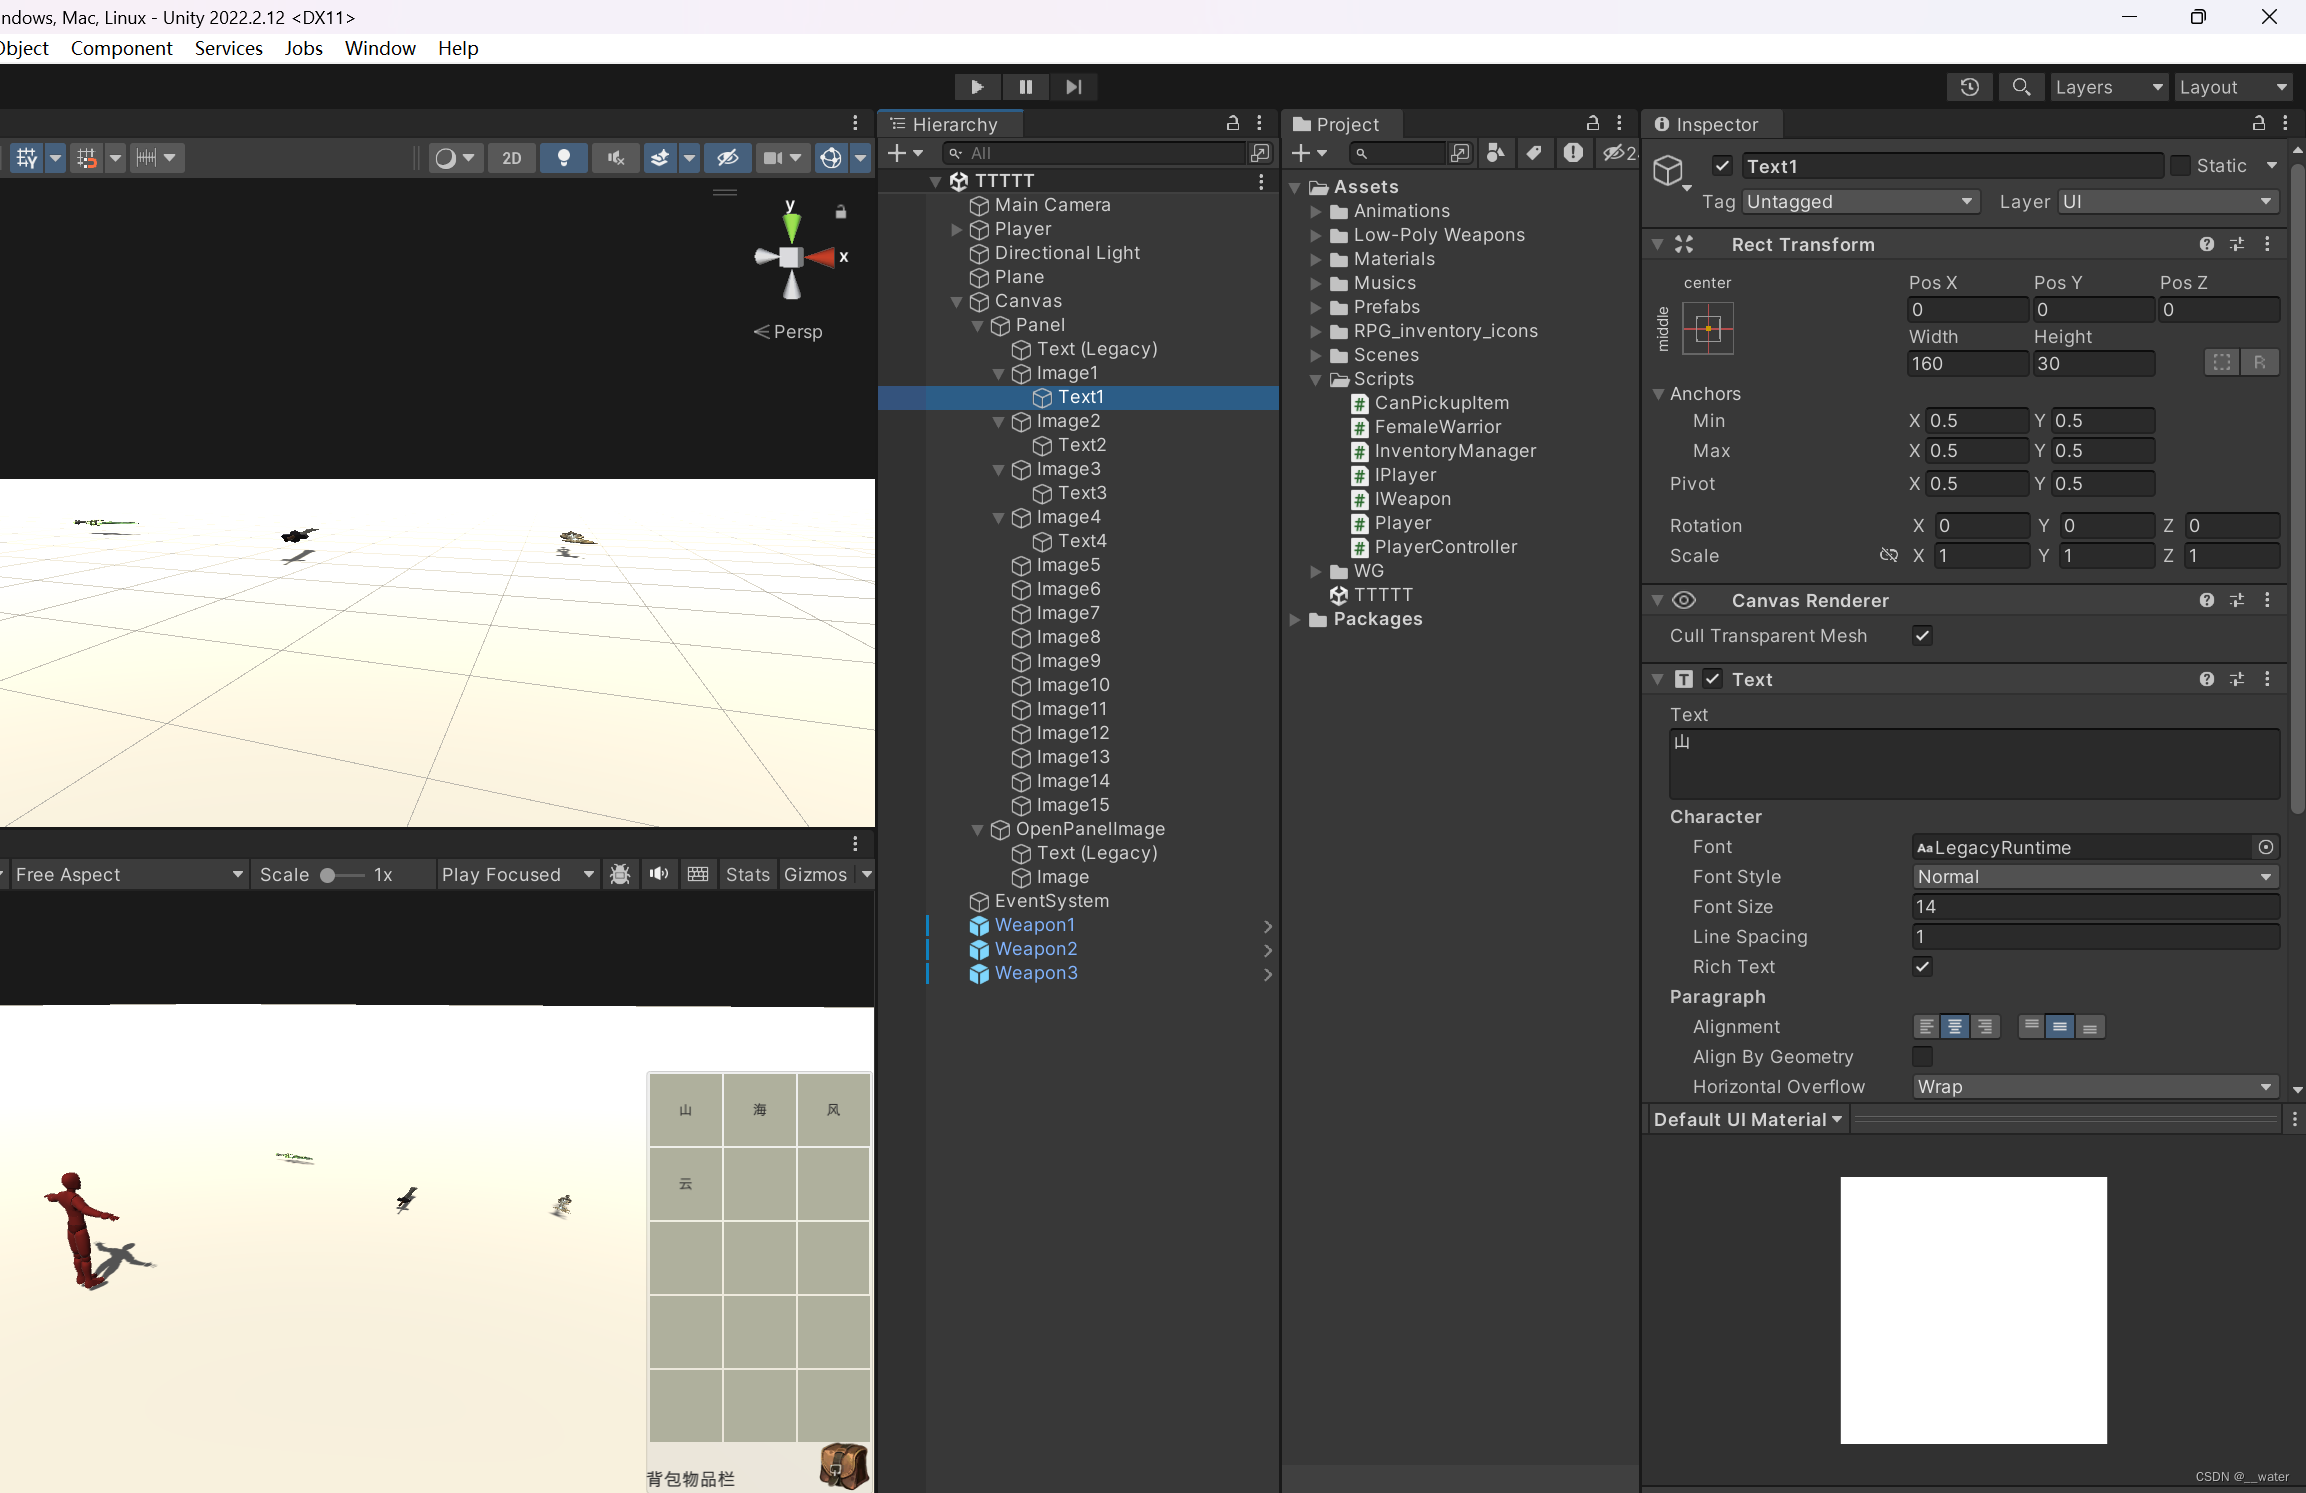


取消激活面板


using System.Collections.Generic;
using UnityEngine;
using UnityEngine.UI;
public class InventoryManager : MonoBehaviour{
public List<string> ItemNames = new List<string>();//道具名称列表
private bool isShowInventoryUI = false;//是否显示背包UI
public Text[] textUI;//UI界面中的文本
public Image[] availableItemIcons;//可以获取的道具图标
public void OpenOrCloseInventoryUI(bool isOpen){//激活或关闭背包UI显示
transform.Find("Panel").gameObject.SetActive(isOpen);
UpdateInventoryTextUI(); //更新文本
UpdateInventoryIconUI();//更新图标
}
private void Update(){
if (Input.GetKeyDown(KeyCode.B))
InventoryUIState();
}
public void InventoryUIState(){//打开或关闭背包
isShowInventoryUI = !isShowInventoryUI;
OpenOrCloseInventoryUI(isShowInventoryUI);//打开或关闭UI
}
private void UpdateInventoryTextUI(){//更新文本UI
for (int i = 0;i < ItemNames.Count;i++)
textUI[i].text = ItemNames[i];
}
private void UpdateInventoryIconUI(){//更新图标UI
for (int i = 0; i < ItemNames.Count; i++){
Image itemIcon = GetIconPrefabByItemName(ItemNames[i]);//根据道具名称返回对应的图标
if (itemIcon != null){
Image newItemIcon = Instantiate(itemIcon);//将图标克隆到对应的Image中
newItemIcon.transform.SetParent(textUI[i].transform.parent);//更改父物体
RectTransform rt = newItemIcon.GetComponent<RectTransform>();//调整位置
rt.anchoredPosition = Vector3.zero;
}
else
Debug.LogError("没找到对应图标");
}
}
private Image GetIconPrefabByItemName(string name){//根据道具名称返回对应的图标
for (int i = 0; i < availableItemIcons.Length; i++){
if (availableItemIcons[i].name.Contains(name))
return availableItemIcons[i];
}
return null;
}
}
隐藏文字部分

运行即完成

挂移动摄像机

using UnityEngine;
public class CameraMove : MonoBehaviour{ //第三人称摄像机简单版
public Transform target;//摄像机的跟随目标
public float distance = 8.0f;//摄像机与目标之间的距离
private float x, y, z;
private float xSpeed = 250.0f;
private float ySpeed = 120.0f;
public float yMinlimit = -45.0f;//限制上下移动角度
public float yMaxlimit = 45.0f;
private void Awake(){
//注册场景加载完毕事件
//EventCenter.AddListener(EventType.SceneLoadComplete, SetTarget);
}
private void SetTarget(){
//将标签为Player的物体设置为跟踪目标
Transform player = GameObject.FindGameObjectWithTag("Player").transform;
if (player != null && target == null)
target = player;
}
private void Start(){
Vector3 angles = transform.eulerAngles;//获取摄像机的当前角度
x = angles.x;
y = angles.y;
z = -distance;
GoRight();
}
private void LateUpdate(){
float temp = Input.GetAxis("Mouse ScrollWheel");//获取滚轮数值
if (target != null){
if (Input.GetMouseButton(0)){
x += Input.GetAxis("Mouse X") * xSpeed * 0.02f;
y -= Input.GetAxis("Mouse Y") * ySpeed * 0.02f;
}
}
//钳制上下移动的角度
y = ClampAngle(y,yMinlimit,yMaxlimit);
z += temp * 100f * 0.02f;//数值按照自己喜好设定
z = Mathf.Clamp(z,-20f,-3.0f);//距离限制,最远是距离玩家20米,最近是3米
GoRight();//作用于摄像机
}
float ClampAngle(float angle,float min,float max){
if (angle < -360)
angle += 360;
if (angle > 360)
angle -= 360;
return Mathf.Clamp(angle,min,max);
}
//摄像机控制位置及角度的核心方法
void GoRight(){
if (target == null)
return;
Quaternion rotation = Quaternion.Euler(y,x,0);//摄像机角度
Vector3 position = rotation * new Vector3(0.0f,0.0f,z)+target.position;
transform.position = position;//摄像机位置
transform.rotation = rotation;//摄像机角度
}
}
即完成摄像机跟随人物移动