配置uni-app開發環境
uni-app快速上手 | uni-app官网


创建项目
图中四个划线就是要配置的地方.
选择vue2还是vue3看个人选择。

目录结构
但是现在新版本创建的项目已经没有components目录了,需要自己创建。

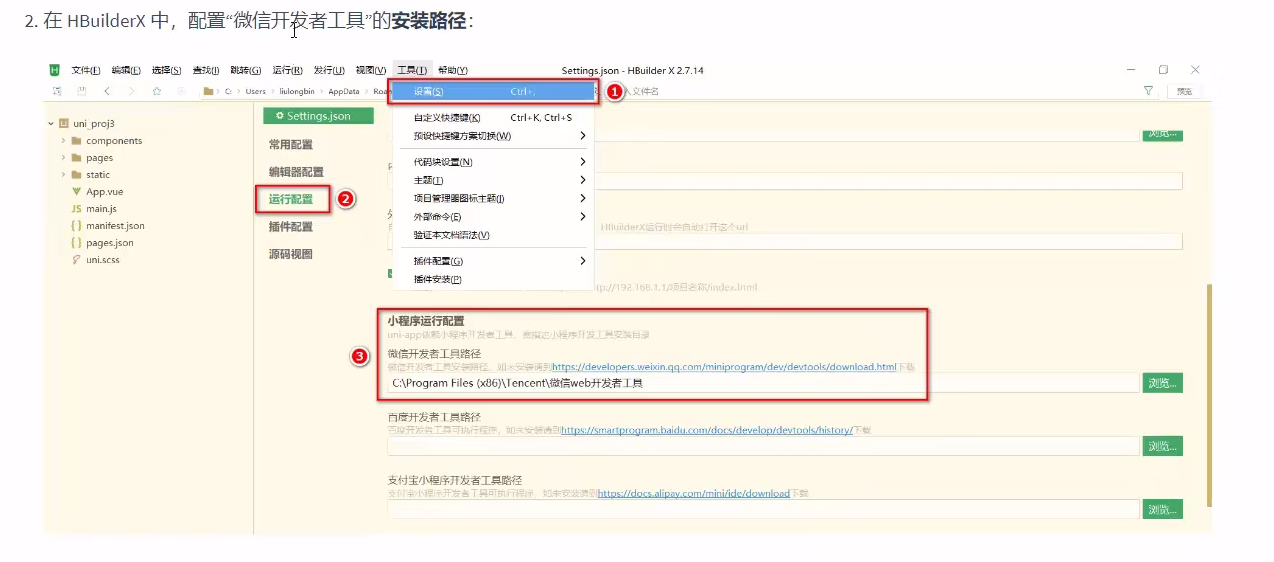
项目运行到微信开发者工具



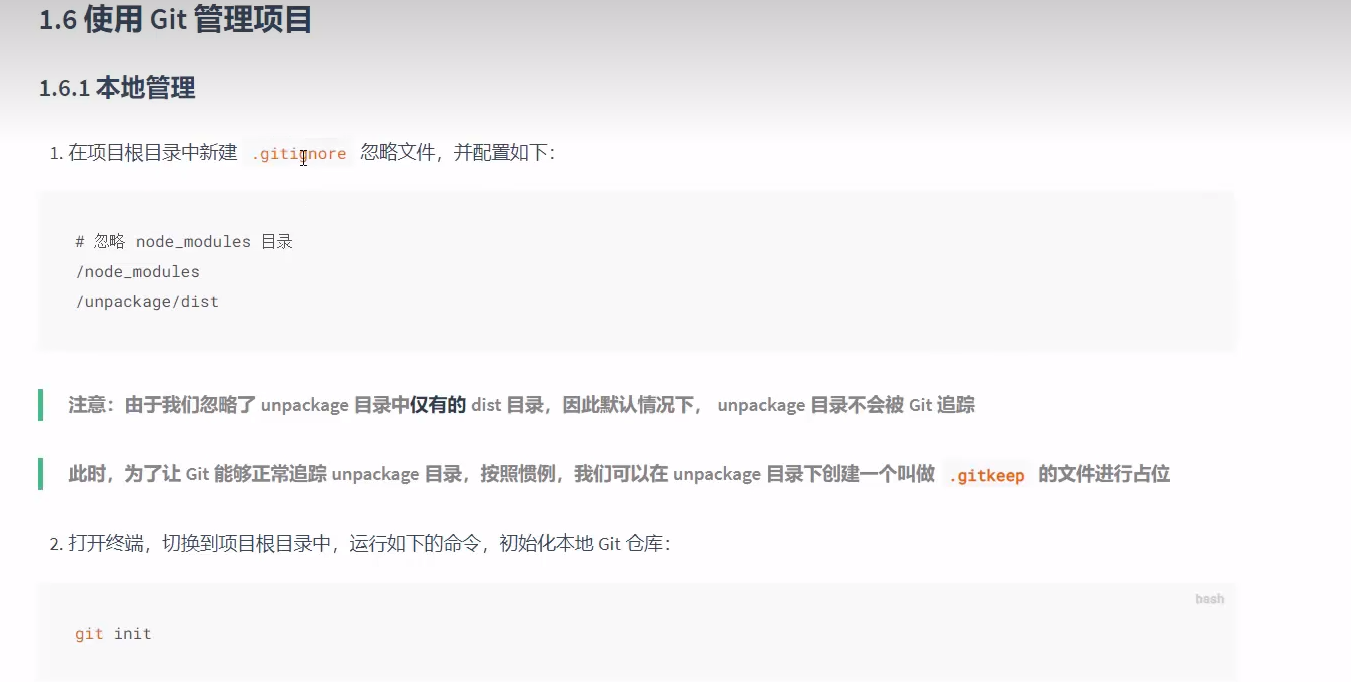
使用git管理项目
node-modules是第三方包,没有必要进行git管理。
/unpackage/dist是运行时自动生成的目录。


tabBar开发
创建tabBar分支

然后使用git branch可以查看当前所在分支。

创建tabbar页面

四个页面创建好后在pages.json里面会自动多四个页面路径。

配置tabBar效果

"tabBar": {
"selectedColor": "#C00000",
"list": [
{
"pagePath": "pages/home/home",
"text": "首页",
"iconPath": "static/tab_icons/home.png",
"selectedIconPath": "static/tab_icons/home-active.png"
},
{
"pagePath": "pages/cate/cate",
"text": "分类",
"iconPath": "static/tab_icons/cate.png",
"selectedIconPath": "static/tab_icons/cate-active.png"
},
{
"pagePath": "pages/cart/cart",
"text": "购物车",
"iconPath": "static/tab_icons/cart.png",
"selectedIconPath": "static/tab_icons/cart-active.png"
},
{
"pagePath": "pages/my/my",
"text": "我的",
"iconPath": "static/tab_icons/my.png",
"selectedIconPath": "static/tab_icons/my-active.png"
}
]
}
删除默认的index页面
1. 在 HBuilderX 中,把 pages 目录下的 index首页文件夹 删除掉
2. 同时,把 page.json 中记录的 index 首页 路径删除掉
3. 为了防止小程序运行失败,在微信开发者工具中,手动删除 pages 目录下的 index 首页文件 夹 4. 同时,把 components 目录下的 uni-link 组件文件夹 删除掉

修改导航栏条的样式效果
1. 打开 pages.json 这个全局的配置文件
2. 修改 globalStyle 节点如下:
{
"globalStyle": {
"navigationBarTextStyle": "white",
"navigationBarTitleText": "鼠鼠优购",
"navigationBarBackgroundColor": "#C00000",
"backgroundColor": "#FFFFFF"
}
}
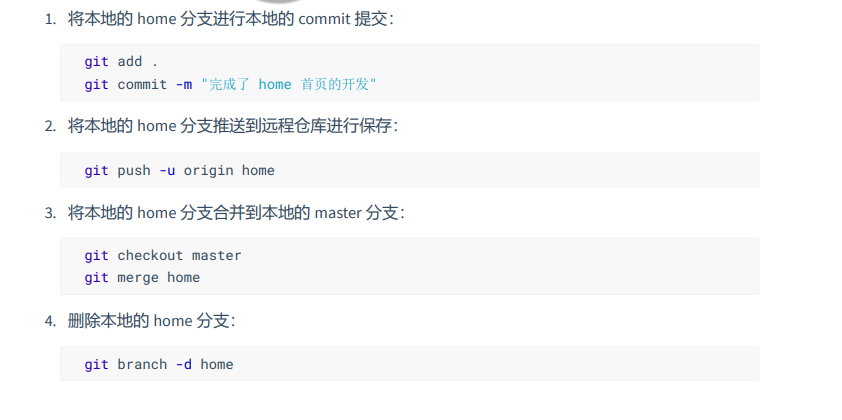
分支的提交与合并

首页
创建home分支
配置网络请求

@escook/request-miniprogram - npm (npmjs.com)
跟着官方文档里面的指引做,可以将配置请求响应拦截器和请求根路径等等。
首先在项目根目录初始化一个npm的包管理配置文件。
git init -y安装网络请求的包
npm install @escook/request-miniprogram
然后在main.js里面进行如下配置
凡是wx.的方法都可以使用uni.代替。
这部分的代码必须要放在ifndef vue3外面,否则微信开发者哪里会有报错,具体就是下面这个
【微信小程序】TypeError: Cannot read property ‘get‘ of undefined & Error: MiniProgramError-CSDN博客
//导入网络请求的包
import { $http } from '@escook/request-miniprogram'uni.$http=$http
//配置根路径
$http.baseUrl='https://api-hmugo-web.itheima.net'
//请求拦截器
$http.beforeRequest=function(options){uni.showLoading({title:'数据加载中...'})
}
//响应拦截器
$http.afterRequest=function(){uni.hideLoading()
}
轮播图区域
请求轮播图的数据

const { data : res} 是解构赋值,res可以换,前面的data不能
home.vue中
<template><view>home</view>
</template><script>export default {data() {return {//轮播图的数据列表swiperList:[]};}, onLoad(){this.getSwiperList()},methods:{async getSwiperList(){const {data:res}= await uni.$http.get('/api/public/v1/home/swiperdata')//请求失败if(res.meta.status!==200){return uni.showToast({title:'数据请求失败!',duration:1500,icon: 'none' })}//请求成功  this.swiperList=res.messageconsole.log(this.swiperList)}}}
</script><style lang="scss"></style>
渲染轮播图的UI结构
<template><view><swiper :indicator-dots="true" :autoplay="true" :interval="3000" :duration="1000" :circular="true"><swiper-item v-for="(item,i) in swiperList" :key="i"><view class="swiper-item"><image :src="item.image_src"></image></view></swiper-item></swiper></view>
</template>
<style lang="scss">
swiper{height:330rpx;.swiper-item,image{width:100%;height:100%;}
}
</style> 效果如下

配置小程序分包

"subPackages": [{"root":"subpkg","pages":[]}],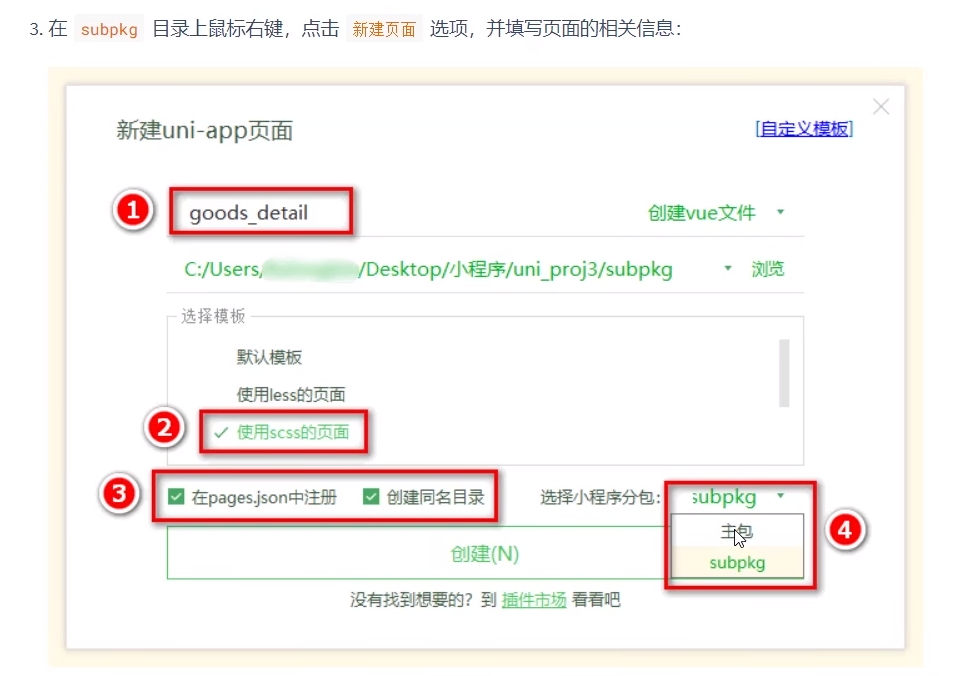
点击轮播图跳转商品详情页
将view组件改为navigator组件,
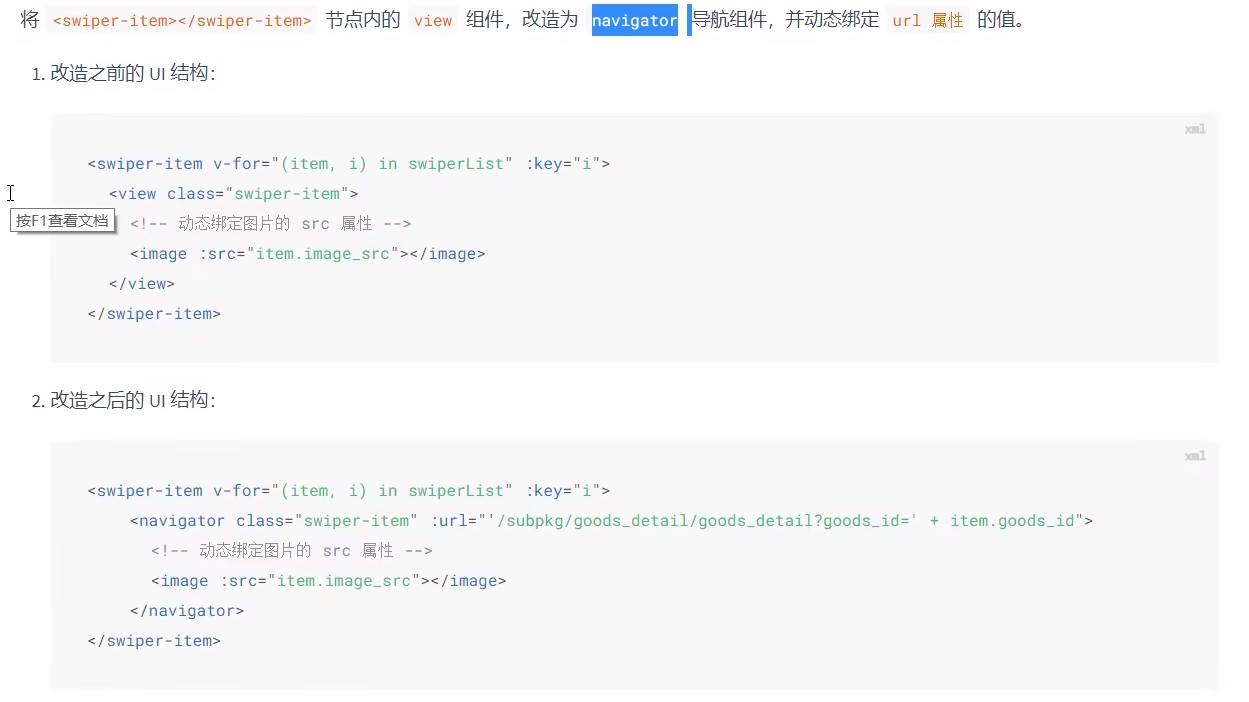
跳转页面的同时将商品id也传过去
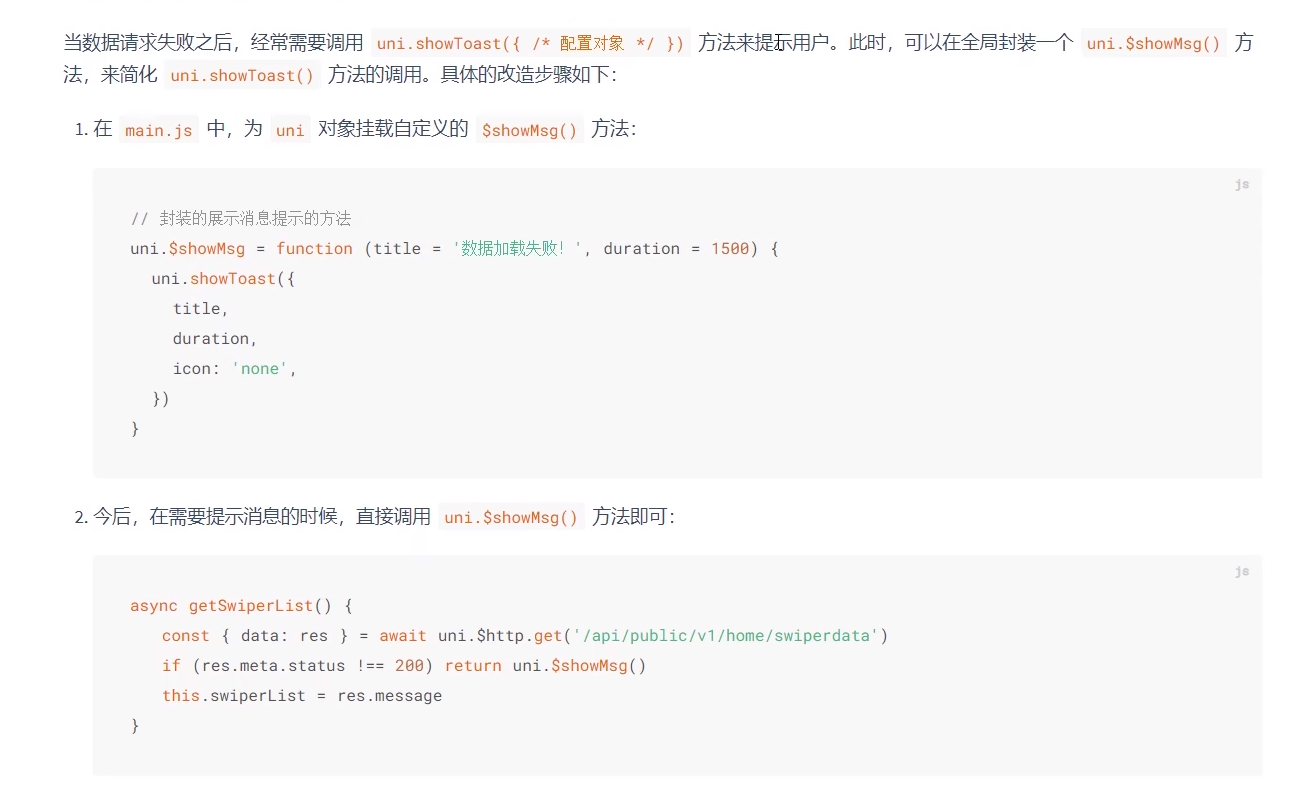
封装uni.$showMsg()方法
分类导航区域
获取分类导航的数据

用到的接口如下

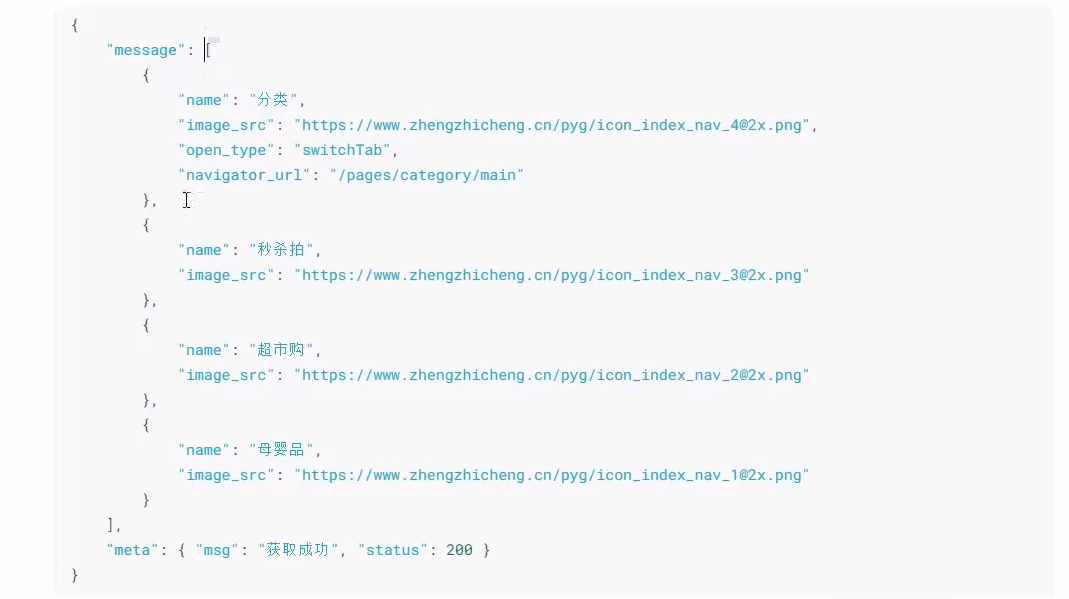
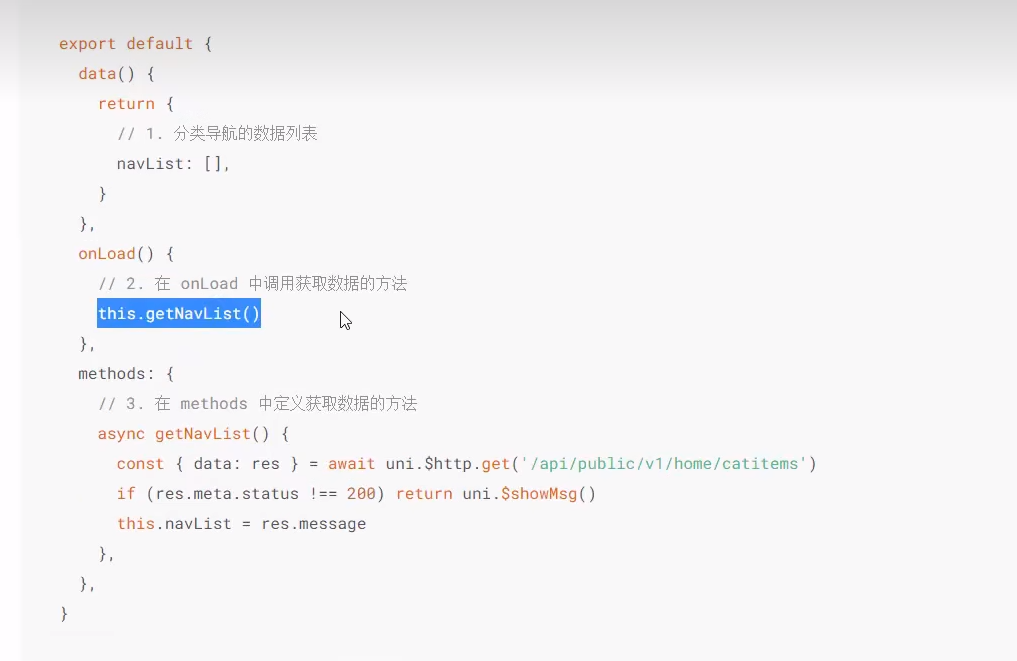
渲染分类导航的UI结构
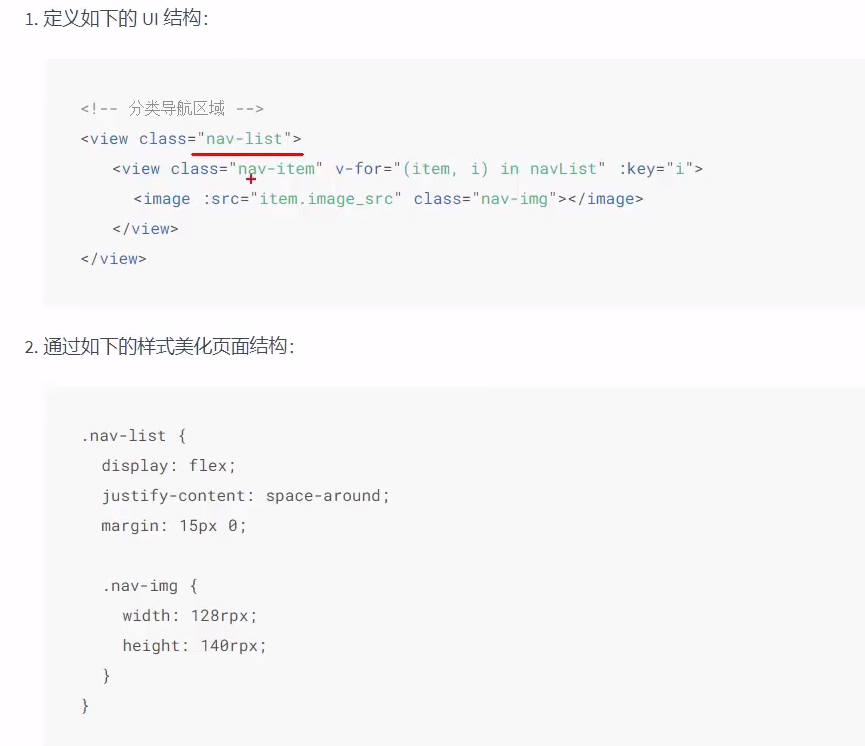
点击跳转分类页面

楼层区域
获取楼层数据


渲染楼层标题
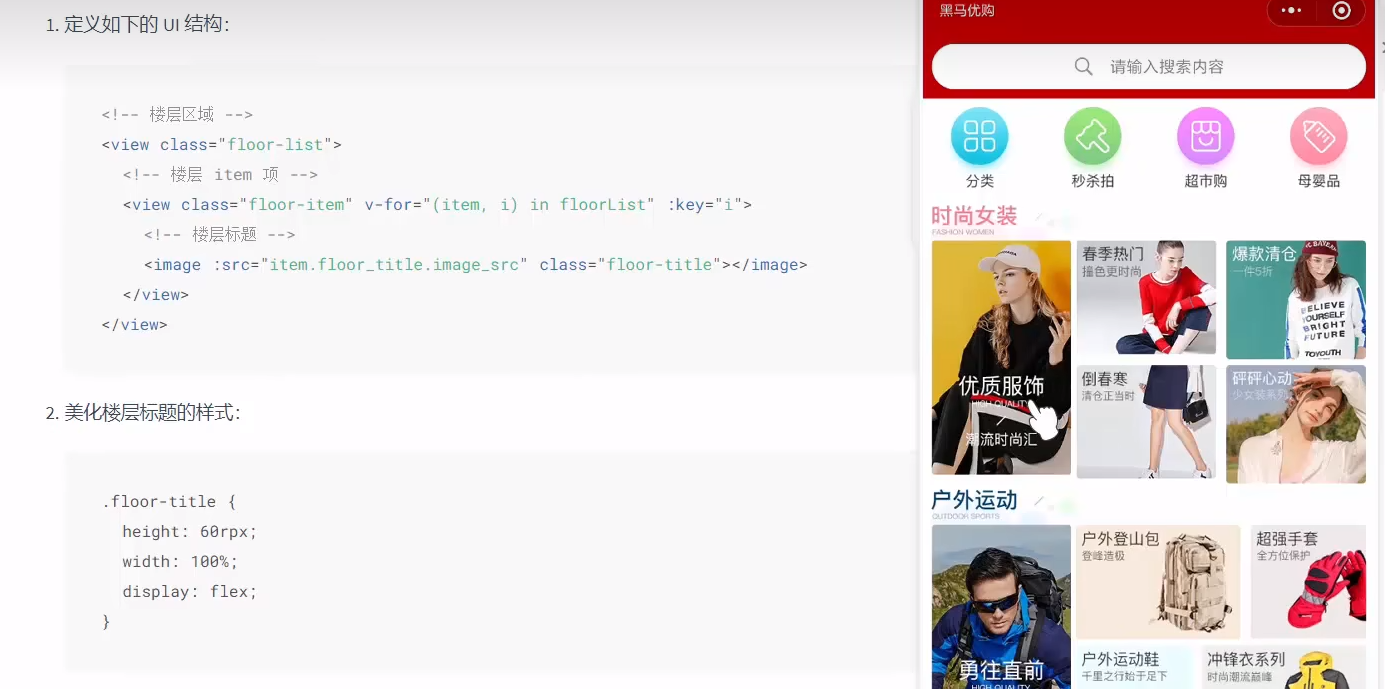
得到如下

渲染楼层图片
<view class="floor-list"><view class="floor-item" v-for="(item,i) in floorList" :key="i"><image :src="item.floor_title.image_src" class="floor-title"></image><view class="floor-img-box"><!--左侧大图片的盒子--><view class="left-img-box"><image :src="item.product_list[0].image_src" :style="{width:item.product_list[0].image_width+'rpx'}" mode="widthFix"> </image></view><!--右侧4个小图片的盒子--><view class="right-img-box"><view class="roght-img-item" v-for="(item2,i2) in item.product_list" :key="i2" v-show="i2 !== 0"><image :src="item2.image_src" mode="widthFix" :style="{width:item2.image_width+'rpx'}" ></image></view></view></view></view></view>.floor-title{height: 60rpx;width: 100%;display: flex;
}.right-img-box{display:flex;flex-wrap: wrap;justify-content: space-around;
}
.floor-img-box{display: flex;padding-left: 10rpx
}效果如下

点击楼层图片跳转到商品列表页面
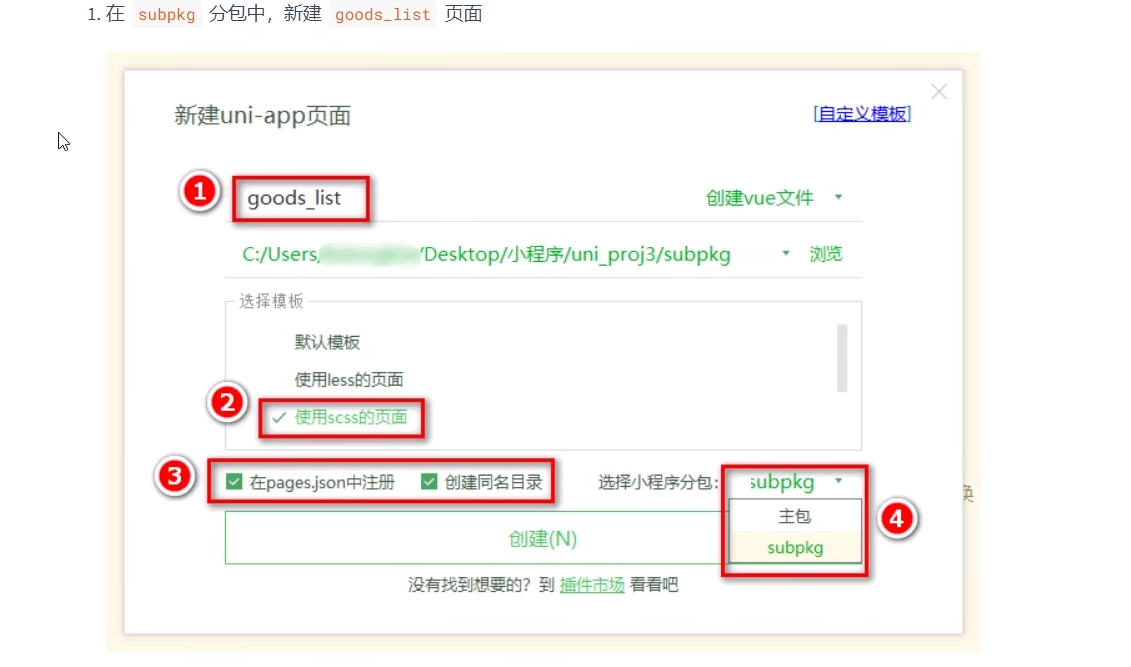
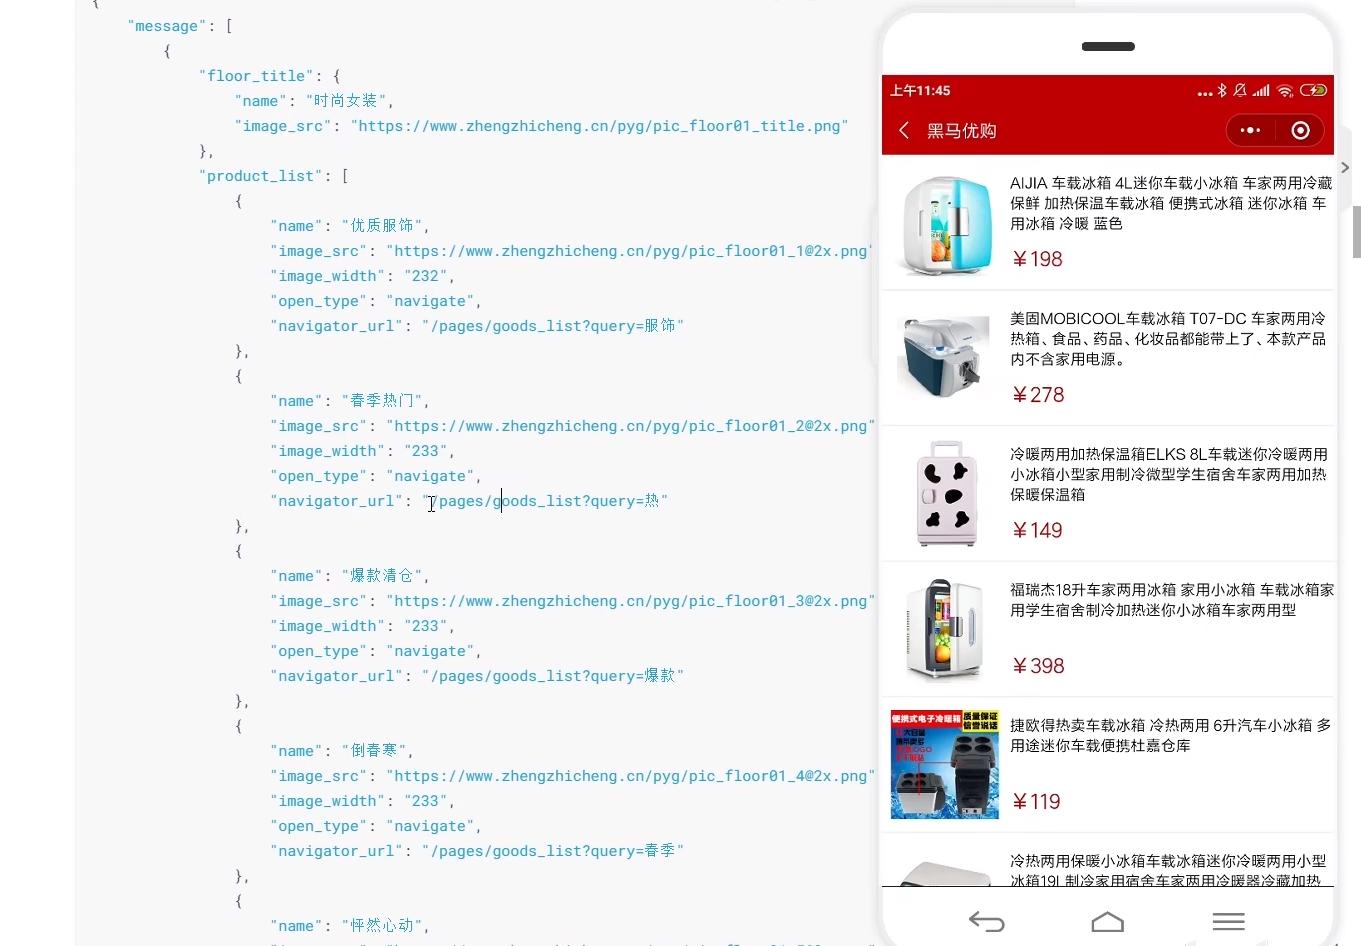
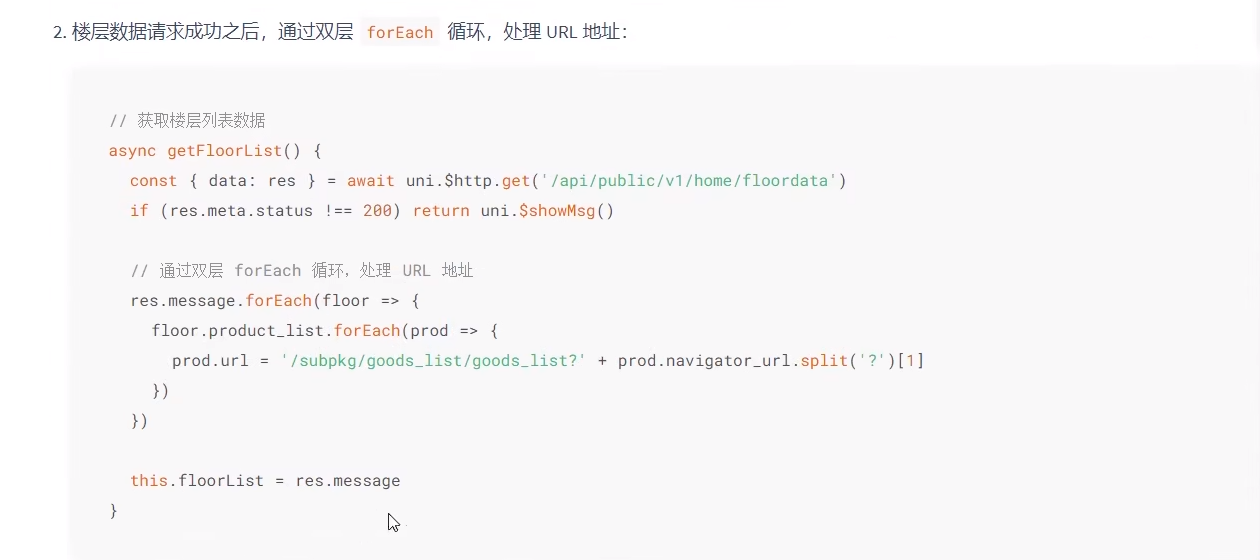
用到的返回数据如下所示.这里返回的路径有问题,要对路径做替换。

合并分支并提交
