实验七:SQLite 和 SQLiteDatabase 的使用
7.1 实验目的
本次实验的目的是让大家熟悉 Android 中对数据库进行操作的相关的接口、类等。SQLiteDatabase 这个是在 android 中数据库操作使用最频繁的一个类。通过它可以实现数据库的创建或打开、创建表、插入数据、删除数据、查询数据、修改数据等操作。
7.2 实验要求
- 实现便签管理小例程。
- 创建项目并熟悉文件目录结构
- 实现便签增删改查功能的实验步骤
7.3 实验内容
【练习 7.1】 便签管理小例程
步骤 1: 项目结构
创建一个名为"便签管理系统"的Android项目,包含以下文件和文件夹:
activity_main.xml(启动窗体)insertinfo.xml(新增便签窗体)showinfo.xml(查看便签信息窗体)manageflag.xml(便签管理窗体)MainActivity.java(主活动)InsertFlag.java(新增便签活动)ShowInfo.java(查看便签信息活动)ManageFlag.java(便签管理活动)DBOpenHelper.java(数据库帮助类)FlagDao.java(便签数据访问类)flag.java(便签实体类)AndroidManifest.xml(清单文件)
步骤 2: 配置布局文件
-
activity_main.xml (启动窗体)
-
包含两个按钮:
btnflaginfo(查看便签信息) 和btninsertinfo(添加便签)<LinearLayout xmlns:android="http://schemas.android.com/apk/res/android"android:layout_width="fill_parent"android:layout_height="fill_parent"android:orientation="vertical"><LinearLayoutandroid:id="@+id/linearLayout1"android:layout_width="match_parent"android:layout_height="wrap_content"android:layout_weight="0.06"android:orientation="vertical"><RelativeLayoutandroid:layout_width="match_parent"android:layout_height="wrap_content"><Buttonandroid:id="@+id/btnflaginfo"android:layout_width="wrap_content"android:layout_height="wrap_content"android:text="便签信息"android:textColor="#8C6931"android:textSize="20dp" /><Buttonandroid:id="@+id/btninsertinfo"android:layout_width="wrap_content"android:layout_height="wrap_content"android:layout_toRightOf="@id/btnflaginfo"android:text="添加便签"android:textColor="#8C6931"android:textSize="20dp" /></RelativeLayout></LinearLayout> </LinearLayout>
-
-
Insertinfo.xml (新增便签窗体)
-
包含一个文本框
txtFlag用于输入便签内容 -
包含两个按钮:
btnflagSave(保存) 和btnflagCancel(取消)<?xml version="1.0" encoding="utf-8"?> <LinearLayout xmlns:android="http://schemas.android.com/apk/res/android"android:id="@+id/itemflag"android:layout_width="fill_parent"android:layout_height="fill_parent"android:orientation="vertical"><LinearLayoutandroid:layout_width="fill_parent"android:layout_height="fill_parent"android:layout_weight="3"android:orientation="vertical"><TextViewandroid:layout_width="wrap_content"android:layout_height="wrap_content"android:layout_gravity="center"android:gravity="center_horizontal"android:text="新增便签"android:textColor="#000000"android:textSize="40sp"android:textStyle="bold" /></LinearLayout><LinearLayoutandroid:layout_width="fill_parent"android:layout_height="fill_parent"android:layout_weight="1"android:orientation="vertical"><RelativeLayoutandroid:layout_width="fill_parent"android:layout_height="fill_parent"android:padding="5dp"><TextViewandroid:id="@+id/tvFlag"android:layout_width="350dp"android:layout_height="wrap_content"android:layout_alignParentRight="true"android:text="请输入便签,最多输入 200 字"android:textColor="#8C6931"android:textSize="23sp" /><EditTextandroid:id="@+id/txtFlag"android:layout_width="350dp"android:layout_height="400dp"android:layout_below="@id/tvFlag"android:gravity="top"android:singleLine="false" /></RelativeLayout></LinearLayout><LinearLayoutandroid:layout_width="fill_parent"android:layout_height="fill_parent"android:layout_weight="3"android:orientation="vertical"><RelativeLayoutandroid:layout_width="fill_parent"android:layout_height="fill_parent"android:padding="10dp"><Buttonandroid:id="@+id/btnflagCancel"android:layout_width="80dp"android:layout_height="wrap_content"android:layout_alignParentRight="true"android:layout_marginLeft="10dp"android:text="取消" /><Buttonandroid:id="@+id/btnflagSave"android:layout_width="80dp"android:layout_height="wrap_content"android:layout_toLeftOf="@id/btnflagCancel"android:maxLength="200"android:text="保存" /></RelativeLayout></LinearLayout> </LinearLayout>
-
-
showinfo.xml (查看便签信息窗体)
- 包含一个文本视图
textView1和一个列表视图lvinfo用于展示便签信息
<?xml version="1.0" encoding="utf-8"?> <LinearLayout xmlns:android="http://schemas.android.com/apk/res/android"android:layout_width="match_parent"android:layout_height="match_parent"android:orientation="vertical"><TextViewandroid:id="@+id/textView1"android:layout_width="wrap_content"android:layout_height="wrap_content"android:text="便签信息"android:textSize="20dp" /><LinearLayoutandroid:id="@+id/linearLayout2"android:layout_width="match_parent"android:layout_height="wrap_content"android:layout_weight="0.94"android:orientation="vertical"><ListViewandroid:id="@+id/lvinfo"android:layout_width="match_parent"android:layout_height="match_parent"android:scrollbarAlwaysDrawVerticalTrack="true" /></LinearLayout> </LinearLayout> - 包含一个文本视图
-
manageflag.xml (便签管理窗体)
- 包含一个文本框
txtFlagManage和两个按钮:btnFlagManageEdit(修改) 和btnFlagManageDelete(删除)
<?xml version="1.0" encoding="utf-8"?> <LinearLayout xmlns:android="http://schemas.android.com/apk/res/android"android:id="@+id/flagmanage"android:layout_width="fill_parent"android:layout_height="fill_parent"android:orientation="vertical"><LinearLayoutandroid:layout_width="fill_parent"android:layout_height="fill_parent"android:layout_weight="3"android:orientation="vertical"><TextViewandroid:layout_width="wrap_content"android:layout_height="wrap_content"android:layout_gravity="center"android:gravity="center_horizontal"android:text="便签管理"android:textColor="#000000"android:textSize="40sp"android:textStyle="bold" /></LinearLayout><LinearLayoutandroid:layout_width="fill_parent"android:layout_height="fill_parent"android:layout_weight="1"android:orientation="vertical"><RelativeLayoutandroid:layout_width="fill_parent"android:layout_height="fill_parent"android:padding="5dp"><TextViewandroid:id="@+id/tvFlagManage"android:layout_width="350dp"android:layout_height="wrap_content"android:layout_alignParentRight="true"android:text="请输入便签,最多输入 200 字"android:textColor="#8C6931"android:textSize="23sp" /><EditTextandroid:id="@+id/txtFlagManage"android:layout_width="350dp"android:layout_height="400dp"android:layout_below="@id/tvFlagManage"android:gravity="top"android:singleLine="false" /></RelativeLayout></LinearLayout><LinearLayoutandroid:layout_width="fill_parent"android:layout_height="fill_parent"android:layout_weight="3"android:orientation="vertical"><RelativeLayoutandroid:layout_width="fill_parent"android:layout_height="fill_parent"android:padding="10dp"><Buttonandroid:id="@+id/btnFlagManageDelete"android:layout_width="80dp"android:layout_height="wrap_content"android:layout_alignParentRight="true"android:layout_marginLeft="10dp"android:text="删除" /><Buttonandroid:id="@+id/btnFlagManageEdit"android:layout_width="80dp"android:layout_height="wrap_content"android:layout_toLeftOf="@id/btnFlagManageDelete"android:maxLength="200"android:text="修改" /></RelativeLayout></LinearLayout> </LinearLayout> - 包含一个文本框
步骤 3: 配置活动文件
-
MainActivity.java
- 初始化界面和按钮
- 为按钮添加点击事件,分别跳转到
ShowInfo和InsertFlag活动
package com.example.notemanagementsystem.activity;import android.os.Bundle; import android.app.Activity; import android.content.Intent; import android.view.Menu; import android.view.View; import android.view.View.OnClickListener; import android.widget.Button;import com.wenlong.DBLab.activity.R;public class MainActivity extends Activity {Button btnflaginfo, btninsertinfo;@Overrideprotected void onCreate(Bundle savedInstanceState) {super.onCreate(savedInstanceState);setContentView(R.layout.activity_main);btnflaginfo = (Button) findViewById(R.id.btnflaginfo);btninsertinfo = (Button) findViewById(R.id.btninsertinfo);btnflaginfo.setOnClickListener(new OnClickListener() {@Overridepublic void onClick(View v) {Intent intent = new Intent(MainActivity.this, ShowInfo.class);startActivity(intent);}});btninsertinfo.setOnClickListener(new OnClickListener() {@Overridepublic void onClick(View v) {Intent intent = new Intent(MainActivity.this, InsertFlag.class);startActivity(intent);}});}@Overridepublic boolean onCreateOptionsMenu(Menu menu) {// Inflate the menu; this adds items to the action bar if it is present.getMenuInflater().inflate(R.menu.main, menu);return true;} } -
InsertFlag.java
- 处理新增便签的界面逻辑
- 获取输入的便签内容,保存到数据库,并显示相应的提示信息
package com.example.notemanagementsystem;import android.app.Activity; import android.os.Bundle; import android.view.View; import android.view.View.OnClickListener; import android.widget.Button; import android.widget.EditText; import android.widget.Toast;import com.example.notemanagementsystem.DAO.FlagDao; import com.example.notemanagementsystem.model.flag;public class InsertFlag extends Activity {EditText txtFlag;// 创建 EditText 组件对象Button btnflagSaveButton;// 创建 Button 组件对象Button btnflagCancelButton;// 创建 Button 组件对象@Overrideprotected void onCreate(Bundle savedInstanceState) {super.onCreate(savedInstanceState);setContentView(R.layout.insertinfo);txtFlag = (EditText) findViewById(R.id.txtFlag);btnflagSaveButton = (Button) findViewById(R.id.btnflagSave);btnflagCancelButton = (Button) findViewById(R.id.btnflagCancel);btnflagSaveButton.setOnClickListener(new OnClickListener() {@Overridepublic void onClick(View v) {String strFlag = txtFlag.getText().toString();// 获取便签文本框的值if (!strFlag.isEmpty()) {// 判断获取FlagDao flagDAO = new FlagDao(InsertFlag.this);// 创建FlagDAO 对象flag flag = new flag(flagDAO.getMaxId() + 1, strFlag);// 创建 Tb_flag 对象flagDAO.add(flag);// 添加便签信息// 弹出信息提示Toast.makeText(InsertFlag.this, "〖新增便签〗数据添加成功!",Toast.LENGTH_SHORT).show();} else {Toast.makeText(InsertFlag.this, "请输入便签!",Toast.LENGTH_SHORT).show();}}});btnflagCancelButton.setOnClickListener(new OnClickListener() {@Overridepublic void onClick(View v) {finish();}});} } -
ShowInfo.java
- 展示所有便签信息的界面逻辑
- 使用
ListView显示便签列表,点击某一项跳转到ManageFlag活动
package com.example.notemanagementsystem;import android.app.Activity; import android.content.Intent; import android.os.Bundle; import android.view.View; import android.widget.AdapterView; import android.widget.AdapterView.OnItemClickListener; import android.widget.ArrayAdapter; import android.widget.ListView; import android.widget.TextView;import com.example.notemanagementsystem.DAO.FlagDao; import com.example.notemanagementsystem.model.flag;import java.util.List;public class ShowInfo extends Activity {public static final String FLAG = "id";// 定义一个常量,用来作为请求码ListView lvinfo;// 创建 ListView 对象String[] strInfos = null;// 定义字符串数组,用来存储收入信息ArrayAdapter<String> arrayAdapter = null;// 创建 ArrayAdapter 对象@Overrideprotected void onCreate(Bundle savedInstanceState) {super.onCreate(savedInstanceState);setContentView(R.layout.showinfo);lvinfo = (ListView) findViewById(R.id.lvinfo);FlagDao flaginfo = new FlagDao(ShowInfo.this);// 创建 FlagDAO 对象// 获取所有便签信息,并存储到 List 泛型集合中List<flag> listFlags = flaginfo.getScrollData(0,(int) flaginfo.getCount());strInfos = new String[listFlags.size()];// 设置字符串数组的长度int n = 0;// 定义一个开始标识for (flag tb_flag : listFlags) {// 将便签相关信息组合成一个字符串,存储到字符串数组的相应位置strInfos[n] = tb_flag.getid() + "|" + tb_flag.getFlag();if (strInfos[n].length() > 15)// 判断便签信息的长度是否大于 15strInfos[n] = strInfos[n].substring(0, 15) + "……";// 将位置大于 15之后的字符串用……代替n++;// 标识加 1}arrayAdapter = new ArrayAdapter<String>(this,android.R.layout.simple_list_item_1, strInfos);lvinfo.setAdapter(arrayAdapter);lvinfo.setOnItemClickListener(new OnItemClickListener() {@Overridepublic void onItemClick(AdapterView<?> parent, View view, int position,long id) {String strInfo = String.valueOf(((TextView) view).getText());// 记录单击的项信息String strid = strInfo.substring(0, strInfo.indexOf('|'));// 从项信息中截取编号Intent intent = null;// 创建 Intent 对象intent = new Intent(ShowInfo.this, ManageFlag.class);// 使用 FlagManage 窗口初始化 Intent 对象intent.putExtra(FLAG, strid);// 设置要传递的数据startActivity(intent);// 执行 Intent,打开相应的 Activity}});} } -
ManageFlag.java
- 处理便签管理的界面逻辑
- 获取传递的便签id,显示该便签内容,可进行编辑和删除操作
package com.example.notemanagementsystem;import android.app.Activity;
import android.content.Intent;
import android.os.Bundle;
import android.view.View;
import android.view.View.OnClickListener;
import android.widget.Button;
import android.widget.EditText;
import android.widget.Toast;import com.example.notemanagementsystem.DAO.FlagDao;
import com.example.notemanagementsystem.model.flag;public class ManageFlag extends Activity {EditText txtFlag;// 创建 EditText 对象Button btnEdit, btnDel;// 创建两个 Button 对象String strid;// 创建字符串,表示便签的 id@Overrideprotected void onCreate(Bundle savedInstanceState) {super.onCreate(savedInstanceState);setContentView(R.layout.manageflag);txtFlag = (EditText) findViewById(R.id.txtFlagManage);btnEdit = (Button) findViewById(R.id.btnFlagManageEdit);btnDel = (Button) findViewById(R.id.btnFlagManageDelete);Intent intent = getIntent();// 创建 Intent 对象Bundle bundle = intent.getExtras();// 获取便签 idstrid = bundle.getString(ShowInfo.FLAG);// 将便签 id 转换为字符串final FlagDao flagDAO = new FlagDao(ManageFlag.this);// 创建 FlagDAO 对象txtFlag.setText(flagDAO.find(Integer.parseInt(strid)).getFlag());// 为修改按钮设置监听事件btnEdit.setOnClickListener(new OnClickListener() {@Overridepublic void onClick(View v) {flag tb_flag = new flag();// 创建 Tb_flag 对象tb_flag.setid(Integer.parseInt(strid));// 设置便签 idtb_flag.setFlag(txtFlag.getText().toString());// 设置便签值flagDAO.update(tb_flag);// 修改便签信息// 弹出信息提示Toast.makeText(ManageFlag.this, "〖便签数据〗修改成功!",Toast.LENGTH_SHORT).show();}});// 为删除按钮设置监听事件btnDel.setOnClickListener(new OnClickListener() {@Overridepublic void onClick(View v) {flagDAO.detele(Integer.parseInt(strid));// 根据指定的 id 删除便签信息Toast.makeText(ManageFlag.this, "〖便签数据〗删除成功!",Toast.LENGTH_SHORT).show();}});}
}
步骤 4: 配置数据库相关文件
-
DBOpenHelper.java
- 创建数据库,定义便签信息表结构
package com.example.notemanagementsystem.DAO;import android.content.Context; import android.database.sqlite.SQLiteDatabase; import android.database.sqlite.SQLiteOpenHelper;public class DBOpenHelper extends SQLiteOpenHelper {private static final int VERSION = 1;// 定义数据库版本号private static final String DBNAME = "flag.db";// 定义数据库名public DBOpenHelper(Context context) {super(context, DBNAME, null, VERSION);}@Overridepublic void onCreate(SQLiteDatabase db) // 创建数据库{db.execSQL("create table tb_flag (_id integer primary key,flag varchar(200)) ");// 创建便签信息表}@Overridepublic void onUpgrade(SQLiteDatabase db, int oldVersion, int newVersion) // 覆写基类的 onUpgrade方法,以便数据库版本更新{} } -
FlagDao.java
- 提供对便签表的增删改查操作
- 包含获取便签总记录数和最大编号的方法
package com.example.notemanagementsystem.DAO;import java.util.ArrayList; import java.util.List;import android.content.Context; import android.database.Cursor; import android.database.sqlite.SQLiteDatabase;import com.example.notemanagementsystem.DAO.DBOpenHelper; import com.example.notemanagementsystem.model.flag;public class FlagDao {private DBOpenHelper helper;// 创建 DBOpenHelper 对象private SQLiteDatabase db;// 创建 SQLiteDatabase 对象public FlagDao(Context context)// 定义构造函数{helper = new DBOpenHelper(context);// 初始化 DBOpenHelper 对象}/*** 添加便签信息** @param tb_flag*/public void add(flag flag) {db = helper.getWritableDatabase();// 初始化 SQLiteDatabase 对象db.execSQL("insert into tb_flag (_id,flag) values (?,?)", new Object[]{flag.getid(), flag.getFlag()});// 执行添加便签信息操作}/*** 更新便签信息** @param tb_flag*/public void update(flag tb_flag) {db = helper.getWritableDatabase();// 初始化 SQLiteDatabase 对象db.execSQL("update tb_flag set flag = ? where _id = ?", new Object[]{tb_flag.getFlag(), tb_flag.getid()});// 执行修改便签信息操作}/*** 查找便签信息** @param id* @return*/public flag find(int id) {db = helper.getWritableDatabase();// 初始化 SQLiteDatabase 对象Cursor cursor = db.rawQuery("select _id,flag from tb_flag where _id = ?",new String[]{String.valueOf(id)});// 根据编号查找便签信息,并存储到 Cursor 类中if (cursor.moveToNext())// 遍历查找到的便签信息{// 将遍历到的便签信息存储到 Tb_flag 类中return new flag(cursor.getInt(cursor.getColumnIndex("_id")), cursor.getString(cursor.getColumnIndex("flag")));}return null;// 如果没有信息,则返回 null}/*** 刪除便签信息** @param ids*/public void detele(Integer... ids) {if (ids.length > 0)// 判断是否存在要删除的 id{StringBuffer sb = new StringBuffer();// 创建 StringBuffer 对象for (int i = 0; i < ids.length; i++)// 遍历要删除的 id 集合{sb.append('?').append(',');// 将删除条件添加到 StringBuffer 对象中}sb.deleteCharAt(sb.length() - 1);// 去掉最后一个“,“字符db = helper.getWritableDatabase();// 创建 SQLiteDatabase 对象// 执行删除便签信息操作db.execSQL("delete from tb_flag where _id in (" + sb + ")",(Object[]) ids);}}/*** 获取便签信息** @param start 起始位置* @param count 每页显示数量* @return*/public List<flag> getScrollData(int start, int count) {List<flag> lisTb_flags = new ArrayList<flag>();// 创建集合对象db = helper.getWritableDatabase();// 初始化 SQLiteDatabase 对象// 获取所有便签信息Cursor cursor = db.rawQuery("select * from tb_flag limit ?,?",new String[]{String.valueOf(start), String.valueOf(count)});while (cursor.moveToNext())// 遍历所有的便签信息{// 将遍历到的便签信息添加到集合中lisTb_flags.add(new flag(cursor.getInt(cursor.getColumnIndex("_id")), cursor.getString(cursor.getColumnIndex("flag"))));}return lisTb_flags;// 返回集合}/*** 获取总记录数** @return*/public long getCount() {db = helper.getWritableDatabase();// 初始化 SQLiteDatabase 对象Cursor cursor = db.rawQuery("select count(_id) from tb_flag", null);// 获取便签信息的记录数if (cursor.moveToNext())// 判断 Cursor 中是否有数据{return cursor.getLong(0);// 返回总记录数}return 0;// 如果没有数据,则返回 0}/*** 获取便签最大编号** @return*/public int getMaxId() {db = helper.getWritableDatabase();// 初始化 SQLiteDatabase 对象Cursor cursor = db.rawQuery("select max(_id) from tb_flag", null);// 获取便签信息表中的最大编号while (cursor.moveToLast()) {// 访问 Cursor 中的最后一条数据return cursor.getInt(0);// 获取访问到的数据,即最大编号}return 0;// 如果没有数据,则返回 0} } -
flag.java
- 定义便签实体类,包含编号和便签内容
package com.example.notemanagementsystem.model;public class flag {private int _id;// 存储便签编号private String flag;// 存储便签信息public flag()// 默认构造函数{super();}// 定义有参构造函数,用来初始化便签信息实体类中的各个字段public flag(int id, String flag) {super();this._id = id;// 为便签号赋值this.flag = flag;// 为便签信息赋值}public int getid()// 设置便签编号的可读属性{return _id;}public void setid(int id)// 设置便签编号的可写属性{this._id = id;}public String getFlag()// 设置便签信息的可读属性{return flag;}public void setFlag(String flag)// 设置便签信息的可写属性{this.flag = flag;}
}
步骤 5: 配置清单文件
-
AndroidManifest.xml
- 配置主活动为
MainActivity - 配置其他三个活动:
ShowInfo,InsertFlag,ManageFlag
<?xml version="1.0" encoding="utf-8"?> <manifest xmlns:android="http://schemas.android.com/apk/res/android"package="com.wenlong.DBLab.activity"android:versionCode="1"android:versionName="1.0"><uses-sdkandroid:minSdkVersion="8"android:targetSdkVersion="18" /><applicationandroid:allowBackup="true"android:icon="@drawable/ic_launcher"android:label="@string/app_name"android:theme="@style/AppTheme"><activityandroid:name="com.example.notemanagementsystem.MainActivity"android:label="@string/app_name"><intent-filter><action android:name="android.intent.action.MAIN" /><category android:name="android.intent.category.LAUNCHER" /></intent-filter></activity><activityandroid:name="com.example.notemanagementsystem.ShowInfo"android:icon="@drawable/ic_launcher"android:label="便签信息"></activity><activityandroid:name="com.example.notemanagementsystem.InsertFlag"android:icon="@drawable/ic_launcher"android:label="添加便签"></activity><activityandroid:name="com.example.notemanagementsystem.ManageFlag"android:icon="@drawable/ic_launcher"android:label="便签管理"></activity></application> </manifest> - 配置主活动为
步骤 6: 运行与测试
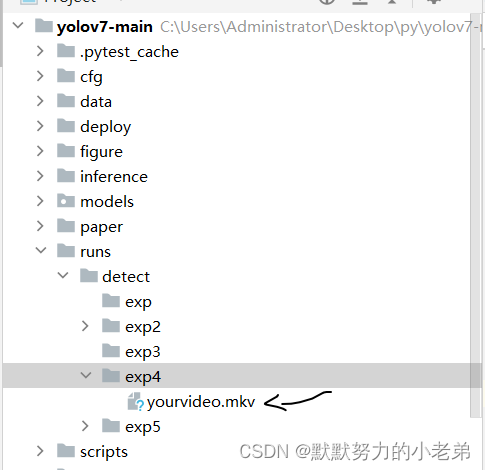
1.文档结构
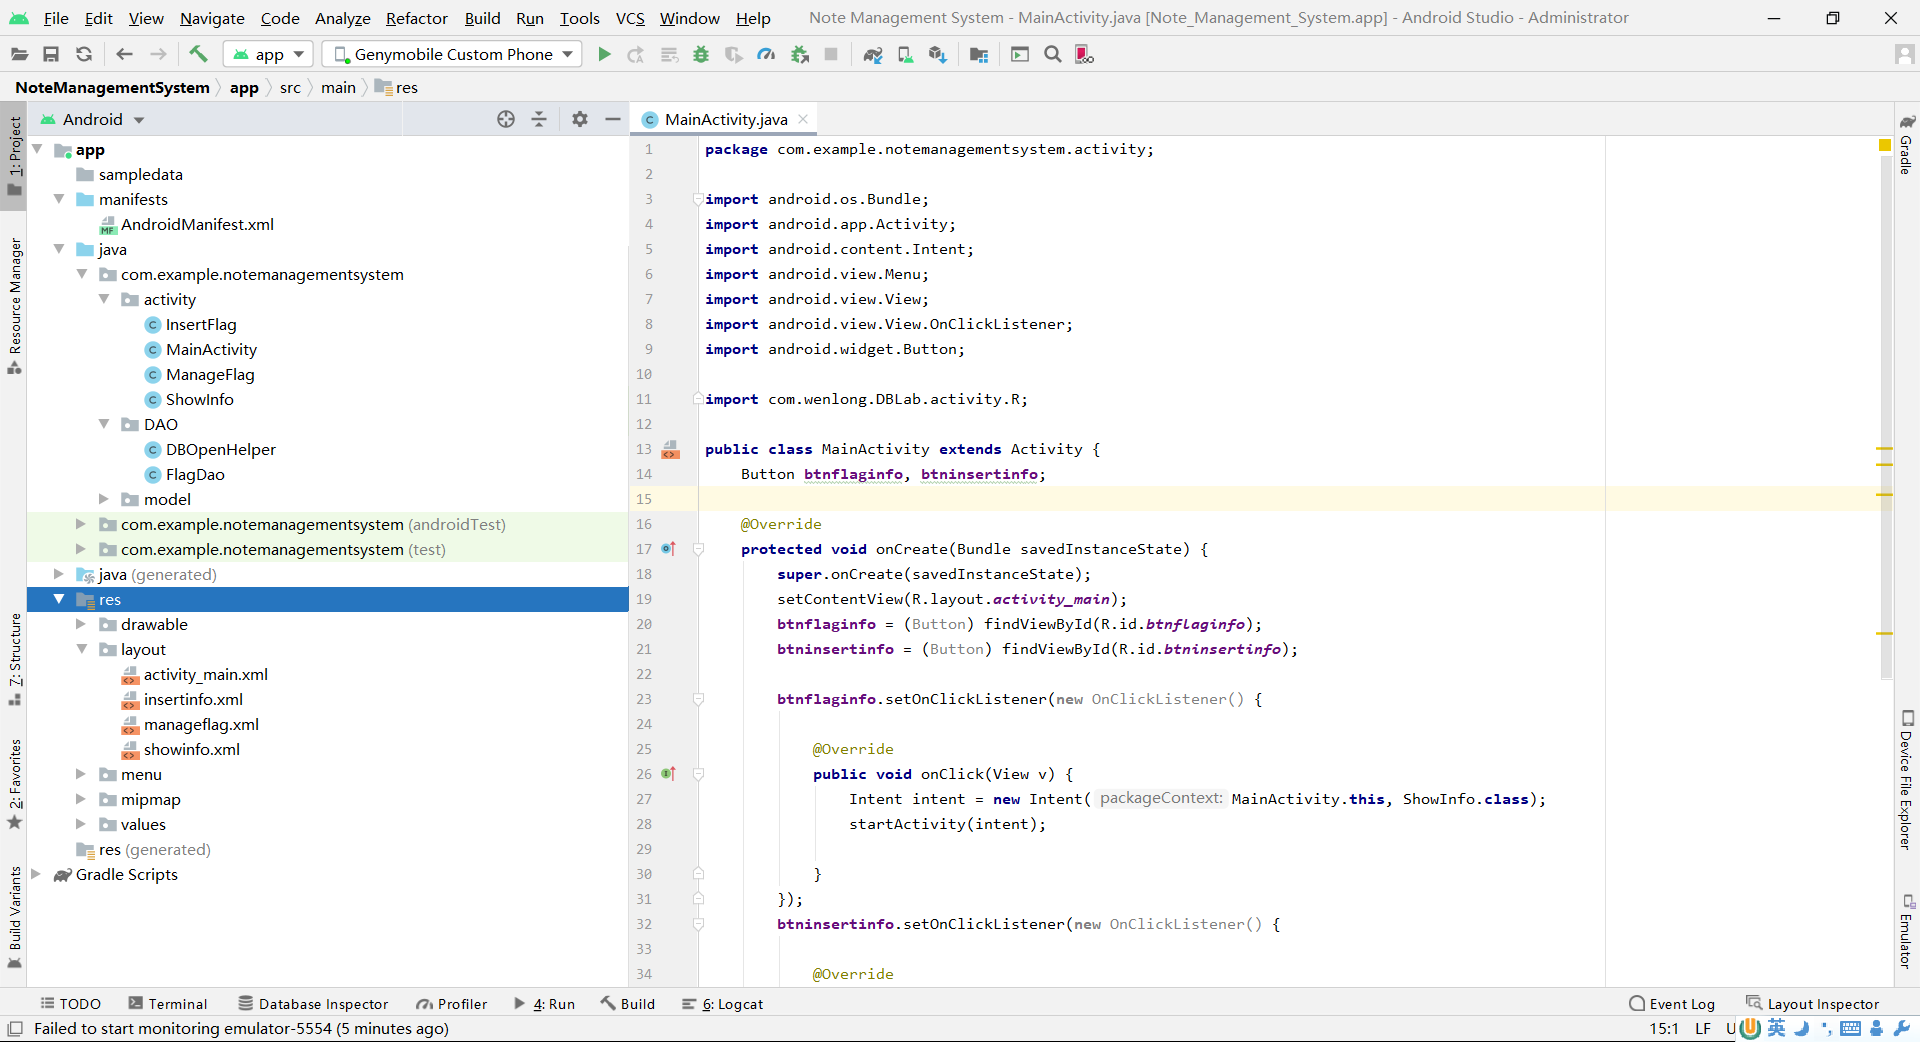
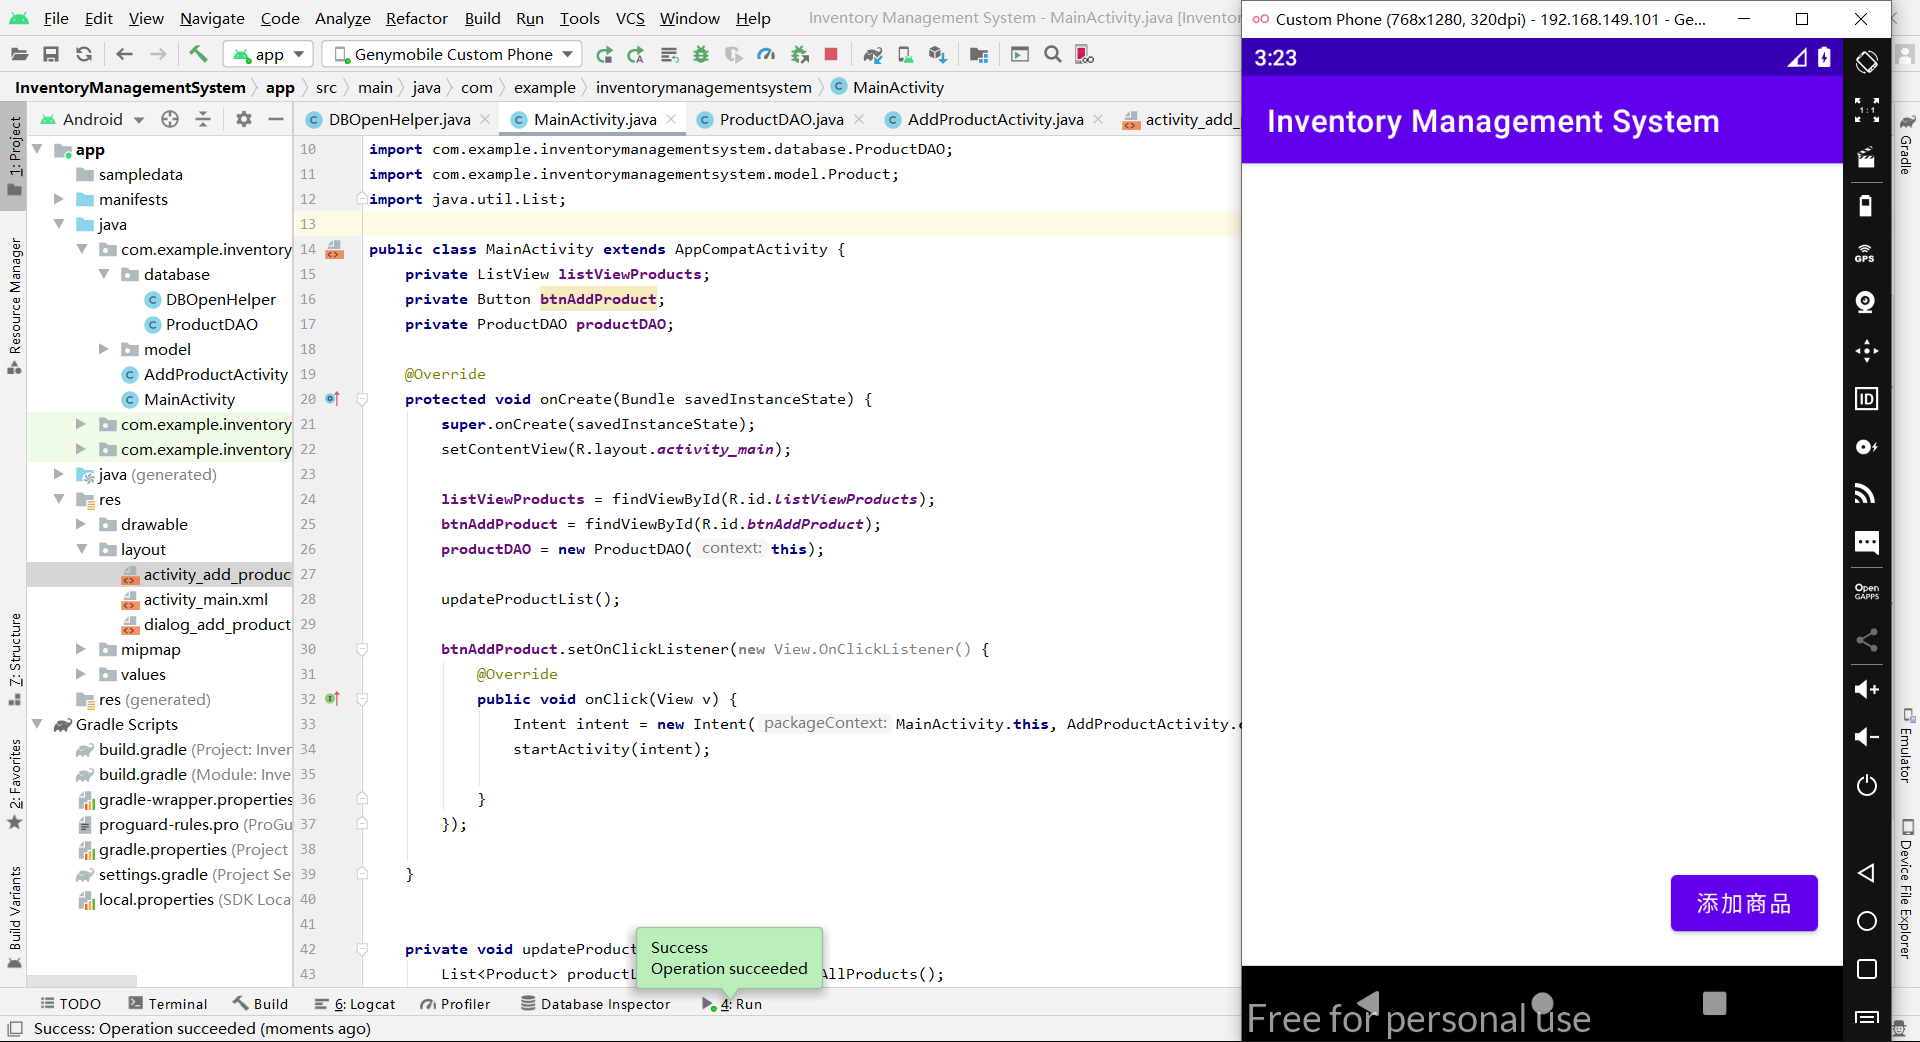
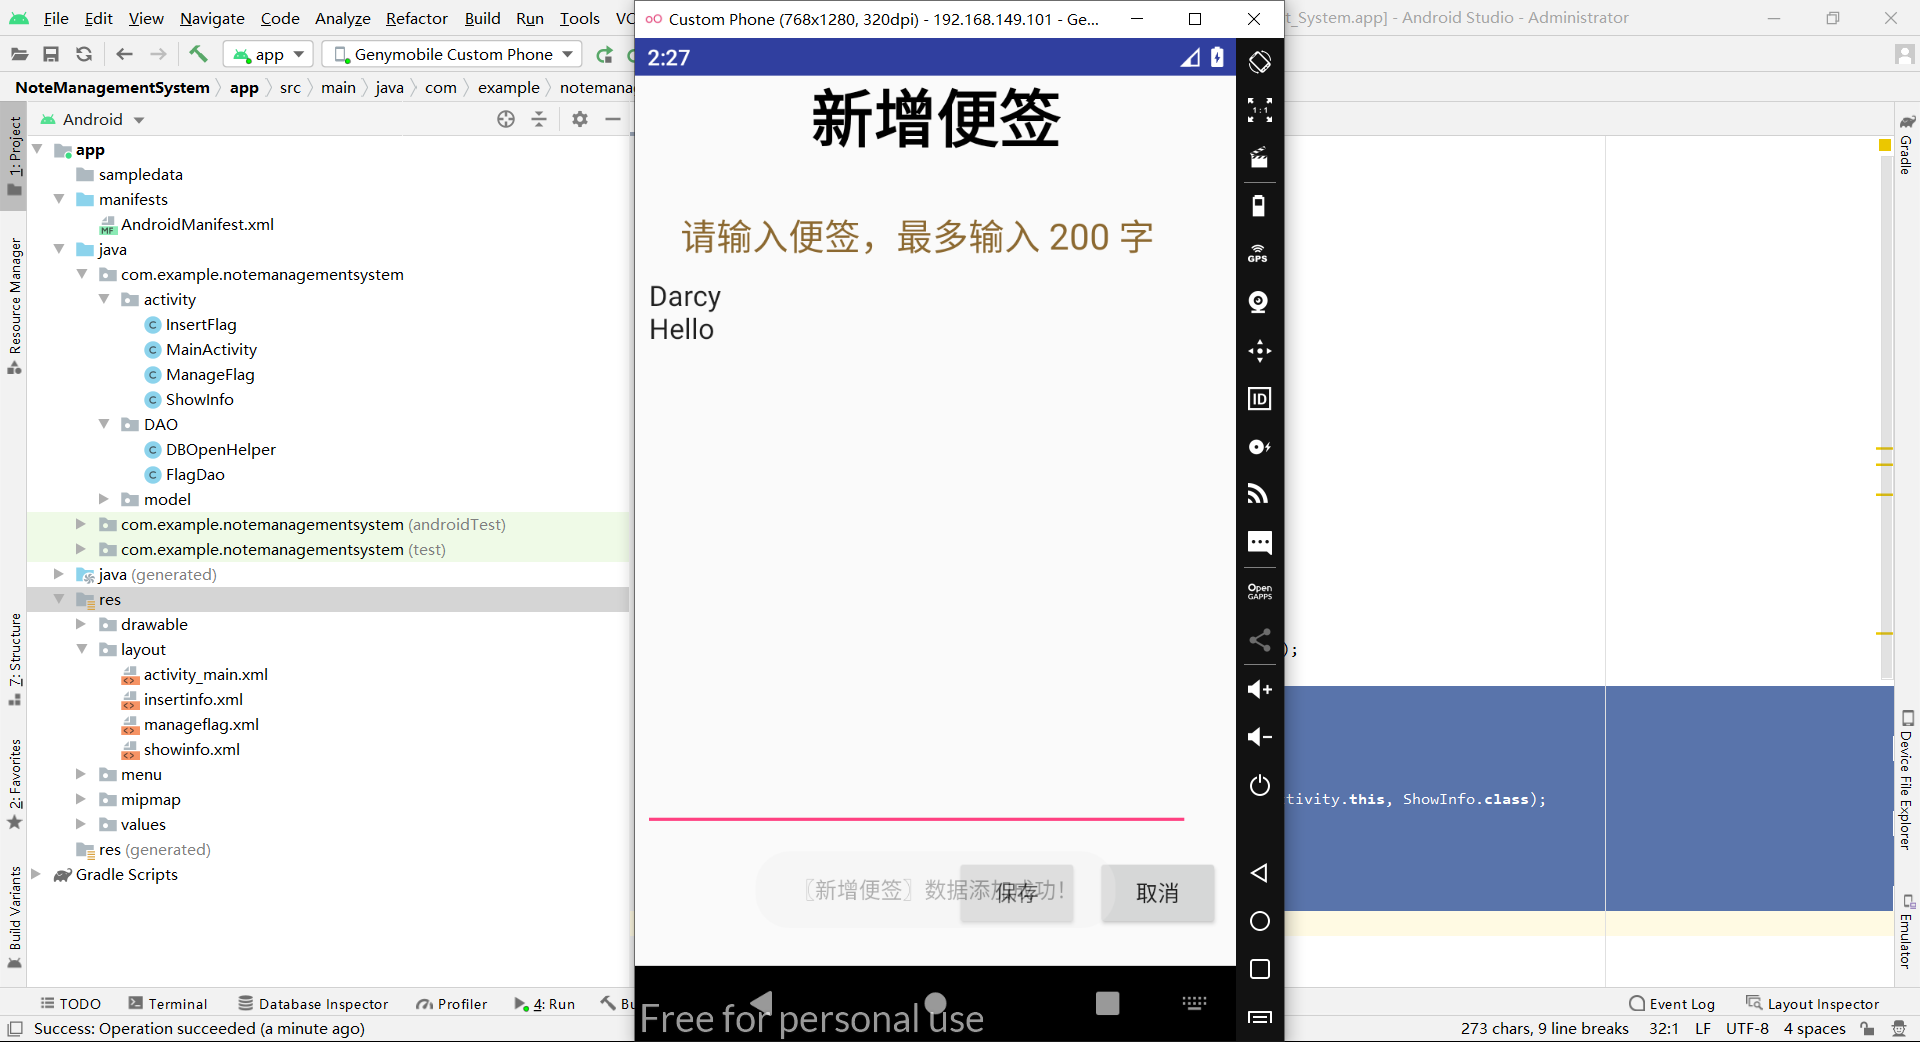
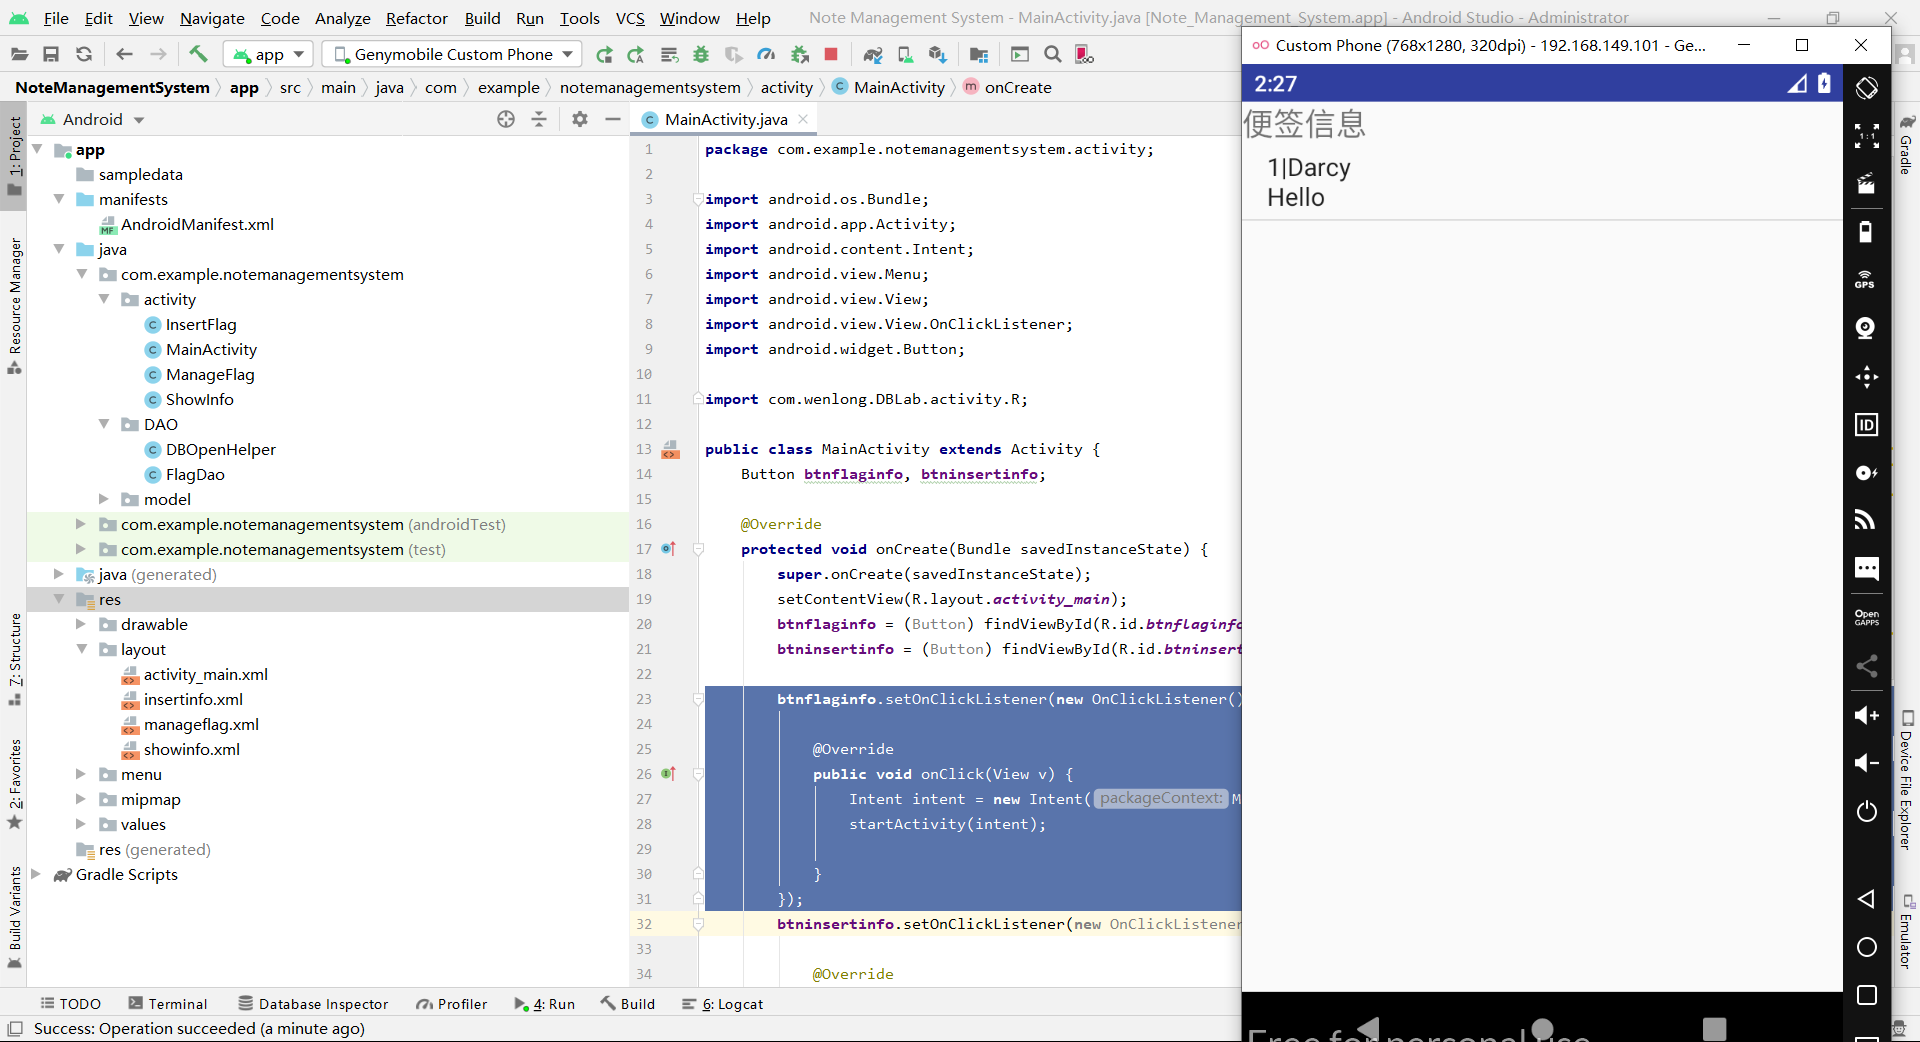
2.运行效果
【拓展题】编写 Android 项目,实现商品库存数据库管理小系统。
步骤一:创建新的 Android 项目
- 打开 Android Studio。
- 选择 “File” -> “New” -> “New Project…”。
- 在弹出的对话框中,输入项目名称为 “InventoryManagementSystem”,选择语言为 Java,选择 “Phone and Tablet” -> “Empty Activity”,然后点击 “Finish”。
步骤二:创建数据库帮助类(DBOpenHelper)
在项目中创建一个用于管理数据库的帮助类。
DBOpenHelper.java
package com.example.inventorymanagementsystem.database;import android.content.Context;
import android.database.sqlite.SQLiteDatabase;
import android.database.sqlite.SQLiteOpenHelper;public class DBOpenHelper extends SQLiteOpenHelper {private static final String DB_NAME = "inventory.db";private static final int DB_VERSION = 1;public DBOpenHelper(Context context) {super(context, DB_NAME, null, DB_VERSION);}@Overridepublic void onCreate(SQLiteDatabase db) {// 创建商品表db.execSQL("CREATE TABLE IF NOT EXISTS products (" +"_id INTEGER PRIMARY KEY AUTOINCREMENT," +"name TEXT," +"quantity INTEGER," +"price REAL)");}@Overridepublic void onUpgrade(SQLiteDatabase db, int oldVersion, int newVersion) {// 数据库升级操作}
}
步骤三:创建商品实体类(Product)
创建一个用于表示商品的实体类。
Product.java
package com.example.inventorymanagementsystem.model;public class Product {private int id;private String name;private int quantity;private double price;public Product() {}public Product(String name, int quantity, double price) {this.name = name;this.quantity = quantity;this.price = price;}// Getter and setter methods
}
步骤四:创建商品数据操作类(ProductDAO)
创建一个用于执行商品数据操作的类。
ProductDAO.java
package com.example.inventorymanagementsystem.database;import android.content.ContentValues;
import android.content.Context;
import android.database.Cursor;
import android.database.sqlite.SQLiteDatabase;
import com.example.inventorymanagementsystem.model.Product;
import java.util.ArrayList;
import java.util.List;public class ProductDAO {private SQLiteDatabase db;public ProductDAO(Context context) {DBOpenHelper dbHelper = new DBOpenHelper(context);db = dbHelper.getWritableDatabase();}public long addProduct(Product product) {ContentValues values = new ContentValues();values.put("name", product.getName());values.put("quantity", product.getQuantity());values.put("price", product.getPrice());return db.insert("products", null, values);}public List<Product> getAllProducts() {List<Product> productList = new ArrayList<>();Cursor cursor = db.query("products", null, null, null, null, null, null);while (cursor.moveToNext()) {Product product = new Product();product.setId(cursor.getInt(cursor.getColumnIndex("_id")));product.setName(cursor.getString(cursor.getColumnIndex("name")));product.setQuantity(cursor.getInt(cursor.getColumnIndex("quantity")));product.setPrice(cursor.getDouble(cursor.getColumnIndex("price")));productList.add(product);}cursor.close();return productList;}// 添加其他数据库操作方法,如更新商品信息、删除商品等
}
步骤五:创建商品管理界面(MainActivity)
在 res/layout 文件夹中创建一个用于显示商品列表和添加商品的界面布局文件。
activity_main.xml
<?xml version="1.0" encoding="utf-8"?>
<RelativeLayout xmlns:android="http://schemas.android.com/apk/res/android"xmlns:tools="http://schemas.android.com/tools"android:layout_width="match_parent"android:layout_height="match_parent"tools:context=".MainActivity"><ListViewandroid:id="@+id/listViewProducts"android:layout_width="match_parent"android:layout_height="match_parent"android:divider="@android:color/darker_gray"android:dividerHeight="1dp" /><Buttonandroid:id="@+id/btnAddProduct"android:layout_width="wrap_content"android:layout_height="wrap_content"android:text="Add Product"android:layout_alignParentBottom="true"android:layout_alignParentEnd="true"android:layout_margin="16dp"/>
</RelativeLayout>
activity_add_product.xml
<LinearLayout xmlns:android="http://schemas.android.com/apk/res/android"android:layout_width="match_parent"android:layout_height="match_parent"android:orientation="vertical"android:padding="16dp"><EditTextandroid:id="@+id/edtProductName"android:layout_width="match_parent"android:layout_height="wrap_content"android:hint="商品名称" /><EditTextandroid:id="@+id/edtProductQuantity"android:layout_width="match_parent"android:layout_height="wrap_content"android:inputType="number"android:hint="数量" /><EditTextandroid:id="@+id/edtProductPrice"android:layout_width="match_parent"android:layout_height="wrap_content"android:inputType="numberDecimal"android:hint="价格" /><Buttonandroid:id="@+id/btnAddProduct"android:layout_width="wrap_content"android:layout_height="wrap_content"android:text="添加商品" />
</LinearLayout>
MainActivity.java
package com.example.inventorymanagementsystem;import android.content.Intent;
import android.os.Bundle;
import android.view.View;
import android.widget.ArrayAdapter;
import android.widget.Button;
import android.widget.ListView;
import androidx.appcompat.app.AppCompatActivity;
import com.example.inventorymanagementsystem.database.ProductDAO;
import com.example.inventorymanagementsystem.model.Product;
import java.util.List;public class MainActivity extends AppCompatActivity {private ListView listViewProducts;private Button btnAddProduct;private ProductDAO productDAO;@Overrideprotected void onCreate(Bundle savedInstanceState) {super.onCreate(savedInstanceState);setContentView(R.layout.activity_main);listViewProducts = findViewById(R.id.listViewProducts);btnAddProduct = findViewById(R.id.btnAddProduct);productDAO = new ProductDAO(this);updateProductList();btnAddProduct.setOnClickListener(new View.OnClickListener() {@Overridepublic void onClick(View v) {Intent intent = new Intent(MainActivity.this, AddProductActivity.class);startActivity(intent);}});}private void updateProductList() {List<Product> productList = productDAO.getAllProducts();ArrayAdapter<Product> adapter = new ArrayAdapter<>(this, android.R.layout.simple_list_item_1, productList);listViewProducts.setAdapter(adapter);}
}
AddProductActivity.java
package com.example.inventorymanagementsystem;import android.os.Bundle;
import android.view.View;
import android.widget.Button;
import android.widget.EditText;
import android.widget.Toast;import androidx.appcompat.app.AppCompatActivity;
import com.example.inventorymanagementsystem.database.ProductDAO;
import com.example.inventorymanagementsystem.model.Product;public class AddProductActivity extends AppCompatActivity {private EditText edtProductName, edtProductQuantity, edtProductPrice;private Button btnAddProduct;private ProductDAO productDAO;@Overrideprotected void onCreate(Bundle savedInstanceState) {super.onCreate(savedInstanceState);setContentView(R.layout.activity_add_product);edtProductName = findViewById(R.id.edtProductName);edtProductQuantity = findViewById(R.id.edtProductQuantity);edtProductPrice = findViewById(R.id.edtProductPrice);btnAddProduct = findViewById(R.id.btnAddProduct);productDAO = new ProductDAO(this);btnAddProduct.setOnClickListener(new View.OnClickListener() {@Overridepublic void onClick(View v) {addProduct();}});}private void addProduct() {// 获取用户输入的商品信息String productName = edtProductName.getText().toString();String quantityStr = edtProductQuantity.getText().toString();String priceStr = edtProductPrice.getText().toString();if (!productName.isEmpty() && !quantityStr.isEmpty() && !priceStr.isEmpty()) {int quantity = Integer.parseInt(quantityStr);double price = Double.parseDouble(priceStr);// 创建商品对象Product newProduct = new Product(productName, quantity, price);// 将商品添加到数据库long result = productDAO.addProduct(newProduct);if (result != -1) {Toast.makeText(AddProductActivity.this, "商品添加成功", Toast.LENGTH_SHORT).show();finish(); // 关闭当前界面} else {Toast.makeText(AddProductActivity.this, "商品添加失败", Toast.LENGTH_SHORT).show();}} else {Toast.makeText(AddProductActivity.this, "请填写完整的商品信息", Toast.LENGTH_SHORT).show();}}
}
步骤六:运行效果