文章目录
- 一、概述
- 1.1 简介
- 1.2 起步依赖
- 1.3 入门案例
- 1.4 快速启动
- 二、基础配置
- 2.1 三种配置文件方式
- 2.2 yaml文件格式
- 2.3 yaml读取数据方式(3种)
- 三、多环境开发
- 3.1 yml文件-多环境开发
- 3.2 properties文件-多环境开发
- 3.3 多环境命令行启动参数设置
- 3.4 多环境开发兼容问题(maven与boot)
- 3.5 配置文件分级
- 四、基于SpringBoot整合SSM
- 4.1 整合Junit
- 4.2 整合Mybatis
- 4.3 案例
一、概述
1.1 简介
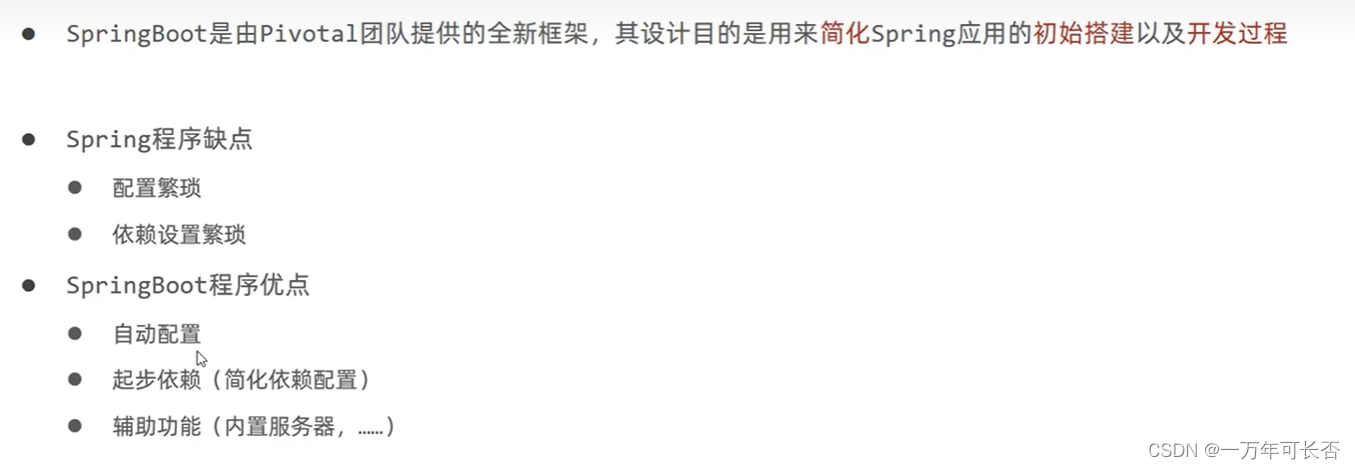
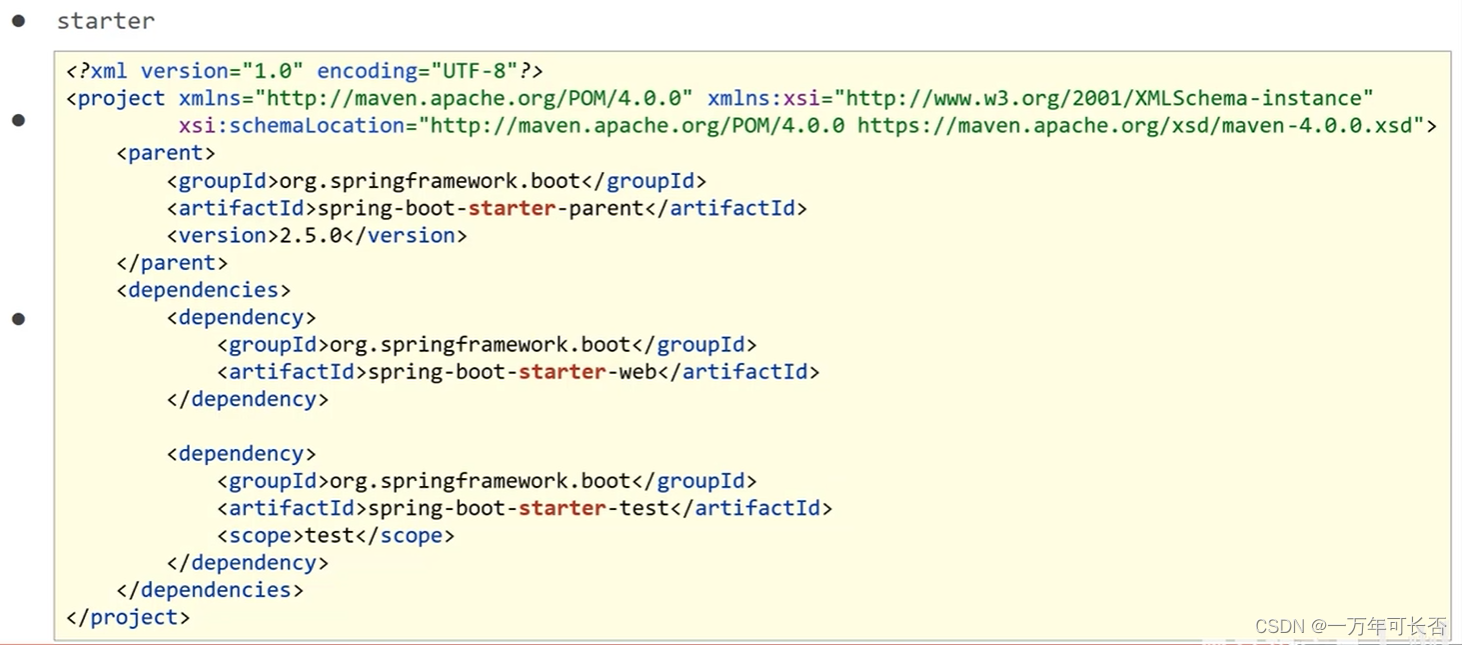
1.2 起步依赖


1.3 入门案例
【springboot】Spring 官方抛弃了 Java 8!新idea如何创建java8项目
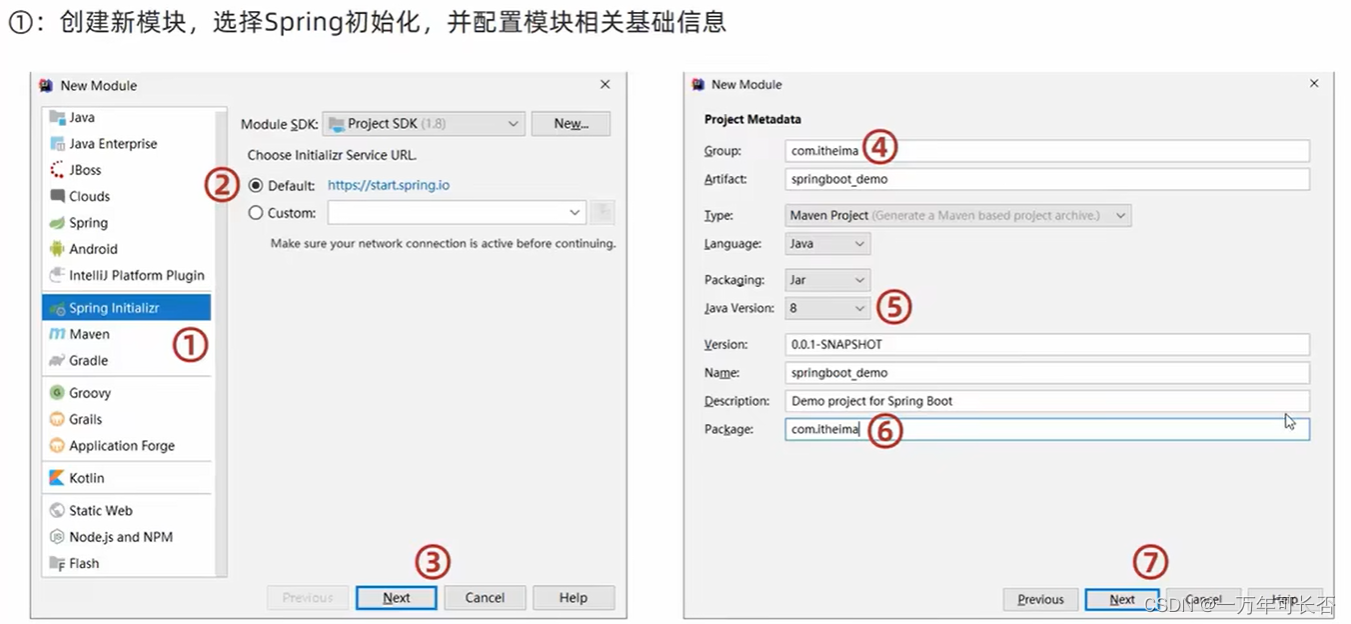
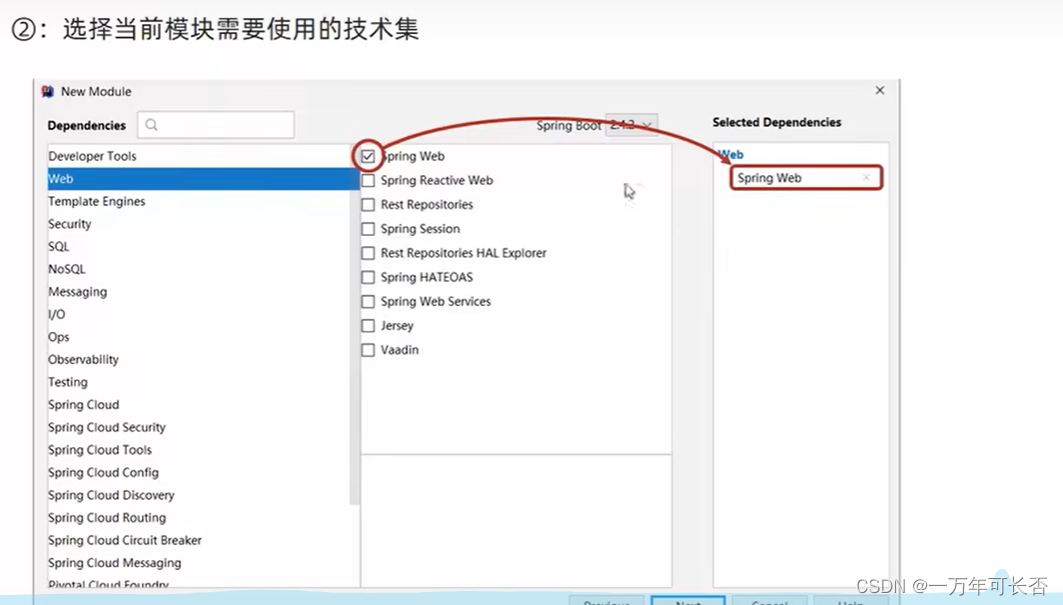
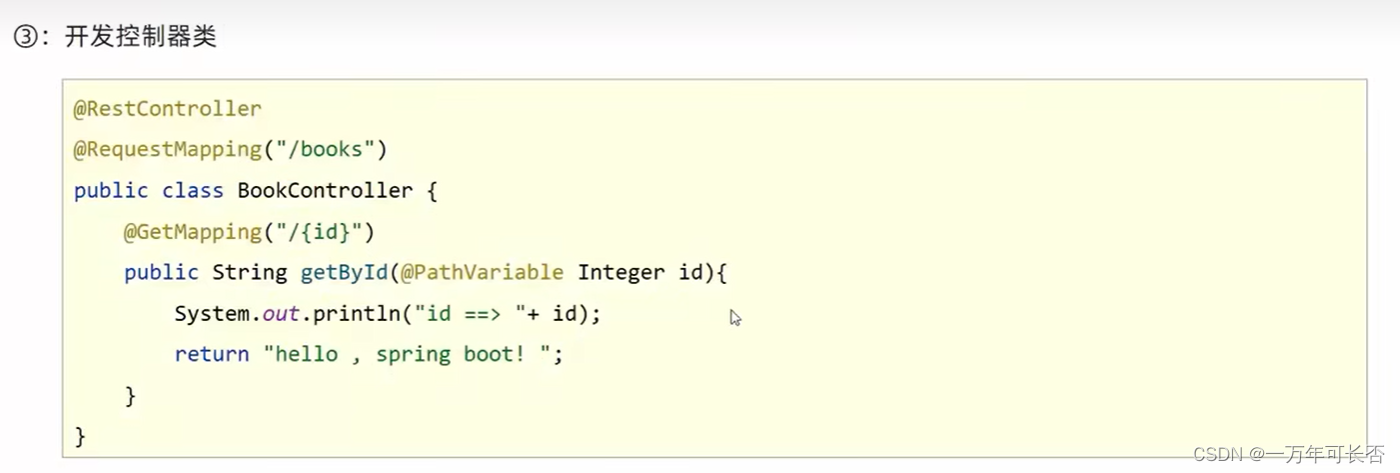
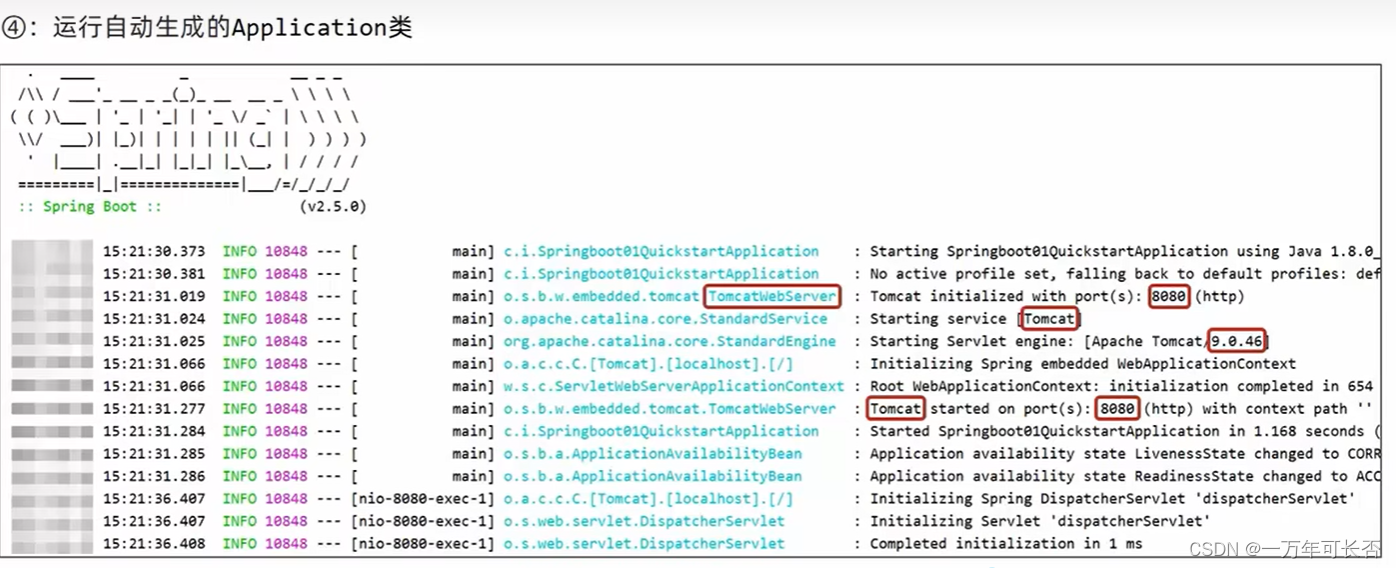
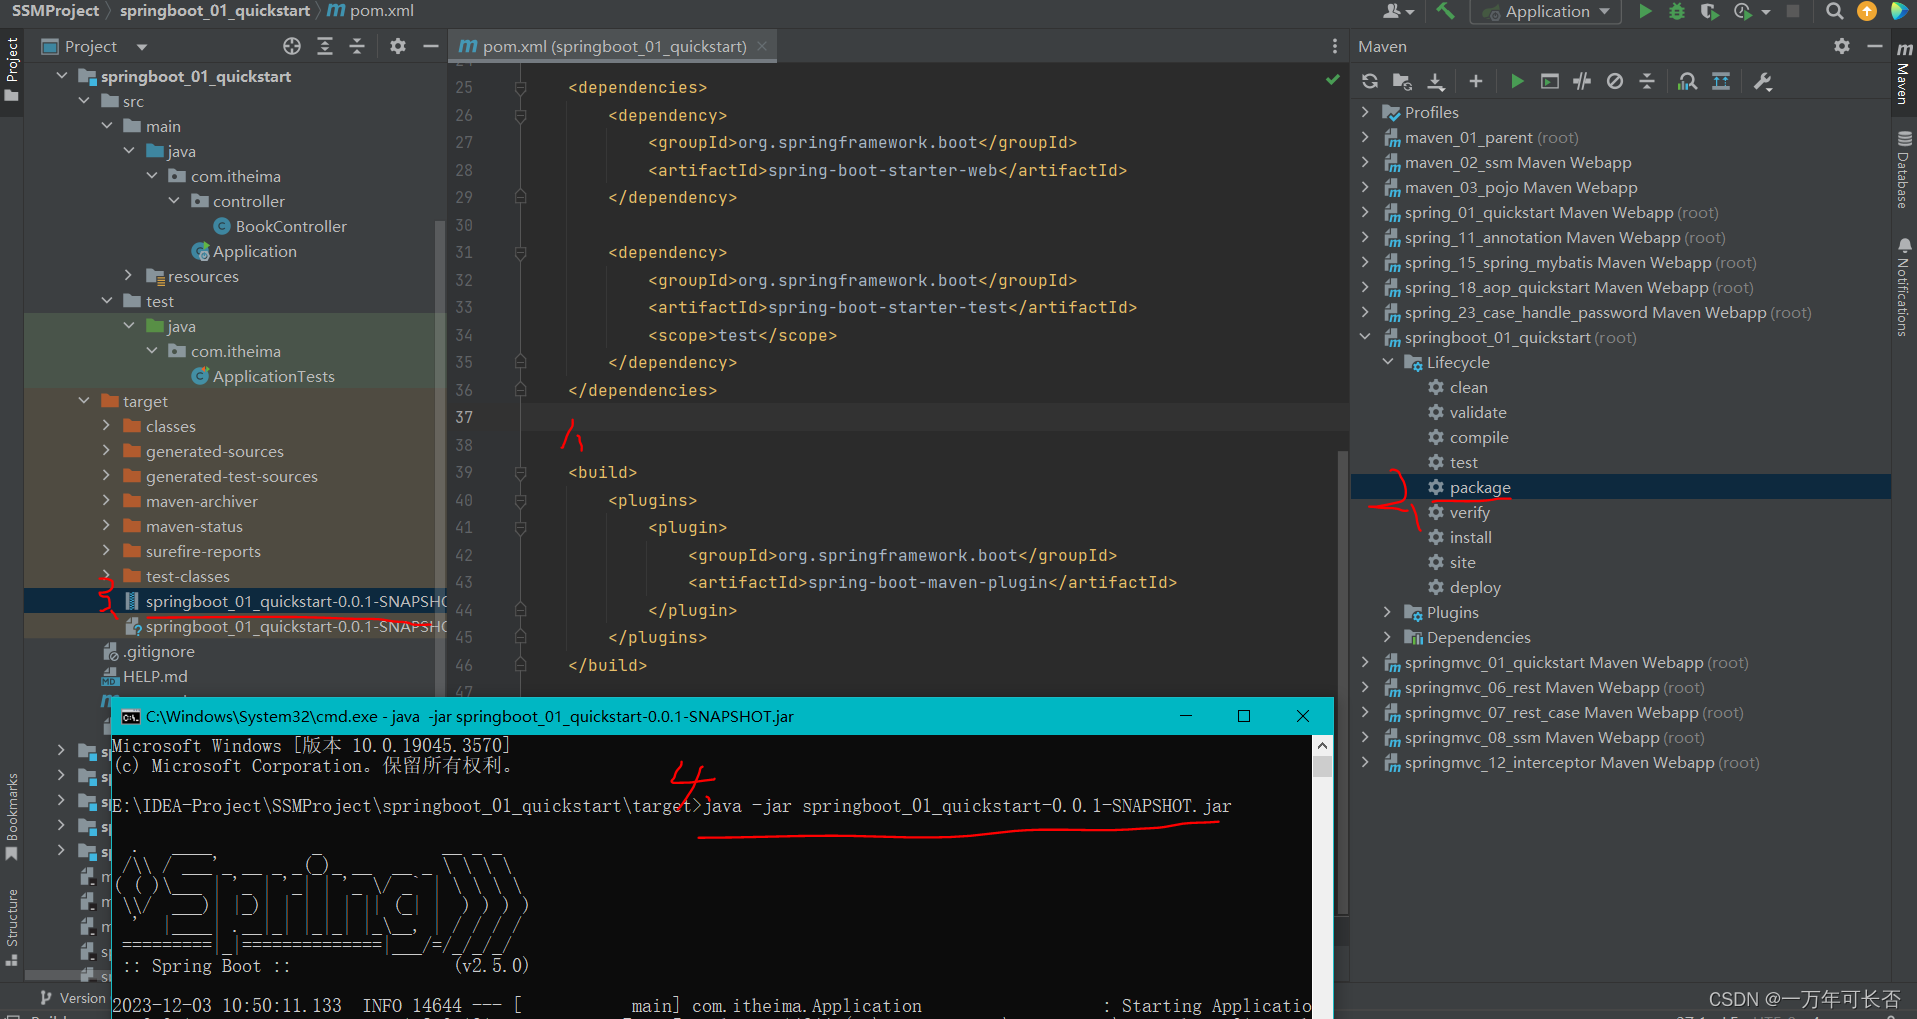
1.4 快速启动
后端人员可以将项目打jar包,交给前端人员,通过dos指令操作运行后端程序和服务器,方便前端人员设计界面,而不用安装idea
注意:下图红色部分1必须写,以保证打包时具有springboot的Maven插件
二、基础配置
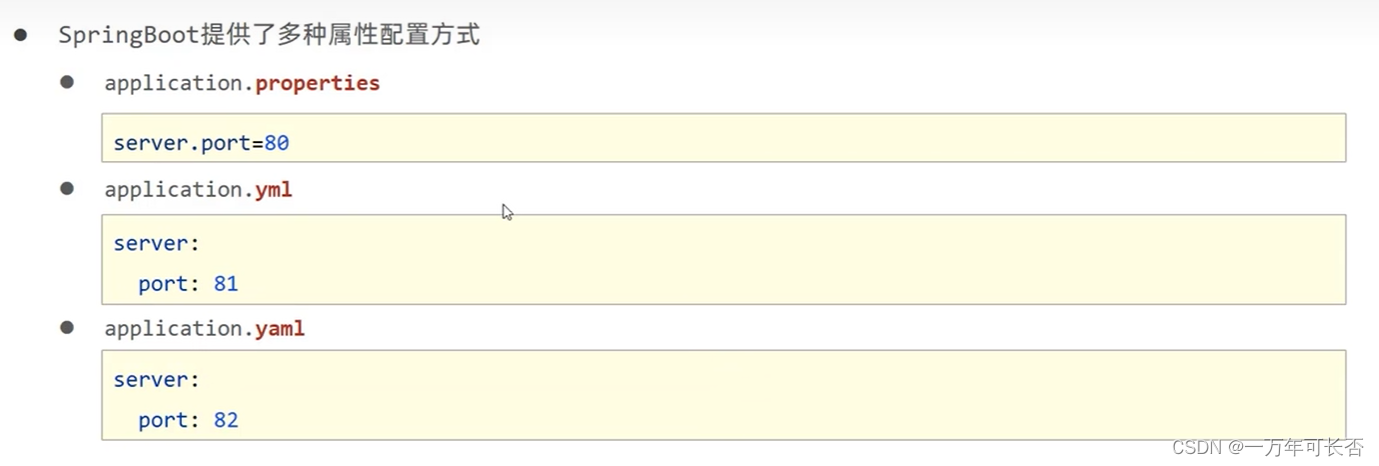
2.1 三种配置文件方式
配置文件建立在src/main/resources目录下。
SpringBoot加载配置文件的顺序:application.propertirs > application.yml > application.yaml
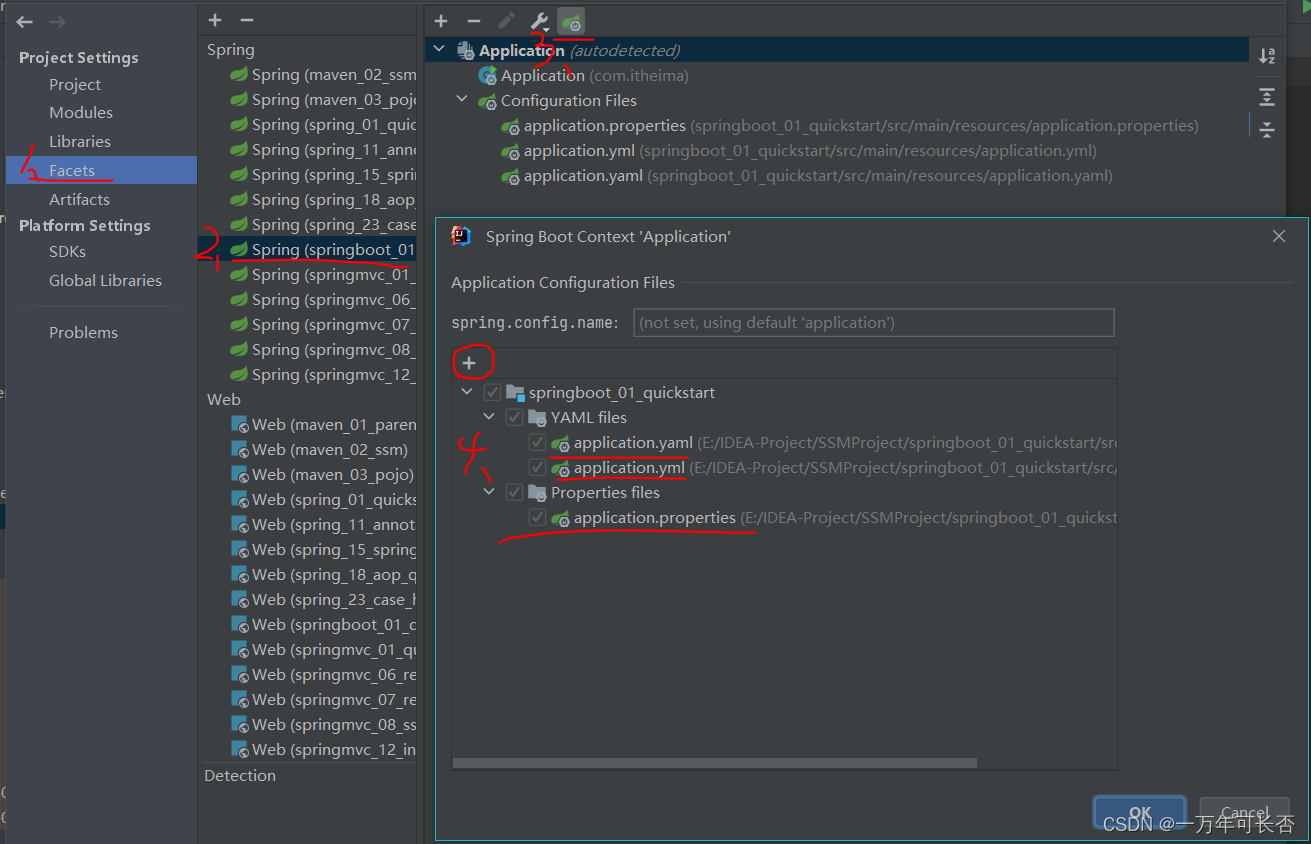
如果自己建的配置文件没有自动提示功能,可通过下述方法解决:
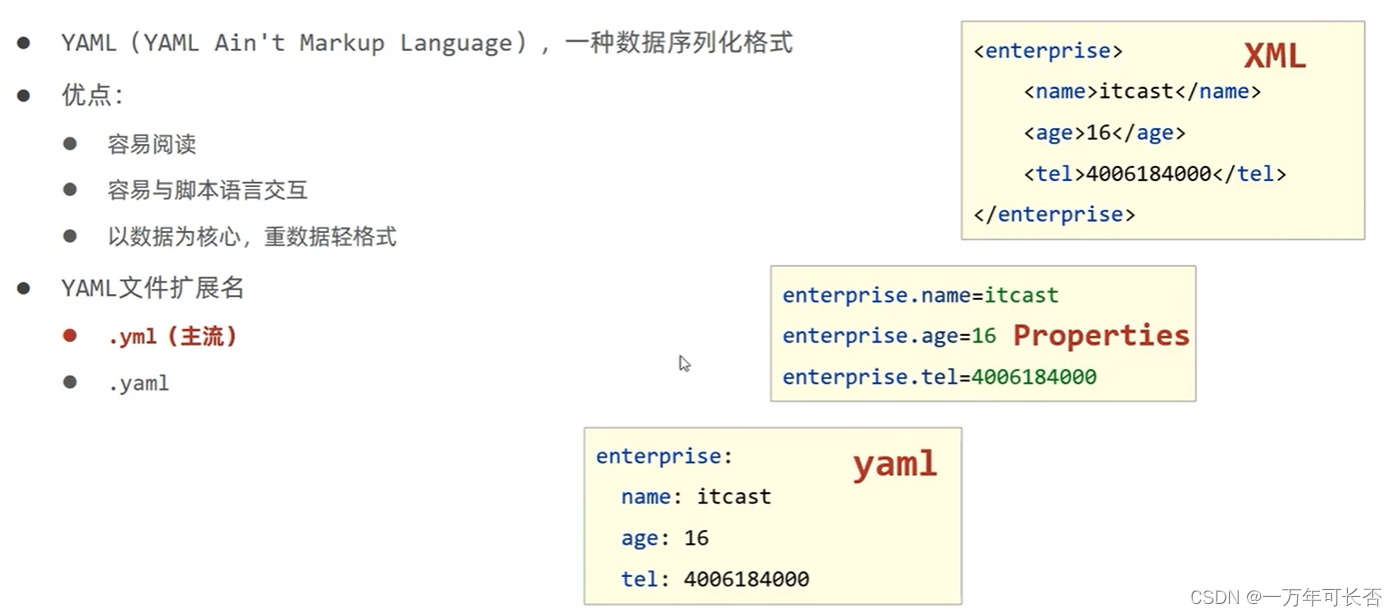
2.2 yaml文件格式

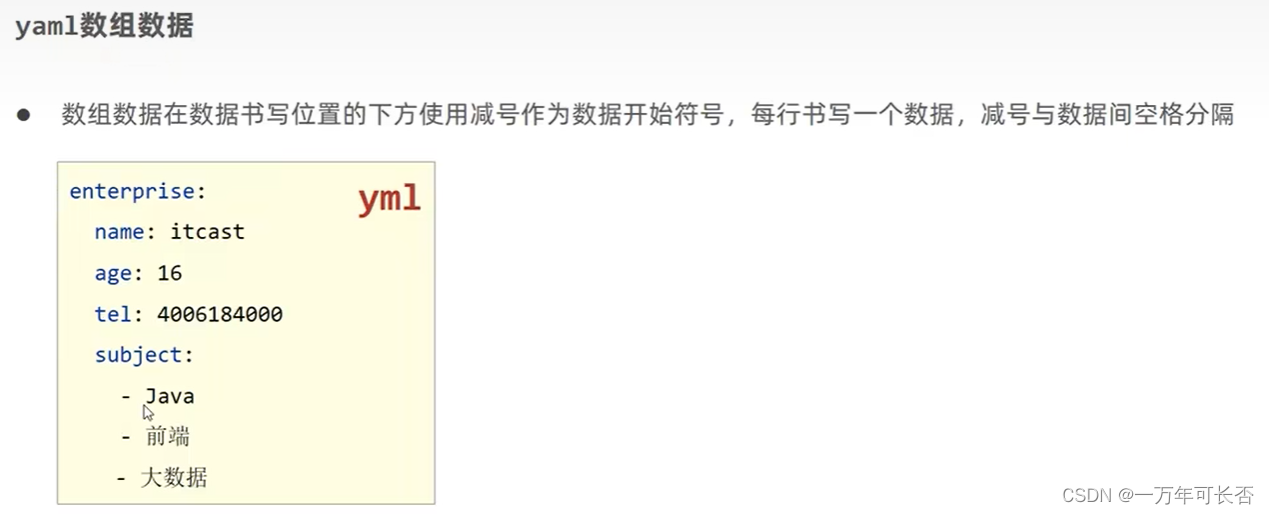
2.3 yaml读取数据方式(3种)
application.yaml
lesson: SpringBootserver:port: 80enterprise:name: itcastage: 16tel: 15922266subject:- Java- 前端- 大数据Enterprise.class
package com.itheima.domain;import org.springframework.boot.context.properties.ConfigurationProperties;
import org.springframework.stereotype.Component;import java.util.Arrays;//封装yaml对象格式数据必须先声明当前实体类受Spring管控
@Component
//使用@ConfigurationProperties注解定义当前实体类读取配置属性信息,通过prefix属性设置读取哪个数据
@ConfigurationProperties(prefix = "enterprise")
public class Enterprise {private String name;private Integer age;private String tel;private String[] subject;@Overridepublic String toString() {return "Enterprise{" +"name='" + name + '\'' +", age=" + age +", tel='" + tel + '\'' +", subject=" + Arrays.toString(subject) +'}';}public String getName() {return name;}public void setName(String name) {this.name = name;}public Integer getAge() {return age;}public void setAge(Integer age) {this.age = age;}public String getTel() {return tel;}public void setTel(String tel) {this.tel = tel;}public String[] getSubject() {return subject;}public void setSubject(String[] subject) {this.subject = subject;}
}
BookController.class
package com.itheima.controller;import com.itheima.domain.Enterprise;
import org.springframework.beans.factory.annotation.Autowired;
import org.springframework.beans.factory.annotation.Value;
import org.springframework.core.env.Environment;
import org.springframework.web.bind.annotation.GetMapping;
import org.springframework.web.bind.annotation.PathVariable;
import org.springframework.web.bind.annotation.RequestMapping;
import org.springframework.web.bind.annotation.RestController;@RestController
@RequestMapping("/books")
public class BookController {@Value("${lesson}")private String lesson;@Value("${server.port}")private String port;@Value("${enterprise.subject[0]}")private String subject_0;@Autowiredprivate Environment environment;@Autowiredprivate Enterprise enterprise;@GetMapping("/{id}")public String getById(@PathVariable Integer id){System.out.println("-----第一种方式:@Value直接读取-------");System.out.println(lesson);System.out.println(port);System.out.println(subject_0);System.out.println("-----第二种方式:Envrionment封装后读取-------");System.out.println(environment.getProperty("enterprise.subject[1]"));System.out.println("-----第三种方式:自定义实体类封装属性-------");System.out.println(enterprise);return "hello , spring boot!";}}
注意:自定义对象封装数据警告解决方案
<!-- 自定义对象封装数据警告解决方案 --><dependency><groupId>org.springframework.boot</groupId><artifactId>spring-boot-configuration-processor</artifactId><optional>true</optional></dependency>
三、多环境开发
3.1 yml文件-多环境开发
#设置启用的环境
spring:profiles:active: test---
#开发
spring:config:activate:on-profile: dev
server:port: 80
---
#生产
spring:profiles: pro
server:port: 81
---
#测试
spring:profiles: test
server:port: 82
---
3.2 properties文件-多环境开发
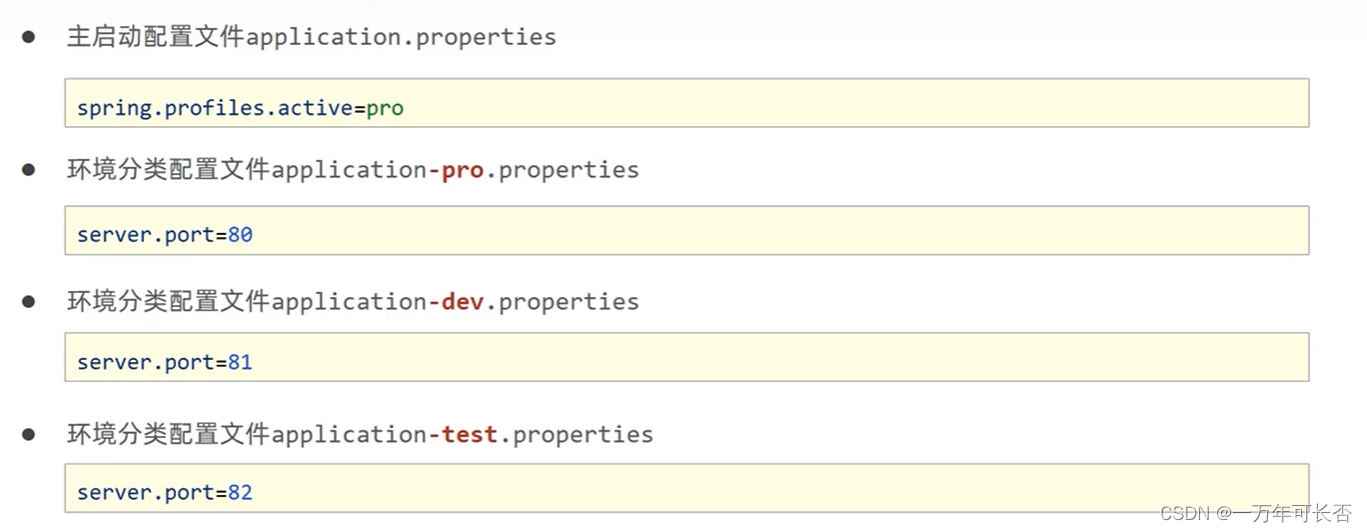
3.3 多环境命令行启动参数设置
- 编写yml文件
- 因为带有中文,所以要设置字符集编码
- 打包前clean一下
- 关闭测试(可选)
- 打包package
- 去jar包的目录下启动cmd,通过命令行配置启动环境:java -jar 包名 --spring.profile.active=环境名
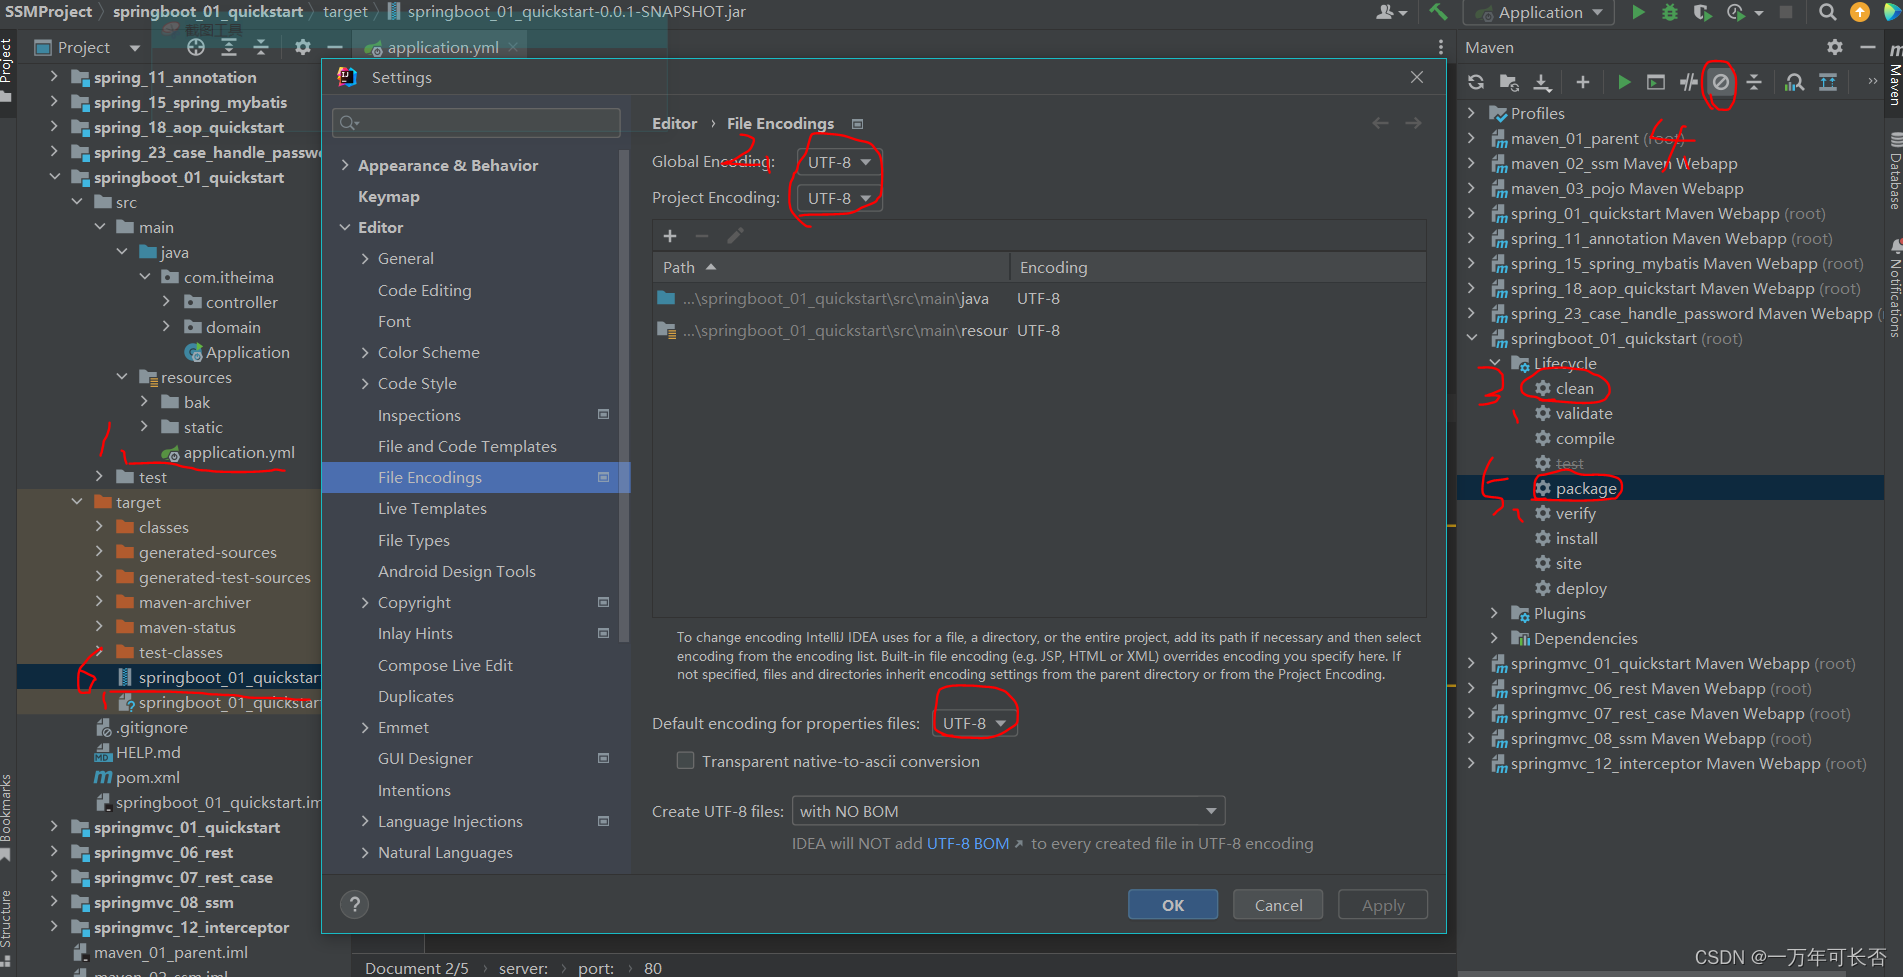
也可以通过命令行改变端口号

3.4 多环境开发兼容问题(maven与boot)


3.5 配置文件分级
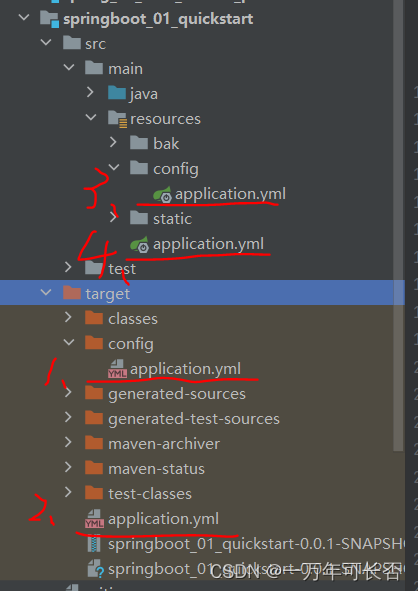
高级别配置文件会覆盖低级别配置文件,解释:
- 当我们在开发时在第4级别配置文件编写;
- 当项目提交时,配置第3级别文件;
- 然后将项目打包;
- 如果需要临时修改配置文件,无需重新打包,直接在jar下配置第1或2级别配置文件,可完成灵活配置
这里的,file一般指的是打包后的目录,即;项目名/target;classpath一般指的是类目录,即:项目名src/main/resources/

四、基于SpringBoot整合SSM
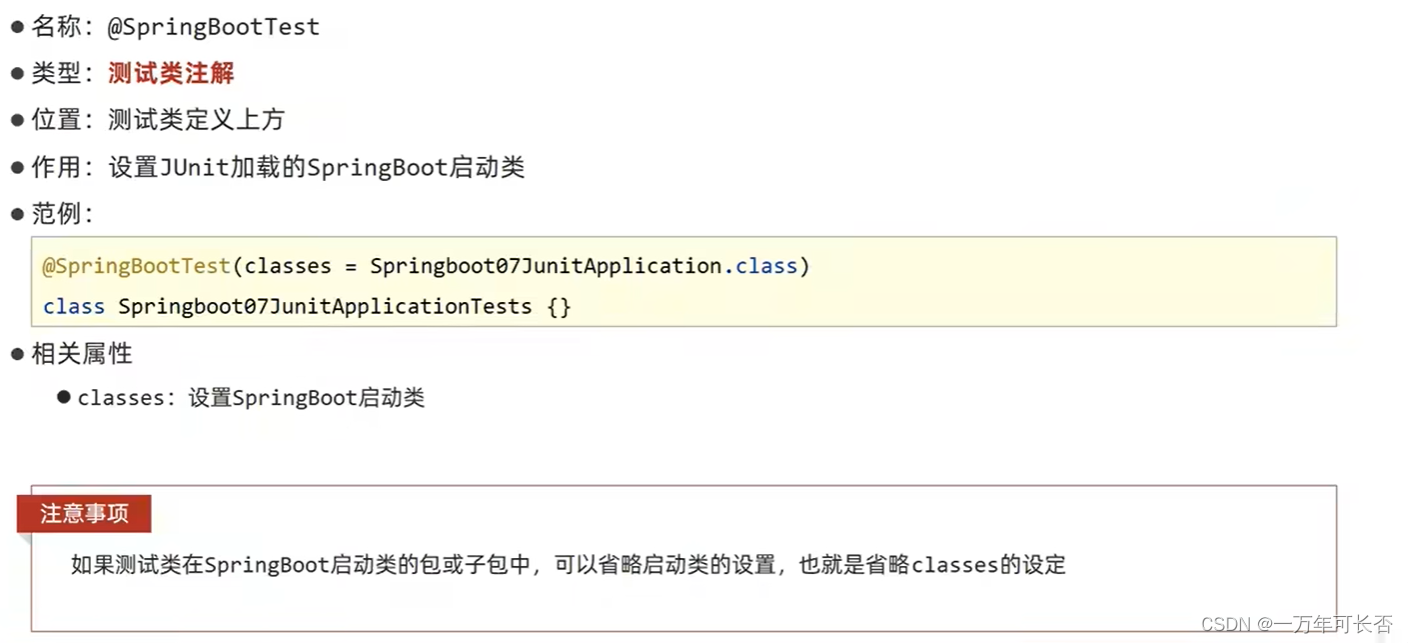
4.1 整合Junit

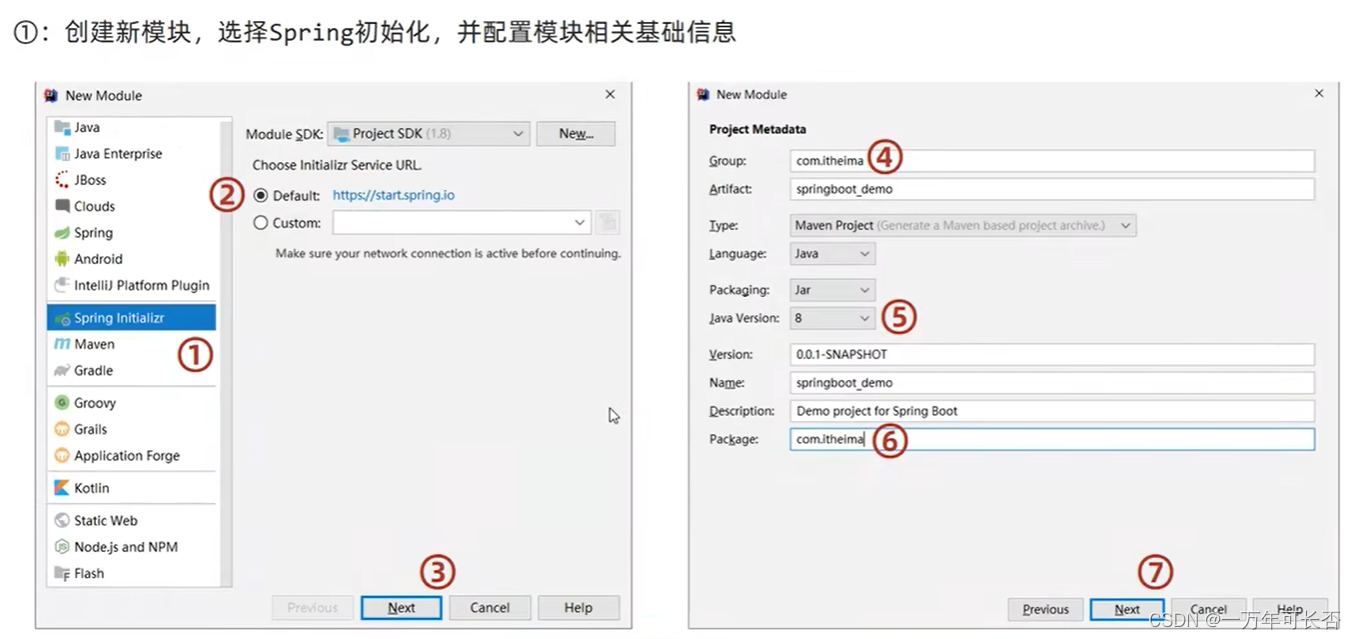
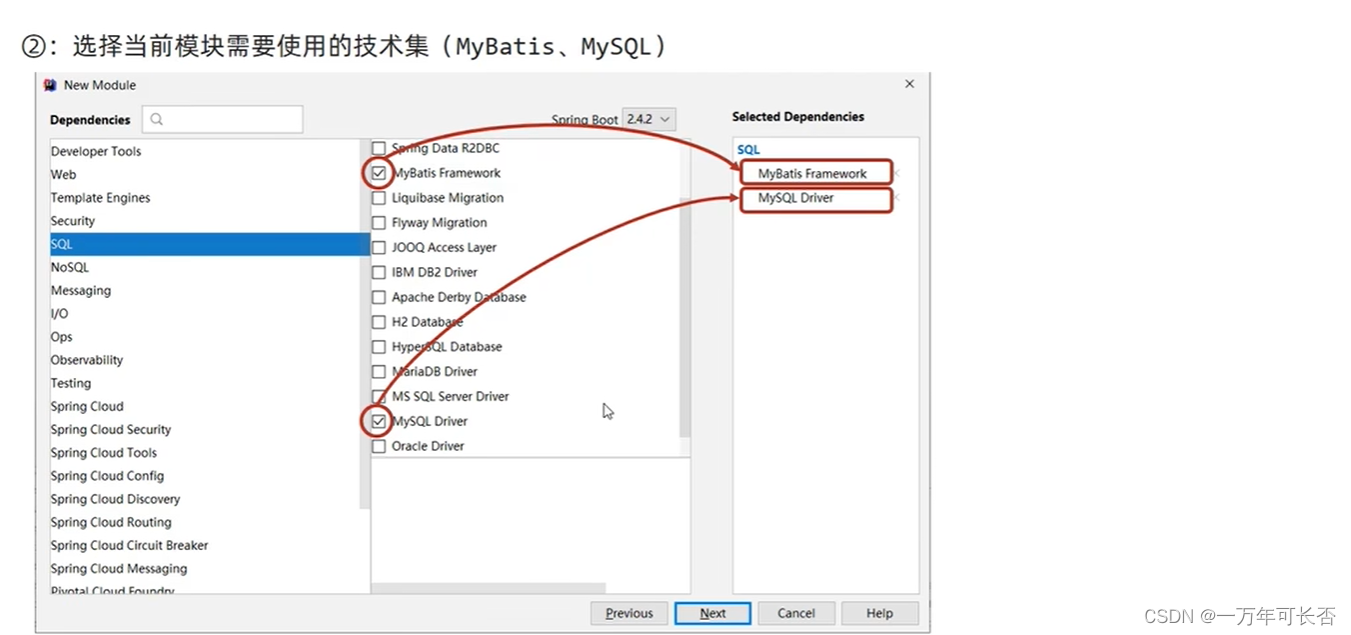
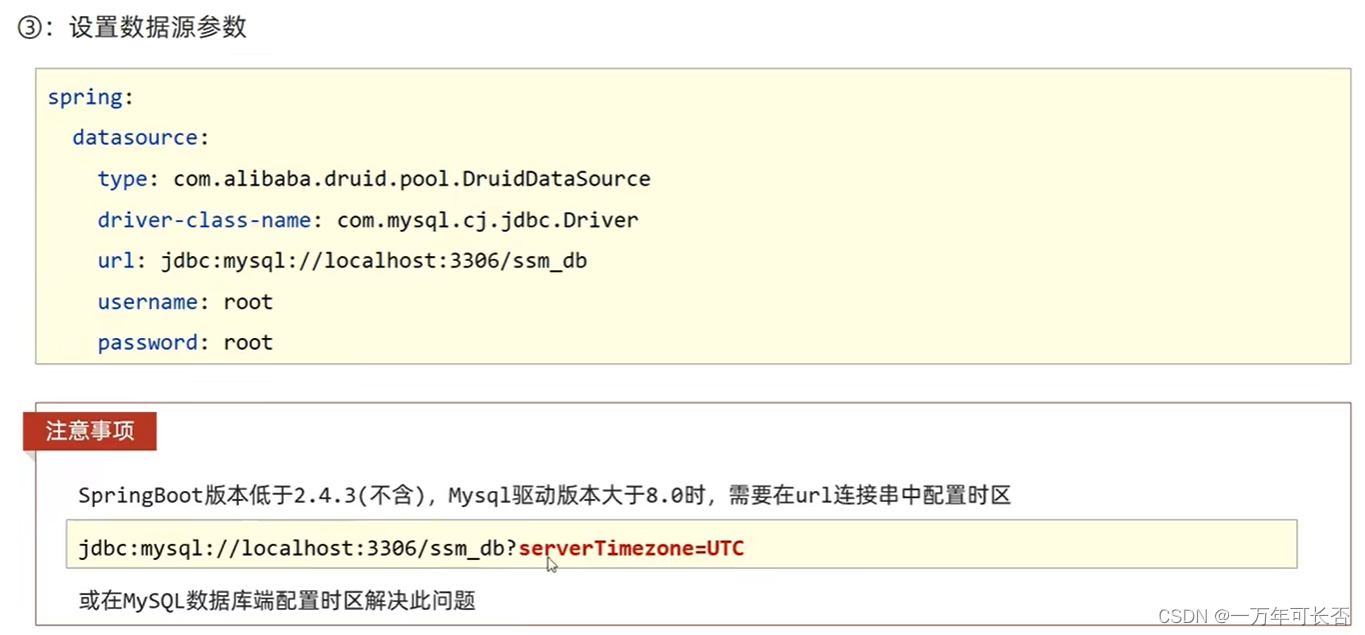
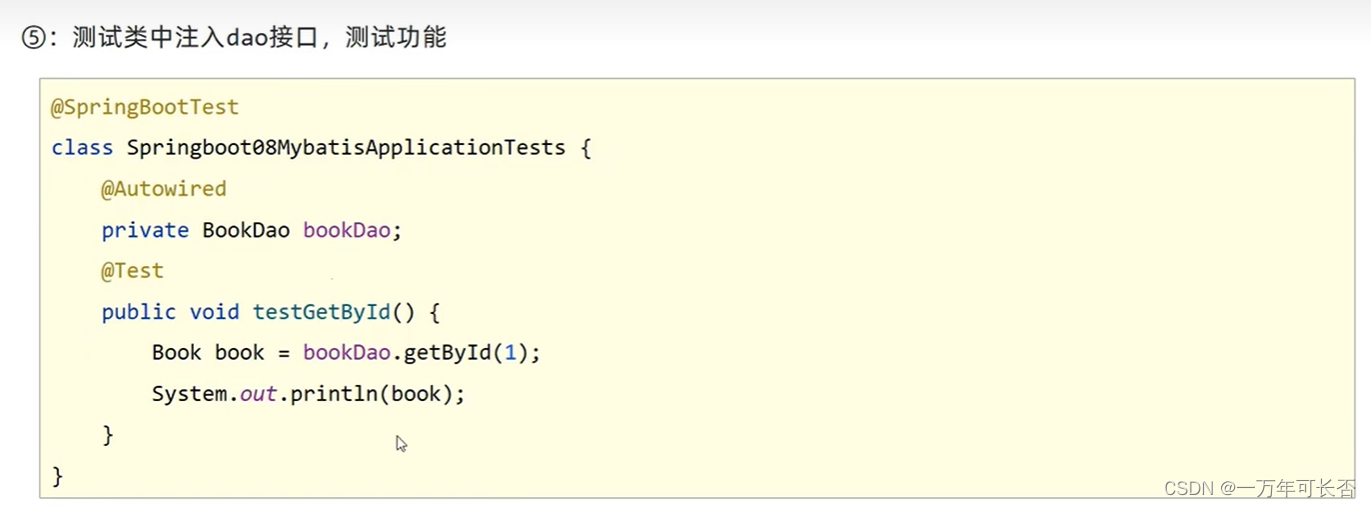
4.2 整合Mybatis

4.3 案例


