1. 二维码
1.1 什么是二维码:
二维码又称QR Code,QR全称Quick Response,是一个近几年来移动设备上超流行的一种编码方式,它比传统的Bar Code条形码能存更多的信息,也能表示更多的数据类型。
二维条码/二维码(2-dimensional bar code)是用某种特定的几何图形按一定规律在平面(二维方向上)分布的黑白相间的图形记录数据符号信息的;在代码编制上巧妙地利用构成计算机内部逻辑基础的“0”、“1”比特流的概念,使用若干个与二进制相对应的几何形体来表示文字数值信息,通过图象输入设备或光电扫描设备自动识读以实现信息自动处理:它具有条码技术的一些共性:每种码制有其特定的字符集;每个字符占有一定的宽度;具有一定的校验功能等。同时还具有对不同行的信息自动识别功能、及处理图形旋转变化点。

1.2 二维码的优势:
- 信息容量大, 可以容纳多达1850个大写字母或2710个数字或500多个汉字
- 应用范围广, 支持文字,声音,图片,指纹等等…
- 容错能力强, 即使图片出现部分破损也能使用
- 成本低, 容易制作
1.3 二维码容错级别:
L级(低) 7%的码字可以被恢复。
M级(中) 的码字的15%可以被恢复。
Q级(四分)的码字的25%可以被恢复。
H级(高) 的码字的30%可以被恢复。
1.4 二维码生成插件 qrious:
qrious是一款基于HTML5 Canvas的纯JS二维码生成插件。通过qrious.js可以快速生成各种二维码,你可以控制二维码的尺寸颜色,还可以将生成的二维码进行Base64编码。
官网地址:https://github.com/neocotic/qrious
qrious.js二维码插件的可用配置参数如下:
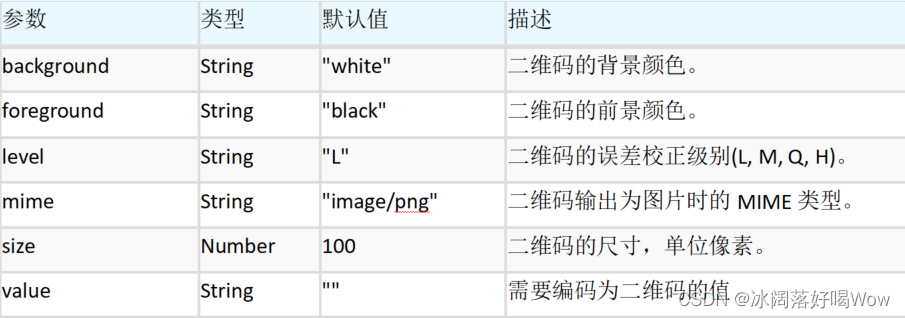
下面的代码即可生成一张二维码:
<html><head><title>二维码入门小demo</title></head><body><img id="qrious"><!-- 引入二维码生成插件 qrious --><script src="qrious.min.js"></script><script>var qr = new QRious({element:document.getElementById('qrious'),size:250,level:'H',	value:'http://www.oracle.com'});</script></body>
</html>
运行效果:

1.5 二维码生成网站:
草料文本二维码生成器 (cli.im)
2. 支付宝扫码支付业务介绍及开发、环境配置流程
2.1 支付宝扫码支付业务流程
支付宝扫码支付是商户系统按支付宝支付协议生成支付二维码,用户再用支付宝“扫一扫”完成支付的模式。该模式适用于PC网站支付、实体店单品或订单支付、媒体广告支付等场景。
具体操作步骤:(了解)
**第一步:**创建应用
接入扫码支付能力,需要在开放平台创建一个应用,通过该应用来接入各种能力。
点击如下链接即可开始创建应用:https://openhome.alipay.com/platform/appManage.htm
第二步:添加应用功能
开发者在开发过程中,可以添加自己需要的功能到待申请功能列表。
给应用添加当面付功能,这样就可以在你的应用里使用扫码支付能力。
第三步:配置秘钥
为了保证交易双方的身份和数据安全,需要配置双方密钥。
第四步:沙箱环境调试使用
支付能力直接涉及到交易与资金,为了方便开放者调试支付能力,支付宝已经准备好沙箱环境,包括沙箱环境账号和沙箱版支付宝钱包,这样就可以在沙箱环境调试了。
第五步:签约
在正式使用这些能力的时候,需要在开放平台里进行签约,这时候约定的合同就生效了。也可以代替商户签约。
第六步:上线应用
上线:商户本身应用上线时候,也要把支付宝开放平台的应用上线。
验收:为了确保应用质量,开放平台提供了云验收平台,可以在线验收应用。
第七步:监控应用
在开放平台监控交易情况
应用上线后还可以在开放平台,查看应用运行情况以及交易状态。
2.2 扫码支付具体申请配置流程
2.2.1 登录支付宝开发者平台:
支付宝开放平台 (alipay.com)

【注意】用自己的支付宝,扫描右边的扫码登录,在支付宝确认登录,即可登录支付宝开发者平台。
2.2.2 登录开发者平台界面如下:
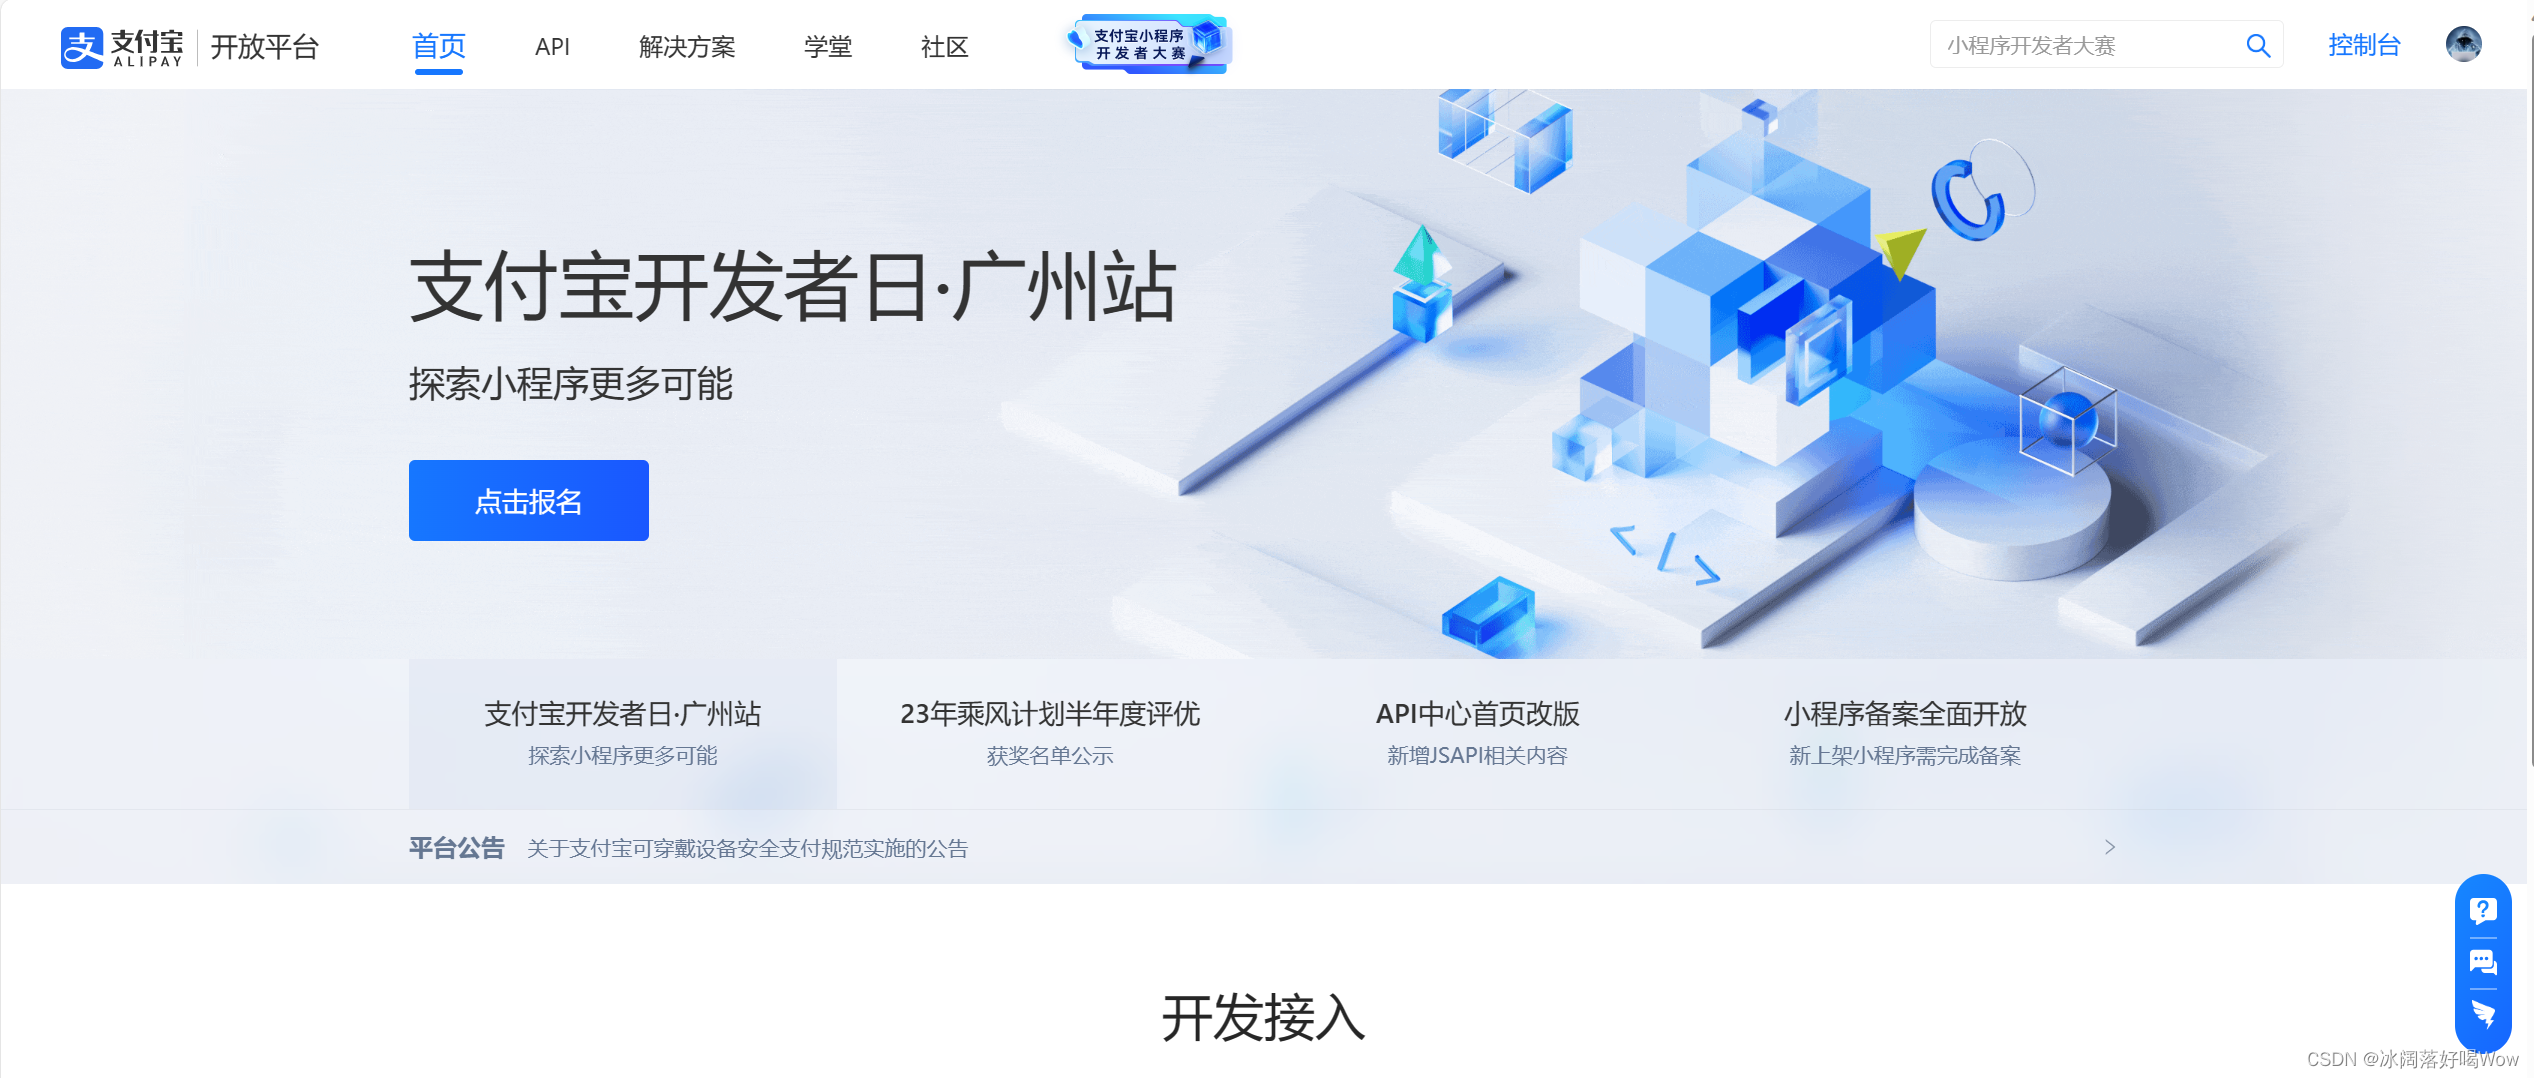
2.2.3 进入并开通沙箱支付:
点击上图中的控制台进入并下滑找到沙箱:
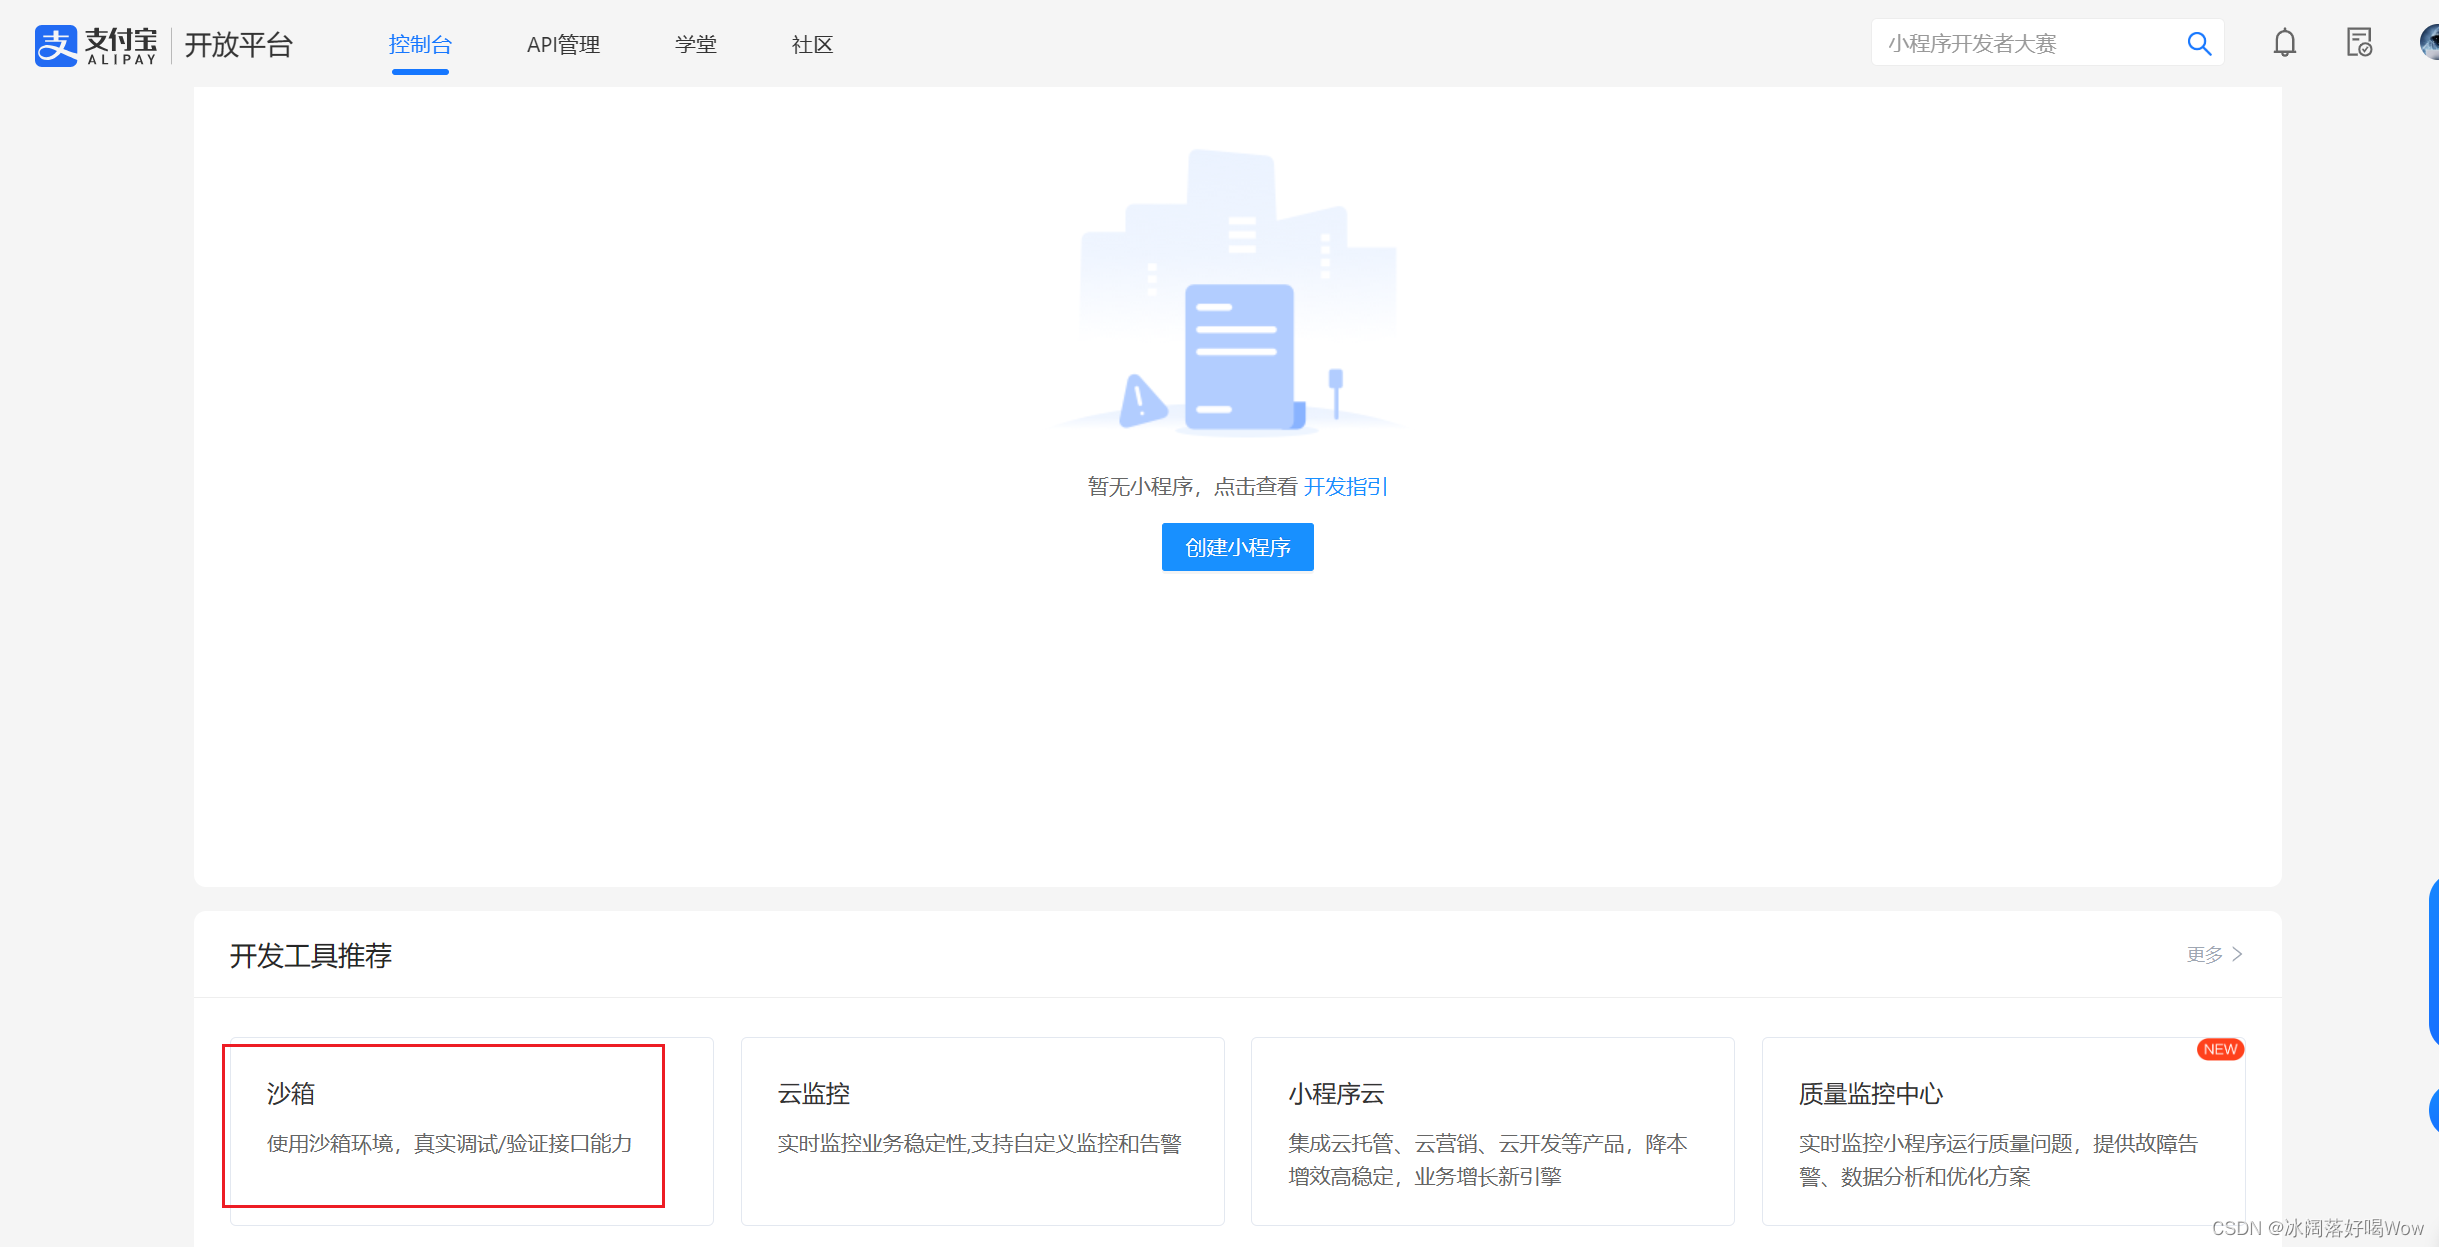
(我已经开通过了)点击进入:
查看自己的沙箱账号:
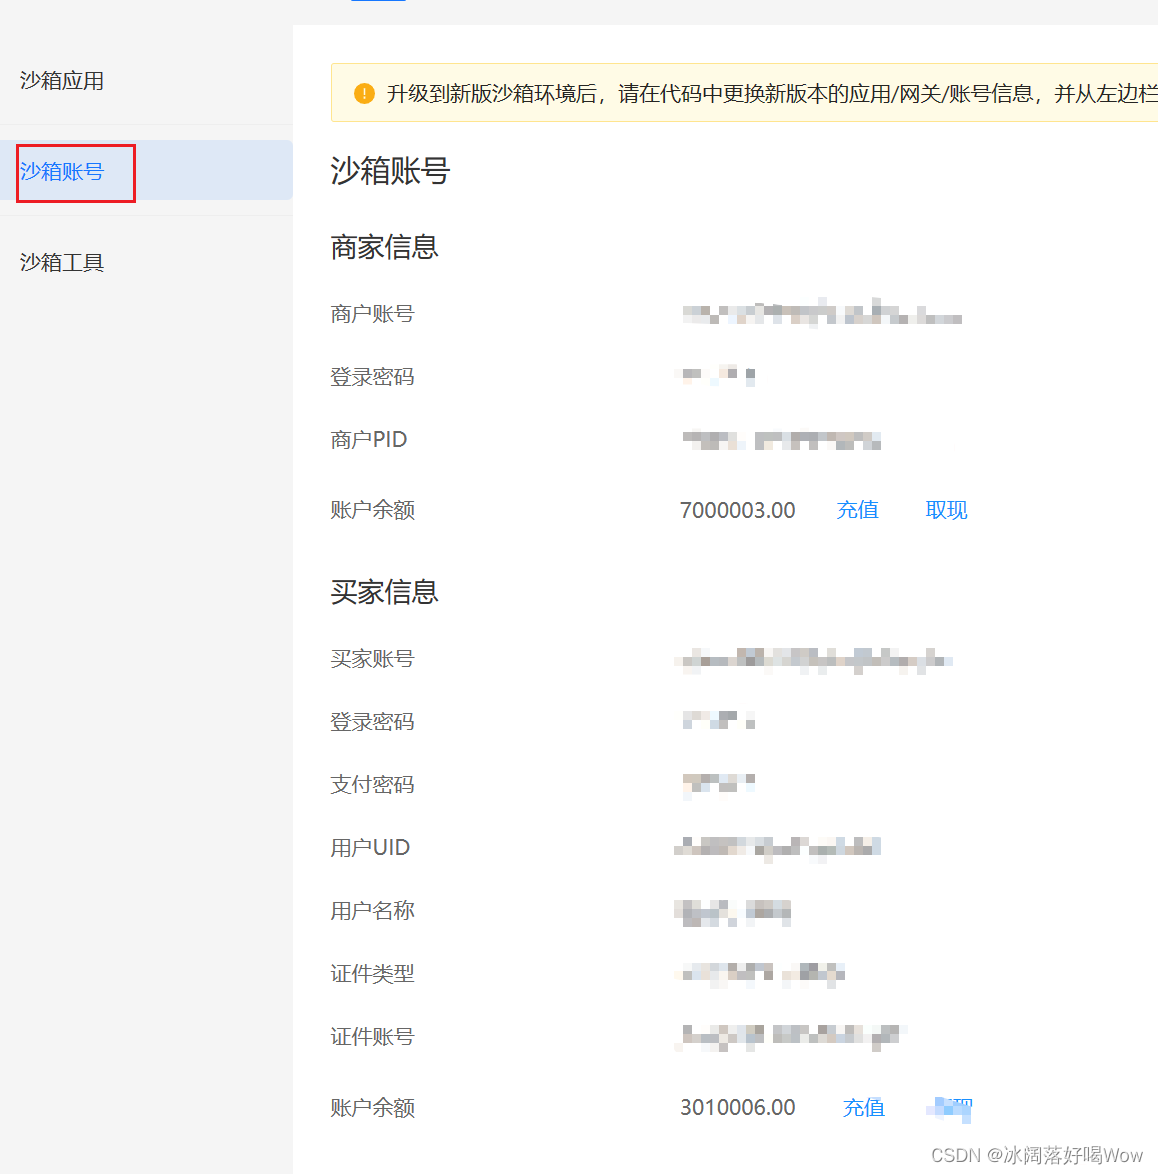
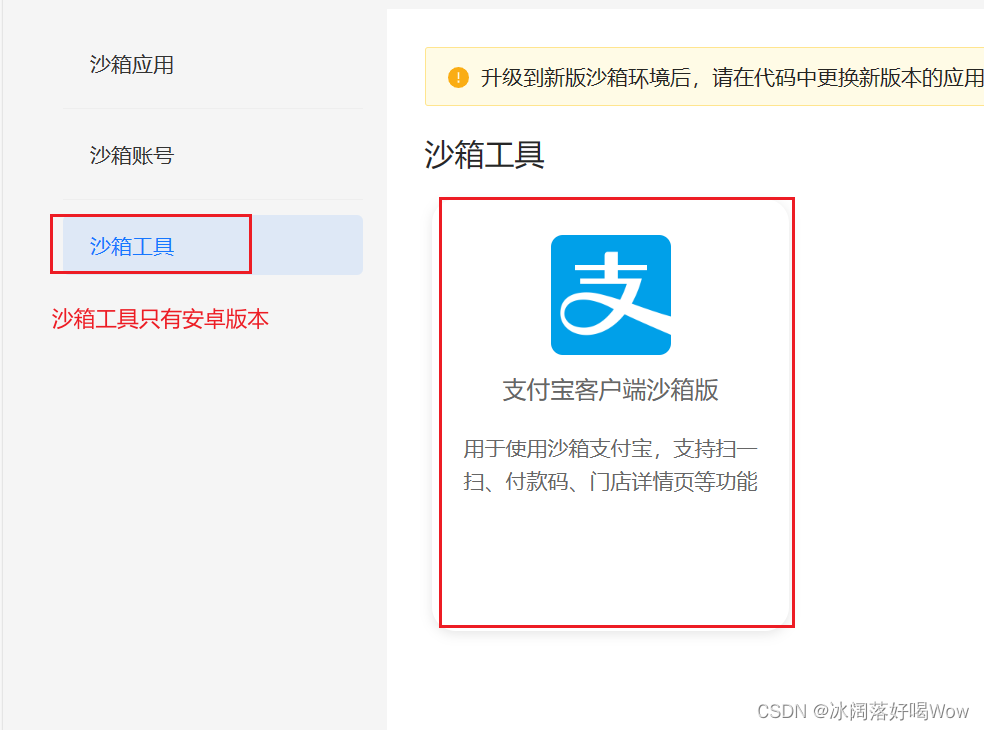
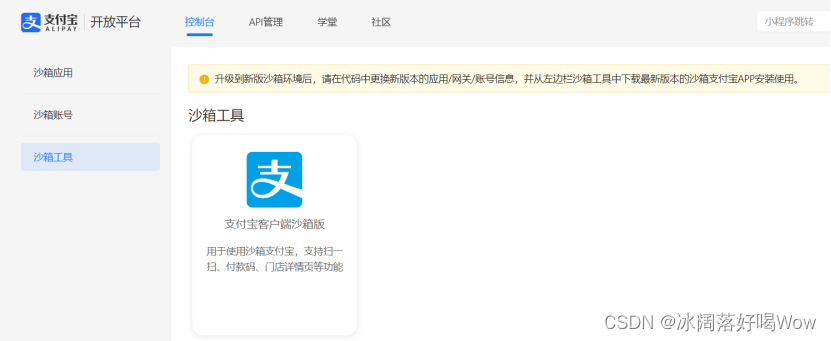
查看沙箱工具(在手机上下载沙箱工具):
2.2.4 配置沙箱环境,记录 appid、支付网关
记好自己的沙箱信息:
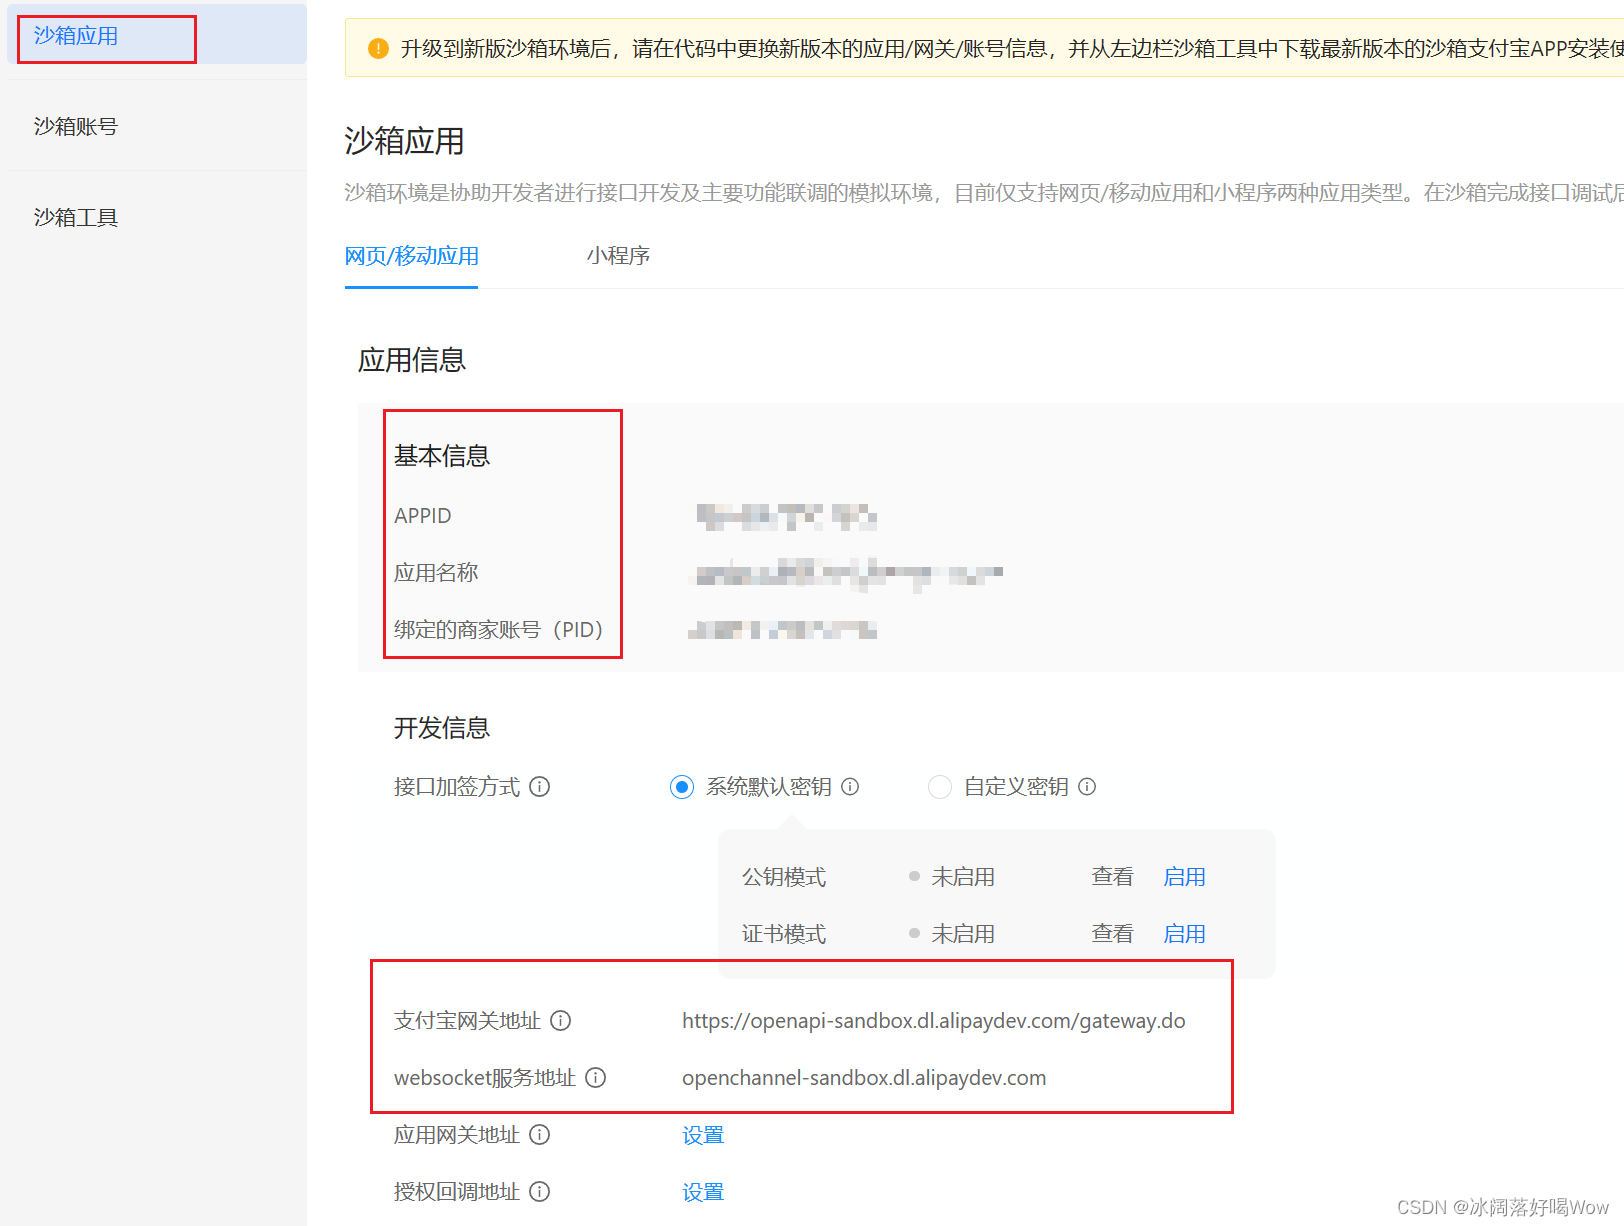
支付宝网关地址:https://openapi-sandbox.dl.alipaydev.com/gateway.do
websocket服务地址:openchannel-sandbox.dl.alipaydev.com
2.2.5 配置沙箱环境,配置RSA2公钥
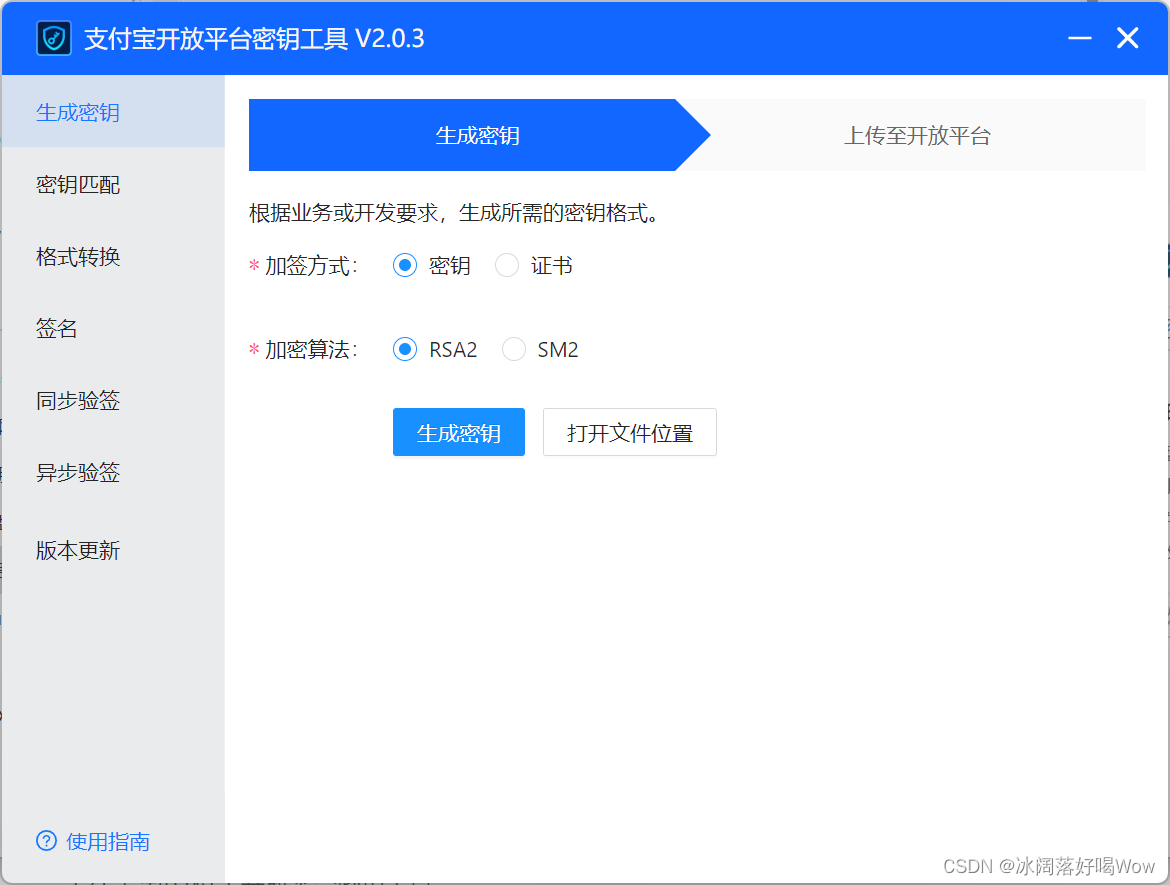
(1)下载支付宝开放平台密钥工具,支付宝提供一键生成工具便于开发者生成一对RSA密钥,可通过下方链接下载密钥生成工具:
密钥工具下载 - 支付宝文档中心 (alipay.com)
(2)启动支付宝开放平台密钥工具:
下载安装后打开:
(3)用支付宝开放平台密钥工具生成商户的应用公钥和应用私钥,拿商户的应用公钥去换支付宝的公钥,在使用时是用的是商户的应用私钥和支付宝的公钥
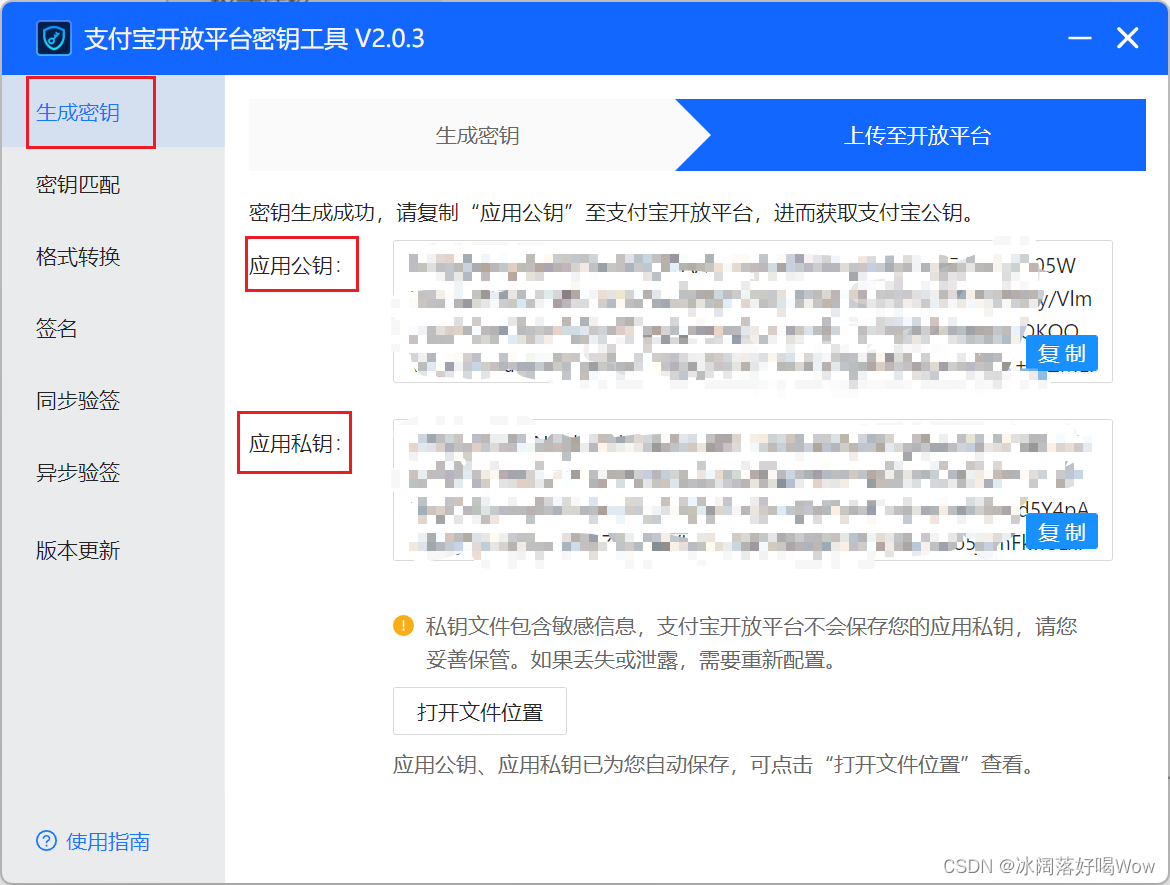
复制应用公钥进支付宝开放平台的沙箱支付内:
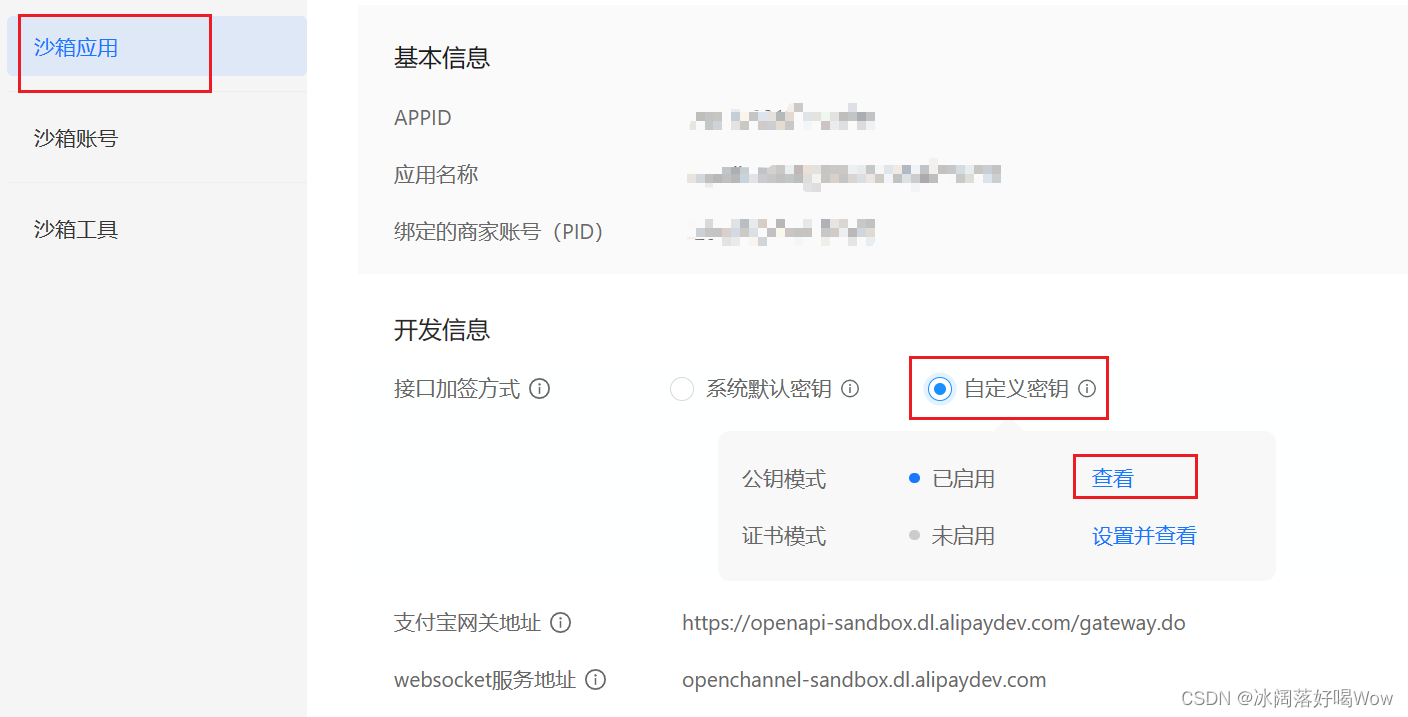
点击查看:
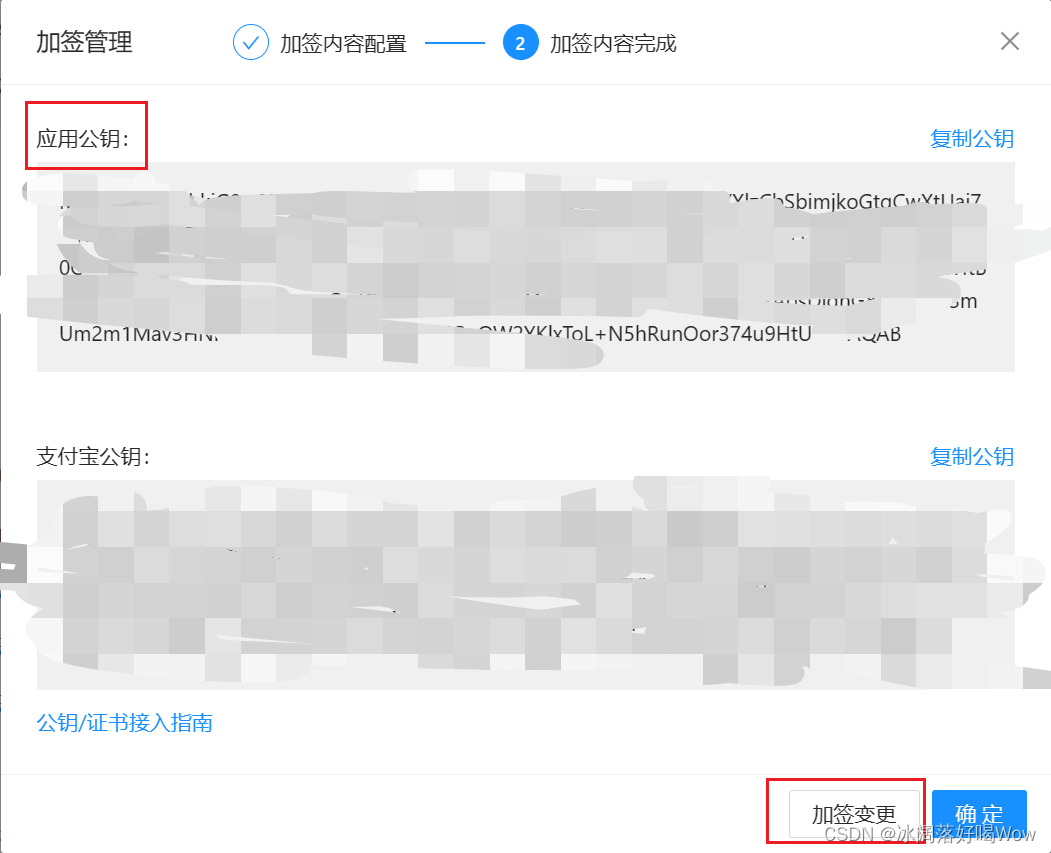
点击加签变更并将已经生成的商户应用公钥粘贴进入:
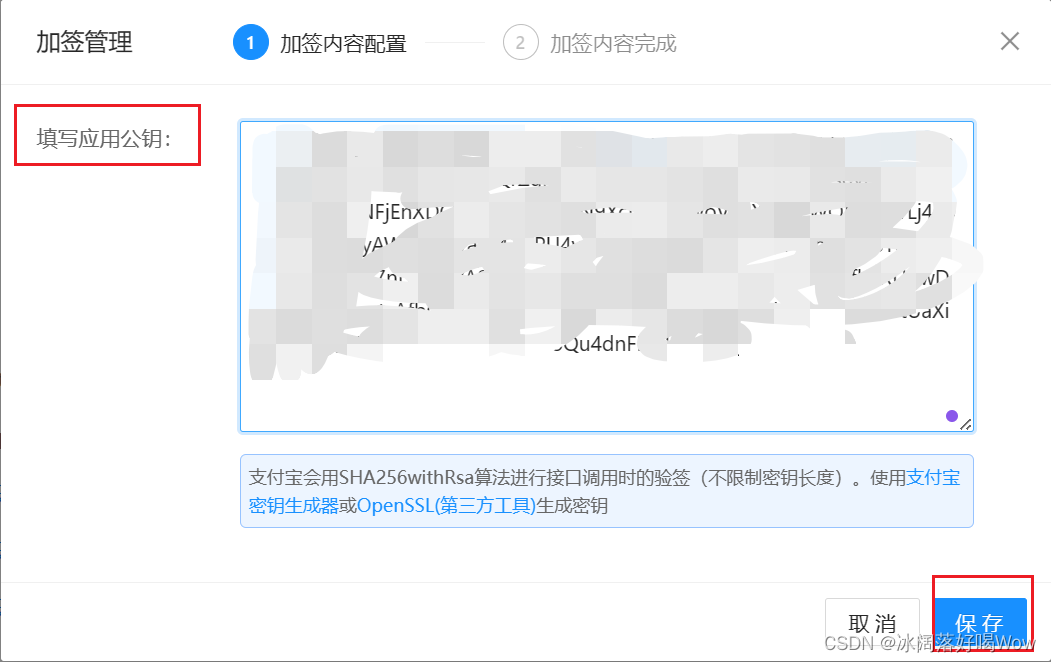
点击保存得到相应的支付宝公钥,然后复制支付宝公钥,记好:
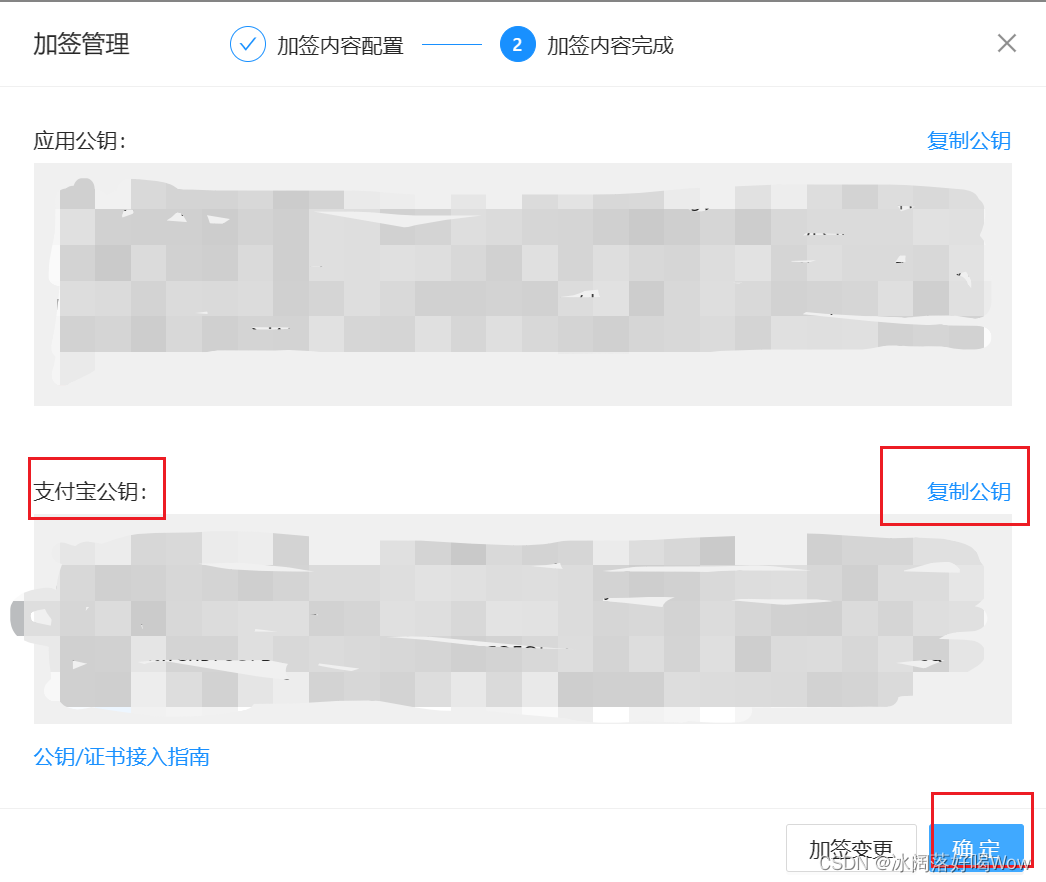
2.3 支付宝支付SDK
<!-- 支付宝支付所需类库包 如果这个版本不好用请换 3.4.27.ALL 版本-->
<dependency><groupId>com.alipay.sdk</groupId><artifactId>alipay-sdk-java</artifactId><version>3.7.110.ALL</version>
</dependency>
2.4 工程搭建与准备工作
创建SpringBoot项目(略):
加入 pom 依赖:
<!-- SpringBoot 的父类依赖 -->
<parent><groupId>org.springframework.boot</groupId><artifactId>spring-boot-starter-parent</artifactId><version>2.7.14</version><relativePath /> <!-- lookup parent from repository -->
</parent><properties><project.build.sourceEncoding>UTF-8</project.build.sourceEncoding><maven.compiler.source>8</maven.compiler.source><maven.compiler.target>8</maven.compiler.target>
</properties><dependencies><dependency><groupId>org.springframework.boot</groupId><artifactId>spring-boot-starter-web</artifactId></dependency><dependency><groupId>org.springframework.boot</groupId><artifactId>spring-boot-starter-actuator</artifactId></dependency><dependency><groupId>com.alibaba.fastjson2</groupId><artifactId>fastjson2</artifactId><version>2.0.42</version></dependency><!-- https://mvnrepository.com/artifact/org.apache.commons/commons-collections4 --><dependency><groupId>org.apache.commons</groupId><artifactId>commons-collections4</artifactId><version>4.4</version></dependency><!-- https://mvnrepository.com/artifact/org.apache.commons/commons-lang3 --><dependency><groupId>org.apache.commons</groupId><artifactId>commons-lang3</artifactId><version>3.12.0</version></dependency><!-- 支付宝支付所需类库包 如果这个版本不好用请换 3.4.27.ALL 版本--><dependency><groupId>com.alipay.sdk</groupId><artifactId>alipay-sdk-java</artifactId><version>3.7.110.ALL</version></dependency></dependencies>
<build><plugins><plugin><groupId>org.springframework.boot</groupId><artifactId>spring-boot-maven-plugin</artifactId></plugin></plugins>
</build>
创建 application.yml 和 application-dev.yml :
# application.yml
spring:profiles:active: dev # 表示开发环境
# application-dev.yml
server:port: 10086
spring:application:name: springboot-alipay
alipay:appId: 自己的APPIDserverUrl: https://openapi-sandbox.dl.alipaydev.com/gateway.doprivateKey: 应用私钥 publicKey: 支付宝公钥format: jsoncharset: UTF-8signType: RSA2
创建 AlipayApplication 启动类:
import org.springframework.boot.SpringApplication;
import org.springframework.boot.autoconfigure.SpringBootApplication;
@SpringBootApplication
public class AlipayApplication {public static void main( String[] args ) {SpringApplication.run(AlipayApplication.class,args);}
}
创建Alipay 配置类 (AlipayConfig) :
import org.springframework.context.annotation.Configuration;
import com.alipay.api.AlipayClient;
import com.alipay.api.DefaultAlipayClient;
import org.springframework.beans.factory.annotation.Value;
import org.springframework.context.annotation.Bean;
@Configuration
public class AlipayConfig {@Value("${alipay.appId}")private String appId;@Value("${alipay.serverUrl}")private String serverUrl;@Value("${alipay.privateKey}")private String privateKey;@Value("${alipay.publicKey}")private String publicKey;@Value("${alipay.charset}")private String charset;@Value("${alipay.format}")private String format;@Value("${alipay.signType}")private String signType;@Beanpublic AlipayClient getAlipayClient() {return new DefaultAlipayClient(serverUrl, appId, privateKey, format, charset, publicKey, signType);}
}
AlipayClient创建关键参数说明:
| 配置参数 | 示例值解释 | 获取方式/示例值 |
|---|---|---|
| URL | 支付宝网关(固定) | https://openapi.alipay.com/gateway.do |
| APP_ID | APPID即创建应用后生成 | 获取见上面创建应用并获取APPID |
| APP_PRIVATE_KEY | 开发者应用私钥,由开发者自己生成 | 获取见上面配置密钥 |
| FORMAT | 参数返回格式,只支持json | json(固定) |
| CHARSET | 请求和签名使用的字符编码格式,支持GBK和UTF-8 | 开发者根据实际工程编码配置 |
| ALIPAY_PUBLIC_KEY | 支付宝公钥,由支付宝生成 | 获取详见上面配置密钥 |
| SIGN_TYPE | 商户生成签名字符串所使用的签名算法类型,目前支持RSA2和RSA,推荐使用RSA2 | RSA2 |
接下来,就可以用alipayClient来调用具体的API了。alipayClient只需要初始化一次,后续调用不同的API都可以使用同一个alipayClient对象。
沙箱支付环境 (安卓手机下载,无 ios 版)
3. 支付宝支付二维码生成
3.1 需求分析与实现思路
3.1.1 需求分析
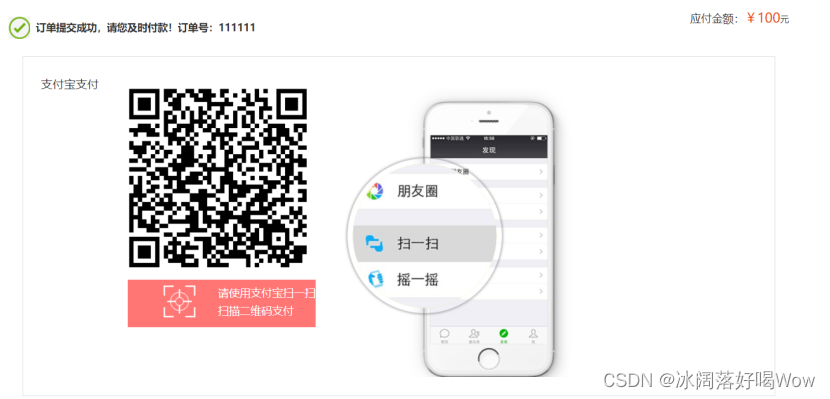
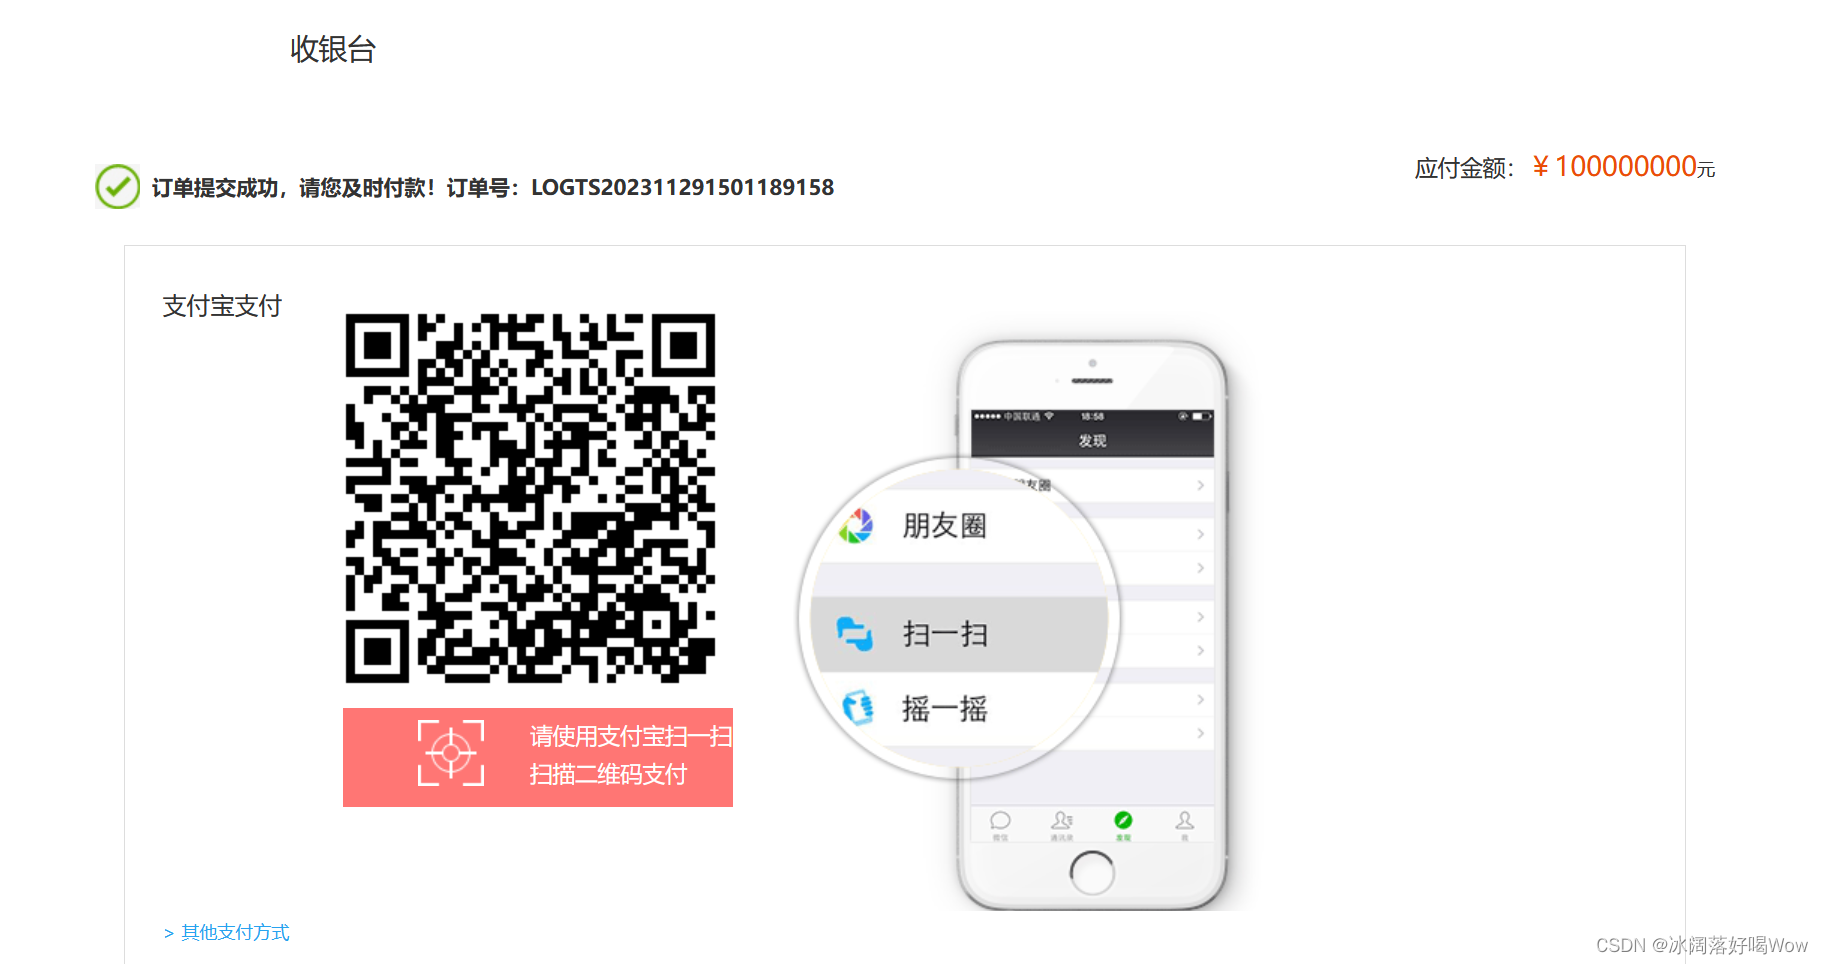
在支付页面上生成支付二维码,并显示订单号和金额
用户拿出手机,打开支付宝扫描页面上的二维码,然后在支付宝中完成支付
3.1.2 实现思路
商户系统通过AlipayClient调用支付宝预下单接口alipay.trade.precreate,获得该订单二维码图片地址。
构建参数发送给预下单接口 ,返回的信息中有支付url,根据url生成二维码,显示的订单号和金额也在返回的信息中。
预下单接口说明:
关键入参:
| 参数名称 | 参数说明 |
|---|---|
| out_trade_no | 商户订单号,需要保证不重复 |
| total_amount | 订单金额 |
| subject | 订单标题 |
| store_id | 商户门店编号 |
| timeout_express | 交易超时时间 |
关键出参:
| 参数名称 | 参数说明 |
|---|---|
| qr_code | 订单二维码(有效时间2小时)的内容,开发者需要自己使用工具根据内容生成二维码图片 |
3.2 后端代码实现
3.2.1 生成二维码
import com.alipay.api.AlipayApiException;
import com.alipay.api.AlipayClient;
import com.alipay.api.request.AlipayTradePrecreateRequest;
import com.alipay.api.response.AlipayTradePrecreateResponse;
import org.springframework.beans.factory.annotation.Autowired;
import org.springframework.web.bind.annotation.GetMapping;
import org.springframework.web.bind.annotation.RestController;
import java.math.BigDecimal;
import java.util.HashMap;
import java.util.Map;
@RestController
public class AlipayController {@AutowiredAlipayClient alipayClient;@GetMapping("/createNative")public Map createNative(String out_trade_no, String total_fee) {Map<String, String> map = new HashMap<String, String>();//创建预下单请求对象AlipayTradePrecreateRequest request = new AlipayTradePrecreateRequest();//转换下单金额按照元long total = Long.valueOf(total_fee);BigDecimal bigTotal = BigDecimal.valueOf(total);BigDecimal cs = BigDecimal.valueOf(100d);BigDecimal bigYuan = bigTotal.divide(cs);System.out.println("预下单金额:" + bigYuan.doubleValue());request.setBizContent("{" +"    \"out_trade_no\":\"" + out_trade_no + "\"," +"    \"total_amount\":\"" + bigYuan.doubleValue() + "\"," +"    \"subject\":\"【12期免息】华为/HUAWEI P60 Pro 超聚光长焦昆仑玻璃学生补贴双向北斗卫星消息鸿蒙智能手机华为官方旗舰店\"," +"    \"store_id\":\"xa_001\"," +"    \"timeout_express\":\"90m\"}");//设置业务参数//发出预下单业务请求try {AlipayTradePrecreateResponse response = alipayClient.execute(request);//从相应对象读取相应结果String code = response.getCode();System.out.println("响应码:" + code);//全部的响应结果String body = response.getBody();System.out.println("返回结果:" + body);if (code.equals("10000")) {map.put("qrcode", response.getQrCode());map.put("out_trade_no", response.getOutTradeNo());map.put("total_fee", total_fee);System.out.println("qrcode:" + response.getQrCode());System.out.println("out_trade_no:" + response.getOutTradeNo());System.out.println("total_fee:" + total_fee);} else {System.out.println("预下单接口调用失败:" + body);}} catch (AlipayApiException e) {e.printStackTrace();}return map;}
}
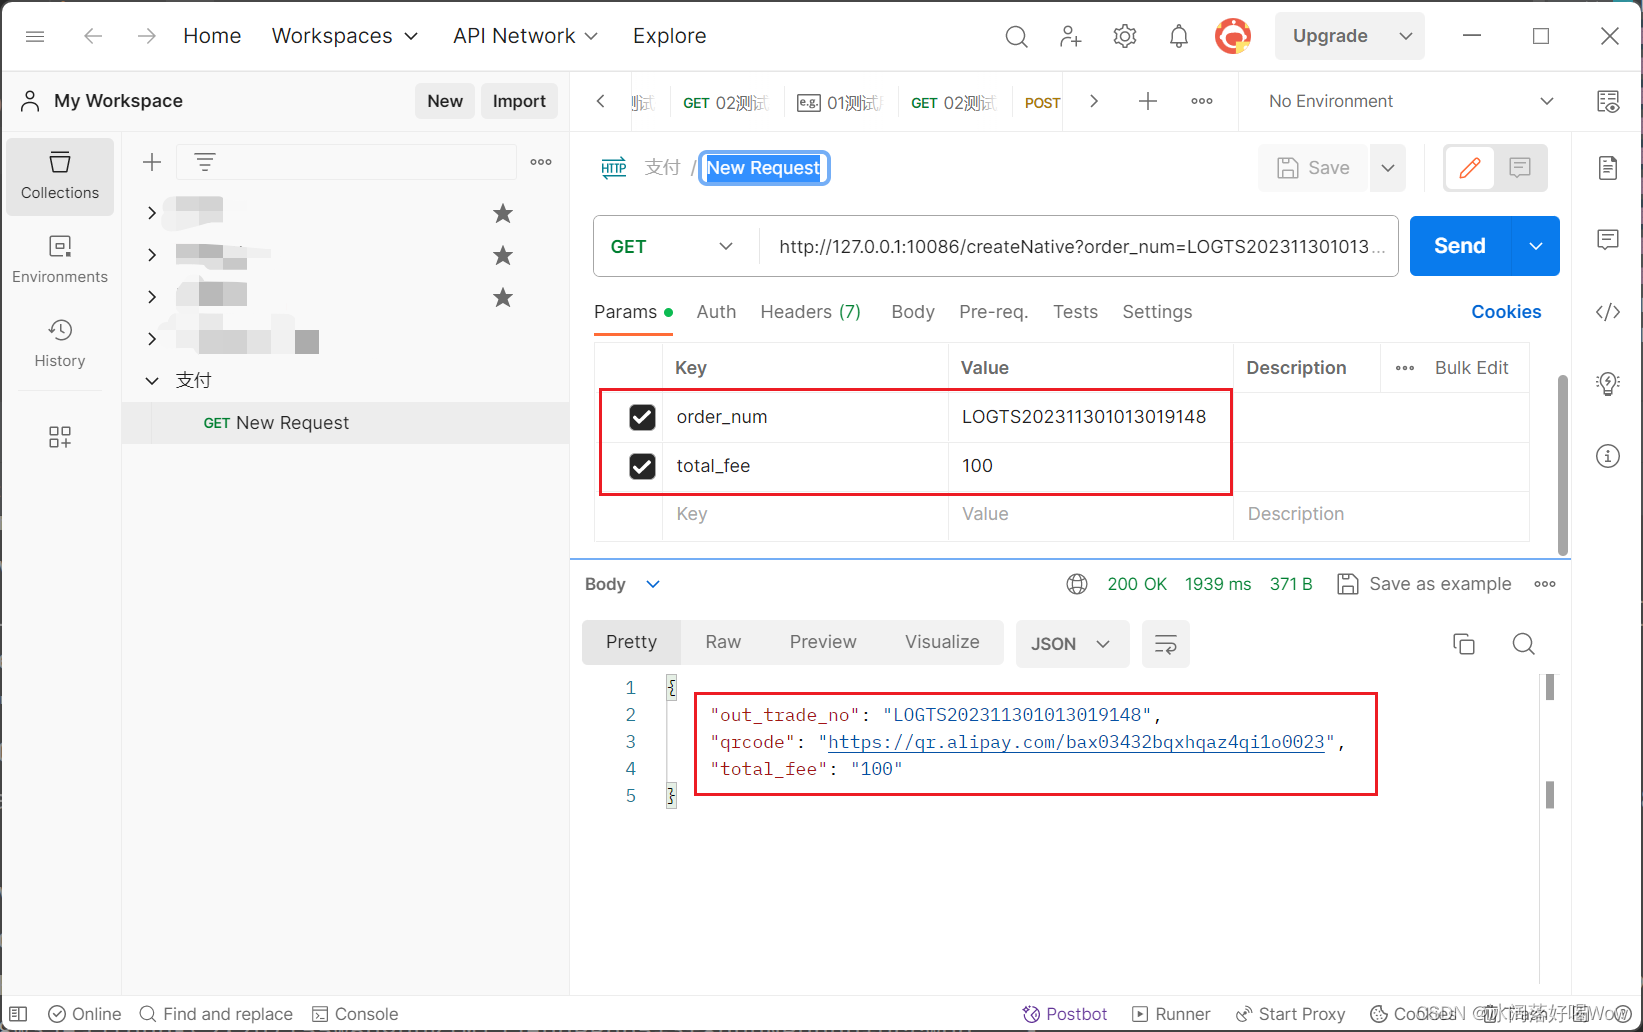
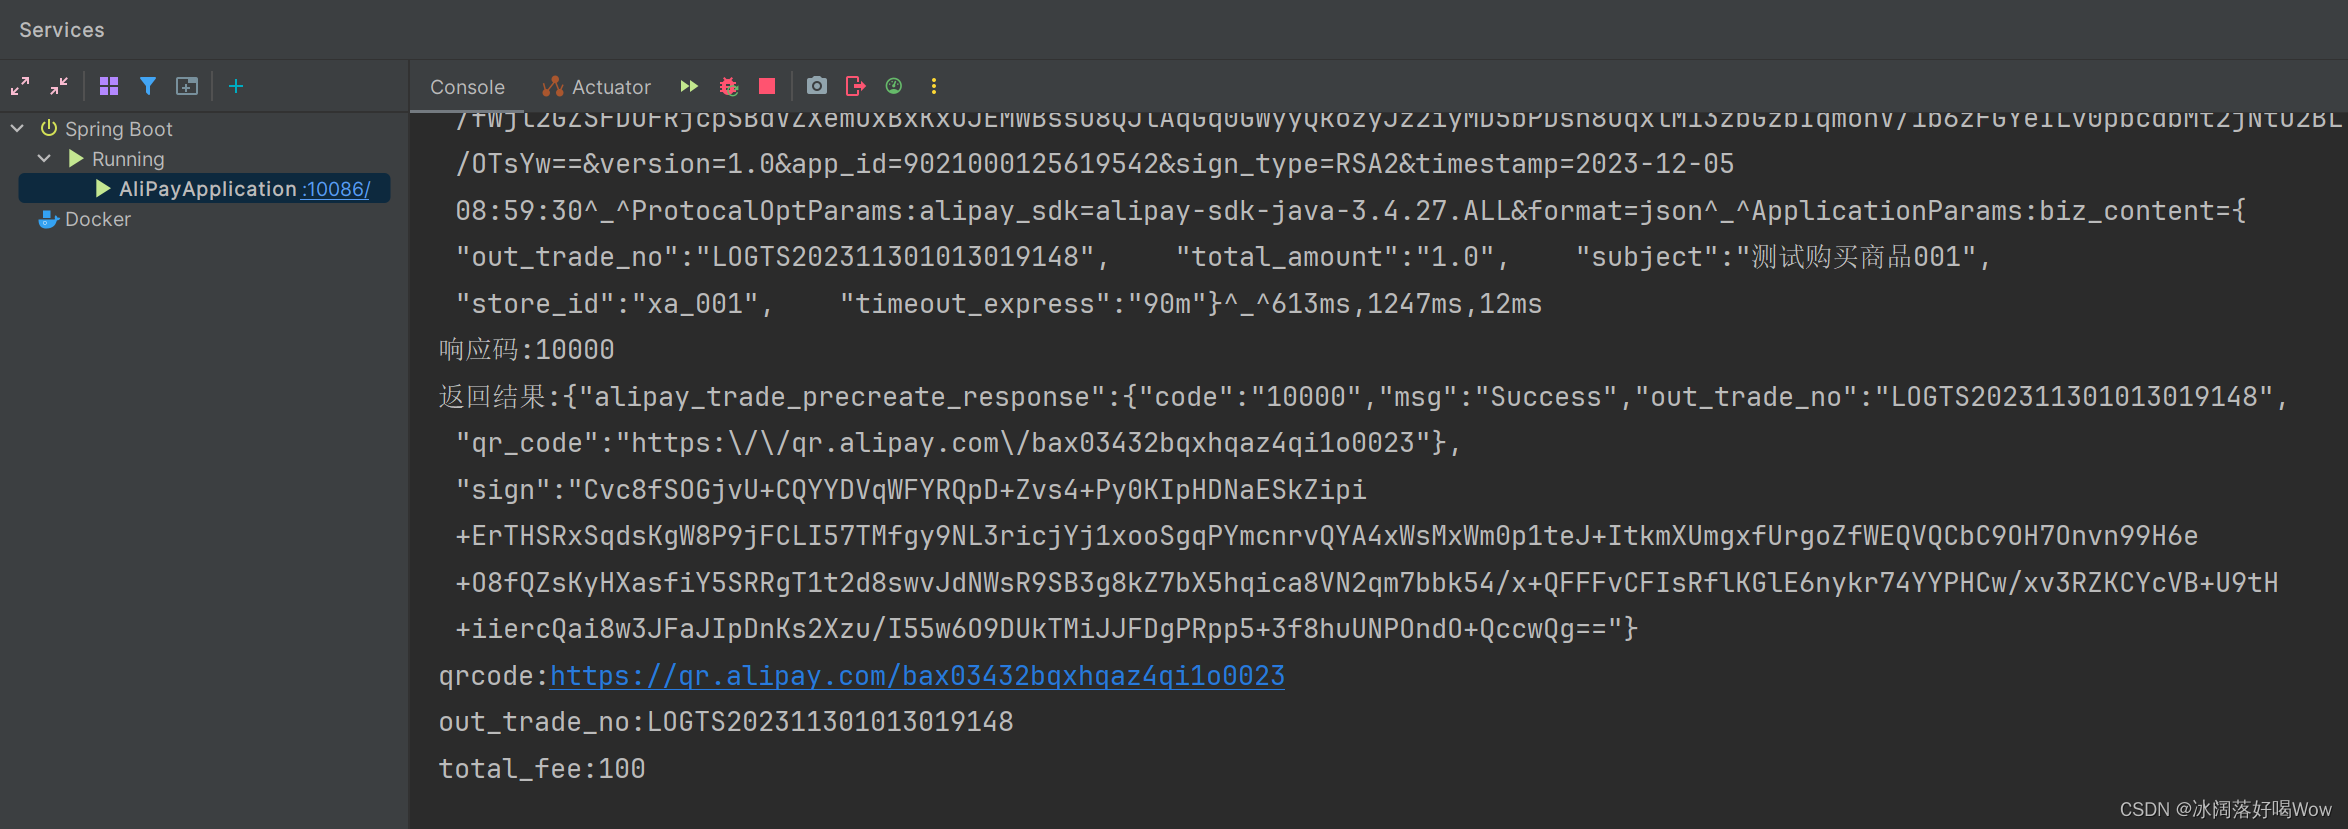
3.2.2 接口测试:
http://127.0.0.1:10086/createNative?order_num=LOGTS202311301013019148&total_fee=100
3.3前端代码实现
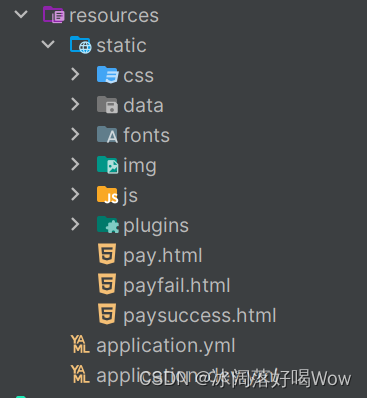
- A方案:在项目的 resources 下建 static(SpringBoot+vue单体项目)
- B方案:前后端分离导入页面
我这里用的是单体项目模式
引入插件 qrious.min.js vue.global.js axios.min.js
引入页面及样式
页面中引入插件:
<!--	 二维码生成插件-->
<script type="text/javascript" src="js/qrious.min.js"></script>
<script src="js/vue.global.js"></script>
<script src="js/axios.min.js"></script>
编写vue异步请求代码:
<script type="text/javascript">const {createApp,toRefs,reactive,computed,toRef} = Vue;createApp({setup(){const data = reactive({out_trade_no : '',total_fee : ''})const createNative = () =>{axios.get('http://127.0.0.1:10086/createNative?order_num=LOGTS202311291501189159&total_fee=100',{}).then(function (res) {data.out_trade_no = res.data.out_trade_nodata.total_fee = res.data.total_fee//二维码qr = new QRious({element:document.getElementById('qrious'),size:250,level:'H',value:res.data.qrcode});})}createNative()return {...toRefs(data),createNative}}}).mount('#app');
</script>
html 页面声明:
<body id="app" ><img id="qrious"/>
前后端联调:
浏览器访问页面,可以取得数据
4 检测支付状态
4.1 需求分析及实现思路
4.1.1 需求分析
当用户支付成功后跳转到成功页面:

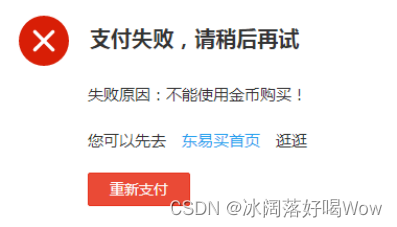
当返回异常时跳转到错误页面:
4.1.2 实现思路
我们通过AlipayClient实现对交易查询接口(alipay.trade.query)的调用。
交易查询接口具体参数:
关键入参:
| 参数名称 | 参数说明 |
|---|---|
| out_trade_no | 支付时传入的商户订单号,与trade_no必填一个 |
| trade_no | 支付时返回的支付宝交易号,与out_trade_no必填一个 |
关键出参:
| 参数名称 | 参数说明 |
|---|---|
| trade_no | 支付宝28位交易号 |
| out_trade_no | 支付时传入的商户订单号 |
| trade_status | 交易当前状态 |
我们在controller方法中轮询调用交易查询指定订单号(间隔3秒),当返回状态为success时,我们会在controller方法返回结果。前端代码收到结果后跳转到成功页面。
4.2检测支付状态
4.2.1 后端代码实现
import com.alipay.api.AlipayApiException;
import com.alipay.api.AlipayClient;
import com.alipay.api.request.AlipayTradePrecreateRequest;
import com.alipay.api.request.AlipayTradeQueryRequest;
import com.alipay.api.response.AlipayTradePrecreateResponse;
import com.alipay.api.response.AlipayTradeQueryResponse;
import com.alipay.entity.ResponseApi;
import org.springframework.beans.factory.annotation.Autowired;
import org.springframework.web.bind.annotation.GetMapping;
import org.springframework.web.bind.annotation.RequestMapping;
import org.springframework.web.bind.annotation.RestController;
import java.math.BigDecimal;
import java.util.HashMap;
import java.util.Map;
@RestController
public class AlipayController {@AutowiredAlipayClient alipayClient;@RequestMapping("/queryPayStatus")public ResponseApi queryPayStatus(String out_trade_no) {//计数器int x = 0;ResponseApi result = null;while (true) {//调用查询接口Map<String, String> map = null;try {map = queryPayStatus2(out_trade_no);} catch (Exception e1) {/*e1.printStackTrace();*/System.out.println("调用查询服务出错");}if (map == null) {//出错result =  ResponseApi.FAILED("支付出错" + map.get("tradestatus"));}if (map.get("tradestatus") != null && map.get("tradestatus").equals("TRADE_SUCCESS")) {//如果成功result = ResponseApi.SUCCESS("支付成功");//修改订单状态
//                orderService.updateOrderStatus(out_trade_no, map.get("trade_no"));break;}if (map.get("tradestatus") != null && map.get("tradestatus").equals("TRADE_CLOSED")) {//如果成功result = ResponseApi.SUCCESS("未付款交易超时关闭,或支付完成后全额退款");break;}if (map.get("tradestatus") != null && map.get("tradestatus").equals("TRADE_FINISHED")) {//如果成功result = ResponseApi.SUCCESS( "交易结束,不可退款");break;}try {Thread.sleep(3000);//间隔三秒} catch (InterruptedException e) {e.printStackTrace();}//为了不让循环无休止地运行,我们定义一个循环变量,如果这个变量超过了这个值则退出循环,设置时间为5分钟x++;if (x >= 100) {result = ResponseApi.FAILED("二维码超时");break;}}return result;}public Map<String, String> queryPayStatus2(String out_trade_no) {Map<String, String> map = new HashMap<String, String>();AlipayTradeQueryRequest request = new AlipayTradeQueryRequest();request.setBizContent("{" +"    \"out_trade_no\":\"" + out_trade_no + "\"," +"    \"trade_no\":\"\"}"); //设置业务参数//发出请求try {AlipayTradeQueryResponse response = alipayClient.execute(request);String code = response.getCode();System.out.println("返回值1:" + response.getBody());if (code.equals("10000")) {//System.out.println("返回值2:"+response.getBody());map.put("out_trade_no", out_trade_no);map.put("tradestatus", response.getTradeStatus());map.put("trade_no", response.getTradeNo());}} catch (AlipayApiException e) {e.printStackTrace();}return map;}
}
4.2.2 前端代码实现
<!-- total_fee 是以分为单位的总金额 -->
<script type="text/javascript">const {createApp, toRefs, reactive, computed, toRef} = Vue;createApp({setup() {const data = reactive({out_trade_no: '',total_fee: ''})const createNative = () => {axios.get('http://127.0.0.1:10086/createNative?order_num=LOGTS202311291501189155&total_fee=1000000', {}).then(function (res) {data.out_trade_no = res.data.out_trade_nodata.total_fee = res.data.total_fee//二维码qr = new QRious({element: document.getElementById('qrious'),size: 250,level: 'H',value: res.data.qrcode});//检测当前订单的支付状态queryPayStatus();})}createNative()//订单支付状态检测const queryPayStatus = () => {axios.get('http://127.0.0.1:10086/queryPayStatus?out_trade_no=LOGTS202311291501189155', {}).then(function (res) {console.log(res);// alert("resp code : "+res.data.data.code);if (res.data.code == 200) {location.href = "paysuccess.html";} else {if (res.data.message == '二维码超时') {document.getElementById("timeout").innerHTML = '二维码已过期,刷新页面重新获取二维码。';} else {location.href = "payfail.html";}}})}return {...toRefs(data), createNative}}}).mount('#app');
</script>
4.2.3 支付宝沙箱支付成功回调结果

5. 项目代码在 Gitee 仓库
Gitee 仓库地址:https://gitee.com/shizp2000/springboot-alipay.git
6. 微信支付
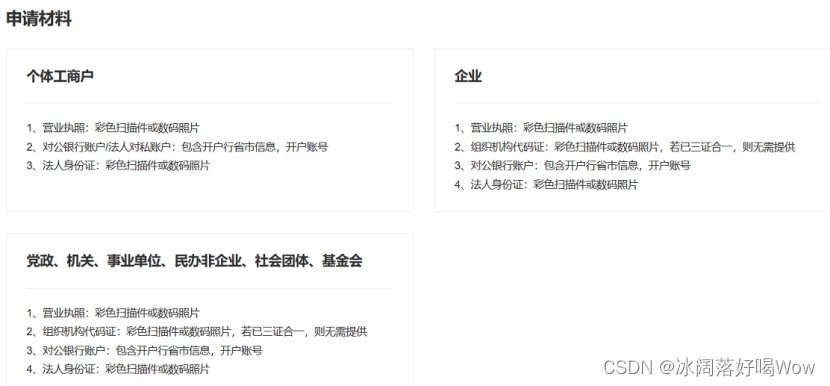
6.1 注册商户号

网上商超为0.6%
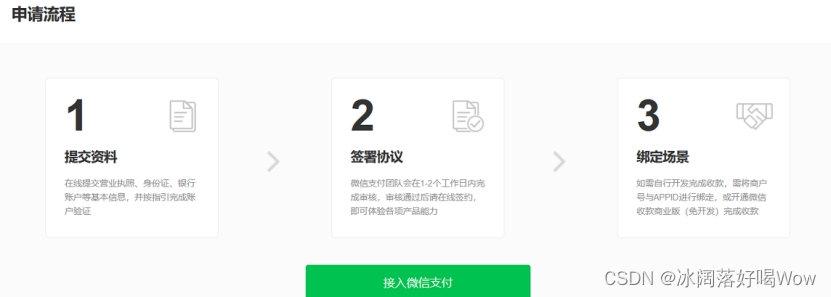
申请网址
https://pay.weixin.qq.com/static/applyment_guide/applyment_detail_miniapp.shtml
申请成功返回首页扫码登陆
登录后点账户中心查看登陆账号(商户号)
6.2 注册微信公众号
注册网址
https://mp.weixin.qq.com/
1、注册服务号
2、登录后点击设置与开发 基本配置 查看开发者ID(appID)
3、绑定商户号与开发者ID
登录https://pay.weixin.qq.com/
进入产品中心appID账号管理 点击关联APPID
完成操作后账号管理显示绑定
4、来到账户中心

点击左侧安全中心的API安全

申请API证书 设置API密钥




![[AbutionGraph开发文档]时序图谱数据库-流式图计算](https://img-blog.csdnimg.cn/direct/5b89b56b37c84f59814a8a645b2b7d2d.png)
