qt 5.15.2 主窗体菜单工具栏树控件功能
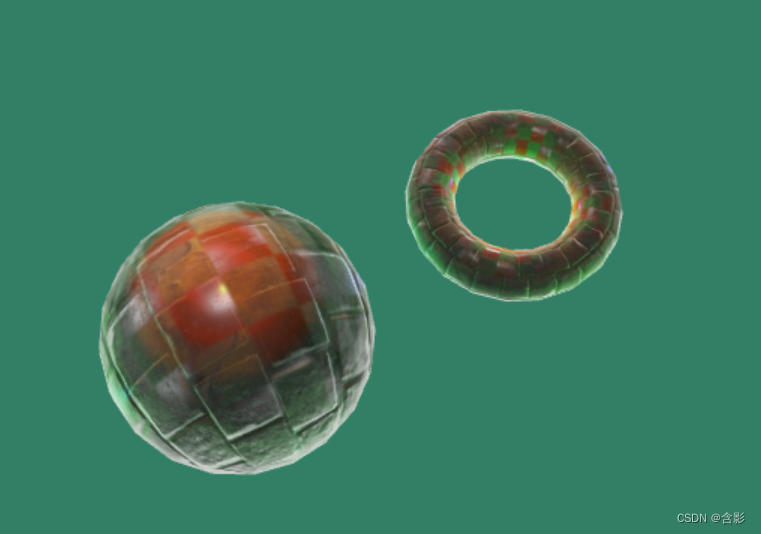
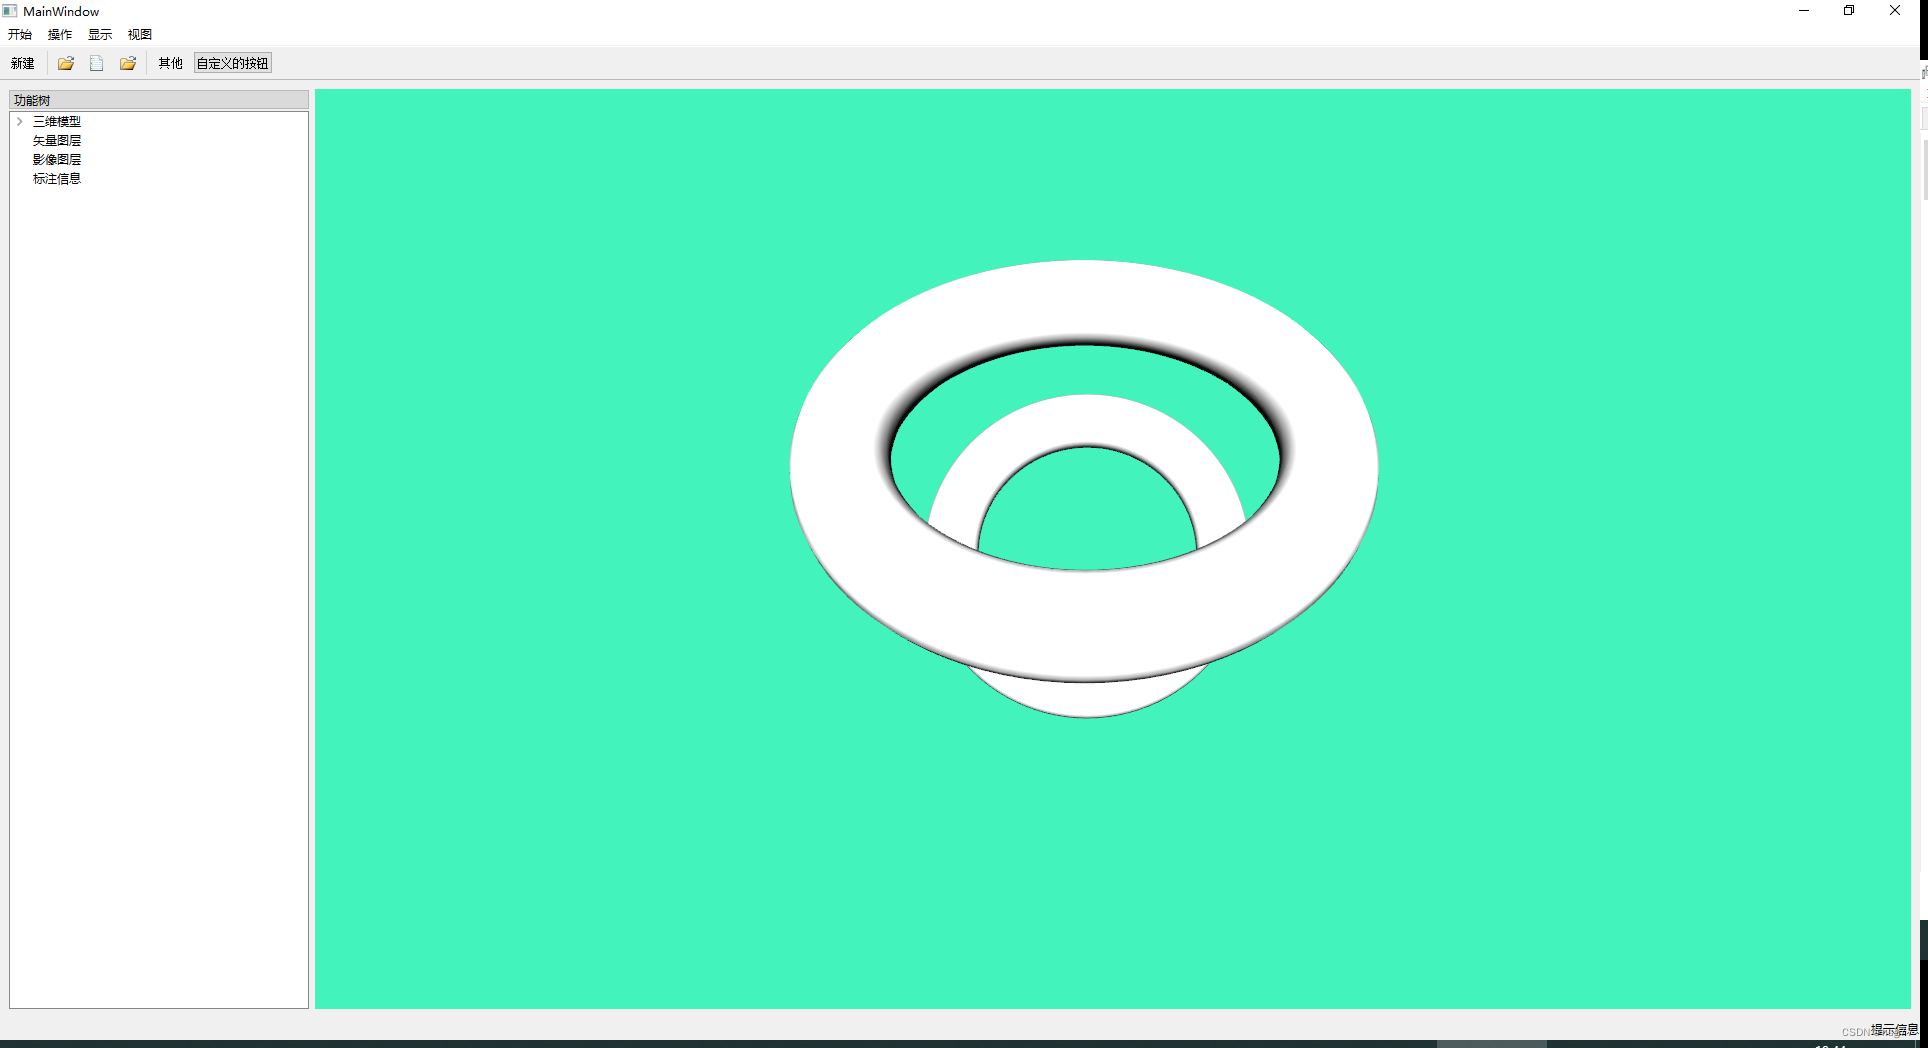
显示主窗体效果:
mainwindow.h文件内容:
#ifndef MAINWINDOW_H
#define MAINWINDOW_H#include <QMainWindow>
#include <QFileDialog>
#include <QString>
#include <QMessageBox>#include <QTreeView>
#include <QFileSystemModel>#include <QDockWidget>
#include <QLabel>
#include <QPushButton>
#include <QTextEdit>
#include <QToolBar>
#include <QAction>
#include <QFile>
#include <QStandardItemModel>
#include <QResizeEvent>
#include <QDebug>
//#include "scene.h"using namespace Qt;QT_BEGIN_NAMESPACE
namespace Ui {
class MainWindow;
}
QT_END_NAMESPACEclass MainWindow : public QMainWindow
{Q_OBJECTpublic:MainWindow(QWidget *parent = nullptr);~MainWindow();//bool eventFilter(QObject *obj, QEvent *event);//void resizeEvent(QResizeEvent *event);private slots:void openImageFile();     //定义卡槽函数void TreeDoubleClicked(const QModelIndex &index);void on_actionOpen_File_triggered();void init_3d();private:Ui::MainWindow *ui;    //QString currentFile;QTreeView* treeView;QDockWidget *dockWidget;//QStandardItem* currentNode;QStandardItemModel* model;//Scene* scene;Qt3DExtras::Qt3DWindow* view;QWidget *sceneWidget;
};
#endif // MAINWINDOW_H
mainwindow.cpp文件内容:
#include "mainwindow.h"
#include "ui_mainwindow.h"#include <QFirstPersonCameraController>
#include <QSplitter>
#include <QVBoxLayout>MainWindow::MainWindow(QWidget *parent): QMainWindow(parent), ui(new Ui::MainWindow)
{ui->setupUi(this);//设置主界面主题颜色风格(黑灰背景色+白字)//this->setStyleSheet ("background-color: rgb(60,60,60);color: rgb(255,255,255);border-color:rgb(230,230,230);");//重置窗口//resize(600, 400);//最大化窗体this->setWindowState(Qt::WindowMaximized);//创建菜单栏 (只有一个菜单栏)QMenuBar *bar = this->menuBar();//将菜单栏放入窗口中this->setMenuBar(bar);//创建菜单项QMenu *menuBegin = bar->addMenu("开始");QMenu *menuEdit = bar->addMenu("操作");QMenu *menuDisplay = bar->addMenu("显示");QMenu *menuView = bar->addMenu("视图");//创建菜单项QAction *build_act = menuBegin->addAction("新建");//给菜单项下面再添加项目//添加分隔符menuBegin->addSeparator();//程序中菜单栏最多有一个//QICon *ico=QIcon(":/images/File");//添加菜单和工具栏按钮功能并与功能函数绑定QString filePath=qApp->applicationDirPath()+"/images/File.ico";QAction *act_open_image =menuBegin->addAction(QIcon(filePath),"打开图片文件");connect(act_open_image,&QAction::triggered,this,&MainWindow::openImageFile);//添加菜单和工具栏按钮功能并与功能函数绑定QString openDirPath=qApp->applicationDirPath()+"/images/Open.ico";QAction *act_open = menuBegin->addAction(QIcon(openDirPath),"打开文件夹");connect(act_open,&QAction::triggered,this,&MainWindow::openImageFile);QAction *act_init_3d = menuBegin->addAction(QIcon(openDirPath),"初始化3D");connect(act_init_3d,&QAction::triggered,this,&MainWindow::init_3d);//工具栏,可以有多个QToolBar * toolBar = new QToolBar(this);this->addToolBar(toolBar);  // 将工具栏添加this->addToolBar(Qt::TopToolBarArea,toolBar);     //出现在top//this->addToolBar(Qt::LeftToolBarArea, toolBar);//令其默认出现在左边//this->addToolBar(Qt::RightToolBarArea, toolBar);//设置允许的停靠范围toolBar->setAllowedAreas(Qt::TopToolBarArea);//toolBar->setAllowedAreas(Qt::LeftToolBarArea | Qt::RightToolBarArea);//不会让其停靠在上边,但会浮动//设置浮动toolBar->setFloatable(false);//禁止浮动//设置移动toolBar->setMovable(false);//禁止移动//工具栏可设置内容toolBar->addAction(build_act);//将新建菜单项添加进来,传入的是QAction指针toolBar->addSeparator();//添加分割线toolBar->addAction(act_open);        //将打开项目添加进来toolBar->addAction(act_open_image);  //打开toolBar->addAction(act_init_3d);     //初始化3dtoolBar->addSeparator();toolBar->addAction("其他");//传入字符串//工具栏添加控件QPushButton *p = new QPushButton(this);p->setText("自定义的按钮");toolBar->addWidget(p);// 添加控件////状态栏:最多一个QStatusBar * stBar = this->statusBar();//设置到窗口this->setStatusBar(stBar);//QLabel *leftMsg=new QLabel(this->currentFile,this);stBar->showMessage(this->currentFile);// 放入标签控件QLabel *label = new QLabel("提示信息", this);stBar->addWidget(label);//放到左侧//状态栏设置标签控件位置stBar->addPermanentWidget(label);//放到右侧//铆接部件(浮动窗口),可以多个QDockWidget *dockWidget = new QDockWidget("功能树", this);//设置只能移动,不能关闭dockWidget->setFeatures(QDockWidget::NoDockWidgetFeatures | QDockWidget::DockWidgetMovable);this->addDockWidget(Qt::LeftDockWidgetArea, dockWidget);//将浮动窗口默认放到左边//设置后期停靠区域,只允许左右dockWidget->setAllowedAreas(Qt::LeftDockWidgetArea);dockWidget->setFixedWidth(300);//设置中心部件//QTextEdit *edit = new QTextEdit(this);//this->setCentralWidget(edit);//菜单栏:set只能一个, 工具栏add可以多个,状态栏set只能一个, 铆接部件add可以多个//树控件treeView=new QTreeView(dockWidget);//treeView->setFixedWidth(300);//treeView->setFixedHeight(600);// 隐藏标题头treeView->setHeaderHidden(true);// 禁用节点编辑treeView->setEditTriggers(QAbstractItemView::NoEditTriggers);//添加双击事件connect(treeView,&QTreeView::doubleClicked,this,&MainWindow::TreeDoubleClicked);dockWidget->setWidget(treeView);// 设置初始权重以控制初始大小分配//QSplitter splitter;//splitter.setStretchFactor(0, 1); // QDockWidget 子控件权重为 1//splitter.addWidget(dockWidget);//splitter.show();//QFileSystemModel* fileSystemModel=new QFileSystemModel;//fileSystemModel->setRootPath("/");//treeView->setModel(fileSystemModel);model = new QStandardItemModel(dockWidget);treeView->setModel(model);QStandardItem* item3d = new QStandardItem("三维模型");model->appendRow(item3d);//子节点QStandardItem* itemOpenShp = new QStandardItem("打开obj文件");item3d->appendRow(itemOpenShp);//QStandardItem* itemVec = new QStandardItem("矢量图层");model->appendRow(itemVec);//QStandardItem* itemImage = new QStandardItem("影像图层");model->appendRow(itemImage);//QStandardItem* itemMarker = new QStandardItem("标注信息");model->appendRow(itemMarker);////scene  3dview = new Qt3DExtras::Qt3DWindow();sceneWidget = QWidget::createWindowContainer(view);scene = new Scene(view);view-> installEventFilter(this);// 添加布局管理   treeView的高宽与QVBoxLayout布局自动变化QWidget *centralWidget = new QWidget();//QVBoxLayout *layout = new QVBoxLayout(centralWidget);QHBoxLayout *layout = new QHBoxLayout(centralWidget);layout->addWidget(dockWidget);   //树控件layout->addWidget(sceneWidget);  //3d地图控件this->setCentralWidget(centralWidget);//
}MainWindow::~MainWindow()
{delete ui;
}bool MainWindow::eventFilter(QObject *obj, QEvent *event)
{if (event->type() == QEvent::KeyPress){QKeyEvent *keyEvent = static_cast<QKeyEvent *>(event);scene->KeyControls(keyEvent);}return QObject::eventFilter(obj, event);
}/*
void MainWindow::resizeEvent(QResizeEvent *event)
{treeView->setFixedWidth(dockWidget->width());treeView->setFixedHeight(dockWidget->height());//qDebug()<<"resize: "<<event->size();this->update();
}*///打开文件 menu/toolbar
void MainWindow::openImageFile()
{QString filename= QFileDialog::getOpenFileName(this,"Open file");QFile file(filename);currentFile = filename;if (!file.open(QIODevice::ReadOnly)) {QMessageBox::warning(this,"Warning", "Cannot open "+file.errorString());}setWindowTitle(filename);//添加3d fileQUrl fUrl=QUrl("file://"+filename);Qt3DRender::QMesh *mesh = new Qt3DRender::QMesh();mesh->setSource(fUrl);Qt3DCore::QEntity *entity = new Qt3DCore::QEntity();entity->addComponent(mesh);Qt3DExtras::QFirstPersonCameraController *cam=new Qt3DExtras::QFirstPersonCameraController(entity);cam->setCamera(view->camera());view->setRootEntity(entity);//view->camera()->viewAll();}//打开文件 tree pad/open
void MainWindow::on_actionOpen_File_triggered()
{QString filename= QFileDialog::getOpenFileName(this,"Open file");QFile file(filename);currentFile = filename;if (!file.open(QIODevice::ReadOnly)) {QMessageBox::warning(this,"Warning", "Cannot open "+file.errorString());}setWindowTitle(filename);//Qt3DRender::QMesh *mesh = new Qt3DRender::QMesh();QUrl data =QUrl::fromLocalFile(filename);mesh->setSource(data);qDebug()<<"mesh status="<<mesh->status();//获取视图的大小//QSize screenSize = view->size();sceneWidget->setMinimumSize(QSize(10, 10));//最小sceneWidget->setMaximumSize(QSize(5000, 5000));//最大scene->NewScene(mesh);Qt3DExtras::QFirstPersonCameraController *cam=new Qt3DExtras::QFirstPersonCameraController(scene->rootEntity);cam->setCamera(view->camera());}void MainWindow::init_3d()
{scene->init3d();Qt3DExtras::QFirstPersonCameraController *cam=new Qt3DExtras::QFirstPersonCameraController(scene->rootEntity);cam->setCamera(view->camera());
}void MainWindow::TreeDoubleClicked(const QModelIndex &index)
{// 获取当前选中节点索引QModelIndex currentIndex = treeView->currentIndex();if (currentIndex.isValid()) {// 执行相关操作,例如获取节点信息或执行其他操作this->currentNode = model->itemFromIndex(currentIndex);if(this->currentNode->text()=="打开obj文件"){this->on_actionOpen_File_triggered();}else{//qDebug() << "Current selected item text:" << currentItem->text();QMessageBox::information(this,"提示信息", this->currentNode->text());}} else {//qDebug() << "No item selected";QMessageBox::information(this,"提示信息", "未选中节点");}
}
本blog地址:https://blog.csdn.net/hsg77
