一. 概念
Tekton 官网
Github
- Tekton 是一种用于构建 CI/CD 管道的云原生解决方案,它由提供构建块的 Tekton Pipelines,Tekton 作为 Kubernetes 集群上的扩展安装和运行,包含一组 Kubernetes 自定义资源,这些资源定义了您可以为管道创建和重用的构建块。安装后,Tekton Pipelines 可通过 Kubernetes CLI (kubectl) 和 API 调用使用。
1. 组件介绍
Tekton 由以下组件组成:
- Tekton Pipelines 是 Tekton 的基础,它定义了一组 Kubernetes自定义资源 ,这些资源充当构建块,您可以从中组装 CI/CD 管道
- Tekton Triggers 允许您根据事件实例化管道。例如,您可以在每次将 PR 合并到 GitHub 存储库时触发管道的实例化和执行。您还可以构建一个用户界面来启动特定的 Tekton 触发器
- Tekton CLI 提供了一个名为 的命令行界面
tkn,它构建在 Kubernetes CLI 之上,允许您与 Tekton 进行交互 - Tekton Dashboard 是 Tekton Pipelines 的基于 Web 的图形界面,可显示有关管道执行的信息。它目前正在进行中
- Tekton Catalog 是高质量、社区贡献的 Tekton 构建块(
Tasks、、Pipelines等等)的存储库,可以在您自己的管道中使用 - Tekton Hub 是一个基于 Web 的图形界面,用于访问 Tekton Catalog
- Tekton Operator 是一种 Kubernetes Operator 模式 ,允许您在 Kubernetes 集群上安装、更新和删除 Tekton 项目
二. 部署
参考一
参考二
1. Tekton Pipelines
Pipelines 部署
kubectl apply -f https://storage.googleapis.com/tekton-releases/pipeline/latest/release.yaml# 指定版本
kubectl apply -f https://storage.googleapis.com/tekton-releases/pipeline/previous/v0.47.0/release.yaml
1). 修改依赖的镜像

vim release.yaml
- 找到名字叫
tekton-pipelines-controller的Deployment, 进行修改,如上图,可以看到很多镜像是gcr.io开头的,这些是后面pipeline启动所需要的我们可以讲这些镜像 pull下来放到镜像仓库
sed -i 's/gcr.io\/tekton-releases\/github.com\/tektoncd\/pipeline\/cmd\/controller:v0.47.0@sha256:e1a541216f70bfc519739e056111d0f69e7959913e28ccbf98ce9fe2fd0dd406/lixd96\/tektoncd-pipeline-cmd-controller:v0.47.0/' pipeline.yamlsed -i 's/gcr.io\/tekton-releases\/github.com\/tektoncd\/pipeline\/cmd\/resolvers:v0.47.0@sha256:5ea2565c256a5085ee422d4778166fd1fe0f985ff6e3816542728379433f30db/lixd96\/tektoncd-pipeline-cmd-resolvers:v0.47.0/' pipeline.yamlsed -i 's/gcr.io\/tekton-releases\/github.com\/tektoncd\/pipeline\/cmd\/webhook:v0.47.0@sha256:e2bc5e55370049efa5ed3e16868ecec65fb9cdb6df0fd7e08568a8b6f3193186/lixd96\/tektoncd-pipeline-cmd-webhook:v0.47.0/' pipeline.yamlsed -i 's/gcr.io\/tekton-releases\/github.com\/tektoncd\/pipeline\/cmd\/kubeconfigwriter:v0.47.0@sha256:449fae542ca42a94171c7e6fe41af4451c62126743f77b47f09bbcecc932145e/lixd96\/tektoncd-pipeline-cmd-kubeconfigwriter:v0.47.0/' pipeline.yamlsed -i 's/gcr.io\/tekton-releases\/github.com\/tektoncd\/pipeline\/cmd\/git-init:v0.47.0@sha256:cd5fb697a91af1883917e5e8ab230566bff60fd1310fb2d0e12badcee7db5db6/lixd96\/tektoncd-pipeline-cmd-git-init:v0.47.0/' pipeline.yamlsed -i 's/gcr.io\/tekton-releases\/github.com\/tektoncd\/pipeline\/cmd\/entrypoint:v0.47.0@sha256:50333090b874cdff1706d9f4de9d367270586d91a3204f223ad3c9c8f8b5968b/lixd96\/tektoncd-pipeline-cmd-entrypoint:v0.47.0/' pipeline.yamlsed -i 's/gcr.io\/tekton-releases\/github.com\/tektoncd\/pipeline\/cmd\/nop:v0.47.0@sha256:6c99e85668d5c5d383ee341fb22affb71ea2908f5615a3ec0157980ac1891ef4/lixd96\/tektoncd-pipeline-cmd-nop:v0.47.0/' pipeline.yamlsed -i 's/gcr.io\/tekton-releases\/github.com\/tektoncd\/pipeline\/cmd\/sidecarlogresults:v0.47.0@sha256:8c7e3dbb3cbfa76e9d291d869d50c93b4b9001dab6e3143d5db7b4e297144814/lixd96\/tektoncd-pipeline-cmd-sidecarlogresults:v0.47.0/' pipeline.yamlsed -i 's/gcr.io\/tekton-releases\/github.com\/tektoncd\/pipeline\/cmd\/imagedigestexporter:v0.47.0@sha256:768185690a3c5b5a79c764fe3d66bac8351136a14dd82d9fd7da019789b4ed95/lixd96\/tektoncd-pipeline-cmd-imagedigestexporter:v0.47.0/' pipeline.yamlsed -i 's/gcr.io\/tekton-releases\/github.com\/tektoncd\/pipeline\/cmd\/pullrequest-init:v0.47.0@sha256:8f5809192c455ea3a657203337e139482b06ffdef1a32d3ad494d6bcdb7c1465/lixd96\/tektoncd-pipeline-cmd-pullrequest-init:v0.47.0/' pipeline.yamlsed -i 's/gcr.io\/tekton-releases\/github.com\/tektoncd\/pipeline\/cmd\/workingdirinit:v0.47.0@sha256:707cf41528b19e7b20925fcfe17b1ebf8e61a22fe824df6b79c17b36f81a2d19/lixd96\/tektoncd-pipeline-cmd-workingdirinit:v0.47.0/' pipeline.yaml
2). HA
Tekton HA
- 默认
Tekton是1个副本,想要高可用版本, 首先需要将Tokton Deployment副本数增加到3个, 然后需要配置选举
# scale
kubectl  -n tekton-pipelines scale deployment tekton-pipelines-controller --replicas=3
vim config-leader-election.yaml
- 选举的信息是在
config-leader-election的configmap中设定的
apiVersion: v1
kind: ConfigMap
metadata:name: config-leader-electionnamespace: tekton-pipelineslabels:app.kubernetes.io/instance: defaultapp.kubernetes.io/part-of: tekton-pipelines
data:_example: |lease-duration: "60s"renew-deadline: "40s"retry-period: "10s"# 如果 buckets 的值为M,Tekton的控制器熟练为N, 那么buckets: "1"
2. triggers
triggers作为 触发器
Triggers 部署
# 镜像处理
sed -i 's/gcr.io\/tekton-releases\/github.com\/tektoncd\/triggers\/cmd\/controller:v0.22.1@sha256:47f18d03c08ebc8ef474dd62e7d83ead3c4aa802c72668dafb73fd6afedd305f/lixd96\/tektoncd-triggers-cmd-controller:v0.22.1/' trigger-release.yamlsed -i 's/gcr.io\/tekton-releases\/github.com\/tektoncd\/triggers\/cmd\/webhook:v0.22.1@sha256:9a124b2ead10a6bc3ae1d32d05b9fe664465cfe6d09830ef89f3987a443a5c86/lixd96\/tektoncd-triggers-cmd-webhook:v0.22.1/' trigger-release.yamlsed -i 's/gcr.io\/tekton-releases\/github.com\/tektoncd\/triggers\/cmd\/eventlistenersink:v0.22.1@sha256:bd8b2ec63012605739dc74871d1a20634d1055ed3d77864a582a9b5f2d22ab92/lixd96\/tektoncd-triggers-cmd-eventlistenersink:v0.22.1/' trigger-release.yamlsed -i 's/gcr.io\/tekton-releases\/github.com\/tektoncd\/triggers\/cmd\/controller:v0.22.1@sha256:47f18d03c08ebc8ef474dd62e7d83ead3c4aa802c72668dafb73fd6afedd305f/lixd96\/tektoncd-triggers-cmd-controller:v0.22.1/' trigger-interceptors.yamlsed -i 's/gcr.io\/tekton-releases\/github.com\/tektoncd\/triggers\/cmd\/eventlistenersink:v0.22.1@sha256:bd8b2ec63012605739dc74871d1a20634d1055ed3d77864a582a9b5f2d22ab92/lixd96\/tektoncd-triggers-cmd-eventlistenersink:v0.22.1/' trigger-interceptors.yamlsed -i 's/gcr.io\/tekton-releases\/github.com\/tektoncd\/triggers\/cmd\/webhook:v0.22.1@sha256:9a124b2ead10a6bc3ae1d32d05b9fe664465cfe6d09830ef89f3987a443a5c86/lixd96\/tektoncd-triggers-cmd-webhook:v0.22.1/' trigger-interceptors.yamlsed -i 's/gcr.io\/tekton-releases\/github.com\/tektoncd\/triggers\/cmd\/interceptors:v0.22.1@sha256:eda7af449fb82b06e952da0f5c0d1c2a3eddbab041e43065d37f67523c60c494/lixd96\/tektoncd-triggers-cmd-interceptors:v0.22.1/' trigger-interceptors.yaml
3. Tekton dashboard
Dashboard 部署
- 默认安装只能以 只读 的形式安装 dashboard
kubectl apply -f https://storage.googleapis.com/tekton-releases/dashboard/latest/release.yaml# 指定版本, 之前的旧版本需要加一个 previous, 只能读版本
kubectl apply -f https://storage.googleapis.com/tekton-releases/dashboard/previous/v0.35.0/release.yaml# 管理人员以读写的形式安装
kubectl apply -f https://storage.googleapis.com/tekton-releases/dashboard/latest/release-full.yaml# 指定版本
kubectl apply -f https://storage.googleapis.com/tekton-releases/dashboard/previous/v0.35.0/release-full.yaml# 镜像处理
sed -i 's/gcr.io\/tekton-releases\/github.com\/tektoncd\/dashboard\/cmd\/dashboard:v0.35.0@sha256:454a405aa4f874a0c22db7ab47ccb225a95addd3de904084e35c5de78e4f2c48/lixd96\/tektoncd-dashboard-cmd-dashboard:v0.35.0/' tekton-dashboard-release.yaml
- 只有可读写的
dashboard才有创建按钮

1). dashboard Ingress
apiVersion: networking.k8s.io/v1
kind: Ingress
metadata:name: dashboardnamespace: tekton-pipelinesannotations:kubernetes.io/ingress.class: nginx
spec:rules:- host: tekton.yeemiao.net.cnhttp:paths:- backend:service:name: tekton-dashboardport:number: 9097path: /pathType: Prefix
4. CLI
CLI 部署
https://github.com/tektoncd/cli/releases/download/v0.30.1/tkn_0.30.1_Linux_x86_64.tar.gztar xvzf tkn_0.30.1_Linux_x86_64.tar.gz -C /usr/local/bin/[root@controller-1 ~/xingguang/tekton]# tkn version
Client version: 0.30.1
Pipeline version: v0.47.0
Dashboard version: v0.34.0
1). 常用命令
tkn taskrun ls
NAME        STARTED        DURATION   STATUS
hello-run   21 hours ago   43s        Succeeded# 可以看到 taskrun 输出的日志
[root@hhy-1 ~/manifest/tekton/hhy-1]# tkn -n default taskrun logs -f hello-run-q5kpl
[hello] Hello World# 可以看到 taskrun 创建了一个 pod, 然后用这个pod 输出了一句话, 当然 pod 执行完任务 状态就会是 Completed 的
[root@hhy-1 ~/manifest/tekton/hhy-1]# kubectl get po
NAME                  READY   STATUS      RESTARTS   AGE
hello-run-q5kpl-pod   0/1     Completed   0          3m59s
[root@hhy-1 ~/manifest/tekton/hhy-1]# kubectl logs -f hello-run-q5kpl-pod
Defaulted container "step-hello" out of: step-hello, prepare (init), place-scripts (init)
Hello World
三. 构建流水线
1. Task
- Task:任务模版,是tekton的最小单元,代表一个任务,包括多个步骤,将比较通用的步骤单独定义为 task,可以复用, 然后使用 pipeline 将多个 task 编排为一个流水线,一个task最好只做一件事,比如:
- git clone
- docker build
- docker push
apiVersion: tekton.dev/v1beta1
kind: Task
metadata:name: hello
spec:steps:- name: echoimage: alpinescript: |#!/bin/shecho "Hello World"
2. TaskRun
-
TaskRun:任务执行实例,拥有任务的运行状态 Pipeline
-
ClusterTask: 弃用
apiVersion: tekton.dev/v1
kind: TaskRun
metadata:name: hello
spec:taskRef:		# 引用 名字为 hello 的 Taskname: hello
3. Pipeline
- Pipeline:流水线模版,控制完成多个task的运行流程, 是多个 Task 的组合
apiVersion: tekton.dev/v1beta1
kind: Pipeline
metadata:						# 唯一标识name: hello-goodbyenamespace: devops
spec:params:						# 指定 Parameters 需要的 pipeline- name: usernametype: stringtasks:- name: hellotaskRef:name: hello- name: goodbyerunAfter:- hellotaskRef:name: goodbyeparams:- name: usernamevalue: $(params.username)
4. PipelineRun
- PipelineRun:流水线执行实例,拥有流水线运行状态,真正的流水线,他会调用流水线(Pipeline)中定义的参数,继而调用task中定义的任务
- pipelinerun 和 taskrun 基本一致,用于触发流水线以及为 pipeline 提供必要的参数
- PipelineResource: 弃用
5. Workspace
Workspace
- TaskRun 在 Task Workspace 中适配的卷存储称为:存储卷源(volume source)支持类型如下:
- persistentVolumeClaim
- volumeClaimTemplate
- emptyDir
- configMap
- secret
1). 使用说明
$(workspaces.<name>.path)- 指定 的路径,其中Workspace是<name>的名称Workspace。当工作空间被声明为可选并且不是由 TaskRun 提供时,这将是一个空字符串。$(workspaces.<name>.bound)- 或true,false指定是否绑定工作区。true如果需要工作空间,则始终如此。$(workspaces.<name>.claim)``PersistentVolumeClaim- 指定用作卷源的名称,Workspace其中<name>是 的名称Workspace。PersistentVolumeClaim如果使用其他卷源,则返回空字符串。$(workspaces.<name>.volume)``Volume- 指定为 a 提供的名称,Workspace其中<name>是 的名称Workspace
2). 案例
apiVersion: tekton.dev/v1beta1
kind: Task
metadata:name: source-lister
spec:params:- name: git-repotype: stringdescription: Git repository to be clonedworkspaces:- name: sourcesteps:- name: git-cloneimage: alpine/qit:v2.32.0script: git clone -v $(params.git-repo) $(workspaces.source.path)/source- name: list-filesimage: alpine:3.15command:- /bin/shargs:- '-c'- 'ls $(workspaces.source.path)/source'
(一). git-clone官网task
- 官方提供了一个代码 clone 的 task,写的很全,直接照搬就可以
git-clone
流水线官方demo文档
apiVersion: tekton.dev/v1beta1
kind: Task
metadata:name: git-clonelabels:app.kubernetes.io/version: "0.5"annotations:tekton.dev/pipelines.minVersion: "0.21.0"tekton.dev/categories: Gittekton.dev/tags: gittekton.dev/displayName: "git clone"tekton.dev/platforms: "linux/amd64,linux/s390x,linux/ppc64le,linux/arm64"
spec:description: >-These Tasks are Git tasks to work with repositories used by other tasksin your Pipeline.The git-clone Task will clone a repo from the provided url into theoutput Workspace. By default the repo will be cloned into the root ofyour Workspace. You can clone into a subdirectory by setting this Task'ssubdirectory param. This Task also supports sparse checkouts. To performa sparse checkout, pass a list of comma separated directory patterns tothis Task's sparseCheckoutDirectories param.workspaces:- name: outputdescription: The git repo will be cloned onto the volume backing this Workspace.- name: ssh-directoryoptional: truedescription: |A .ssh directory with private key, known_hosts, config, etc. Copied tothe user's home before git commands are executed. Used to authenticatewith the git remote when performing the clone. Binding a Secret to thisWorkspace is strongly recommended over other volume types.- name: basic-authoptional: truedescription: |A Workspace containing a .gitconfig and .git-credentials file. Thesewill be copied to the user's home before any git commands are run. Anyother files in this Workspace are ignored. It is strongly recommendedto use ssh-directory over basic-auth whenever possible and to bind aSecret to this Workspace over other volume types.- name: ssl-ca-directoryoptional: truedescription: |A workspace containing CA certificates, this will be used by Git toverify the peer with when fetching or pushing over HTTPS.params:- name: urldescription: Repository URL to clone from.type: string- name: revisiondescription: Revision to checkout. (branch, tag, sha, ref, etc...)type: stringdefault: ""- name: refspecdescription: Refspec to fetch before checking out revision.default: ""- name: submodulesdescription: Initialize and fetch git submodules.type: stringdefault: "true"- name: depthdescription: Perform a shallow clone, fetching only the most recent N commits.type: stringdefault: "1"- name: sslVerifydescription: Set the `http.sslVerify` global git config. Setting this to `false` is not advised unless you are sure that you trust your git remote.type: stringdefault: "true"- name: subdirectorydescription: Subdirectory inside the `output` Workspace to clone the repo into.type: stringdefault: ""- name: sparseCheckoutDirectoriesdescription: Define the directory patterns to match or exclude when performing a sparse checkout.type: stringdefault: ""- name: deleteExistingdescription: Clean out the contents of the destination directory if it already exists before cloning.type: stringdefault: "true"- name: httpProxydescription: HTTP proxy server for non-SSL requests.type: stringdefault: ""- name: httpsProxydescription: HTTPS proxy server for SSL requests.type: stringdefault: ""- name: noProxydescription: Opt out of proxying HTTP/HTTPS requests.type: stringdefault: ""- name: verbosedescription: Log the commands that are executed during `git-clone`'s operation.type: stringdefault: "true"- name: gitInitImagedescription: The image providing the git-init binary that this Task runs.type: stringdefault: "gcr.io/tekton-releases/github.com/tektoncd/pipeline/cmd/git-init:v0.21.0"- name: userHomedescription: |Absolute path to the user's home directory. Set this explicitly if you are running the image as a non-root user or have overriddenthe gitInitImage param with an image containing custom user configuration.type: stringdefault: "/tekton/home"results:- name: commitdescription: The precise commit SHA that was fetched by this Task.- name: urldescription: The precise URL that was fetched by this Task.steps:- name: cloneimage: "$(params.gitInitImage)"env:- name: HOMEvalue: "$(params.userHome)"- name: PARAM_URLvalue: $(params.url)- name: PARAM_REVISIONvalue: $(params.revision)- name: PARAM_REFSPECvalue: $(params.refspec)- name: PARAM_SUBMODULESvalue: $(params.submodules)- name: PARAM_DEPTHvalue: $(params.depth)- name: PARAM_SSL_VERIFYvalue: $(params.sslVerify)- name: PARAM_SUBDIRECTORYvalue: $(params.subdirectory)- name: PARAM_DELETE_EXISTINGvalue: $(params.deleteExisting)- name: PARAM_HTTP_PROXYvalue: $(params.httpProxy)- name: PARAM_HTTPS_PROXYvalue: $(params.httpsProxy)- name: PARAM_NO_PROXYvalue: $(params.noProxy)- name: PARAM_VERBOSEvalue: $(params.verbose)- name: PARAM_SPARSE_CHECKOUT_DIRECTORIESvalue: $(params.sparseCheckoutDirectories)- name: PARAM_USER_HOMEvalue: $(params.userHome)- name: WORKSPACE_OUTPUT_PATHvalue: $(workspaces.output.path)- name: WORKSPACE_SSH_DIRECTORY_BOUNDvalue: $(workspaces.ssh-directory.bound)- name: WORKSPACE_SSH_DIRECTORY_PATHvalue: $(workspaces.ssh-directory.path)- name: WORKSPACE_BASIC_AUTH_DIRECTORY_BOUNDvalue: $(workspaces.basic-auth.bound)- name: WORKSPACE_BASIC_AUTH_DIRECTORY_PATHvalue: $(workspaces.basic-auth.path)- name: WORKSPACE_SSL_CA_DIRECTORY_BOUNDvalue: $(workspaces.ssl-ca-directory.bound)- name: WORKSPACE_SSL_CA_DIRECTORY_PATHvalue: $(workspaces.ssl-ca-directory.path)script: |#!/usr/bin/env shset -euif [ "${PARAM_VERBOSE}" = "true" ] ; thenset -xfiif [ "${WORKSPACE_BASIC_AUTH_DIRECTORY_BOUND}" = "true" ] ; thencp "${WORKSPACE_BASIC_AUTH_DIRECTORY_PATH}/.git-credentials" "${PARAM_USER_HOME}/.git-credentials"cp "${WORKSPACE_BASIC_AUTH_DIRECTORY_PATH}/.gitconfig" "${PARAM_USER_HOME}/.gitconfig"chmod 400 "${PARAM_USER_HOME}/.git-credentials"chmod 400 "${PARAM_USER_HOME}/.gitconfig"fiif [ "${WORKSPACE_SSH_DIRECTORY_BOUND}" = "true" ] ; thencp -R "${WORKSPACE_SSH_DIRECTORY_PATH}" "${PARAM_USER_HOME}"/.sshchmod 700 "${PARAM_USER_HOME}"/.sshchmod -R 400 "${PARAM_USER_HOME}"/.ssh/*fiif [ "${WORKSPACE_SSL_CA_DIRECTORY_BOUND}" = "true" ] ; thenexport GIT_SSL_CAPATH="${WORKSPACE_SSL_CA_DIRECTORY_PATH}"fiCHECKOUT_DIR="${WORKSPACE_OUTPUT_PATH}/${PARAM_SUBDIRECTORY}"cleandir() {# Delete any existing contents of the repo directory if it exists.## We don't just "rm -rf ${CHECKOUT_DIR}" because ${CHECKOUT_DIR} might be "/"# or the root of a mounted volume.if [ -d "${CHECKOUT_DIR}" ] ; then# Delete non-hidden files and directoriesrm -rf "${CHECKOUT_DIR:?}"/*# Delete files and directories starting with . but excluding ..rm -rf "${CHECKOUT_DIR}"/.[!.]*# Delete files and directories starting with .. plus any other characterrm -rf "${CHECKOUT_DIR}"/..?*fi}if [ "${PARAM_DELETE_EXISTING}" = "true" ] ; thencleandirfitest -z "${PARAM_HTTP_PROXY}" || export HTTP_PROXY="${PARAM_HTTP_PROXY}"test -z "${PARAM_HTTPS_PROXY}" || export HTTPS_PROXY="${PARAM_HTTPS_PROXY}"test -z "${PARAM_NO_PROXY}" || export NO_PROXY="${PARAM_NO_PROXY}"/ko-app/git-init \-url="${PARAM_URL}" \-revision="${PARAM_REVISION}" \-refspec="${PARAM_REFSPEC}" \-path="${CHECKOUT_DIR}" \-sslVerify="${PARAM_SSL_VERIFY}" \-submodules="${PARAM_SUBMODULES}" \-depth="${PARAM_DEPTH}" \-sparseCheckoutDirectories="${PARAM_SPARSE_CHECKOUT_DIRECTORIES}"cd "${CHECKOUT_DIR}"RESULT_SHA="$(git rev-parse HEAD)"EXIT_CODE="$?"if [ "${EXIT_CODE}" != 0 ] ; thenexit "${EXIT_CODE}"fiprintf "%s" "${RESULT_SHA}" > "$(results.commit.path)"printf "%s" "${PARAM_URL}" > "$(results.url.path)"
四.
- 生命周期同
PipelineRun或者TaskRun
workspaces:
- name: git-sourcevolumeClaimTemplate:spec:accessModes:- ReadWriteManyresources:requests:storage: 1Gi
(一). 案例
代码内容
1. git-clone
# 官网提供的git 的 demo
kubectl -n kube-ops apply -f https://raw.githubusercontent.com/tektoncd/catalog/main/task/git-clone/0.5/git-clone.yaml
2. 单元测试
apiVersion: tekton.dev/v1beta1
kind: Task
metadata: name: unit-testnamespace: kube-ops
spec: workspaces:- name: sourcesteps: - name: unit-testworkingDir: $(workspaces.source.path)image: golang:1.17.5env:- name: GOPROXYvalue: https://goproxy.cncommand: ['go'] args:- "test"- "./..."
3. make-build-push
- 采用
kaniko来做的镜像,需要镜像仓库的认证信息,需要创建secret
apiVersion: v1
data:.dockerconfigjson: eyJhdXRocyI6eyJodHRwczovL2hhcmJvci55ZWVtaWFvLm5ldC5jbiI6eyJ1c2VybmFtZSI6ImNoZW54aW5nZ3VhbmciLCJwYXNzd29yZCI6ImR3MmV4czZuRCFkZmprMTIyIiwiYXV0aCI6IlkyaGxibmhwYm1kbmRXRnVaenBrZHpKbGVITTJia1FoWkdacWF6RXlNZz09In19fQ==
kind: Secret
metadata:name: dockerhubnamespace: kube-ops
type: kubernetes.io/dockerconfigjson# 也可以用名称创建
kubectl  -n kube-ops create secret docker-registry dockerhub --docker-server=https://harbor.yeemiao.net.cn --docker-username=chenxingguang --docker-password='dw2exs6nD!dfjk122'
apiVersion: tekton.dev/v1beta1
kind: Task
metadata: name: build-push-imagenamespace: kube-ops
spec: params:- name: pathToDockerfiledescription: The path to the dockerfile to build (relative to the context)default: Dockerfile- name: imageUrldescription: Url of image repository- name: imageTagdescription: Tag to apply to the built imagedefault: latestworkspaces:- name: source- name: dockerconfigmountPath: /kaniko/.dockersteps:- name: build-and-pushimage: registry.cn-hangzhou.aliyuncs.com/coolops/kaniko-executor:v1.5.0workingDir: $(workspaces.source.path)command:- /kaniko/executorargs:- --dockerfile=$(params.pathToDockerfile)- --destination=$(params.imageUrl):$(params.imageTag)- --context=$(workspaces.source.path)
4. deploy-to-k8s
- 部署到k8s中,需要认证
kubectl create secret generic kubernetes-config --from-file=/root/.kube/config
apiVersion: tekton.dev/v1alpha1
kind: Task
metadata:name: deploy-to-k8snamespace: kube-ops
spec:workspaces:- name: source- name: kubernetesconfigmountPath: /root/.kubeparams:- name: pathToYamlFiledescription: The path to the yaml file to deploy within the git sourcedefault: deployment.yaml- name: IMAGE- name: TAGsteps:- name: run-kubectlimage: registry.cn-hangzhou.aliyuncs.com/coolops/kubectl:1.19.16workingDir: $(workspaces.source.path)script: |sed -i s#IMAGE#$(params.IMAGE)#g $(params.pathToYamlFile)sed -i s#TAG#$(params.TAG)#g $(params.pathToYamlFile)kubectl apply -f $(params.pathToYamlFile)
5. pipeline
apiVersion: tekton.dev/v1beta1
kind: Pipeline
metadata: name: devops-hello-world-pipelinenamespace: kube-ops
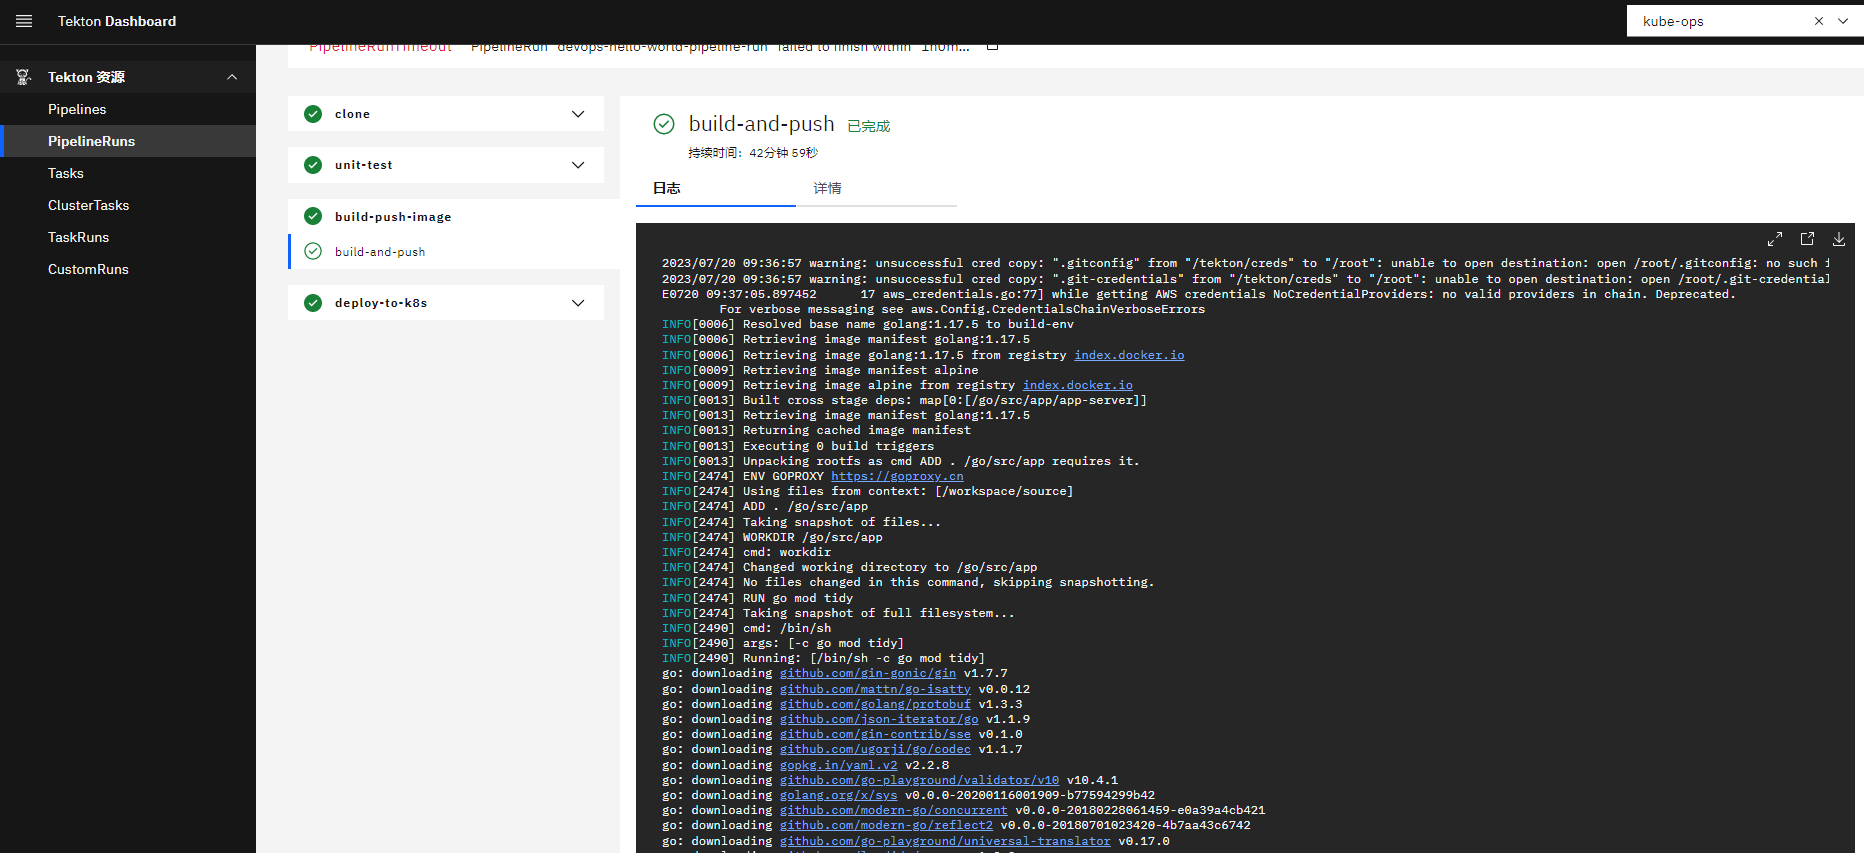
spec: workspaces: # 声明 workspaces - name: go-repo-pvc - name: docker-config- name: kubernetes-configparams: # 定义代码仓库 - name: git_url - name: revision type: string default: "master" - name: gitInitImagetype: stringdefault: "registry.cn-hangzhou.aliyuncs.com/coolops/tekton-git-init:v0.29"# 定义镜像参数 - name: pathToDockerfiledescription: The path to the build context, used by Kaniko - within the workspacedefault: .- name: imageUrldescription: Url of image repository- name: imageTagdescription: Tag to apply to the built imagedefault: latesttasks: # 添加task到流水线中 - name: clone taskRef: name: git-clone workspaces: - name: output workspace: go-repo-pvc params: - name: url value: $(params.git_url) - name: revision value: $(params.revision) - name: gitInitImagevalue: $(params.gitInitImage)- name: unit-test workspaces: # 传递 workspaces - name: sourceworkspace: go-repo-pvctaskRef: name: unit-testrunAfter:- clone- name: build-push-imageparams:- name: pathToDockerfilevalue: $(params.pathToDockerfile)- name: imageUrlvalue: $(params.imageUrl)- name: imageTagvalue: $(params.imageTag)taskRef: name: build-push-image runAfter:- unit-test workspaces: # 传递 workspaces - name: sourceworkspace: go-repo-pvc- name: dockerconfigworkspace: docker-config- name: deploy-to-k8staskRef: name: deploy-to-k8sparams:- name: pathToYamlFilevalue: deployment.yaml- name: IMAGEvalue: $(params.imageUrl)- name: TAGvalue: $(params.imageTag)workspaces:- name: sourceworkspace: go-repo-pvc - name: kubernetesconfigworkspace: kubernetes-configrunAfter:- build-push-image
6. PipelineRun
- 需要创建一个用户
apiVersion: v1
kind: Secret
metadata: name: gitlab-auth namespace: kube-opsannotations: tekton.dev/git-0: http://gitlab-tekton.yeemiao.net.cn/root/tekton-deploy.git	# 代码仓库
type: kubernetes.io/basic-auth
stringData: username: rootpassword: Hhy0304@moon
---
apiVersion: v1
kind: ServiceAccount
metadata: name: tekton-build-sanamespace: kube-ops
secrets:  - name: gitlab-auth
---
apiVersion: rbac.authorization.k8s.io/v1
kind: ClusterRoleBinding
metadata: name: tekton-clusterrole-bindingnamespace: kube-ops
roleRef: apiGroup: rbac.authorization.k8s.io kind: ClusterRole name: edit
subjects:
- kind: ServiceAccount name: tekton-build-sa namespace: kube-ops
真正的执行过程
apiVersion: tekton.dev/v1beta1
kind: PipelineRun
metadata:name: devops-hello-world-pipeline-runnamespace: kube-ops
spec:serviceAccountName: tekton-build-sapipelineRef:name: devops-hello-world-pipeline params:- name: revisionvalue: master- name: git_urlvalue: http://gitlab-tekton.yeemiao.net.cn/root/tekton-deploy.git- name: imageUrlvalue: harbor.yeemiao.net.cn/library/tekton-quiz- name: imageTagvalue: v1beta1- name: pathToDockerfilevalue: Dockerfileworkspaces:- name: go-repo-pvcvolumeClaimTemplate:spec:accessModes:- ReadWriteManystorageClassName: soin-nfsresources:requests:storage: 1Gi- name: docker-configsecret:secretName: docker-config- name: kubernetes-configsecret:secretName: kubernetes-config
查看部署的pod
[root@controller-1 ~/xingguang/tekton/case]# kubectl  -n kube-ops get po |grep http
httpserver-78b8445f5c-wqcwm                            1/1     Running     0          17s