这篇mylangrobot项目由neka-nat创建,本文已获得作者Shirokuma授权进行编辑和转载。
https://twitter.com/neka_nat
GitHub-mylangrobot :GitHub - neka-nat/mylangrobot: Language instructions to mycobot using GPT-4V
引言
本项目创建了一个使用GPT-4V和myCobot的一个演示,演示机械臂简单得到拾取操作,这个演示使用了一个名叫SoM(物体检测对象)的方法,通过自然语言生成机器人动作。通俗点换一句话来说就是,机器接受自然语言,去寻找目标然后让机械臂进行抓取的一个案例。
本项目的亮点主要是GPT-4V的图像处理和SoM物体检测算法相结合,通过自然语言和机器交互实现机械臂运动。
软件
SoM
Set of Mark(SoM)是一种用于增强大型语言模型的视觉理解能力。图像经过SoM处理之后能够在图像上添加一系列的标记,这些标记能够被语言类模型识别和处理。这些标记有助于模型更准确的识别和理解图像中的物体和内容。
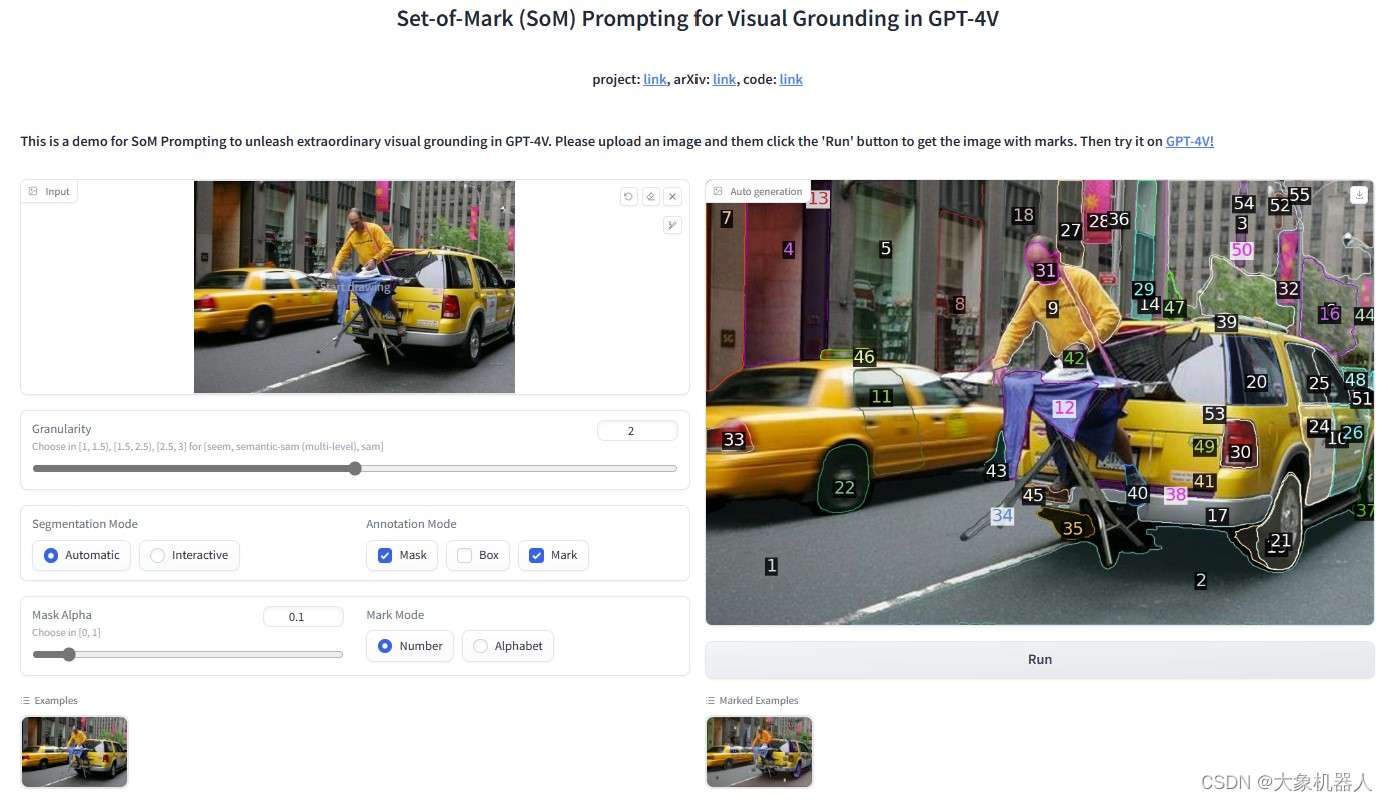
这使得语言模型能够针对图像中的元素进行更精准的分析和描述,从而提高其在视觉任务上的表现。
GPT-4V
我们常聊的GPT是一个大预言模型,我们可以跟它进行对话聊天。在迭代新的版本的GPT-4V是一个大模型多模态语言模型,它不单单能处理文本信息,现在还能够处理图像信息。能够对图像理解,图像生成,图像描述的功能,这样大模型结合GPT-4的强大自然语言处理能力和现金的图像分析技术,可以提供更高效和更准确的视觉和语言综合能力。
下面是OpenAI 提供的例子
简要介绍:将一个视频提供给GPT4,通过GPT-4V对图像的处理,生成对视频讲解的内容的过程。原文链接:Processing and narrating a video with GPT's visual capabilities and the TTS API | OpenAI Cookbook
User:
"These are frames from a video that I want to upload. Generate a compelling description that I can upload along with the video."
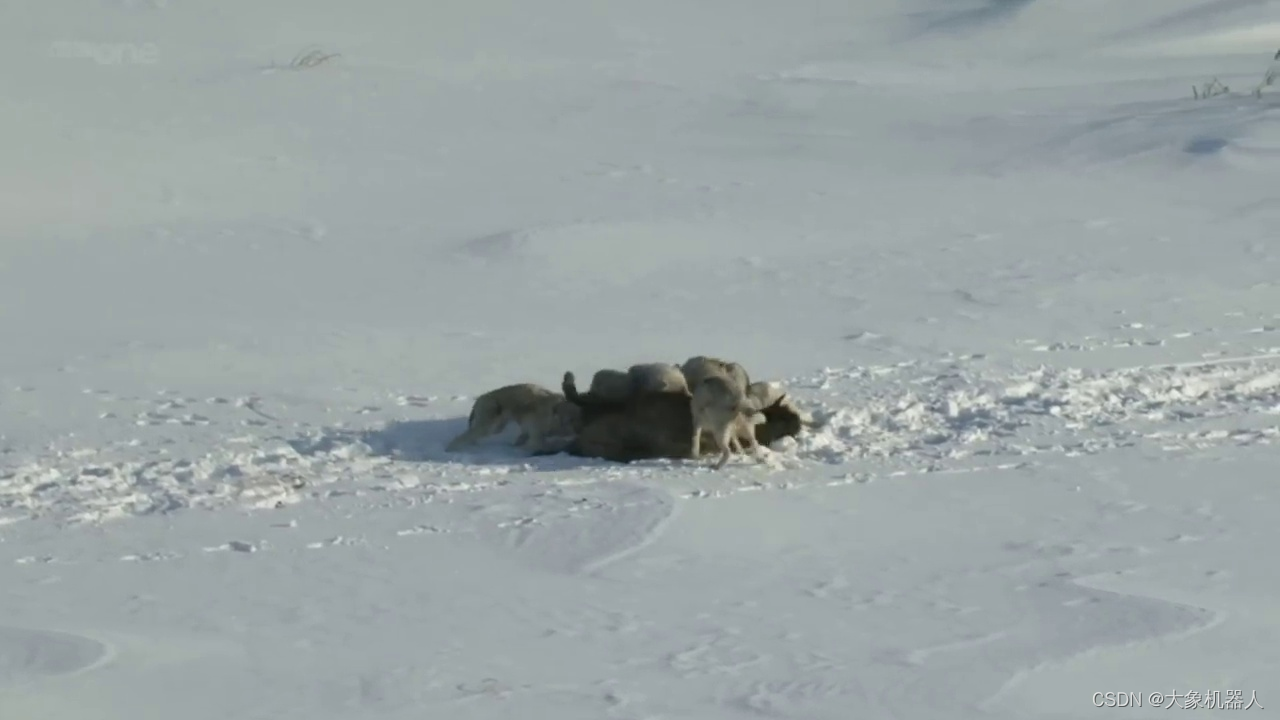
视频中某一帧的图像
#GPT-4V对图像的描述处理
GPT4:
"🐺 Survival of the Fittest: An Epic Tale in the Snow ❄️ - Witness the intense drama of nature as a pack of wolves face off against mighty bison in a harsh winter landscape. This raw footage captures the essence of the wild where every creature fights for survival. With each frame, experience the tension, the strategy, and the sheer force exerted in this life-or-death struggle. See nature's true colors in this gripping encounter on the snowy plains. 🦬"Remember to respect wildlife and nature. This video may contain scenes that some viewers might find intense or distressing, but they depict natural animal behaviors important for ecological studies and understanding the reality of life in the wilderness.
Openai-whisper
Introducing Whisper
OpenAI开发的一种自动语音识别(ASR)系统。它使用先进的深度学习技术来转录、翻译和理解人类的语音。Whisper的特点是它能够支持多种语言,且在识别不同口音和噪音环境下的语音方面表现出色。此外,它还能够处理不同的音频质量,使其适用于多种应用场景,如转录会议记录、自动生成字幕和辅助翻译等。

pymycobot
GitHub - elephantrobotics/pymycobot: This is a python API for ElephantRobotics product.
pymycobot是针对mycobot机器人系列的python库。MyCobot是一款小型、多功能的协作机器人臂,适用于教育、研究和轻量级工业应用。PyMyCobot库提供了一套简单的编程接口,使开发者能够控制和编程MyCobot机器人,进行例如移动、抓取、感应等操作。这个库支持多种操作系统和开发环境,方便集成到各种项目中,特别是在机器人学和自动化领域的应用。通过使用Python这种广泛使用的编程语言,pymycobot使得操作和实验MyCobot机器人变得更加易于访问和灵活。
硬件
myCobot 280M5
myCobot 280 M5是大象机器人公司生产的一款桌面级小型六轴协作机器人。这款机器人臂设计紧凑,适用于教育、研究和轻型工业应用。myCobot 280 M5支持多种编程和控制方式,适用于各种操作系统和编程语言,包括:
主控和辅控芯片:ESP32
支持蓝牙(2.4G/5G)和无线(2.4G 3D Antenna)
多种输入和输出端口
支持自由移动、关节运动、笛卡尔运动、轨迹录制和无线控制
兼容操作系统:Windows、Linux、MAC
支持编程语言:Python、C++、C#、JavaScript
支持编程平台和工具:RoboFlow、myblockly、Mind+、UiFlow、Arduino、mystudio
支持通信协议:串口控制协议、TCP/IP、MODBUS
这些特性使myCobot 280 M5成为一个多功能、易于使用且适用于多种应用场景的机器人解决方案。
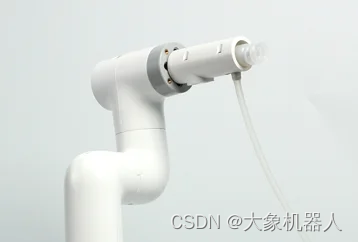
myCobot 垂直吸泵 V2.0
通过真空吸附原理工作,提供3.3V IO控制,可以广泛大在于各种嵌入式设备的开发使用。

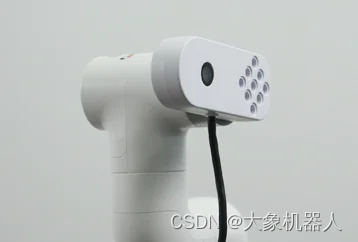
摄像头
标准的USB接口和LEGO接口,USB接口可以搭配各种PC设备使用,LEGO接口可以便捷固定,可应用于机器视觉,图像识别等应用。

mylangrobot 软件分析
根据开头描述的项目流程具体的流程如下:
- 音频输入:首先录入音频指令
- 音频处理:使用“openai-whisper”对音频进行处理,转化为文本
- 语言模型交互:利用GPT-4模型处理转换后的文本指令,理解用户的命令
- 图像处理:使用GPT-4V 和 增强图像能力的SoM来对图像处理寻找指令提到的目标
- 机械臂控制:控制机械臂对识别出的目标进行抓取
音频处理
该功能用到了speech_recognition 是用来手机麦克风的音频数据,能够让计算机进行识别。
使用到的库
import io
import os
from enum import Enum
from typing import Protocolimport openai
import speech_recognition as sr
from pydub import AudioSegment
from pydub.playback import play
定义接口,获取用户的输入,像用户输出。
class Interface(Protocol):
    def input(self, prefix: str = "") -> str:
        return prefix + self._input_impl()    def _input_impl(self) -> str:
        ...    def output(self, message: str) -> None:
        ...
首先初始化麦克风设备,用于音频的输入和输出
class Audio(Interface):
    def __init__(self):
        self.r = sr.Recognizer()
        self.mic = sr.Microphone()# openai-whisper API key
        self.client = openai.OpenAI(api_key=os.environ.get("OPENAI_API_KEY"))
将输入的音频转化为文本格式输出。
 def _input_impl(self) -> str:
        print("Please tell me your command.")
        with self.mic as source:
            self.r.adjust_for_ambient_noise(source)
            audio = self.r.listen(source)        try:
            return self.r.recognize_whisper(audio, language="japanese")        except sr.UnknownValueError:
            print("could not understand audio")
        except sr.RequestError as e:
            print("Could not request results from Google Speech Recognition service; {0}".format(e))
最后返回的r就是获得音频的文本格式可以用于GPT-4模型的交互。
图像处理和GPT4语言交互
在传输文本格式给GPT-4模型交互是,是和图像一起传递过去,所以图像处理和交互一起讲解。
图像处理使用到的库
import cv2
import numpy as np
import supervision as sv
import torch
from segment_anything import SamAutomaticMaskGenerator, sam_model_registryfrom .utils import download_sam_model_to_cache
主要是用到的是SamAutomaticMaskGenerator这个功能,将检测到的目标进行标记以及绘制标记。
#将图像转化为RGB格式
        image_rgb = cv2.cvtColor(image, cv2.COLOR_BGR2RGB)
#对图像处理,进行目标检测和标记的绘制sam_result = self.mask_generator.generate(image_rgb)
        detections = sv.Detections.from_sam(sam_result=sam_result)
        height, width, _ = image.shape
        image_area = height * width        min_area_mask = (detections.area / image_area) > self.MIN_AREA_PERCENTAGE
        max_area_mask = (detections.area / image_area) < self.MAX_AREA_PERCENTAGE
        detections = detections[min_area_mask & max_area_mask]        #返回图片和检测的信息的结果
        labels = [str(i) for i in range(len(detections))]
        annotated_image = mask_annotator.annotate(scene=image_rgb.copy(), detections=detections)
        annotated_image = label_annotator.annotate(scene=annotated_image, detections=detections, labels=labels)
        return annotated_image, detections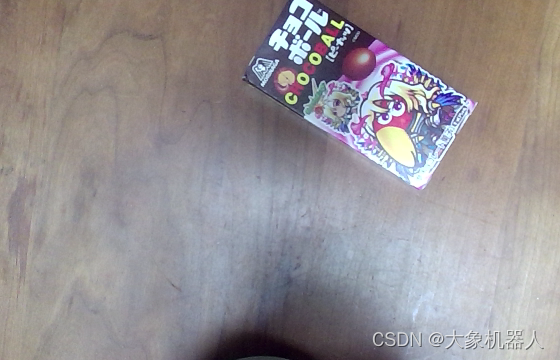
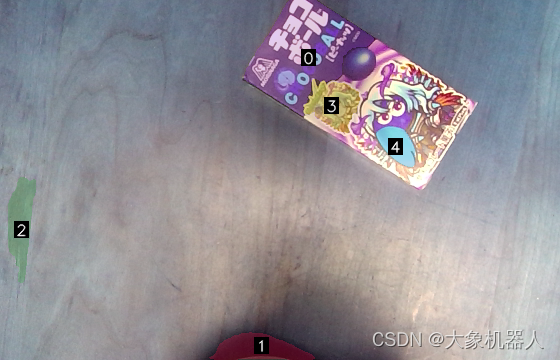
就能得到这样的效果。
note:下面的功能需要获取GPT-4的API-Key,才能够进行使用。
将得到的结果照片传递给GPT-4模型,需要经过一些处理之后才能实现。经过GPT-4V可以对图片进行处理最后返回出来图片内容的信息,以及得到相对应序号的物体信息。
def prepare_inputs(message: str, image: np.ndarray) -> dict:
    # # Path to your image
    # image_path = "temp.jpg"
    # # Getting the base64 string
    base64_image = encode_image_from_cv2(image)    payload = {
        "model": "gpt-4-vision-preview",
        "messages": [
            {"role": "system", "content": [metaprompt]},
            {
                "role": "user",
                "content": [
                    {
                        "type": "text",
                        "text": message,
                    },
                    {"type": "image_url", "image_url": {"url": f"data:image/jpeg;base64,{base64_image}"}},
                ],
            },
        ],
        "max_tokens": 800,
    }    return payloaddef request_gpt4v(message: str, image: np.ndarray) -> str:
    payload = prepare_inputs(message, image)
    response = requests.post("https://api.openai.com/v1/chat/completions", headers=headers, json=payload)
    res = response.json()["choices"][0]["message"]["content"]
    return res
机械臂控制和整体整合
在图像处理和GPT-4V模型处理完后会根据解析的指令生成目标的点位信息,这些点位信息被传递给机械臂控制系统,机械臂控制系统根据点位信息移动到响应的位置进行抓去动作。
主要涉及几个方法,移动到目标物体
    def move_to_object(self, object_no: int, speed: Optional[float] = None) -> None:
        object_no = self._check_and_correct_object_no(object_no)
        print("[MyCobotController] Move to Object No. {}".format(object_no))
        detection = (
            np.array([-self._detections[object_no][0], -self._detections[object_no][1]]) + self.capture_coord.pos[:2]
        )
        print("[MyCobotController] Object pos:", detection[0], detection[1])
        self.move_to_xy(detection[0], detection[1], speed)
grab动作
    def grab(self, speed: Optional[float] = None) -> None:
        print("[MyCobotController] Grab to Object")
        current_pos = self.current_coords().pos
        self.move_to_z(self.object_height + self.end_effector_height, speed)
        self._mycobot.set_basic_output(self._suction_pin, 0)
        time.sleep(2)
        self.move_to_z(current_pos[2], speed)
drop动作
    def move_to_place(self, place_name: str, speed: Optional[float] = None) -> None:print("[MyCobotController] Move to Place {}".format(place_name))
        self._current_position = self.positions[place_name]
        self._mycobot.sync_send_angles(
            np.array(self._current_position) + self.calc_gravity_compensation(self._current_position),
            speed or self._default_speed,
            self._command_timeout,)print("Current coords: {}".format(self.current_coords()))
各个功能个实现了之后需要协调整个流程操作,梳理流程逻辑最后完成任务。
具体的代码可以查看operator.py文件。
实例测试
下面进行实例测试来看项目成果,内容是语音输入“pick up the chocolate”,机械臂去执行任务。
https://youtu.be/Eda1m7DnIhQ
视频
总结
这个项目展示了如何利用先进的人工智能和机器人技术来实现复杂的自动化任务。通过结合语音识别、自然语言处理、图像分析和精确的机械臂控制,该项目成功地创建了一个能够理解和执行语言指令的机器人系统。这不仅提高了机器人与人类交互的自然度和效率,而且还开辟了机器人技术在各种实际应用中的新可能性,如自动化制造、物流、助手机器人等领域。
最后再次感谢Shirokuma,给我们分享这个案例。如果你有更好的案例欢迎联系我们!


