pytest常用插件
pytest-html插件
安装:
pip install pytest-html -U用途:
生成html的测试报告
用法:
在.ini配置文件里面添加
addopts = --html=report.html --self-contained-html效果:
执行结果中存在html测试报告路径
![]()
pytest-xdist插件
安装:
pip install pytest-xdist -U用途:
可以使用并发的方式执行用例
用法:
在.ini配置文件中添加
addopte -n 并发数(建议不要超过系统CPU的核心数)
如果并发数为0,相当于没有使用插件
效果:
会减少用例的执行时间,但是由于调用进程也需要消耗资源,所以填写的并发数太多时间并不会得到有效的提升
无并发执行情况:

并发数为2的执行情况:

可以看到效率有所提高
pytest-rerunfailures插件
安装:
pip install pytest-rerunfailures -U用途:
在用例失败后进行重试,可以执行重试最大次数和每次重试之前的等待时间
用法:
在.ini配置文件中添加
addopts --reruns 重新执行的数量 --reruns-delay 每次重新执行的等待时间
如: --reruns 5 --reruns-delay 1   表示如果失败最多重新执行5次,并且每次重新执行之间间隔一秒
效果:
用例内容:
生成一个随机数范围是[1, 3)
断言这个随机数是否等于1,相当于是50%的概率
def test_1():a = random.randint(1, 3)assert a == 1使用--reruns 5 --reruns-delay 1的配置执行后

pytest-order插件
安装:
pip install pytest-order -U用途:
给用例排序,让用例可以按照执行的顺序执行
用法:
在用例上面加上如下标识
@pytest.mark.order(1)执行时会按照数字从小到大的顺序执行,如果没有填数字或者没有添加标识的用例,会在排序的所有用例执行之后,按照原本的用例顺序执行。
效果:
用例内容:
test_1没有添加标识
test_2添加了标识但没有加入数字
test_3、test_4、test_5添加了标识并且加入了数字
def test_1():print('执行用例test_1')@pytest.mark.order()
def test_2():print('执行用例test_2')@pytest.mark.order(1)
def test_3():print('执行用例test_3')@pytest.mark.order(3)
def test_4():print('执行用例test_4')@pytest.mark.order(2)
def test_5():print('执行用例test_5')
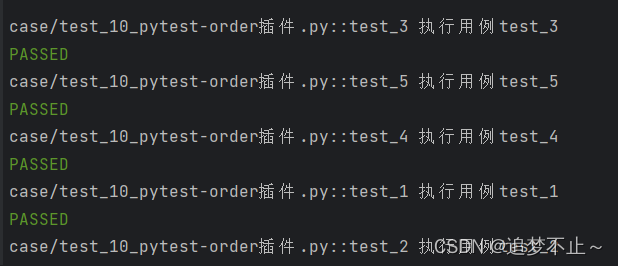
预期执行顺序:
test_3、test_5、test_4、test_1、test_2
执行结果:
符合预期
pytest-base-url插件
安装:
pip install pytest-base-url -U用途:
在用例中可以使用名为base-url的变量,可以在用例之间传递信息
用法:
在.ini配置文件中添加:
addopts  --base-url 内容
或者
base_url = 内容
效果:
用例内容:
打印base-url的内容
def test_abc(base_url):print('正在使用的环境是:', base_url)base-url的内容为:
base_url = 测试环境效果:

pytest-result-log插件
安装:
pip install pytest-result-log -U用途:
打印的日志更详细,并且会对不同用例的日志进行区分
用法:
安装之后即可用
配置格式:
log_file = ./pytest.log
log_file_level = info
log_file_format = %(levelname)-8s %(asctime)s [%(name)s:%(lineno)s] : %(message)s
log_file_date_format = %Y-%m-%d %H:%M:%S# 设置打印日志的级别
result_log_level_verbose = info
效果:
用例内容:
import logginglogger = logging.getLogger()def test_log1():logger.info("哈哈哈,我是日志内容")def test_log2():logger.info("哈哈哈,我也是日志内容")assert 1 == 2执行结果:
会生成一个.log的文件,文件名为配置中设置的名称
log_file = ./pytest.log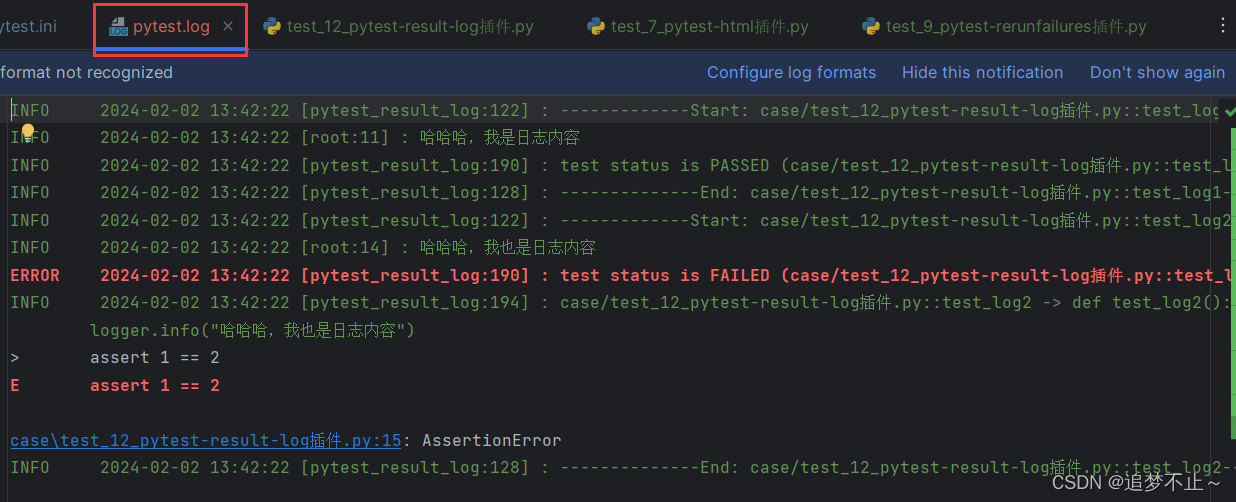
Allure测试报告框架
环境需要
需要安装Allure和jdk11及以上版本(建议17)
并且需要将其加入到系统的环境变量
最终结果就是:在cmd窗口或者终端中输入java和allure都可以出现对应的内容
allure-pytest插件
安装:
pip install allure-pytest -U用途:
将pytest生成的测试报告转化为Allure可以识别的数据
用法:
在.ini配置文件中添加:
addopts --alluredir=./temps --clean-alluredirAllure测试报告框架的用法
当生成了pytest的测试报告之后,在终端输入:
allure generate -c -o report temps其中generate表示生成报告
-c表示清空之前的报告
-o表示报告存放的目录名字(后面的report是我设置的目录名字)
temps表示allure-pytest插件生成的测试结果存放的位置(名字可以自己更换)
可以通过在main.py文件中添加如下代码,用来在用例执行完之后,自动执行该命令
os.system('allure generate -c -o report temps')效果:
点击你存放allure报告的目录(我的是report),找到index.html用浏览器打开
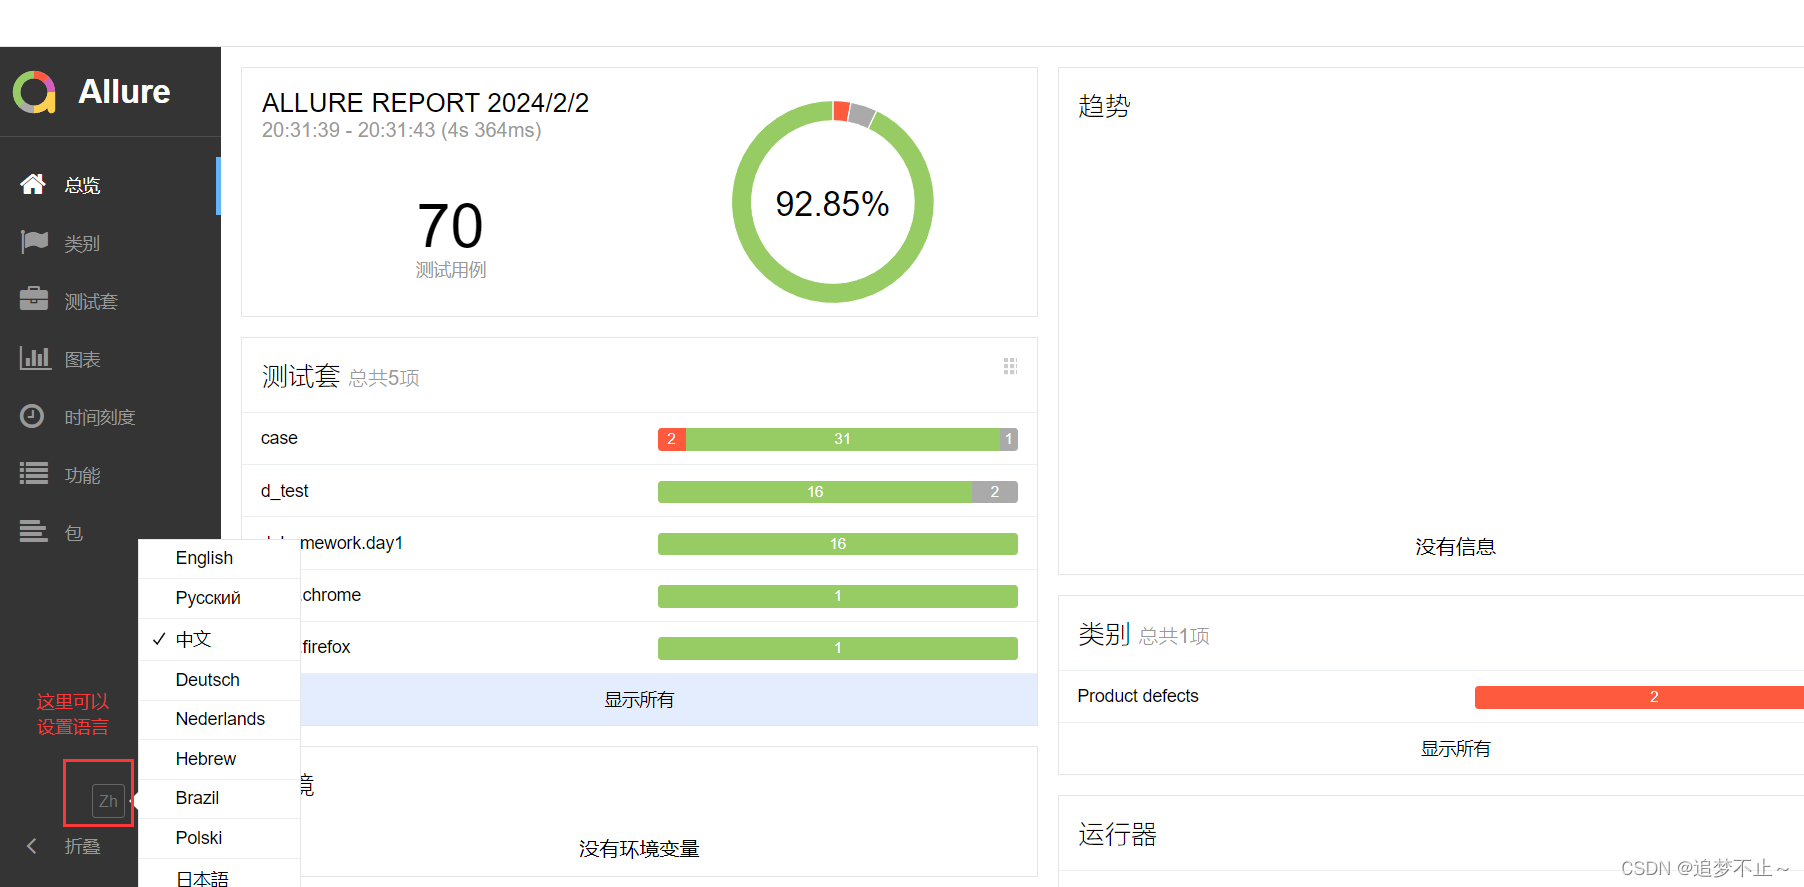
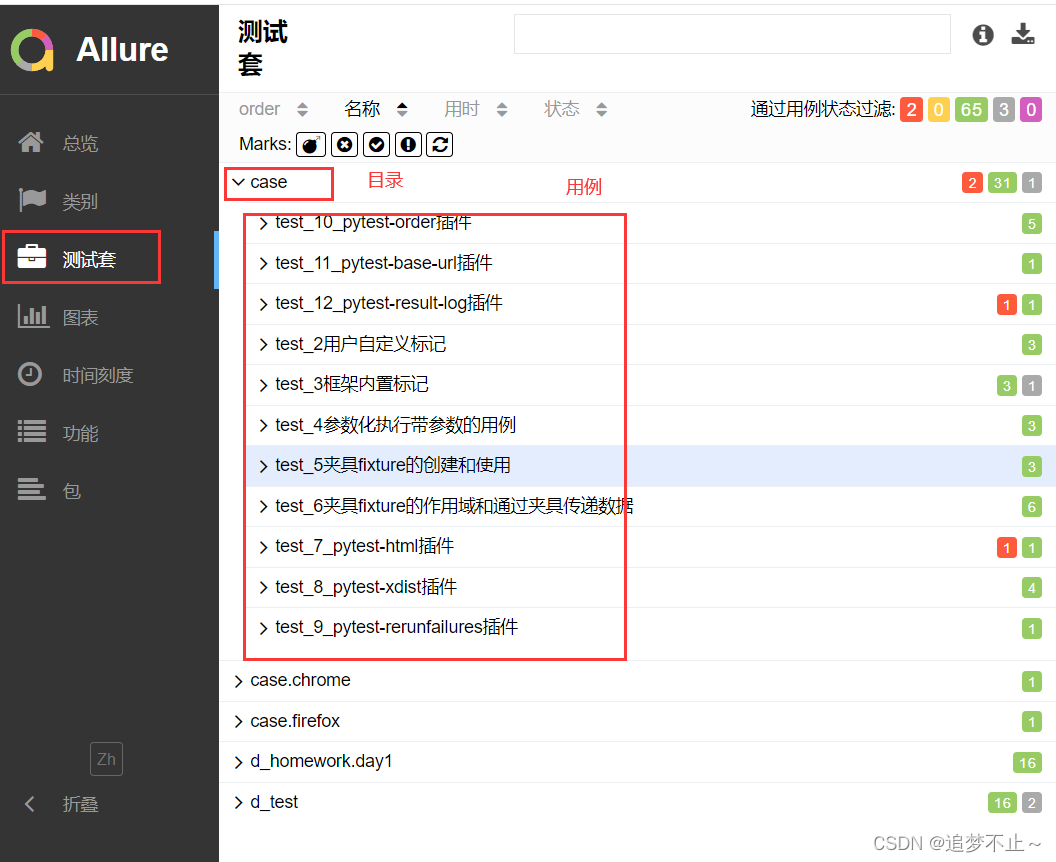
其中测试套会根据用来存在的目录进行区分
Allure测试报告定制
在Allure目录下找到config/allure.yml
修改成如下内容(就是把 - custom-logo-plugin 那一行加进去):
plugins:- junit-xml-plugin- xunit-xml-plugin- trx-plugin- behaviors-plugin- packages-plugin- screen-diff-plugin- xctest-plugin- jira-plugin- xray-plugin- custom-logo-plugin然后在来到Allure的plugins\custom-logo-plugin\static路径下
找到图片文件和css文件
设计好对应的logo图片和css样式,加进去Allure报告的logo就会修改了
Allure报告中对用例分类
我们可以在用例加上allure标记
同类型的标记中内容相同的标记会被归为一类
# 对测试用例进行划分,级别从大到小
@allure.epic()
@allure.feature()
@allure.story()
@allure.title()
举例:
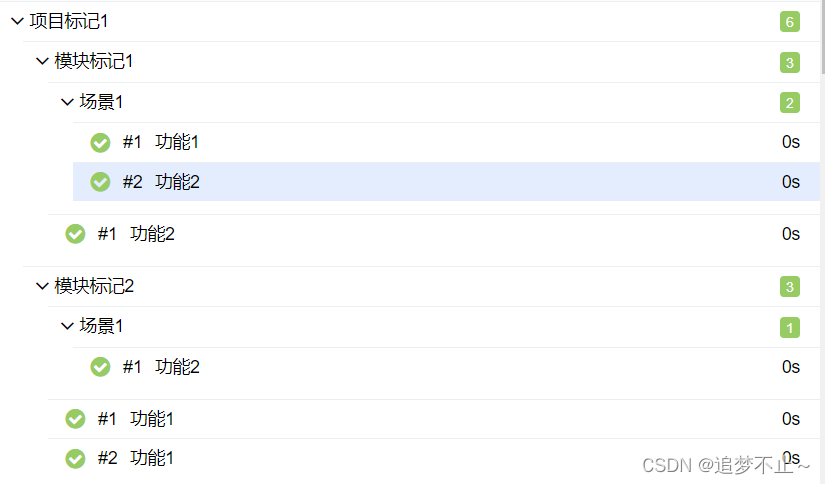
@allure.epic('项目标记1')
@allure.feature('模块标记1')
class Test1:@allure.story('场景1')@allure.title('功能1')def test_1(self):print('执行了test_1')@allure.story('场景1')@allure.title('功能2')def test_2(self):print('执行了test_2')@allure.title('功能2')def test_3(self):print('执行了test_3')@allure.epic('项目标记1')
@allure.feature('模块标记2')
class Test2:@allure.title('功能1')def test_1(self):print('执行了test_1')@allure.title('功能1')def test_2(self):print('执行了test_2')@allure.story('场景1')@allure.title('功能2')def test_3(self):print('执行了test_3')
Test1类和Test2类都加上了epic('项目标记1')此时他们会在报告会打包到一个名为"项目标记1"的目录下
又因为他们各自有带有不同的feature()标记,所以在"项目标记1"目录下Test1类和Test2类中的用例会再被分为两个目录:"模块标记1"和"模块标记2"
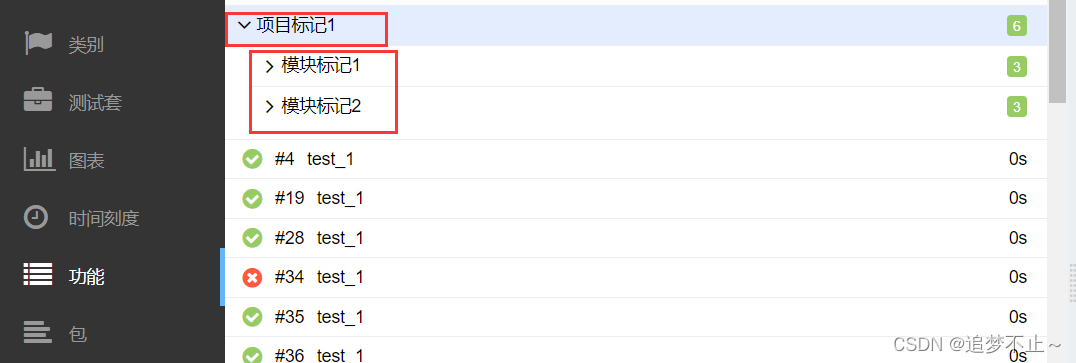
Test1类中用例又被分为"场景1"目录和直接展示的用例,以此类推
