| 实验环境: 宿主机为win11 Vmware workstaion 17 目标机的OS: Ubuntu 2004 网络:NAT 获取地址:192.168.248.131/24 DNS,DHCP:192.168.248.2 |
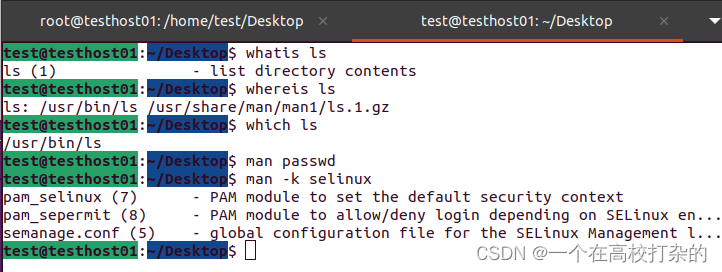
| 第一章ppt的命令操作(部分) S1、执行whoami、who、w命令 root@testhost01:/home/test/Desktop# whoami root root@testhost01:/home/test/Desktop# who test :0 2024-03-06 16:27 (:0) root@testhost01:/home/test/Desktop# w 16:49:03 up 51 min, 1 user, load average: 0.14, 0.21, 0.34 USER TTY FROM LOGIN@ IDLE JCPU PCPU WHAT test :0 :0 16:27 ?xdm? 4:18 0.01s /usr/libexec/gd root@testhost01:/home/test/Desktop# test@testhost01:~/Desktop$ w 16:49:28 up 52 min, 1 user, load average: 0.09, 0.20, 0.33 USER TTY FROM LOGIN@ IDLE JCPU PCPU WHAT test :0 :0 16:27 ?xdm? 4:20 0.01s /usr/libexec/gd test@testhost01:~/Desktop$ who test :0 2024-03-06 16:27 (:0) test@testhost01:~/Desktop$ whoami test S2、执行whatis、whereis、which、man、lsusb、uname、arch命令 test@testhost01:~/Desktop$ whatis ls ls (1) - list directory contents test@testhost01:~/Desktop$ whereis ls ls: /usr/bin/ls /usr/share/man/man1/ls.1.gz test@testhost01:~/Desktop$ which ls /usr/bin/ls test@testhost01:~/Desktop$ man passwd test@testhost01:~/Desktop$ man -k selinux pam_selinux (7) - PAM module to set the default security context pam_sepermit (8) - PAM module to allow/deny login depending on SELinux en... semanage.conf (5) - global configuration file for the SELinux Management l... test@testhost01:~/Desktop$
root@testhost01:/home/test/Desktop# lsusb Bus 001 Device 001: ID 1d6b:0002 Linux Foundation 2.0 root hub Bus 002 Device 003: ID 0e0f:0002 VMware, Inc. Virtual USB Hub Bus 002 Device 002: ID 0e0f:0003 VMware, Inc. Virtual Mouse Bus 002 Device 001: ID 1d6b:0001 Linux Foundation 1.1 root hub root@testhost01:/home/test/Desktop# free -m total used free shared buff/cache available Mem: 7902 1417 4576 2 1908 6203 Swap: 0 0 0 root@testhost01:/home/test/Desktop#
test@testhost01:~/Desktop$ uname -r 5.15.0-91-generic test@testhost01:~/Desktop$ arch x86_64 test@testhost01:~/Desktop$
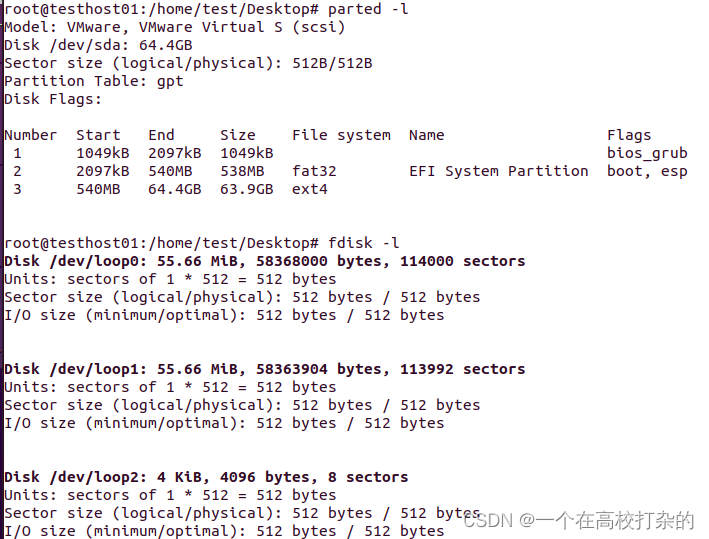
S3、执行parted、fdisk命令 root@testhost01:/home/test/Desktop# parted -l Model: VMware, VMware Virtual S (scsi) Disk /dev/sda: 64.4GB Sector size (logical/physical): 512B/512B Partition Table: gpt Disk Flags: Number Start End Size File system Name Flags 1 1049kB 2097kB 1049kB bios_grub 2 2097kB 540MB 538MB fat32 EFI System Partition boot, esp 3 540MB 64.4GB 63.9GB ext4 root@testhost01:/home/test/Desktop# fdisk -l Disk /dev/loop0: 55.66 MiB, 58368000 bytes, 114000 sectors Units: sectors of 1 * 512 = 512 bytes Sector size (logical/physical): 512 bytes / 512 bytes I/O size (minimum/optimal): 512 bytes / 512 bytes Disk /dev/loop1: 55.66 MiB, 58363904 bytes, 113992 sectors Units: sectors of 1 * 512 = 512 bytes Sector size (logical/physical): 512 bytes / 512 bytes I/O size (minimum/optimal): 512 bytes / 512 bytes Disk /dev/loop2: 4 KiB, 4096 bytes, 8 sectors Units: sectors of 1 * 512 = 512 bytes Sector size (logical/physical): 512 bytes / 512 bytes I/O size (minimum/optimal): 512 bytes / 512 bytes
|
| 二、复习常用命令: telnet、useradd、newusers、userdel、usermod、groupadd、groupdel、groupmod、su S1、查看/etc/passwd和/etc/shadow文件 root@testhost01:/home/test/Desktop# cat /etc/passwd … colord:x:120:126:colord colour management daemon,,,:/var/lib/colord:/usr/sbin/nologin sssd:x:121:127:SSSD system user,,,:/var/lib/sss:/usr/sbin/nologin geoclue:x:122:128::/var/lib/geoclue:/usr/sbin/nologin pulse:x:123:129:PulseAudio daemon,,,:/var/run/pulse:/usr/sbin/nologin hplip:x:124:7:HPLIP system user,,,:/run/hplip:/bin/false gnome-initial-setup:x:125:65534::/run/gnome-initial-setup/:/bin/false gdm:x:126:131:Gnome Display Manager:/var/lib/gdm3:/bin/false test:x:1000:1000:test,,,:/home/test:/bin/bash systemd-coredump:x:999:999:systemd Core Dumper:/:/usr/sbin/nologin sshd:x:127:65534::/run/sshd:/usr/sbin/nologin xrdp:x:128:135::/run/xrdp:/usr/sbin/nologin nginx:x:129:136:nginx user,,,:/nonexistent:/bin/false lxd:x:998:100::/var/snap/lxd/common/lxd:/bin/false fwupd-refresh:x:130:137:fwupd-refresh user,,,:/run/systemd:/usr/sbin/nologin root@testhost01:/home/test/Desktop# cat /etc/shadow … … sssd:*:18557:0:99999:7::: geoclue:*:18557:0:99999:7::: pulse:*:18557:0:99999:7::: hplip:*:18557:0:99999:7::: gnome-initial-setup:*:18557:0:99999:7::: gdm:*:18557:0:99999:7::: test:$6$xBcb08zuERidUKrQ$qD5fD1.Q0G2b2qbZCXsr62UEgdgsIhGCeU9yAKNTT9kOip.Zi0apPzJxwrQOssVhvaFCBCj6AnTwOyXq8W7f7.:18774:0:99999:7::: systemd-coredump:!*:18774:::::: sshd:*:18775:0:99999:7::: xrdp:!:19013:0:99999:7::: nginx:!:19212:0:99999:7::: lxd:!:19570:::::: fwupd-refresh:*:19570:0:99999:7::: root@testhost01:/home/test/Desktop# S2、使用useradd、passwd命令 root@testhost01:/home/test/Desktop# useradd dx1a root@testhost01:/home/test/Desktop# cat /etc/passwd … nginx:x:129:136:nginx user,,,:/nonexistent:/bin/false lxd:x:998:100::/var/snap/lxd/common/lxd:/bin/false fwupd-refresh:x:130:137:fwupd-refresh user,,,:/run/systemd:/usr/sbin/nologin dx1a:x:1001:1001::/home/dx1a:/bin/sh root@testhost01:/home/test/Desktop# cat /etc/shadow … nginx:!:19212:0:99999:7::: lxd:!:19570:::::: fwupd-refresh:*:19570:0:99999:7::: dx1a:!:19788:0:99999:7::: test@testhost01:~/Desktop$ passwd dx1a passwd: You may not view or modify password information for dx1a. test@testhost01:~/Desktop$ su root Password: root@testhost01:/home/test/Desktop# passwd dx1a New password: 输入了1qaz@WSX Retype new password: passwd: password updated successfully root@testhost01:/home/test/Desktop# cat /etc/shadow nginx:!:19212:0:99999:7::: lxd:!:19570:::::: fwupd-refresh:*:19570:0:99999:7::: dx1a:$6$9m9rb7.8ivQHQrSA$zrMGNhdRGxALrIP6fDAJGTGMe9c1UE0NAUb.q3lLUMrivurbk/tvjPd5rZN9IKEBu6yjVXpX4qKGloWfSjB9E.:19789:0:99999:7::: root@testhost01:/home/test/Desktop# root@testhost01:/home/test/Desktop# su dx1a $ w 08:34:46 up 26 min, 1 user, load average: 0.16, 0.12, 0.11 USER TTY FROM LOGIN@ IDLE JCPU PCPU WHAT test :0 :0 08:12 ?xdm? 1:38 0.01s /usr/libexec/gd $ whoami dx1a
Exam1:dx1a忘记自己的passwd了怎么办? 方法一:请求root帮助,删除密码后自己重置 root@testhost01:/home/test/Desktop# passwd -d dx1a passwd: password expiry information changed. root@testhost01:/home/test/Desktop# su dx1a $ passwd New password: !QAZ2wsx Retype new password: passwd: password updated successfully $
方法二:请求root帮助,vi /etc/passwd中对应的dx1a的行,删除口令域中的“x”标记并保存 然后切换su dx1a后执行passwd重置密码。
S2、usermod、groupadd、groupdel、groupmod命令 //锁定用户账户,使口令无效,以下两个操作等同效果 root@testhost01:~# passwd -l dx1a passwd: password expiry information changed. root@testhost01:~# usermod -L dx1a
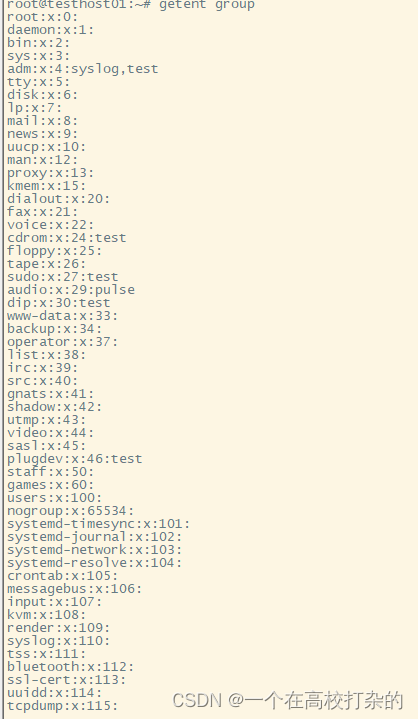
将现有用户账户添加到组,将dx1a添加到组student中 root@testhost01:~# usermod -a -G student dx1a root@testhost01:~# id dx1a uid=1001(dx1a) gid=1001(dx1a) groups=1001(dx1a),1002(student) 创建一个新用户并使用单个命令将其分配给primary和secondary(主要和次要组)。用id命令验证。 root@testhost01:~# useradd -g users dx1b root@testhost01:~# id dx1b uid=1002(dx1b) gid=100(users) groups=100(users) 使用getent group查看linux 中多个系统组,还可以使用cat /etc/group显示
若要查看当前用户的组信息,使用groups命令: root@testhost01:~# groups dx1a dx1a : dx1a student root@testhost01:~# groups dx1b dx1b : users groupmod命令用于修改用户组的名称或GID 命令:groupmod -n newgroup oldgroup root@testhost01:~# groupmod -n stu student root@testhost01:~# 先设置stu组的密码,然后用groupmod -p修改stu组的密码为student root@testhost01:~# gpasswd stu Changing the password for group stu New Password: Re-enter new password: root@testhost01:~# groupmod -p student stu root@testhost01:~# groupdel删除用户组命令 略 |
Sy2 Linux系统登录及用户管理
本文来自互联网用户投稿,该文观点仅代表作者本人,不代表本站立场。本站仅提供信息存储空间服务,不拥有所有权,不承担相关法律责任。如若转载,请注明出处:http://www.rhkb.cn/news/270774.html
如若内容造成侵权/违法违规/事实不符,请联系长河编程网进行投诉反馈email:809451989@qq.com,一经查实,立即删除!相关文章
极狐GitLab 如何设置 Markdown 中的图片大小
GitLab 是一个全球知名的一体化 DevOps 平台,很多人都通过私有化部署 GitLab 来进行源代码托管。极狐GitLab 是 GitLab 在中国的发行版,专门为中国程序员服务。可以一键式部署极狐GitLab。
使用极狐GitLab 进行代码托管或者 CI/CD,都避免不了…
Vue3.0里为什么要用 Proxy API 替代 defineProperty API ?
文章目录 Object.defineProperty小结 proxy总结有需要的请私信博主,还请麻烦给个关注,博主不定期更新,或许能够有所帮助!!请关注公众号 Object.defineProperty 定义:Object.defineProperty() 方法会直接在一…
docker部署aria2-pro
前言
我平时有一些下载视频和一些资源文件的需求,有时候需要离线下载,也要速度比较快的方式
之前我是用家里的玩客云绝育之后不再写盘当下载机用的,但是限制很多
我发现了aria2 这个下载器非常适合我,而有个大佬又在原来的基础…
php常见的45个漏洞及解决方案
[TOC](太多了,目录只列出最重要的几个,剩下的同学们自己翻) PHP作为一种广泛应用的服务器端脚本语言,在历史上曾曝出过多种安全漏洞。以下是一些PHP漏洞的类别及其简要解释,以及如何解决这些问题࿱…
一次一对一服务引起的沉思和笑话(微信号Stefan)
前情提要
客户需求:
分析页面代码和接口请求协议和参数需求,将人工下载视频怎么获得最终的视频链接,这一逻辑清晰的展示并讲解清除。我询问了是否需要成品爬虫,他说代码他自己能搞定。
我给的价格选择:
第一种、首…
flowable的java class task,也叫服务任务
源码地址12级程序猿-新年正当红/flowable-ui和服务任务
启动flowable-ui-app 浏览器输入下面的地址
http://localhost:8080/flowable-ui/#/
在服务任务这里设置java类的路径
com.dmg.flowabledemo.task.MyServiceTask 当请假任务完成之后,自动触发这个服务任务…
Java精品项目--第5期基于SpringBoot的高速收费系统的设计分析与实现
项目使用技术栈
SpringBootMavenShiroMySQLMybatis-PlusJavaJDK1.8HTML
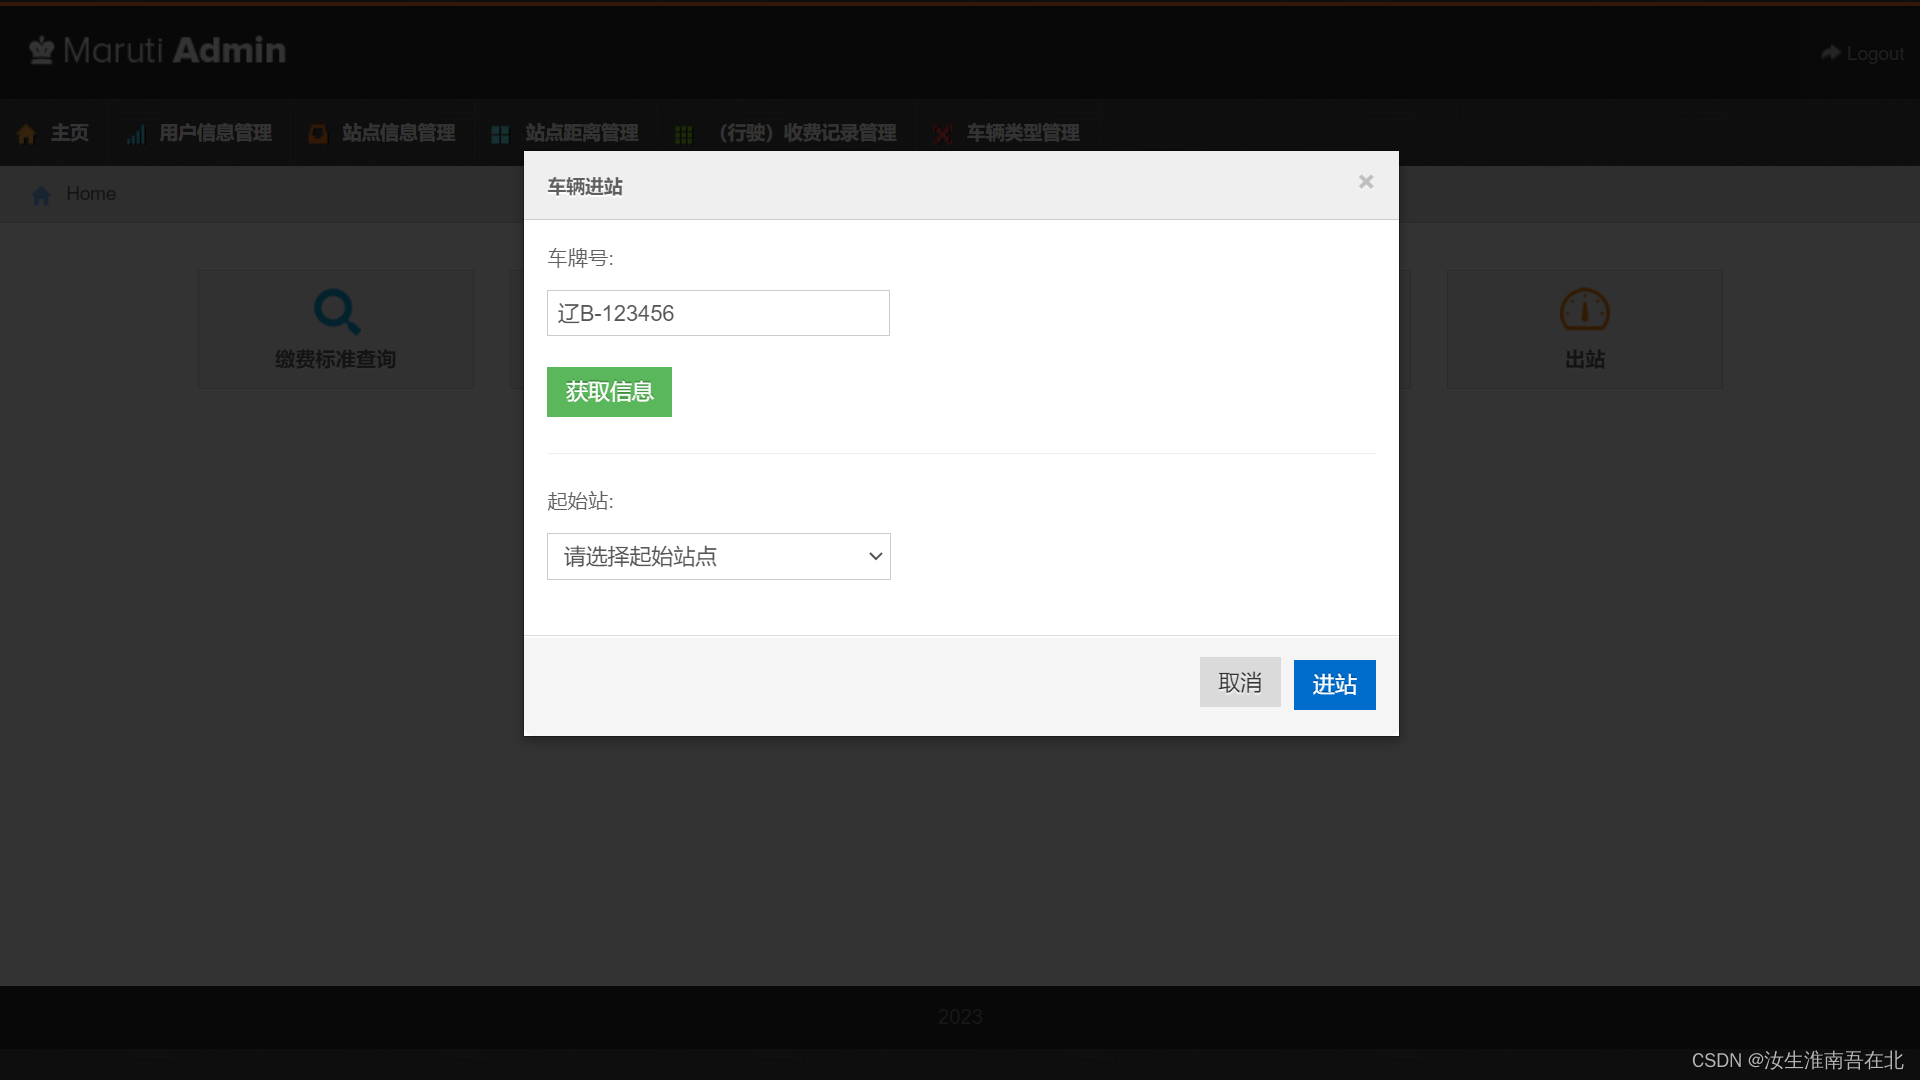
系统介绍 项目截图
工商全程无纸化应用与CA认证结合方案
一、引言
随着互联网技术的飞速发展,政务服务正逐步向数字化、网络化、智能化转型。为响应国家关于推进“互联网政务服务”的号召,XX工商管理局致力于实现工商企业网上注册全程无纸化,提升政务服务的效率与质量。本方案旨在结合陕西CA认证中…
PowerBI怎么修改数据库密码
第一步:点击转换数据 第二步:点击数据源设置 第三步:点击编辑权限 第四步:点击编辑 第五步:输入正要修改的密码就可以了
半导体行业案例:Jira与龙智插件助力某半导体企业实现精益项目管理
近日,龙智Atlassian技术团队收到了国内一家大型半导体企业的感谢信。龙智团队提供的半导体行业项目管理解决方案和服务受到了客户的好评: 在龙智团队的支持下,我们的业务取得了喜人的成果和进步。龙智公司的专业服务和产品,是我们…
解密Lawnchair:打造个性化极致的Android桌面体验
解密Lawnchair:打造个性化极致的Android桌面体验
1. 简介 Lawnchair是一款知名的Android桌面定制工具,旨在为用户提供个性化极致的桌面体验。作为一个开源项目,Lawnchair融合了简洁、灵活和强大的特点,让用户能够自由定制其Andro…
1.5如何缓解图像分类任务中训练数据不足带来的问题?
1.5 图像数据不足时的处理方法
场景描述 在机器学习中,绝大部分模型都需要大量的数据进行训练和学习(包括有监督学习和无监督学习),然而在实际应用中经常会遇到训练数据不足的问题。 比如图像分类,作为计算机视觉最基本的任务之一࿰…
必看——GlobalSign代码签名证书怎么申请?
一、GlobalSign代码签名证书申请流程 第一部分:选择适合的证书类型 1. 访问官方渠道: 首先访问JoySSL官方网站页面,浏览并了解不同类型的代码签名证书选项,包括但不限于标准代码签名证书、扩展验证(EV)代码…
设计模式之模版方法实践
模版方法实践案例
实践之前还是先了解一下模版方法的定义
定义
模板方法模式是一种行为设计模式,它定义了一个骨架,并允许子类在不改变结构的情况下重写的特定步骤。模板方法模式通过在父类中定义一个模板方法,其中包含了主要步骤…
1、MQ_介绍、优缺点、类型等
MQ介绍
1. MQ概述
MQ(Message Queue):消息队列,是基础数据结构中FIFO(first in first out)的一种数据结构。一般用来解决流量削峰、应用解耦、异步处理等问题,实现高性能,高可用&a…
Salesforce 2024财年爆发式增长!第一次现金分红
对于Salesforce来说,这是非凡的转型之年,所有的关键指标都表现强劲,现金流和利润增长创下了纪录。截至第四季度末,Salesforce的剩余履约价值(RPO)总额为569亿美元,同比增长17%。 Marc Benioff
…
使用DockerFile构建Tomcat镜像
1、准备镜像文件tomcat压缩包,jdk的压缩包
tomcat链接:https://pan.baidu.com/s/1Xpecb-BSGR2sdxSL7FDtBw?pwd1234 提取码:1234
jdk链接:https://pan.baidu.com/s/1mQHInn27j1I9uuuicBsyAA?pwd1234 提取码:1234 …
最新文章
- 哪个网站做网络推好/搜狗推广管家
- 中城投建设集团网站/武汉seo关键词排名
- wordpress 特色 外链/移动网站如何优化排名
- 做塑胶原料用什么网站好/手机制作网页用什么软件
- 网站建设开题报告论述/网站的收录情况怎么查
- 怎么做网站后台 更新日志/百度的人工客服
- 极狐GitLab 17.7正式发布,可从 GitLab 丝滑迁移至极狐GitLab【一】
- 在MySQL 主库上进行自动清理 purged gtid 时,会等待 binlog复制到从库吗
- 教育行业 UI 设计基础篇:简洁直观的风格打造
- C#调用OpenXml,读取excel行数据,遇到空单元跳过现象处理
- 分布式协同 - 分布式事务_2PC 3PC解决方案
- GFPS扩展技术原理(七)-音频切换消息流
推荐文章
- 一个续写故事达到人类水平的AI,OpenAI大规模无监督语言模型GPT-2...
- GENIUS: 根据草稿进行文本生成的预训练模型,可用于多种NLP任务的数据增强...
- 序列类型 --- list, tuple, range
- 内网穿透技术总结
- # 关于Linux下的parted分区工具显示起始点为1049kB的问题解释
- # 深入浅出 快速认识JAVA常用数据结构【栈, 队列, 链表, 数组】
- #WEB前端(DIV、SPAN)
- (HttpClient技术)(Hotmail和outlook系列)Hotmail和outlook的邮箱注册破解
- (java+Seleniums3)自动化测试实战
- (SpringBoot)第十一章:SpringBoot 统一功能处理(AOP实战)
- (vue3)create-vue 组合式APIsetup、ref、watch,通信
- (长期更新)《零基础入门 ArcGIS(ArcMap) 》实验一(下)----空间数据的编辑与处理(超超超详细!!!)
