目录
- 1.下载工具 Qt Installer Framework
- 2.将`bin`文件添加到环境变量
- 3.拷贝`startmenu`示例-备用
- 4.准备Qt Release打包好的程序
- 5.把Release打包好的程序放到`packages\org.qtproject.ifw.example\data`文件夹下
- 6.生成安装包
- 7.修改安装包图标
- 8.修改主程序程序安装引导-创建快捷键
- 9.添加驱动安装包
- 10.嫌弃打包耗时太长?
Qt Installer Framework 使用
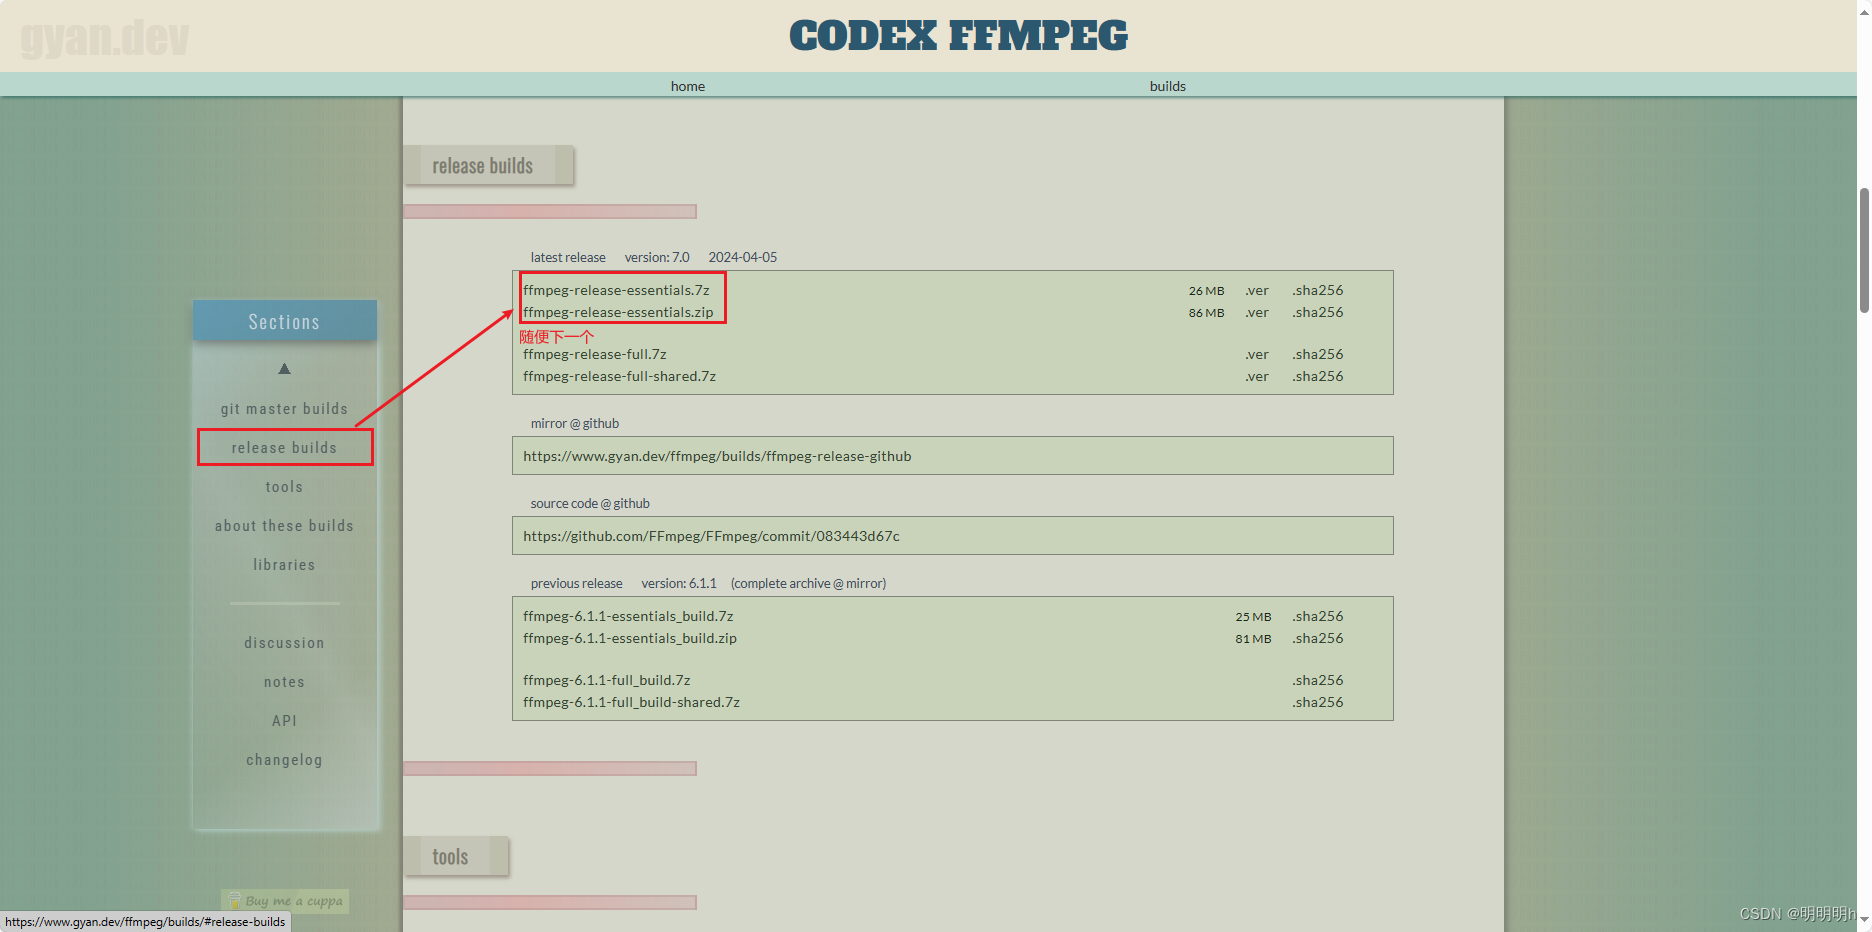
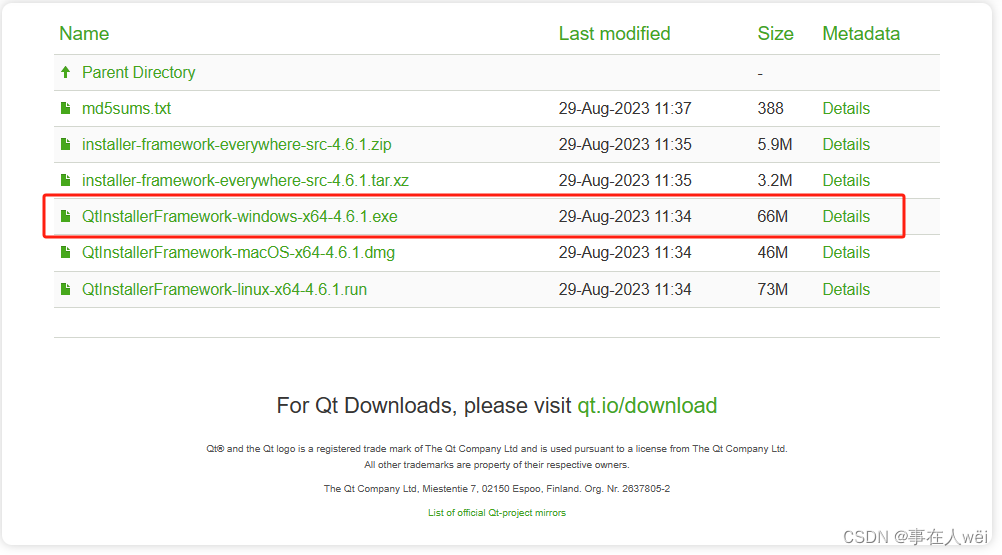
1.下载工具 Qt Installer Framework
官网下载链接
下载直接安装
2.将bin文件添加到环境变量

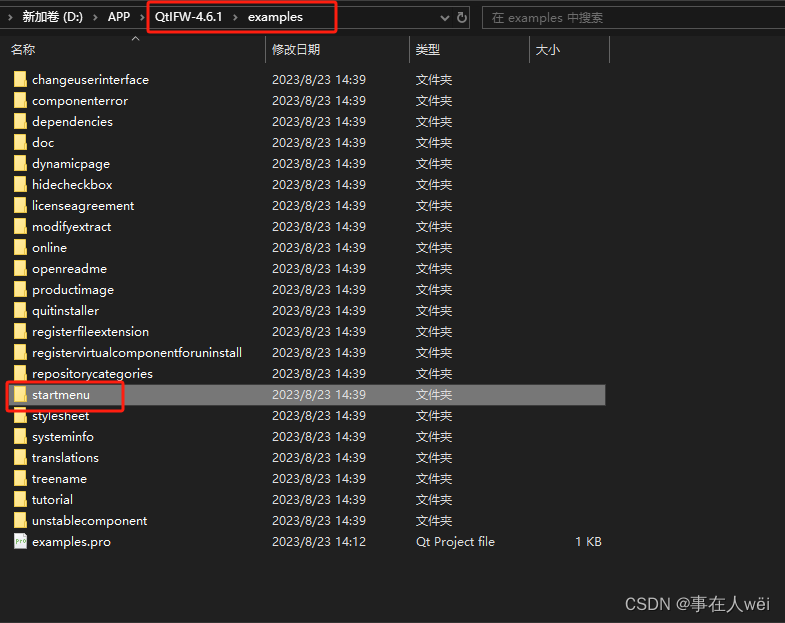
3.拷贝startmenu示例-备用
4.准备Qt Release打包好的程序
确保自己的.exe能够正常运行,没有缺少dll文件
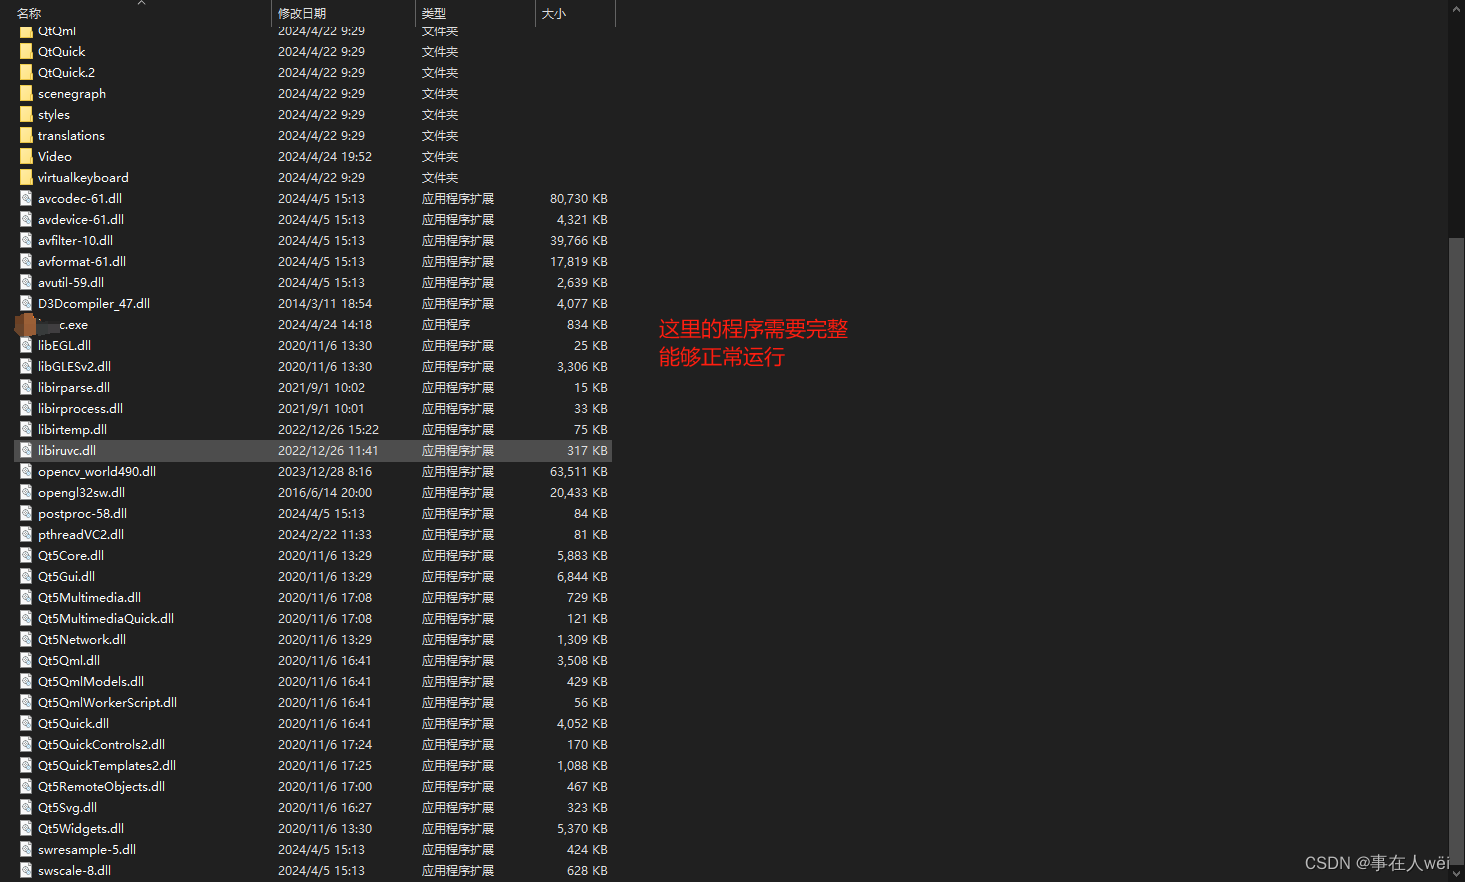
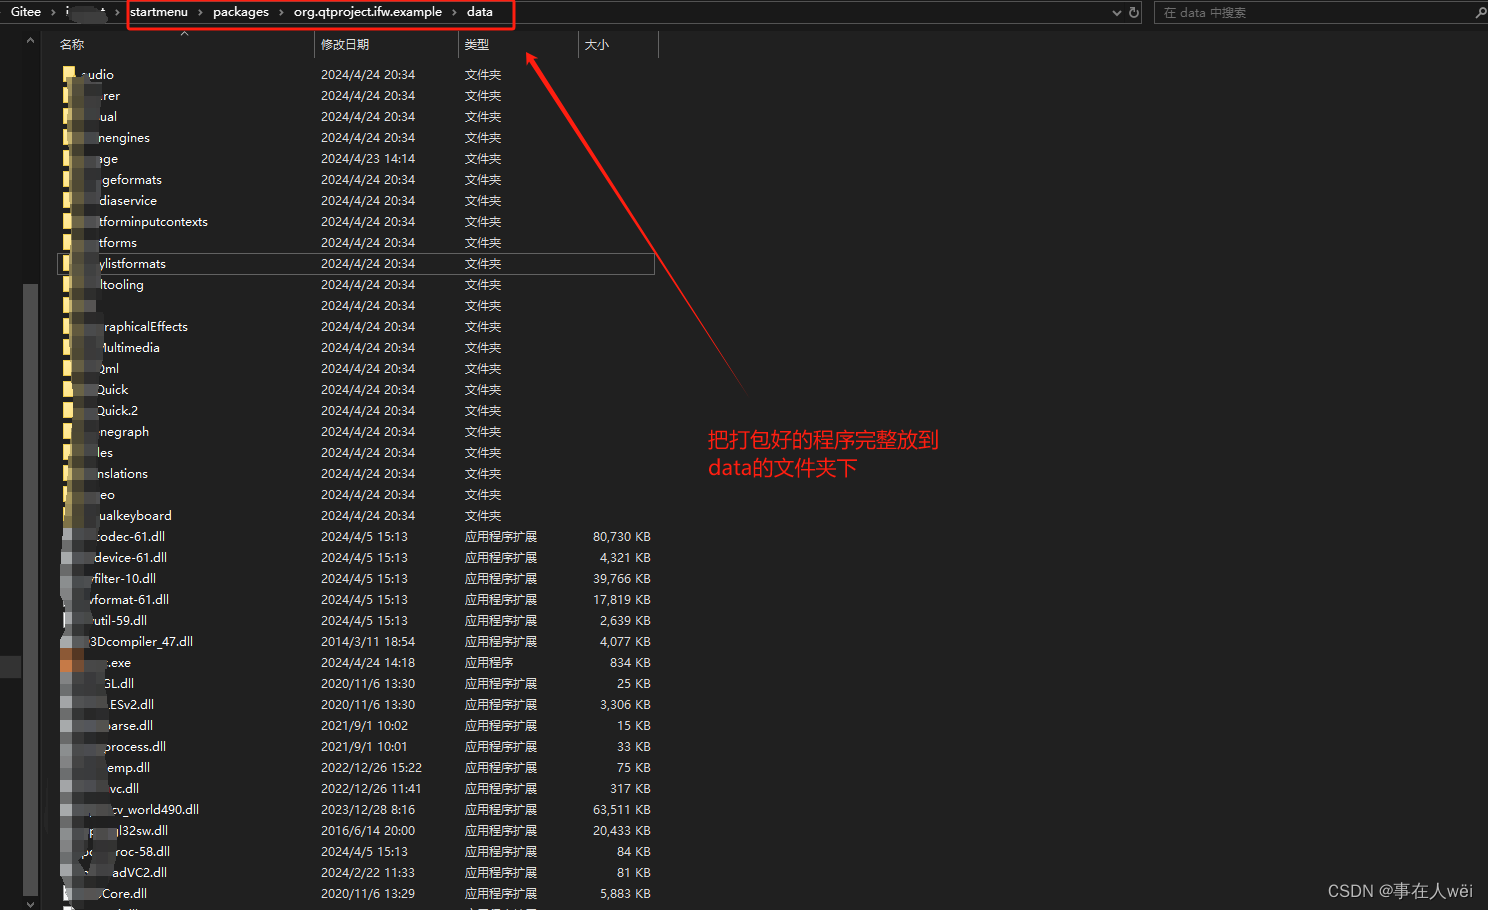
5.把Release打包好的程序放到packages\org.qtproject.ifw.example\data文件夹下
6.生成安装包
回到startmenu目录下,打开CMD终端,执行指令
binarycreator --offline-only -c config/config.xml -p packages install.exe -v
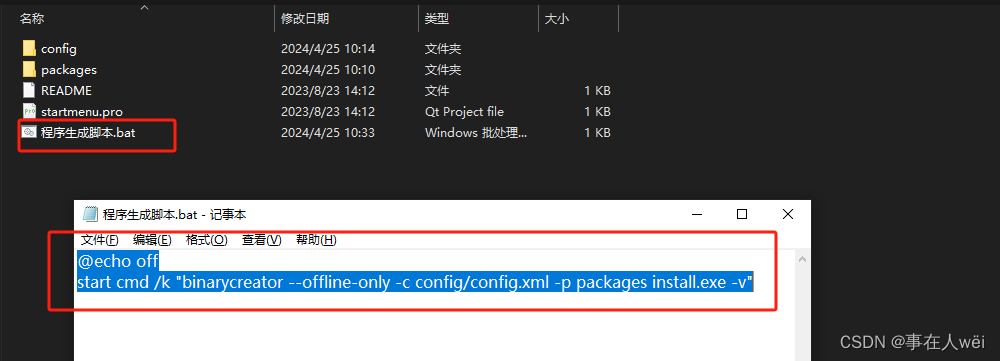
脚本程序生成脚本.bat
@echo off
start cmd /k "binarycreator --offline-only -c config/config.xml -p packages install.exe -v"
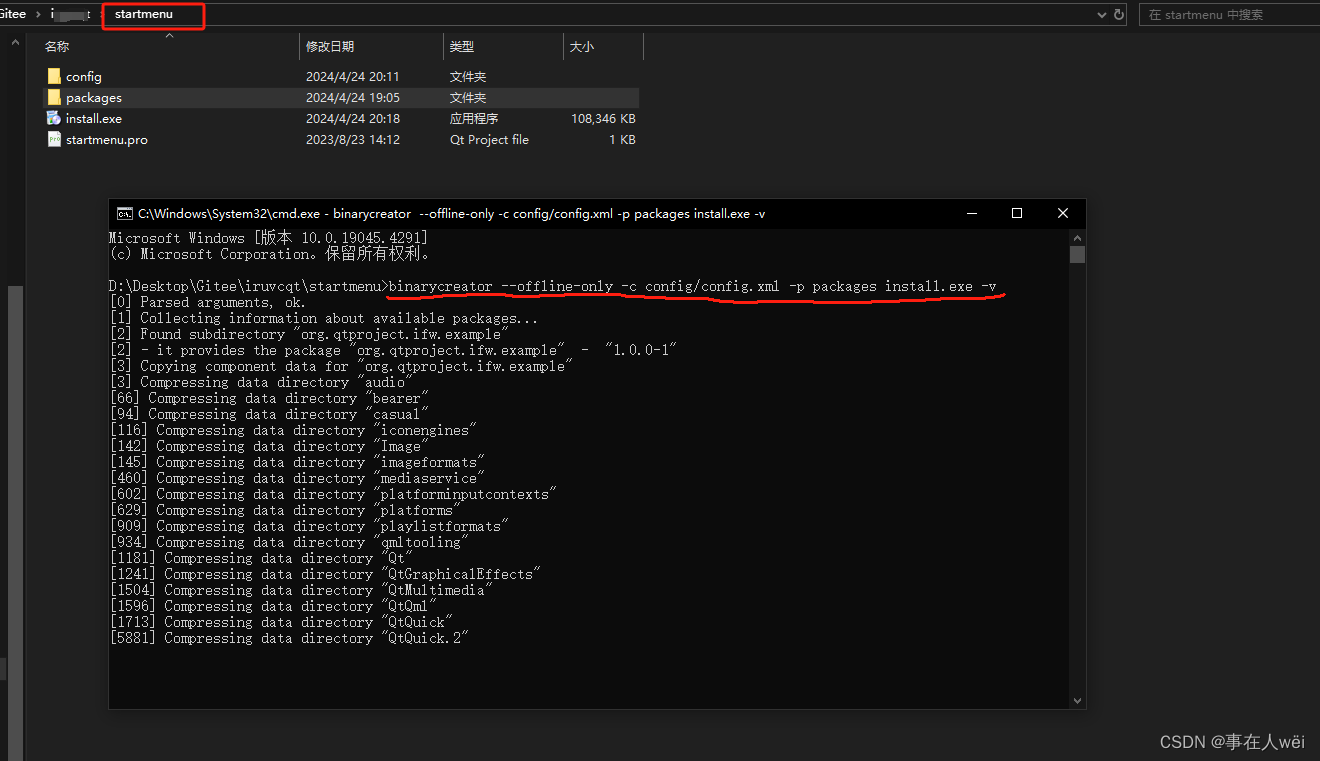
不出意外,正常生成安装包,双击即可安装

7.修改安装包图标
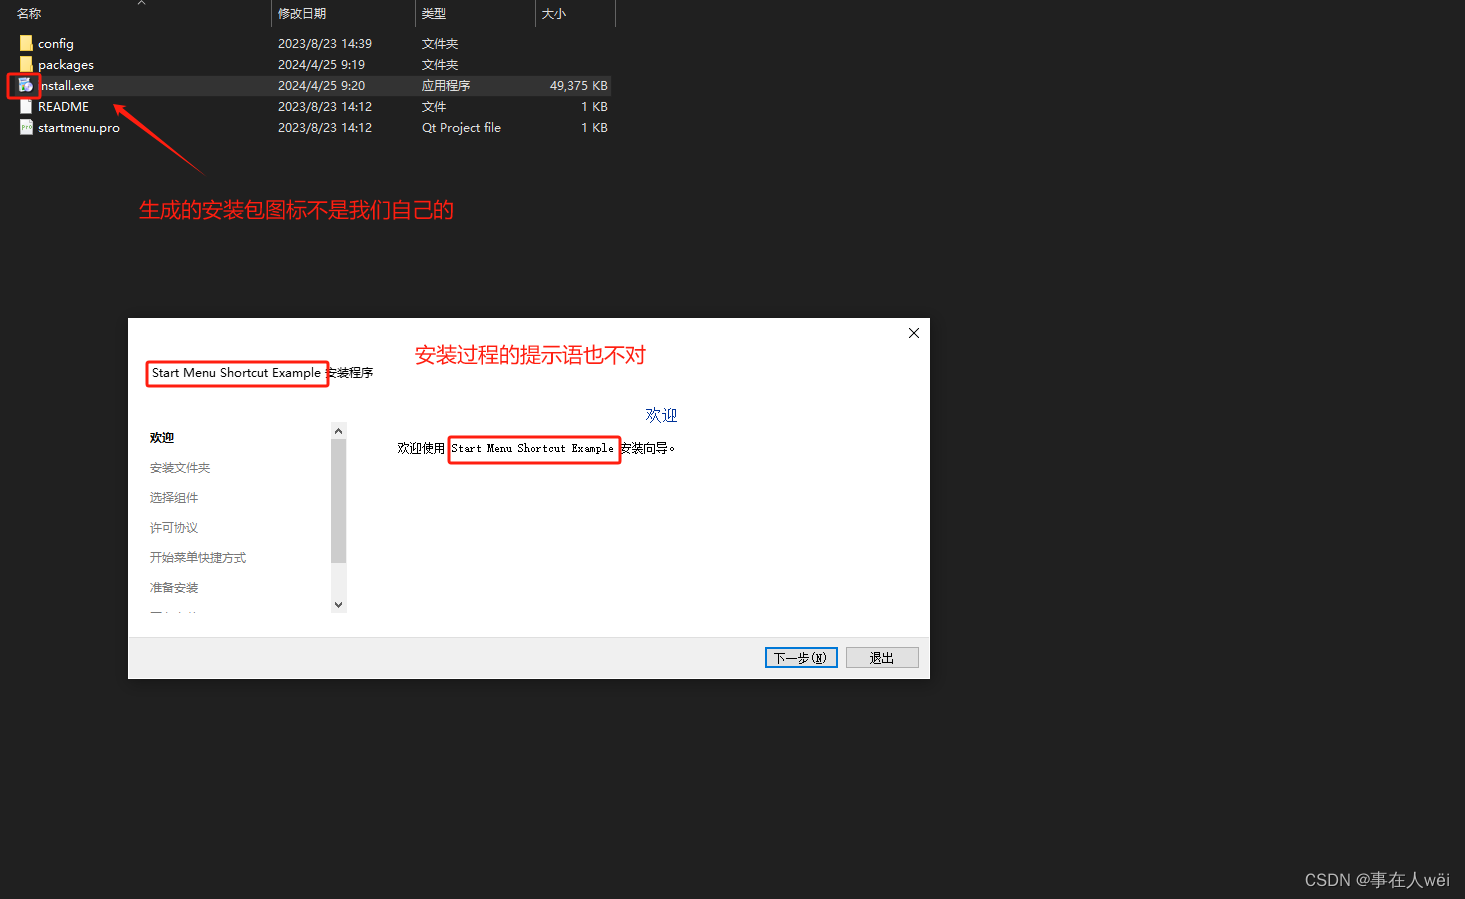
在startmenu\config文件夹下准备3张图片

修改startmenu\config\config.xml文件
<?xml version="1.0" encoding="UTF-8"?>
<Installer><Name>软件名称</Name><!-- 软件名称 --><Version>0.1.3</Version><!-- 版本号 --><Title>安装程序窗口标题</Title><!-- 安装程序窗口标题 --><Publisher>公司名称</Publisher><!-- 公司名称 --><!-- Directory name is used in component.xml --><StartMenuDir>Ancel IR</StartMenuDir><!-- 要生成的windows开始菜单目录 --><TargetDir>@HomeDir@/APPPath</TargetDir><!-- 默认安装路径 --><Logo>logo.png</Logo><InstallerApplicationIcon>app</InstallerApplicationIcon><!-- app.ico,但是不要ico后缀 --><InstallerWindowIcon>app.png</InstallerWindowIcon>
</Installer>
重新生成后,安装过程中引导语,图标就是我们自定义的了
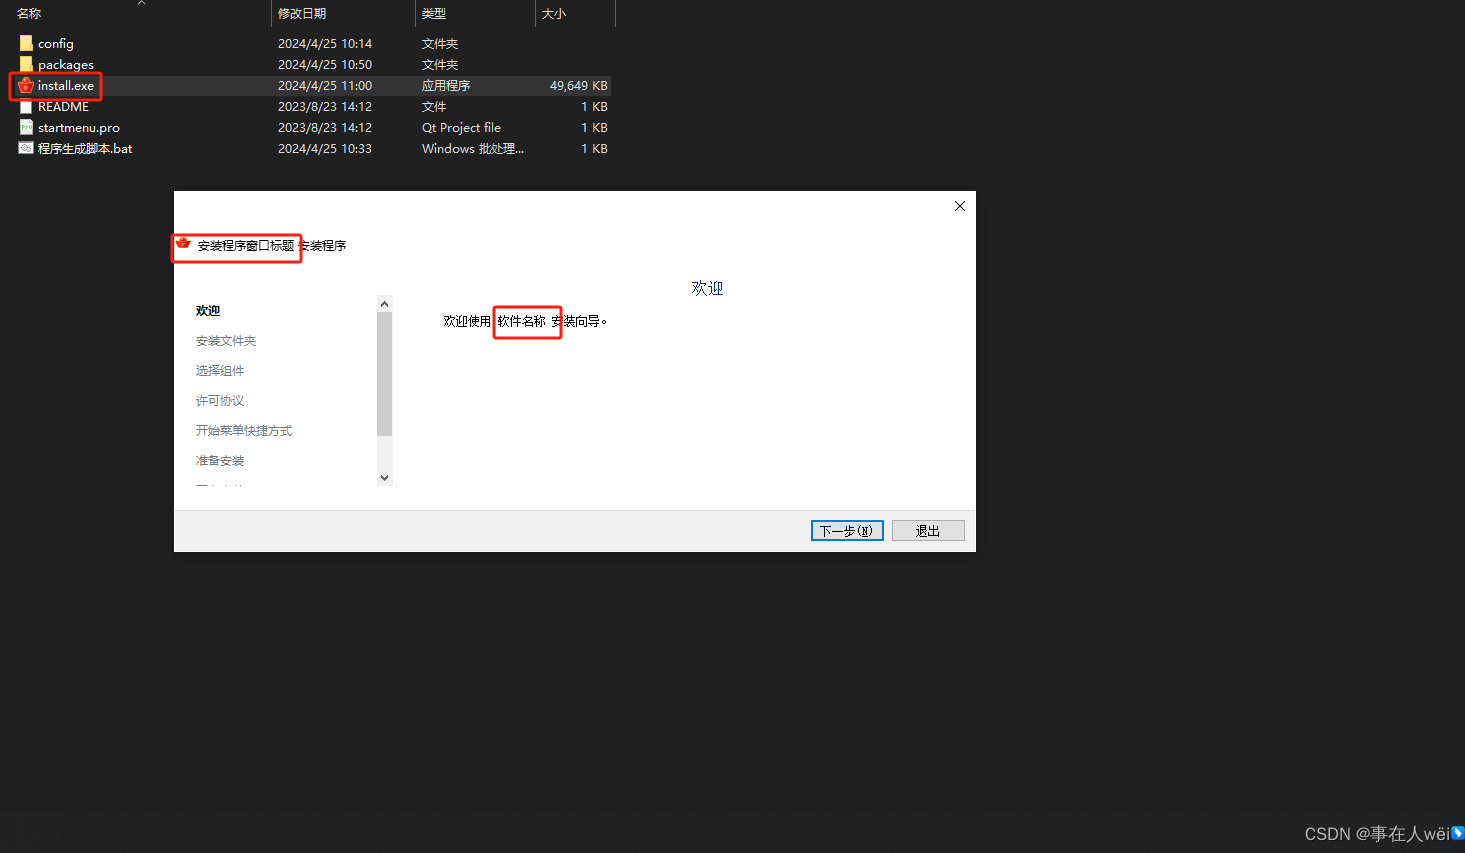
8.修改主程序程序安装引导-创建快捷键
修改文件packages\org.qtproject.ifw.example\meta\package.xml
<?xml version="1.0" encoding="UTF-8"?>
<Package><DisplayName>主程序</DisplayName><Description>主程序描述.</Description><Version>1.0.0-1</Version><ReleaseDate>2013-01-01</ReleaseDate><Default>true</Default><Script>installscript.qs</Script>
</Package>
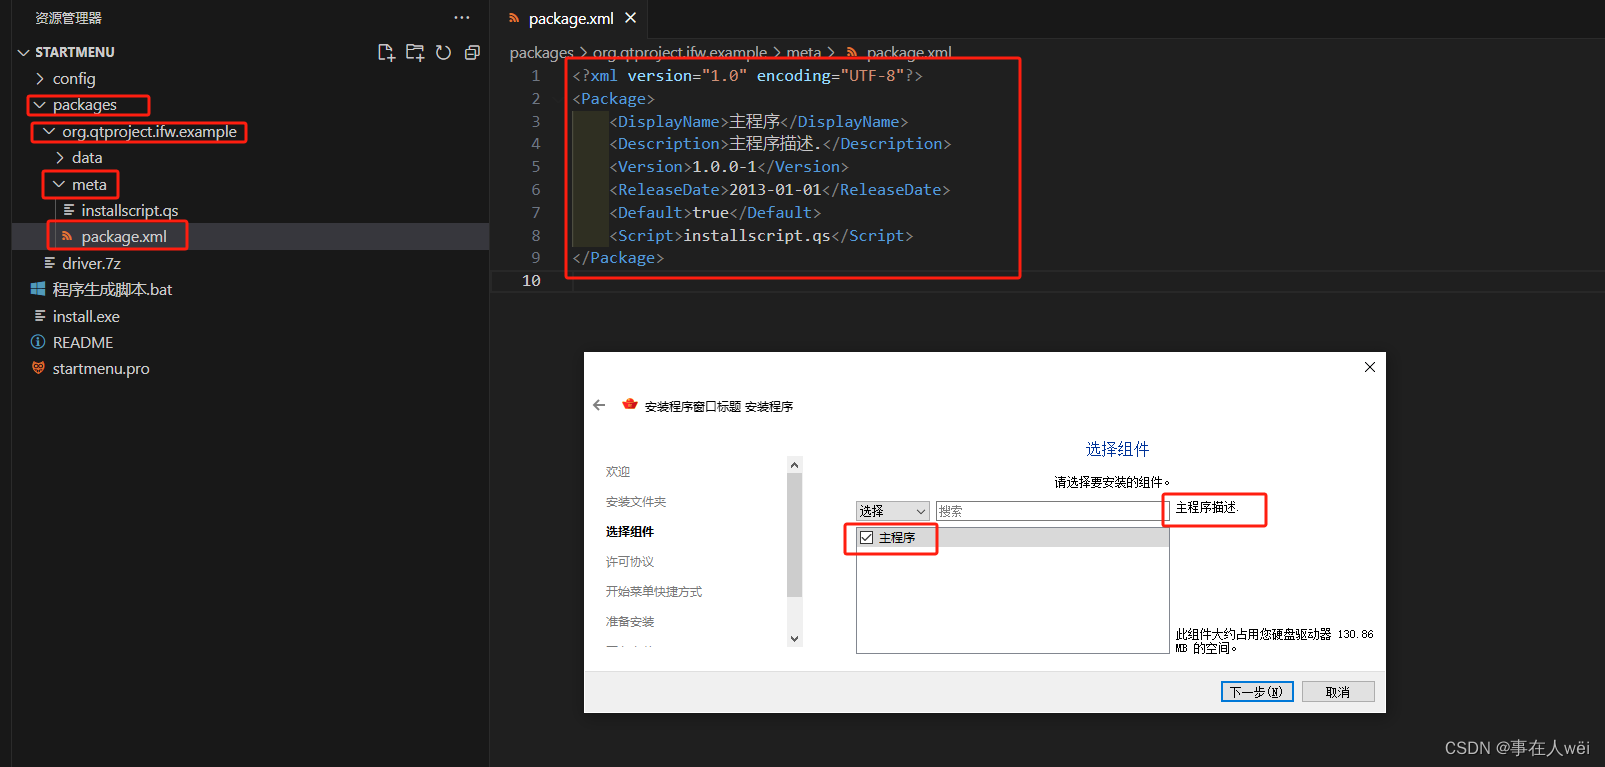
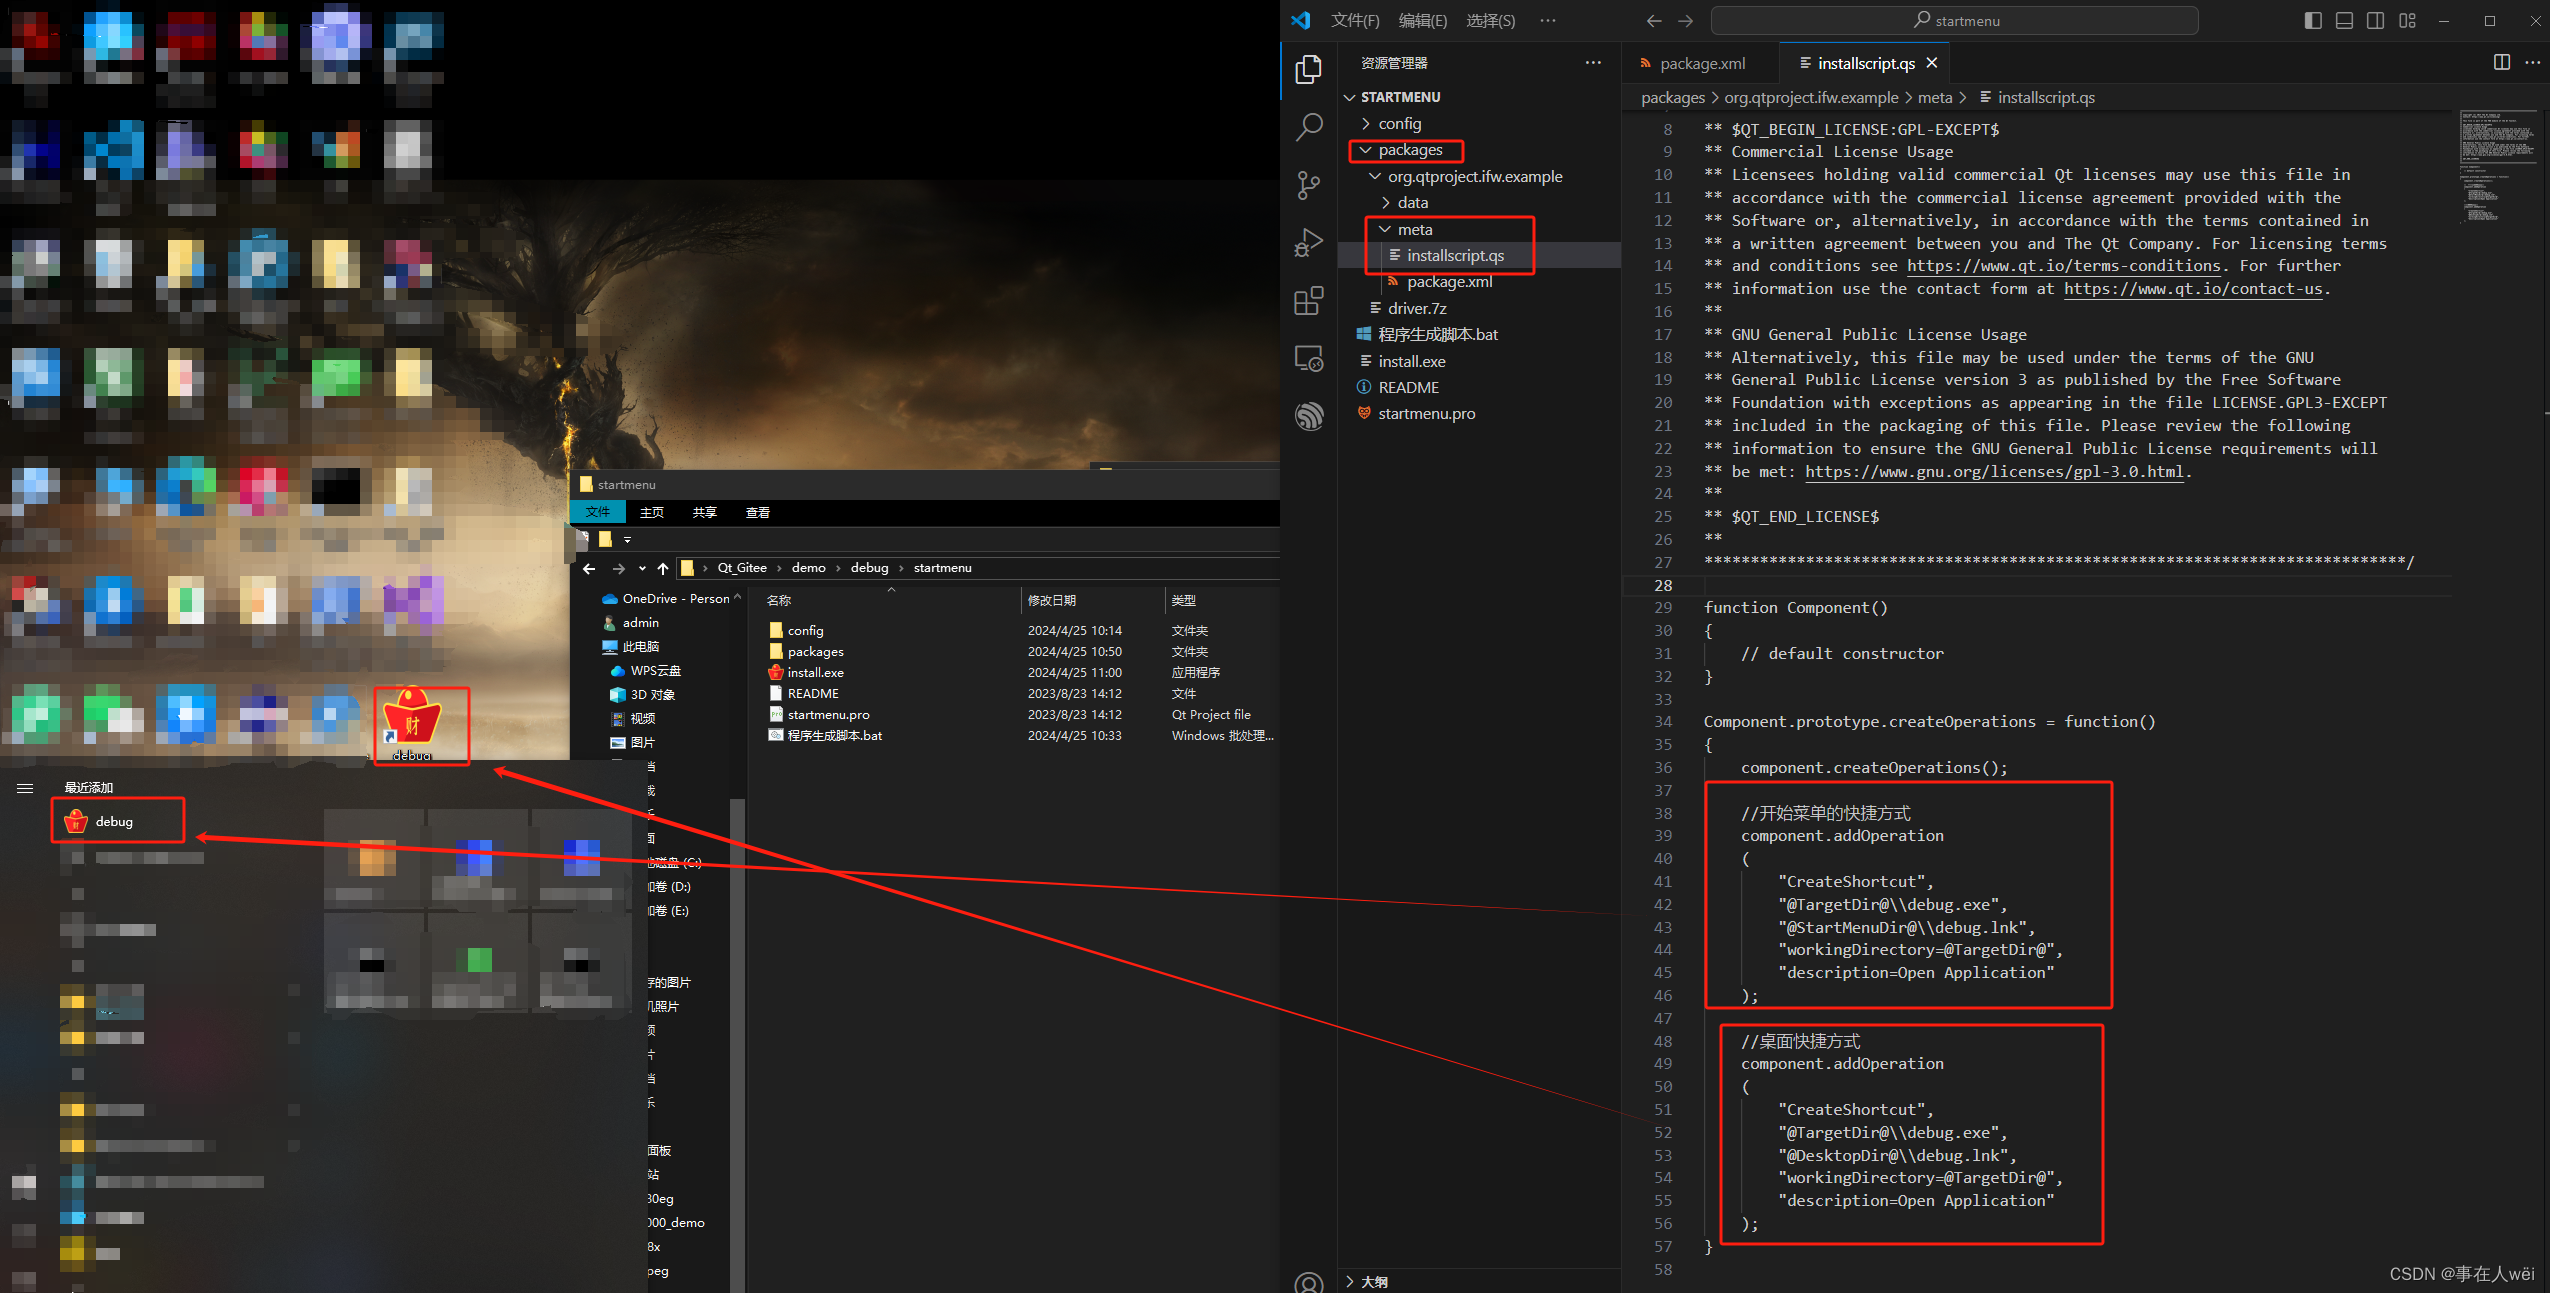
创建快捷键
修改文件packages\org.qtproject.ifw.example\meta\installscript.qs
function Component()
{// default constructor
}Component.prototype.createOperations = function()
{component.createOperations();//开始菜单的快捷方式component.addOperation("CreateShortcut","@TargetDir@\\debug.exe","@StartMenuDir@\\debug.lnk","workingDirectory=@TargetDir@","description=Open Application");//桌面快捷方式component.addOperation("CreateShortcut","@TargetDir@\\debug.exe","@DesktopDir@\\debug.lnk","workingDirectory=@TargetDir@","description=Open Application");
}
9.添加驱动安装包
这里以安装CH340串口驱动为例
把原来的org.qtproject.ifw.example拷贝一份,重命名为driver

把ch340驱动程序放到packages\driver\data目录下

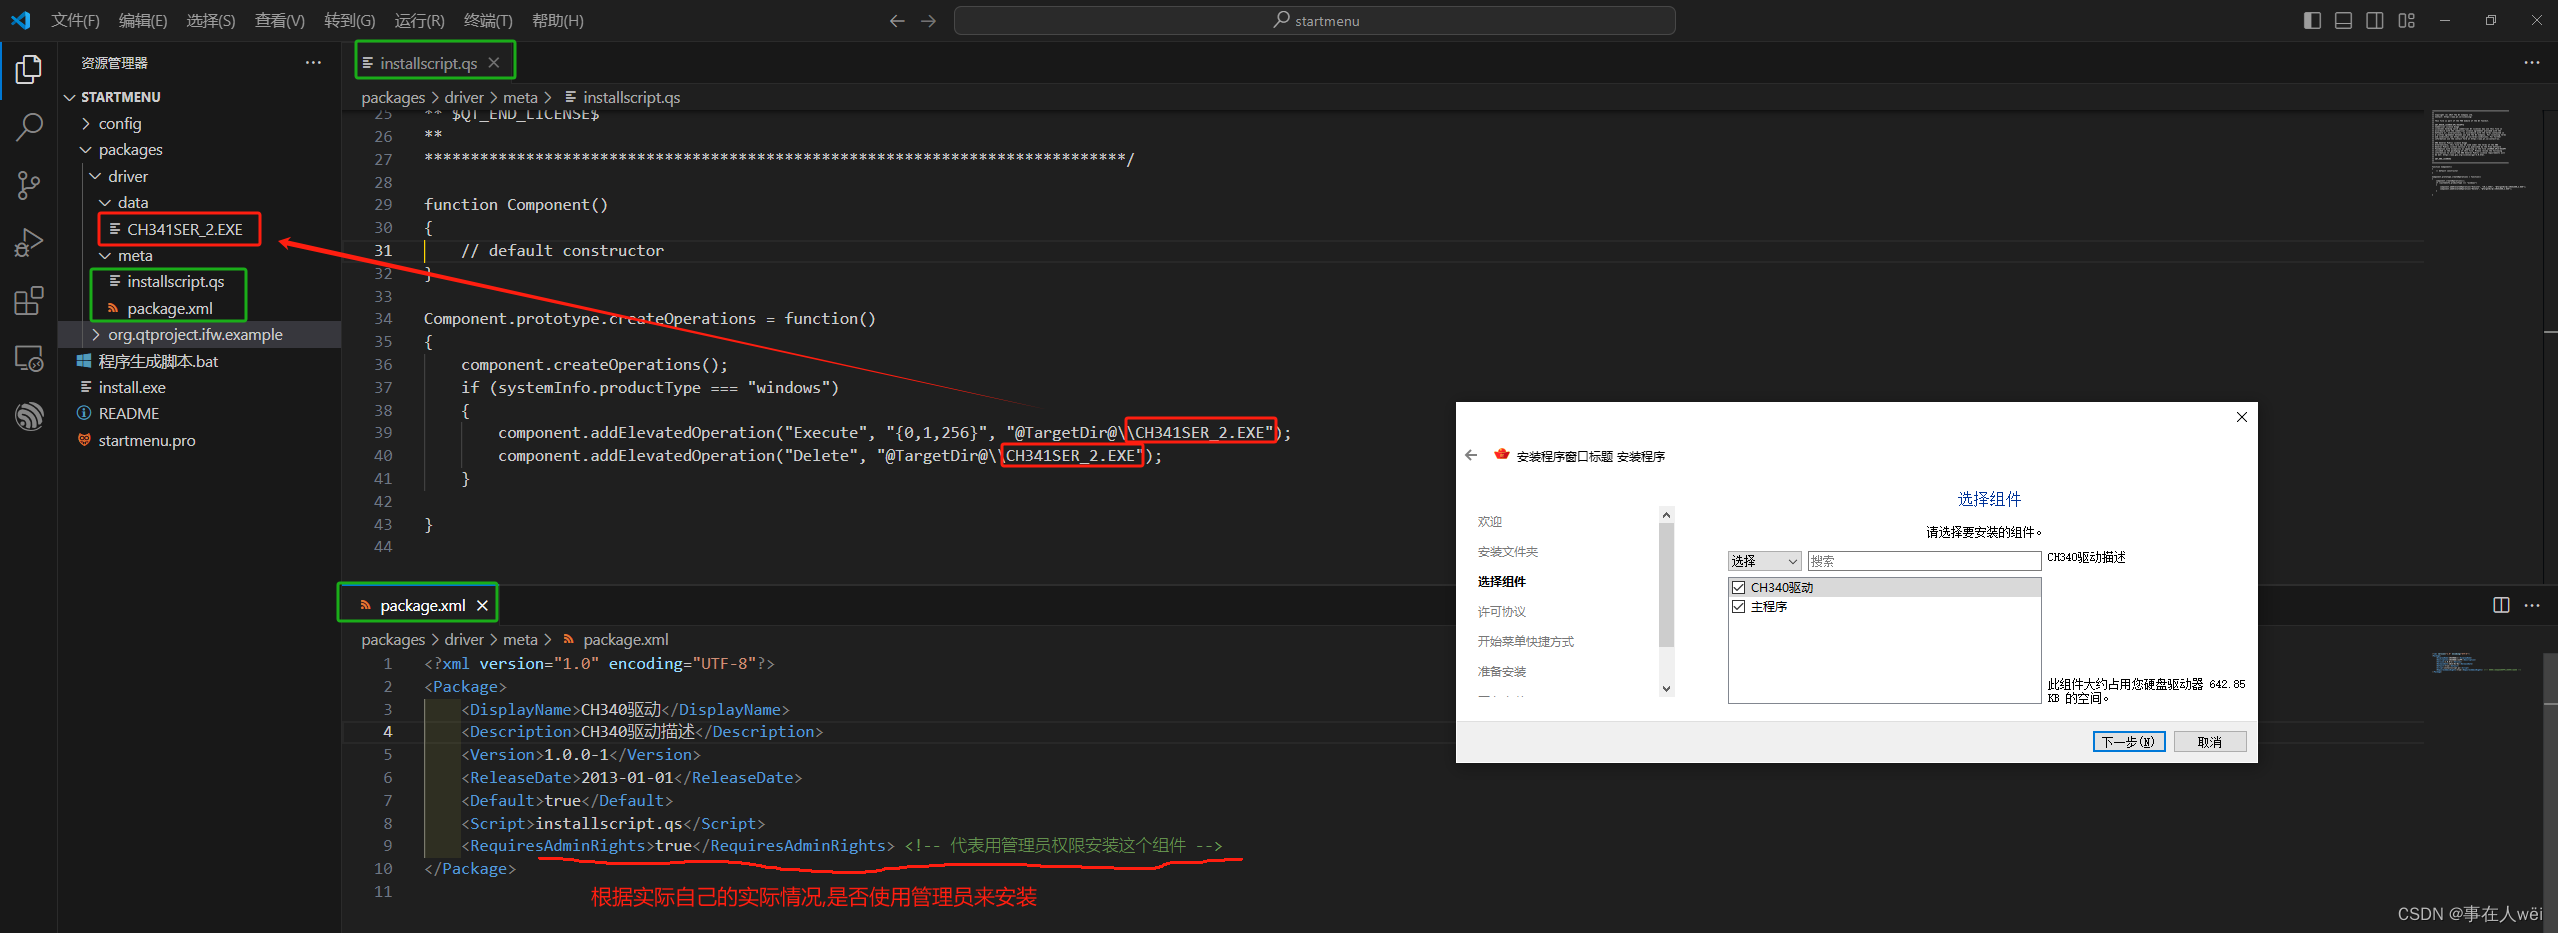
修改文件packages\driver\meta\installscript.qs
function Component()
{// default constructor
}Component.prototype.createOperations = function()
{component.createOperations();if (systemInfo.productType === "windows"){component.addElevatedOperation("Execute", "{0,1,256}", "@TargetDir@\\CH341SER_2.EXE");component.addElevatedOperation("Delete", "@TargetDir@\\CH341SER_2.EXE");}}
修改文件packages\driver\meta\package.xml
<?xml version="1.0" encoding="UTF-8"?>
<Package><DisplayName>CH340驱动</DisplayName><Description>CH340驱动描述</Description><Version>1.0.0-1</Version><ReleaseDate>2013-01-01</ReleaseDate><Default>true</Default><Script>installscript.qs</Script><RequiresAdminRights>true</RequiresAdminRights> <!-- 代表用管理员权限安装这个组件 -->
</Package>
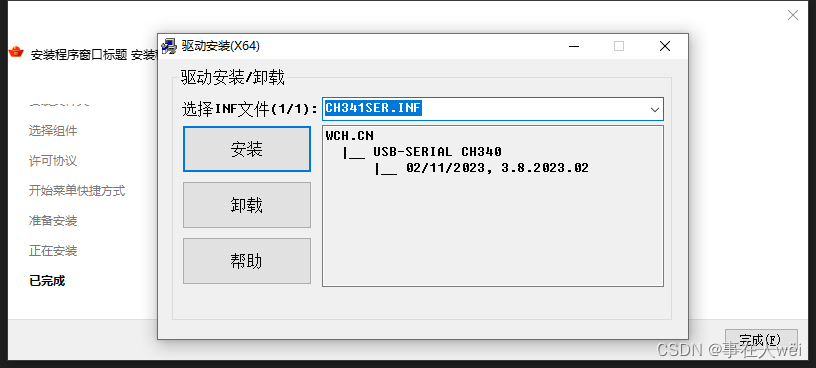
安装的过程就会自动弹出CH340安装请求
10.嫌弃打包耗时太长?
全选所有文件,右键,然后压缩成data.7z
不要创建 data 文件夹,再压缩
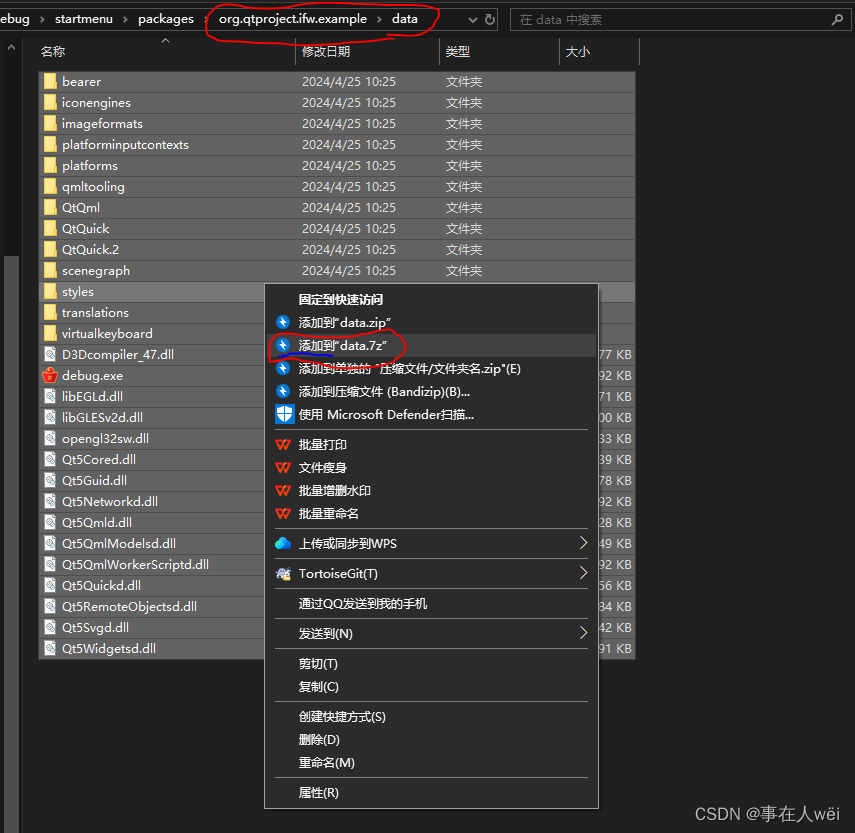
最后得效果是这样

如果有驱动,也一样压缩成.7z
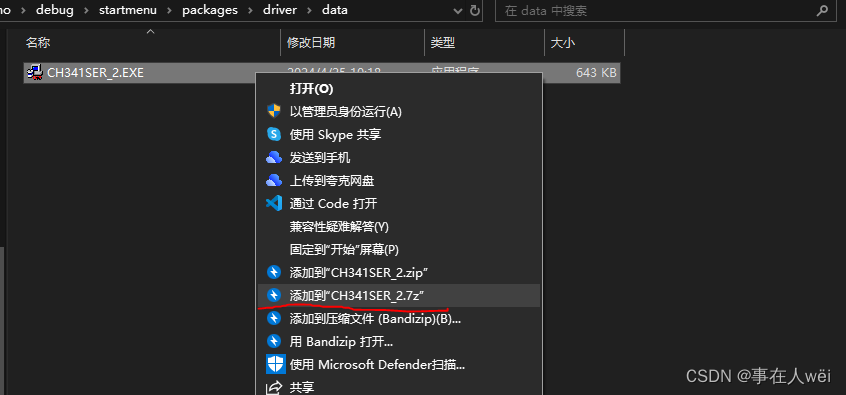

再次执行生成安装包指令,2s就能出来install.exe安装包
