基于arcpro3.0.2版的使用深度学习检测对象之椰子树
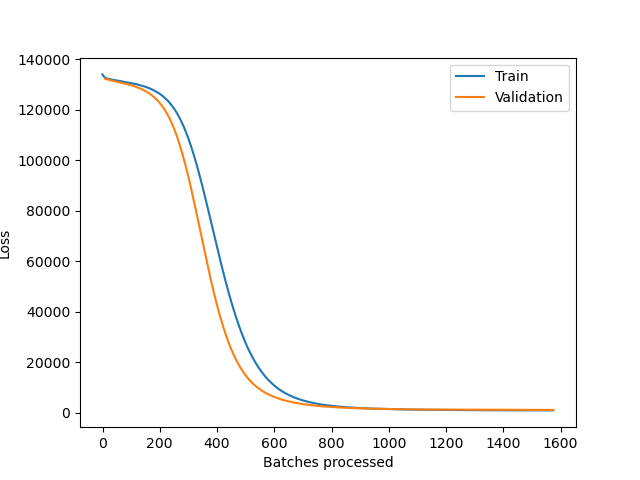
GPU显卡Nivda 1080 训练模型图
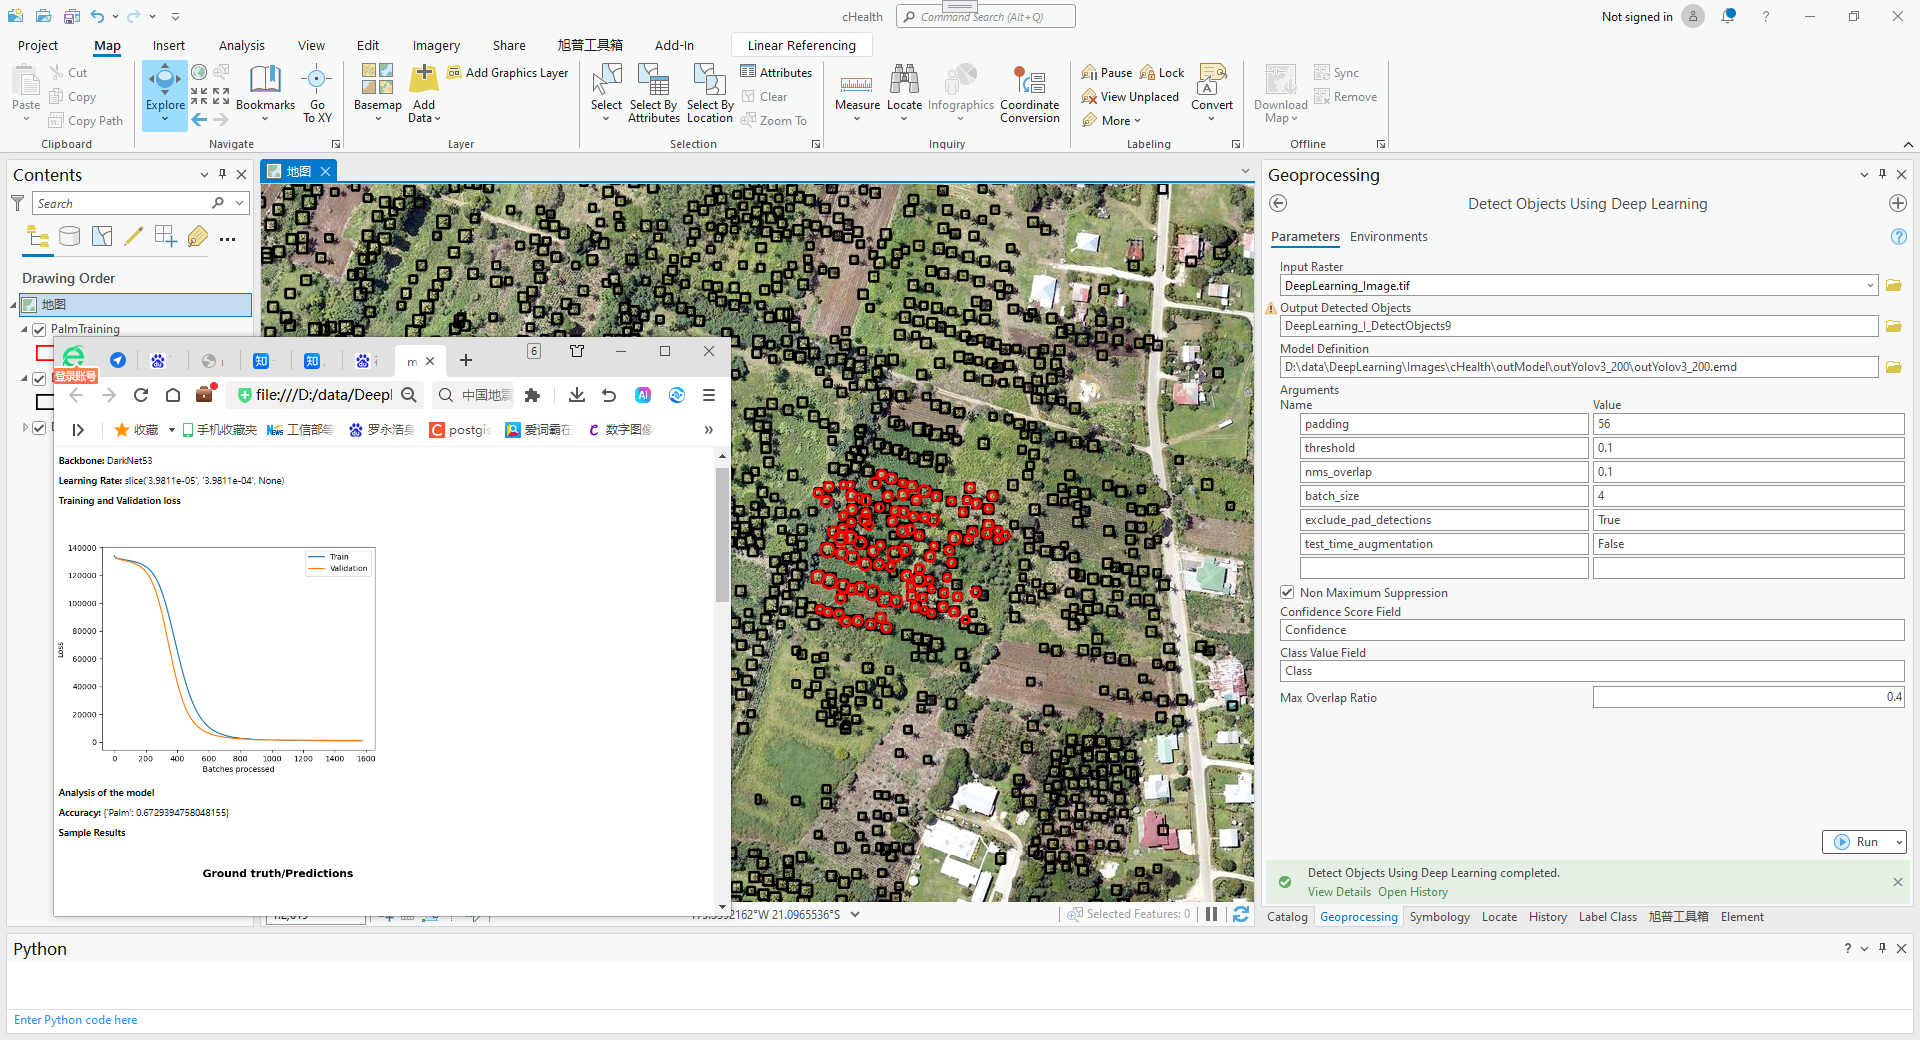
(四)检测对象之椰子树
使用深度学习检测对象
打开 detect objects using deep learning,参数
输入栅格为要检测的影像
模型定位为上一步输出的.emd文件
cpu模式+Max Overlap Ratio=0.4
运行时间:2个小时
(三)训练样本目标模型
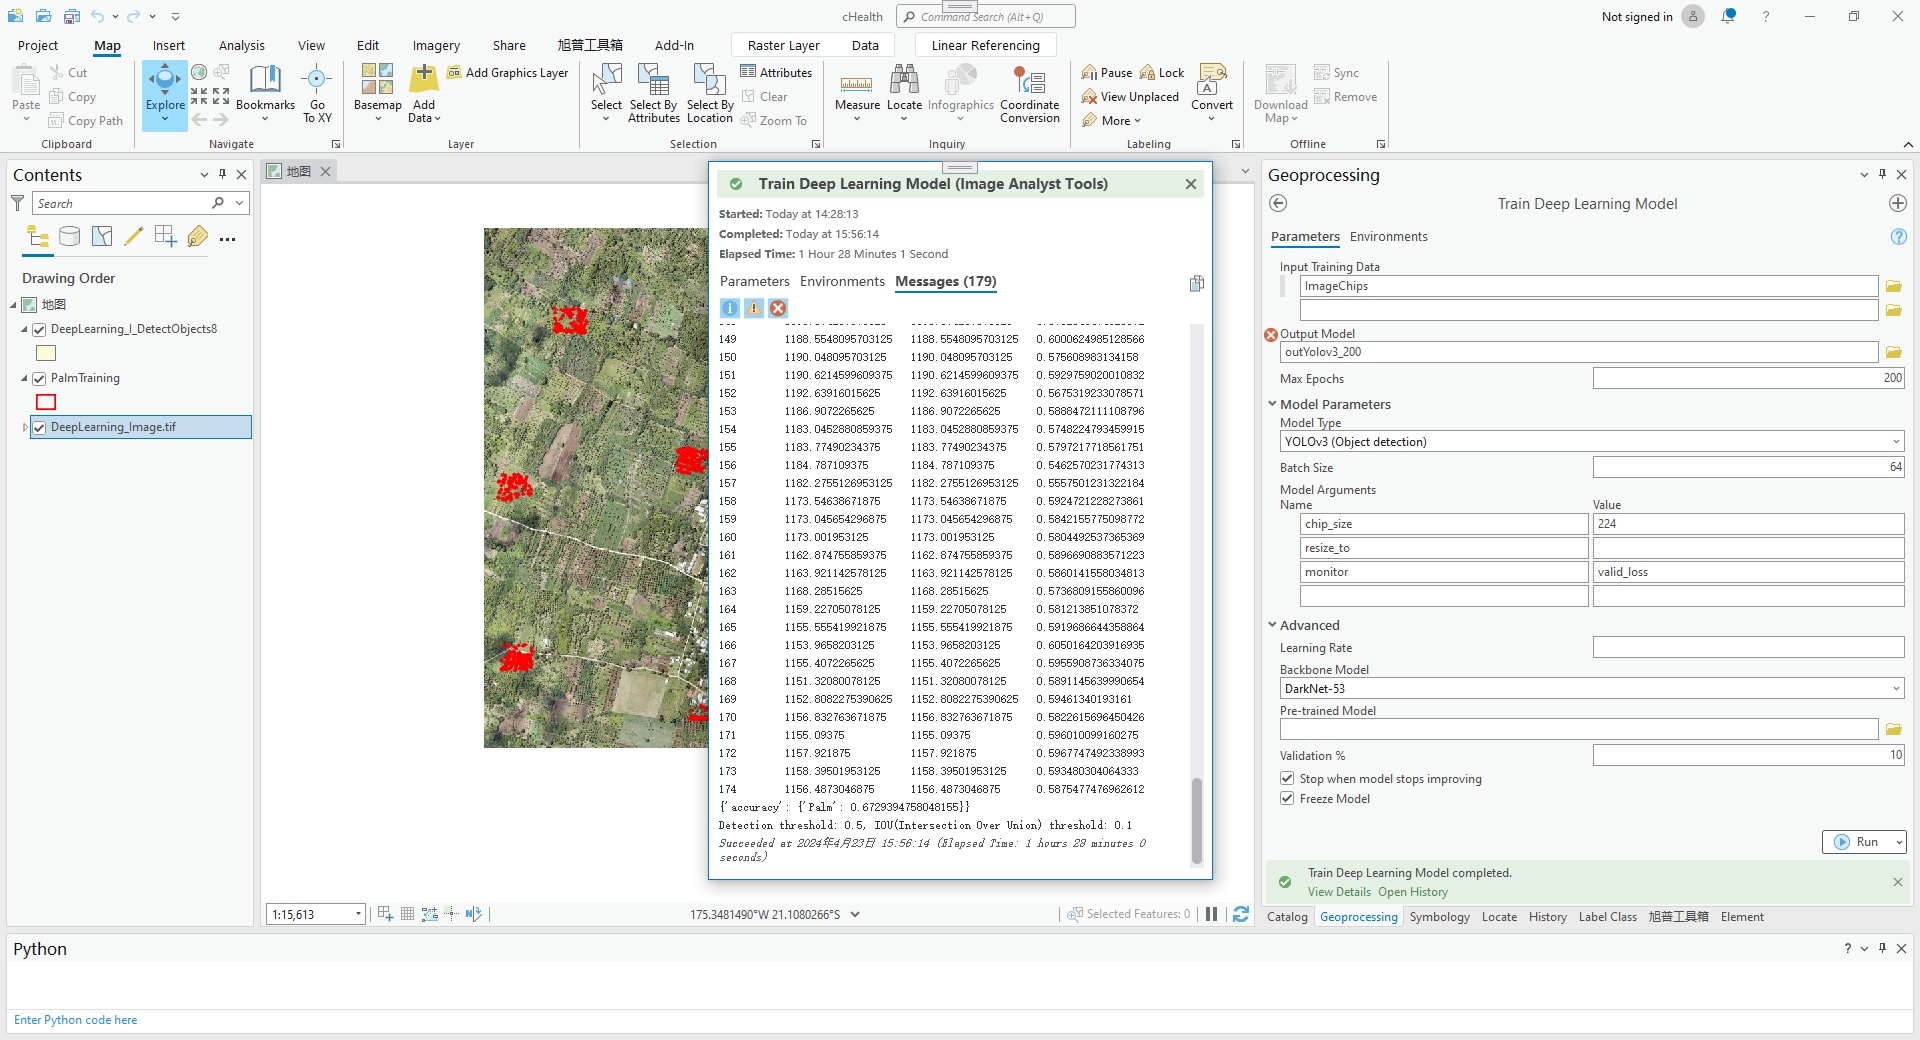
采用YOLOv3+Backbone: DarkNet53+200个Epochs+GPU训练
生成的Accuracy: {‘Palm’: 0.6729394758048155}
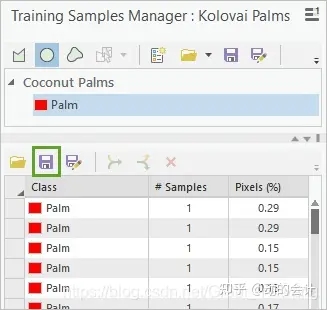
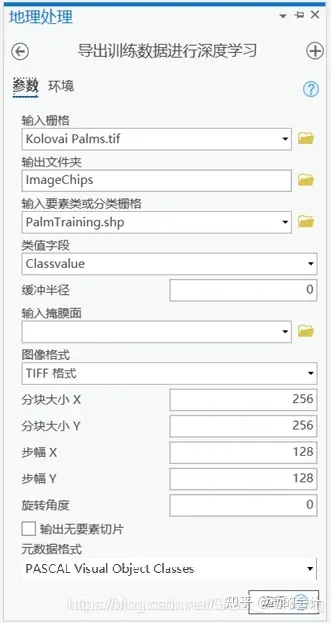
(二)训练样本管理器
制作样本并导出样本库
其样本制作参考地址:https://zhuanlan.zhihu.com/p/393579634?utm_id=0
(一)安装arcpro3.0.2的AI使用环境
clone arcgispro-py3
激活环境
conda activate C:\Users\hsg\AppData\Local\ESRI\conda\envs\arcgispro-py3-clone
conda deactivate
安装tensorflow
pip install -i https://pypi.tuna.tsinghua.edu.cn/simple lyft-dataset-sdk
pip install -i https://pypi.tuna.tsinghua.edu.cn/simple jupyter
pip install -i https://pypi.tuna.tsinghua.edu.cn/simple numba0.48.0
pip install -i https://pypi.tuna.tsinghua.edu.cn/simple numpy1.20.0
pip install -i https://pypi.tuna.tsinghua.edu.cn/simple networkx==2.2
pip install -i https://pypi.tuna.tsinghua.edu.cn/simple tensorflow
cmd中激活环境后执行测试代码
python helloworld.py
python tensorflowV.py
测试安装环境python代码
helloworld.py
import tensorflow as tf
print(tf.__version__)
print('hello world!')
tensorflowV.py
import tensorflow as tf
print('tensorflow version:'+tf.__version__)
tf.compat.v1.disable_eager_execution()
w1=tf.random.truncated_normal([2,3],0.0,1.0)
w2=tf.random.truncated_normal([3,1],0.0,1.0)x=tf.compat.v1.placeholder(tf.float32,shape=(3,2),name="input")
a=tf.compat.v1.matmul(x,w1)
y=tf.compat.v1.matmul(a,w2)with tf.compat.v1.Session() as s:init_op=tf.compat.v1.global_variables_initializer()s.run(init_op)print(s.run(y,feed_dict={x:[[0.7,0.9],[0.1,0.4],[0.5,0.8]]}))
vscode执行py文件需要设置vscode python执行环境
快捷键:Ctrl+Shift+P
选择python select interpreter
选择下面路径的arcgispro-py3-clone版本
C:\Users\hsg\AppData\Local\ESRI\conda\envs\arcgispro-py3-clone
本blog地址:https://blog.csdn.net/hsg77

