看完本文的标题,可能有人要打我。你说黑白的老照片不好吗?非要说什么遗像,我现在就把你变成遗像!好了,言归正传。我想大部分人都用过美颜相机或者剪映等软件吧,它们的滤镜功能是如何实现的,有人想过吗?难道要使用Java/Kotlin遍历Bitmap,然后处理到手机发烫吗?学过计算机图形学的应该知道,图片或视频的图像数据的最小单位是像素px。视频编码H.264的YUV数据不也是视频像素数据嘛,只不过有很多帧。
代码实现
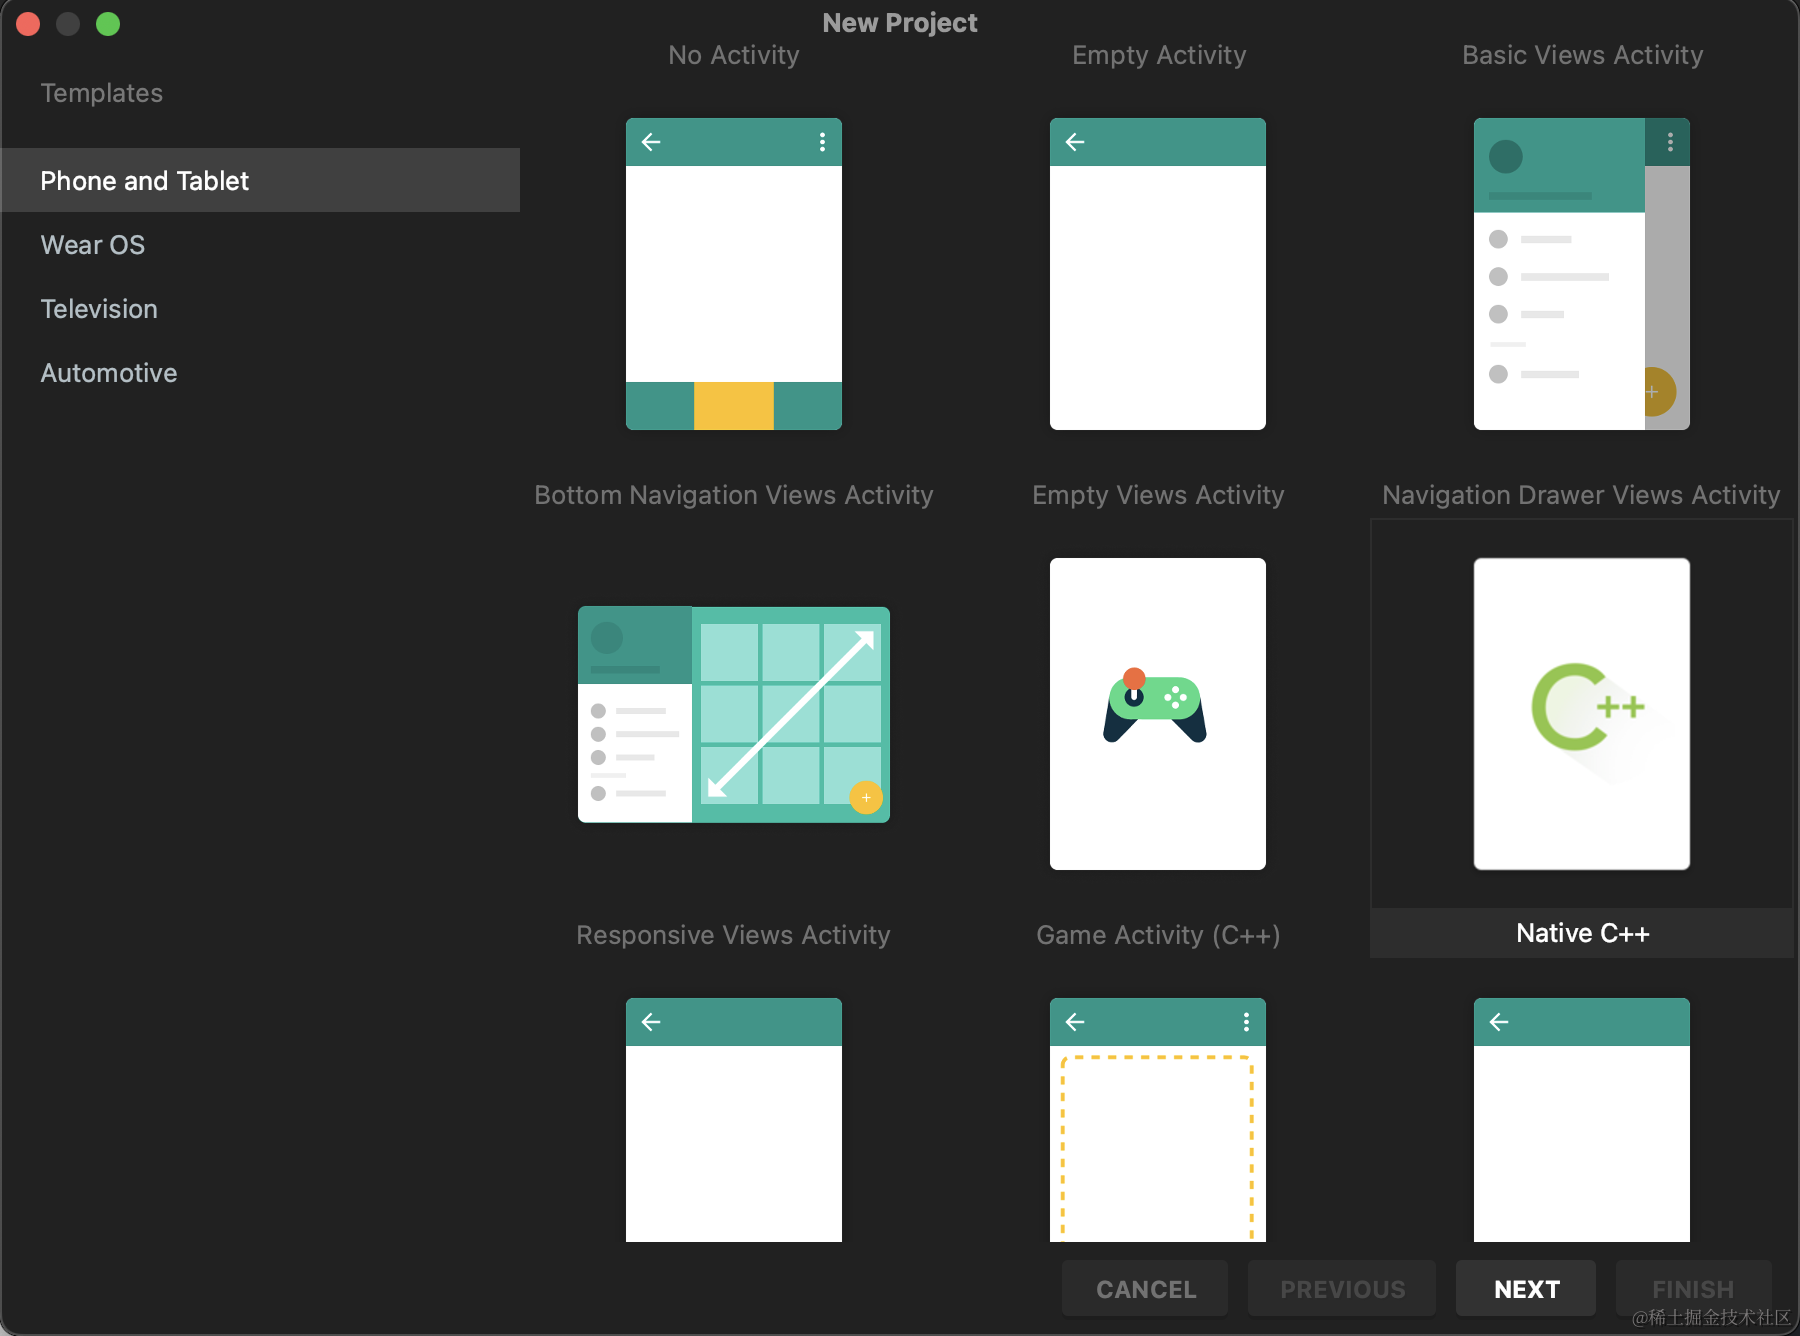
本篇文章,我来教大家简单的处理图像中一个个的像素点的色值,从而达到改变图片风格的效果。首先我们创建一个Native C++项目。
然后我们需要写个简单的xml布局。
<?xml version="1.0" encoding="utf-8"?><androidx.constraintlayout.widget.ConstraintLayoutxmlns:android="http://schemas.android.com/apk/res/android"xmlns:app="http://schemas.android.com/apk/res-auto"xmlns:tools="http://schemas.android.com/tools"android:layout_width="match_parent"android:layout_height="match_parent"tools:context=".MainActivity"><ImageViewandroid:id="@+id/iv_display"android:layout_width="wrap_content"android:layout_height="wrap_content"app:layout_constraintBottom_toBottomOf="parent"app:layout_constraintEnd_toEndOf="parent"app:layout_constraintStart_toStartOf="parent"app:layout_constraintTop_toTopOf="parent" /><Buttonandroid:id="@+id/btnPicProcess"android:layout_width="match_parent"android:layout_height="wrap_content"app:layout_constraintEnd_toEndOf="parent"app:layout_constraintStart_toStartOf="parent"app:layout_constraintBottom_toBottomOf="parent"android:text="黑白"/></androidx.constraintlayout.widget.ConstraintLayout>
接下来我们需要实现Activity的代码了。注意这里有个external方法,它相当于java中的带native关键字的方法,只不过这是kotlin的写法。在handleBitmap()方法中调用底层方法处理图像。就这么一个简单的流程,因为我们把图像处理的逻辑全部都放到c++底层代码中了。之所以把图像处理的逻辑全权交给C++的原因我想大家应该都知道了,IO是非常耗时的,而两层循环的时间复杂度是O(n²)。那就是java使用jni跟c++频繁通信会大量调输入输出流,时间都损耗在bitmap的setPixels方法上了。那还不如你处理好了给我结果就好了,我不需要关心过程。
package com.dorachat.myapplicationimport android.graphics.Bitmap
import android.graphics.BitmapFactory
import androidx.appcompat.app.AppCompatActivity
import android.os.Bundle
import com.dorachat.myapplication.databinding.ActivityMainBindingclass MainActivity : AppCompatActivity() {private lateinit var binding: ActivityMainBindingoverride fun onCreate(savedInstanceState: Bundle?) {super.onCreate(savedInstanceState)binding = ActivityMainBinding.inflate(layoutInflater)setContentView(binding.root)val bitmap = BitmapFactory.decodeResource(resources, R.drawable.pic)binding.ivDisplay.setImageBitmap(bitmap)binding.btnPicProcess.setOnClickListener {binding.ivDisplay.setImageBitmap(handleBitmap(bitmap))}}/*** jni处理图片。*/private fun handleBitmap(bitmap: Bitmap) : Bitmap {val bmp = bitmap.copy(Bitmap.Config.ARGB_8888, true);nativeProcessBitmap(bmp);return bmp;}/*** 黑白特效,调用native底层方法。*/external fun nativeProcessBitmap(bitmap: Bitmap)companion object {// Used to load the 'myapplication' library on application startup.init {System.loadLibrary("myapplication")}}
}
我们再来看下CMakeLists.txt的代码,注意target_link_libraries中要链接jnigraphics。
# For more information about using CMake with Android Studio, read the
# documentation: https://d.android.com/studio/projects/add-native-code.html.
# For more examples on how to use CMake, see https://github.com/android/ndk-samples.# Sets the minimum CMake version required for this project.
cmake_minimum_required(VERSION 3.22.1)# Declares the project name. The project name can be accessed via ${ PROJECT_NAME},
# Since this is the top level CMakeLists.txt, the project name is also accessible
# with ${CMAKE_PROJECT_NAME} (both CMake variables are in-sync within the top level
# build script scope).
project("myapplication")# Creates and names a library, sets it as either STATIC
# or SHARED, and provides the relative paths to its source code.
# You can define multiple libraries, and CMake builds them for you.
# Gradle automatically packages shared libraries with your APK.
#
# In this top level CMakeLists.txt, ${CMAKE_PROJECT_NAME} is used to define
# the target library name; in the sub-module's CMakeLists.txt, ${PROJECT_NAME}
# is preferred for the same purpose.
#
# In order to load a library into your app from Java/Kotlin, you must call
# System.loadLibrary() and pass the name of the library defined here;
# for GameActivity/NativeActivity derived applications, the same library name must be
# used in the AndroidManifest.xml file.
add_library(${CMAKE_PROJECT_NAME} SHARED# List C/C++ source files with relative paths to this CMakeLists.txt.native-lib.cpp)# Specifies libraries CMake should link to your target library. You
# can link libraries from various origins, such as libraries defined in this
# build script, prebuilt third-party libraries, or Android system libraries.
target_link_libraries(${CMAKE_PROJECT_NAME}# List libraries link to the target libraryandroidlogjnigraphics)
最后就是我们最最重要的底层代码了。通过调用AndroidBitmap_getInfo来读取图片像素数据,并将其保存在AndroidBitmapInfo中。AndroidBitmap_lockPixels 是 Android Native Development Kit (NDK) 中的一个函数,用于锁定一个 android.graphics.Bitmap 对象的像素数据,以便在 Native 代码中进行像素级别的操作。这个函数允许在 C 或 C++ 代码中直接访问 Android 应用中的位图像素数据,以便进行图像处理、渲染或其他图像相关的操作。最后记得调用AndroidBitmap_unlockPixels解锁。至于为什么是(R+G+B)/3,这个问题要问我为什么这么算,我能力有限教不了你们,你得问计算机图像处理学的专家,哈哈。当将彩色图像转换为黑白图像时,通常采用灰度化的方法,即将红、绿、蓝三个通道的数值取平均值,以获得灰度图像。因此,将RGB图像转换为黑白图像时,每个像素的灰度值通常是红、绿、蓝通道值的平均值,即(R+G+B)/3。
#include <jni.h>
#include <string>
#include <stdio.h>
#include <pthread.h>
#include <unistd.h>
#include <android/bitmap.h>#define MAKE_RGB565(r, g, b) ((((r) >> 3) << 11) | (((g) >> 2) << 5) | ((b) >> 3))
#define MAKE_ARGB(a, r, g, b) ((a&0xff)<<24) | ((r&0xff)<<16) | ((g&0xff)<<8) | (b&0xff)#define RGB565_R(p) ((((p) & 0xF800) >> 11) << 3)
#define RGB565_G(p) ((((p) & 0x7E0 ) >> 5)  << 2)
#define RGB565_B(p) ( ((p) & 0x1F  )        << 3)#define RGB8888_A(p) (p & (0xff<<24) >> 24 )
#define RGB8888_R(p) (p & (0xff<<16) >> 16 )
#define RGB8888_G(p) (p & (0xff<<8)  >> 8 )
#define RGB8888_B(p) (p & (0xff) )#define RGBA_A(p) (((p) & 0xFF000000) >> 24)
#define RGBA_R(p) (((p) & 0x00FF0000) >> 16)
#define RGBA_G(p) (((p) & 0x0000FF00) >>  8)
#define RGBA_B(p)  ((p) & 0x000000FF)
#define MAKE_RGBA(r, g, b, a) (((a) << 24) | ((r) << 16) | ((g) << 8) | (b))extern "C" JNIEXPORT void JNICALL
Java_com_dorachat_myapplication_MainActivity_nativeProcessBitmap(JNIEnv *env,jobject instance,jobject bitmap) {if (bitmap == NULL) {return;}AndroidBitmapInfo bitmapInfo;memset(&bitmapInfo, 0, sizeof(bitmapInfo));// Need add "jnigraphics" into target_link_libraries in CMakeLists.txtAndroidBitmap_getInfo(env, bitmap, &bitmapInfo);// Lock the bitmap to get the buffervoid *pixels = NULL;int res = AndroidBitmap_lockPixels(env, bitmap, &pixels);// From top to bottomint x = 0, y = 0;for (y = 0; y < bitmapInfo.height; ++y) {// From left to rightfor (x = 0; x < bitmapInfo.width; ++x) {int a = 0, r = 0, g = 0, b = 0;void *pixel = NULL;// Get each pixel by formatif (bitmapInfo.format == ANDROID_BITMAP_FORMAT_RGBA_8888) {pixel = ((uint32_t *) pixels) + y * bitmapInfo.width + x;int r, g, b;uint32_t v = *((uint32_t *) pixel);r = RGB8888_R(v);g = RGB8888_G(v);b = RGB8888_B(v);int sum = r + g + b;*((uint32_t *) pixel) = MAKE_ARGB(0xff, sum / 3, sum / 3, sum / 3);} else if (bitmapInfo.format == ANDROID_BITMAP_FORMAT_RGB_565) {pixel = ((uint16_t *) pixels) + y * bitmapInfo.width + x;int r, g, b;uint16_t v = *((uint16_t *) pixel);r = RGB565_R(v);g = RGB565_G(v);b = RGB565_B(v);int sum = r + g + b;*((uint16_t *) pixel) = MAKE_RGB565(sum / 3, sum / 3, sum / 3);}}}AndroidBitmap_unlockPixels(env, bitmap);
}
效果演示
知道你们喜欢清纯的,来了。最后不忘留个赞吧。

![Amazon云计算AWS之[7]内容推送服务CloudFront](https://img-blog.csdnimg.cn/direct/4bef8334ca6844bba248ad23ff803fe3.png)

