目录
一、案例一 概述
二、案例一 前置知识点
2.1、什么是 Docker Compose
2.2、什么是 Consul
三、案例一 使用 docker Compose 搭建 Consul 集群环境
3.1、案例实验环境
3.2、案例需求
四、案例实施
4.1、Docker 网络通信
1)端口映射
2)容器互联
4.2、Docker Compose 容器编排
1)docker Compose 环境安装
2)文件格式及编写注意事项
3)配置常用字段描述
4)Docker Compose 常用命令
4.3、Compose 命令介绍及 LNMP 环境部署
1)基本的使用格式
2)docker-compose 选项
3)创建 lnmp 环境
4.4、基于 Nginx 和 Consul 构建自动发现的 Docker 服务架构
1)建立 consul 服务
2)查看集群信息
3)web 界面查看
4.5、容器服务自动加入 nginx 集群
1)安装 Gliderlabs/Registrator
2)测试服务发现功能是否正常
3)验证 http 和 nginx 服务是否注册到 consul
4)安装 consul-template
5)安装 nginx
6)配置并启动 template
7)访问 template-nginx 配置文件
8)增加一个 nginx 容器节点
五、案例二 概述
六、案例二 前置知识点
6.1、什么是 Harbor
6.2、Harbor 的优势
6.3、Harbor 的构成
七、案列二:Harbor 构建 Docker 私有仓库
7.1、本案例实验环境
7.2、案例需求
7.3、案例实现思路
八、案例实施
8.1、部署 Docker-Compose 服务
1)下载 Docker-Compose
2)查看 Docker-Compose 版本判断安装是否成功
8.2、部署 Harbor 服务
1)下载 Harbor 安装程序
2)配置 Harbor 参数文件
3)启动 Harbor
4)查看 Harbor 启动镜像
5)创建一个新项目
6)客户端上传镜像
8.3、Harbor 日常操作管理
1)通过 Harbor Web 创建项目
2)创建 Harbor 用户
3)查看日志
8.4、维护管理 Harbor
1)停止、启动、重启 Harbor
2)修改 Harbor.yml 配置文件
3)移除 Harbor 服务容器同时保留镜像数据/数据库
4)如需重新部署,需要移除 Harbor 服务容器全部数据
一、案例一 概述
创鑫公司提出了一个新需求,使用 Docker 将 Consul、Consul Template、Registrator 和 Nginx 组装成一个值得信任且可扩展的服务框架,可在这个框架中添加和移除服务,不需要重写任何配置,也不需要重启任何服务,一切都能正常运行。
二、案例一 前置知识点
2.1、什么是 Docker Compose
Docker Compose 的前身是 Fig,它是一个定义及运行多个 Docker 容器的工具。使用 Docker Compose 时,只需要在一个配置文件中定义多个 Docker 容器,然后使用一条命令启动这些容器。Docker Compose 会通过解析容器间的依赖关系按先后顺序启动所定义的容器。
2.2、什么是 Consul
Consul 是 HashiCorp 公司推出的开源工具,用于实现分布式系统的服务发现与配置。与其他分布式服务注册与发现的方案不同,与 Airbnb 的 SmartStack 等相比,Consul 的方案更 “一站式”,内置了服务注册与发现框架、分布一致性协议实现、健康检查、Key/Value 存储、多数据中心方案,不再需要依赖其他工具(例如 ZooKeeper 等),使用起来也较为简单。 Consul 是基于 Golang 语言开发实现的,因此具有天然可移植性(支持 Linux、windows 和 Mac OS X);安装包仅包含一个可执行文件,方便部署,与 Docker 等轻量级容器可无缝配合。
三、案例一 使用 docker Compose 搭建 Consul 集群环境
3.1、案例实验环境
本案例的实验环境配置如下表所示。
| 主机 | 操作系统 | 主机名/ IP 地址 | 主要软件及版本 |
| 服务器 | Centos 7.9-x86_64 | consul / 192.168.23.213 | docker-ce-19.03.15、Compose、Consul、Consul-template |
| 服务器 | Centos 7.9-x86_64 | registrator / 192.168.23.214 | docker-ce-19.03.15、registrator |
创建 Docker Compose 及 Consul 环境
3.2、案例需求
- 实现单机网络下容器与容器之间互通。
- 使用 Docker Compose 创建容器。
- 搭建 Consul 服务实现自动发现和更新。
四、案例实施
4.1、Docker 网络通信
Docker 提供了映射容器端口到宿主机和容器互联两种机制来为容器提供网络服务。
1)端口映射
在启动容器的时候,如果不指定对应的端口,在容器外是无法通过网络来访问容器内的服务。端口映射机制将容器内的服务提供给外部网络访问,实质上就是将宿主机的端口映射到容器中,使得外部网络访问宿主机的端口便可访问容器内的服务。
实现端口映射,需要在运行 docker run 命令时使用 -P(大写)选项实现随机映射,docker 会随机映射一个端口到容器内部开放的网络端口。 例如:
[root@local ~]# docker pull nginx
[root@local ~]# docker run -d -P nginx
1eeb86cf101944c321836e755169e2ff00151884439f8322489ca29b1596dfce
此时,使用 docker ps 命令可以看到,本机的 32768 端口被映射到了容器中的 80 端口。 所以访问宿主机的 32768 端口就可访到容器内 Web 应用提供的界面。
[root@local ~]# docker ps -a
CONTAINER ID        IMAGE               COMMAND                  CREATED             STATUS              PORTS                   NAMES
1eeb86cf1019        nginx               "/docker-entrypoint.…"   29 seconds ago      Up 28 seconds       0.0.0.0:32768->80/tcp   nostalgic_chandrasekhar
还可以在运行 docker run 命令时使用 -p(小写)选项实现指定要映射的端口,例如:
[root@local ~]# docker run -d -p 49280:80 nginx
33f73a5adb2f654f6d057ba15320bc1e8050d1474094d743a10f2b927e8e0cac
此时,将本机的 49280 端口被映射到了容器中的 80 端口。
[root@local ~]# docker ps -a
CONTAINER ID        IMAGE               COMMAND                  CREATED              STATUS              PORTS                   NAMES
33f73a5adb2f        nginx               "/docker-entrypoint.…"   27 seconds ago       Up 25 seconds       0.0.0.0:49280->80/tcp   funny_roentgen
2)容器互联
容器互联是通过容器的名称在容器间建立一条专门的网络通信隧道。简单点说,就是会在源容器和接收容器之间建立一条隧道,接收容器可以看到源容器指定的信息。
在运行 docker run 命令时使用 --link 选项实现容器之间的互联通信。
格式:--link name:alias
其中 name 是要连接的容器名称,alias 是该连接的别名。
注意:容器互联是通过容器的名称来执行的,--name 选项可以给容器创建一个友好的名称,这个名称是唯一的。
下面是使用容器互联技术实现容器间通信的步骤。
(1)创建源容器
使用 docker run 命令建立容器 A ,使用 --name 指定容器名称为 web1。
[root@local ~]# docker run -d -P --name web1 nginx
c617a32244115c4ec113c28a7d765f32b6a55897ab1ebb64ddefeb9baa9fcf8a
(2)创建接收容器
使用 docker run 命令建立容器 B,--name 指定名称为 web2,--link 指定连接容器以实现容器互联。
[root@local ~]# docker run -d -P --name web2 --link web1:web1 nginx
9eacc4abfc14ae9403c019eb23daef3d571b61c6bacfebc8b0fac823d7389217
(3)测试容器互联
最简单的检测方法是进入容器,使用 curl 命令查看容器是否相互连通。
[root@local ~]# docker exec -it web2 /bin/bash
root@9eacc4abfc14:/# curl web1
<!DOCTYPE html>
<html>
<head>
<title>Welcome to nginx!</title>
<style>
html { color-scheme: light dark; }
body { width: 35em; margin: 0 auto;
font-family: Tahoma, Verdana, Arial, sans-serif; }
</style>
</head>
<body>
<h1>Welcome to nginx!</h1>
<p>If you see this page, the nginx web server is successfully installed and
working. Further configuration is required.</p><p>For online documentation and support please refer to
<a href="http://nginx.org/">nginx.org</a>.<br/>
Commercial support is available at
<a href="http://nginx.com/">nginx.com</a>.</p><p><em>Thank you for using nginx.</em></p>
</body>
</html>
此时,可以看到容器 web2 与容器 web1 已经建立互联关系。这时 Docker 在两个互联的容器之间创建了一条安全隧道,而且不用映射它们的端口到宿主机上,从而避免暴露端口到外部网络。
4.2、Docker Compose 容器编排
Compose 是 Docker 的服务编排工具,主要用来构建基于 Docker 的复杂应用 Compose 通过一个配置文件管理多个 Docker 容器,非常适合组合使用多个容器进行开发的场景。
1)docker Compose 环境安装
[root@local ~]# curl -SL https://github.com/docker/compose/releases/download/v1.2.1/docker-compose-linux-x86_64 -o /usr/local/bin/docker-compose
[root@local ~]# chmod +x /usr/local/bin/docker-compose
[root@local ~]# docker-compose -v
docker-compose version 1.21.1, build 5a3f1a3
2)文件格式及编写注意事项
YAML 是一种标记语言,它可以很直观的展示数据序列化格式,可读性高。类似于 XML 数据描述语言,语法比 XML 简单的很多。YAML 数据结构通过缩进来表示,连续的项目通过减号来表示,键值对用冒号分隔,数组用中括号([])括起来, hash 用花括号({})括起来。
使用 YAML 时需要注意下面事项:
- 不支持制表符 tab 键缩进,需要使用空格缩进。
- 通常开头缩进两个空格。
- 字符后缩进一个空格,如冒号、逗号、横杆。
- 用 # 号注释。
- 如果包含特殊字符,要使用单引号('')引起来。
- 布尔值(true、 false、 yes、 no、 on、 off)必须用引号("")括起来,这样分析器会将它们解释为字符串。
3)配置常用字段描述
下表是配置的常用字段描述。
| 字段 | 描述 |
| build | 指定 Dockerfile 文件名 |
| Dockerfile | 构建镜像上下文路径 |
| context | 可以是 dockerfile 的路径,或者是指向 git 仓库的 url 地址 |
| image | 指定镜像 |
| command | 执行命令,覆盖默认命令 |
| container name | 指定容器名称,由于容器名称是唯一的,如果指定自定义名称, 则无法 scale |
| deploy | 指定部署和运行服务相关配置,只能在 Swarm 模式使用 |
| environment | 添加环境变量 |
| networks | 加入网络 |
| ports | 暴露容器端口,与 -p 相同,但端口不能低于 60 |
| volumes | 挂载宿主机路径或命令卷 |
| restart | 重启策略,默认 no,always,no-failure,unless-stoped |
| hostname | 容器主机名 |
常用字段描述表
4)Docker Compose 常用命令
下表是 Docker Compose 常用命令描述。
| 字段 | 描述 |
| build | 重新构建服务 |
| ps | 列出容器 |
| up | 创建和启动容器 |
| exec | 在容器里面执行命令 |
| scale | 指定一个服务容器启动数量 |
| top | 显示容器进程 |
| logs | 查看容器输出 |
| down | 删除容器、网络、数据卷 |
| stop/start/restart | 停止/启动/重启服务 |
Docker Compose 常用命令描述表
4.3、Compose 命令介绍及 LNMP 环境部署
Compose 的多数命令都可以运行在一个或多个服务上。如果没有特别的说明,命令则应用在项目所有的服务上。执行 docker-compose [COMMAND] --help 查看具体某个命令的使用说明。
1)基本的使用格式
命令格式:docker-compose [options] [COMMAND] [ARGS...]
2)docker-compose 选项
- --verbose 输出更多调试信息。
- --version 打印版本并退出。
- -f, --file FILE 使用特定的 compose 模板文件,默认为 docker-compose.yml。
- -p, --project-name NAME 指定项目名称,默认使用目录名称。
3)创建 lnmp 环境
(1)建立工作目录
[root@consul ~]# mkdir compose-lnmp
[root@consul ~]# cd compose-lnmp
[root@consul compose-lnmp]# mkdir {nginx,mysql,php,wwwroot}
[root@consul compose-lnmp]# ls
mysql  nginx  php  wwwroot
(2) 编写 docker-compose 的 yaml 文件
[root@consul compose-lnmp]# vim lnmp.yml
version: '3'
services:nginx:hostname: nginxbuild:dockerfile: nginx.dockerfilecontext: ./nginxports:- 81:80volumes:- ./wwwroot:/usr/share/nginx/htmllinks:- php:phpphp:hostname: phpbuild:dockerfile: php.dockerfilecontext: ./phpports:- 9000:9000volumes:- ./wwwroot:/usr/share/nginx/htmllinks:- mysql:mysqlmysql:hostname: mysqlbuild:dockerfile: mysql.dockerfilecontext: ./mysqlports:- 3306:3306
编写 nginx 的 dockerfile 文件
[root@consul compose-lnmp]# vim nginx/nginx.dockerfile
FROM centos:7.9.2009
RUN yum -y install epel-release && yum -y install nginx && rm -rf /etc/nginx/nginx.conf && mv /etc/nginx/nginx.conf.default /etc/nginx/nginx.conf && sed -i '65,71s/#//g' /etc/nginx/nginx.conf && sed -i '65,71s/\/scripts/$document_root/g' /etc/nginx/nginx.conf && sed -i '65,71s/127.0.0.1/php/g' /etc/nginx/nginx.conf && sed -i '65,71s/html/\/usr\/share\/nginx\/html/g' /etc/nginx/nginx.conf && yum clean all
EXPOSE 80
CMD [ "/usr/sbin/nginx","-g","daemon off;" ]
编写 php 的 dockerfile 文件
[root@consul compose-lnmp]# vim php/php.dockerfile
FROM centos:7.9.2009
RUN yum install -y php php-fpm php-mysql && sed -i '/listen = /s/127.0.0.1/0.0.0.0/g' /etc/php-fpm.d/www.conf && sed -i '/listen.allowed_clients/s/^/;/g' /etc/php-fpm.d/www.conf && yum clean all
CMD [ "/usr/sbin/php-fpm" ]
编写 mysql 的 dockerfile 文件
[root@consul compose-lnmp]# vim mysql/mysql.dockerfile
FROM centos:7.9.2009
RUN echo -e '[mysql57-community]\nname=MySQL 5.7 Community Server\nbaseurl=http://repo.mysql.com/yum/mysql-5.7-community/el/7/$basearch/\nenabled=1\ngpgcheck=0' > /etc/yum.repos.d/mysql57.repo && yum -y install mysql-community-server && /usr/sbin/mysqld --initialize-insecure && yum clean all
ADD init.sh /init.sh
RUN chmod +x /init.sh && /init.sh
EXPOSE 3306
CMD ["/usr/sbin/mysqld","--user=root"]
编写 mysql 脚本
[root@consul compose-lnmp]# vim mysql/init.sh
#!/bin/bash
/usr/sbin/mysqld --user=root &
sleep 3
mysql -u root -e 'grant all on *.* to root@"%" identified by "cisco@123"'
kill -9 $(cat /var/run/mysqld/mysqld.pid)
rm -rf /var/lib/mysql/mysql.sock.lock
(3)使用 docker-compose 构建 LNMP 环境并在后台运行。
[root@consul compose-lnmp]# docker-compose -f lnmp.yml up -d(4)查看 lnmp 环境的容器
[root@consul compose-lnmp]# docker-compose -f lnmp.yml psName                      Command               State           Ports
--------------------------------------------------------------------------------------
compose-lnmp_mysql_1   /usr/sbin/mysqld --user=root     Up      0.0.0.0:3306->3306/tcp
compose-lnmp_nginx_1   /usr/sbin/nginx -g daemon off;   Up      0.0.0.0:81->80/tcp
compose-lnmp_php_1     /usr/sbin/php-fpm                Up      0.0.0.0:9000->9000/tcp
(5)测试
[root@consul compose-lnmp]# echo "lnmp" > wwwroot/index.html浏览器访问
测试 php 连接
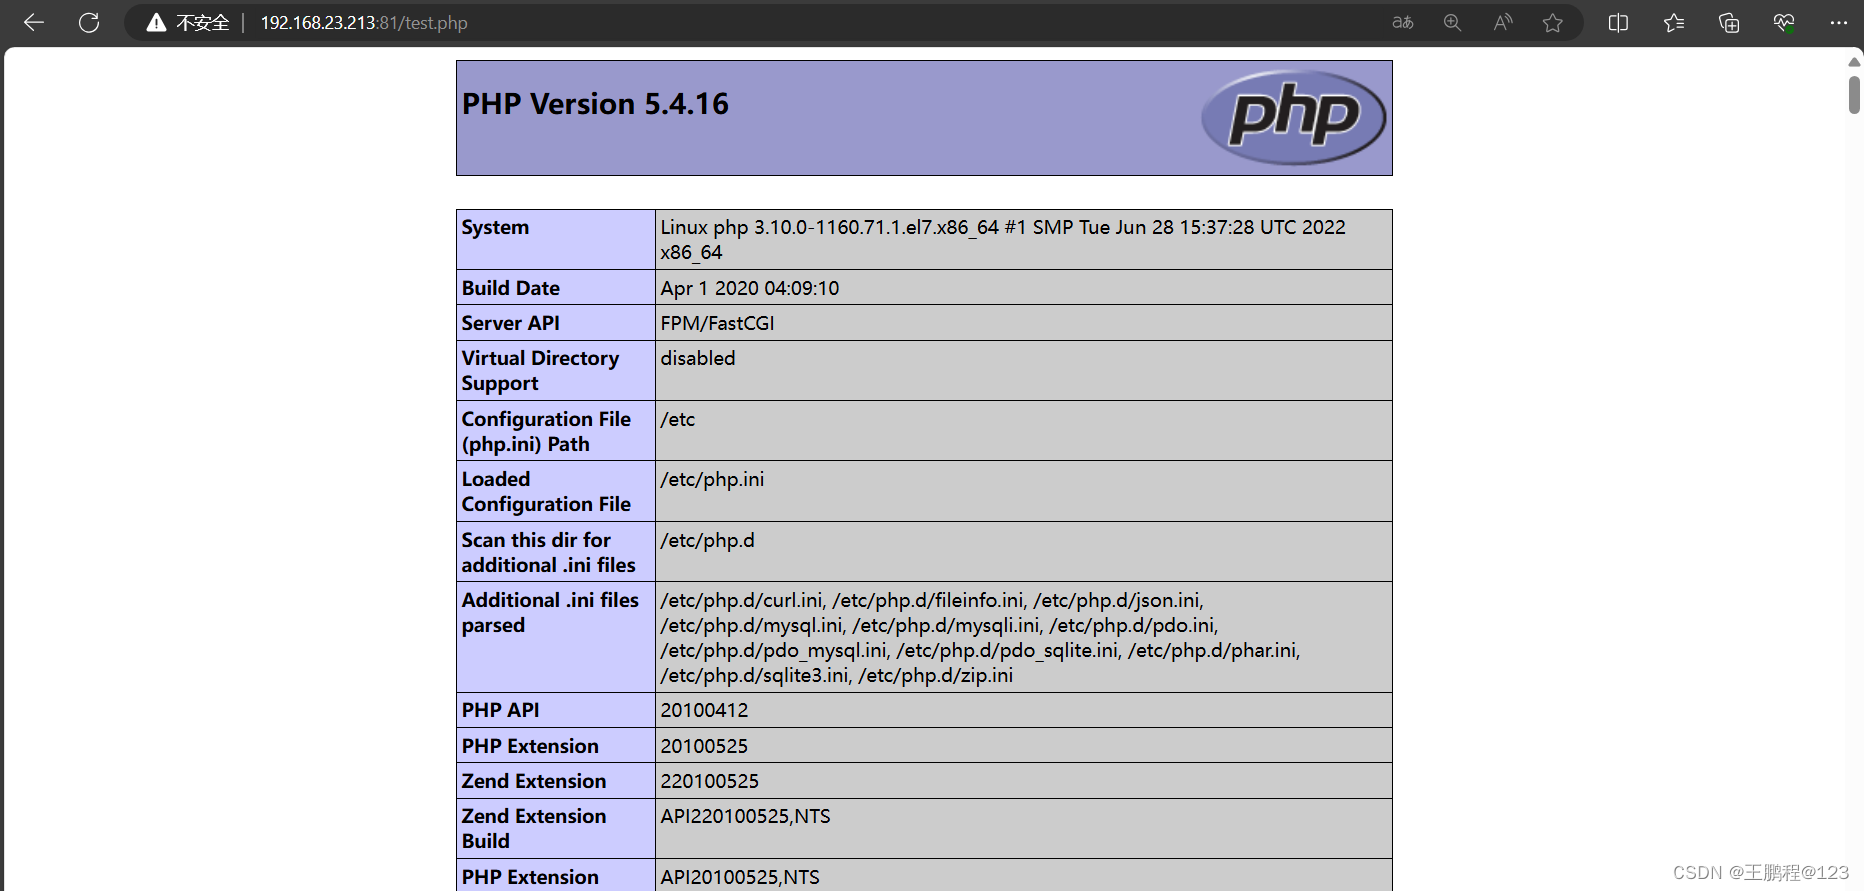
[root@consul compose-lnmp]# vim wwwroot/test.php
<?php
phpinfo();
?>
浏览器访问
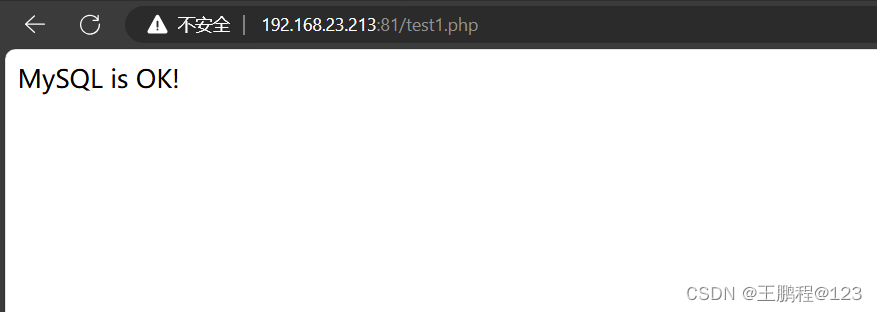
测试 mysql 连接
[root@consul compose-lnmp]# vim wwwroot/test1.php
<?php
$link=mysql_connect("mysql","root","cisco@123");
if ($link) echo "MySQL is OK!";
mysql_close($link);
?>
浏览器访问
4.4、基于 Nginx 和 Consul 构建自动发现的 Docker 服务架构
1)建立 consul 服务
要想利用 Consul 提供的服务实现服务的注册与发现,需要建立 Consul 服务。在 Consul 方案中,每个提供服务的节点上都要部署和运行 Consul 的 Agent,所有运行 Consul Agent 节点的集合构成 Consul Cluster。Consul Agent 有两种运行模式:Server 和 Client。这里的 Server 和 Client 只是 Consul 集群层面的区分,与搭建在 Cluster 之上的应用服务无关。以 Server 模式运行的 Consul Agent 节点用于维护 Consul 集群的状态,官方建议每个 Consul Cluster 至少有 3 个或以上的运行在 Server mode 的 Agent,Client 节点不限。
[root@consul ~]# mkdir consul
[root@consul ~]# cd consul/
将 consul 压缩包上传到/root/consul 目录下:
[root@consul consul]# unzip consul_1.10.1_linux_amd64.zip  //解压
[root@consul consul]# mv consul /usr/bin/  //移动至 /usr/bin/ 目录下
其中的命令参数:
- -bootstrap:用来控制一个 server 是否在 bootstrap 模式,在一个 datacenter 中只能有一个 server 处于 bootstrap 模式,当一个 server 处于 bootstrap 模式时,可以自己选举为 raft leader。
- -data-dir 参数指定数据存储目录。
- -bind:该地址用来在集群内部的通讯,集群内的所有节点到地址都必须是可达的,默认是 0.0.0.0。
- -ui 参数指定开启 UI 界面,这样可以通过 http://localhost:8500/ui 这样的地址访问 consul 自 带的 web UI 界面。
- -client consul 绑定在哪个 client 地址上,这个地址提供 HTTP、DNS、RPC 等服务, 默认 是 127.0.0.1。
- -node:节点在集群中的名称,在一个集群中必须是唯一的,默认是该节点的主机名。
下面使用后台命令启动 consul 服务端:
[root@consul ~]# nohup consul agent -server -bootstrap -ui -data-dir=/var/lib/consul-data -bind=192.168.23.213 -client=0.0.0.0 -node=consul-server01 &> /var/log/consul.log & //启动 consul安装 consul 是用于服务注册,也就是容器本身的一些信息注册到 consul 里面,其他程序可以通过 consul 获取注册的相关服务信息,这就是服务注册与发现。
2)查看集群信息
[root@consul ~]# consul members
Node             Address              Status  Type    Build   Protocol  DC   Segment
consul-server01  192.168.23.213:8301  alive   server  1.10.1  2         dc1  <all>
[root@consul ~]# consul info | grep leaderleader = trueleader_addr = 192.168.23.213:8300
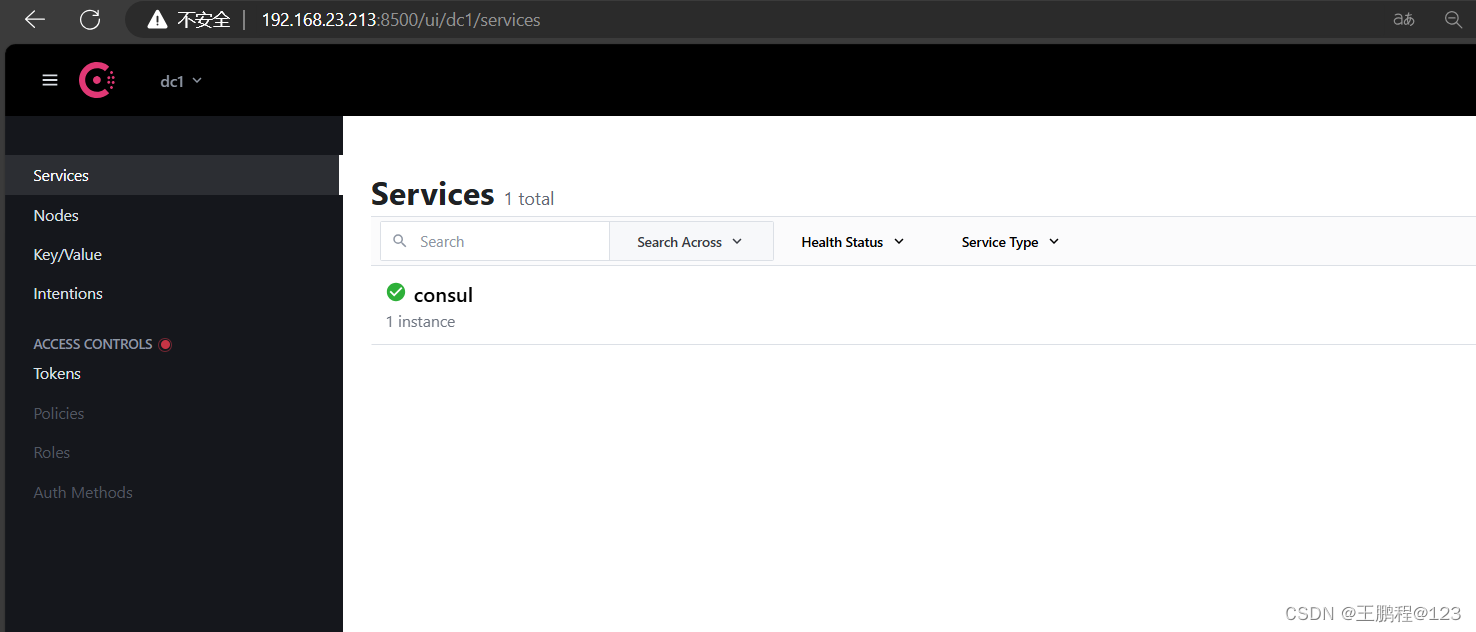
3)web 界面查看
4.5、容器服务自动加入 nginx 集群
1)安装 Gliderlabs/Registrator
Gliderlabs/Registrator 可检查容器运行状态自动注册,还可注销 docker 容器的服务到服务配置中心。目前支持 Consul、Etcd 和 SkyDNS2。
在 192.168.23.214 节点,执行以下操作:
[root@registrator ~]# docker run -d --name=registrator --net=host -v /var/run/docker.sock:/tmp/docker.sock --restart=always gliderlabs/registrator:latest -ip=192.168.23.214 consul://192.168.23.213:8500查看
[root@registrator ~]# docker ps -a
CONTAINER ID        IMAGE                           COMMAND                  CREATED             STATUS              PORTS               NAMES
df496a8aab37        gliderlabs/registrator:latest   "/bin/registrator -i…"   22 seconds ago      Up 22 seconds                           registrator
2)测试服务发现功能是否正常
[root@registrator ~]# docker run -itd -p 83:80 --name test-01 -h test01 nginx
[root@registrator ~]# docker run -itd -p 84:80 --name test-02 -h test02 nginx
[root@registrator ~]# docker run -itd -p 88:80 --name test-03 -h test03 httpd
[root@registrator ~]# docker run -itd -p 89:80 --name test-04 -h test04 httpd
3)验证 http 和 nginx 服务是否注册到 consul
浏览器中,输入 http://192.168.23.213:8500,在 Web 页面中“单击 NODES”,然后单击 “consurl-server01”,会出现 5 个服务,如下图所示。
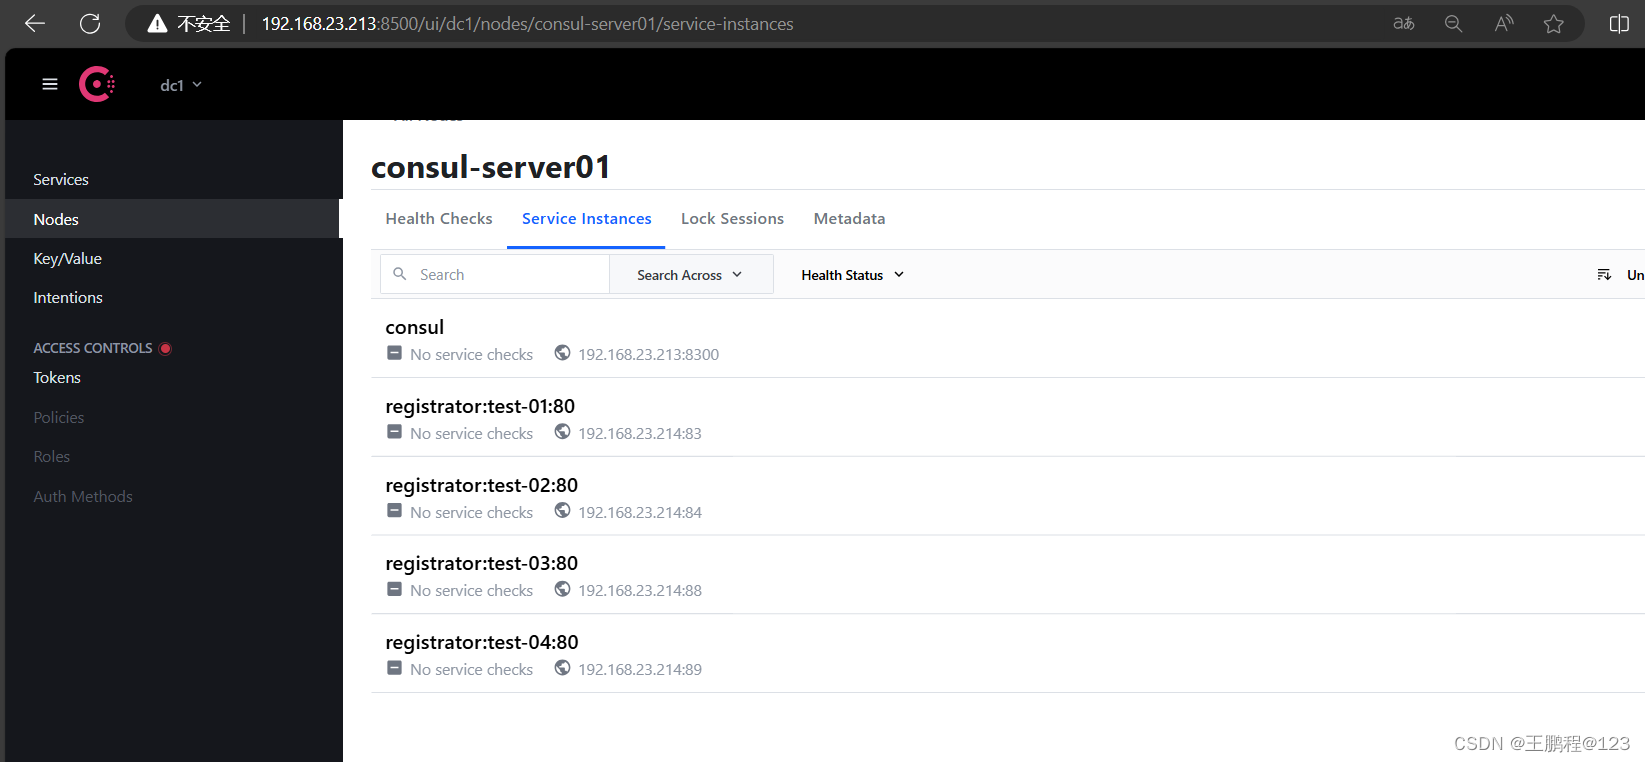 验证 nginx 和 httpd 服务注册
[root@consul ~]# curl 127.0.0.1:8500/v1/catalog/services  //使用 curl 测试连接服务器
{"consul":[],"httpd":[],"nginx":[]}
从结果看,httpd 和 nginx 服务已经注册到 consul 里面,说明服务正常。
4)安装 consul-template
Consul-Template 是基于 Consul 的自动替换配置文件的应用。在 Consul-Template 没出现之前,构建服务大多采用的与 Zookeeper、Etcd+Confd 类似的系统。
Consul-Template 是一个守护进程,用于实时查询 Consul 集群信息,并更新文件系统上任意数量的指定模板,生成配置文件。更新完成以后,可以选择运行 shell 命令执行更新操作,重新加载 Nginx。
Consul-Template 可以查询 Consul 中的服务目录、Key、Key-values 等。这种强大的抽象功能和查询语言模板可以使 Consul-Template 特别适合动态的创建配置文件。例如:创建 Apache/Nginx Proxy Balancers 、 Haproxy Backends 、 Varnish Servers 、 Application Configurations 等。
5)安装 nginx
用 nginx 做调度器
在 192.168.23.213 上执行如下操作:
[root@consul ~]# yum -y install epel-release  //修改安装源
[root@consul ~]# yum -y install nginx  //安装 nginx
准备 template nginx 模版文件
[root@consul ~]# cd consul/
[root@consul consul]# vim nginx.ctmpl
upstream http_backend {{{range service "nginx"}}server {{ .Address }}:{{ .Port }};{{ end }}
}
server {listen 90;server_name localhost 192.168.23.213;access_log /var/log/nginx/kgc.cn-access.log;index index.html index.php;location / {proxy_set_header HOST $host;proxy_set_header X-Real-IP $remote_addr;proxy_set_header Client-IP $remote_addr;proxy_set_header X-Forwarded-For $proxy_add_x_forwarded_for;proxy_pass http://http_backend;}
}
启动 nginx
[root@consul ~]# systemctl start nginx
[root@consul ~]# systemctl enable nginx
6)配置并启动 template
手动上传 consul-template_0.27.0_linux_amd64.zip 包到/root 目录下。
[root@consul ~]# unzip consul-template_0.27.0_linux_amd64.zip
Archive:  consul-template_0.27.0_linux_amd64.zipinflating: consul-template
[root@consul ~]# mv consul-template /usr/bin/
在前台启动 template 服务,启动后不要按 ctrl+c 中止。
[root@consul ~]# consul-template -consul-addr 192.168.23.213:8500 -template "/root/consul/nginx.ctmpl:/etc/nginx/conf.d/kgc.conf:/usr/sbin/nginx -s reload" --log-level=info
2024-05-30T11:00:29.833+0800 [INFO] consul-template v0.27.0 (d4af0222)
2024-05-30T11:00:29.833+0800 [INFO] (runner) creating new runner (dry: false, once: false)
2024-05-30T11:00:29.834+0800 [INFO] (runner) creating watcher
2024-05-30T11:00:29.835+0800 [INFO] (runner) starting
再打开一个连接,可以查看刚刚指定 template 模板文件生成的配置文件如下。
[root@consul conf.d]# cat /etc/nginx/conf.d/kgc.conf
upstream http_backend {server 192.168.23.214:83;server 192.168.23.214:84;}
server {listen 90;server_name localhost 192.168.23.213;access_log /var/log/nginx/kgc.cn-access.log;index index.html index.php;location / {proxy_set_header HOST $host;proxy_set_header X-Real-IP $remote_addr;proxy_set_header Client-IP $remote_addr;proxy_set_header X-Forwarded-For $proxy_add_x_forwarded_for;proxy_pass http://http_backend;}
}
7)访问 template-nginx 配置文件
通过浏览访问 template-nginx 配置文件里面 Nginx 监听的 83 端口,访问成功如下图所示。
 访问 nginx 界面成功
8)增加一个 nginx 容器节点
- 增加一个 nginx 容器节点,测试服务发现及配置更新功能。
[root@registrator ~]# docker run -itd -p 85:80 --name test-05 -h test5 nginx观察 template 服务,会从模板更新 /etc/nginx/conf.d/kgc.cog 文件内容,并且重载 nginx 服务
c2024-05-30T11:05:49.801+0800 [INFO] (runner) rendered "/root/consul/nginx.ctmpl" => "/etc/nginx/conf.d/kgc.conf"
2024-05-30T11:05:49.801+0800 [INFO] (runner) executing command "/usr/sbin/nginx -s reload" from "/root/consul/nginx.ctmpl" => "/etc/nginx/conf.d
2024-05-30T11:05:49.801+0800 [INFO] (child) spawning: sh -c /usr/sbin/nginx -s reload
- 查看 /etc/nginx/conf.d/kgc.conf 文件内容
[root@consul conf.d]# cat /etc/nginx/conf.d/kgc.conf
upstream http_backend {server 192.168.23.214:83;server 192.168.23.214:84;server 192.168.23.214:85;}
server {listen 90;server_name localhost 192.168.23.213;access_log /var/log/nginx/kgc.cn-access.log;index index.html index.php;location / {proxy_set_header HOST $host;proxy_set_header X-Real-IP $remote_addr;proxy_set_header Client-IP $remote_addr;proxy_set_header X-Forwarded-For $proxy_add_x_forwarded_for;proxy_pass http://http_backend;}
}
- 查看三台 nginx 容器日志,请求正常轮询到各个容器节点上。
打开 registrator 三个连接 ,分别查看 test-01、test-02、test-05 三台容器的日志访问情况
[root@registrator ~]# docker logs -f test-01
/docker-entrypoint.sh: /docker-entrypoint.d/ is not empty, will attempt to perform configuration
/docker-entrypoint.sh: Looking for shell scripts in /docker-entrypoint.d/
/docker-entrypoint.sh: Launching /docker-entrypoint.d/10-listen-on-ipv6-by-default.sh
10-listen-on-ipv6-by-default.sh: info: Getting the checksum of /etc/nginx/conf.d/default.conf
10-listen-on-ipv6-by-default.sh: info: Enabled listen on IPv6 in /etc/nginx/conf.d/default.conf
/docker-entrypoint.sh: Sourcing /docker-entrypoint.d/15-local-resolvers.envsh
/docker-entrypoint.sh: Launching /docker-entrypoint.d/20-envsubst-on-templates.sh
/docker-entrypoint.sh: Launching /docker-entrypoint.d/30-tune-worker-processes.sh
/docker-entrypoint.sh: Configuration complete; ready for start up
2024/05/30 01:50:09 [notice] 1#1: using the "epoll" event method
2024/05/30 01:50:09 [notice] 1#1: nginx/1.25.5
2024/05/30 01:50:09 [notice] 1#1: built by gcc 12.2.0 (Debian 12.2.0-14)
2024/05/30 01:50:09 [notice] 1#1: OS: Linux 3.10.0-1160.71.1.el7.x86_64
2024/05/30 01:50:09 [notice] 1#1: getrlimit(RLIMIT_NOFILE): 1048576:1048576
2024/05/30 01:50:09 [notice] 1#1: start worker processes
2024/05/30 01:50:09 [notice] 1#1: start worker process 28
2024/05/30 01:50:09 [notice] 1#1: start worker process 29[root@registrator ~]# docker logs -f test-02
/docker-entrypoint.sh: /docker-entrypoint.d/ is not empty, will attempt to perform configuration
/docker-entrypoint.sh: Looking for shell scripts in /docker-entrypoint.d/
/docker-entrypoint.sh: Launching /docker-entrypoint.d/10-listen-on-ipv6-by-default.sh
10-listen-on-ipv6-by-default.sh: info: Getting the checksum of /etc/nginx/conf.d/default.conf
10-listen-on-ipv6-by-default.sh: info: Enabled listen on IPv6 in /etc/nginx/conf.d/default.conf
/docker-entrypoint.sh: Sourcing /docker-entrypoint.d/15-local-resolvers.envsh
/docker-entrypoint.sh: Launching /docker-entrypoint.d/20-envsubst-on-templates.sh
/docker-entrypoint.sh: Launching /docker-entrypoint.d/30-tune-worker-processes.sh
/docker-entrypoint.sh: Configuration complete; ready for start up
2024/05/30 01:50:30 [notice] 1#1: using the "epoll" event method
2024/05/30 01:50:30 [notice] 1#1: nginx/1.25.5
2024/05/30 01:50:30 [notice] 1#1: built by gcc 12.2.0 (Debian 12.2.0-14)
2024/05/30 01:50:30 [notice] 1#1: OS: Linux 3.10.0-1160.71.1.el7.x86_64
2024/05/30 01:50:30 [notice] 1#1: getrlimit(RLIMIT_NOFILE): 1048576:1048576
2024/05/30 01:50:30 [notice] 1#1: start worker processes
2024/05/30 01:50:30 [notice] 1#1: start worker process 28
2024/05/30 01:50:30 [notice] 1#1: start worker process 29[root@registrator ~]# docker logs -f test-05
/docker-entrypoint.sh: /docker-entrypoint.d/ is not empty, will attempt to perform configuration
/docker-entrypoint.sh: Looking for shell scripts in /docker-entrypoint.d/
/docker-entrypoint.sh: Launching /docker-entrypoint.d/10-listen-on-ipv6-by-default.sh
10-listen-on-ipv6-by-default.sh: info: Getting the checksum of /etc/nginx/conf.d/default.conf
10-listen-on-ipv6-by-default.sh: info: Enabled listen on IPv6 in /etc/nginx/conf.d/default.conf
/docker-entrypoint.sh: Sourcing /docker-entrypoint.d/15-local-resolvers.envsh
/docker-entrypoint.sh: Launching /docker-entrypoint.d/20-envsubst-on-templates.sh
/docker-entrypoint.sh: Launching /docker-entrypoint.d/30-tune-worker-processes.sh
/docker-entrypoint.sh: Configuration complete; ready for start up
2024/05/30 03:05:49 [notice] 1#1: using the "epoll" event method
2024/05/30 03:05:49 [notice] 1#1: nginx/1.25.5
2024/05/30 03:05:49 [notice] 1#1: built by gcc 12.2.0 (Debian 12.2.0-14)
2024/05/30 03:05:49 [notice] 1#1: OS: Linux 3.10.0-1160.71.1.el7.x86_64
2024/05/30 03:05:49 [notice] 1#1: getrlimit(RLIMIT_NOFILE): 1048576:1048576
2024/05/30 03:05:49 [notice] 1#1: start worker processes
2024/05/30 03:05:49 [notice] 1#1: start worker process 28
2024/05/30 03:05:49 [notice] 1#1: start worker process 29
然后再浏览器访问 nginx 调度器的 90 端口,可以看到,nginx 调度器将访问请求分别发送到容器 test-01、test-02、test-05
[root@registrator ~]# docker logs -f test-01
.......//省略部分内容
192.168.23.213 - - [30/May/2024:03:13:23 +0000] "GET / HTTP/1.0" 304 0 "-" "Mozilla/5.0 (Windows NT 10.0; Win64; x64) AppleWebKit/537.36 (KHTML, like Gecko) Chrome/125.0.0.0 Safari/537.36 Edg/125.0.0.0" "192.168.23.10"[root@registrator ~]# docker logs -f test-02
......//省略部分内容
192.168.23.213 - - [30/May/2024:03:13:08 +0000] "GET /favicon.ico HTTP/1.0" 404 555 "http://192.168.23.213:90/" "Mozilla/5.0 (Windows NT 10.0; Win64; x64) AppleWebKit/537.36 (KHTML, like Gecko) Chrome/125.0.0.0 Safari/537.36 Edg/125.0.0.0" "192.168.23.10"[root@registrator ~]# docker logs -f test-05
......//省略部分内容
192.168.23.213 - - [30/May/2024:03:13:17 +0000] "GET / HTTP/1.0" 304 0 "-" "Mozilla/5.0 (Windows NT 10.0; Win64; x64) AppleWebKit/537.36 (KHTML, like Gecko) Chrome/125.0.0.0 Safari/537.36 Edg/125.0.0.0" "192.168.23.10"
五、案例二 概述
最近创鑫公司提出了一个新需求,将项目全部打包成镜像部署私有仓库服务,经过几轮商讨,最终选择 Docker Harbor。Docker Harbor 有可视化的 Web 管理界面,可以方便管理 Docker 镜像,又提供了多个项目的镜像权限管理控制功能等。
六、案例二 前置知识点
6.1、什么是 Harbor
Harbor 是 VMware 公司开源的企业级 Docker Registry 项目,其目标是帮助用户迅速搭建一个企业级的 Docker Registry 服务。它以 Docker 公司开源的 Registry 为基础,提供了管理 UI、基于角色的访问控制(Role Based AccessControl)、AD/LDAP 集成、以及审计日志 (Auditlogging)等企业用户需求的功能。通过添加一些企业必需的功能特性,例如安全、标识和管理等,扩展了开源 Docker Distribution。作为一个企业级私有 Registry 服务器, Harbor 提供了更好的性能和安全,以提升用户使用 Registry 构建和运行环境传输镜像的效率。
6.2、Harbor 的优势
Harbor 具有如下优势:
- 基于角色控制:用户和仓库都是基于项目进行组织的,而用户在项目中可以拥有不同的权限。
- 基于镜像的复制策略: 镜像可以在多个 Harbor 实例之间进行复制(同步),适用于负载平衡、高可用性、多数据中心、混合和多云场景。
- 支持 LDAP/AD:Harbor 与现有的企业 LDAP/AD 集成,用于用户认证和管理。
- 删除图像和收集垃圾:镜像可以被删除,也可以回收镜像占用的空间。
- 图形 UI:用户可以轻松浏览、搜索镜像仓库以及对项目进行管理。
- 审计:对存储库的所有操作都进行记录。
- RESTful API:用于大多数管理操作的 RESTful API,易于与外部系统集成。
6.3、Harbor 的构成
Harbor 在架构上主要有 Proxy、Registry、Core services、Database(Harbor-db)、 Log collector(Harbor-log)五个组件:
- Proxy
Harbor 的 Registry、UI、Token 等服务通过一个前置的反向代理统一接收浏览器和 Docker 客户端的请求,并将请求转发给后端不同的服务。
- Registry
负责储存 Docker 镜像,并处理 Docker push/pull 命令。由于要对用户进行访问控制,即不同用户对 Docker image 有不同的读写权限,Registry 会指向一个 Token 服务,强制用户的每次 Docker pull/push 请求都要携带一个合法的 Token,Registry 会通过公钥对 Token 进行解密验证。
- Core services
这是 Harbor 的核心功能,主要提供以下服务:
- UI(Harbor-ui):提供图形化界面,帮助用户管理 Registry 上的镜像(image), 并对 用户进行授权。
- Webhook: 为了及时获取 Registry 上 image 状态变化的情况,在 Registry 上配置 Webhook,把状态变化传递给 UI 模块。
- Token 服务:负责根据用户权限给每个 Docker push/pull 命令签发 Token。Docker 客 户端向 Registry 服务发起的请求,如果不包含 Token,会被重定向,获得 Token 后再 重新向 Registry 进行请求。
- Database(Harbor-db)
为 coreservices 提供数据库服务,负责储存用户权限、审计日志、Docker image 分组信息等数据。
- Log collector(Harbor-log)
为了帮助监控 Harbor 运行,负责收集其他组件的 log,供日后进行分析,如下图所示。
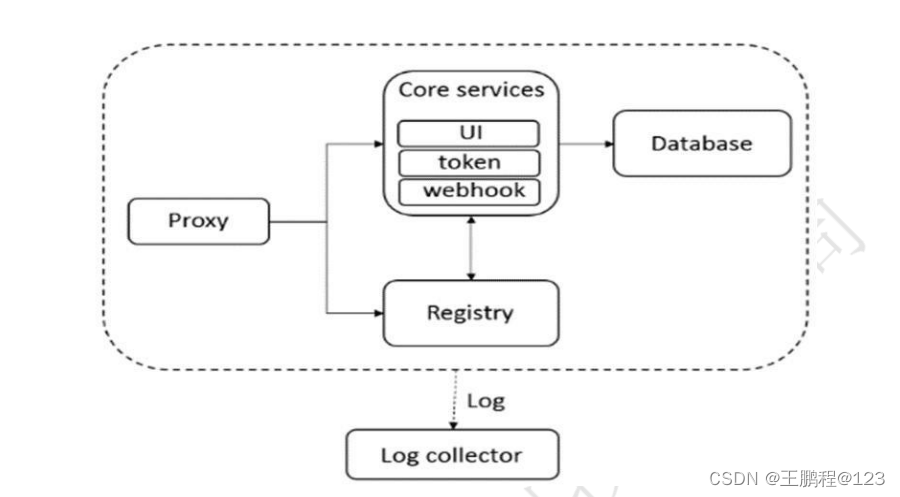 Harbor 架构原理图
Harbor 的每个组件都是以 Docker 容器的形式构建的,因此,使用 Docker Compose 来对它进行部署。
七、案列二:Harbor 构建 Docker 私有仓库
7.1、本案例实验环境
| 主机用途 | 操作系统 | 主机名/ IP 地址 | 主要软件及版本 |
| 服务端 | CentOS 7.9-x86_64 | harbor / 192.168.23.213 | Docker-ce-19.03.15、Docker-compose、harbor-offline-v1.1.2 |
| 客户端 | CentOS 7.9-x86_64 | client / 192.168.23.214 | Docker-ce-19.03.15 |
7.2、案例需求
- 通过 Harbor 创建 Docker 私有仓库。
- 图形化管理 Docker 私有仓库镜像。
7.3、案例实现思路
- 部署 Docker Compose。
- 部署 Harbor 服务。
- 通过 Harbor 管理上传的私有镜像。
- 维护 Harbor。
八、案例实施
8.1、部署 Docker-Compose 服务
部署 Harbor 是需要 Docker-Compose 服务做支撑的,所以要先部署该服务。
1)下载 Docker-Compose
[root@harbor ~]# curl -SL https://github.com/docker/compose/releases/download/v1.2.1/docker-compose-linux-x86_64 -o /usr/local/bin/docker-compose
[root@harbor ~]# chmod +x /usr/local/bin/docker-compose
2)查看 Docker-Compose 版本判断安装是否成功
[root@harbor ~]# docker-compose -v
docker-compose version 1.21.1, build 5a3f1a3
8.2、部署 Harbor 服务
Harbor 被部署为多个 Docker 容器,因此可以部署在任何支持 Docker 的 Linux 发行版上。服务端主机需要安装 Python、Docker 和 Docker Compose。
1)下载 Harbor 安装程序
[root@harbor ~]# wget http://harbor.orientsoft.cn/harbor-2.3.1/harbor-online-installer-v2.3.1.tgz
[root@harbor ~]# tar zxf harbor-online-installer-v2.3.1.tgz -C /usr/local/
2)配置 Harbor 参数文件
配置参数位于文件 /usr/local/harbor/harbor.yml.tpml 中。安装之前需要修改 IP 地址。
[root@harbor ~]# cd /usr/local/harbor/
[root@harbor harbor]# ls
common.sh  harbor.yml.tmpl  install.sh  LICENSE  prepare
[root@harbor harbor]# cp harbor.yml.tmpl harbor.yml
[root@harbor harbor]# vim harbor.yml
......//省略部分内容
hostname: 192.168.23.213  //修改此行
......//注销以下几行
由于https需要证书,本地没有所有注销
#https:# https port for harbor, default is 443#port: 443# The path of cert and key files for nginx#certificate: /your/certificate/path#private_key: /your/private/key/path
harbor_admin_password: cisco@123  //此行修改登录仓库密码
关于 Harbor.yml 配置文件中有两类参数:所需参数和可选参数。
- 所需参数
这些参数需要在配置文件 Harbor.yml 中设置。如果用户更新它们并运行 install.sh 脚本重新安装 Harbour,参数将生效。具体参数如下:
- hostname:用于访问用户界面和 register 服务。它应该是目标机器的 IP 地址或完全限 定的域名( FQDN ), 例如 192.168.168.91 或 hub.kgc.cn。不要使用 localhost 或 127.0.0.1 为主机名。
- ui_url_protocol:(http 或 https,默认为 http)用于访问 UI 和令牌/通知服务的协议。 如果公证处于启用状态,则此参数必须为 https。
- max_job_workers:镜像复制作业线程。
- db_password:用于 db_auth 的 MySQL 数据库 root 用户的密码。
- customize_crt:该属性可设置为打开或关闭,默认打开。打开此属性时,准备脚本创建 私钥和根证书,用于生成/验证注册表令牌。当由外部来源提供密钥和根证书时,将此 属性设置为 off。
- ssl_cert:SSL 证书的路径,仅当协议设置为 https 时才应用。
- ssl_cert_key:SSL 密钥的路径,仅当协议设置为 https 时才应用。
- secretkey_path:用于在复制策略中加密或解密远程 register 密码的密钥路径。
- 可选参数
这些参数对于更新是可选的,即用户可以将其保留为默认值,并在启动 Harbor 后在 Web UI 上进行更新。如果进入 Harbor.cfg,只会在第一次启动 Harbor 时生效,随后对这些参数的更新,Harbor.cfg 将被忽略。
注意:如果选择通过 UI 设置这些参数,请确保在启动 Harbour 后立即执行此操作。具体来说,必须在注册或在 Harbor 中创建任何新用户之前设置所需的 auth_mode。当系统中有用户时(除了默认的 admin 用户),
- Email:Harbor 需要该参数才能向用户发送“密码重置”电子邮件,并且只有在需要该功 能时才需要。请注意,在默认情况下 SSL 连接时没有启用。如果 SMTP 服务器需要 SSL, 但不支持 STARTTLS,那么应该通过设置启用 SSL email_ssl = TRUE。
- harbour_admin_password:管理员的初始密码,只在 Harbour 第一次启动时生效。之 后, 此设置将被忽略,并且应在 UI 中设置管理员的密码。请注意,默认的用户名/密码 是admin/Harbor12345。
- auth_mode:使用的认证类型,默认情况下,它是 db_auth,即凭据存储在数据库中。 对于 LDAP 身份验证,请将其设置为 ldap_auth。
- self_registration:启用/禁用用户注册功能。禁用时,新用户只能由 Admin 用户创建, 只有管理员用户可以在 Harbour 中创建新用户。注意:当 auth_mode 设置为 ldap_auth 时,自注册功能将始终处于禁用状态,并且该标志被忽略。
- Token_expiration:由令牌服务创建的令牌的到期时间(分钟),默认为 30 分钟。
- project_creation_restriction:用于控制哪些用户有权创建项目的标志。默认情况下,每 个人都可以创建一个项目。如果将其值设置为“adminonly”,那么只有 admin 可以创建 项目。
- verify_remote_cert:打开或关闭,默认打开。此标志决定了当 Harbour 与远程register 实例通信时是否验证 SSL/TLS 证书。将此属性设置为 off 将绕过 SSL/TLS 验证,这在 远程实例具有自签名或不可信证书时经常使用。
另外,默认情况下,Harbour 将镜像存储在本地文件系统上。在生产环境中,可以考虑使用其他存储后端而不是本地文件系统,如 S3 、Openstack Swif 、Ceph 等。但需要更新 common/templates/registry/config.yml 文件。
3)启动 Harbor
配置完成就可以启动 Harbor 了,如下操作。
[root@harbor ~]# sh /usr/local/harbor/install.sh4)查看 Harbor 启动镜像
查看 Harbor 启动镜像,如下所示。
[root@harbor ~]# docker images
REPOSITORY                    TAG                 IMAGE ID            CREATED             SIZE
goharbor/redis-photon         v2.3.1              4a0d49a4ece0        2 years ago         191MB
goharbor/harbor-registryctl   v2.3.1              91e798004920        2 years ago         132MB
goharbor/registry-photon      v2.3.1              972ce19b1882        2 years ago         81.2MB
goharbor/nginx-photon         v2.3.1              3b3ede1db494        2 years ago         44.3MB
goharbor/harbor-log           v2.3.1              40a54594fe22        2 years ago         194MB
goharbor/harbor-jobservice    v2.3.1              d6e174ae0a00        2 years ago         171MB
goharbor/harbor-core          v2.3.1              f05acc3947d6        2 years ago         158MB
goharbor/harbor-portal        v2.3.1              4a15c5622fda        2 years ago         57.6MB
goharbor/harbor-db            v2.3.1              b16a9c81ef03        2 years ago         263MB
goharbor/prepare              v2.3.1              4ce629d59c20        2 years ago         288MB[root@harbor ~]# docker ps -a
CONTAINER ID        IMAGE                                COMMAND                  CREATED              STATUS                        PORTS                       NAMES
aad10060a129        goharbor/harbor-jobservice:v2.3.1    "/harbor/entrypoint.…"   About a minute ago   Up About a minute (healthy)                               harbor-jobservice
c0d4e8b31aaa        goharbor/nginx-photon:v2.3.1         "nginx -g 'daemon of…"   About a minute ago   Up About a minute (healthy)   0.0.0.0:80->8080/tcp        nginx
da368879ac22        goharbor/harbor-core:v2.3.1          "/harbor/entrypoint.…"   About a minute ago   Up About a minute (healthy)                               harbor-core
243207d20217        goharbor/harbor-portal:v2.3.1        "nginx -g 'daemon of…"   About a minute ago   Up About a minute (healthy)                               harbor-portal
f9db9e4c1530        goharbor/redis-photon:v2.3.1         "redis-server /etc/r…"   About a minute ago   Up About a minute (healthy)                               redis
7b67cb243029        goharbor/harbor-db:v2.3.1            "/docker-entrypoint.…"   About a minute ago   Up About a minute (healthy)                               harbor-db
680c47b01d37        goharbor/harbor-registryctl:v2.3.1   "/home/harbor/start.…"   About a minute ago   Up About a minute (healthy)                               registryctl
6d056820d85f        goharbor/registry-photon:v2.3.1      "/home/harbor/entryp…"   About a minute ago   Up About a minute (healthy)                               registry
cb6c603e4c07        goharbor/harbor-log:v2.3.1           "/bin/sh -c /usr/loc…"   About a minute ago   Up About a minute (healthy)   127.0.0.1:1514->10514/tcp   harbor-log
如果一切都正常,应该可以打开浏览器访问 http://192.168.23.213 的管理页面,默认的管理员用户名是 admin 密码是前面修改的 cisco@123。如下图所示,说明部署成功。
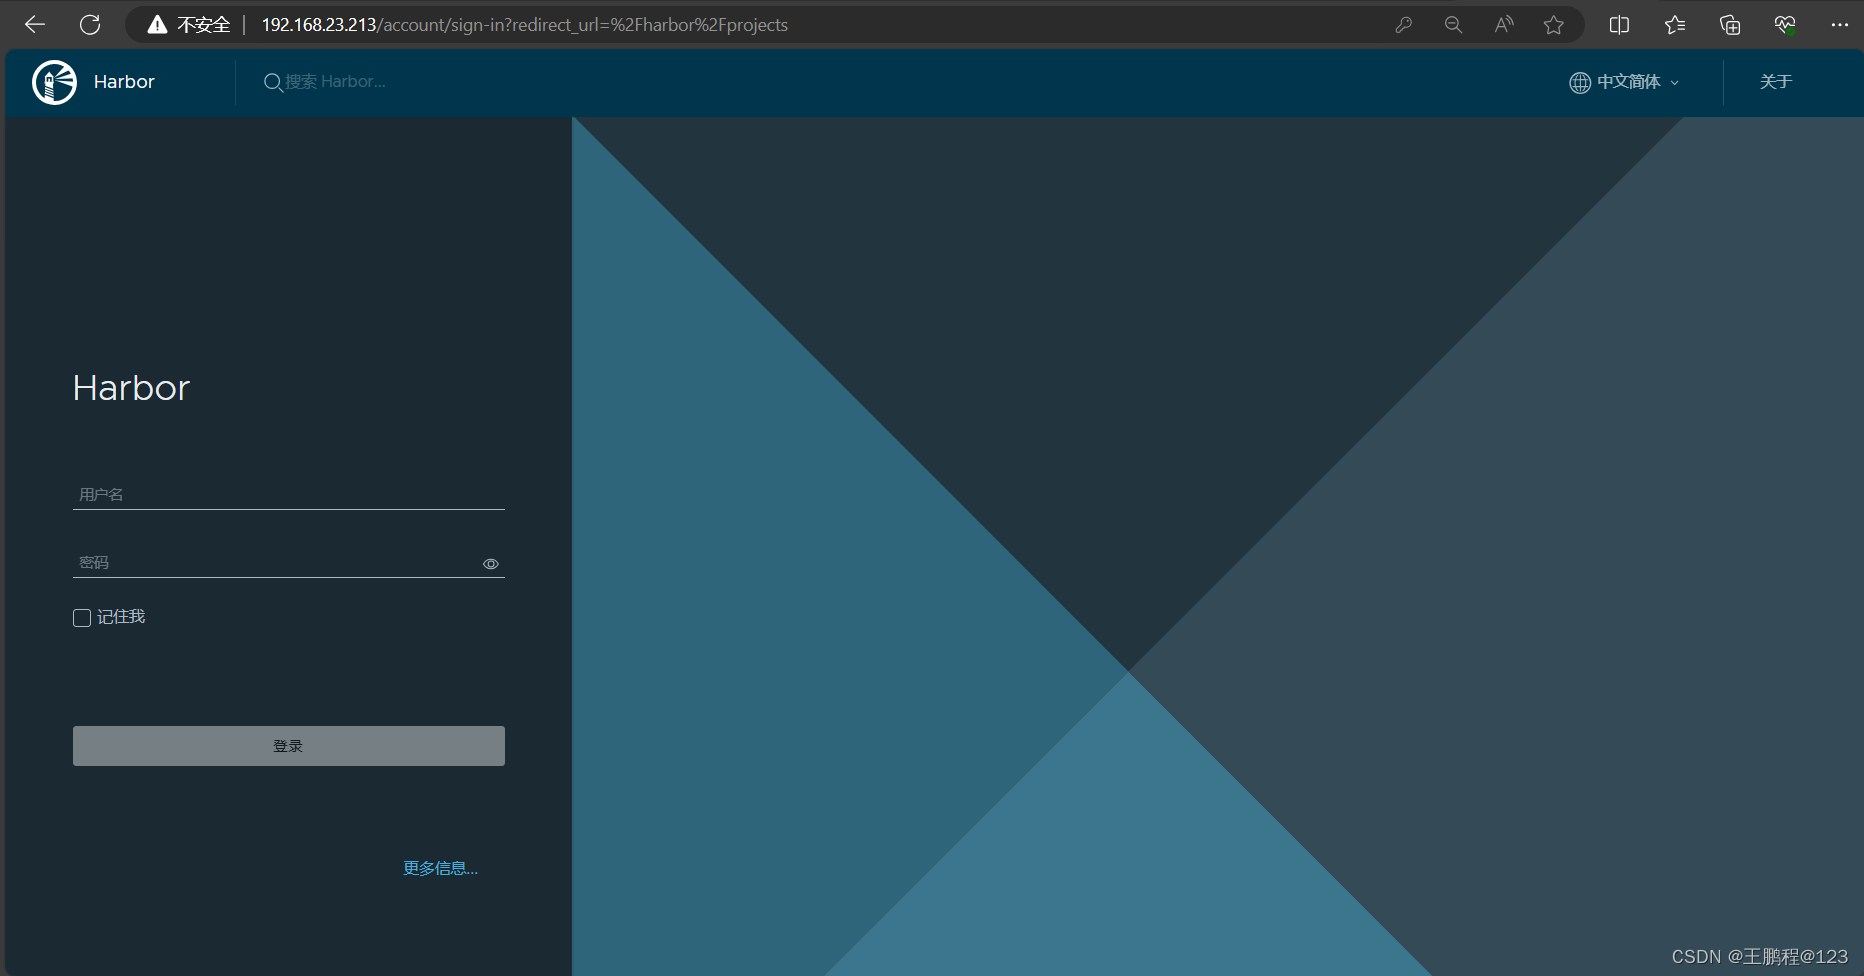 web 管理登录界面
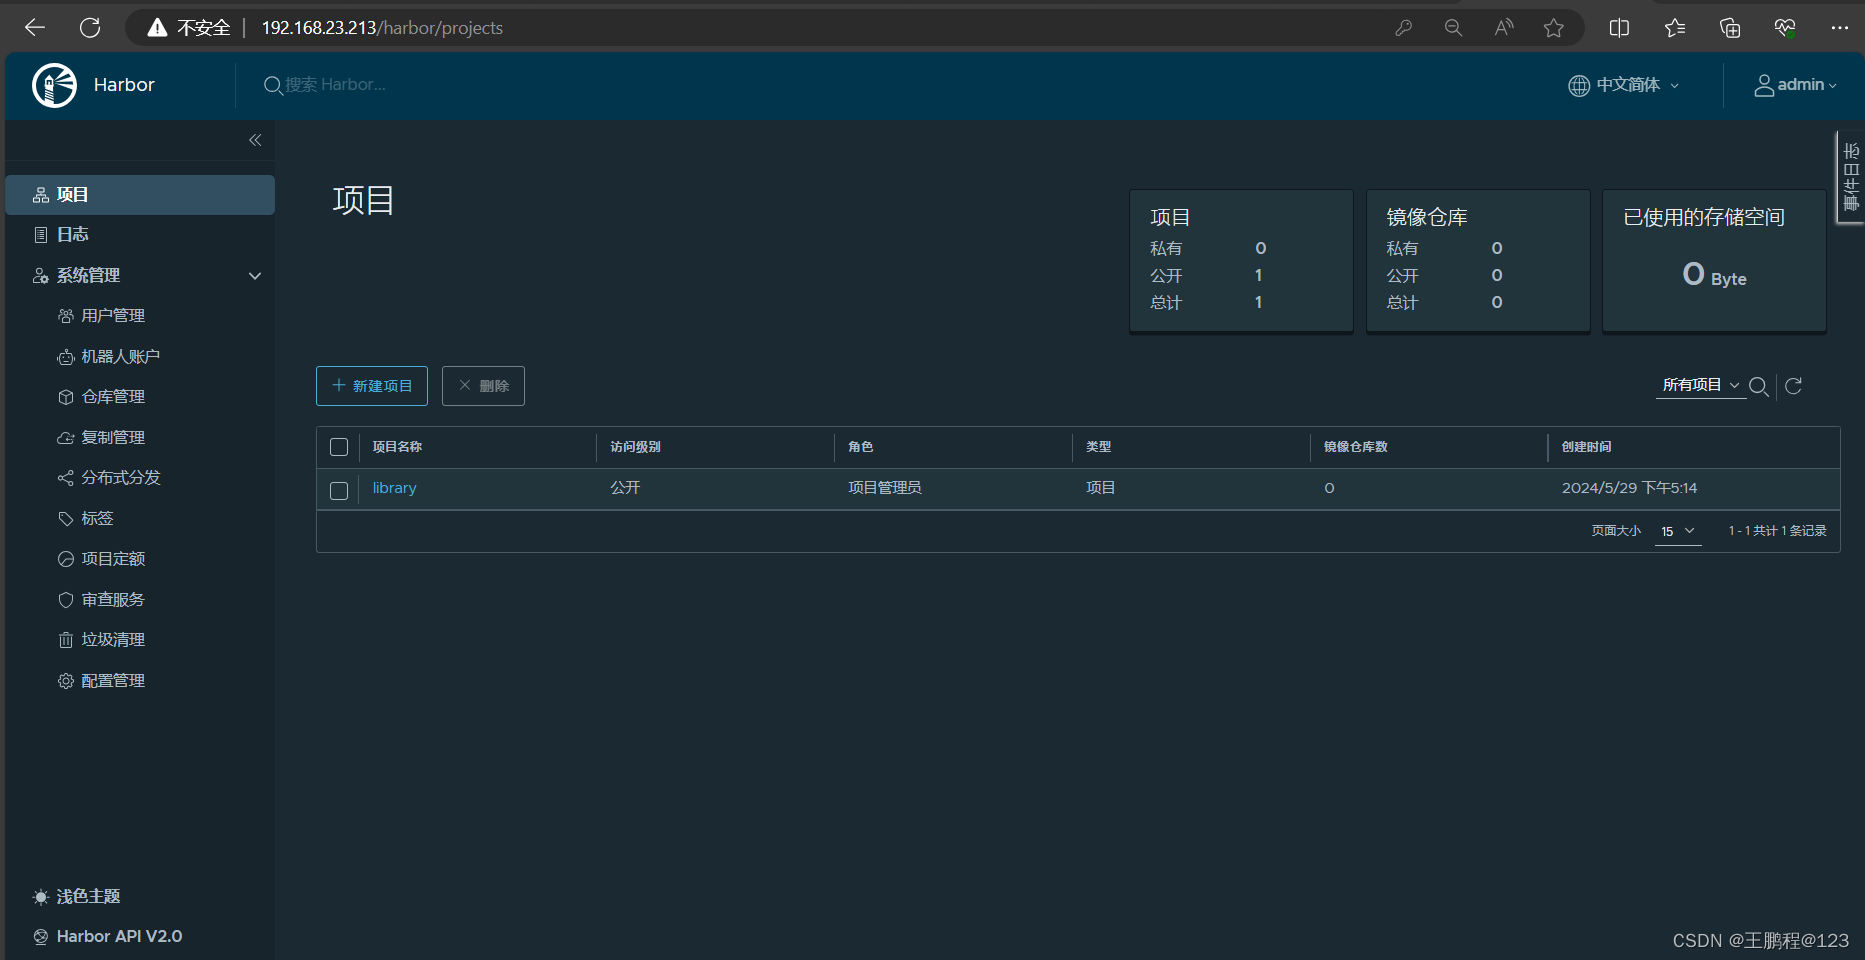
至此,Harbor 已经搭建完成,具体在 WEB UI 界面操作也比较简单。
5)创建一个新项目
在 WEB UI 界面创建新项目的操作步骤如下。
- 输入用户名和密码登录界面后可以创建一个新项目。点击“+项目”按钮,如下图所示。
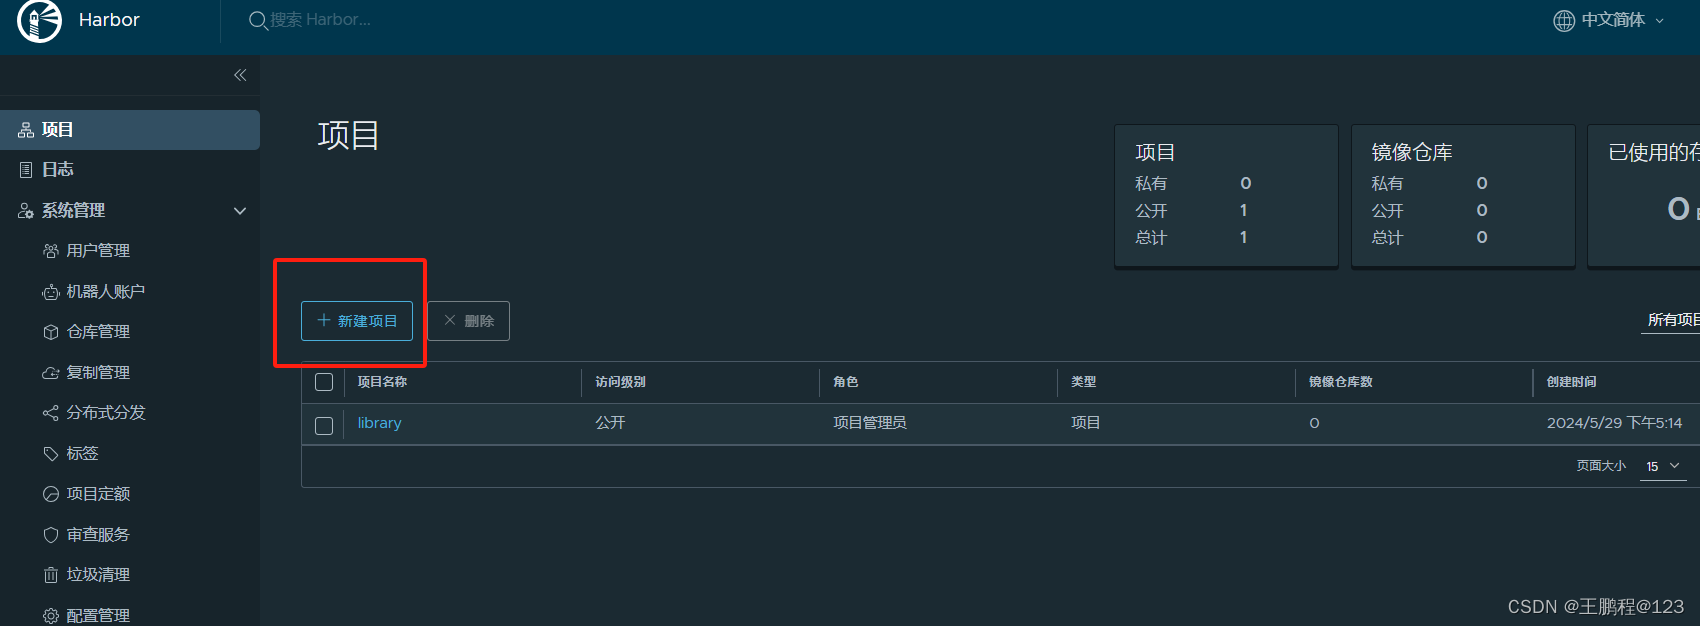 创建新项目
创建新项目
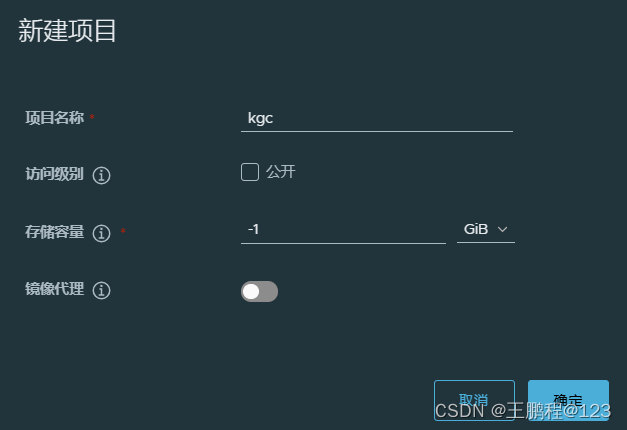
- 填写项目名称为“myproject-kgc”,如下图所示。

新项目命名
- 点击“确定”按钮,成功创建新项目后,页面效果如下图所示。
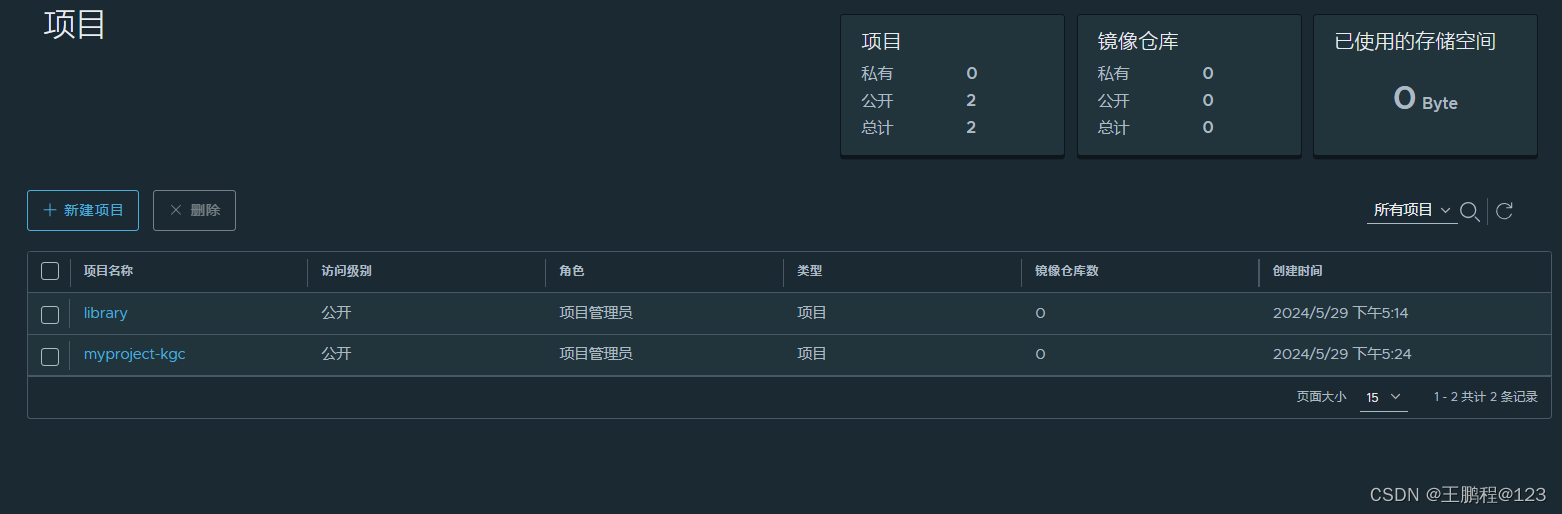 新项目创建成功
- 此时可使用 Docker 命令在本地通过 127.0.0.1 来登录和推送镜像。默认情况下, Register 服务器在端口 80 上侦听。
- 登录 Harbor。
[root@harbor ~]# docker login -u admin -p cisco@123 http://127.0.0.1
WARNING! Using --password via the CLI is insecure. Use --password-stdin.
WARNING! Your password will be stored unencrypted in /root/.docker/config.json.
Configure a credential helper to remove this warning. See
https://docs.docker.com/engine/reference/commandline/login/#credentials-storeLogin Succeeded
- 下载镜像测试
[root@harbor ~]# docker pull nginx- 将镜像打标签。
[root@harbor ~]# docker tag nginx 127.0.0.1/myproject-kgc/nginx:vv1- 上传镜像到 Harbor。
[root@harbor ~]# docker push 127.0.0.1/myproject-kgc/nginx:vv1
The push refers to repository [127.0.0.1/myproject-kgc/nginx]
d874fd2bc83b: Pushed
32ce5f6a5106: Pushed
f1db227348d0: Pushed
b8d6e692a25e: Pushed
e379e8aedd4d: Pushed
2edcec3590a4: Pushed
vv1: digest: sha256:ee89b00528ff4f02f2405e4ee221743ebc3f8e8dd0bfd5c4c20a2fa2aaa7ede3 size: 1570- 在 Harbor 界面 myproject-kgc 目录下可看见此镜像及相关信息,如下图所示。
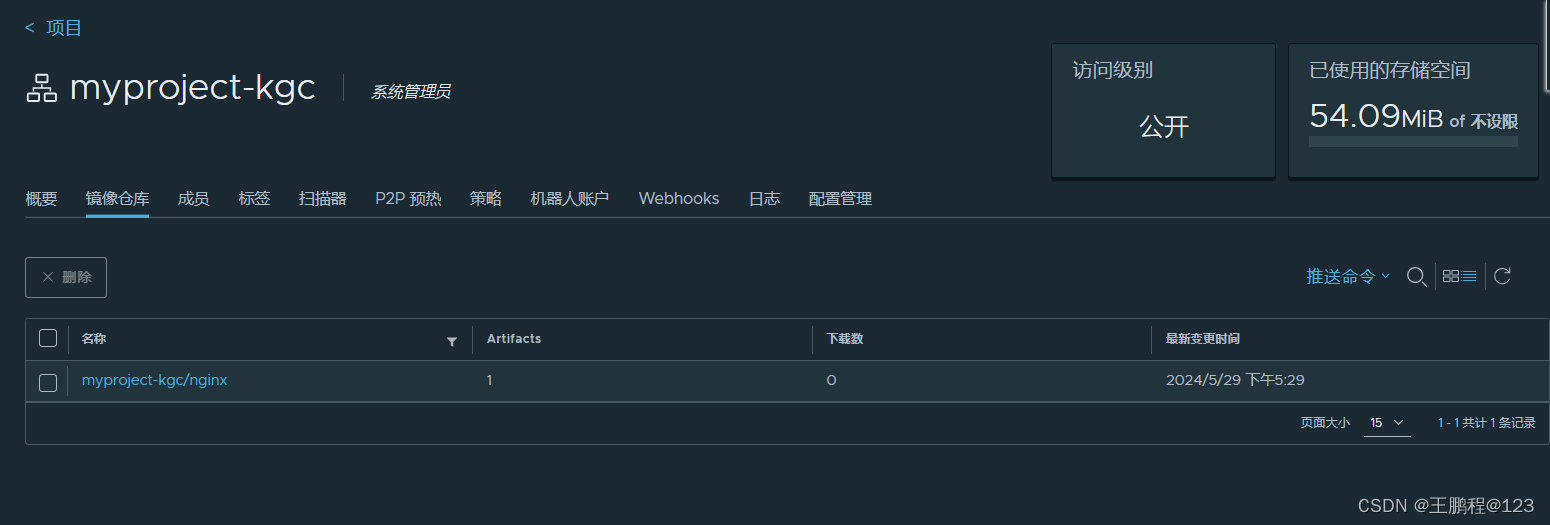 查看已上传镜像(1)
6)客户端上传镜像
以上操作都是在 Harbor 服务器本地操作。如果其他客户端上传镜像到 Harbor,就会报如下错误。出现这问题的原因 Docker Registry 交互默认使用的是 HTTPS,但是搭建私有镜像默认使用的是 HTTP 服务,所以与私有镜像交互时出现以下错误。
[root@client ~]# docker login -u admin -p cisco@123 http://192.168.23.213
WARNING! Using --password via the CLI is insecure. Use --password-stdin.
Error response from daemon: Get https://192.168.23.213/v2/: dial tcp 192.168.23.213:443: connect: connection refused- 在 Docker 客户端配置操作
解决办法是:在 Docker server 启动的时候,增加启动参数,默认使用 HTTP 访问。
[root@client ~]# vim /usr/lib/systemd/system/docker.service
......//省略部分内容
ExecStart=/usr/bin/dockerd -H fd:// --containerd=/run/containerd/containerd.sock --insecure-registry 192.168.23.213  //在此行后面加上 --insecure-registry 192.168.23.213
......//省略部分内容- 重启 Docker
[root@client ~]# systemctl daemon-reload
[root@client ~]# systemctl restart docker- 再次登录 Harbor
[root@client ~]# docker login -u admin -p cisco@123 http://192.168.23.213
WARNING! Using --password via the CLI is insecure. Use --password-stdin.
WARNING! Your password will be stored unencrypted in /root/.docker/config.json.
Configure a credential helper to remove this warning. See
https://docs.docker.com/engine/reference/commandline/login/#credentials-storeLogin Succeeded- 下载镜像镜像测试
[root@client ~]# docker pull httpd- 镜像打标签及上传到 myproject-kgc 项目里面
[root@client ~]# docker tag httpd 192.168.23.213/myproject-kgc/httpd:vv1
[root@client ~]# docker push 192.168.23.213/myproject-kgc/httpd:vv1- 查看 Harbor 的 web 界面
可以看到 myproject-kgc 项目里面有两个镜像,如下图所示
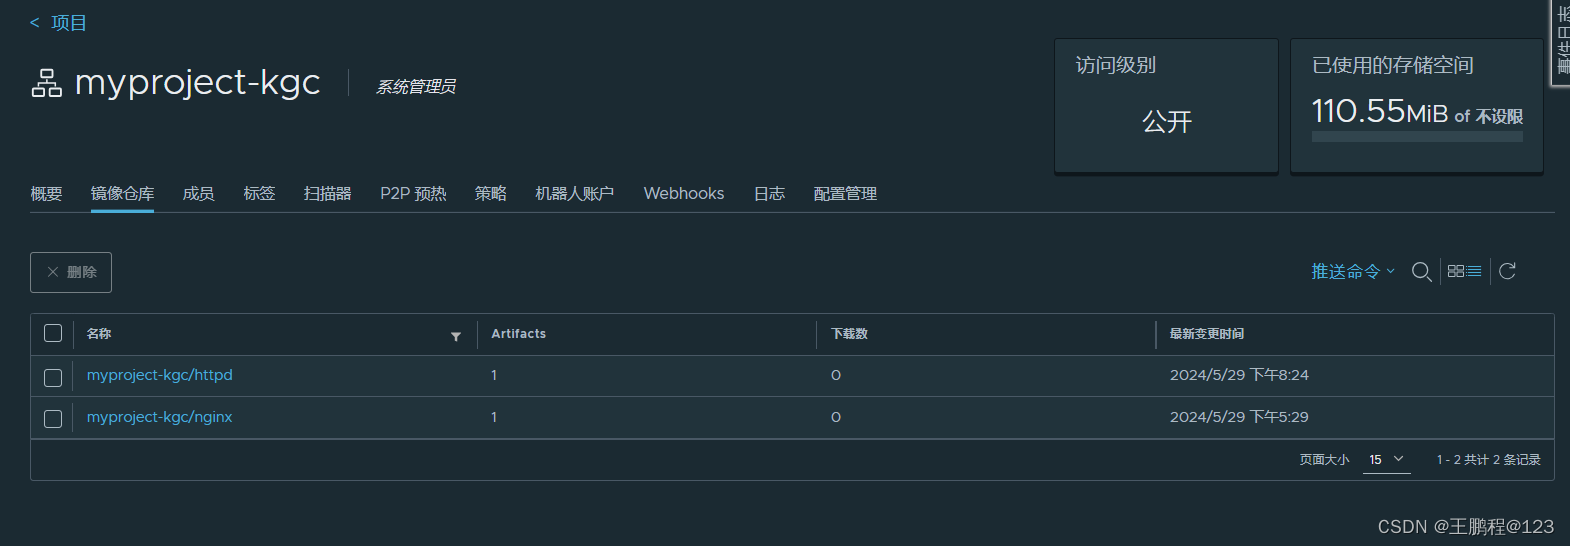 查看已上传镜像(2)
- 从 Harbor 仓库拉取镜像
[root@client ~]# docker pull 192.168.23.213/myproject-kgc/nginx:vv18.3、Harbor 日常操作管理
在 Harbor 仓库中,任何镜像在被 push 到 regsitry 之前都必须有一个自己所属的项目。
1)通过 Harbor Web 创建项目
单击“+项目”,填写项目名称。本章案例中项目级别设置为"私有",即不勾选,如下图所示。如果设置为公共仓库,则所有人对此项目下的镜像拥有读权限,命令行中不需要 执行"Docker login"即可下载镜像,镜像操作与 Docker Hub 一致。
2)创建 Harbor 用户
下面是创建 Harbor 用户的操作。
- 创建用户并分配权限
在 Web 管理界面中单击系统管理→用户管理→+用户,填写用户名为“kgc-user01”,邮箱为 kgc-user01@kgc.cn,全名为“kgc”,密码为“Cisco@123”,注释为“管理员”,如下图所示。

填写创建用户信息
用户创建成功后,勾选用户左侧的 √ 可将上述创建的用户设置为管理员角色或进行删除操作。本例不作任何设置,如下图所示。
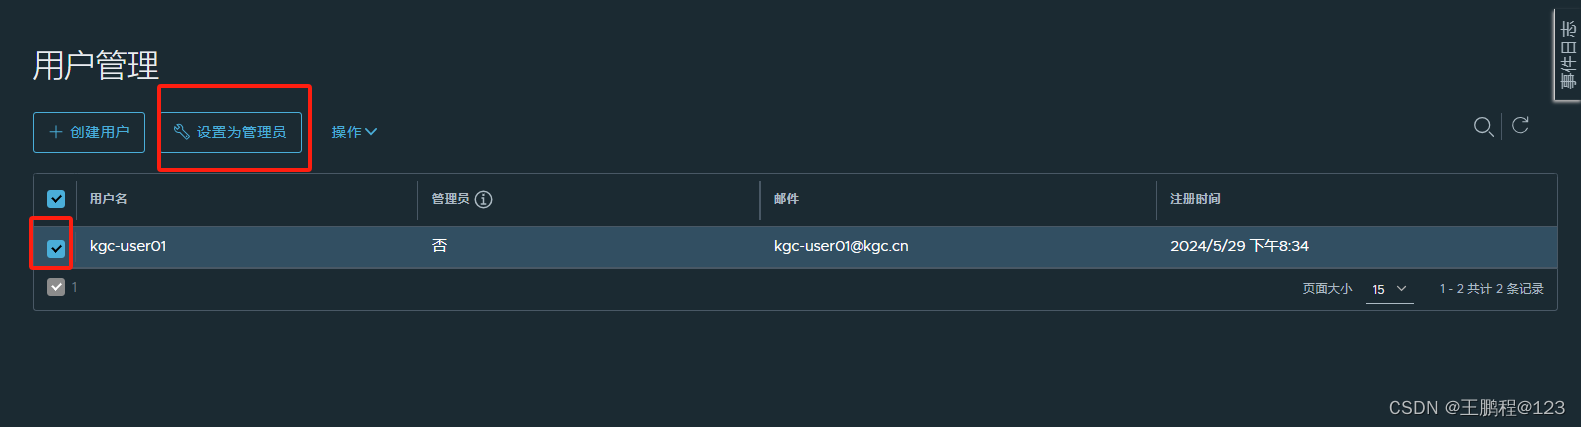 用户管理
用户管理
- 添加项目成员
单击项目→myproject-kgc→成员→+成员,填写上述创建的用户并分配角色为“开发人 员”,如下图所示。
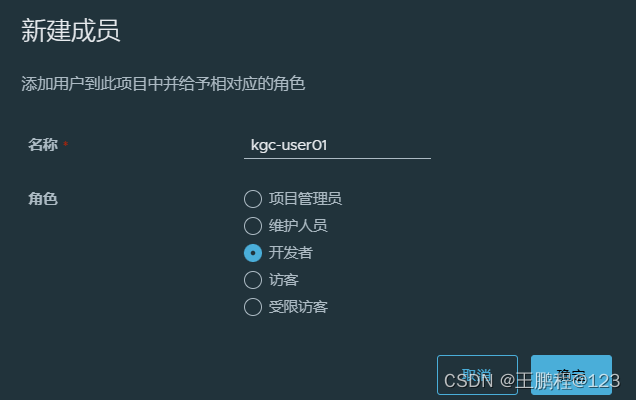
设置新建成员信息
此时选用户左侧的 √ 仍然可对成员角色进行变更或者删除操作,如下图所示。
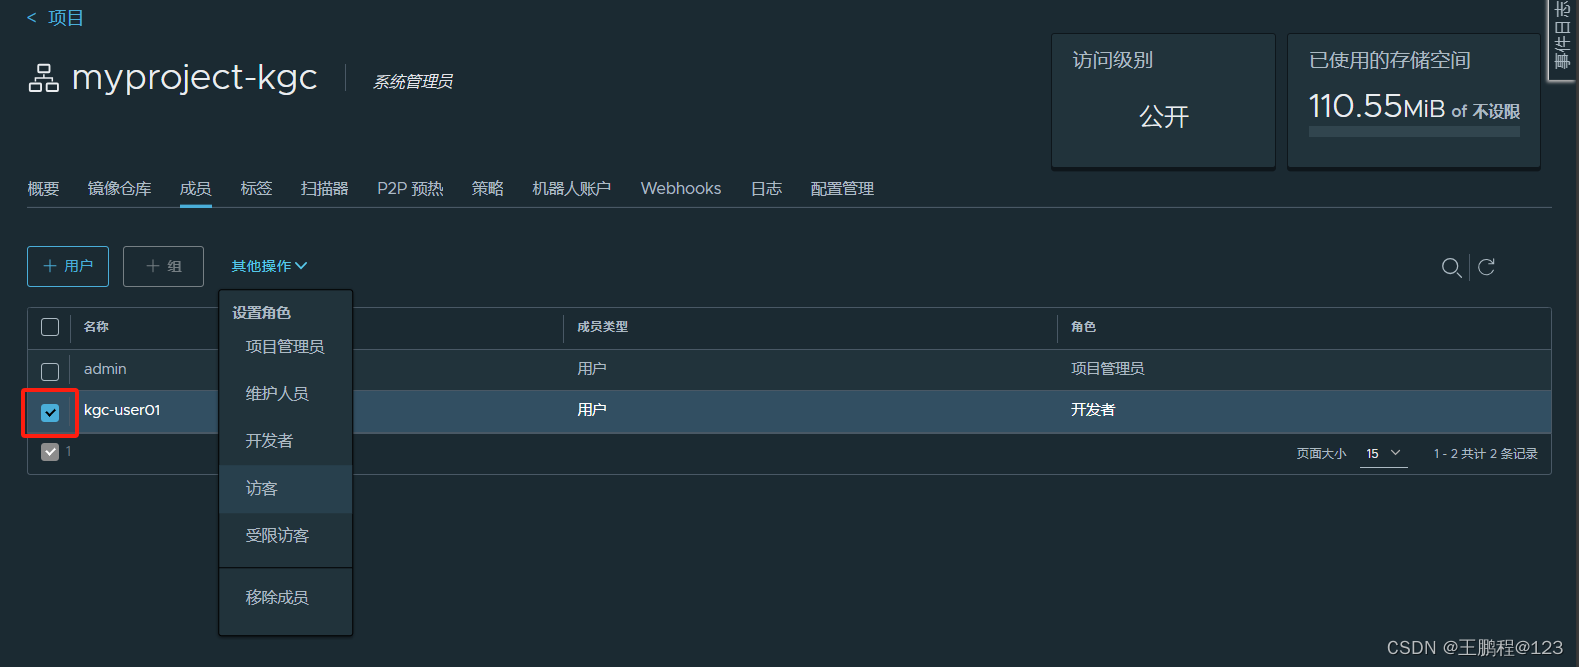 成员管理
成员管理
-
在客户端上使用普通账户操作镜像
删除上述打标签的本地镜像。
[root@client ~]# docker rmi 192.168.23.213/myproject-kgc/httpd:vv1
Untagged: 192.168.23.213/myproject-kgc/httpd:vv1
Untagged: 192.168.23.213/myproject-kgc/httpd@sha256:8813dc065467624daff73cb7625d17cea6be5f77504196453d1ece9a89bc8ea3
先退出当前用户,然后使用上述创建的账户 kgc-user01 登录。
[root@client ~]# docker logout 192.168.23.213
Removing login credentials for 192.168.23.213
[root@client ~]# docker login 192.168.23.213
Username: kgc-user01
Password:
WARNING! Your password will be stored unencrypted in /root/.docker/config.json.
Configure a credential helper to remove this warning. See
https://docs.docker.com/engine/reference/commandline/login/#credentials-storeLogin Succeeded
下载服务器 192.168.23.213/myproject-kgc/nginx:vv1 的镜像。
[root@client ~]# docker pull 192.168.23.213/myproject-kgc/nginx:vv1
vv1: Pulling from myproject-kgc/nginx
a2abf6c4d29d: Pull complete
a9edb18cadd1: Pull complete
589b7251471a: Pull complete
186b1aaa4aa6: Pull complete
b4df32aa5a72: Pull complete
a0bcbecc962e: Pull complete
Digest: sha256:ee89b00528ff4f02f2405e4ee221743ebc3f8e8dd0bfd5c4c20a2fa2aaa7ede3
Status: Downloaded newer image for 192.168.23.213/myproject-kgc/nginx:vv1
192.168.23.213/myproject-kgc/nginx:vv1
3)查看日志
Web 界面日志,操作日志按时间顺序记录用户相关操作,如下图所示。
 web 界面查看日志记录
8.4、维护管理 Harbor
可以使用 docker-compose 管理 Harbor。一些有用的命令如下所示, 必须在与 docker- compose.yml 相同的目录中运行。
1)停止、启动、重启 Harbor
[root@harbor ~]# cd /usr/local/harbor/
[root@harbor harbor]# docker-compose stop  //停止 Harbor
Stopping harbor-jobservice ... done
Stopping nginx             ... done
Stopping harbor-core       ... done
Stopping harbor-portal     ... done
Stopping redis             ... done
Stopping harbor-db         ... done
Stopping registryctl       ... done
Stopping registry          ... done
Stopping harbor-log        ... done[root@harbor harbor]# docker-compose start  //启动 Harbor
Starting log         ... done
Starting registry    ... done
Starting registryctl ... done
Starting postgresql  ... done
Starting portal      ... done
Starting redis       ... done
Starting core        ... done
Starting jobservice  ... done
Starting proxy       ... done[root@harbor harbor]# docker-compose start  //重启 Harbor
2)修改 Harbor.yml 配置文件
要更改 Harbour 的配置文件时,请先停止现有的 Harbour 实例并更新 Harbor.cfg;然后运行 prepare 脚本来填充配置;最后重新创建并启动 Harbour 的实例。
[root@harbor harbor]# docker-compose down -v //停止 Harbor 实例
[root@harbor harbor]# vim harbor.yml  //修改配置文件
[root@harbor harbor]# ./prepare  //运行 prepare 更新配置
[root@harbor harbor]# docker-compose up -d  //启动 Harbor 实例
3)移除 Harbor 服务容器同时保留镜像数据/数据库
[root@harbor harbor]# docker-compose down -v4)如需重新部署,需要移除 Harbor 服务容器全部数据
持久数据,如镜像,数据库等在宿主机的 /data/ 目录下,日志在宿主机的/var/log/Harbor/目录下。
[root@harbor ~]# rm -rf /data/database
[root@harbor ~]# rm -rf /data/registry
目前,微服务架构也在潜移默化的改变着应用的部署方式,其提倡将应用分割成一系列细小的服务,每个服务专注于单一业务功能,服务之间采用轻量级通信机制相互沟通。同时,数据库解决方案也在发生变化,多种持久化混合方案提倡将数据存放在最适合的数据库解决方案中,而传统的数据库解决方案将数据存在同一个数据库服务中。
服务数量的增加也就意味着容器数量的增多,逐渐增加的容器数量为容器部署、运行及管理带来了挑战。Docker Compose 的出现解决多个容器部署的问题并提高了多个容器解决方案的可移植性。
Docker 官方镜像仓库是一个用于管理公共镜像的地方,用户可以在上面找到想要的镜像,也可以把自己的镜像推送上去。但是,有时候服务器无法访问互联网,或者不希望将自己的镜像放到互联网上,那么就需要用到 Docker Registry 私有仓库,它可以用来存储和管理自己的镜像。