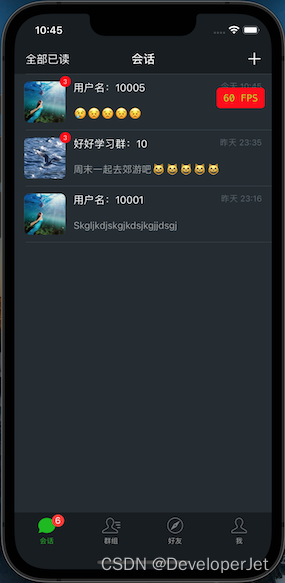
7.1日更新 Python3 TCP Demo相关
https://blog.csdn.net/Deft_MKJing/article/details/80851879
2.2日更新,socket简易群聊通信,之前实现的是静态本地聊天模拟

最新版本Demo传送门
1.需要的先下载下来,先开启SocketSeverce 2 这个服务器代码,已经封装好了Socket建立和连接
2.打开工程,自动会连上服务器,已经写好了socket的生成和连接
3.再打开一个终端,模拟第二个客户端telnet 192.168.31.150 3667 输入之后就能进行简单的群聊功能
// 客户端示例代码
// 连接到聊天服务器GCDAsyncSocket *socket = [[GCDAsyncSocket alloc] initWithDelegate:self delegateQueue:dispatch_get_global_queue(0, 0)];[socket connectToHost:@"127.0.0.1" onPort:3667 error:nil];self.clientSocket = socket;
// 服务端部分示例代码
- (instancetype)init
{if (self = [super init]) {/**注意:这里的服务端socket,只负责socket(),bind(),lisence(),accept(),他的任务到底结束,只负责监听是否有客户端socket来连接*/self.serviceSocket = [[GCDAsyncSocket alloc] initWithDelegate:self delegateQueue:dispatch_get_global_queue(0, 0)];}return self;
}- (void)connected
{NSError *error = nil;// 给一个需要连接的端口,0-1024是系统的[self.serviceSocket acceptOnPort:3667 error:&error];if (error) {NSLog(@"3666服务器开启失败。。。。。%@",error);}else{NSLog(@"开启成功,并开始监听");}
}

个人非常喜欢老外写的框架,而且是还是不断更新的,这个简直是不断学习的好资料啊,人家那面向对象封装的,值得学习,那么花时间来简单介绍下该框架的应用场景
核心类名介绍
Mode数据类
- JSQAudioMediaItem.h 语音
- JSQLocationMediaItem.h 定位
- JSQMediaItem.h 非文件的Media基类
- JSQMessage.h 所有消息都由该类包装,因此,最外层 collectionView用到的就是数组包含该类
- JSQMessageAvatarImageDataSource.h 头像数据代理
- JSQMessageBubbleImageDataSource.h 气泡数据代理
- JSQMessageData.h 发送消息ID date代理
- JSQMessageMediaData.h 非文本消息数据代理
- JSQMessagesAvatarImage.h 头像类
- JSQMessagesBubbleImage.h 气泡类
- JSQMessagesCollectionViewDataSource.h
- JSQMessagesCollectionViewDelegateFlowLayout.h
- JSQPhotoMediaItem.h 图片
- JSQVideoMediaItem.h 视频
View类
- JSQMessagesCellTextView.m 纯文本TextView
- JSQMessagesCollectionView.m 核心collectionView继承原生的
- JSQMessagesCollectionViewCell.m 核心cell
- JSQMessagesCollectionViewCellIncoming.xib 收到消息cell
- JSQMessagesCollectionViewCellOutgoing.xib 发送消息cell
- JSQMessagesComposerTextView.m 粘贴文本
- JSQMessagesInputToolbar.m 底部的toolBar
- JSQMessagesLabel.m 头部时间或者底部文字Label
- JSQMessagesLoadEarlierHeaderView.xib 更多加载View
- JSQMessagesMediaPlaceholderView.m MediaPlaceHolderView
- JSQMessagesTypingIndicatorFooterView.xib 预加载指示Bubble
类虽然很多,但是肯定越多越好,说明功能越强大啊
1.万事开头难,第一步
创建一个ViewController继承与JSQMessagesViewController,然后来一个数据model,来存放所有接受和发出去的消息,各种类型上面已经介绍了,直接放h文件的代码
// VC
@interface MKJChatViewcontroller : JSQMessagesViewController<UIActionSheetDelegate, JSQMessagesComposerTextViewPasteDelegate>
@property (strong, nonatomic) DemoModelData *demoData; //!< 消息模型- (void)receiveMessagePressed:(UIBarButtonItem *)sender;// Model
***  This is for demo/testing purposes only. *  This object sets up some fake model data.*  Do not actually do anything like this.*  假数据,用来展示玩玩的,别当真*/static NSString * const kJSQDemoAvatarDisplayNameSquires = @"Jesse Squires";
static NSString * const kJSQDemoAvatarDisplayNameCook = @"Tim Cook";
static NSString * const kJSQDemoAvatarDisplayNameJobs = @"Jobs";
static NSString * const kJSQDemoAvatarDisplayNameWoz = @"Steve Wozniak";static NSString * const kJSQDemoAvatarIdSquires = @"053496-4509-289";
static NSString * const kJSQDemoAvatarIdCook = @"468-768355-23123";
static NSString * const kJSQDemoAvatarIdJobs = @"707-8956784-57";
static NSString * const kJSQDemoAvatarIdWoz = @"309-41802-93823";@interface DemoModelData : NSObject/**  这里放的都是JSQMessage对象 该对象有两个初始化方式 1.media or noMedia*/@property (strong, nonatomic) NSMutableArray *messages; // message数组@property (strong, nonatomic) NSDictionary *avatars; // 聊天人所有头像@property (strong, nonatomic) JSQMessagesBubbleImage *outgoingBubbleImageData; // 发出去的气泡颜色@property (strong, nonatomic) JSQMessagesBubbleImage *incomingBubbleImageData; // 收到的气泡颜色@property (strong, nonatomic) NSDictionary *users; // 用户名字信息- (void)addPhotoMediaMessage;//!< 图片消息- (void)addLocationMediaMessageCompletion:(JSQLocationMediaItemCompletionBlock)completion; //!< 定位小心- (void)addVideoMediaMessage; //!< 视频 无底图- (void)addVideoMediaMessageWithThumbnail; //!< 视频带底图- (void)addAudioMediaMessage; //!< 音频
首先注意的,这里的数据都是faker,没错,就是faker大魔王,拿来玩玩而已,具体需要根据业务逻辑来,那么再来看看伪造的实现数据
2.搞事情,搞数据啊
// 纯文本JSQMessage对象创建
self.messages = [[NSMutableArray alloc] initWithObjects:[[JSQMessage alloc] initWithSenderId:kJSQDemoAvatarIdSquiressenderDisplayName:kJSQDemoAvatarDisplayNameSquiresdate:[NSDate distantPast]text:NSLocalizedString(@"Welcome to JSQMessages: A messaging UI framework for iOS.", nil)]
// 非纯文本JSQMessage对象创建之图片
JSQPhotoMediaItem *photoItem = [[JSQPhotoMediaItem alloc] initWithImage:[UIImage imageNamed:@"goldengate"]];JSQMessage *photoMessage = [JSQMessage messageWithSenderId:kJSQDemoAvatarIdSquiresdisplayName:kJSQDemoAvatarDisplayNameSquiresmedia:photoItem];// 非纯文本JSQMessage对象创建之Location定位CLLocation *ferryBuildingInSF = [[CLLocation alloc] initWithLatitude:37.795313 longitude:-122.393757];JSQLocationMediaItem *locationItem = [[JSQLocationMediaItem alloc] init];[locationItem setLocation:ferryBuildingInSF withCompletionHandler:completion];JSQMessage *locationMessage = [JSQMessage messageWithSenderId:kJSQDemoAvatarIdSquiresdisplayName:kJSQDemoAvatarDisplayNameSquiresmedia:locationItem];// 非纯文本JSQMessage对象创建之视频NSURL *videoURL = [NSURL URLWithString:@"http://qingdan.img.iwala.net/v/twt/twt1612_720P.mp4"];JSQVideoMediaItem *videoItem = [[JSQVideoMediaItem alloc] initWithFileURL:videoURL isReadyToPlay:YES];JSQMessage *videoMessage = [JSQMessage messageWithSenderId:kJSQDemoAvatarIdSquiresdisplayName:kJSQDemoAvatarDisplayNameSquiresmedia:videoItem];
// 非纯文本JSQMessage对象创建之语音
NSString * sample = [[NSBundle mainBundle] pathForResource:@"jsq_messages_sample" ofType:@"m4a"];NSData * audioData = [NSData dataWithContentsOfFile:sample];JSQAudioMediaItem *audioItem = [[JSQAudioMediaItem alloc] initWithData:audioData];JSQMessage *audioMessage = [JSQMessage messageWithSenderId:kJSQDemoAvatarIdSquiresdisplayName:kJSQDemoAvatarDisplayNameSquiresmedia:audioItem];
// 最后都加到Model的数据里面
[self.messages addObject:JSQMessage对象];
3.搞头像和气泡
// 头像图片制作工具类// 新方法// 通过文字和颜色创建头像JSQMessagesAvatarImage *jsqImage = [JSQMessagesAvatarImageFactory avatarImageWithUserInitials:@"MKJ"backgroundColor:[UIColor colorWithWhite:0.85f alpha:1.0f]textColor:[UIColor colorWithWhite:0.60f alpha:1.0f]font:[UIFont systemFontOfSize:14.0f]diameter:kJSQMessagesCollectionViewAvatarSizeDefault+10];// 通过image创建头像JSQMessagesAvatarImage *cookImage = [JSQMessagesAvatarImageFactory avatarImageWithImage:[UIImage imageNamed:@"demo_avatar_cook"] diameter:kJSQMessagesCollectionViewAvatarSizeDefault];;// 气泡图片制作工具类// [UIImage jsq_bubbleRegularImage]这个方法有很多种气泡模式,圆的,尖的以及边框形式的JSQMessagesBubbleImageFactory *bubbleFactory = [[JSQMessagesBubbleImageFactory alloc] initWithBubbleImage:[UIImage jsq_bubbleRegularImage] capInsets:UIEdgeInsetsZero];// 发出去的气泡颜色self.outgoingBubbleImageData = [bubbleFactory outgoingMessagesBubbleImageWithColor:[UIColor jsq_messageBubbleLightGrayColor]];
//        self.outgoingBubbleImageData = [bubbleFactory outgoingMessagesBubbleImageWithColor:[UIColor whiteColor]];// 收到的气泡颜色self.incomingBubbleImageData = [bubbleFactory incomingMessagesBubbleImageWithColor:[UIColor jsq_messageBubbleGreenColor]];
4.控制器写数据逻辑代理
先提一下那个滚动动画,慎用,有点不可控
- (void)viewDidAppear:(BOOL)animated
{[super viewDidAppear:animated];/***  Enable/disable springy bubbles, default is NO.*  You must set this from `viewDidAppear:`*  Note: this feature is mostly stable, but still experimental*  注意啊,这个有时候会蹦掉,玩玩就好了*/// 一个bubbles的移动动画效果self.collectionView.collectionViewLayout.springinessEnabled = [[[NSUserDefaults standardUserDefaults] valueForKey:@"kDynamic"] boolValue];
}
模拟个右上角的按钮,来接受消息,最核心代码
// 收到别人发的消息了
- (void)receiveMessagePressed:(UIBarButtonItem *)sender
{// 这仅仅是模拟Demo/***  Show the typing indicator to be shown*  是否需要一个加载指示*/self.showTypingIndicator = YES;/***  Scroll to actually view the indicator 滚动到最后*/[self scrollToBottomAnimated:YES];/***  Copy last sent message, this will be the new "received" message*  来一份上一次的数据*/JSQMessage *copyMessage = [[self.demoData.messages lastObject] copy];if (!copyMessage) {copyMessage = [JSQMessage messageWithSenderId:kJSQDemoAvatarIdJobsdisplayName:kJSQDemoAvatarDisplayNameJobstext:@"First received!"];}/***  Allow typing indicator to show*/dispatch_after(dispatch_time(DISPATCH_TIME_NOW, (int64_t)(3.0 * NSEC_PER_SEC)), dispatch_get_main_queue(), ^{NSMutableArray *userIds = [[self.demoData.users allKeys] mutableCopy];[userIds removeObject:self.senderId];NSString *randomUserId = userIds[arc4random_uniform((int)[userIds count])];JSQMessage *newMessage = nil;id<JSQMessageMediaData> newMediaData = nil;id newMediaAttachmentCopy = nil;// JSQMessage对应的BOOL isMediaMessage = NO就是text,YES就是图片,音频,视频,定位if (copyMessage.isMediaMessage) {/***  Last message was a media message*/// 先把代理存储下id<JSQMessageMediaData> copyMediaData = copyMessage.media;// 如果是图片if ([copyMediaData isKindOfClass:[JSQPhotoMediaItem class]]) {JSQPhotoMediaItem *photoItemCopy = [((JSQPhotoMediaItem *)copyMediaData) copy];// 默认都是YES的,这句话的意思是气泡的小尖尖朝哪个方向,YES是发出去的,就朝右,反之photoItemCopy.appliesMediaViewMaskAsOutgoing = NO;newMediaAttachmentCopy = [UIImage imageWithCGImage:photoItemCopy.image.CGImage];/***  Set image to nil to simulate "downloading" the image*  and show the placeholder view*  代表发出去的消息会进行短暂的loading*/photoItemCopy.image = nil;newMediaData = photoItemCopy;}else if ([copyMediaData isKindOfClass:[JSQLocationMediaItem class]]) {// 坐标消息  同上JSQLocationMediaItem *locationItemCopy = [((JSQLocationMediaItem *)copyMediaData) copy];locationItemCopy.appliesMediaViewMaskAsOutgoing = NO;newMediaAttachmentCopy = [locationItemCopy.location copy];/***  Set location to nil to simulate "downloading" the location data*/locationItemCopy.location = nil;newMediaData = locationItemCopy;}else if ([copyMediaData isKindOfClass:[JSQVideoMediaItem class]]) {// 视频消息 同上JSQVideoMediaItem *videoItemCopy = [((JSQVideoMediaItem *)copyMediaData) copy];videoItemCopy.appliesMediaViewMaskAsOutgoing = NO;newMediaAttachmentCopy = [videoItemCopy.fileURL copy];/***  Reset video item to simulate "downloading" the video*/videoItemCopy.fileURL = nil;videoItemCopy.isReadyToPlay = NO;newMediaData = videoItemCopy;}else if ([copyMediaData isKindOfClass:[JSQAudioMediaItem class]]) {// 同上JSQAudioMediaItem *audioItemCopy = [((JSQAudioMediaItem *)copyMediaData) copy];audioItemCopy.appliesMediaViewMaskAsOutgoing = NO;newMediaAttachmentCopy = [audioItemCopy.audioData copy];/***  Reset audio item to simulate "downloading" the audio*/audioItemCopy.audioData = nil;newMediaData = audioItemCopy;}else {NSLog(@"%s error: unrecognized media item", __PRETTY_FUNCTION__);}// 除开Text外的消息类newMessage = [JSQMessage messageWithSenderId:randomUserIddisplayName:self.demoData.users[randomUserId]media:newMediaData];}else {/***  Last message was a text message  纯文本消息类*/newMessage = [JSQMessage messageWithSenderId:randomUserIddisplayName:self.demoData.users[randomUserId]text:copyMessage.text];}/***  Upon receiving a message, you should:**  1. Play sound (optional)*  2. Add new id<JSQMessageData> object to your data source*  3. Call `finishReceivingMessage`*/// [JSQSystemSoundPlayer jsq_playMessageReceivedSound];// 播放声音[self.demoData.messages addObject:newMessage];[self finishReceivingMessageAnimated:YES];// 如果消息类型是Media  非文本形式if (newMessage.isMediaMessage) {/***  Simulate "downloading" media  模拟下载*/dispatch_after(dispatch_time(DISPATCH_TIME_NOW, (int64_t)(2.0 * NSEC_PER_SEC)), dispatch_get_main_queue(), ^{/***  模拟下载,下载完之后重新刷*/if ([newMediaData isKindOfClass:[JSQPhotoMediaItem class]]) {((JSQPhotoMediaItem *)newMediaData).image = newMediaAttachmentCopy;[self.collectionView reloadData];}else if ([newMediaData isKindOfClass:[JSQLocationMediaItem class]]) {[((JSQLocationMediaItem *)newMediaData)setLocation:newMediaAttachmentCopy withCompletionHandler:^{[self.collectionView reloadData];}];}else if ([newMediaData isKindOfClass:[JSQVideoMediaItem class]]) {((JSQVideoMediaItem *)newMediaData).fileURL = newMediaAttachmentCopy;((JSQVideoMediaItem *)newMediaData).isReadyToPlay = YES;[self.collectionView reloadData];}else if ([newMediaData isKindOfClass:[JSQAudioMediaItem class]]) {((JSQAudioMediaItem *)newMediaData).audioData = newMediaAttachmentCopy;[self.collectionView reloadData];}else {NSLog(@"%s error: unrecognized media item", __PRETTY_FUNCTION__);}});}});
}
注意:收到消息三步骤
1.playSound 可选
2.Add new id object to your data source 把数据源加入
3. Call finishReceivingMessage,告诉完成了,直接刷新数据
发送纯文本消息,步骤和上面一样
// 纯文本发送
- (void)didPressSendButton:(UIButton *)buttonwithMessageText:(NSString *)textsenderId:(NSString *)senderIdsenderDisplayName:(NSString *)senderDisplayNamedate:(NSDate *)date
{/***  Sending a message. Your implementation of this method should do *at least* the following:**  1. Play sound (optional)*  2. Add new id<JSQMessageData> object to your data source*  3. Call `finishSendingMessage`*/// 套路三部曲 直接完成组装// [JSQSystemSoundPlayer jsq_playMessageSentSound];JSQMessage *message = [[JSQMessage alloc] initWithSenderId:senderIdsenderDisplayName:senderDisplayNamedate:datetext:text];[self.demoData.messages addObject:message];[self finishSendingMessageAnimated:YES];
}
发送非文本消息,ActionSheet选择器
// 点击左侧accessory按钮启动actionSheet
- (void)didPressAccessoryButton:(UIButton *)sender
{[self.inputToolbar.contentView.textView resignFirstResponder];UIActionSheet *sheet = [[UIActionSheet alloc] initWithTitle:NSLocalizedString(@"Media messages", nil)delegate:selfcancelButtonTitle:NSLocalizedString(@"Cancel", nil)destructiveButtonTitle:nilotherButtonTitles:NSLocalizedString(@"Send photo", nil), NSLocalizedString(@"Send location", nil), NSLocalizedString(@"Send video", nil), NSLocalizedString(@"Send video thumbnail", nil), NSLocalizedString(@"Send audio", nil), nil];[sheet showFromToolbar:self.inputToolbar];
}// 点击左侧accessory按钮弹出sheet,选择需要发送的事件添加到数据源
- (void)actionSheet:(UIActionSheet *)actionSheet didDismissWithButtonIndex:(NSInteger)buttonIndex
{if (buttonIndex == actionSheet.cancelButtonIndex) {[self.inputToolbar.contentView.textView becomeFirstResponder];return;}switch (buttonIndex) {case 0:[self.demoData addPhotoMediaMessage];break;case 1:{__weak UICollectionView *weakView = self.collectionView;[self.demoData addLocationMediaMessageCompletion:^{[weakView reloadData];}];}break;case 2:[self.demoData addVideoMediaMessage];break;case 3:[self.demoData addVideoMediaMessageWithThumbnail];break;case 4:[self.demoData addAudioMediaMessage];break;}// [JSQSystemSoundPlayer jsq_playMessageSentSound];[self finishSendingMessageAnimated:YES];
}
注意:发送消息三步骤和上面的收到的步骤一模一样的
剩下的都是一些修饰的代理数据UI以及一些附带事件的实现
// 发送的人ID
- (NSString *)senderId
// 发送人名字
- (NSString *)senderDisplayName
// 根据index返回需要加载的message对象
- (id<JSQMessageData>)collectionView:(JSQMessagesCollectionView *)collectionView messageDataForItemAtIndexPath:(NSIndexPath *)indexPath
// 删除消息
- (void)collectionView:(JSQMessagesCollectionView *)collectionView didDeleteMessageAtIndexPath:(NSIndexPath *)indexPath
// 聊天气泡,根据ID判断是发送的还是接受的
- (id<JSQMessageBubbleImageDataSource>)collectionView:(JSQMessagesCollectionView *)collectionView messageBubbleImageDataForItemAtIndexPath:(NSIndexPath *)indexPath
// 头像
- (id<JSQMessageAvatarImageDataSource>)collectionView:(JSQMessagesCollectionView *)collectionView avatarImageDataForItemAtIndexPath:(NSIndexPath *)indexPath
// 时间UI
- (NSAttributedString *)collectionView:(JSQMessagesCollectionView *)collectionView attributedTextForCellTopLabelAtIndexPath:(NSIndexPath *)indexPath
// 除本人以外显示bubble cell上面的名字
- (NSAttributedString *)collectionView:(JSQMessagesCollectionView *)collectionView attributedTextForMessageBubbleTopLabelAtIndexPath:(NSIndexPath *)indexPath
// 气泡cell底部文字
- (NSAttributedString *)collectionView:(JSQMessagesCollectionView *)collectionView attributedTextForCellBottomLabelAtIndexPath:(NSIndexPath *)indexPath
基本上的逻辑就已经完成了,只要根据业务加载实际的逻辑就能自己做一套聊天的了,但是细节还需要完善很多,毕竟一套成熟的聊天框架是需要不断完善的,这里抛砖引玉,觉得可以的同学可以顺手给个赞,有问题及时留言,多交流多学习总是不会错的
1.WechatQQ聊天初级Demo
2.Wechat朋友圈高度自适应
3.RunLoop理解和常见问题
4.RunTime基本使用和面试问题


