Bitmap缩放和平移
- 加载一张
Bitmap可能为宽高相同的正方形,也可能为宽高不同的矩形 - 缩放方向可以为中心缩放,左上角缩放,右上角缩放,左下角缩放,右下角缩放
Bitmap中心缩放,包含了缩放和平移两个操作,不可拆开Bitmap其余四个方向的缩放,可以单独缩放不带平移,也可以缩放带平移
XML文件
<?xml version="1.0" encoding="utf-8"?>
<LinearLayout xmlns:android="http://schemas.android.com/apk/res/android"android:layout_width="match_parent"android:layout_height="match_parent"android:orientation="vertical"><com.yang.app.MyRelativeLayoutandroid:id="@+id/real_rl"android:layout_width="match_parent"android:layout_height="0dp"android:layout_weight="1"android:layout_marginTop="30dp"android:layout_marginBottom="30dp"android:layout_marginLeft="30dp"android:layout_marginRight="30dp"android:background="@color/gray"><com.yang.app.MyImageViewandroid:id="@+id/real_iv"android:layout_width="match_parent"android:layout_height="match_parent"android:layout_marginTop="30dp"android:layout_marginBottom="30dp"android:layout_marginLeft="30dp"android:layout_marginRight="30dp" /></com.yang.app.MyRelativeLayout><ImageViewandroid:layout_width="match_parent"android:layout_height="200dp"android:layout_weight="0"android:background="#00ff00" />
</LinearLayout>
Activity代码
const val TAG = "Yang"
class MainActivity : AppCompatActivity() {var mRealView : MyImageView ?= nullvar mRelativeLayout : MyRelativeLayout ?= nullvar tempBitmap : Bitmap ?= nullvar mHandler = Handler(Looper.getMainLooper())var screenWidth = 0var screenHeight = 0var srcRect = RectF()var destRect = RectF()override fun onCreate(savedInstanceState: Bundle?) {super.onCreate(savedInstanceState)setContentView(R.layout.activity_main)mRealView = findViewById(R.id.real_iv)mRelativeLayout = findViewById(R.id.real_rl)// 屏幕宽高的一半作为临时RectF, 用于压缩BitmapscreenWidth = resources.displayMetrics.widthPixelsscreenHeight = resources.displayMetrics.heightPixelsval tempRect = RectF(0f, 0f, screenWidth.toFloat() / 2, screenHeight.toFloat() / 2)CoroutineScope(Dispatchers.IO).launch {tempBitmap = getBitmap(resources, tempRect, R.drawable.fake)withContext(Dispatchers.Main) {mRelativeLayout?.post {// 获取初始区域的RectFsrcRect.set(0f,0f,mRelativeLayout?.width?.toFloat()!!,mRelativeLayout?.height?.toFloat()!!)// 获取结束区域的RectFmRelativeLayout?.forEach { childView ->if (childView is MyImageView) {destRect.set(0f,0f,childView.width.toFloat(),childView.height.toFloat())}}scaleRectFun(tempBitmap, srcRect, destRect)}}}}fun scaleRectFun(tempBitmap: Bitmap?, srcRect : RectF, destRect: RectF){tempBitmap?.let { bitmap->mRelativeLayout?.setBitmap(bitmap)val animator = ValueAnimator.ofFloat(0f, 1f)animator.duration = 5000Lanimator.interpolator = DecelerateInterpolator()animator.addUpdateListener {val value = it.animatedValue as Float// 中心缩放mRelativeLayout?.setDestRectCenterWithTranslate(srcRect, destRect, value)// 左上角不带平移缩放// mRelativeLayout?.setDestRectLeftTopNoTranslate(srcRect, destRect, value)// 左上角平移缩放// mRelativeLayout?.setDestRectLeftTopWithTranslate(srcRect, destRect, value)// 右上角不带平移缩放// mRelativeLayout?.setDestRectRightTopNoTranslate(srcRect, destRect, value)// 右上角平移缩放// mRelativeLayout?.setDestRectRightTopWithTranslate(srcRect, destRect, value)// 左下角不带平移缩放// mRelativeLayout?.setDestRectLeftBottomNoTranslate(srcRect, destRect, value)// 左下角平移缩放// mRelativeLayout?.setDestRectLeftBottomWithTranslate(srcRect, destRect, value)// 右下角不带平移缩放// mRelativeLayout?.setDestRectRightBottomNoTranslate(srcRect, destRect, value)// 右下角平移缩放// mRelativeLayout?.setDestRectRightBottomWithTranslate(srcRect, destRect, value)}animator.start()}}
}
fun getBitmap(resources : Resources, destRect : RectF, imageId: Int): Bitmap? {var imageWidth = -1var imageHeight = -1val preOption = BitmapFactory.Options().apply {// 只获取图片的宽高inJustDecodeBounds = trueBitmapFactory.decodeResource(resources, imageId, this)}imageWidth = preOption.outWidthimageHeight = preOption.outHeight// 计算缩放比例val scaleMatrix = Matrix()// 确定未缩放Bitmap的RectFvar srcRect = RectF(0f, 0f, imageWidth.toFloat(), imageHeight.toFloat())// 通过目标RectF, 确定缩放数值,存储在scaleMatrix中scaleMatrix.setRectToRect(srcRect, destRect, Matrix.ScaleToFit.CENTER)// 缩放数值再映射到原始Bitmap上,得到缩放后的RectFscaleMatrix.mapRect(srcRect)val finalOption = BitmapFactory.Options().apply {if (imageHeight > 0 && imageWidth > 0) {inPreferredConfig = Bitmap.Config.RGB_565inSampleSize = calculateInSampleSize(imageWidth,imageHeight,srcRect.width().toInt(),srcRect.height().toInt())}}return BitmapFactory.decodeResource(resources, imageId, finalOption)
}fun calculateInSampleSize(fromWidth: Int, fromHeight: Int, toWidth: Int, toHeight: Int): Int {var bitmapWidth = fromWidthvar bitmapHeight = fromHeightif (fromWidth > toWidth|| fromHeight > toHeight) {var inSampleSize = 2// 计算最大的inSampleSize值,该值是2的幂,并保持原始宽高大于目标宽高while (bitmapWidth >= toWidth && bitmapHeight >= toHeight) {bitmapWidth /= 2bitmapHeight /= 2inSampleSize *= 2}return inSampleSize}return 1
}
自定义ViewGroup和View代码
class MyImageView @JvmOverloads constructor(context: Context, attrs: AttributeSet? = null, defStyleAttr: Int = 0
) : AppCompatImageView(context, attrs, defStyleAttr)class MyRelativeLayout @JvmOverloads constructor(context: Context, attrs: AttributeSet? = null, defStyleAttr: Int = 0
) : RelativeLayout(context, attrs, defStyleAttr) {var mBitmap : Bitmap ?= nullvar mScaleMatrix = Matrix()var mDestRect = RectF()fun setBitmap(bitmap: Bitmap?) {mBitmap = bitmap}override fun onDraw(canvas: Canvas?) {super.onDraw(canvas)mBitmap?.let {canvas?.drawBitmap(it, mScaleMatrix, Paint().apply {isAntiAlias = true})}}
}
中心缩放
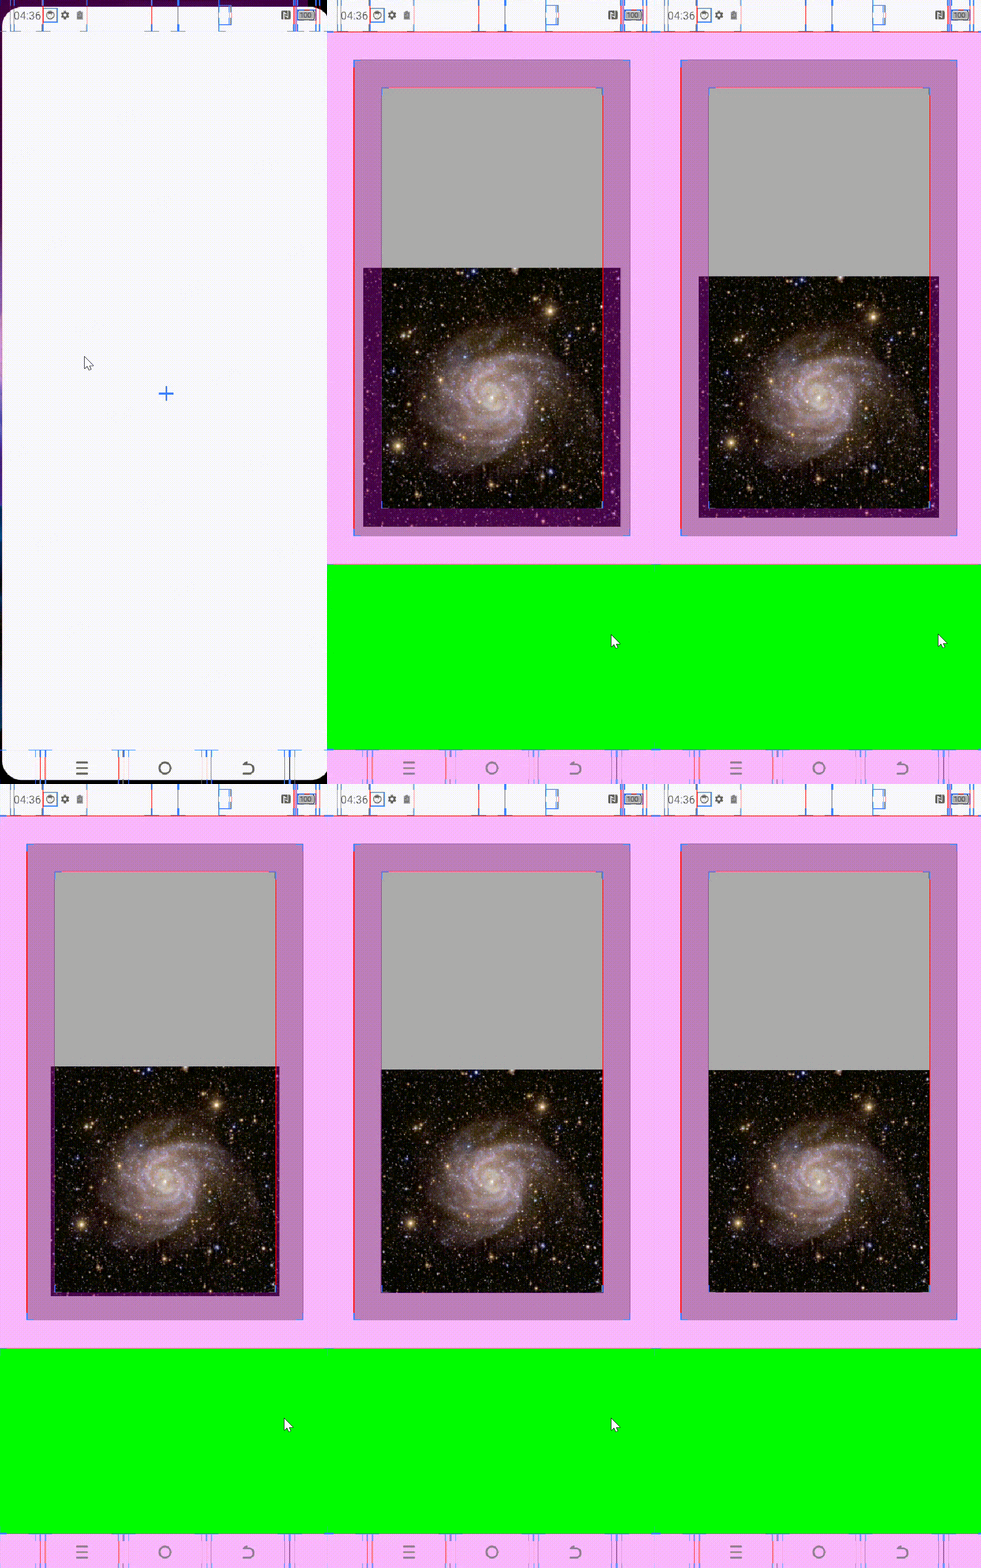
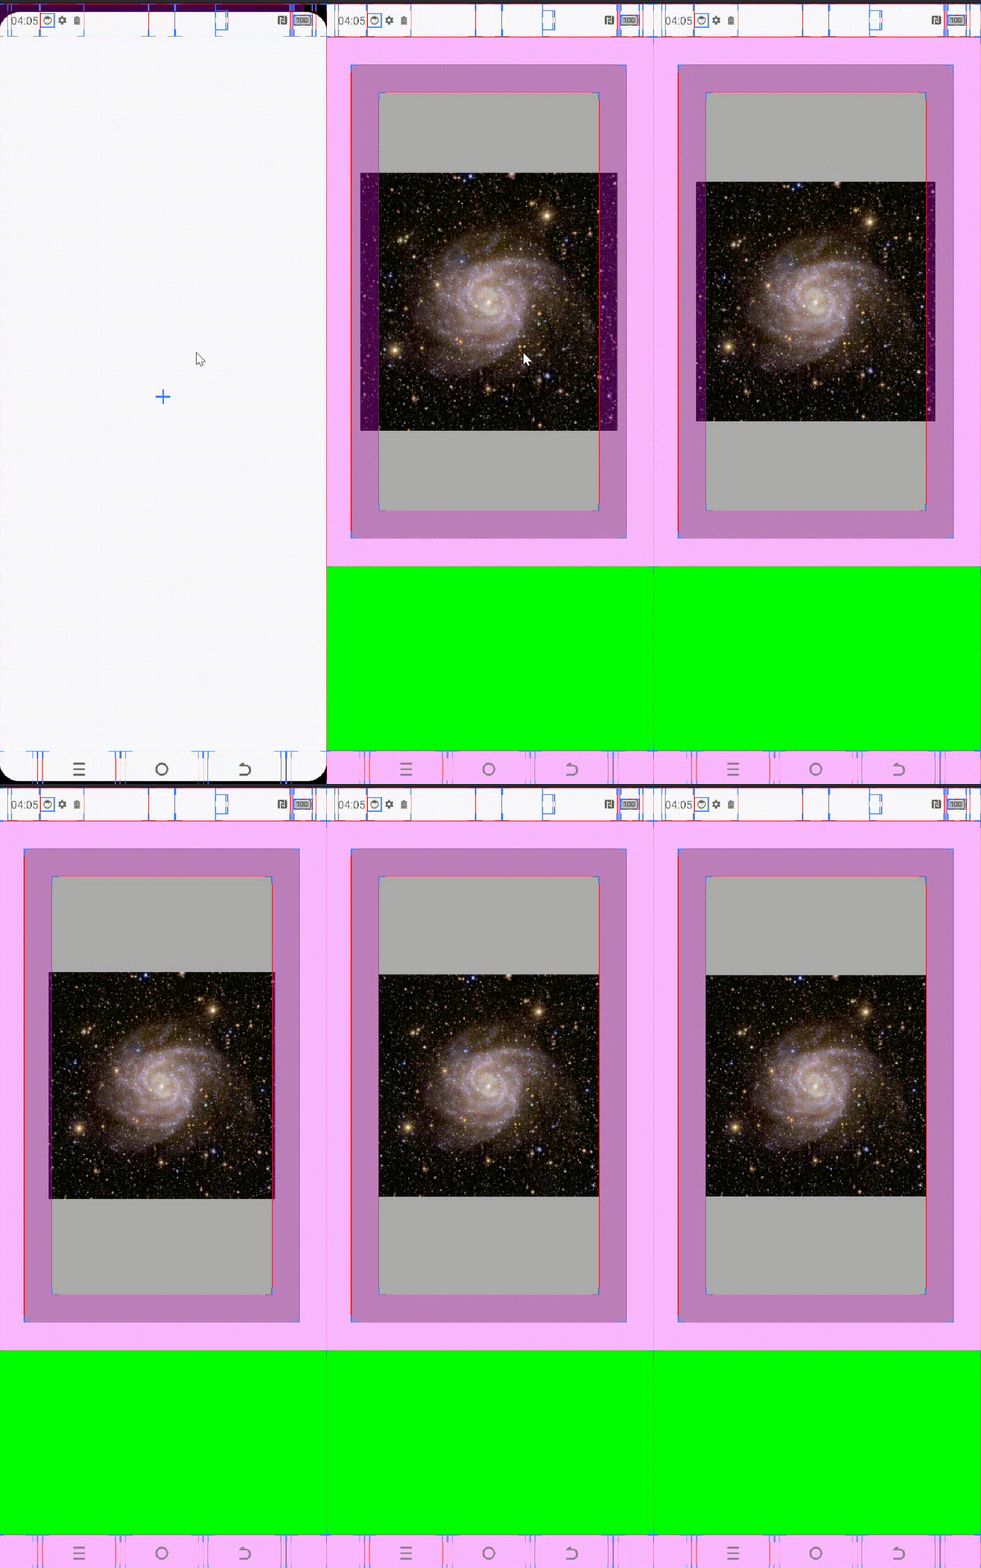
ValueAnimator动画的初始值为0,开始区域为外层MyRelativeLayout区域,结束区域为内层MyImageView区域,缩放区域在这两个区域大小之间变化- 缩放比例取决于当前缩放区域
mDestRect和Bitmap宽高的最小宽高比
fun setDestRectCenterWithTranslate(srcRect: RectF, destRect: RectF, value : Float) {mDestRect = RectF(srcRect.left + (destRect.left - srcRect.left) * value,srcRect.top  + (destRect.top - srcRect.top) * value,srcRect.right + (destRect.right - srcRect.right) * value,srcRect.bottom + (destRect.bottom - srcRect.bottom) * value)val scale = Math.min(mDestRect.width() / mBitmap?.width!!, mDestRect.height() / mBitmap!!.height)val dx = (srcRect.width() - mBitmap?.width!! * scale) / 2val dy = (srcRect.height() - mBitmap?.height!! * scale) / 2mScaleMatrix.reset()mScaleMatrix.postScale(scale, scale)mScaleMatrix.postTranslate(dx, dy)invalidate()
}
- 中心缩放效果图
左上角缩放
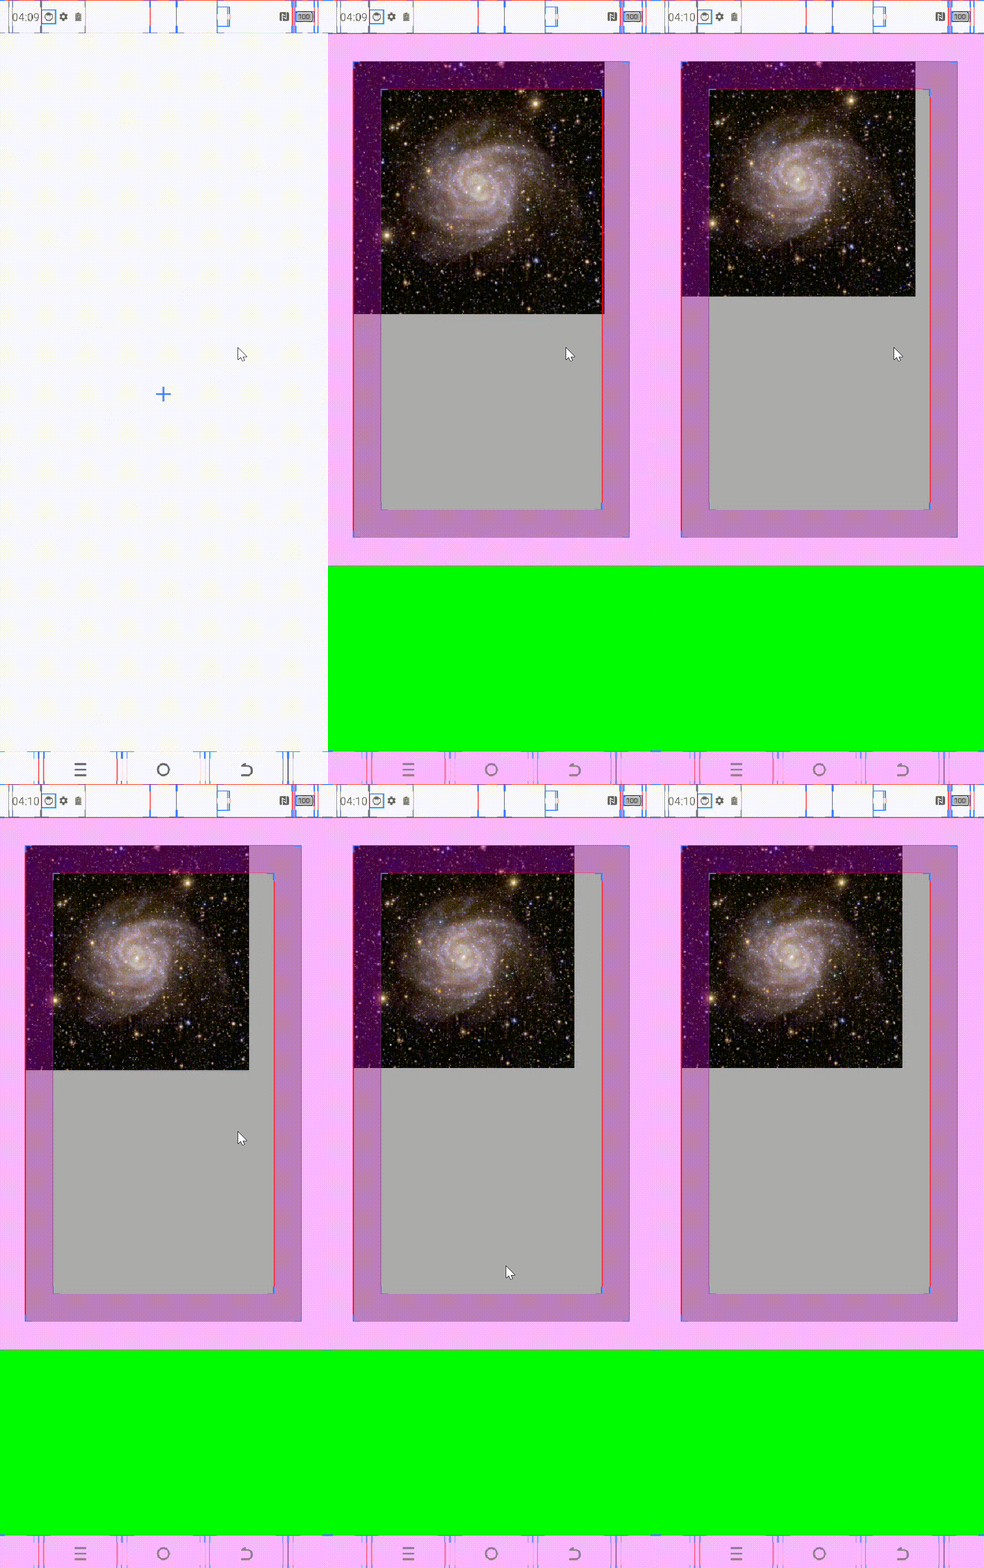
- 左上角不带平移缩放
fun setDestRectLeftTopNoTranslate(srcRect: RectF, destRect: RectF, value : Float) {mDestRect = RectF(srcRect.left + (destRect.left - srcRect.left) * value,srcRect.top + (destRect.top - srcRect.top) * value,srcRect.right + (destRect.right - srcRect.right) * value,srcRect.bottom + (destRect.bottom - srcRect.bottom) * value)val scale = Math.min(mDestRect.width() / mBitmap?.width!!, mDestRect.height() / mBitmap!!.height)mScaleMatrix.setScale(scale, scale)invalidate()
}
-
左上角不带平移缩放效果图
-
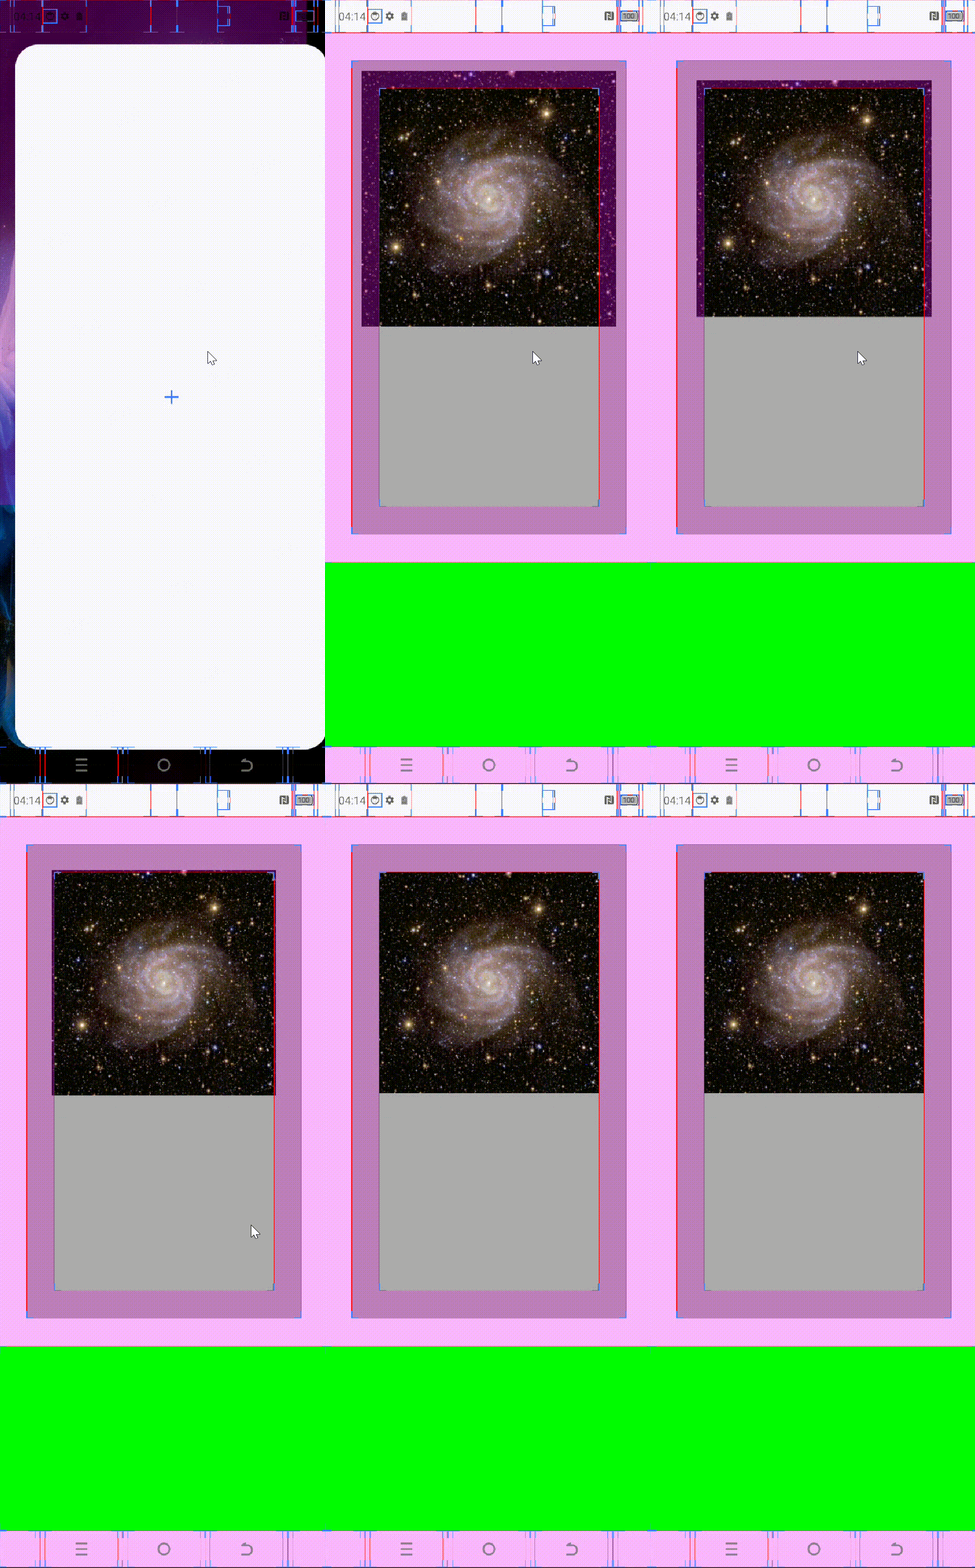
左上角带平移缩放
fun setDestRectLeftTopWithTranslate(srcRect: RectF, destRect: RectF, value : Float) {mDestRect = RectF(srcRect.left + (destRect.left - srcRect.left) * value,srcRect.top + (destRect.top - srcRect.top) * value,srcRect.right + (destRect.right - srcRect.right) * value,srcRect.bottom + (destRect.bottom - srcRect.bottom) * value)val scale = Math.min(mDestRect.width() / mBitmap?.width!!, mDestRect.height() / mBitmap!!.height)val dx = ((srcRect.width() - destRect.width())/2) * value + (destRect.left - srcRect.left) * valueval dy = ((srcRect.height() - destRect.height())/2) * value + (destRect.top - srcRect.top) * valuemScaleMatrix.reset()mScaleMatrix.postScale(scale, scale)mScaleMatrix.postTranslate(dx, dy)invalidate()
}
- 左上角带平移缩放效果图
右上角缩放
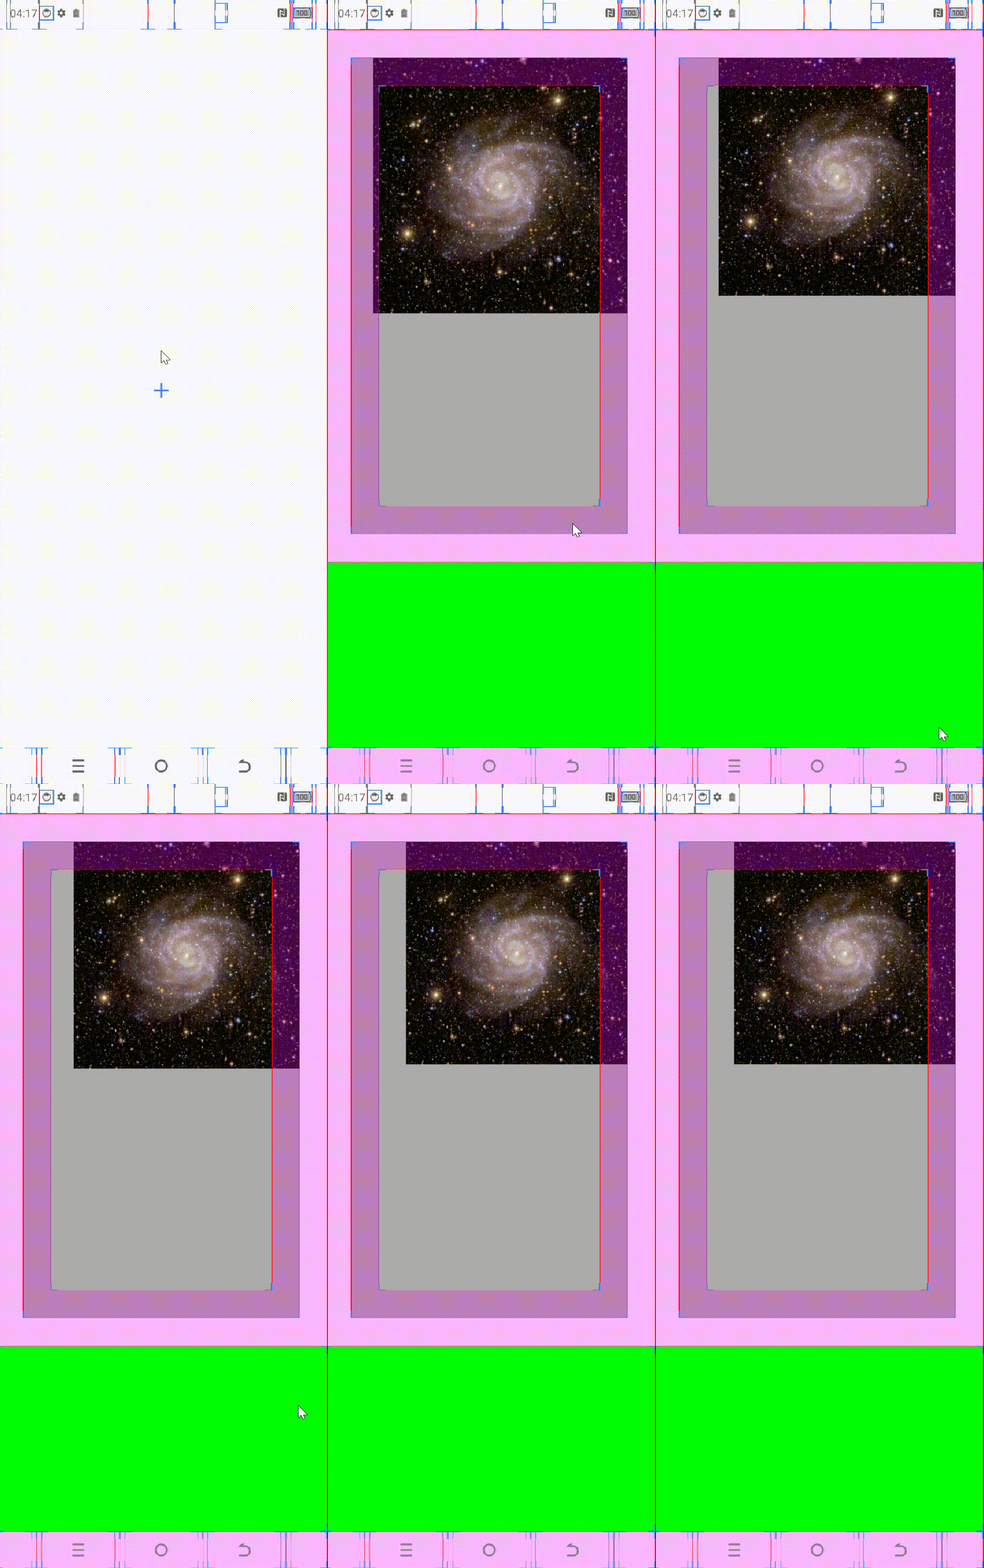
- 右上角不带平移缩放
fun setDestRectRightTopNoTranslate(srcRect: RectF, destRect: RectF, value : Float) {mDestRect = RectF(srcRect.left  + (destRect.left - srcRect.left) * value,srcRect.top + (destRect.top - srcRect.top) * value,srcRect.right + (destRect.right - srcRect.right) * value,srcRect.bottom + (destRect.bottom - srcRect.bottom) * value)val scale = Math.min(mDestRect.width() / mBitmap?.width!!, mDestRect.height() / mBitmap!!.height)val dx = srcRect.width() - mBitmap!!.width * scaleval dy = 0fmScaleMatrix.reset()mScaleMatrix.postScale(scale, scale)mScaleMatrix.postTranslate(dx, dy)invalidate()
}
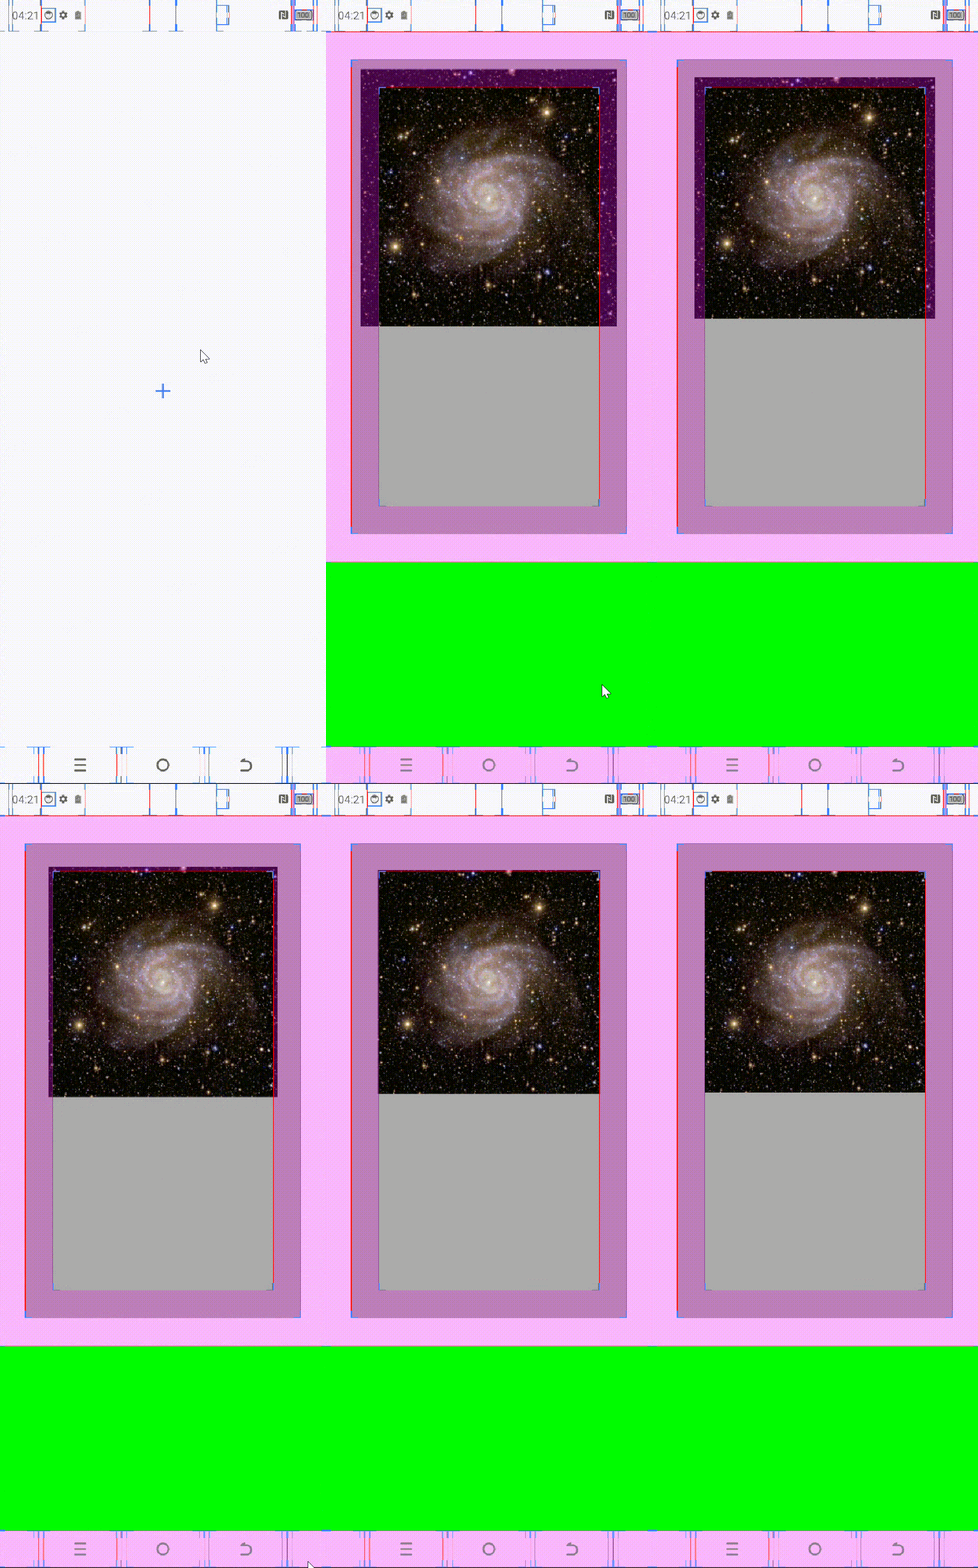
- 右上角不带平移缩放效果图
- 右上角带平移缩放
fun setDestRectRightTopWithTranslate(srcRect: RectF, destRect: RectF, value : Float) {mDestRect = RectF(srcRect.left  + (destRect.left - srcRect.left) * value,srcRect.top + (destRect.top - srcRect.top) * value,srcRect.right + (destRect.right - srcRect.right) * value,srcRect.bottom + (destRect.bottom - srcRect.bottom) * value)val scale = Math.min(mDestRect.width() / mBitmap?.width!!, mDestRect.height() / mBitmap!!.height)val dx = ((srcRect.width() - destRect.width())/2) * value + (destRect.left - srcRect.left) * valueval dy = ((srcRect.height() - destRect.height())/2) * value + (destRect.top - srcRect.top) * valuemScaleMatrix.reset()mScaleMatrix.postScale(scale, scale)mScaleMatrix.postTranslate(dx, dy)invalidate()
}
- 右上角不带平移缩放效果图
左下角缩放
- 左下角不带平移缩放
fun setDestRectLeftBottomNoTranslate(srcRect: RectF, destRect: RectF, value : Float) {mDestRect = RectF(srcRect.left + (destRect.left - srcRect.left) * value,srcRect.top  + (destRect.top - srcRect.top) * value,srcRect.right + (destRect.right - srcRect.right) * value,srcRect.bottom + (destRect.bottom - srcRect.bottom) * value)val scale = Math.min(mDestRect.width() / mBitmap?.width!!, mDestRect.height() / mBitmap!!.height)val dx = 0fval dy = srcRect.height() - mBitmap?.height!! * scalemScaleMatrix.reset()mScaleMatrix.postScale(scale, scale)mScaleMatrix.postTranslate(dx, dy)invalidate()
}
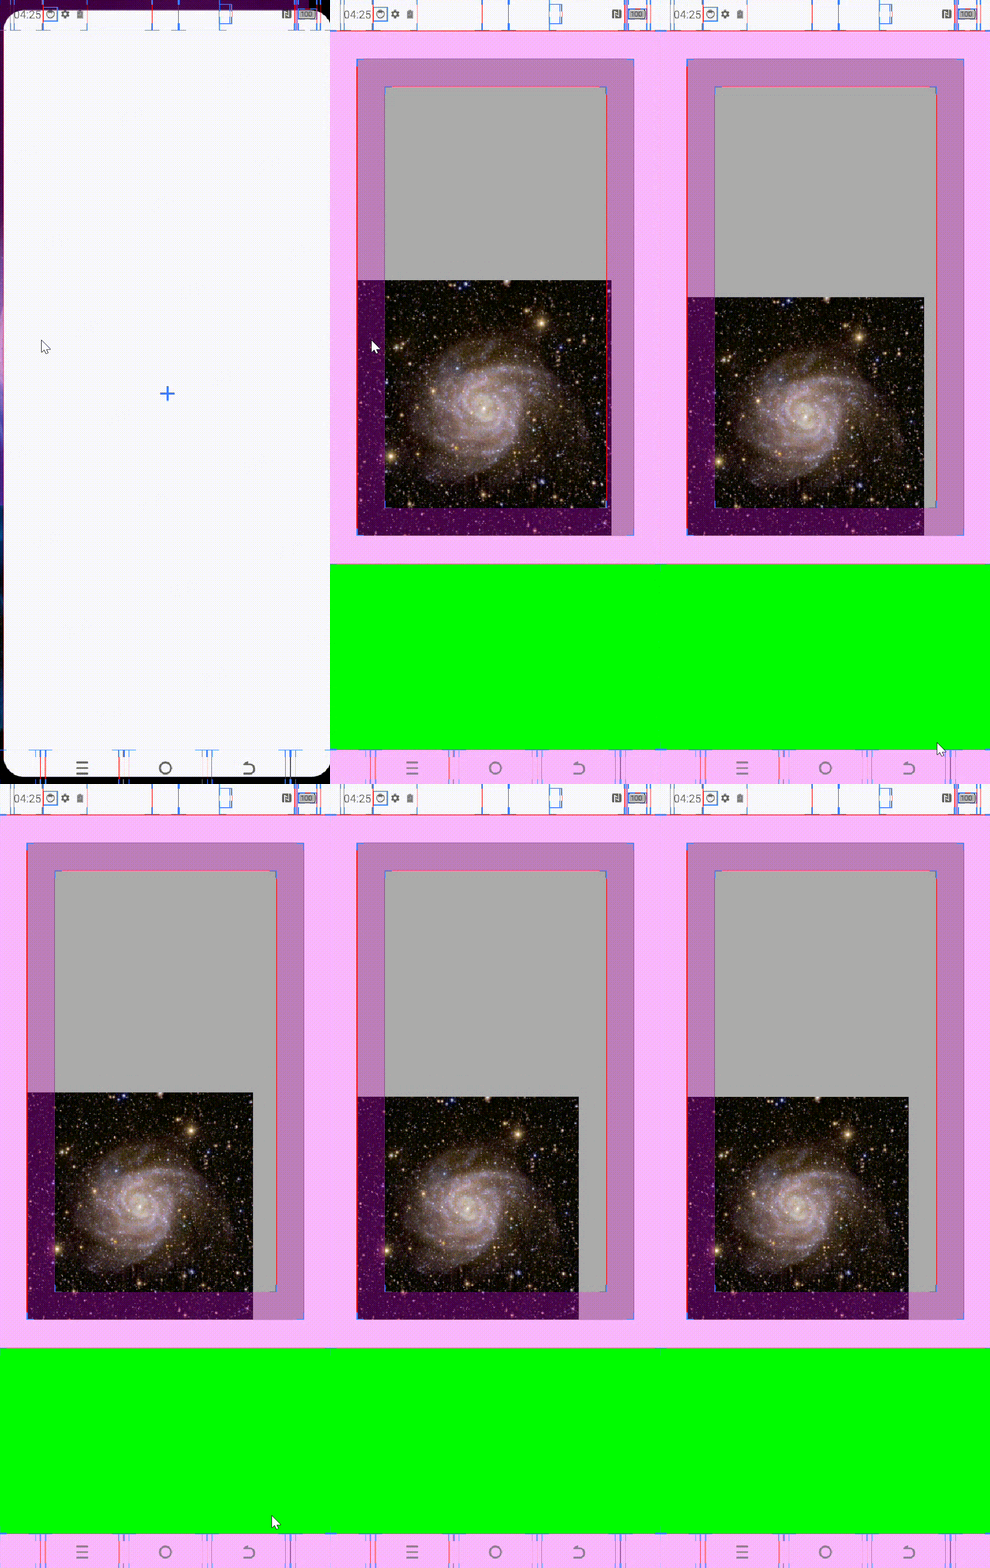
- 左下角不带平移缩放效果图
- 左下角平移缩放
fun setDestRectLeftBottomWithTranslate(srcRect: RectF, destRect: RectF, value : Float) {mDestRect = RectF(srcRect.left + (destRect.left - srcRect.left) * value,srcRect.top  + (destRect.top - srcRect.top) * value,srcRect.right + (destRect.right - srcRect.right) * value,srcRect.bottom + (destRect.bottom - srcRect.bottom) * value)val scale = Math.min(mDestRect.width() / mBitmap?.width!!, mDestRect.height() / mBitmap!!.height)val dx = ((srcRect.width() - destRect.width())/2 )* valueval dy = ((srcRect.height() - destRect.height())/2 )* value + (destRect.bottom - srcRect.bottom) * value + (srcRect.height()- mBitmap?.height!! * scale)mScaleMatrix.reset()mScaleMatrix.postScale(scale, scale)mScaleMatrix.postTranslate(dx, dy)invalidate()
}
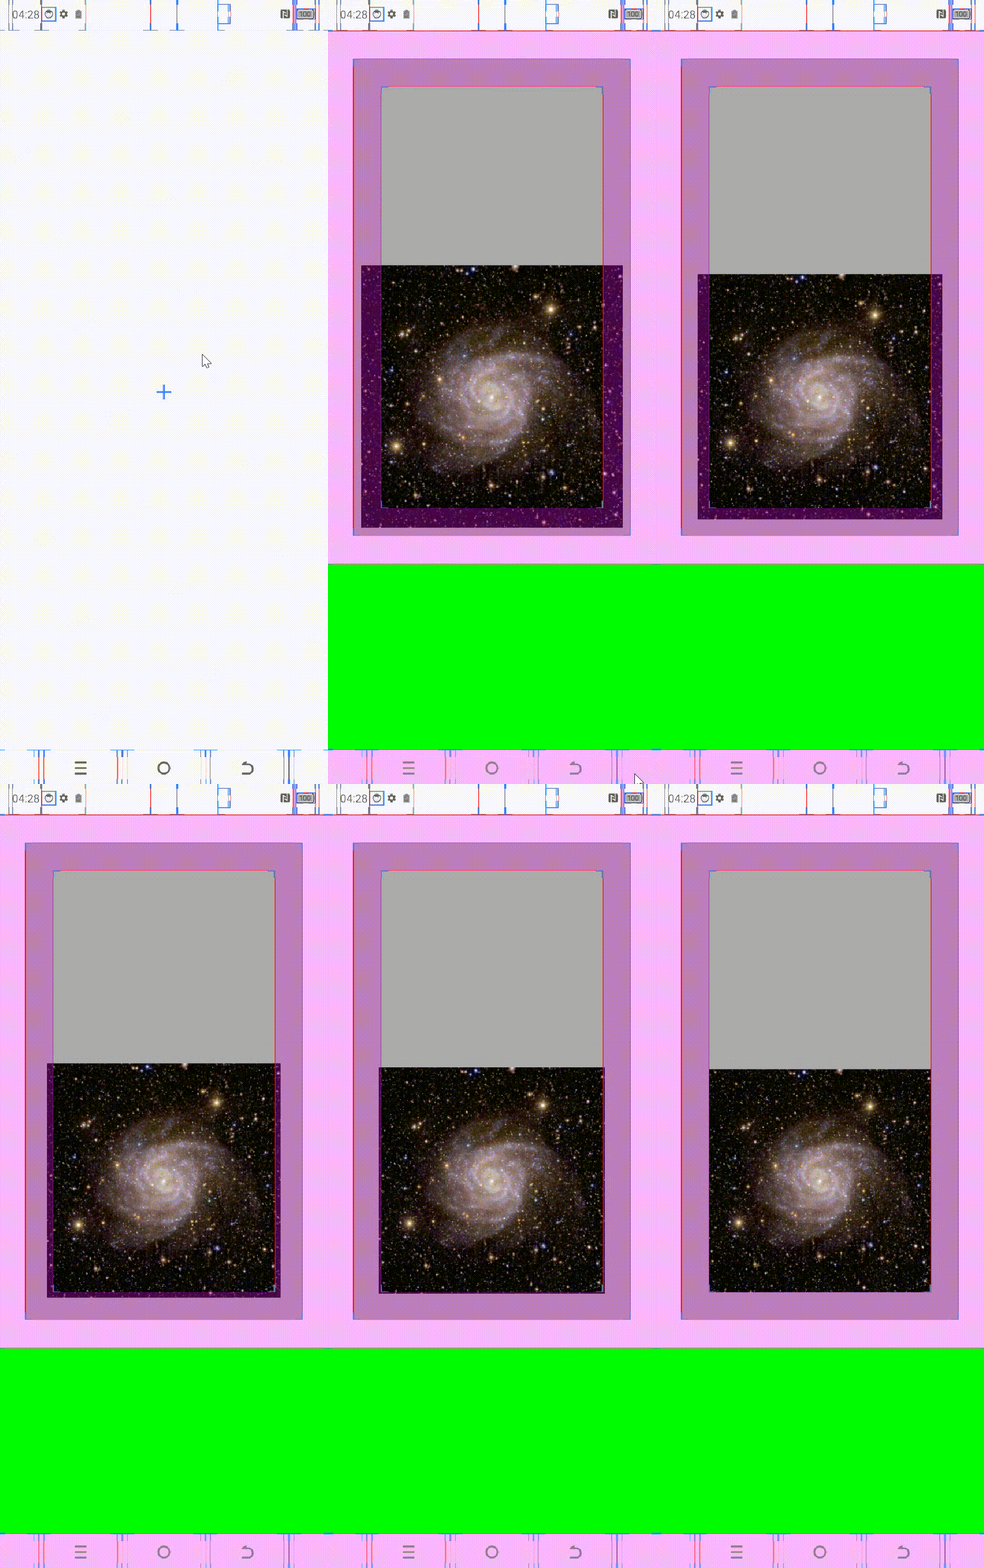
- 左下角平移缩放效果图
右下角缩放
- 右下角不带平移缩放
fun setDestRectRightBottomNoTranslate(srcRect: RectF, destRect: RectF, value : Float) {mDestRect = RectF(srcRect.left + (destRect.left - srcRect.left) * value,srcRect.top  + (destRect.top - srcRect.top) * value,srcRect.right + (destRect.right - srcRect.right) * value,srcRect.bottom + (destRect.bottom - srcRect.bottom) * value)val scale = Math.min(mDestRect.width() / mBitmap?.width!!, mDestRect.height() / mBitmap!!.height)val dx = srcRect.width() - mBitmap!!.width * scaleval dy = srcRect.height() - mBitmap?.height!! * scalemScaleMatrix.reset()mScaleMatrix.postScale(scale, scale)mScaleMatrix.postTranslate(dx, dy)invalidate()
}
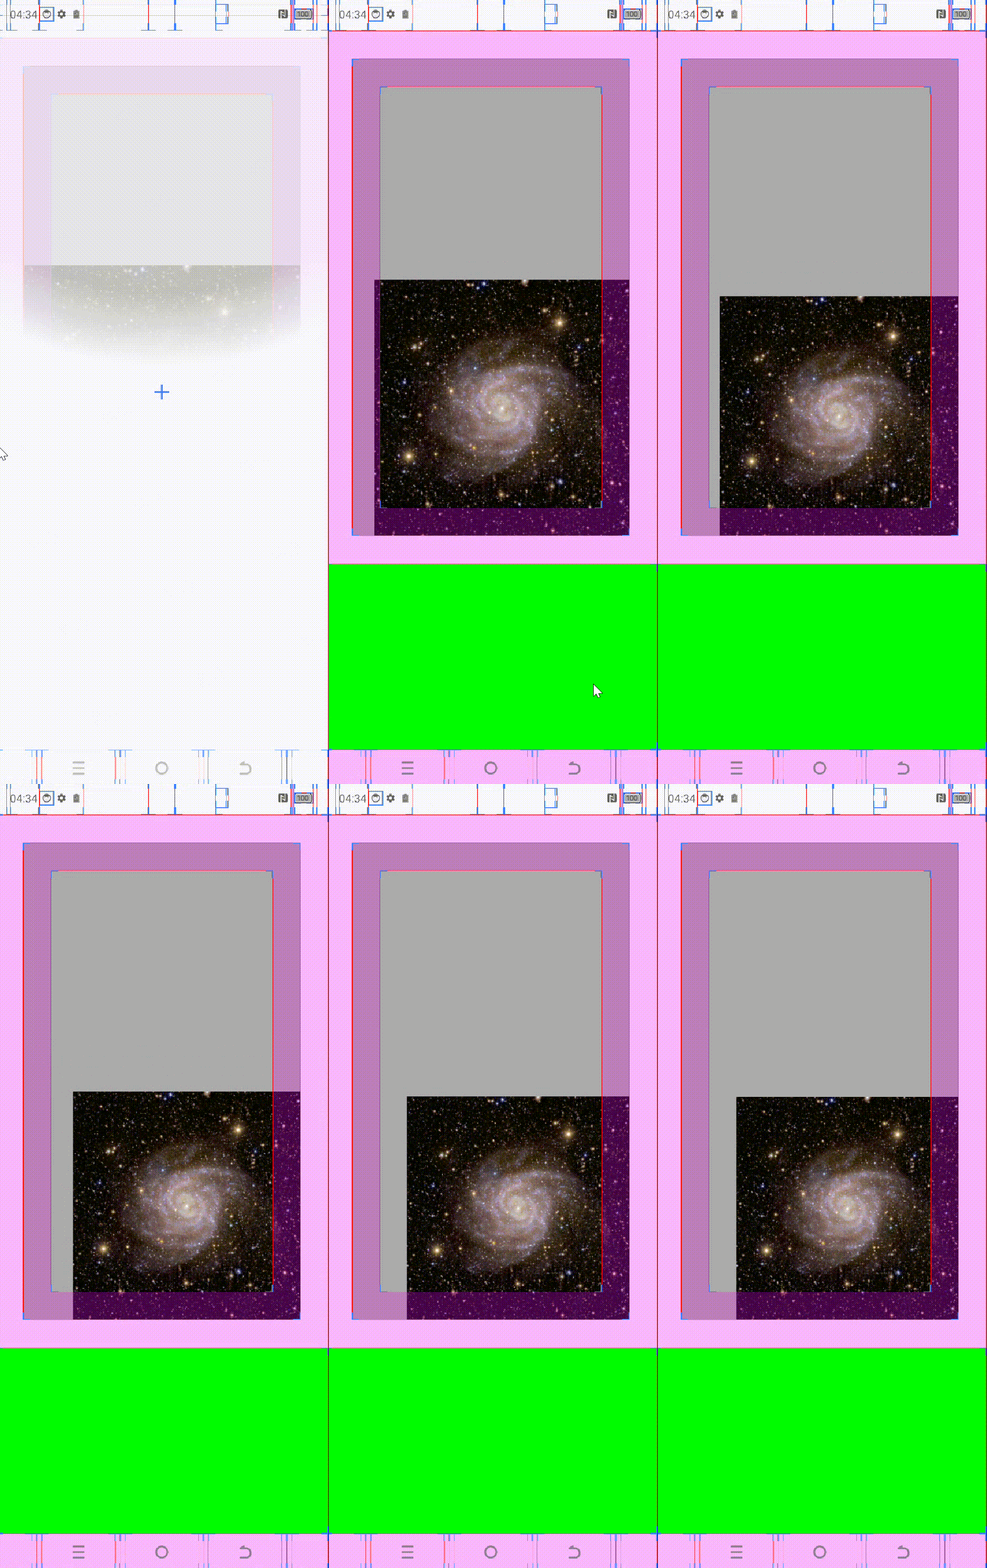
- 右下角不带平移缩放效果图
- 右下角平移缩放
fun setDestRectRightBottomWithTranslate(srcRect: RectF, destRect: RectF, value : Float) {mDestRect = RectF(srcRect.left + (destRect.left - srcRect.left) * value,srcRect.top  + (destRect.top - srcRect.top) * value,srcRect.right + (destRect.right - srcRect.right) * value,srcRect.bottom + (destRect.bottom - srcRect.bottom) * value)val scale = Math.min(mDestRect.width() / mBitmap?.width!!, mDestRect.height() / mBitmap!!.height)val dx = ((srcRect.width() - destRect.width())/2 )* valueval dy = ((srcRect.height() - destRect.height())/2 )* value + (destRect.bottom - srcRect.bottom) * value + (srcRect.height()- mBitmap?.height!! * scale)mScaleMatrix.reset()mScaleMatrix.postScale(scale, scale)mScaleMatrix.postTranslate(dx, dy)invalidate()
}
- 右下角平移缩放效果图
