MPTCP介绍
Multipath TCP — Multipath TCP -- documentation 2022 documentation
安装ubuntu18.04,可以使用虚拟机安装
点击安装VMware Tool
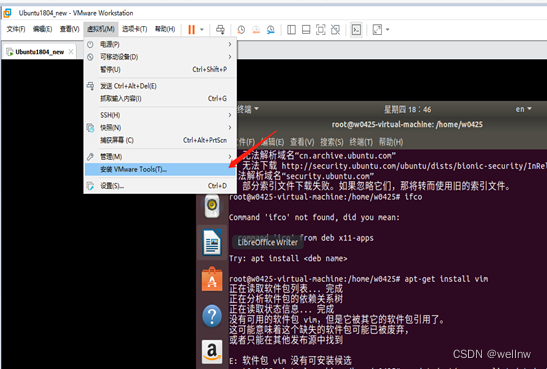
桌面会出现如下图标

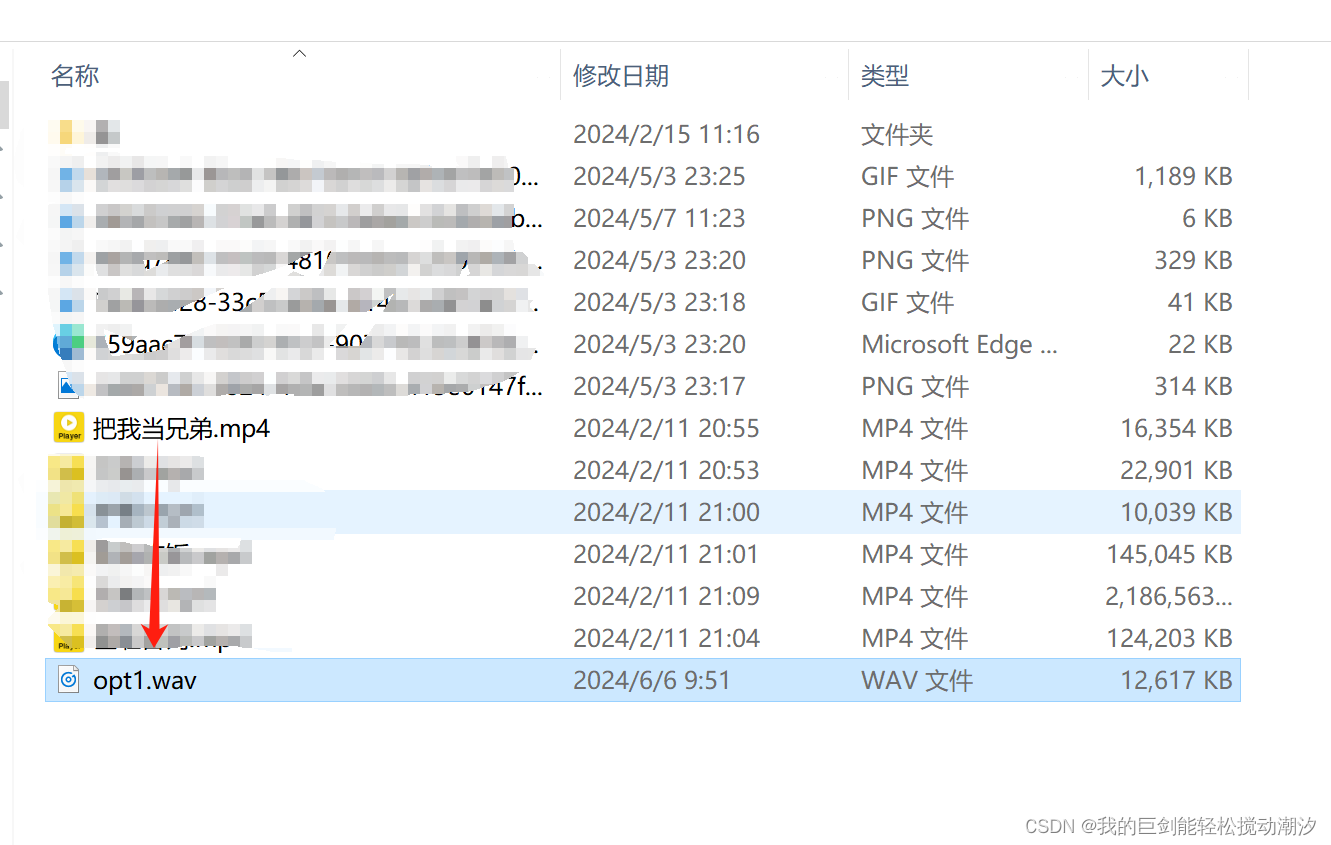
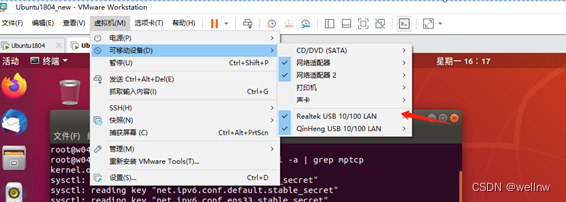
双击打开VMware Tools,复制如下图所示的文件到Home目录

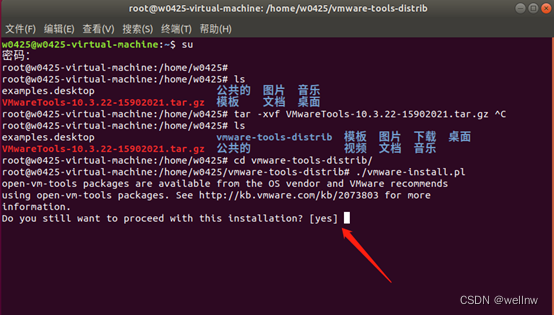
打开终端,切换到管理员权限(如果忘记管理员密码可以使用sudo passwd root修改密码)
![]()
解压vmwaretools
tar -xvf VMwareTools-10.3.22-15902021.tar.gz
切换到vmware-tools-distrib目录下
cd vmware-tools-distrib
执行vmware-install.pl安装
./vmware-install.pl
按照提示输入yes,然后回车
后面根据提示可以一直回车,安装完成之后,需要重启设备
更新ubuntu18.04源
#阿里源
deb http://mirrors.aliyun.com/ubuntu/ bionic main restricted universe multiverse
deb http://mirrors.aliyun.com/ubuntu/ bionic-security main restricted universe multiverse
deb http://mirrors.aliyun.com/ubuntu/ bionic-updates main restricted universe multiverse
deb http://mirrors.aliyun.com/ubuntu/ bionic-proposed main restricted universe multiverse
deb http://mirrors.aliyun.com/ubuntu/ bionic-backports main restricted universe multiverse
deb-src http://mirrors.aliyun.com/ubuntu/ bionic main restricted universe multiverse
deb-src http://mirrors.aliyun.com/ubuntu/ bionic-security main restricted universe multiverse
deb-src http://mirrors.aliyun.com/ubuntu/ bionic-updates main restricted universe multiverse
deb-src http://mirrors.aliyun.com/ubuntu/ bionic-proposed main restricted universe multiverse
deb-src http://mirrors.aliyun.com/ubuntu/ bionic-backports main restricted universe multiverse#网易源
deb http://mirrors.163.com/ubuntu/ bionic main restricted universe multiverse
deb http://mirrors.163.com/ubuntu/ bionic-security main restricted universe multiverse
deb http://mirrors.163.com/ubuntu/ bionic-updates main restricted universe multiverse
deb http://mirrors.163.com/ubuntu/ bionic-proposed main restricted universe multiverse
deb http://mirrors.163.com/ubuntu/ bionic-backports main restricted universe multiverse
deb-src http://mirrors.163.com/ubuntu/ bionic main restricted universe multiverse
deb-src http://mirrors.163.com/ubuntu/ bionic-security main restricted universe multiverse
deb-src http://mirrors.163.com/ubuntu/ bionic-updates main restricted universe multiverse
deb-src http://mirrors.163.com/ubuntu/ bionic-proposed main restricted universe multiverse
deb-src http://mirrors.163.com/ubuntu/ bionic-backports main restricted universe multiverse#清华源
deb https://mirrors.tuna.tsinghua.edu.cn/ubuntu/ bionic main restricted universe multiverse
deb-src https://mirrors.tuna.tsinghua.edu.cn/ubuntu/ bionic main restricted universe multiverse
deb https://mirrors.tuna.tsinghua.edu.cn/ubuntu/ bionic-updates main restricted universe multiverse
deb-src https://mirrors.tuna.tsinghua.edu.cn/ubuntu/ bionic-updates main restricted universe multiverse
deb https://mirrors.tuna.tsinghua.edu.cn/ubuntu/ bionic-backports main restricted universe multiverse
deb-src https://mirrors.tuna.tsinghua.edu.cn/ubuntu/ bionic-backports main restricted universe multiverse
deb https://mirrors.tuna.tsinghua.edu.cn/ubuntu/ bionic-security main restricted universe multiverse
deb-src https://mirrors.tuna.tsinghua.edu.cn/ubuntu/ bionic-security main restricted universe multiverse
deb https://mirrors.tuna.tsinghua.edu.cn/ubuntu/ bionic-proposed main restricted universe multiverse
deb-src https://mirrors.tuna.tsinghua.edu.cn/ubuntu/ bionic-proposed main restricted universe multiverse##中科大源
deb https://mirrors.ustc.edu.cn/ubuntu/ bionic main restricted universe multiverse
deb-src https://mirrors.ustc.edu.cn/ubuntu/ bionic main restricted universe multiverse
deb https://mirrors.ustc.edu.cn/ubuntu/ bionic-updates main restricted universe multiverse
deb-src https://mirrors.ustc.edu.cn/ubuntu/ bionic-updates main restricted universe multiverse
deb https://mirrors.ustc.edu.cn/ubuntu/ bionic-backports main restricted universe multiverse
deb-src https://mirrors.ustc.edu.cn/ubuntu/ bionic-backports main restricted universe multiverse
deb https://mirrors.ustc.edu.cn/ubuntu/ bionic-security main restricted universe multiverse
deb-src https://mirrors.ustc.edu.cn/ubuntu/ bionic-security main restricted universe multiverse
deb https://mirrors.ustc.edu.cn/ubuntu/ bionic-proposed main restricted universe multiverse
deb-src https://mirrors.ustc.edu.cn/ubuntu/ bionic-proposed main restricted universe multiverse
备份系统原始源
sudo cp /etc/apt/sources.list /etc/apt/sources.list.backup
更改源
sudo gedit /etc/apt/sources.list
将原始内容删除,替换ubuntu18.04源.txt里面的内容
更新源
sudo apt-get update
安装ifconfig指令工具包
sudo apt install net-tools
安装vim工具包
sudo apt install vim
安装支持mptcp内版本的内核
软件包下载地址
Releases · multipath-tcp/mptcp (github.com)![]() https://github.com/multipath-tcp/mptcp/releases
https://github.com/multipath-tcp/mptcp/releases
将软件包
linux-headers-5.4.230.mptcp_20230203134326-1_amd64.deb
linux-libc-dev_20230203134326-1_amd64.deb
linux-image-5.4.230.mptcp_20230203134326-1_amd64.deb
linux-mptcp_v0.96_20230203134326-1_all.deb
拷贝到ubuntu系统里面,然后执行安装
安装指令
解压软件包
sudo dpkg -i linux*.deb
安装软件包
sudo apt-get install –f
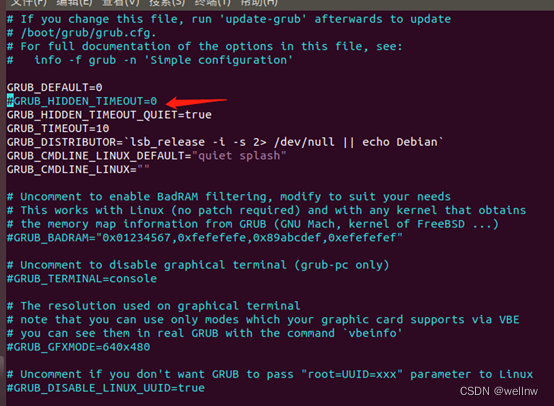
开启开机选择内核版本选项
打开/etc/default/grub文件
注释掉#GRUB_HIDDEN_TIMEOUT=0
更新grub
root@w0425-virtual-machine:/home/w0425/mptcp/5.4# sudo update-grub
Generating grub configuration file ...
Found linux image: /boot/vmlinuz-5.4.230.mptcp
Found initrd image: /boot/initrd.img-5.4.230.mptcp
Found linux image: /boot/vmlinuz-4.19.234.mptcp
Found initrd image: /boot/initrd.img-4.19.234.mptcp
Found linux image: /boot/vmlinuz-4.15.0-20-generic
Found initrd image: /boot/initrd.img-4.15.0-20-generic
Found memtest86+ image: /boot/memtest86+.elf
Found memtest86+ image: /boot/memtest86+.bin
Done
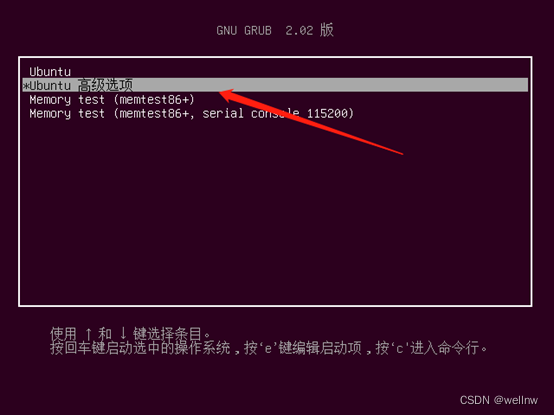
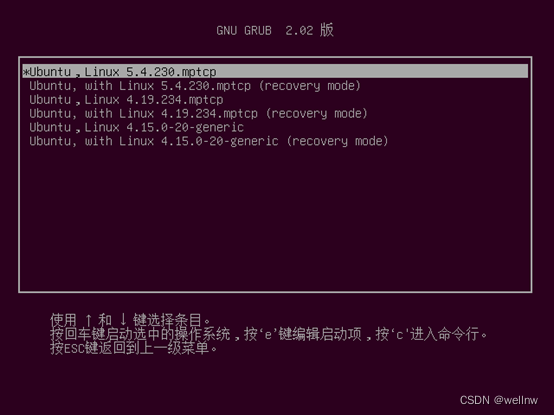
重启设备,选择支持mptcp版本内核
重启之后会自动进入内核选择界面,按键盘的上下键选择Ubuntu高级选项(Advanced options for Ubuntu),然后回车进入内核选择界面,选择带mptcp的内核版本,然后回车启动
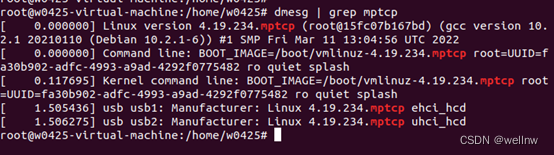
确认内核支持mptcp方法
关闭mptcp_checksum选择
echo 0 > /proc/sys/net/mptcp/mptcp_checksum
开启debug
echo 1 > /proc/sys/net/mptcp/mptcp_debug
查看mptcp是否默认开启,为1表示开启
root@w0425-virtual-machine:/home/w0425# cat /proc/sys/net/mptcp/mptcp_enabled
1
开启和关闭mptcp方法
开启
echo 1 > /proc/sys/net/mptcp/mptcp_enabled
关闭
echo 0 > /proc/sys/net/mptcp/mptcp_enabled
安装测试工具
Iperf & tcpdump
sudo apt-get install iperf iperf3 tcpdump
git
sudo apt-get install git
curl
sudo apt-get install curl
mptcpd
电脑浏览器手动下载
https://github.com/multipath-tcp/mptcpd/archive/refs/tags/v0.12.tar.gz
mptcpd-0.12.tar.gz
编译安装mptcpd
安装软件包依赖工具
sudo apt-get -y install autoconf automake libtool autoconf-archive pkg-config
安装ell工具
git clone git://git.kernel.org/pub/scm/libs/ell/ell.git
git checkout 0.56
cd ell
./bootstrap
./configure
make install
安装mptcpd
拷贝mptcpd-0.12.tar.gz到ubuntu
解压
tar –xvf mptcpd-0.12.tar.gz
编译安装
cd mptcpd-0.12
./bootstrap
./configure
mke install
检查是否安装成功
root@w0425-virtual-machine:/home/w0425/mptcp/mptcpd-0.12# mptcpize
root@w0425-virtual-machine:/home/w0425/mptcp/mptcpd-0.12# mptcpize
Usage: mptcpize CMD
mptcpize - a tool to enable MPTCP usage on unmodified legacy servicesAvailable CMDs:run [-d] prog [<args>]    Run target program with specifiedarguments, forcing MPTCP socket usageinstead of TCP.  If the '-d' argumentis provided, dump messages on stderrwhen a TCP socket is forced to MPTCP.enable <unit>             Update the systemd <unit>, forcingthe given service to run under theabove launcher.disable <unit>            Update the systemd <unit>, removingthe above launcher.Report bugs to <mptcp@lists.linux.dev>.
Ubuntu配置
网卡设置
需要实体网卡,不能使用nat模式,nat模式会出现mptcp异常
查看内核是否启动mptcp

关闭checksum
默认mptcp配置如下,需要手动关闭checksum

需要确认net.mptcp.mptcp_enabled=1
指令如下:
sysctl –w net.mptcp.mptcp_checksum=0
启动tcpdump
tcpdump –ni any port 8888 –vvvv &
启动iperf
mptcpize run iperf –c 192.168.1.1 –p 8888 –P 2 –t 30 –i 1
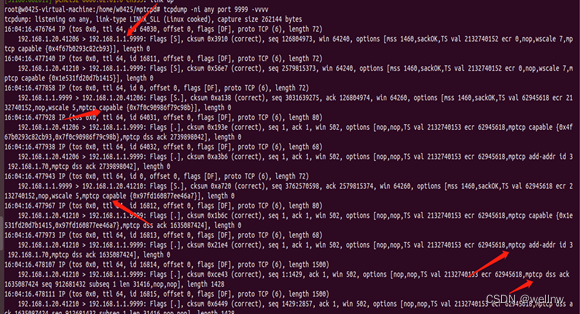
抓包结果分析
192.168.1.20 to 192.168.1.1 带有mptcp capable表示客户端请求是支持mptcp的
192.168.1.1 to 192.168.1.20 带有mptcp capable字段表示服务器回复支持mptcp
Tcpdump抓包