来源:《UNITY SHADER入门精要》
文章目录
- 1、代码理解
1、代码理解
我们现在要注意光源的 5 个属性:位置、方向、颜色、强度、衰减。
在理解代码之前,我们依然需要熟悉我们的理论,主要我们要设置两个 Pass,注意它们的不同的特性,和要做的事情。
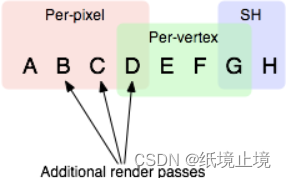
注意,据书中所说,注意两个 Pass 中的 #pragma multi_complie_fwdbase 命令和 #pragma multi_complie_fwdadd 命令,在官方文档中没有说明,但是,实验表明,只有使用了这两个编译指令,我们才可以在相关的 Pass 访问到光照变量、、光照衰减值等等的变量。
Shader "Unity Shaders Book/Chapter 9/Forward Rendering" {Properties {_Diffuse ("Diffuse", Color) = (1, 1, 1, 1)_Specular ("Specular", Color) = (1, 1, 1, 1)_Gloss ("Gloss", Range(8.0, 256)) = 20}SubShader {Tags { "RenderType"="Opaque" }Pass {// Pass for ambient light & first pixel light (directional light)Tags { "LightMode"="ForwardBase" }CGPROGRAM// Apparently need to add this declaration #pragma multi_compile_fwdbase
第 17 句,我们使用了 #pragma 编译命令。#pragma multicomplie_fwdbase 确保我们在 Shader 中使用光照衰减等光照变量可以被正确赋值。这个 Pass 我们称之为 BasePass,正如我们之前概念里提到的那样。
#pragma vertex vert#pragma fragment frag#include "Lighting.cginc"fixed4 _Diffuse;fixed4 _Specular;float _Gloss;struct a2v {float4 vertex : POSITION;float3 normal : NORMAL;};struct v2f {float4 pos : SV_POSITION;float3 worldNormal : TEXCOORD0;float3 worldPos : TEXCOORD1;};v2f vert(a2v v) {v2f o;o.pos = UnityObjectToClipPos(v.vertex);o.worldNormal = UnityObjectToWorldNormal(v.normal);o.worldPos = mul(unity_ObjectToWorld, v.vertex).xyz;return o;}fixed4 frag(v2f i) : SV_Target {fixed3 worldNormal = normalize(i.worldNormal);fixed3 worldLightDir = normalize(_WorldSpaceLightPos0.xyz);fixed3 ambient = UNITY_LIGHTMODEL_AMBIENT.xyz;fixed3 diffuse = _LightColor0.rgb * _Diffuse.rgb * max(0, dot(worldNormal, worldLightDir));fixed3 viewDir = normalize(_WorldSpaceCameraPos.xyz - i.worldPos.xyz);fixed3 halfDir = normalize(worldLightDir + viewDir);fixed3 specular = _LightColor0.rgb * _Specular.rgb * pow(max(0, dot(worldNormal, halfDir)), _Gloss);fixed atten = 1.0;return fixed4(ambient + (diffuse + specular) * atten, 1.0);}ENDCG}
所有的工作都在片元着色器中完成,顶点着色器只是在做了最简单的坐标转换而已。我们这里依然使用了 _LightColor0 来获取光源的强度和 _WorldSpaceLightPos0 来获取场景中的位置。平行光的强度不会衰减,所以,我们这里 atten 赋值为1。
如果一个场景中包含了多个平行光,Unity 会选择最亮的平行光传递给 Base Pass 进行逐像素处理,其他的平行光会按照逐顶点活在 Additional Pass 中按照住像素的方式处理。
Pass {// Pass for other pixel lightsTags { "LightMode"="ForwardAdd" }Blend One OneCGPROGRAM// Apparently need to add this declaration#pragma multi_compile_fwdadd
我们第二个 Pass ,按照理论知识,第 3 行,我们定义为 Addtional Pass,为此,我们首先需要设置 Pass 的渲染路径标签:"LightMode" = "ForwardAdd"。
第 5 行,我们使用 Blend One One 命令来对结果进行混合,而亲测,选择更容易理解的 Blend SrcAlpha DstAlpha 也能得到正确的效果。
第10 行,我们还要给给出宏指令 #prgma multi_complie_fwdadd 指令,这样才能保证我们在 Addtional Pass 中获得正确的光照变量。
#pragma vertex vert#pragma fragment frag#include "Lighting.cginc"#include "AutoLight.cginc"fixed4 _Diffuse;fixed4 _Specular;float _Gloss;struct a2v {float4 vertex : POSITION;float3 normal : NORMAL;};struct v2f {float4 pos : SV_POSITION;float3 worldNormal : TEXCOORD0;float3 worldPos : TEXCOORD1;};v2f vert(a2v v) {v2f o;o.pos = UnityObjectToClipPos(v.vertex);o.worldNormal = UnityObjectToWorldNormal(v.normal);o.worldPos = mul(unity_ObjectToWorld, v.vertex).xyz;return o;}
同样,顶点着色器做的事情几乎就是常规的操作。
fixed4 frag(v2f i) : SV_Target {fixed3 worldNormal = normalize(i.worldNormal);#ifdef USING_DIRECTIONAL_LIGHTfixed3 worldLightDir = normalize(_WorldSpaceLightPos0.xyz);#elsefixed3 worldLightDir = normalize(_WorldSpaceLightPos0.xyz - i.worldPos.xyz);#endiffixed3 diffuse = _LightColor0.rgb * _Diffuse.rgb * max(0, dot(worldNormal, worldLightDir));fixed3 viewDir = normalize(_WorldSpaceCameraPos.xyz - i.worldPos.xyz);fixed3 halfDir = normalize(worldLightDir + viewDir);fixed3 specular = _LightColor0.rgb * _Specular.rgb * pow(max(0, dot(worldNormal, halfDir)), _Gloss);#ifdef USING_DIRECTIONAL_LIGHTfixed atten = 1.0;#else#if defined (POINT)float3 lightCoord = mul(unity_WorldToLight, float4(i.worldPos, 1)).xyz;fixed atten = tex2D(_LightTexture0, dot(lightCoord, lightCoord).rr).UNITY_ATTEN_CHANNEL;#elif defined (SPOT)float4 lightCoord = mul(unity_WorldToLight, float4(i.worldPos, 1));fixed atten = (lightCoord.z > 0) * tex2D(_LightTexture0, lightCoord.xy / lightCoord.w + 0.5).w * tex2D(_LightTextureB0, dot(lightCoord, lightCoord).rr).UNITY_ATTEN_CHANNEL;#elsefixed atten = 1.0;#endif#endifreturn fixed4((diffuse + specular) * atten, 1.0);
}			ENDCG}}FallBack "Specular"
}
代码中共分为两个部分,第一个部分,第 3-13 行,我们进行第一个部分的处理:
首先,我们仍然使用 _LightColor0 来得到光源的颜色和强度。我们使用 宏定义 #ifdef USING_DIRECTIONAL_LIGHT 来确定当前是否是平行光。因为,如果 Pass 处理的光源是萍乡光,那么 Unity 底层就会定义 USING_DIRECTIONAL_LIGHT。如果是平行光,那么可以直接使用 _WorldSpaceLightPos0.xyz 得到光源方向。如果是点光源或者聚光灯的话,那么 _WorldSpaceLightPos0.xyz表示的是世界空间下光源的位置。
第二个部分,第 15-27 行,我们处理不同光源的衰减,如果是平行光的话,那 atten = 1 那就不衰减。如果是点光源或聚光灯,处理更加复杂,本来会涉及大量的开根号、除法等运算,但是为了节省效率,Unity 选择了使用一张纹理作为查找表(Lookup Table, LUT),对这个表取样,以获得光源的衰减值。
例子中的场景有 5 个光源,其中 1 个是平行光,其他 4 个都是点光源。平行光会按照 Base Pass 逐像素的方式处理,其他四个点光源都会按照 Addtional Pass 中逐像素的方式处理,每一个光源都会调用一次 Additional Pass。
但是如果我们手动把场景中的所有光源设置为 Not Important 那么,因为没有在 Bass Pass 中计算逐顶点 和 SH光源,因此场景中的 4 个点光源实际上不会对物体造成任何影响。
