利用科大讯飞语音合成模块SDK实现ROS语音交互
本文内容与CSDN博主「AI Chen」的原创文章相同,可以直接参考原文:https://blog.csdn.net/qq_39400324/article/details/125351722快速链接
本文目的在于记录学习过程,作为笔记。
本文标记为转载。
目录
- 利用科大讯飞语音合成模块SDK实现ROS语音交互
- 参考及引用
- 一、SDK下载
- 二、语音与文字的相互转换
- 1.语音转文字
- Ⅰ对下载的SDK进行编译
- Ⅱ若出现编译报错
- Ⅲ运行语音转文字历程
- 2.文字转语音
- Ⅰ对下载的SDK进行编译
- Ⅱ运行文字转语音历程
- Ⅲ在上述基础上实现自动播放
- 三、ROS的语音与文字转换
- 1.语音输入转为文字
- Ⅰ创建工作空间
- Ⅱ修改代码文件
- Ⅲ配置编译文件
- Ⅳ运行代码程序
- 2.文字输入转为语音
- Ⅰ创建工作空间
- Ⅱ修改代码文件
- Ⅲ配置编译文件
- Ⅳ运行代码程序
- 3.使用launch文件将语音与文字实现相互转换
- Ⅰ介绍
- Ⅱ建立launch文件
- Ⅲ运行代码程序
- 四、实现语音交互
- 1.介绍
- 2.修改cpp文件
- 3.配置编译文件
- 4.创建launch文件
- 5.运行代码程序
参考及引用
CSDN博主「AI Chen」的原创文章
本文大部分内容根据CSDN博主「AI Chen」的原创文章(遵循CC 4.0 BY-SA版权协议)所记录的笔记。
原文链接:https://blog.csdn.net/qq_39400324/article/details/125351722快速链接
————————————————————————————————————————————
一、SDK下载
讯飞开放平台:https://www.xfyun.cn/快速链接
控制台——创建新应用——下载Linux MSC

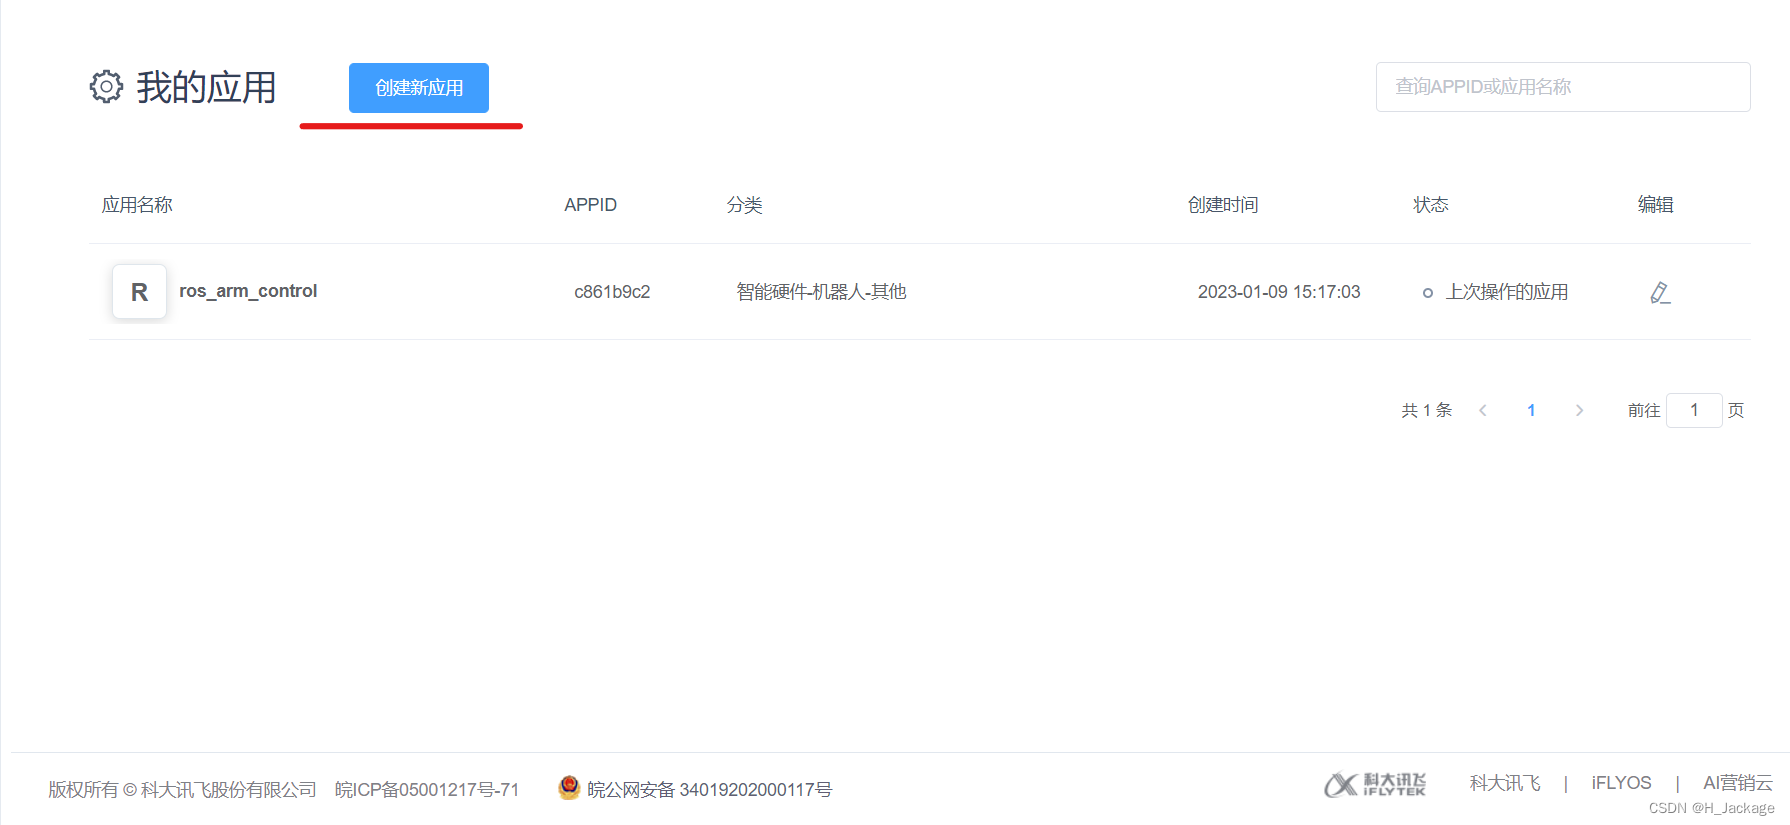
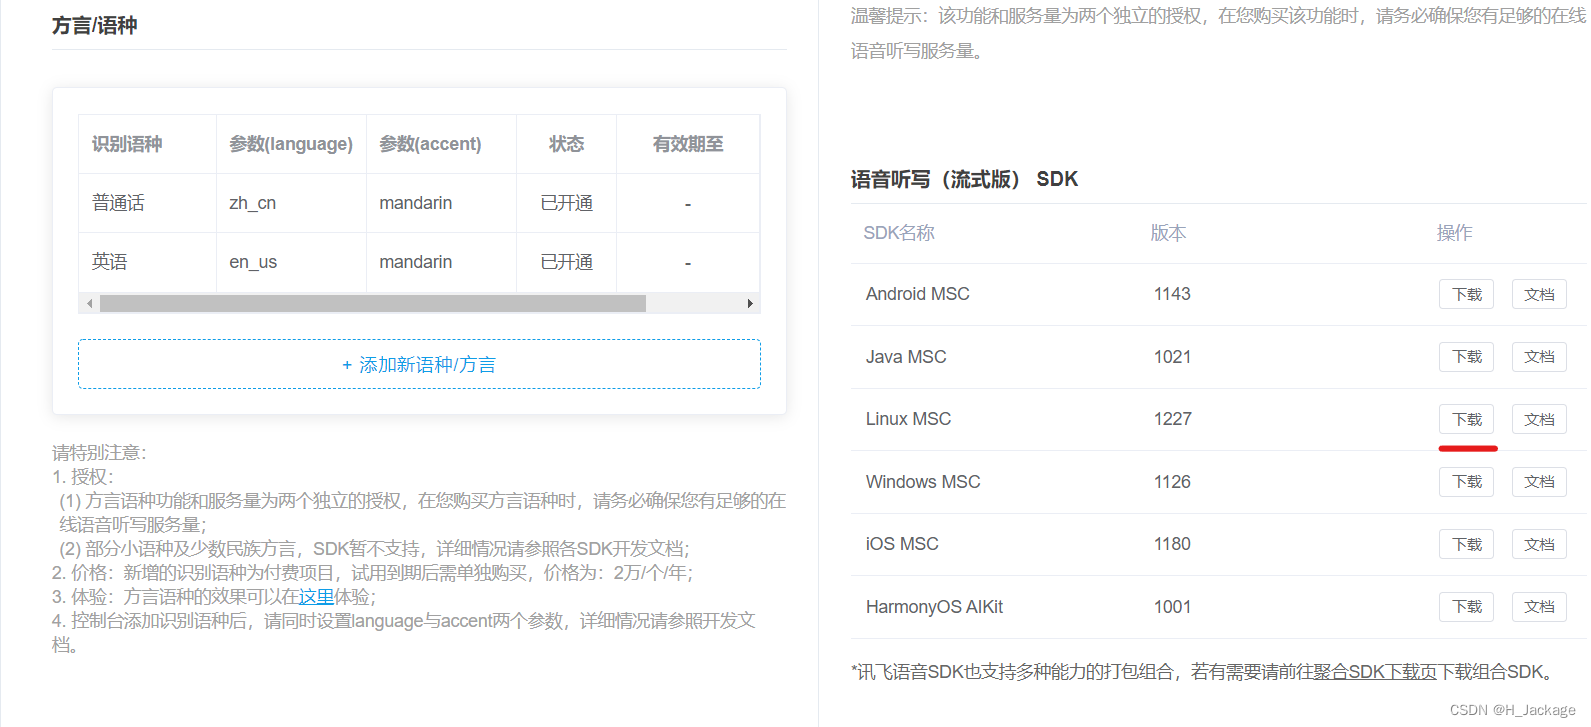
下载后解压,移动到Ubuntu内,我命名为Linux_aisound
二、语音与文字的相互转换
1.语音转文字
Ⅰ对下载的SDK进行编译
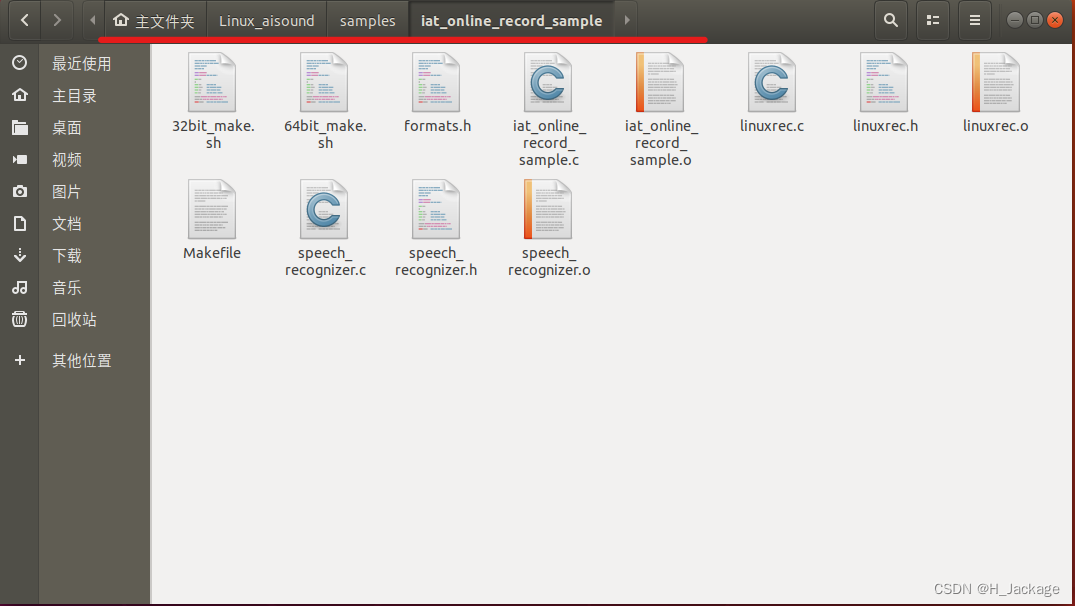
到home/安装Ubuntu的用户名/所下载的SDK包/samples/iat_online_record_sample路径下,使用如下命令进行编译
source 64bit_make.sh
Ⅱ若出现编译报错
若出现编译报错,则使用该命令安装后,再编译一次,具体可参考此处
sudo apt-get install libasound2-dev
Ⅲ运行语音转文字历程
在第Ⅰ步编译完成后,会在home/安装Ubuntu的用户名/所下载的SDK包/bin/路径下产生iat_online_record_sample,在home/安装Ubuntu的用户名/所下载的SDK包/bin/路径下打开终端,运行如下指令:
./iat_online_record_sample
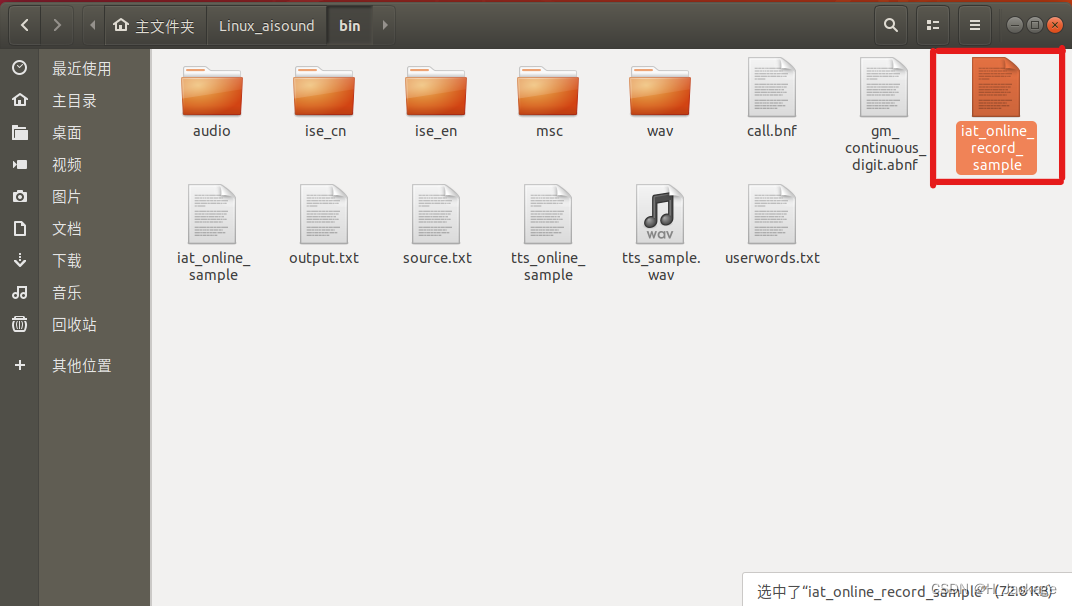
出现如下报错:
./iat_online_record_sample: error while loading shared libraries: libmsc.so: cannot open shared object file: No such file or directory
解决办法:
把home/安装Ubuntu的用户名/所下载的SDK包/bin/libs/x64/路径下的libmsc.so文件复制到usr/lib/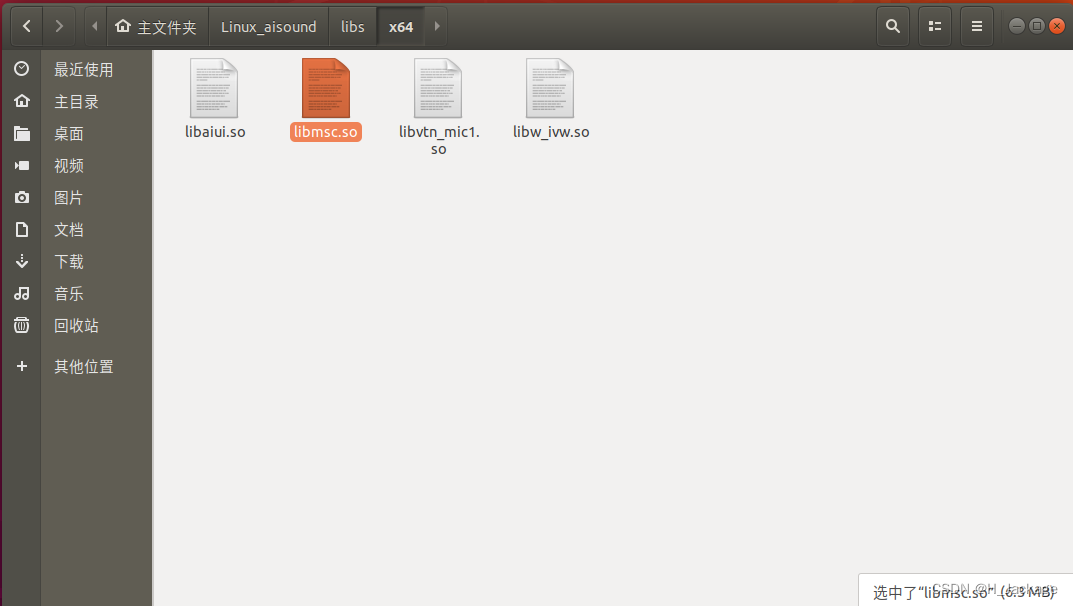
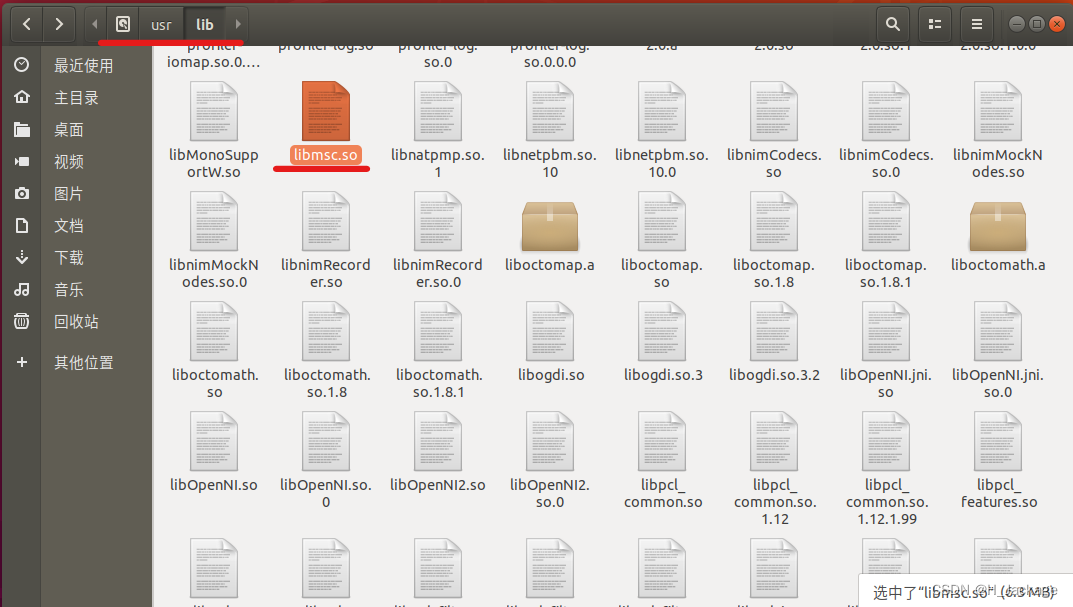
可以参考原作者提供的办法
sudo cp libs/x64/libmsc.so /usr/lib/
sudo ldconfig
我i这里尝试后发现会报错,于是更改了路径后(vm123是我的用户名)就能复制成功,指令如下:
sudo cp /home/vm123/Linux_aisound/libs/x64/libmsc.so /usr/lib
复制完成后,重新运行:
./iat_online_record_sample
并进行配置:
①是否上传使用者的字符库,选择 No
②语音从哪里来,选择From microphone
最后,对着麦克风讲话,将识别并转换为文字。
2.文字转语音
Ⅰ对下载的SDK进行编译
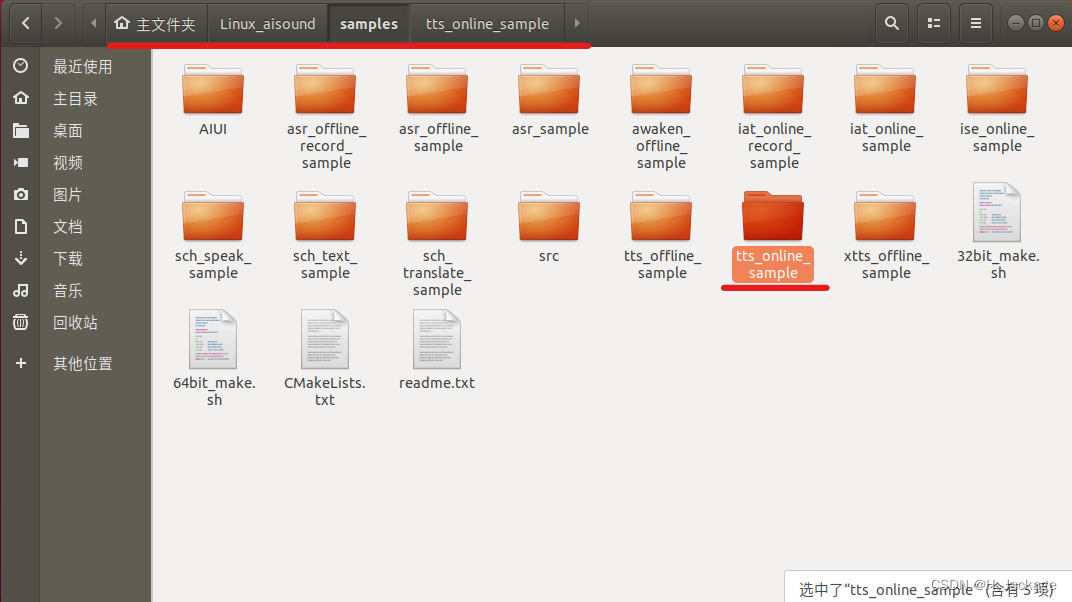
到home/安装Ubuntu的用户名/所下载的SDK包/samples/tts_online_sample路径下,使用如下命令进行编译
source 64bit_make.sh
Ⅱ运行文字转语音历程
在第Ⅰ步编译完成后,会在home/安装Ubuntu的用户名/所下载的SDK包/bin/路径下产生tts_online_sample,在home/安装Ubuntu的用户名/所下载的SDK包/bin/路径下打开终端,运行如下指令:
./tts_online_sample
运行结束后关闭终端,会在home/安装Ubuntu的用户名/所下载的SDK包/bin/路径下生成刚才测试产生的语音。
Ⅲ在上述基础上实现自动播放
在home/安装Ubuntu的用户名/所下载的SDK包/samples/tts_online_sample/路径下修改tts_online_sample.c文件。
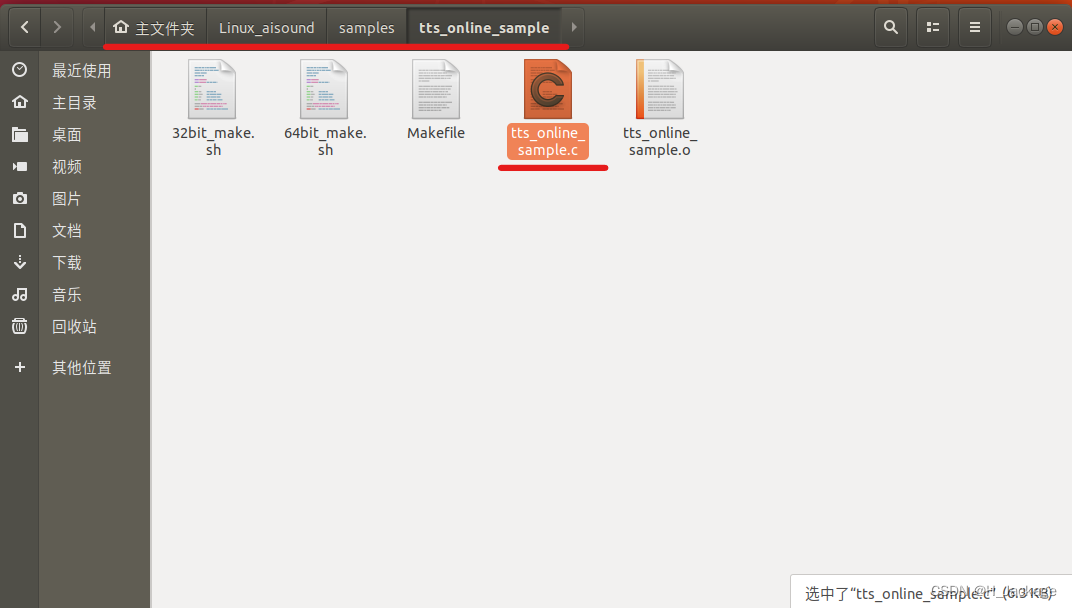
在第174行printf("合成完毕\n");后面,添加如下代码,就可以在合成之后自动播放合成的文件。
popen("play tts_sample.wav","r");
添加完成后需按照上述重新编译。
三、ROS的语音与文字转换
1.语音输入转为文字
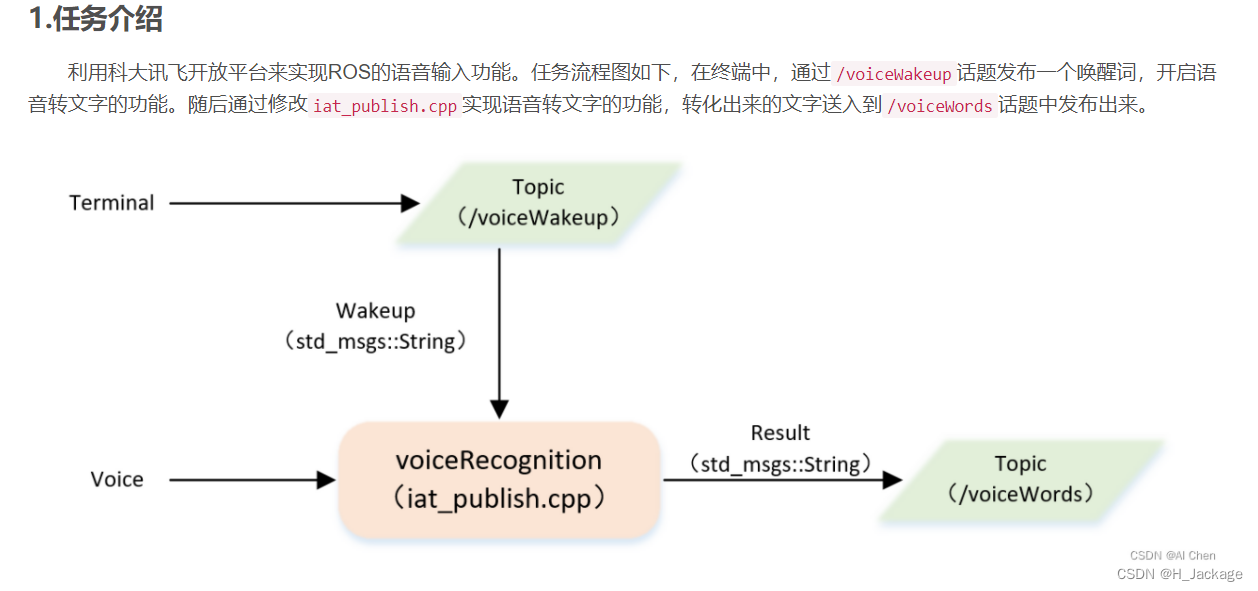
Ⅰ创建工作空间
创建工作空间,命名为catkin_ws_voice_control,在工作空间创建一个功能包,命名为robot_voice,创建功能包的依赖为roscpp std_msgs。
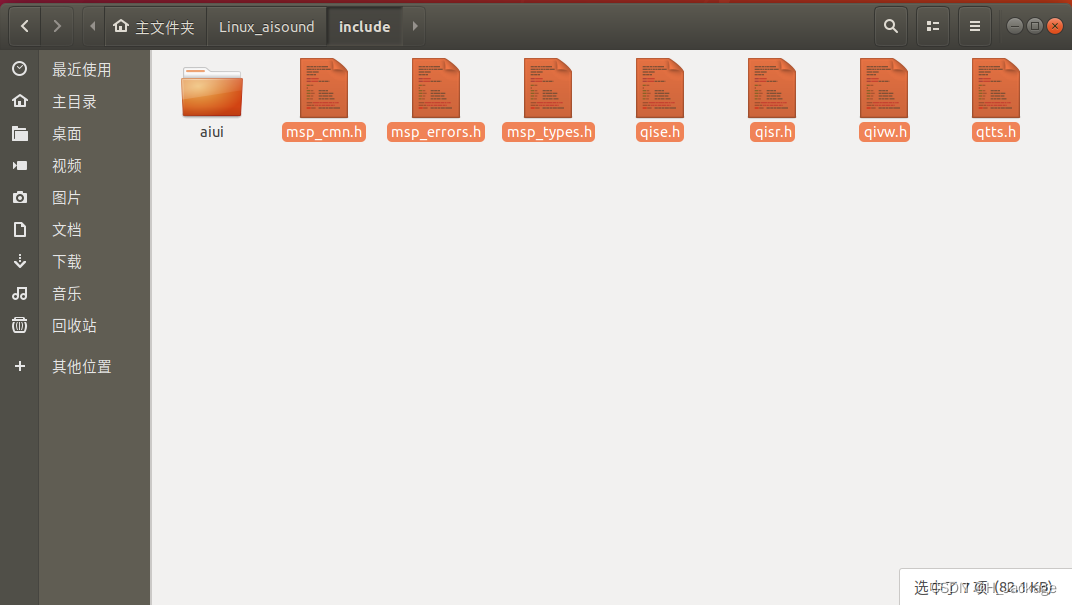
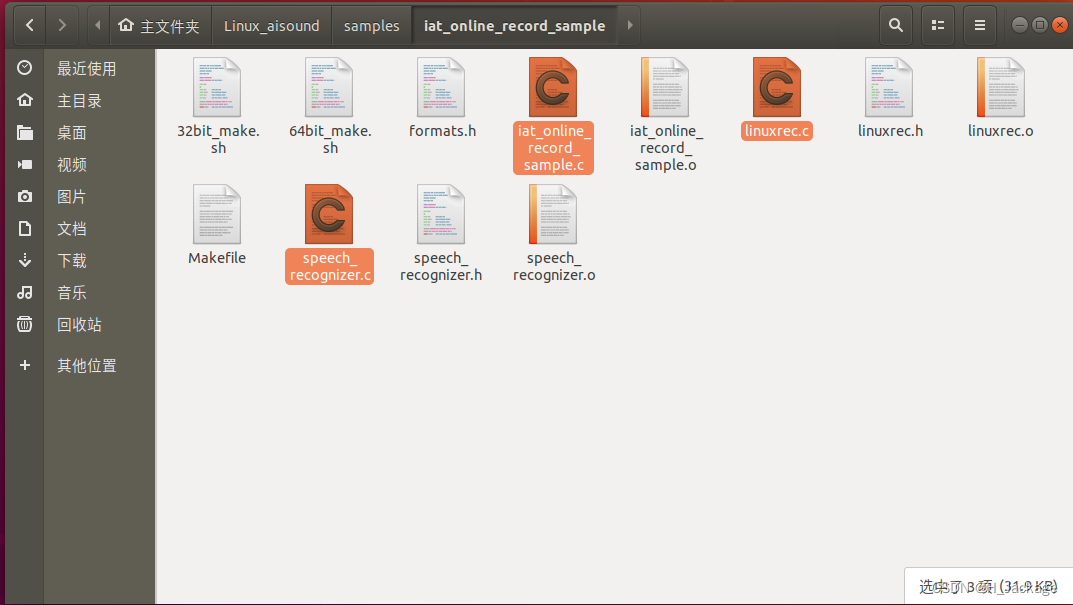
将所下载的语音SDK包/include/路径下的7个.h文件复制到home/安装Ubuntu的用户名/catkin_ws_voice_control/robot_voice/include/robot_voice/路径下。
将所下载的语音SDK包/samples/iat_online_record_sample/路径下的3个.h文件复制到home/安装Ubuntu的用户名/catkin_ws_voice_control/robot_voice/include/robot_voice/路径下。
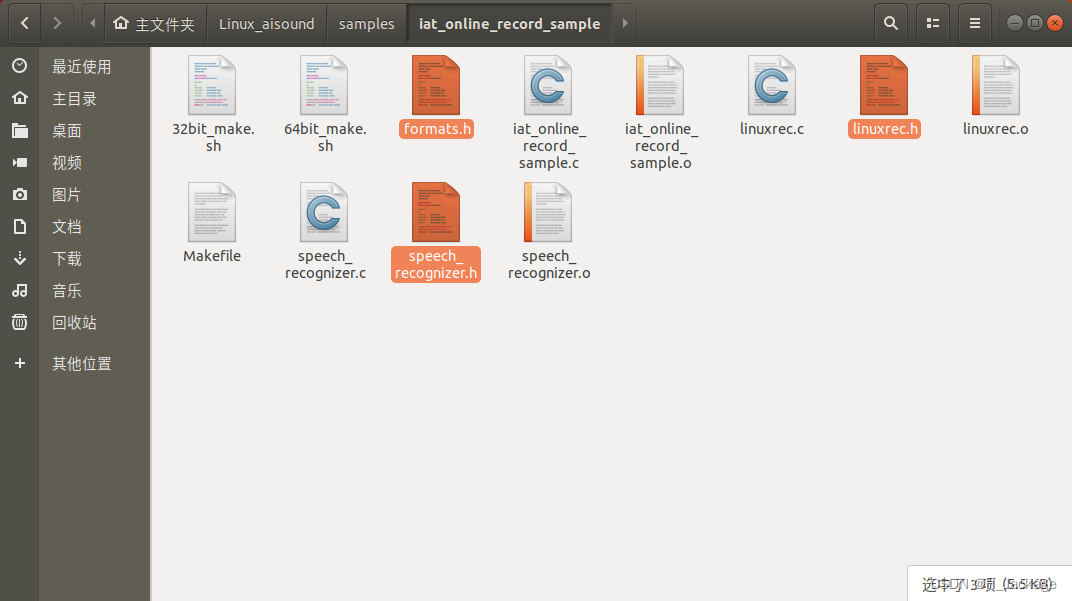
将所下载的语音SDK包/samples/iat_online_record_sample/路径下的3个.c文件复制到home/安装Ubuntu的用户名/catkin_ws_voice_control/src/robot_voice/src/路径下。并把iat_online_record_sample.c改为iat_publish.cpp(注意后缀更改)。
Ⅱ修改代码文件
首先,修改iat_publish.cpp:
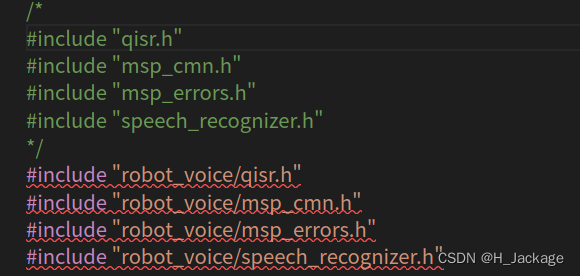
①头文件
将
#include "qisr.h"
#include "msp_cmn.h"
#include "msp_errors.h"
#include "speech_recognizer.h"
改为
#include "robot_voice/qisr.h"
#include "robot_voice/msp_cmn.h"
#include "robot_voice/msp_errors.h"
#include "robot_voice/speech_recognizer.h"
如图所示:
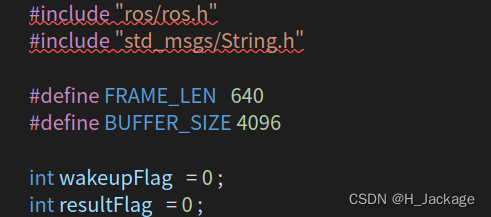
②

#include "ros/ros.h"
#include "std_msgs/String.h"int wakeupFlag   = 0 ;
int resultFlag   = 0 ;
添加后如图:
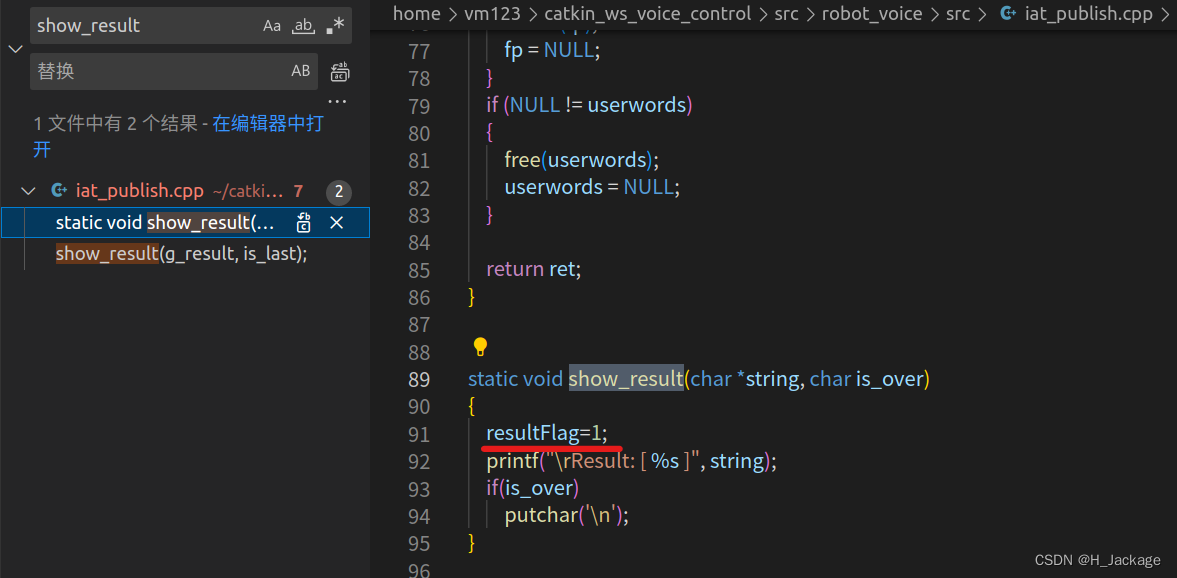
③

resultFlag=1;
④

// 初始化ROSros::init(argc, argv, "voiceRecognition");ros::NodeHandle n;ros::Rate loop_rate(10);// 声明Publisher和Subscriber// 订阅唤醒语音识别的信号ros::Subscriber wakeUpSub = n.subscribe("voiceWakeup", 1000, WakeUp); // 订阅唤醒语音识别的信号 ros::Publisher voiceWordsPub = n.advertise<std_msgs::String>("voiceWords", 1000); ROS_INFO("Sleeping...");int count=0;
⑤
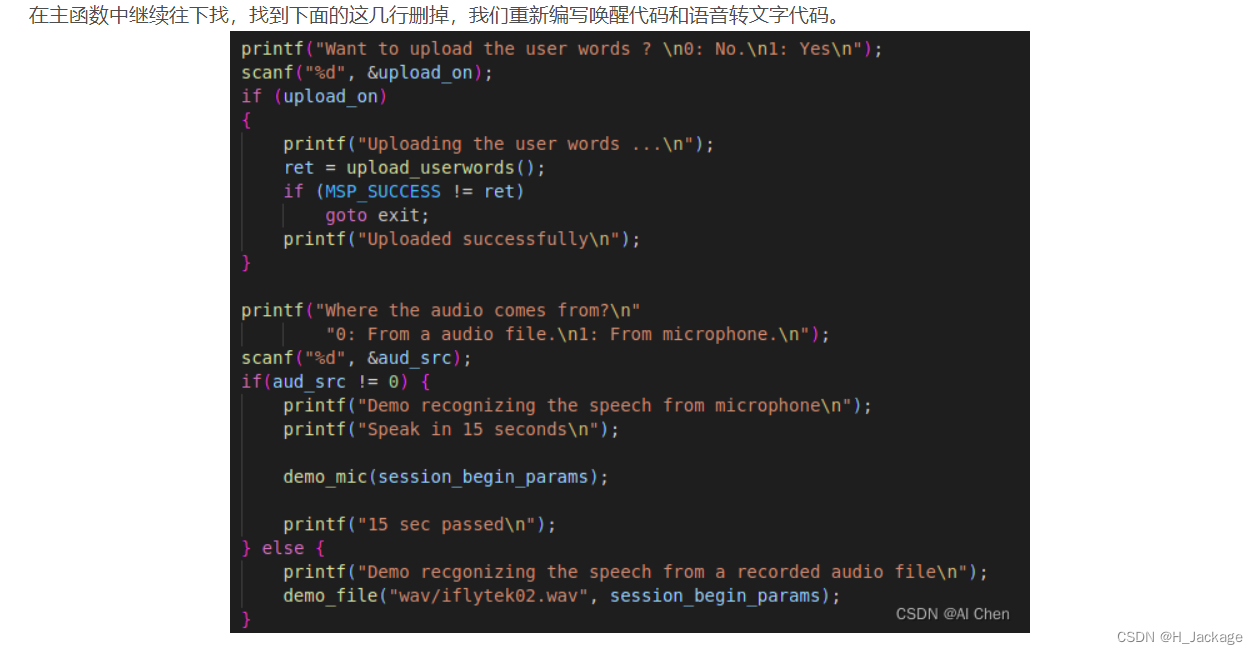

while(ros::ok())
{// 语音识别唤醒     if(wakeupFlag){printf("Demo recognizing the speech from microphone\n");printf("Speak in 8 seconds\n");demo_mic(session_begin_params);printf("8 sec passed\n");wakeupFlag=0;}// 语音识别完成if(resultFlag){resultFlag=0;std_msgs::String msg;msg.data = g_result;voiceWordsPub.publish(msg);}ros::spinOnce();loop_rate.sleep();count++;
}
⑥

void WakeUp(const std_msgs::String::ConstPtr& msg)
{printf("waking up\r\n");usleep(700*1000);wakeupFlag=1;
}
⑦若需要修改15秒的语音转文字为其他时间的语音转文字,则

printf("Demo recognizing the speech from microphone\n");
printf("Speak in 8 seconds\n");printf("Speak in 8 seconds\n");printf("8 sec passed\n");

/* demo 8 seconds recording */
while(i++ < 8)sleep(1);
其次,修改linuxrec.c和speech_recognizer.c:

#include "robot_voice/formats.h"
#include "robot_voice/linuxrec.h"
和
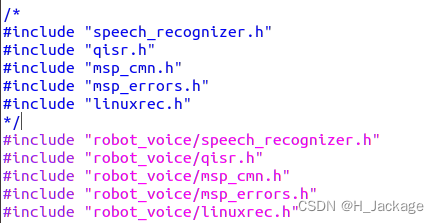
#include "robot_voice/speech_recognizer.h"
#include "robot_voice/qisr.h"
#include "robot_voice/msp_cmn.h"
#include "robot_voice/msp_errors.h"
#include "robot_voice/linuxrec.h"
Ⅲ配置编译文件
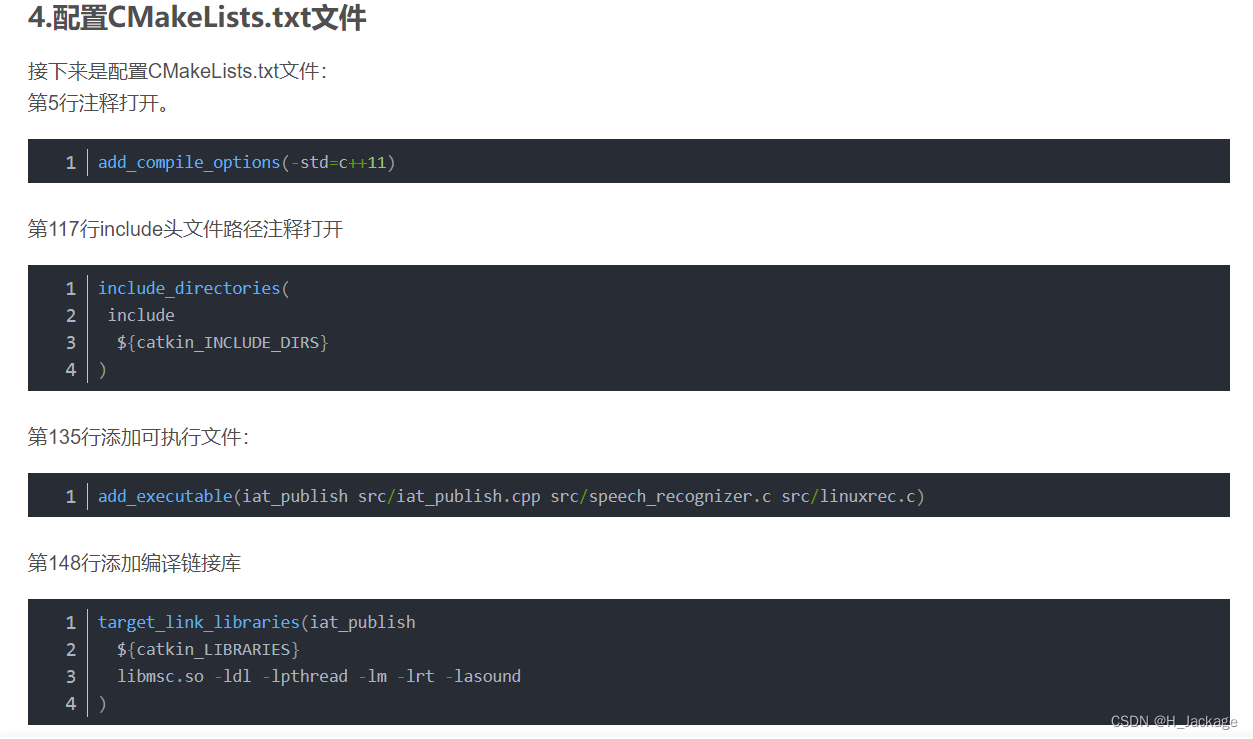
添加可执行文件:
add_executable(iat_publish src/iat_publish.cpp src/speech_recognizer.c src/linuxrec.c)
添加编译连接库:
target_link_libraries(iat_publish${catkin_LIBRARIES}libmsc.so -ldl -lpthread -lm -lrt -lasound
)
Ⅳ运行代码程序
编译功能包
(环境变量)
(运行roscore)
运行代码程序
rosrun robot_voice iat_publish
发布话题
rostopic pub /voiceWakeup std_msgs/String "data: 'input any words'"
2.文字输入转为语音

Ⅰ创建工作空间
将所下载的语音SDK包/samples/tts_online_sample/路径下的tts_online_sample.c文件复制到home/安装Ubuntu的用户名/catkin_ws_voice_control/src/robot_voice/src/路径下。并把tts_online_sample.c改为tts_subscribe.cpp(注意后缀更改)。
Ⅱ修改代码文件
修改tts_subscribe.cpp
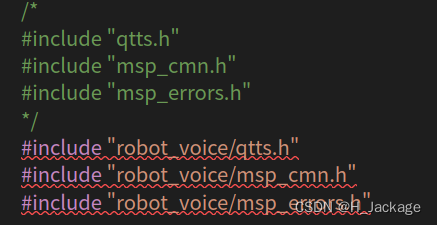
①头文件
将
#include "qtts.h"
#include "msp_cmn.h"
#include "msp_errors.h"
改为
#include "robot_voice/qtts.h"
#include "robot_voice/msp_cmn.h"
#include "robot_voice/msp_errors.h"
如图所示:
②增加ROS头文件
#include "ros/ros.h"
#include "std_msgs/String.h"
③修改代码内容
将如图所示内容删除(main函数内)

④在主函数内插入ros句柄
ros::init(argc,argv,"TextToSpeech");
ros::NodeHandle n;
ros::Subscriber sub =n.subscribe("voiceWords", 1000, voiceWordsCallback);
ros::spin();

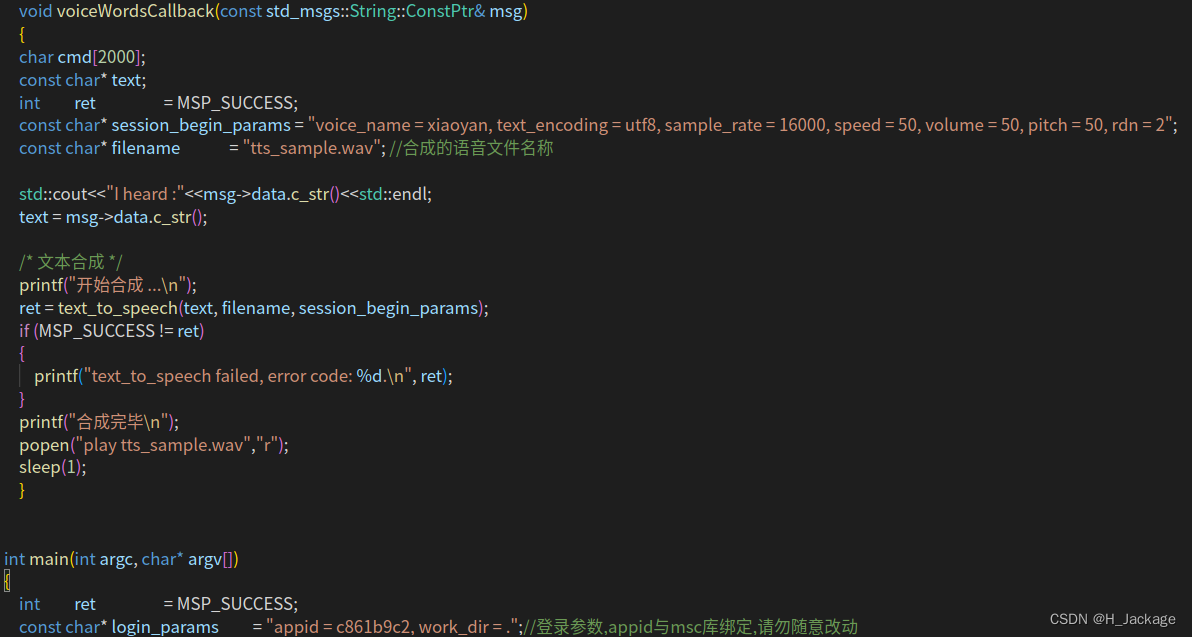
⑤在主函数前边插入文字转语音的回调函数
void voiceWordsCallback(const std_msgs::String::ConstPtr& msg)
{
char cmd[2000];
const char* text;
int         ret                  = MSP_SUCCESS;
const char* session_begin_params = "voice_name = xiaoyan, text_encoding = utf8, sample_rate = 16000, speed = 50, volume = 50, pitch = 50, rdn = 2";
const char* filename             = "tts_sample.wav"; //合成的语音文件名称std::cout<<"I heard :"<<msg->data.c_str()<<std::endl;
text = msg->data.c_str(); /* 文本合成 */
printf("开始合成 ...\n");
ret = text_to_speech(text, filename, session_begin_params);
if (MSP_SUCCESS != ret)
{printf("text_to_speech failed, error code: %d.\n", ret);
}
printf("合成完毕\n");
popen("play tts_sample.wav","r");
sleep(1);
}
⑥注释掉一部分

⑦修复一个错误

void toExit()
{printf("按任意键退出 ...\n");getchar();MSPLogout(); //退出登录
}
Ⅲ配置编译文件
将以下添加至CMakeLists.txt文件
add_executable(tts_subscribe src/tts_subscribe.cpp)
target_link_libraries(tts_subscribe${catkin_LIBRARIES}libmsc.so -ldl -pthread
)
Ⅳ运行代码程序
编译功能包
(环境变量)
(运行roscore)
运行代码程序
rosrun robot_voice tts_subscribe
随后打开另一终端运行
rostopic pub /voiceWords std_msgs/String "data: ' 这是一个测试案例'"
若报错,可自行寻找原因,或使用我运行成功的代码https://blog.csdn.net/m0_64730542/article/details/128792625
3.使用launch文件将语音与文字实现相互转换
Ⅰ介绍
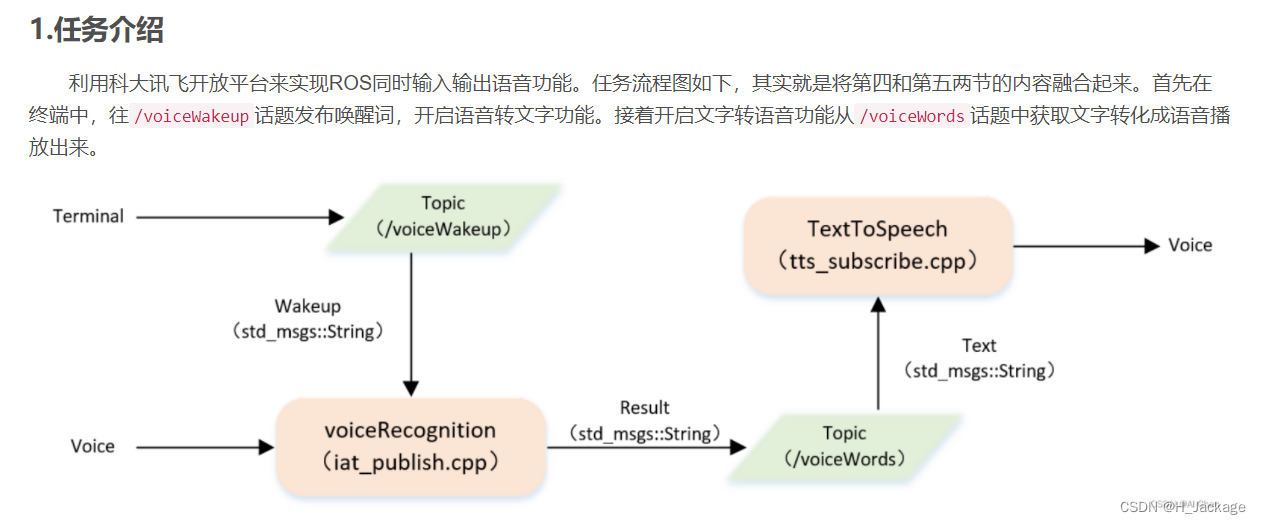
Ⅱ建立launch文件
①在home/安装Ubuntu的用户名/catkin_ws_voice_control/src/robot_voice/路径下创建名为launch的文件。
②新建文本,命名为repeat_voice.launch
内容为
<launch><node name="iat_publish" pkg="robot_voice" type="iat_publish" output="screen"/><node name="tts_subscribe" pkg="robot_voice" type="tts_subscribe" output="screen"/></launch>
roslaunch robot_voice repeat_voice.launch
Ⅲ运行代码程序
四、实现语音交互
1.介绍
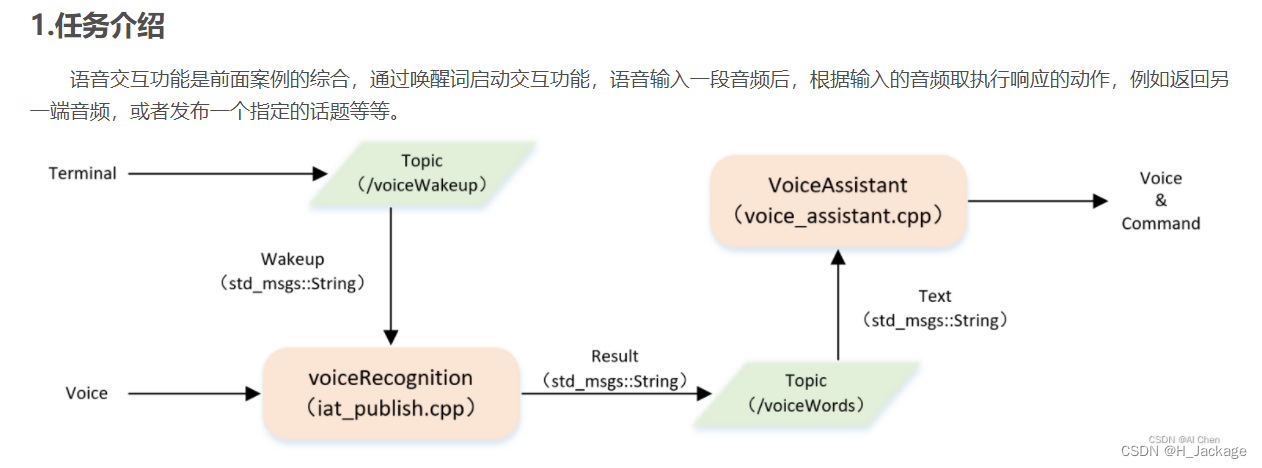
2.修改cpp文件

①添加to_string( )函数
std::string to_string(int val)
{char buf[20];sprintf(buf, "%d", val);return std::string(buf);
}
②修改voiceWordsCallback( )函数
void voiceWordsCallback(const std_msgs::String::ConstPtr& msg)
{char cmd[2000];const char* text;int         ret                  = MSP_SUCCESS;const char* session_begin_params = "voice_name = xiaoyan, text_encoding = utf8, sample_rate = 16000, speed = 50, volume = 50, pitch = 50, rdn = 2";const char* filename             = "tts_sample.wav"; //合成的语音文件名称std::cout<<"I heard :"<<msg->data.c_str()<<std::endl;std::string dataString = msg->data;if(dataString.find("你是谁") != std::string::npos || dataString.find("名字") != std::string::npos){char nameString[100] = "我是你的语音小助手,你可以叫我小R";text = nameString;std::cout<<text<<std::endl;}else if(dataString.find("你几岁了") != std::string::npos || dataString.find("年龄") != std::string::npos){char eageString[100] = "我已经四岁了,不再是两三岁的小孩子了";text = eageString;std::cout<<text<<std::endl;}else if(dataString.find("你可以做什么") != std::string::npos || dataString.find("干什么") != std::string::npos){char helpString[100] = "你可以问我现在时间";text = helpString;std::cout<<text<<std::endl;}else if(dataString.find("时间") != std::string::npos){//获取当前时间struct tm *ptm; long ts; ts = time(NULL); ptm = localtime(&ts); std::string string = "现在时间" + to_string(ptm-> tm_hour) + "点" + to_string(ptm-> tm_min) + "分";char timeString[40] = {0};string.copy(timeString, sizeof(string), 0);text = timeString;std::cout<<text<<std::endl;}else{text = msg->data.c_str();}/* 文本合成 */printf("开始合成 ...\n");ret = text_to_speech(text, filename, session_begin_params);if (MSP_SUCCESS != ret){printf("text_to_speech failed, error code: %d.\n", ret);}printf("合成完毕\n");popen("play tts_sample.wav","r");sleep(1);
}
3.配置编译文件
在CMakeLists.txt添加
add_executable(voice_assistant src/voice_assistant.cpp)
target_link_libraries(voice_assistant${catkin_LIBRARIES} libmsc.so -ldl -pthread
)
4.创建launch文件
创建名为voice_assistant.launch的文件,内容为
<launch><node name="iat_publish" pkg="robot_voice" type="iat_publish" output="screen"/><node name="voice_assistant" pkg="robot_voice" type="voice_assistant" output="screen"/>
</launch>
5.运行代码程序
运行
roslaunch robot_voice voice_assistant.launch
然后发布
rostopic pub /voiceWakeup std_msgs/String "data: 'any words'"
即可进行


