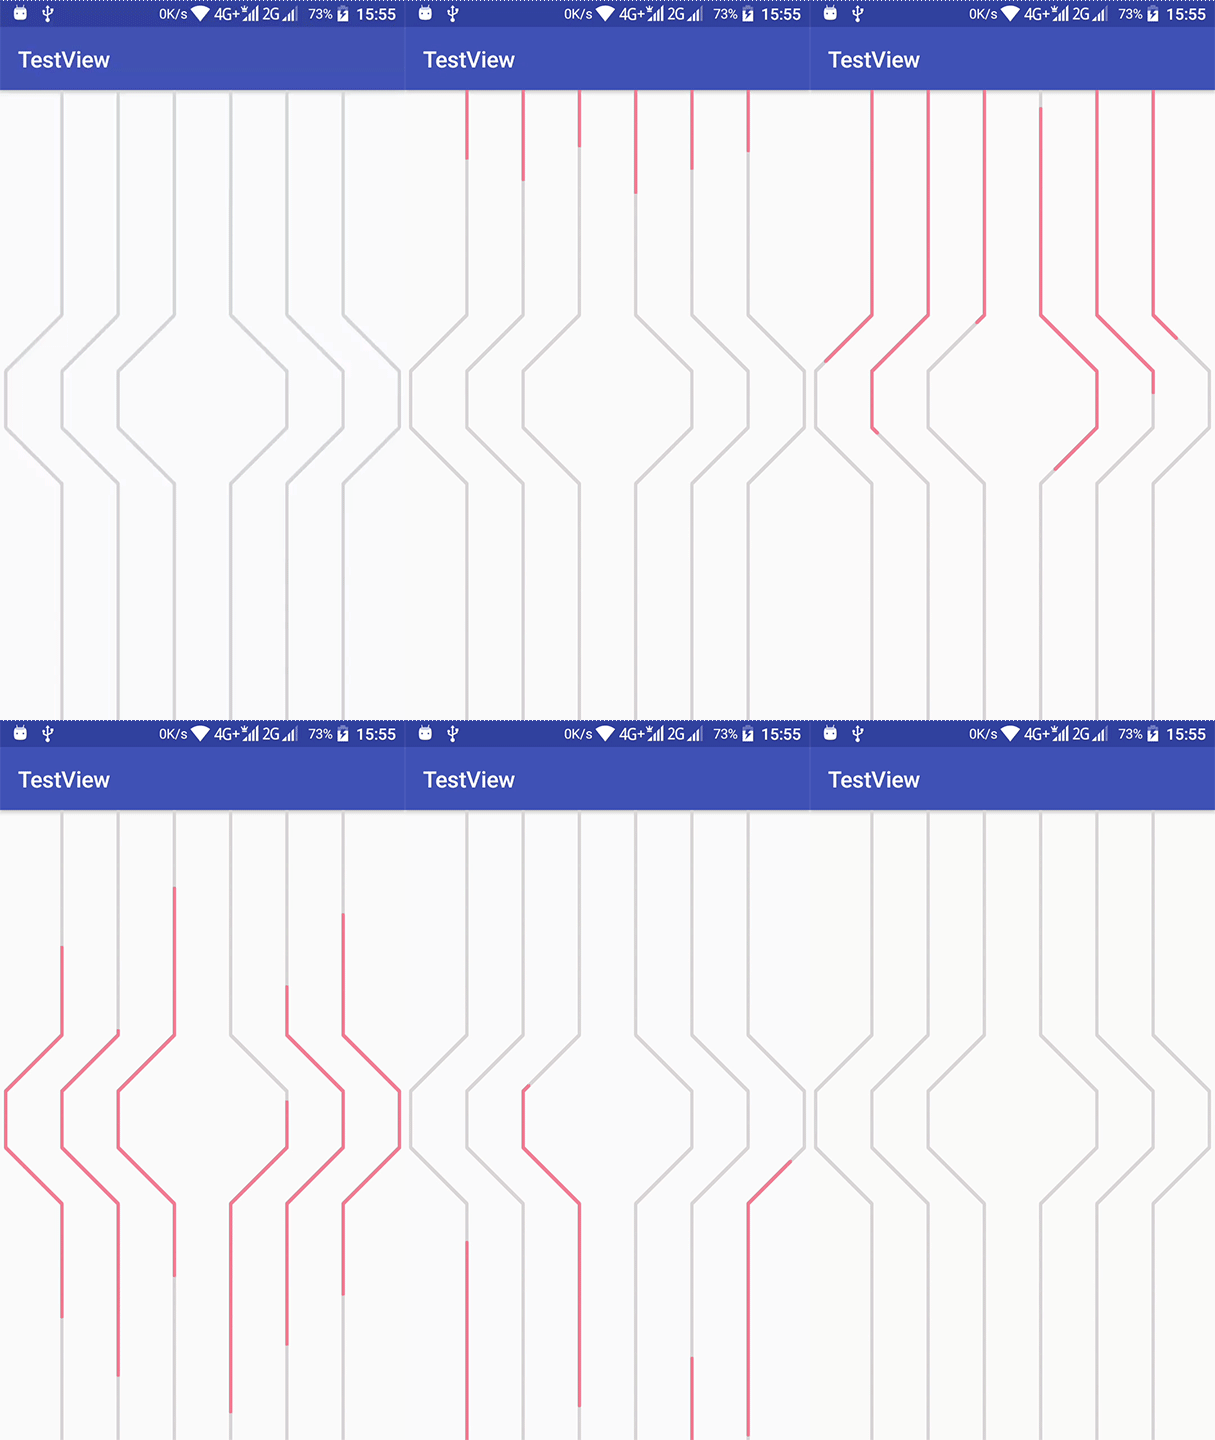
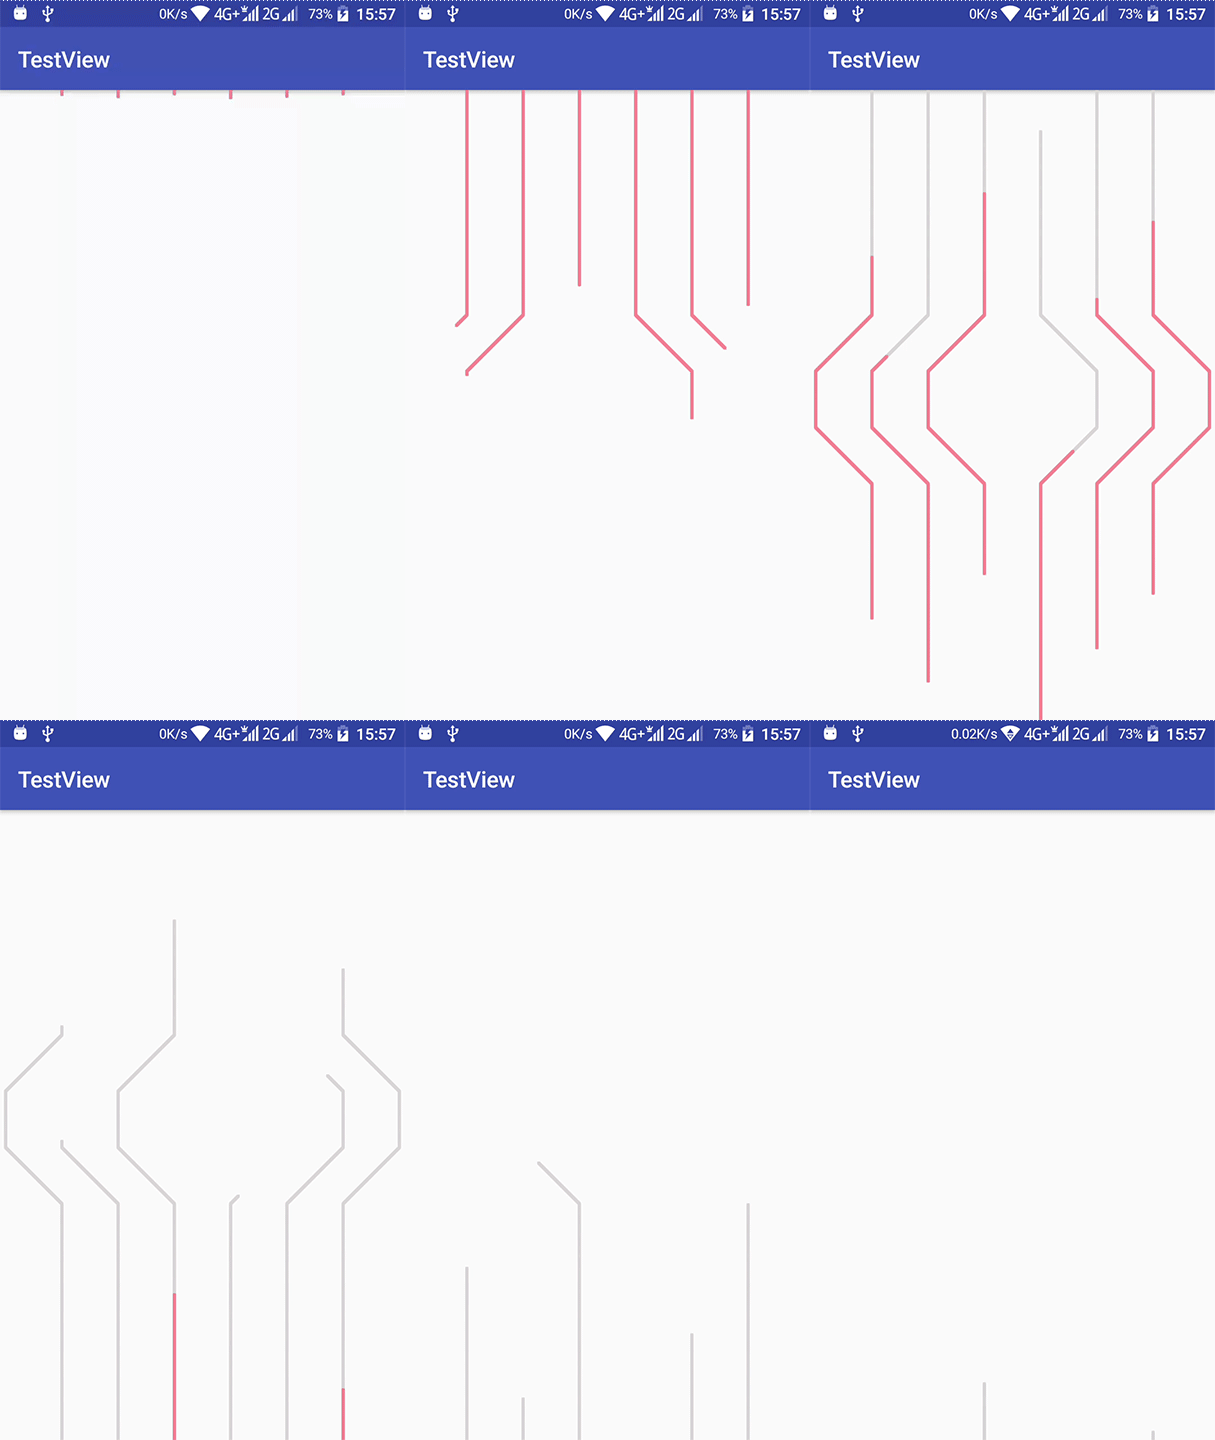
2018/08/08已优化成以下效果:
GitHub:https://github.com/wuyr/PathView
哈哈,注意字眼,本文并不是仿弹幕聊天室,而是弹幕聊天室后面的线条动画。
今天在新版bilibili客户端发现了一个很炫酷的效果:
不过这动画太快了,一闪而过,根本看不清它是怎么样的,不过,别急,我们先来分析一下:这个肯定不是普通的补间动画了,应该是ValueAnimator,(不过知道他是ValueAnimator又有什么用呢?别说,还真有用)我们知道在设置 - 开发人员选项里面有几个关于动画缩放的设置, 而且这个ValueAnimator的时长,也是跟设置里面的 “动画时长缩放” 这个选项有关系的,我们将它设置为缩放10x,再来看看效果:
(由于图片太大了,所以质量上要作些牺牲)
哈哈,动画果然变慢了,这下能看清楚了(不过为什么这个选项能控制我们ValueAnimator的时长呢? 我们要怎样摆脱这个控制呢? 哈哈,这个可以看下我这篇文章:“Android ValueAnimator时长错乱或者不起作用的解决方法以及问题分析”)
看清楚它的效果后,就要想想应该怎样去实现了。我们再回去看一下动画,像进度条吗?好像是有点,不过又不是直线,是直线的话,直接改变起止点就行了,那些曲线会不会是路径呢?哈哈,我觉得应该是吧。
其实我们可以将每一条线当作是一个单独的view,再仔细看一遍动画:
发现它是有两条不同颜色的线条的,先是粉红色先走,然后灰色线条跟尾。
还有两条线是先显示灰色线条,然后粉红色在灰色上面走的。
在线条出现和走完的时候,还会播放一个透明度动画。
那粉红色线条的长度在播放动画中,是会变的,特别是在线条走到终点之后,线条末端的速度加快了
我们先一步步来实现,关于path的动画播放,大家是不是已经想到了5.0系统以下的 PathMeasure 类 和5.0之后 Path 的 approximate 方法呢?我们用这两种方法都是能够获取Path中任何位置的一个点的(SDK中PathInterpolatorCompat这个类就有依赖到这两种方法了,5.0及以上的系统,它用PathInterpolator类,里面即是使用approximate方法,5.0以下的,它用PathInterpolatorApi14类,里面是用PathMeasure来获取数据的)
这次我们不用新的approximate方法了,统一用PathMeasure吧,这样比较方便。
熟悉自定义view的小伙伴们,就会记得Canvas有个drawPoints方法,这个是批量画点的,哈哈,我们正好用到这个方法,来看看它的说明:
/** * Draw a series of points. Each point is centered at the coordinate specified by pts[], and its * diameter is specified by the paint's stroke width (as transformed by the canvas' CTM), with * special treatment for a stroke width of 0, which always draws exactly 1 pixel (or at most 4 * if antialiasing is enabled). The shape of the point is controlled by the paint's Cap type. * The shape is a square, unless the cap type is Round, in which case the shape is a circle. * * @param pts Array of points to draw [x0 y0 x1 y1 x2 y2 ...] * @param offset Number of values to skip before starting to draw. * @param count The number of values to process, after skipping offset of them. Since one point * uses two values, the number of "points" that are drawn is really (count >> 1). * @param paint The paint used to draw the points */ public void drawPoints(@Size(multiple = 2) float[] pts, int offset, int count, @NonNull Paint paint) { super.drawPoints(pts, offset, count, paint); }
直接看这句:
@param pts Array of points to draw [x0 y0 x1 y1 x2 y2 ...]
我们把x,y对应的float数组放进去就行了。
现在画法已经准备好,就差数据了,那么这些数据从哪里来呢?
做过路径动画的小伙伴们会知道PathMeasure类的getPosTan方法:
/*** Pins distance to 0 <= distance <= getLength(), and then computes the* corresponding position and tangent. Returns false if there is no path,* or a zero-length path was specified, in which case position and tangent* are unchanged.** @param distance The distance along the current contour to sample* @param pos If not null, returns the sampled position (x==[0], y==[1])* @param tan If not null, returns the sampled tangent (x==[0], y==[1])* @return false if there was no path associated with this measure object*/public boolean getPosTan(float distance, float pos[], float tan[]) {if (pos != null && pos.length < 2 ||tan != null && tan.length < 2) {throw new ArrayIndexOutOfBoundsException();}return native_getPosTan(native_instance, distance, pos, tan);}
第一个参数就是我们输入路径上的距离,第二个就是要填充(x,y)的数组,第三个参数, tan就是正切了, 我们可以配合Math.atan2这个方法来获取到路径的走向, 也就是角度了, 哈哈, 如果做火车的动画可以用这个. 但是我们这次并不需要用到这个,所以可以直接传null
下面我们来看一下代码怎么写:
private void init(Path path) {final PathMeasure pathMeasure = new PathMeasure(path, false);final float pathLength = pathMeasure.getLength();numPoints = (int) (pathLength / PRECISION) + 1;mData = new float[numPoints * 2];final float[] position = new float[2];int index = 0;for (int i = 0; i < numPoints; ++i) {final float distance = (i * pathLength) / (numPoints - 1);pathMeasure.getPosTan(distance, position, null);mData[index] = position[0];mData[index + 1] = position[1];index += 2;}numPoints = mData.length;}
第10行,我们拿到了当前距离上点的数据,11,12行我们就把它放进了一个数组,最后我们的mData是这样的: {x0, y0, x1, y1, x2, y2, ...},哈哈,这样我们就可以直接画了。
其实这个方法是从SDK里面PathInterpolatorApi14这个类改装过来的,它原来的是x和y分开,我们现在将x,y合到一个数组里面,这样更方便我们后面的调用。
但是那个动画,线条的末端并不是一直在起点的,会跟着头部一起移动的,怎么办呢? 别急,我们有个更方便的方法,哈哈,就是Arrays.copyOfRange,可以用这个方法来裁剪数组的,我们来看下代码:
/*** 拿到start和end之间的x,y数据** @param start 开始百分比* @param end 结束百分比* @return 裁剪后的数据*/float[] getRangeValue(float start, float end) {if (start >= end)return null;int startIndex = (int) (numPoints * start);int endIndex = (int) (numPoints * end);//必须是偶数,因为需要float[]{x,y}这样x和y要配对的if (startIndex % 2 != 0) {//直接减,不用担心 < 0 因为0是偶数,哈哈--startIndex;}if (endIndex % 2 != 0) {//不用检查越界++endIndex;}//根据起止点裁剪return Arrays.copyOfRange(mData, startIndex, endIndex);}
好了,下面看看完整的类,现在基本可以测试下效果了,我们等下先用SeekBar来控制值的变化:
代码都比较简单,就先不写注释了
public class PathView extends View {private Keyframes mKeyframes;private float[] mLightPoints;private float[] mDarkPoints;private int mLightLineColor;private int mDarkLineColor;private Paint mPaint;public PathView(Context context) {this(context, null);}public PathView(Context context, @Nullable AttributeSet attrs) {this(context, attrs, 0);}public PathView(Context context, @Nullable AttributeSet attrs, int defStyleAttr) {super(context, attrs, defStyleAttr);init();}private void init() {//初始化画笔mPaint = new Paint();mPaint.setStyle(Paint.Style.STROKE);mPaint.setAntiAlias(true);//默认颜色mLightLineColor = Color.RED;mDarkLineColor = Color.DKGRAY;}public void setPath(Path path) {mKeyframes = new Keyframes(path);}public void setLineWidth(float width) {mPaint.setStrokeWidth(width);}public void setLightLineColor(@ColorInt int color) {mLightLineColor = color;}public void setDarkLineColor(@ColorInt int color) {mDarkLineColor = color;}public void setLightLineProgress(float start, float end) {setLineProgress(start, end, true);}public void setDarkLineProgress(float start, float end) {setLineProgress(start, end, false);}private void setLineProgress(float start, float end, boolean isLightPoints) {if (mKeyframes == null)throw new IllegalStateException("path not set yet");if (isLightPoints)mLightPoints = mKeyframes.getRangeValue(start, end);elsemDarkPoints = mKeyframes.getRangeValue(start, end);invalidate();}@Overrideprotected void onDraw(Canvas canvas) {mPaint.setColor(mDarkLineColor);if (mDarkPoints != null)canvas.drawPoints(mDarkPoints, mPaint);mPaint.setColor(mLightLineColor);if (mLightPoints != null)canvas.drawPoints(mLightPoints, mPaint);}private static class Keyframes {static final float PRECISION = 1f; //精度我们用1就够了 (数值越少 numPoints 就越大)int numPoints;float[] mData;Keyframes(Path path) {init(path);}void init(Path path) {final PathMeasure pathMeasure = new PathMeasure(path, false);final float pathLength = pathMeasure.getLength();numPoints = (int) (pathLength / PRECISION) + 1;mData = new float[numPoints * 2];final float[] position = new float[2];int index = 0;for (int i = 0; i < numPoints; ++i) {final float distance = (i * pathLength) / (numPoints - 1);pathMeasure.getPosTan(distance, position, null);mData[index] = position[0];mData[index + 1] = position[1];index += 2;}numPoints = mData.length;}/*** 拿到start和end之间的x,y数据** @param start 开始百分比* @param end 结束百分比* @return 裁剪后的数据*/float[] getRangeValue(float start, float end) {if (start >= end)return null;int startIndex = (int) (numPoints * start);int endIndex = (int) (numPoints * end);//必须是偶数,因为需要float[]{x,y}这样x和y要配对的if (startIndex % 2 != 0) {//直接减,不用担心 < 0 因为0是偶数,哈哈--startIndex;}if (endIndex % 2 != 0) {//不用检查越界++endIndex;}//根据起止点裁剪return Arrays.copyOfRange(mData, startIndex, endIndex);}}
随便画个两个Path看下效果:
哈哈,现在基本的效果算是实现了,但是我们还要让它们自己动起来,还有加一个呼吸的效果(其实就是透明度的动画)。
不过这样,他那个动画有10多条线,也就是10多个View同时播放动画的话,配置低的手机可能会有卡顿现象,所以我们应将view改成SurfaceView,然后用线程池来缓解线程的频繁创建、销毁。
一步步来,我们先改成SurfaceView,然后用一个ValueAnimator让它自己动起来先:
public class PathView extends SurfaceView implements SurfaceHolder.Callback, Runnable {private volatile boolean isDrawing, isAnimationStarted;private SurfaceHolder mSurfaceHolder;private Keyframes mKeyframes;private float[] mLightPoints;private float[] mDarkPoints;private int mLightLineColor;private int mDarkLineColor;private ValueAnimator mValueAnimator;private long mAnimationDuration, mAnimationStartDelay;private Paint mPaint;public PathView(Context context) {this(context, null);}public PathView(Context context, AttributeSet attrs) {this(context, attrs, 0);}public PathView(Context context, AttributeSet attrs, int defStyleAttr) {super(context, attrs, defStyleAttr);init();}private void init() {setZOrderOnTop(true);mSurfaceHolder = getHolder();mSurfaceHolder.setFormat(PixelFormat.TRANSLUCENT);mSurfaceHolder.addCallback(this);//初始化画笔mPaint = new Paint();mPaint.setStyle(Paint.Style.STROKE);mPaint.setAntiAlias(true);//默认颜色mLightLineColor = Color.RED;mDarkLineColor = Color.GRAY;mAnimationDuration = 6000L;mAnimationStartDelay = 2000L;}public void setPath(Path path) {mKeyframes = new Keyframes(path);}public void setAnimationDuration(long duration) {mAnimationDuration = duration;}public void setStartDelay(long delay) {mAnimationStartDelay = delay;}public void startAnimation() {if (!isAnimationStarted) {isAnimationStarted = true;mValueAnimator = ValueAnimator.ofFloat(-1.4F, 1F).setDuration(mAnimationDuration);mValueAnimator.setRepeatCount(ValueAnimator.INFINITE);mValueAnimator.setRepeatMode(ValueAnimator.RESTART);mValueAnimator.setStartDelay(mAnimationStartDelay);mValueAnimator.addUpdateListener(new ValueAnimator.AnimatorUpdateListener() {@Overridepublic void onAnimationUpdate(ValueAnimator animation) {float currentProgress = (float) animation.getAnimatedValue();float lightLineStartProgress, lightLineEndProgress;float darkLineStartProgress, darkLineEndProgress;darkLineEndProgress = currentProgress;darkLineStartProgress = lightLineStartProgress = darkLineEndProgress + 1.4F;lightLineEndProgress = darkLineEndProgress + 1;if (lightLineEndProgress < 0) {lightLineEndProgress = 0;}if (darkLineEndProgress < 0) {darkLineEndProgress = 0;}if (lightLineStartProgress > 1) {darkLineStartProgress = lightLineStartProgress = 1;}setLightLineProgress(lightLineStartProgress, lightLineEndProgress);setDarkLineProgress(darkLineStartProgress, darkLineEndProgress);}});mValueAnimator.start();}}public void setLineWidth(float width) {mPaint.setStrokeWidth(width);}public void setLightLineColor(@ColorInt int color) {mLightLineColor = color;}public void setDarkLineColor(@ColorInt int color) {mDarkLineColor = color;}private void setLightLineProgress(float start, float end) {setLineProgress(start, end, true);}private void setDarkLineProgress(float start, float end) {setLineProgress(start, end, false);}private void setLineProgress(float start, float end, boolean isLightPoints) {if (mKeyframes == null)throw new IllegalStateException("path not set yet");if (isLightPoints)mLightPoints = mKeyframes.getRangeValue(start, end);elsemDarkPoints = mKeyframes.getRangeValue(start, end);}@Overridepublic void surfaceCreated(SurfaceHolder holder) {restart();}@Overridepublic void surfaceChanged(SurfaceHolder holder, int format, int width, int height) {}@Overridepublic void surfaceDestroyed(SurfaceHolder holder) {stop();}@Overridepublic void run() {while (isDrawing) {Canvas canvas = mSurfaceHolder.lockCanvas();if (canvas == null) return;canvas.drawColor(Color.TRANSPARENT, PorterDuff.Mode.CLEAR);startDraw(canvas);mSurfaceHolder.unlockCanvasAndPost(canvas);}}private void startDraw(Canvas canvas) {mPaint.setColor(mDarkLineColor);if (mDarkPoints != null) {canvas.drawPoints(mDarkPoints, mPaint);}mPaint.setColor(mLightLineColor);if (mLightPoints != null) {canvas.drawPoints(mLightPoints, mPaint);}}private void restart() {isDrawing = true;new Thread(this).start();}private void stop() {isDrawing = false;if (mValueAnimator != null && mValueAnimator.isRunning())mValueAnimator.cancel();}private static class Keyframes {static final float PRECISION = 1f; //精度我们用1就够了 (数值越少 numPoints 就越大)int numPoints;float[] mData;Keyframes(Path path) {init(path);}void init(Path path) {final PathMeasure pathMeasure = new PathMeasure(path, false);final float pathLength = pathMeasure.getLength();numPoints = (int) (pathLength / PRECISION) + 1;mData = new float[numPoints * 2];final float[] position = new float[2];int index = 0;for (int i = 0; i < numPoints; ++i) {final float distance = (i * pathLength) / (numPoints - 1);pathMeasure.getPosTan(distance, position, null);mData[index] = position[0];mData[index + 1] = position[1];index += 2;}numPoints = mData.length;}/*** 拿到start和end之间的x,y数据** @param start 开始百分比* @param end   结束百分比* @return 裁剪后的数据*/float[] getRangeValue(float start, float end) {int startIndex = (int) (numPoints * start);int endIndex = (int) (numPoints * end);//必须是偶数,因为需要float[]{x,y}这样x和y要配对的if (startIndex % 2 != 0) {//直接减,不用担心 < 0  因为0是偶数,哈哈--startIndex;}if (endIndex % 2 != 0) {//不用检查越界++endIndex;}//根据起止点裁剪return startIndex > endIndex ? Arrays.copyOfRange(mData, endIndex, startIndex) : null;}}
}
我们来看看效果:
虽然效果是差不多了,但是看上去太生硬,没有那种橡筋的感觉,我们再来认真观察一下bilibili的效果:
嗯,那粉红线条确实有一种像是被拉扯的感觉: 一开始线头走得比较快,线尾慢,接近终点的时候,线头变慢,然后线尾加速。而底部的灰色线条则走的比较平稳。
我们改一下startAnimation方法:
    public void startAnimation() {if (mValueAnimator != null && mValueAnimator.isRunning())mValueAnimator.cancel();
//        底部灰色线条向后加长到原Path的60%mValueAnimator = ValueAnimator.ofFloat(-.6F, 1).setDuration(mAnimationDuration);
//        先不循环
//        mValueAnimator.setRepeatCount(ValueAnimator.INFINITE);
//        mValueAnimator.setRepeatMode(ValueAnimator.RESTART);
//        mValueAnimator.setStartDelay(mAnimationStartDelay);mValueAnimator.addUpdateListener(new ValueAnimator.AnimatorUpdateListener() {@Overridepublic void onAnimationUpdate(ValueAnimator animation) {float currentProgress = (float) animation.getAnimatedValue();float lightLineStartProgress,//粉色线头lightLineEndProgress;//粉色线尾float darkLineStartProgress,//灰色线头darkLineEndProgress;//灰色线尾darkLineEndProgress = currentProgress;//                粉色线头从0开始,并且初始速度是灰色线尾的两倍darkLineStartProgress = lightLineStartProgress = (.6F + currentProgress) * 2;//                粉色线尾从-0.25开始,速度跟灰色线尾速度一样lightLineEndProgress = .35F + currentProgress;//                粉色线尾走到30%时,速度变为原来速度的2倍if (lightLineEndProgress > .3F) {lightLineEndProgress = (.35F + currentProgress - .3F) * 2 + .3F;}//                当粉色线头走到65%时,速度变为原来速度的0.35倍if (darkLineStartProgress > .65F) {darkLineStartProgress = lightLineStartProgress = ((.6F + currentProgress) * 2 - .65F) * .35F + .65F;}if (lightLineEndProgress < 0) {lightLineEndProgress = 0;}if (darkLineEndProgress < 0) {darkLineEndProgress = 0;}if (lightLineStartProgress > 1) {darkLineStartProgress = lightLineStartProgress = 1;}setLightLineProgress(lightLineStartProgress, lightLineEndProgress);setDarkLineProgress(darkLineStartProgress, darkLineEndProgress);}});mValueAnimator.start();}
主要是写了注释那几行,我们现在来看看效果:
哈哈,这下是不是有种平滑拉伸的感觉呢,接下来就剩下透明度的动画了,我们加上去再看下效果:
哈哈哈,这效果算是完成了,我们再完善下代码,加两个模式: 飞机模式(粉红色线条走过后会留下痕迹),火车模式(一开始痕迹已经存在):
public class PathView extends SurfaceView implements SurfaceHolder.Callback, Runnable {@IntDef({TRAIN_MODE, AIRPLANE_MODE})@IntRange(from = AIRPLANE_MODE, to = TRAIN_MODE)@Retention(RetentionPolicy.SOURCE)private @interface Mode {}public static final int AIRPLANE_MODE = 0; // 一开始不显示灰色线条,粉红色线条走过后才留下灰色线条public static final int TRAIN_MODE = 1;// 一开始就显示灰色线条,并且一直显示,直到动画结束private volatile boolean isDrawing;private Semaphore mLightLineSemaphore, mDarkLineSemaphore;private SurfaceHolder mSurfaceHolder;private Keyframes mKeyframes;private int mMode;private float[] mLightPoints;private float[] mDarkPoints;private int mLightLineColor;private int mDarkLineColor;private ValueAnimator mProgressAnimator, mAlphaAnimator;private long mAnimationDuration;private Paint mPaint;private int mAlpha;public PathView(Context context) {this(context, null);}public PathView(Context context, AttributeSet attrs) {this(context, attrs, 0);}public PathView(Context context, AttributeSet attrs, int defStyleAttr) {super(context, attrs, defStyleAttr);init();}private void init() {setZOrderOnTop(true);mSurfaceHolder = getHolder();mSurfaceHolder.setFormat(PixelFormat.TRANSLUCENT);mSurfaceHolder.addCallback(this);//初始化画笔mPaint = new Paint();mPaint.setStyle(Paint.Style.STROKE);mPaint.setAntiAlias(true);//默认动画时长mAnimationDuration = 1000L;//默认颜色mLightLineColor = Color.parseColor("#F17F94");mDarkLineColor = Color.parseColor("#D8D5D7");mLightLineSemaphore = new Semaphore(1);mDarkLineSemaphore = new Semaphore(1);}public void setMode(@Mode int mode) {if ((mAlphaAnimator != null && mAlphaAnimator.isRunning()) || (mAlphaAnimator != null && mAlphaAnimator.isRunning()))throw new IllegalStateException("animation has been started!");mMode = mode;if (mode == TRAIN_MODE)setDarkLineProgress(1, 0);elsesetDarkLineProgress(0, 0);}public void setPath(Path path) {mKeyframes = new Keyframes(path);mAlpha = 0;}public void setAnimationDuration(long duration) {mAnimationDuration = duration;}public void startAnimation() {if (mAlphaAnimator != null && mAlphaAnimator.isRunning())mAlphaAnimator.cancel();if (mProgressAnimator != null && mProgressAnimator.isRunning())mProgressAnimator.cancel();mAlphaAnimator = ValueAnimator.ofInt(0, 255).setDuration(mAnimationDuration / 10);// 时长是总时长的10%mAlphaAnimator.addUpdateListener(new ValueAnimator.AnimatorUpdateListener() {@Overridepublic void onAnimationUpdate(ValueAnimator animation) {mAlpha = (int) animation.getAnimatedValue();}});mAlphaAnimator.addListener(new AnimatorListenerAdapter() {@Overridepublic void onAnimationEnd(Animator animation) {startUpdateProgress();}});mAlphaAnimator.start();}public void setLineWidth(float width) {mPaint.setStrokeWidth(width);}public void setLightLineColor(@ColorInt int color) {mLightLineColor = color;}public void setDarkLineColor(@ColorInt int color) {mDarkLineColor = color;}private void setLightLineProgress(float start, float end) {setLineProgress(start, end, true);}private void startUpdateProgress() {mAlphaAnimator = null;
//        底部灰色线条向后加长到原Path的60%mProgressAnimator = ValueAnimator.ofFloat(-.6F, 1).setDuration(mAnimationDuration);mProgressAnimator.addUpdateListener(new ValueAnimator.AnimatorUpdateListener() {@Overridepublic void onAnimationUpdate(ValueAnimator animation) {float currentProgress = (float) animation.getAnimatedValue();float lightLineStartProgress,//粉色线头lightLineEndProgress;//粉色线尾float darkLineStartProgress,//灰色线头darkLineEndProgress;//灰色线尾darkLineEndProgress = currentProgress;//                粉色线头从0开始,并且初始速度是灰色线尾的两倍darkLineStartProgress = lightLineStartProgress = (.6F + currentProgress) * 2;//                粉色线尾从-0.25开始,速度跟灰色线尾速度一样lightLineEndProgress = .35F + currentProgress;//                粉色线尾走到30%时,速度变为原来速度的2倍if (lightLineEndProgress > .3F) {lightLineEndProgress = (.35F + currentProgress - .3F) * 2 + .3F;}//                当粉色线头走到65%时,速度变为原来速度的0.35倍if (darkLineStartProgress > .65F) {darkLineStartProgress = lightLineStartProgress = ((.6F + currentProgress) * 2 - .65F) * .35F + .65F;}if (lightLineEndProgress < 0) {lightLineEndProgress = 0;}if (darkLineEndProgress < 0) {darkLineEndProgress = 0;}//                当粉色线尾走到90%时,播放透明渐变动画if (lightLineEndProgress > .9F) {if (mAlphaAnimator == null) {mAlphaAnimator = ValueAnimator.ofInt(255, 0).setDuration((long) (mAnimationDuration * .2));// 时长是总时长的20%mAlphaAnimator.addUpdateListener(new ValueAnimator.AnimatorUpdateListener() {@Overridepublic void onAnimationUpdate(ValueAnimator animation) {mAlpha = (int) animation.getAnimatedValue();}});mAlphaAnimator.start();}}if (lightLineStartProgress > 1) {darkLineStartProgress = lightLineStartProgress = 1;}setLightLineProgress(lightLineStartProgress, lightLineEndProgress);//                飞机模式才更新灰色线条if (mMode == AIRPLANE_MODE)setDarkLineProgress(darkLineStartProgress, darkLineEndProgress);}});mProgressAnimator.start();}private void setDarkLineProgress(float start, float end) {setLineProgress(start, end, false);}private void setLineProgress(float start, float end, boolean isLightPoints) {if (mKeyframes == null)throw new IllegalStateException("path not set yet!");if (isLightPoints) {try {mLightLineSemaphore.acquire();} catch (InterruptedException e) {return;}mLightPoints = mKeyframes.getRangeValue(start, end);mLightLineSemaphore.release();} else {try {mDarkLineSemaphore.acquire();} catch (InterruptedException e) {return;}mDarkPoints = mKeyframes.getRangeValue(start, end);mDarkLineSemaphore.release();}}@Overridepublic void surfaceCreated(SurfaceHolder holder) {restart();}@Overridepublic void surfaceChanged(SurfaceHolder holder, int format, int width, int height) {}@Overridepublic void surfaceDestroyed(SurfaceHolder holder) {stop();}@Overridepublic void run() {while (isDrawing) {Canvas canvas = mSurfaceHolder.lockCanvas();if (canvas == null) return;canvas.drawColor(Color.TRANSPARENT, PorterDuff.Mode.CLEAR);startDraw(canvas);mSurfaceHolder.unlockCanvasAndPost(canvas);}}private void startDraw(Canvas canvas) {try {mDarkLineSemaphore.acquire();} catch (InterruptedException e) {return;}if (mDarkPoints != null) {mPaint.setColor(mDarkLineColor);mPaint.setAlpha(mAlpha);canvas.drawPoints(mDarkPoints, mPaint);}mDarkLineSemaphore.release();try {mLightLineSemaphore.acquire();} catch (InterruptedException e) {return;}if (mLightPoints != null) {mPaint.setColor(mLightLineColor);mPaint.setAlpha(mAlpha);canvas.drawPoints(mLightPoints, mPaint);}mLightLineSemaphore.release();}private void restart() {isDrawing = true;new Thread(this).start();}private void stop() {isDrawing = false;try {mDarkLineSemaphore.acquire();} catch (InterruptedException e) {return;}mDarkPoints = null;mDarkLineSemaphore.release();try {mLightLineSemaphore.acquire();} catch (InterruptedException e) {return;}mLightPoints = null;mLightLineSemaphore.release();if (mAlphaAnimator != null && mAlphaAnimator.isRunning())mAlphaAnimator.cancel();if (mProgressAnimator != null && mProgressAnimator.isRunning())mProgressAnimator.cancel();}private static class Keyframes {static final float PRECISION = 1f; //精度我们用1就够了 (数值越少 numPoints 就越大)int numPoints;float[] mData;Keyframes(Path path) {init(path);}void init(Path path) {final PathMeasure pathMeasure = new PathMeasure(path, false);final float pathLength = pathMeasure.getLength();numPoints = (int) (pathLength / PRECISION) + 1;mData = new float[numPoints * 2];final float[] position = new float[2];int index = 0;for (int i = 0; i < numPoints; ++i) {final float distance = (i * pathLength) / (numPoints - 1);pathMeasure.getPosTan(distance, position, null);mData[index] = position[0];mData[index + 1] = position[1];index += 2;}numPoints = mData.length;}/*** 拿到start和end之间的x,y数据** @param start 开始百分比* @param end   结束百分比* @return 裁剪后的数据*/float[] getRangeValue(float start, float end) {int startIndex = (int) (numPoints * start);int endIndex = (int) (numPoints * end);//必须是偶数,因为需要float[]{x,y}这样x和y要配对的if (startIndex % 2 != 0) {//直接减,不用担心 < 0  因为0是偶数,哈哈--startIndex;}if (endIndex % 2 != 0) {//不用检查越界++endIndex;}//根据起止点裁剪return startIndex > endIndex ? Arrays.copyOfRange(mData, endIndex, startIndex) : null;}}
}
我们再跑一次看看效果:
// 线宽 pathView.setLineWidth(5);pathView2.setLineWidth(5);pathView3.setLineWidth(5);pathView4.setLineWidth(5);pathView5.setLineWidth(5);pathView6.setLineWidth(5);// 设置路径pathView.setPath(path1);pathView2.setPath(path2);pathView3.setPath(path3);pathView4.setPath(path4);pathView5.setPath(path5);pathView6.setPath(path6);// 中间两条线设置火车模式pathView3.setMode(PathView.TRAIN_MODE);pathView4.setMode(PathView.TRAIN_MODE);// 动画时长pathView.setAnimationDuration(18000);pathView2.setAnimationDuration(18000);pathView3.setAnimationDuration(18000);pathView4.setAnimationDuration(18000);pathView5.setAnimationDuration(18000);pathView6.setAnimationDuration(18000); // 开始播放pathView.startAnimation();pathView2.startAnimation();pathView3.startAnimation();pathView4.startAnimation();pathView5.startAnimation();pathView6.startAnimation();
哈哈哈,就是这样了,本文到此结束,有错误的地方请指出,谢谢大家!
Demo地址: https://github.com/wuyr/PathView


