文章目录
- 1.模拟实现list
- 1.1构造函数
- 1.2迭代器类的实现
- 1.3运算符重载
- 1.4增删查改
1.模拟实现list
list使用文章

1.1构造函数

析构函数

在定义了一个类模板list时。我们让该类模板包含了一个内部结构体_list_node,用于表示链表的节点。该结构体包含了指向前一个节点和后一个节点的指针以及节点的值。在list中保存了链表的头节点指针和链表长度大小。
namespace my_list
{	//用类模板定义一个list结点template<class T>struct _list_node{//list结点的构造函数,T()作为缺省值,当未转参时调用_list_node(const T& val = T()):_next(nullptr), _prev(nullptr), _val(val){}//list_node的成员函数,list为带头双向循环链表_list_node* _prev;_list_node* _next;T _val;};//用类模拟实现listtemplate<class T>class list{private:typedef _list_node<T> Node;public://list的构造函数,初始化头节点指针list(){_head = new Node;_head->_prev = _head;_head->_next = _head;_size = 0;}//析构函数~list(){iterator it = begin();while (it != end()){it = erase(it);}_size = 0;delete _head;_head = nullptr;}private://成员函数为list的头节点指针,和链表长度Node* _head;size_t _size;};
}
1.2迭代器类的实现


因为list的底层实现和之前的vector和string不同,vector和string是数组和顺序表,而list底层是链表。而对于数组和顺序表,我们可以直接使用指针来实现其迭代器,但是对于list类型就无法使用指针来实现它的迭代器,因为迭代器++无法访问到他的下一个节点。所以我们这里建立一个迭代器的结构体,用来封装node指针,来实现list的专属迭代器
这段代码定义了一个名为__list_iterator的迭代器结构体,用于遍历链表。该结构体模板有三个模板参数:T表示链表中节点的数据类型,Ref表示引用类型T&,Ptr表示指针类型 T* _node:指向链表节点的指针。构造函数__list_iterator(Node* node):用于初始化迭代器对象,将指针node赋值给_node。通过_node就可以实现各种操作符重载。
定义了一个迭代器结构体,用于在链表中进行遍历和操作。通过重载运算符,可以使用迭代器对象像指针一样访问链表中的元素。
//使用类进行封装Node*,来实现list的专属迭代器
//list迭代器和一些内置类型迭代器不一样,++无法准确访问到下一个位置
//typedef __list_iterator<T, T&> iterator;
//typedef __list_iterator<T, const T&> iterator;
template<class T, class Ref, class Ptr>
struct __list_iterator
{typedef _list_node<T> Node;typedef __list_iterator<T, Ref, Ptr> self;Node* _node;//迭代器的构造函数__list_iterator(Node* node):_node(node){}//重载*Ref operator*(){return _node->_val;}//重载->Ptr operator->(){return &_node->_val;}//重载前置++self& operator++(){_node = _node->_next;return *this;}//重载后置++self operator++(int){__list_iterator<T> tmp(*this);_node = _node->_next;return tmp;}//重载前置--self& operator--(){_node = _node->_prev;return *this;}//重载后置--self operator--(int){self tmp(*this);_node = _node->_prev;return tmp;}//重载!=bool operator!=(const self& it) const{return _node != it._node;}//重载==bool operator==(const self& it) const{return _node == it._node;}
};
通过建立一个新的结构体来重载迭代器,我们即可实现list专属迭代器对其链表进行++、- -等操作。
typedef __list_iterator<T, T&, T*> iterator;
typedef __list_iterator<T, const T&, const T*> const_iterator;//list迭代器实现
iterator begin()
{//隐式类型转换,内置类型转换为自定义类型,实现迭代器功能//return _head->_next;return iterator(_head->_next);
}iterator end()
{//return _head;return iterator(_head);
}const_iterator begin() const
{//return _head->_next;return const_iterator(_head->_next);
}const_iterator end() const
{//return _head;return const_iterator(_head);
}
1.3运算符重载
迭代器的运算符重载在上面的代码中,已经都基本实现了。

赋值运算符重载函数operator=首先创建了一个临时的链表对象lt,并将传入的链表对象的副本赋值给lt。然后,调用swap函数,将当前链表对象和临时链表对象进行交换。这样做的原因是为了实现异常安全的赋值操作。通过将传入的链表对象的副本赋值给临时链表对象,可以确保在交换过程中不会影响到传入的链表对象。 最后,返回当前链表对象的引用。
通过这样的实现逻辑,可以实现链表对象之间的赋值操作,并且保证在异常发生时不会破坏数据的完整性。
//交换
void swap(list<T>& lt)
{std::swap(_head, lt._head);std::swap(_size, lt._size);
}//赋值运算符重载
list<T>& operator=(list<T> lt)//list& operator=(list lt)
{swap(lt);return *this;
}
1.4增删查改
push_back

和带头双向循环链表的尾插一样。首先,创建一个新的链表节点newnode,节点的值为传入的参数x。然后,获取到链表的尾指针tail,即头节点的前一个节点。
接着,将新节点newnode插入到链表的尾部。首先,将新节点的前驱指针指向尾节点tail,将尾节点的后继指针指向新节点。这样就将新节点连接到了链表的尾部。
然后,将新节点的后继指针指向头节点,将头节点的前驱指针指向新节点。这样就将新节点连接到了链表的头部。
//尾插
void push_back(const T& x)
{//创建一个新的链表结点,且获取到链表的尾指针Node* newnode = new Node(x);Node* tail = _head->_prev;//连接尾结点newnode->_prev = tail;tail->_next = newnode;//连接头节点_head->_prev = newnode;newnode->_next = _head;++_size;
}
insert
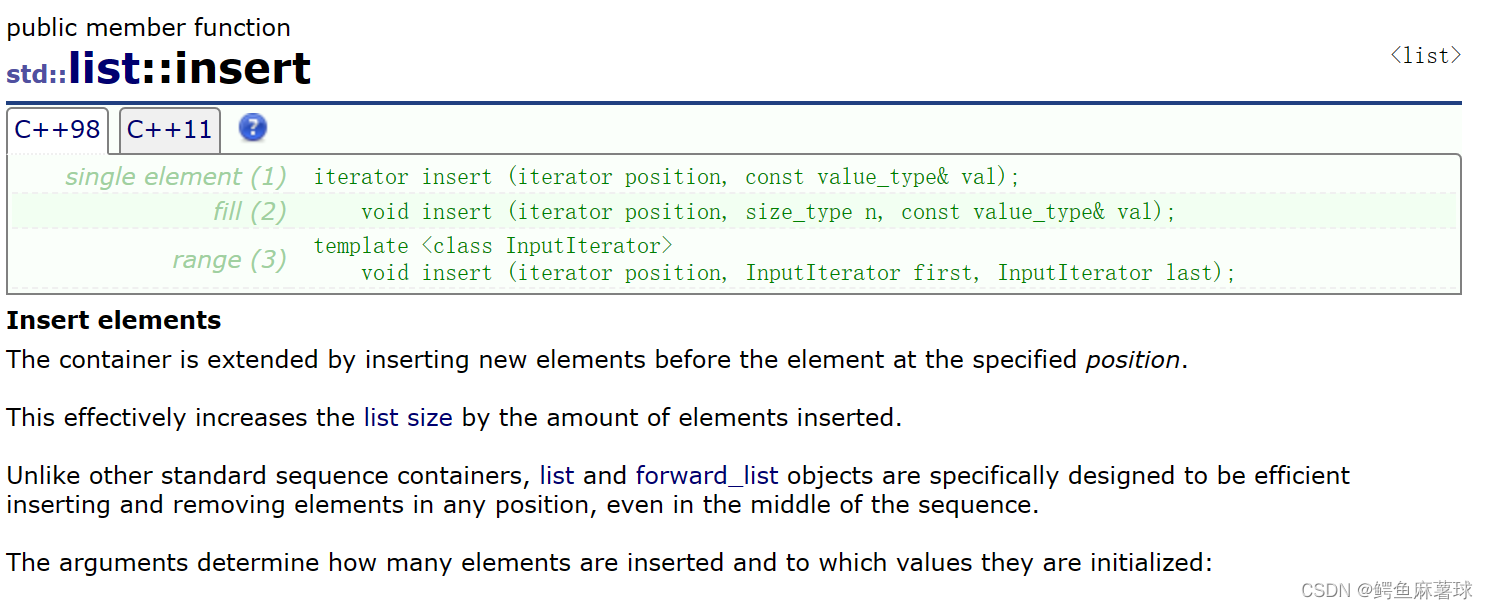
和上面的逻辑类似。
//在pos位置之前插入
iterator insert(iterator pos, const T& x)
{Node* cur = pos._node;Node* prev = cur->_prev;Node* newnode = new Node(x);prev->_next = newnode;newnode->_next = cur;cur->_prev = newnode;newnode->_prev = prev;++_size;return newnode;
}
erase

首先,通过断言判断传入的迭代器pos不等于链表的末尾迭代器。如果等于末尾迭代器,表示要删除的节点不存在,会导致错误。然后,根据传入的迭代器pos获取到要删除的节点cur,以及其前驱节点prev和后继节点next。
接着,将前驱节点的后继指针指向后继节点,将后继节点的前驱指针指向前驱节点。这样就将要删除的节点从链表中断开。然后,释放要删除的节点的内存。还要将链表的大小减1。
为了避免迭代器失效,返回下一个节点的指针作为新的迭代器。这样可以保证在删除节点后,仍然可以使用返回的迭代器进行遍历和操作。
//删除
iterator erase(iterator pos)
{assert(pos != end());Node* cur = pos._node;Node* prev = cur->_prev;Node* next = cur->_next;prev->_next = next;next->_prev = prev;delete cur;--_size;//为了避免迭代器失效,返回下一个结点指针return next;
}
完整实现
#pragma once#include<assert.h>namespace my_list
{	//用类模板定义一个list结点template<class T>struct _list_node{//list结点的构造函数,T()作为缺省值,当未转参时调用_list_node(const T& val = T()):_next(nullptr), _prev(nullptr), _val(val){}//list_node的成员函数,list为带头双向循环链表_list_node* _prev;_list_node* _next;T _val;};//使用类进行封装Node*,来实现list的专属迭代器//list迭代器和一些内置类型迭代器不一样,++无法准确访问到下一个位置//typedef __list_iterator<T, T&> iterator;//typedef __list_iterator<T, const T&> iterator;template<class T, class Ref, class Ptr>struct __list_iterator{typedef _list_node<T> Node;typedef __list_iterator<T, Ref, Ptr> self;Node* _node;//迭代器的构造函数__list_iterator(Node* node):_node(node){}//重载*Ref operator*(){return _node->_val;}//重载->Ptr operator->(){return &_node->_val;}//重载前置++self& operator++(){_node = _node->_next;return *this;}//重载后置++self operator++(int){__list_iterator<T> tmp(*this);_node = _node->_next;return tmp;}//重载前置--self& operator--(){_node = _node->_prev;return *this;}//重载后置--self operator--(int){self tmp(*this);_node = _node->_prev;return tmp;}//重载!=bool operator!=(const self& it) const{return _node != it._node;}//重载==bool operator==(const self& it) const{return _node == it._node;}};//实现const类型迭代器/*template<class T>struct __list_const_iterator{typedef list_node<T> Node;Node* _node;__list_const_iterator(Node* node):_node(node){}const T& operator*(){return _node->_val;}__list_const_iterator<T>& operator++(){_node = _node->_next;return *this;}__list_const_iterator<T> operator++(int){__list_const_iterator<T> tmp(*this);_node = _node->_next;return tmp;}bool operator!=(const __list_const_iterator<T>& it){return _node != it._node;}bool operator==(const __list_const_iterator<T>& it){return _node == it._node;}};*///用类模拟实现listtemplate<class T>class list{private:typedef _list_node<T> Node;public:typedef __list_iterator<T, T&, T*> iterator;typedef __list_iterator<T, const T&, const T*> const_iterator;//list迭代器实现iterator begin(){//隐式类型转换,内置类型转换为自定义类型,实现迭代器功能//return _head->_next;return iterator(_head->_next);}iterator end(){//return _head;return iterator(_head);}const_iterator begin() const{//return _head->_next;return const_iterator(_head->_next);}const_iterator end() const{//return _head;return const_iterator(_head);}//初始化void empty_init(){_head = new Node;_head->_prev = _head;_head->_next = _head;_size = 0;}//list的构造函数,初始化头节点指针list(){empty_init();}//拷贝构造list(const list<T>& lt)//list(const list& lt){empty_init();for (auto& e : lt){push_back(e);}}//交换void swap(list<T>& lt){std::swap(_head, lt._head);std::swap(_size, lt._size);}//赋值运算符重载list<T>& operator=(list<T> lt)//list& operator=(list lt){swap(lt);return *this;}//析构函数~list(){clear();delete _head;_head = nullptr;}//清理void clear(){iterator it = begin();while (it != end()){it = erase(it);}_size = 0;}//尾插void push_back(const T& x){//创建一个新的链表结点,且获取到链表的尾指针Node* newnode = new Node(x);Node* tail = _head->_prev;//连接尾结点newnode->_prev = tail;tail->_next = newnode;//连接头节点_head->_prev = newnode;newnode->_next = _head;++_size;//insert(end(), x);}//头插void push_front(const T& x){insert(begin(), x);}//尾删void pop_back(){erase(--end());}//头删void pop_front(){erase(begin());}//在pos位置之前插入iterator insert(iterator pos, const T& x){Node* cur = pos._node;Node* prev = cur->_prev;Node* newnode = new Node(x);prev->_next = newnode;newnode->_next = cur;cur->_prev = newnode;newnode->_prev = prev;++_size;return newnode;}//删除iterator erase(iterator pos){assert(pos != end());Node* cur = pos._node;Node* prev = cur->_prev;Node* next = cur->_next;prev->_next = next;next->_prev = prev;delete cur;--_size;//为了避免迭代器失效,返回下一个结点指针return next;}//返回sizesize_t size(){/*size_t sz = 0;iterator it = begin();while (it != end()){++sz;++it;}return sz;*/return _size;}private://成员函数为list的头节点指针,和链表长度Node* _head;size_t _size;};//打印函数void print(const list<int>& lt){list<int>::const_iterator it = lt.begin();while (it != lt.end()){// (*it) += 1;cout << *it << " ";++it;}cout << endl;}
}
测试代码
#define _CRT_SECURE_NO_WARNINGS 1#include<iostream>
#include<list>
using namespace std;#include"list.h"void test_list1()
{//list<int> lt;//lt.push_back(1);//lt.push_back(2);//lt.push_back(3);//lt.push_back(4);//for (auto e : lt)//{//	cout << e << " ";//}//cout << endl;my_list::list<int> lt;lt.push_back(1);lt.push_back(2);lt.push_back(3);lt.push_back(4);my_list::list<int>::iterator it = lt.begin();while (it != lt.end()){cout << *it << " ";++it;}cout << endl;auto itt = lt.begin();while (itt != lt.end()){++(*itt);++itt;}for (auto e: lt){cout << e << " ";}cout << endl;
}struct A
{A(int a1 = 0, int a2 = 0):_a1(a1), _a2(a2){}int _a1;int _a2;
};void test_list2()
{my_list::list<A> lt;lt.push_back(A(1, 1));lt.push_back(A(2, 2));lt.push_back(A(3, 3));lt.push_back(A(4, 4));auto it = lt.begin();while (it != lt.end()){//cout << *(it)._a1 << " " << *(it)._a2 <<endl;cout << it->_a1 << " " << it->_a2 << endl;++it;}cout << endl;
}void test_list3()
{my_list::list<int> lt;lt.push_back(1);lt.push_back(2);lt.push_back(3);lt.push_back(4);for (auto e : lt){cout << e << " ";}cout << endl;lt.push_front(5);lt.push_front(6);print(lt);lt.pop_front();lt.pop_back();print(lt);lt.clear();lt.push_back(10);lt.push_back(20);lt.push_back(30);lt.push_back(40);print(lt);cout << lt.size() << endl;}int main()
{//test_list1();//test_list2();test_list3();return 0;
}


