系列文章目录
第一章 目标检测与跟踪 (1)- 机器人视觉与YOLO V8
目标检测与跟踪 (1)- 机器人视觉与YOLO V8_Techblog of HaoWANG的博客-CSDN博客3D物体实时检测、三维目标识别、6D位姿估计一直是机器人视觉领域的核心研究课题,最新的研究成果也广泛应用于工业信息化领域的方方面面。通过众多的传感器,例如激光扫描仪、深度摄像头、双目视觉传感即可获得三维物体的识别数据,以此为基础开展研究的计算机视觉方向领域也有着较为深入的发展。https://blog.csdn.net/hhaowang/article/details/131893371?spm=1001.2014.3001.5501
目录
系列文章目录
前言
一、安装CUDA&cuDNN
二、安装Pytorch
1.安装miniconda
2. 下载Pytorch &torchvision
3. 安装
三、工程源码安装
四、功能特性与测试
Detection
Segmentation
Classification
Pose
Conclusion
五、测试
前言
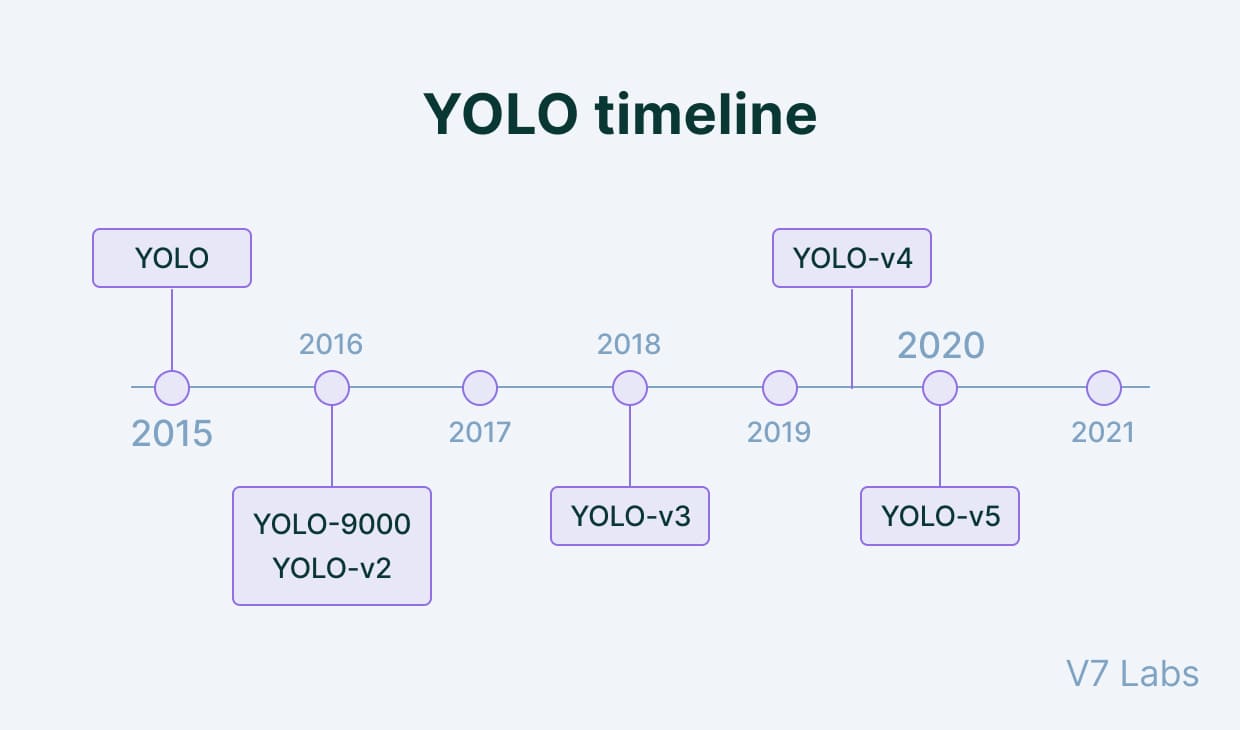
YOLOv8 算法的核心特性和改动可以归结为如下:
1. 提供了一个全新的 SOTA 模型,包括 P5 640 和 P6 1280 分辨率的目标检测网络和基于 YOLACT 的实例分割模型。和 YOLOv5 一样,基于缩放系数也提供了 N/S/M/L/X 尺度的不同大小模型,用于满足不同场景需求
2. Backbone:
骨干网络和 Neck 部分可能参考了 YOLOv7 ELAN 设计思想,将 YOLOv5 的 C3 结构换成了梯度流更丰富的 C2f 结构,并对不同尺度模型调整了不同的通道数。

一、安装CUDA&cuDNN
无论采用哪一种方式,首先都需要更新 Ubuntu 软件源和升级到最新版本的软件包。由于国内从 Ubuntu 官方软件源下载速度比较慢,所以,建议采用国内 Ubuntu 镜像源,比如阿里 Ubuntu 软件源或清华大学 Ubuntu 软件源。具体的配置方式是修改配置文件 /etc/apt/sources.list,将其中的 archive.ubuntu.com 替换为 mirrors.alibaba.com 或 mirrors.tuna.tsinghua.edu.cn 。也可以在图形界面应用 "Software & Update" 中,修改 Ubuntu Software 标签页中的 Download from 后的软件源地址。

参考专题博客文章
Ubuntu 18.04/20.04 CV环境配置(上):CUDA11.1 + cudnn安装配置_ubuntu安装cuda11.1_Techblog of HaoWANG的博客-CSDN博客Ubuntu18.04 20.04 NVIDIA CUDA 环境配置与cudnn Tensorrt等配置与使用_ubuntu安装cuda11.1https://blog.csdn.net/hhaowang/article/details/125803582?spm=1001.2014.3001.5501
二、安装Pytorch
1.安装miniconda
参考:【YOLOV8训练检测模型(window+anaconda环境安装+部署)】_小虫啦啦啦的博客-CSDN博客YOLOv8
https://blog.csdn.net/weixin_42511814/article/details/131802059
conda activate yolov8
2. 下载Pytorch &torchvision
在pytorch版本查询页面,查看与自己的NVIDA Version相匹配的安装指令,从中查看匹配的pytorch和torchvision的版本号
Previous PyTorch Versions | PyTorchAn open source machine learning framework that accelerates the path from research prototyping to production deployment.https://pytorch.org/get-started/previous-versions/
如下图所示可以看到Linux and Window环境下CUDA 11.1,所对应的pytorch版本是1.9.1,torchvision版本是0.10.1

进入pytorch官网安装页面,找到对应的pytorch和torchvision的安装包(cp代表python版本,如果其中一个文件找不到对应版本,则重复上一步骤查询可匹配的其他版本)
https://link.csdn.net/?target=https%3A%2F%2Fdownload.pytorch.org%2Fwhl%2Ftorch_stable.html
3. 安装
1. 激活配置环境,conda activate yolov8
2. 使用pip install进行配置
pip install torch-1.9.1+cu111-cp38-cp38-win_amd64.whl
pip install torchvision-0.10.1+cu111-cp38-cp38-win_amd64.whl
安装完成提示
Successfully installed certifi-2023.7.22 charset-normalizer-3.2.0 contourpy-1.1.0 cycler-0.11.0 fonttools-4.41.1 idna-3.4 importlib-resources-6.0.0 kiwisolver-1.4.4 matplotlib-3.7.2 opencv-python-4.8.0.74 packaging-23.1 pandas-2.0.3 psutil-5.9.5 py-cpuinfo-9.0.0 pyparsing-3.0.9 python-dateutil-2.8.2 pytz-2023.3 pyyaml-6.0.1 requests-2.31.0 scipy-1.10.1 seaborn-0.12.2 six-1.16.0 tqdm-4.65.0 tzdata-2023.3 ultralytics-8.0.146 urllib3-2.0.4 zipp-3.16.2三、工程源码安装
源码GitHub地址:https://docs.ultralytics.com/quickstart/#install-ultralytics
https://docs.ultralytics.com/quickstart/#understanding-settings
1. 源码安装:
Clone the ultralytics repository if you are interested in contributing to the development or wish to experiment with the latest source code. After cloning, navigate into the directory and install the package in editable mode -e using pip.
# Clone the ultralytics repository
git clone https://github.com/ultralytics/ultralytics# Navigate to the cloned directory
cd ultralytics# Install the package in editable mode for development
pip install -e .
2. pip安装
Install the ultralytics package using pip, or update an existing installation by running pip install -U ultralytics. Visit the Python Package Index (PyPI) for more details on the ultralytics package: https://pypi.org/project/ultralytics/.
注意:conda先激活虚拟环境,再进行pip install步骤
# Install the ultralytics package using pip
pip install ultralytics
四、功能特性与测试

Ultralytics YOLOv8 Tasks - Ultralytics YOLOv8 Docs
YOLOv8 is an AI framework that supports multiple computer vision tasks. The framework can be used to perform detection, segmentation, classification, and pose estimation. Each of these tasks has a different objective and use case.
Detection
Detection is the primary task supported by YOLOv8. It involves detecting objects in an image or video frame and drawing bounding boxes around them. The detected objects are classified into different categories based on their features. YOLOv8 can detect multiple objects in a single image or video frame with high accuracy and speed.
Detection Examples
Segmentation
Segmentation is a task that involves segmenting an image into different regions based on the content of the image. Each region is assigned a label based on its content. This task is useful in applications such as image segmentation and medical imaging. YOLOv8 uses a variant of the U-Net architecture to perform segmentation.
Segmentation Examples
Classification
Classification is a task that involves classifying an image into different categories. YOLOv8 can be used to classify images based on their content. It uses a variant of the EfficientNet architecture to perform classification.
Classification Examples
Pose
Pose/keypoint detection is a task that involves detecting specific points in an image or video frame. These points are referred to as keypoints and are used to track movement or pose estimation. YOLOv8 can detect keypoints in an image or video frame with high accuracy and speed.
Pose Examples
Conclusion
YOLOv8 supports multiple tasks, including detection, segmentation, classification, and keypoints detection. Each of these tasks has different objectives and use cases. By understanding the differences between these tasks, you can choose the appropriate task for your computer vision application.
Segment
Instance segmentation goes a step further than object detection and involves identifying individual objects in an image and segmenting them from the rest of the image.

The output of an instance segmentation model is a set of masks or contours that outline each object in the image, along with class labels and confidence scores for each object. Instance segmentation is useful when you need to know not only where objects are in an image, but also what their exact shape is.
YOLOv8 Segment models use the -seg suffix, i.e. yolov8n-seg.pt and are pretrained on COCO.五、测试

Ultralytics YOLOv8 supports several modes that can be used to perform different tasks. These modes are:
- Train: For training a YOLOv8 model on a custom dataset.
- Val: For validating a YOLOv8 model after it has been trained.
- Predict: For making predictions using a trained YOLOv8 model on new images or videos.
- Export: For exporting a YOLOv8 model to a format that can be used for deployment.
- Track: For tracking objects in real-time using a YOLOv8 model.
- Benchmark: For benchmarking YOLOv8 exports (ONNX, TensorRT, etc.) speed and accuracy.
CLI - Ultralytics YOLOv8 DocsLearn how to use Ultralytics YOLO through Command Line: train models, run predictions and exports models to different formats easily using terminal commands.https://docs.ultralytics.com/usage/cli/
yolo使用命令行(CLI)执行操作,进入虚拟环境后按照 yolo TASK MODE ARGS指令形式。

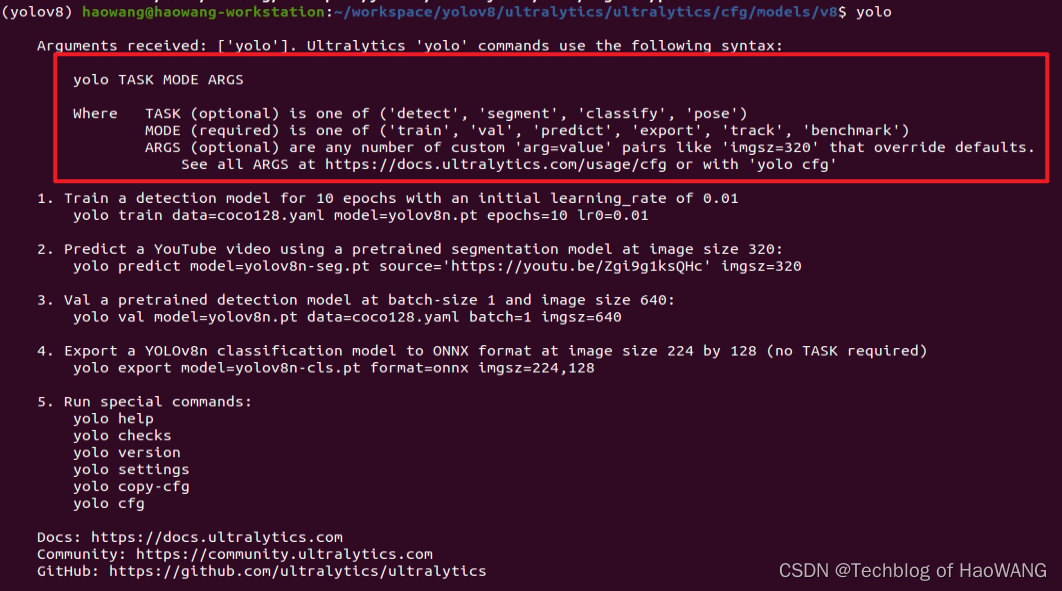
参数解释如下:
yolo TASK MODE ARGSWhere TASK (optional) is one of ('detect', 'segment', 'classify', 'pose')MODE (required) is one of ('train', 'val', 'predict', 'export', 'track', 'benchmark')ARGS (optional) are any number of custom 'arg=value' pairs like 'imgsz=320' that override defaults.See all ARGS at https://docs.ultralytics.com/usage/cfg or with 'yolo cfg'
使用预训练模型进行测试:
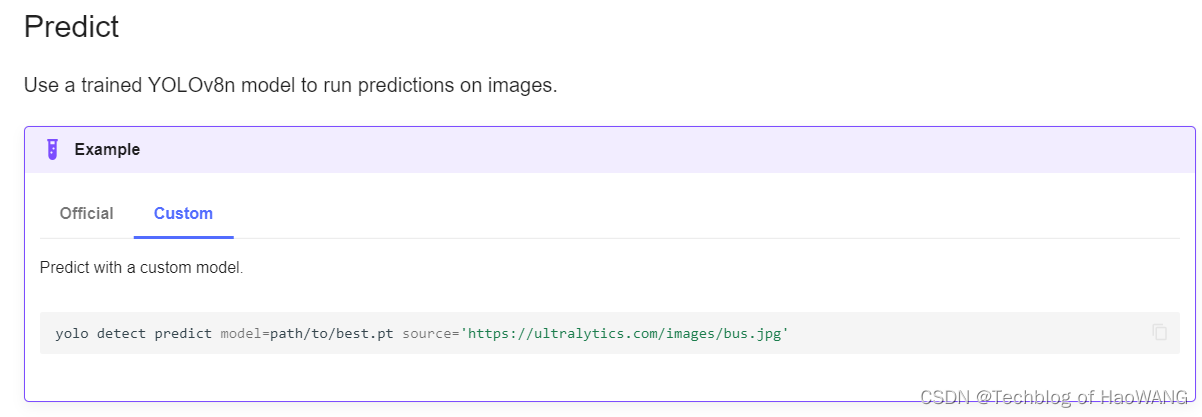
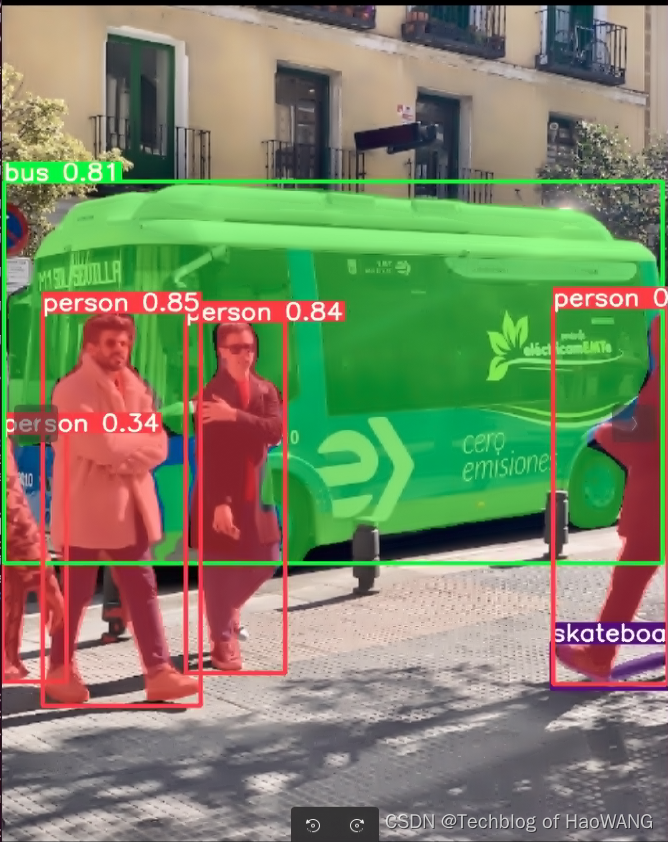
yolo detect predict model=yolov8n-seg.pt source='https://ultralytics.com/images/bus.jpg'
执行单一图片的分割预测,使用预训练模型yolov8n-seg.pt


注意:LooseVersion = distutils.version.LooseVersion报错
修改miniconda3/envs/yolov8/lib/python3.8/site-packages/torch/utils/tensorboard/__init__.py
import tensorboard
#from setuptools import distutils
from distutils.version import LooseVersion# LooseVersion = distutils.version.LooseVersionif not hasattr(tensorboard, '__version__') or LooseVersion(tensorboard.__version__) < LooseVersion('1.15'):raise ImportError('TensorBoard logging requires TensorBoard version 1.15 or above')#del distutils
del LooseVersion
del tensorboardfrom .writer import FileWriter, SummaryWriter  # noqa: F401
from tensorboard.summary.writer.record_writer import RecordWriter  # noqa: F401

![[golang gin框架] 45.Gin商城项目-微服务实战之后台Rbac微服务之角色权限关联](https://img-blog.csdnimg.cn/1aeb9c46b93542638866a62a44df0410.png)
![[CVPR-23-Highlight] Magic3D: High-Resolution Text-to-3D Content Creation](https://img-blog.csdnimg.cn/cb4c2653d55d4eeca6ef5b34afaf5040.png)


