文章目录
- SSM整合之后xml方式
- 1 系统环境
- 1.1 软件环境
- 1.2 项目环境
- 1.3 配置web.xml
- 1.4 配置jdbc.properties文件
- 1.5 配置SpringMVC核心文件
- 1.6 配置Spring的核心文件
- 1.7 配置MyBatis的核心文件
- 1.8 配置数据库
- 1.9 配置文件位置
- 2 编写后端代码
- 2.1 编写实体类
- 2.2 编写Dao接口
- 2.3 编写Dao映射文件(resource目录下)
- 2.4 编写Service接口
- 2.5 编写ServiceImpl实现类
- 2.6 编写Controller类
- 2.7 代码映射文件位置
- 3 编写前端代码
- 3.1 编写首页index.jsp
- 3.2 配置Tomcat
- 3.3 webapp下配置图片
- 3.4 编写功能页面WEB-INF下
- 4 运行访问
- 4.1 请求路径
- 4.2 增删改查界面
- 4.3 项目源代码
SSM整合之后xml方式
1 系统环境
1.1 软件环境
软件版本:
IDEA 2021.3
Maven 3.6.3
MySql (Mariadb) 10.10
JDK 1.8
1.2 项目环境
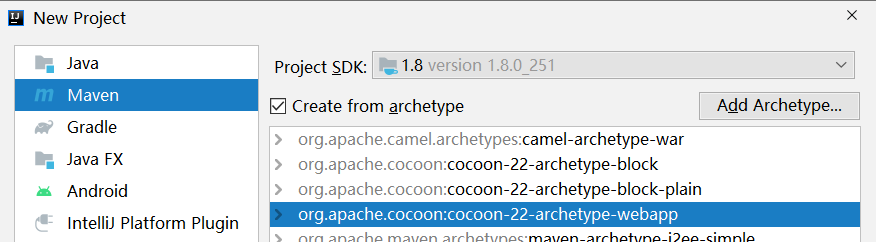
1、创建Maven的web工程
2、引入pom依赖
<dependencies><!--servlet的依赖--><dependency><groupId>javax.servlet</groupId><artifactId>javax.servlet-api</artifactId><version>4.0.1</version><scope>provided</scope></dependency><!--jsp的依赖--><dependency><groupId>javax.servlet</groupId><artifactId>jsp-api</artifactId><version>2.0</version></dependency><!--JSTL表达式--><dependency><groupId>javax.servlet</groupId><artifactId>jstl</artifactId><version>1.2</version></dependency><!--SpringWeb--><dependency><groupId>org.springframework</groupId><artifactId>spring-webmvc</artifactId><version>5.3.1</version></dependency><!--spring事务--><dependency><groupId>org.springframework</groupId><artifactId>spring-tx</artifactId><version>5.3.1</version></dependency><!--jsckson的依赖--><dependency><groupId>com.fasterxml.jackson.core</groupId><artifactId>jackson-core</artifactId><version>2.14.2</version></dependency><dependency><groupId>com.fasterxml.jackson.core</groupId><artifactId>jackson-databind</artifactId><version>2.14.2</version></dependency><!--mybatis的依赖--><dependency><groupId>org.mybatis</groupId><artifactId>mybatis</artifactId><version>3.5.13</version></dependency><!--spring整合mybatis--><dependency><groupId>org.mybatis</groupId><artifactId>mybatis-spring</artifactId><version>2.1.1</version></dependency><!--mysql依赖--><dependency><groupId>mysql</groupId><artifactId>mysql-connector-java</artifactId><version>8.0.28</version></dependency><!--Spring的JDBC--><dependency><groupId>org.springframework</groupId><artifactId>spring-jdbc</artifactId><version>5.3.17</version></dependency><!--druid连接池--><dependency><groupId>com.alibaba</groupId><artifactId>druid</artifactId><version>1.2.16</version></dependency><!--单元测试--><dependency><groupId>junit</groupId><artifactId>junit</artifactId><version>4.11</version><scope>test</scope></dependency><!--lombok插件--><dependency><groupId>org.projectlombok</groupId><artifactId>lombok</artifactId><version>1.18.28</version></dependency></dependencies>
3 设置插件
<build><resources><resource><!--所在的目录--><directory>src/main/java</directory><!--包括目录下的.properties .xml文件都会扫描到--><includes><include>**/*.properties</include><include>**/*.xml</include></includes><filtering>false</filtering></resource></resources><plugins><plugin><groupId>org.apache.maven.plugins</groupId><artifactId>maven-compiler-plugin</artifactId><version>3.1</version><configuration><source>1.8</source><target>1.8</target></configuration></plugin></plugins></build>
1.3 配置web.xml
配置前端控制器
<!--配置前端控制器--><servlet><servlet-name>myssm</servlet-name><servlet-class>org.springframework.web.servlet.DispatcherServlet</servlet-class><init-param><param-name>contextConfigLocation</param-name><param-value>classpath:config/springmvc.xml</param-value></init-param><load-on-startup>1</load-on-startup></servlet><servlet-mapping><servlet-name>myssm</servlet-name><url-pattern>*.do</url-pattern></servlet-mapping>
注册监听器
<!--注册监听器--><context-param><param-name>contextConfigLocation</param-name><param-value>classpath:config/applicationContext.xml</param-value></context-param><listener><listener-class>org.springframework.web.context.ContextLoaderListener</listener-class></listener>
注册字符过滤器,处理中文乱码
<!--注册字符过滤器--><filter><filter-name>characterEncodingFilter</filter-name><filter-class>org.springframework.web.filter.CharacterEncodingFilter</filter-class><init-param><param-name>encoding</param-name><param-value>utf-8</param-value></init-param><init-param><param-name>forceRequestEncoding</param-name><param-value>true</param-value></init-param><init-param><param-name>forceResponseEncoding</param-name><param-value>true</param-value></init-param></filter><filter-mapping><filter-name>characterEncodingFilter</filter-name><url-pattern>/*</url-pattern></filter-mapping>
1.4 配置jdbc.properties文件
jdbc.driver=com.mysql.cj.jdbc.Driver
jdbc.url=jdbc:mysql://localhost:3306/db002
jdbc.username=root
jdbc.password=root
1.5 配置SpringMVC核心文件
<?xml version="1.0" encoding="UTF-8"?>
<beans xmlns="http://www.springframework.org/schema/beans"xmlns:xsi="http://www.w3.org/2001/XMLSchema-instance"xmlns:context="http://www.springframework.org/schema/context"xmlns:mvc="http://www.springframework.org/schema/mvc"xsi:schemaLocation="http://www.springframework.org/schema/beans http://www.springframework.org/schema/beans/spring-beans.xsd http://www.springframework.org/schema/context http://www.springframework.org/schema/context/spring-context.xsd http://www.springframework.org/schema/mvc https://www.springframework.org/schema/mvc/spring-mvc.xsd"><!--springMVC的配置文件  配置controller和其他web相关对象--><!--配置扫描--><context:component-scan base-package="com.hx.controller"/><!--配置视图解析器--><bean class="org.springframework.web.servlet.view.InternalResourceViewResolver"><property name="prefix" value="/WEB-INF/jsp/"/><property name="suffix" value=".jsp"/></bean><!--配置注解驱动--><mvc:annotation-driven></mvc:annotation-driven>
</beans>
1.6 配置Spring的核心文件
<beans xmlns="http://www.springframework.org/schema/beans"xmlns:xsi="http://www.w3.org/2001/XMLSchema-instance"xmlns:aop="http://www.springframework.org/schema/aop"xmlns:p="http://www.springframework.org/schema/p"xmlns:tx="http://www.springframework.org/schema/tx"xmlns:context="http://www.springframework.org/schema/context"
xsi:schemaLocation="http://www.springframework.org/schema/beanshttp://www.springframework.org/schema/beans/spring-beans.xsdhttp://www.springframework.org/schema/contexthttp://www.springframework.org/schema/context/spring-context.xsdhttp://www.springframework.org/schema/mvchttps://www.springframework.org/schema/mvc/spring-mvc.xsd"><!--spring的配置文件,声明Service dao等工具类对象--><!-- 加载配置文件 --><context:property-placeholder location="classpath:config/jdbc.properties" /><!-- 数据库连接池 --><bean id="dataSource" class="com.alibaba.druid.pool.DruidDataSource"destroy-method="close"><property name="driverClassName" value="${jdbc.driver}" /><property name="url" value="${jdbc.url}" /><property name="username" value="${jdbc.username}" /><property name="password" value="${jdbc.password}" /></bean><!--声明SqlSessionFactoryBean 创建 sqlSessionFactory--><!-- mapper配置,mybatis的SqlSessionFactoryBean --><!-- 让spring管理sqlsessionfactory 使用mybatis和spring整合包中的 --><bean id="sqlSessionFactory" class="org.mybatis.spring.SqlSessionFactoryBean"><!-- 数据库连接池 --><property name="dataSource" ref="dataSource" /><!-- 加载mybatis的全局配置文件 --><property name="configLocation" value="classpath:config/mybatis-config.xml" /></bean><!--声明mybatis的扫描,创建dao对象--><!-- 配置Mapper扫描器 --><bean class="org.mybatis.spring.mapper.MapperScannerConfigurer"><property name="sqlSessionFactoryBeanName" value="sqlSessionFactory"/><property name="basePackage" value="com.hx.dao"/></bean><!--声明service的扫描--><context:component-scan base-package="com.hx.service"/></beans>
1.7 配置MyBatis的核心文件
<?xml version="1.0" encoding="UTF-8" ?>
<!DOCTYPE configurationPUBLIC "-//mybatis.org//DTD Config 3.0//EN""http://mybatis.org/dtd/mybatis-3-config.dtd">
<configuration><!--设置实体类别名--><typeAliases><package name="com.hx.domain"/></typeAliases><!--配置接口文件映射--><mappers><!--使用package要求:1、mapper文件名称和mapper接口名完全一致,包括大小写2、mapper文件和mapper接口必须在统一目录--><package name="com.hx.dao"/></mappers>
</configuration>
1.8 配置数据库
创建数据库,数据表student
表字段如下:

1.9 配置文件位置
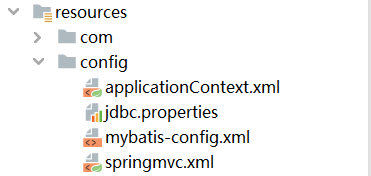
2 编写后端代码
2.1 编写实体类
@Data
@AllArgsConstructor
@NoArgsConstructor
public class Student {private Integer sid;private String sname;private Integer sage;
}
2.2 编写Dao接口
@Mapper
public interface StudentDao {//查询所有List<Student> findAll();//新增数据int addStu(@Param("student") Student student);//删除数据int delStuById(Integer sid);//修改数据int updateStu(Student student);
}
2.3 编写Dao映射文件(resource目录下)
<?xml version="1.0" encoding="UTF-8" ?>
<!DOCTYPE mapper PUBLIC "-//mybatis.org//DTD Mapper 3.0//EN""http://mybatis.org/dtd/mybatis-3-mapper.dtd">
<mapper namespace="com.hx.dao.StudentDao"><!--查询所有列表--><select id="findAll" resultType="Student">select sid, sname, sagefrom student;</select><!--新增数据--><insert id="addStu">insert into studentvalues (#{student.sid}, #{student.sname}, #{student.sage});</insert><!--删除数据--><delete id="delStuById">deletefrom studentwhere sid = #{sid}</delete><!--修改数据--><update id="updateStu" parameterType="Student">update studentset sname=#{sname},sage=#{sage}where sid = #{sid}</update>
</mapper>
2.4 编写Service接口
public interface StudentService {//查询所有List<Student> selectAll();//插入数据int insertStu(Student student);int delStuById(Integer sid);int updateStu(Student student);
}
2.5 编写ServiceImpl实现类
@Service
public class StudentServiceImpl implements StudentService {@Autowiredprivate StudentDao studentDao;@Overridepublic List<Student> selectAll() {return studentDao.findAll();}@Overridepublic int insertStu(Student student) {return studentDao.addStu(student);}@Overridepublic int delStuById(Integer sid) {return studentDao.delStuById(sid);}@Overridepublic int updateStu(Student student) {return studentDao.updateStu(student);}
}
2.6 编写Controller类
1、业务Controller
@Controller
@RequestMapping("/student")
public class StudentController {@Autowiredprivate StudentService studentService;@GetMapping("/getAll.do")public ModelAndView getAll() {List<Student> list = studentService.selectAll();ModelAndView mv = new ModelAndView();mv.addObject("list", list);mv.setViewName("listStu");return mv;}@PostMapping("/add.do")public ModelAndView saveStu(Student student) {String tips = "插入失败";ModelAndView mv = new ModelAndView();int i = studentService.insertStu(student);if (i > 0) {tips = "插入成功";}mv.addObject("data1", tips);mv.setViewName("success");return mv;}@RequestMapping("/put.do")public ModelAndView putStu(Student student) {String tips = "修改失败!";ModelAndView mv = new ModelAndView();int i = studentService.updateStu(student);if (i > 0) {tips = "修改成功";}mv.addObject("data2", tips);mv.setViewName("success");return mv;}@RequestMapping(value = "/del.do")public ModelAndView delStu(Integer sid) {String tips = "删除失败!";ModelAndView mv = new ModelAndView();int i = studentService.delStuById(sid);if (i > 0) {tips = "删除成功";}mv.addObject("data3", tips);mv.setViewName("success");return mv;}
}
2、页面相关Controller
@RestController
@RequestMapping("/index")
public class IndexController {@RequestMapping("/m1Add.do")public ModelAndView m1Add(){ModelAndView mv = new ModelAndView();mv.setViewName("add");return mv;}@RequestMapping("/m2Put.do")public ModelAndView m2Put(){ModelAndView mv = new ModelAndView();mv.setViewName("put");return mv;}@RequestMapping("/m3Del.do")public ModelAndView m3Del(){ModelAndView mv = new ModelAndView();mv.setViewName("del");return mv;}
}
2.7 代码映射文件位置
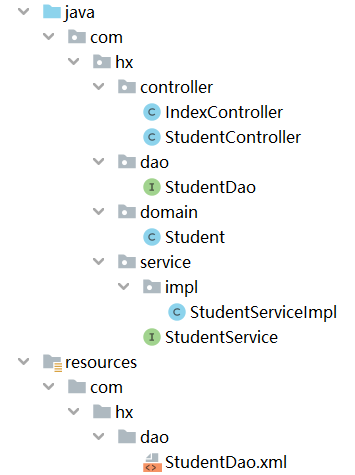
3 编写前端代码
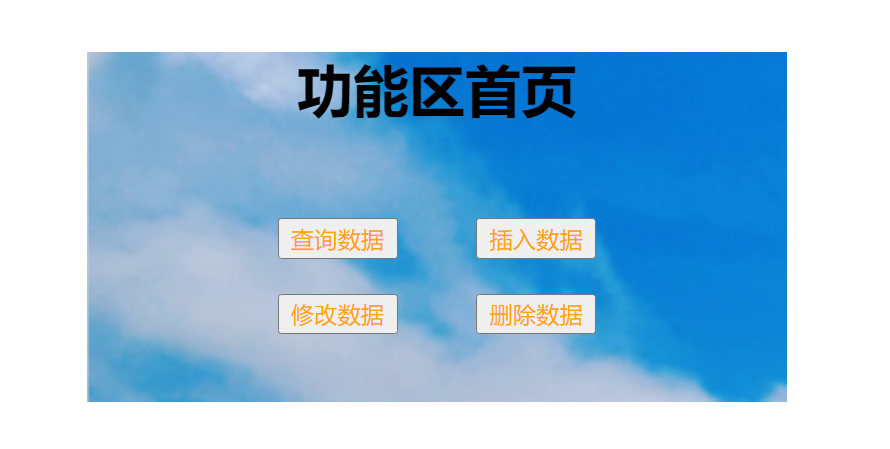
3.1 编写首页index.jsp
<%@ page contentType="text/html;charset=UTF-8" language="java" %>
<html>
<head><title>Title</title><style>div {background-color: antiquewhite;width: 400px;height: 200px;margin: 100px auto;text-align: center;background-image: url("images/p5.jpg");background-repeat: no-repeat;}a {text-decoration: none;color: orange;}button {margin: 10px 20px;}</style>
</head>
<body>
<div><h1>功能区首页</h1><br><button><a href="/student/getAll.do">查询数据</a></button><button><a href="/index/m1Add.do">插入数据</a></button><br><button><a href="/index/m2Put.do">修改数据</a></button><button><a href="/index/m3Del.do">删除数据</a></button>
</div>
</body>
</html>
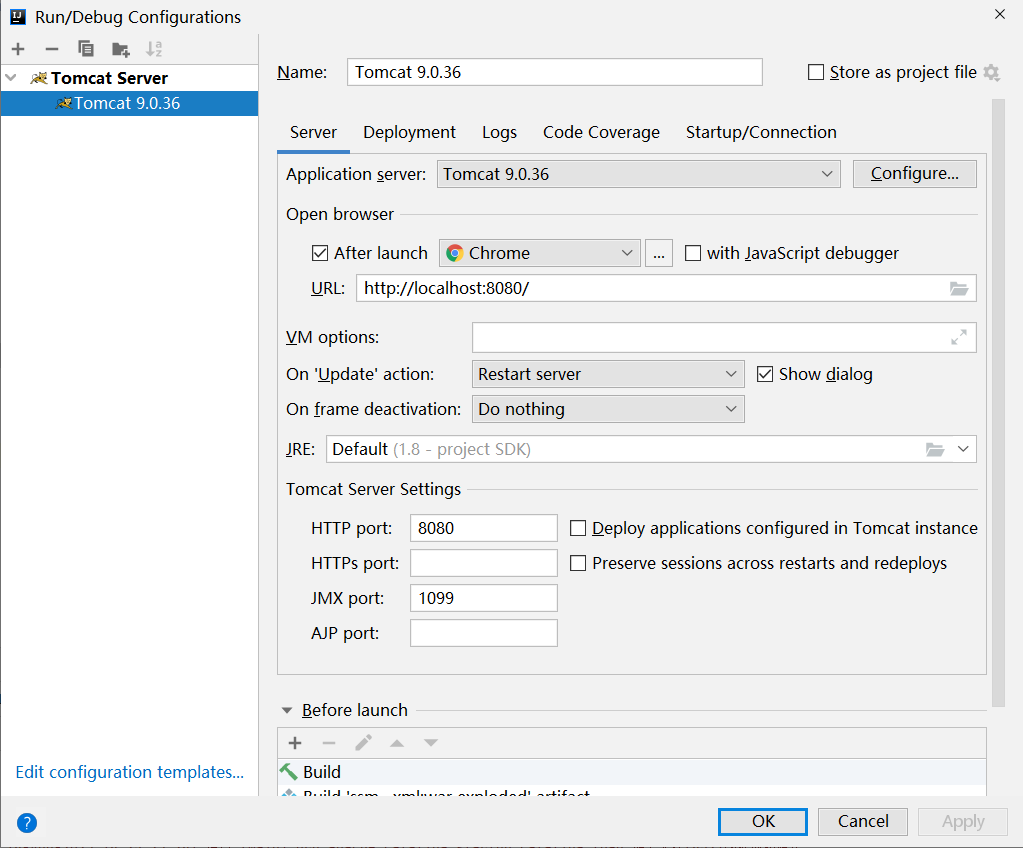
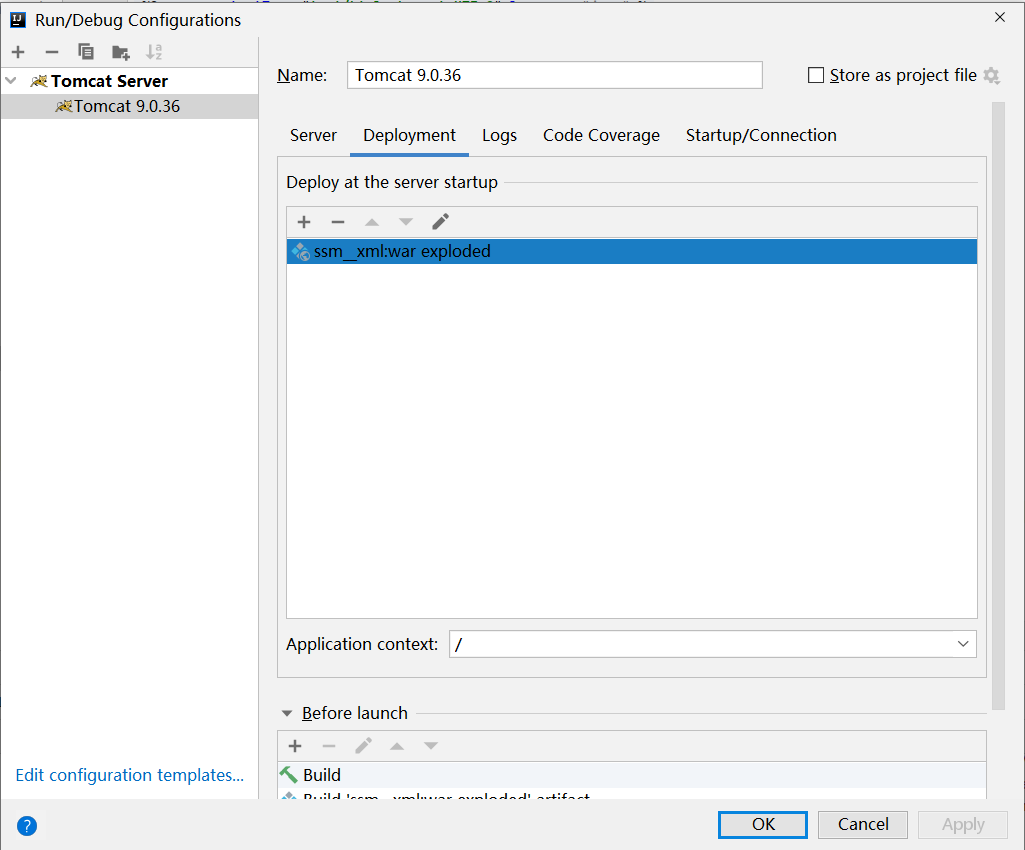
3.2 配置Tomcat
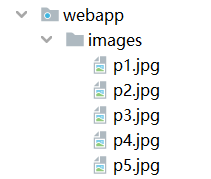
3.3 webapp下配置图片
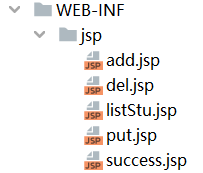
3.4 编写功能页面WEB-INF下
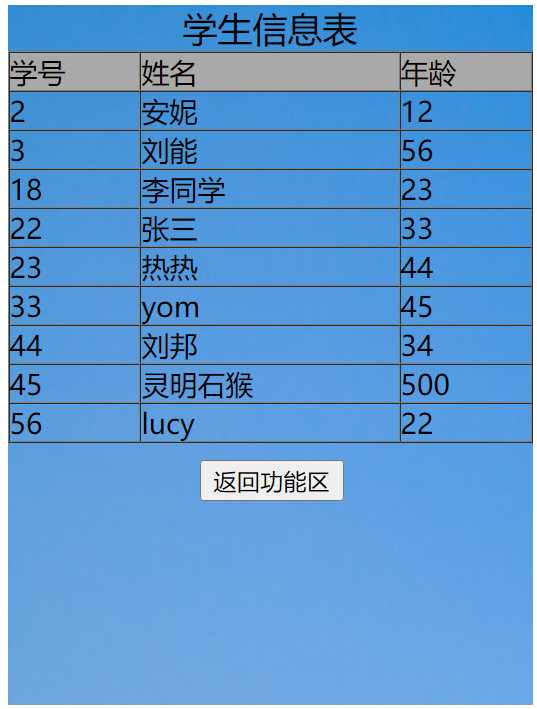
1 编写 listStu.jsp
<%@ page contentType="text/html;charset=UTF-8" language="java" %>
<%@ taglib prefix="c" uri="http://java.sun.com/jsp/jstl/core" %>
<%String basePath =request.getScheme() + "://" +request.getServerName() + ":" +request.getServerPort() + request.getContextPath() + "/";
%>
<html>
<head><title>展示所有学生信息</title><style>.box1 {width: 300px;height: 400px;text-align: center;margin: 10px auto;background-image: url("/images/p3.jpg");background-repeat: no-repeat;}.box2 {width: 80px;height: 25px;text-align: center;margin: 10px auto;}</style>
</head>
<body>
<div class="box1"><table border="1px" width="300px" height="30px" align="center" cellspacing="0" cellpadding="0"><caption style="font-size: 20px">学生信息表</caption><tr bgcolor="#a9a9a9" text-align="center"><td>学号</td><td>姓名</td><td>年龄</td></tr><%--数据行--%><c:forEach items="${list}" var="stu" varStatus="s"><tr><td>${stu.sid}</td><td>${stu.sname}</td><td>${stu.sage}</td></tr></c:forEach></table><%--返回到首页--%><div class="box2"><form action="<%=basePath%>index.jsp"><input type="submit" name="返回" value="返回功能区"></form></div>
</div>
</body>
</html>
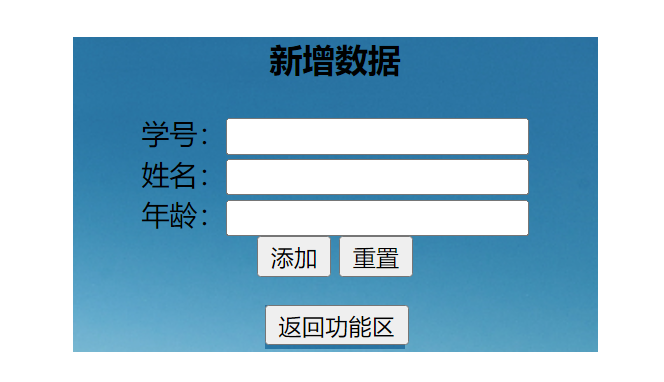
2 编写 add.jsp
<%@ page contentType="text/html;charset=UTF-8" language="java" %>
<%String basePath =request.getScheme() + "://" +request.getServerName() + ":" +request.getServerPort() + request.getContextPath() + "/";
%>
<html>
<head><title>新增学生信息</title><style>div {background-color: antiquewhite;width: 300px;height: 180px;margin: 100px auto;text-align: center;line-height: normal;background-image: url("/images/p1.jpg");background-repeat: no-repeat;}.box2 {width: 80px;height: 25px;text-align: center;margin: auto;}</style>
</head>
<body>
<div><h3>新增数据</h3><form action="/student/add.do" method="post">学号:<input type="text" name="sid" value=""><br>姓名:<input type="text" name="sname" value=""><br>年龄:<input type="text" name="sage" value=""><br><input type="submit" value="添加"><input type="reset" value="重置"></form><%--返回到首页--%><div class="box2"><form action="<%=basePath%>index.jsp"><input type="submit" name="返回" value="返回功能区"></form></div>
</div>
</body>
</html>
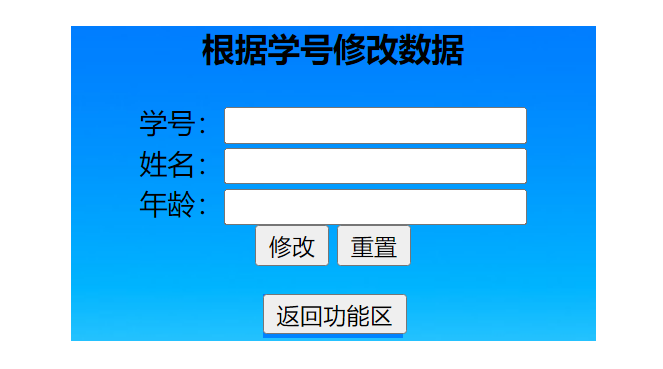
3 编写 put.jsp
<%@ page contentType="text/html;charset=UTF-8" language="java" %>
<%String basePath =request.getScheme() + "://" +request.getServerName() + ":" +request.getServerPort() + request.getContextPath() + "/";
%>
<html>
<head><title>修改学生信息</title><style>div {background-color: antiquewhite;width: 300px;height: 180px;margin: 100px auto;text-align: center;line-height: normal;background-image: url("/images/p4.jpg");background-repeat: no-repeat;}.box2 {width: 80px;height: 25px;text-align: center;margin: auto;}</style>
</head>
<body>
<div><h3>根据学号修改数据</h3><form action="/student/put.do" method="post">学号:<input type="text" name="sid" value=""><br>姓名:<input type="text" name="sname" value=""><br>年龄:<input type="text" name="sage" value=""><br><input type="submit" value="修改"><input type="reset" value="重置"></form><%--返回到首页--%><div class="box2"><form action="<%=basePath%>index.jsp"><input type="submit" name="返回" value="返回功能区"></form></div>
</div>
</body>
</html>
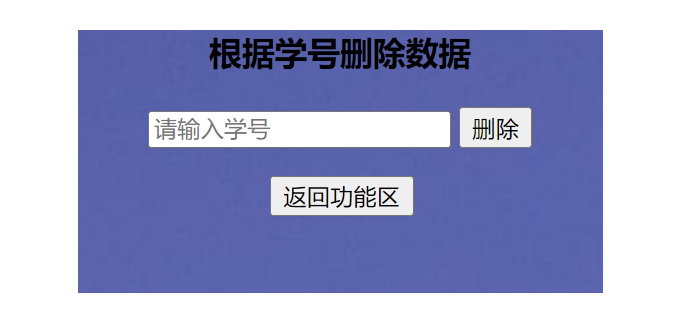
4 编写 del.jsp
<%@ page contentType="text/html;charset=UTF-8" language="java" %>
<%String basePath =request.getScheme() + "://" +request.getServerName() + ":" +request.getServerPort() + request.getContextPath() + "/";
%>
<html>
<head><title>删除学生信息</title><style>div {background-color: beige;width: 300px;height: 150px;margin: 100px auto;text-align: center;background-image: url("/images/p2.jpg");background-repeat: no-repeat;}.box2 {width: 80px;height: 25px;text-align: center;margin: auto;}</style>
</head>
<body>
<div><h3>根据学号删除数据</h3><form action="/student/del.do" method="get"><input type="text" placeholder="请输入学号" name="sid" value=""><input type="submit" value="删除"></form><%--返回到首页--%><div class="box2"><form action="<%=basePath%>index.jsp"><input type="submit" name="返回" value="返回功能区"></form></div>
</div>
</body>
</html>
5 编写success.jsp
<%@ page contentType="text/html;charset=UTF-8" language="java" %>
<%@ taglib prefix="c" uri="http://java.sun.com/jsp/jstl/core" %>
<%String basePath =request.getScheme() + "://" +request.getServerName() + ":" +request.getServerPort() + request.getContextPath() + "/";
%>
<html>
<head><title>Title</title><style>.box1{width: 200px;height: 150px;background-color: lightgoldenrodyellow;margin: 0 auto;text-align: center;}</style>
</head>
<body>
<div class="box1"><div class="box2"><div>插入:${data1}</div><div>修改:${data2}</div><div>删除:${data3}</div></div><%--返回到首页--%><div><form action="<%=basePath%>index.jsp"><input type="submit" name="返回" value="返回功能区"></form></div>
</div>
</body>
</html>
4 运行访问
4.1 请求路径
首页:http://localhost:8080
4.2 增删改查界面
- 查询功能
- 新增功能
- 修改功能
- 删除功能
4.3 项目源代码
https://gitee.com/allureyu/ssm__xml.git
以上纯属个人一手编写,欢迎指教,不喜勿喷!