官方磨砂方式
- (UIVisualEffectView *)effectView{if(!_effectView){UIBlurEffect *blur = [UIBlurEffect effectWithStyle:UIBlurEffectStyleLight];_effectView = [[UIVisualEffectView alloc] initWithEffect:blur];}return _effectView;
}
使用这种方式对一张图的上半部分和下半部分分别磨砂,并进行拼接,然后发现效果是这样的,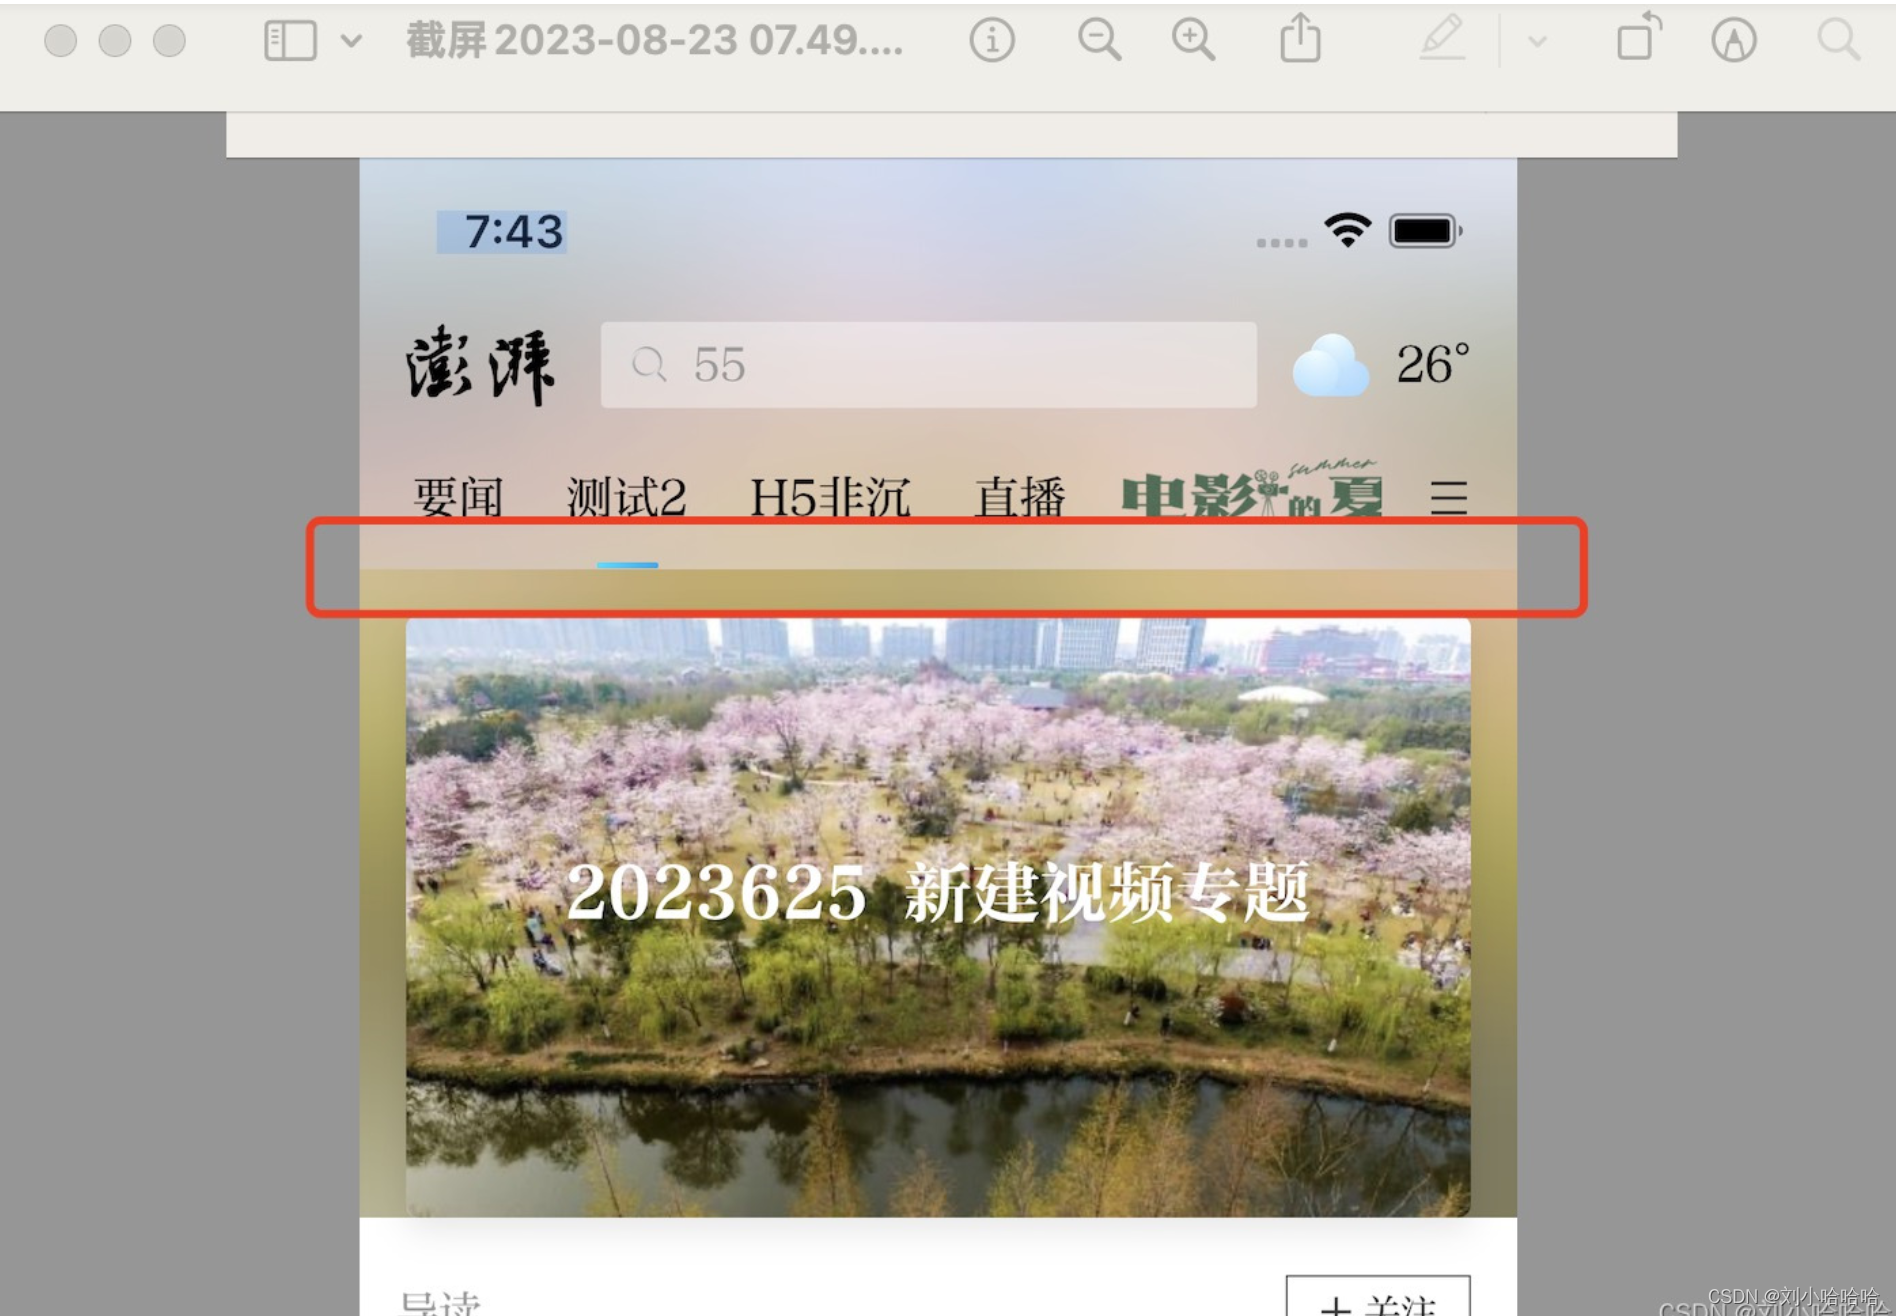
即两个部分有明显的界限,无法完全贴合
自己生成新的磨砂图片
给UIImage添加一个分类,添加如下方法
- (UIImage *)applyLightEffect
{UIColor *tintColor = [UIColor colorWithWhite:1.0 alpha:0.3];return [self applyBlurWithRadius:30 tintColor:tintColor saturationDeltaFactor:1.8 maskImage:nil];
}- (UIImage *)applyBlurWithRadius:(CGFloat)blurRadius tintColor:(UIColor *)tintColor saturationDeltaFactor:(CGFloat)saturationDeltaFactor maskImage:(UIImage *)maskImage
{// Check pre-conditions.if (self.size.width < 1 || self.size.height < 1) {TPLOG (@"*** error: invalid size: (%.2f x %.2f). Both dimensions must be >= 1: %@", self.size.width, self.size.height, self);return nil;}if (!self.CGImage) {TPLOG (@"*** error: image must be backed by a CGImage: %@", self);return nil;}if (maskImage && !maskImage.CGImage) {TPLOG (@"*** error: maskImage must be backed by a CGImage: %@", maskImage);return nil;}CGRect imageRect = { CGPointZero, self.size };UIImage *effectImage = self;BOOL hasBlur = blurRadius > __FLT_EPSILON__;BOOL hasSaturationChange = fabs(saturationDeltaFactor - 1.) > __FLT_EPSILON__;if (hasBlur || hasSaturationChange) {UIGraphicsBeginImageContextWithOptions(self.size, NO, [[UIScreen mainScreen] scale]);CGContextRef effectInContext = UIGraphicsGetCurrentContext();CGContextScaleCTM(effectInContext, 1.0, -1.0);CGContextTranslateCTM(effectInContext, 0, -self.size.height);CGContextDrawImage(effectInContext, imageRect, self.CGImage);vImage_Buffer effectInBuffer;effectInBuffer.data     = CGBitmapContextGetData(effectInContext);effectInBuffer.width    = CGBitmapContextGetWidth(effectInContext);effectInBuffer.height   = CGBitmapContextGetHeight(effectInContext);effectInBuffer.rowBytes = CGBitmapContextGetBytesPerRow(effectInContext);UIGraphicsBeginImageContextWithOptions(self.size, NO, [[UIScreen mainScreen] scale]);CGContextRef effectOutContext = UIGraphicsGetCurrentContext();vImage_Buffer effectOutBuffer;effectOutBuffer.data     = CGBitmapContextGetData(effectOutContext);effectOutBuffer.width    = CGBitmapContextGetWidth(effectOutContext);effectOutBuffer.height   = CGBitmapContextGetHeight(effectOutContext);effectOutBuffer.rowBytes = CGBitmapContextGetBytesPerRow(effectOutContext);if (hasBlur) {// A description of how to compute the box kernel width from the Gaussian// radius (aka standard deviation) appears in the SVG spec:// http://www.w3.org/TR/SVG/filters.html#feGaussianBlurElement//// For larger values of 's' (s >= 2.0), an approximation can be used: Three// successive box-blurs build a piece-wise quadratic convolution kernel, which// approximates the Gaussian kernel to within roughly 3%.//// let d = floor(s * 3*sqrt(2*pi)/4 + 0.5)//// ... if d is odd, use three box-blurs of size 'd', centered on the output pixel.//CGFloat inputRadius = blurRadius * [[UIScreen mainScreen] scale];int radius = floor(inputRadius * 3. * sqrt(2 * M_PI) / 4 + 0.5);if (radius % 2 != 1) {radius += 1; // force radius to be odd so that the three box-blur methodology works.}vImageBoxConvolve_ARGB8888(&effectInBuffer, &effectOutBuffer, NULL, 0, 0,radius, radius, 0, kvImageEdgeExtend);vImageBoxConvolve_ARGB8888(&effectOutBuffer, &effectInBuffer, NULL, 0, 0, radius, radius, 0, kvImageEdgeExtend);vImageBoxConvolve_ARGB8888(&effectInBuffer, &effectOutBuffer, NULL, 0, 0, radius, radius, 0, kvImageEdgeExtend);}BOOL effectImageBuffersAreSwapped = NO;if (hasSaturationChange) {CGFloat s = saturationDeltaFactor;CGFloat floatingPointSaturationMatrix[] = {0.0722 + 0.9278 * s,  0.0722 - 0.0722 * s,  0.0722 - 0.0722 * s,  0,0.7152 - 0.7152 * s,  0.7152 + 0.2848 * s,  0.7152 - 0.7152 * s,  0,0.2126 - 0.2126 * s,  0.2126 - 0.2126 * s,  0.2126 + 0.7873 * s,  0,0,                    0,                    0,  1,};const int32_t divisor = 256;NSUInteger matrixSize = sizeof(floatingPointSaturationMatrix)/sizeof(floatingPointSaturationMatrix[0]);int16_t saturationMatrix[matrixSize];for (NSUInteger i = 0; i < matrixSize; ++i) {saturationMatrix[i] = (int16_t)roundf(floatingPointSaturationMatrix[i] * divisor);}if (hasBlur) {vImageMatrixMultiply_ARGB8888(&effectOutBuffer, &effectInBuffer, saturationMatrix, divisor, NULL, NULL, kvImageNoFlags);effectImageBuffersAreSwapped = YES;}else {vImageMatrixMultiply_ARGB8888(&effectInBuffer, &effectOutBuffer, saturationMatrix, divisor, NULL, NULL, kvImageNoFlags);}}if (!effectImageBuffersAreSwapped)effectImage = UIGraphicsGetImageFromCurrentImageContext();UIGraphicsEndImageContext();if (effectImageBuffersAreSwapped)effectImage = UIGraphicsGetImageFromCurrentImageContext();UIGraphicsEndImageContext();}// Set up output context.UIGraphicsBeginImageContextWithOptions(self.size, NO, [[UIScreen mainScreen] scale]);CGContextRef outputContext = UIGraphicsGetCurrentContext();CGContextScaleCTM(outputContext, 1.0, -1.0);CGContextTranslateCTM(outputContext, 0, -self.size.height);// Draw base image.CGContextDrawImage(outputContext, imageRect, self.CGImage);// Draw effect image.if (hasBlur) {CGContextSaveGState(outputContext);if (maskImage) {CGContextClipToMask(outputContext, imageRect, maskImage.CGImage);}CGContextDrawImage(outputContext, imageRect, effectImage.CGImage);CGContextRestoreGState(outputContext);}// Add in color tint.if (tintColor) {CGContextSaveGState(outputContext);CGContextSetFillColorWithColor(outputContext, tintColor.CGColor);CGContextFillRect(outputContext, imageRect);CGContextRestoreGState(outputContext);}// Output image is ready.UIImage *outputImage = UIGraphicsGetImageFromCurrentImageContext();UIGraphicsEndImageContext();return outputImage;
}
外面使用
UIImage *blurImage = [image applyLightEffect];self.bannerView.image = blurImage;效果图
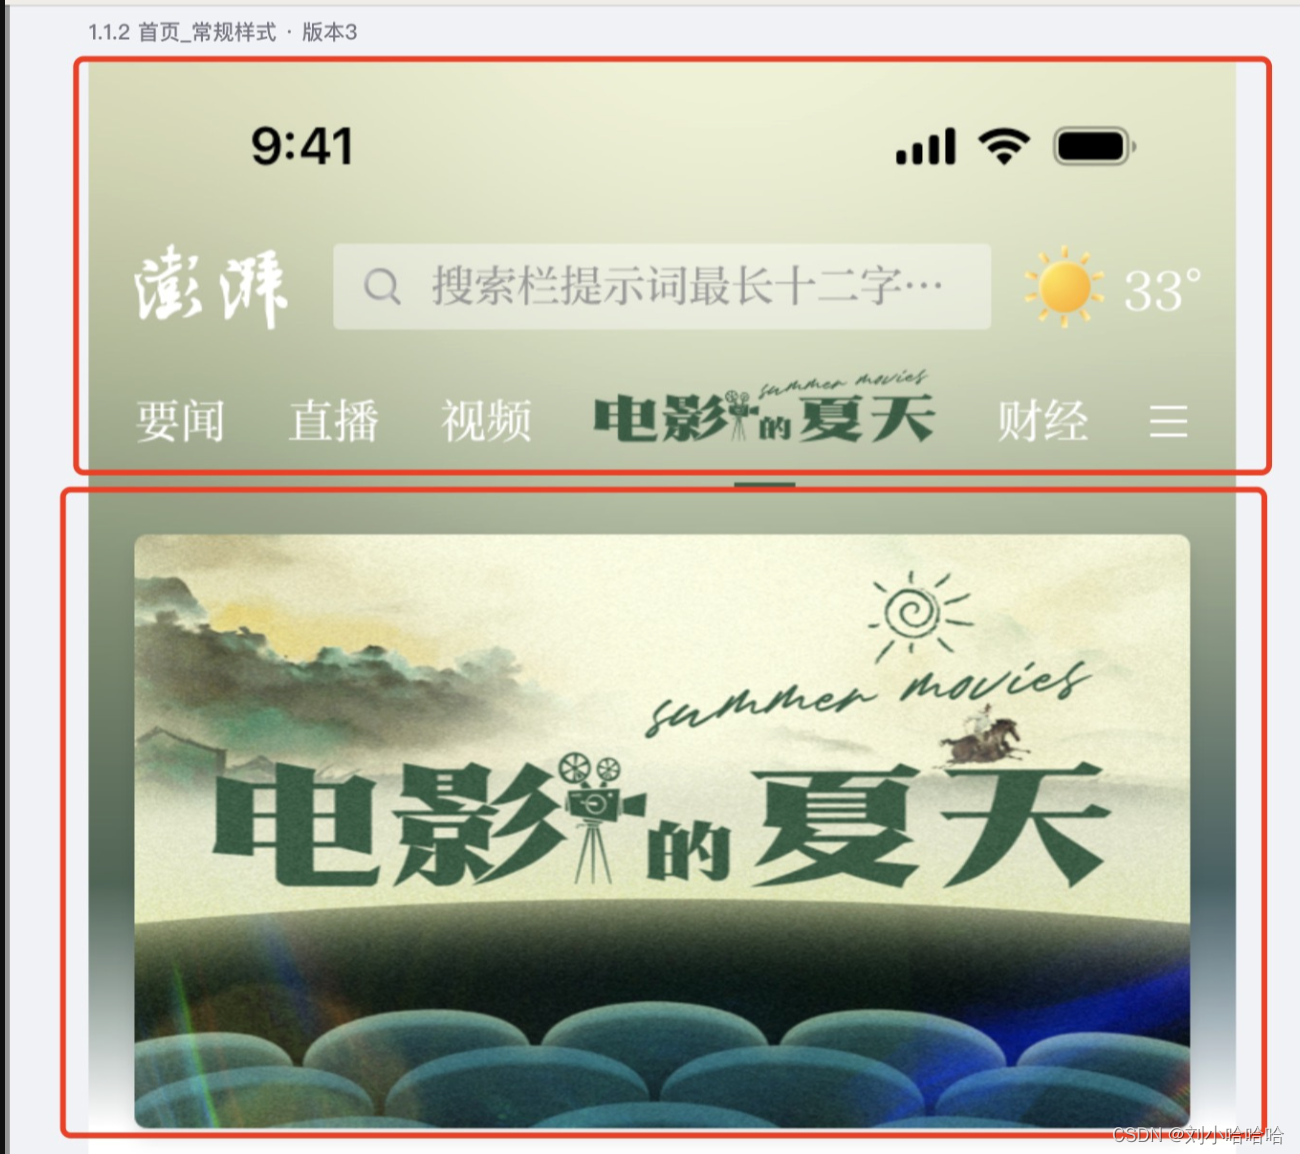
上下完全贴合
综上所述,如果某清情况下我们要分别对图片进行磨砂,并式两个图片完全贴合,则可以使用 这种磨砂方式