1,安装android studio2022。
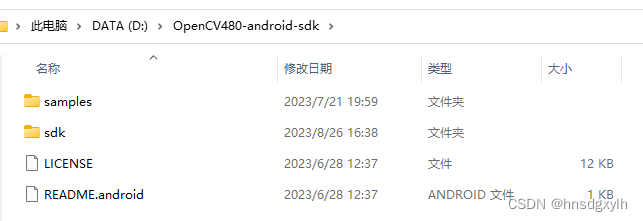
2,下载OPENCV4ANDROID,解压到任意盘中。
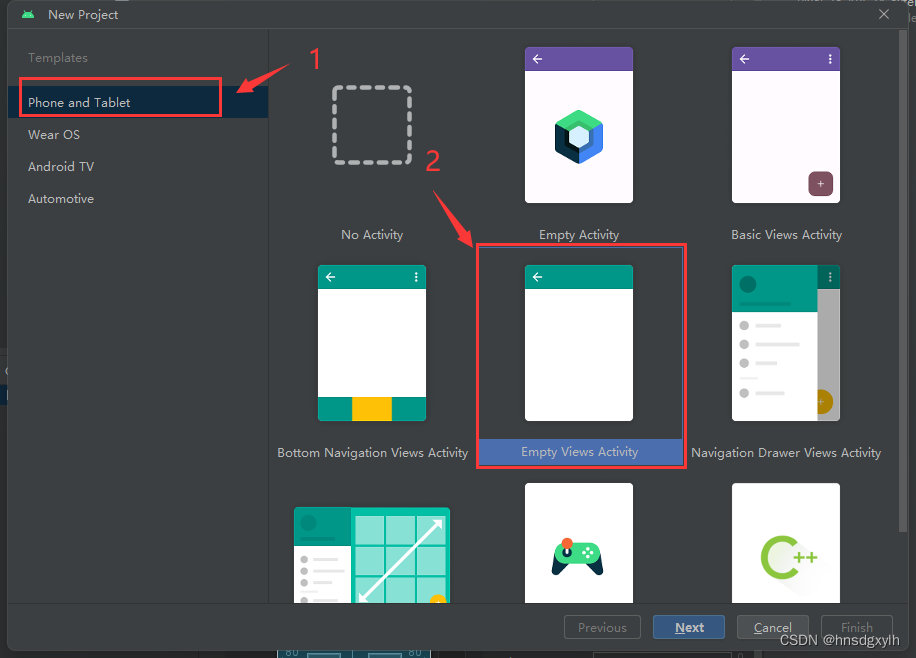
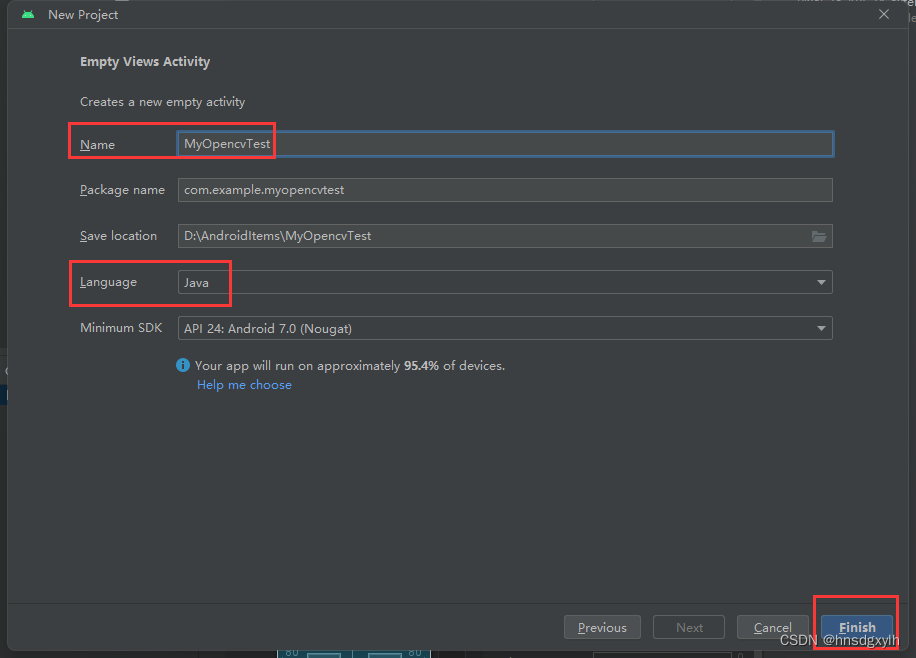
3,File->New->New Project,选择Empty Views Activity。再选择语言,本文选择JAVA。
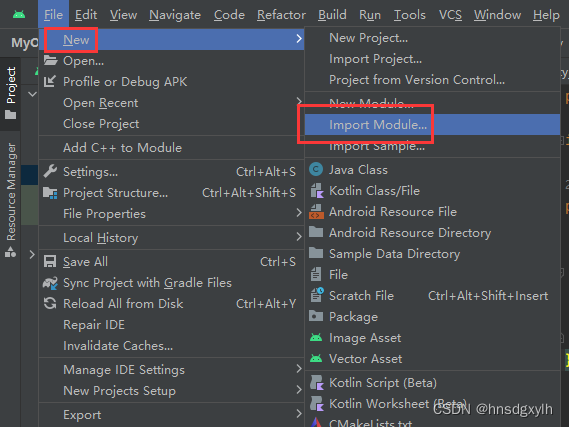
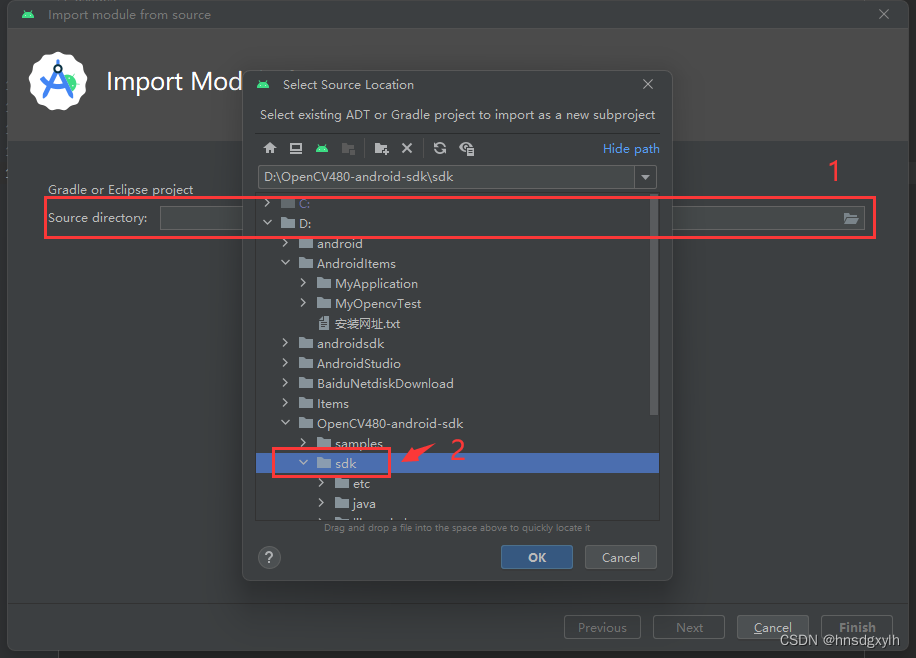
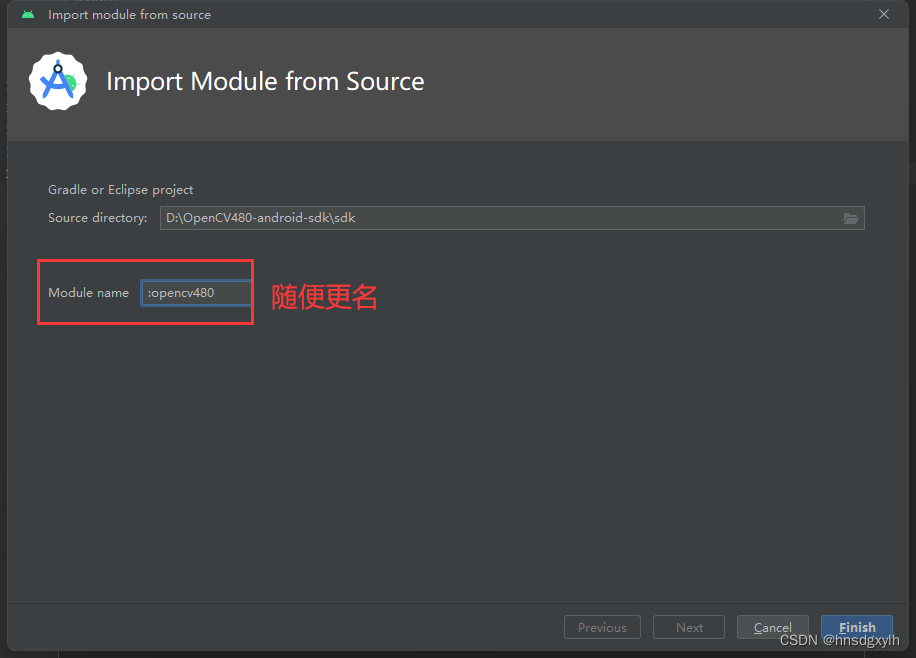
4,File->New->Import Module->Source directory->选择解压后的OPENCV的sdk文件夹,Module name随便更改,点击确定。
5,Android Studio下面出现如下错误,需要更改一些配置。

6,File->Project Structure

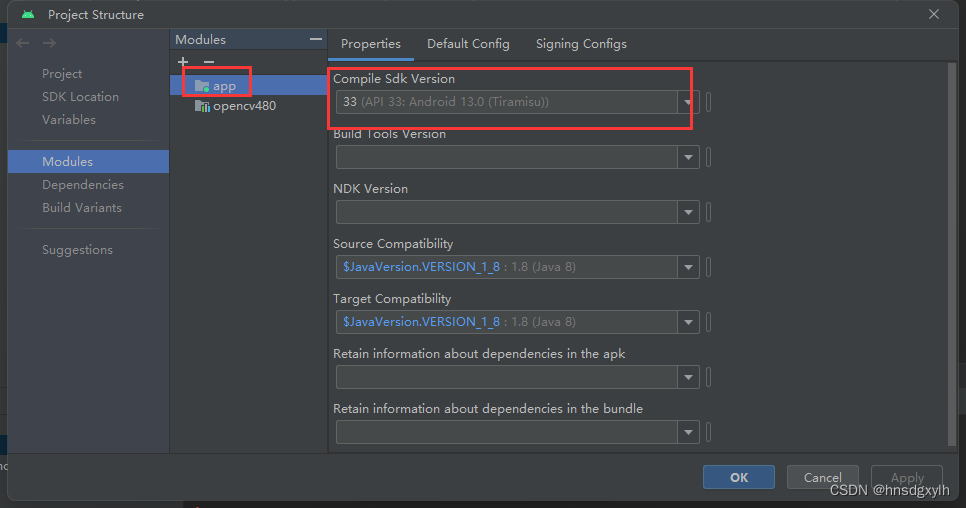
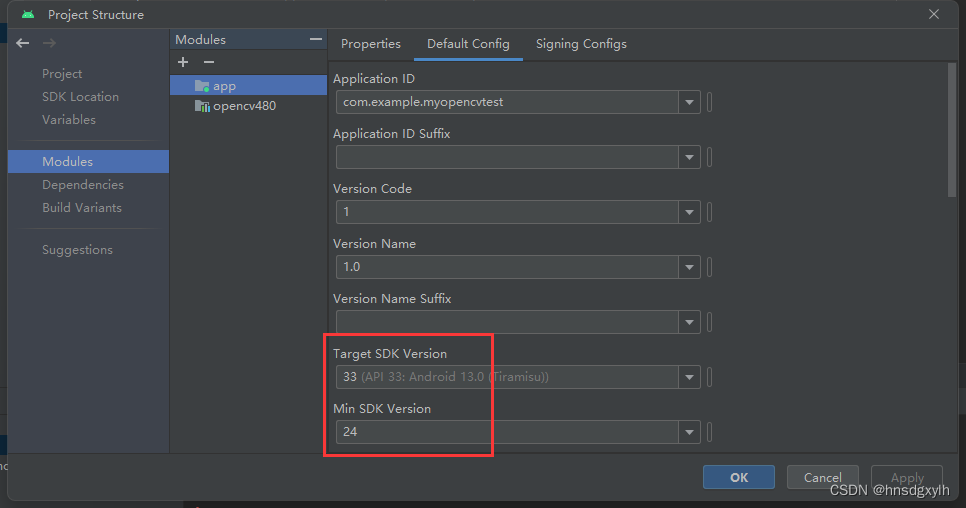
更改opencv480的三个部分,Compile Sdk Vision,Target SDK Vision, Min SDK Vision, 这三个模块,跟app的模块一致。
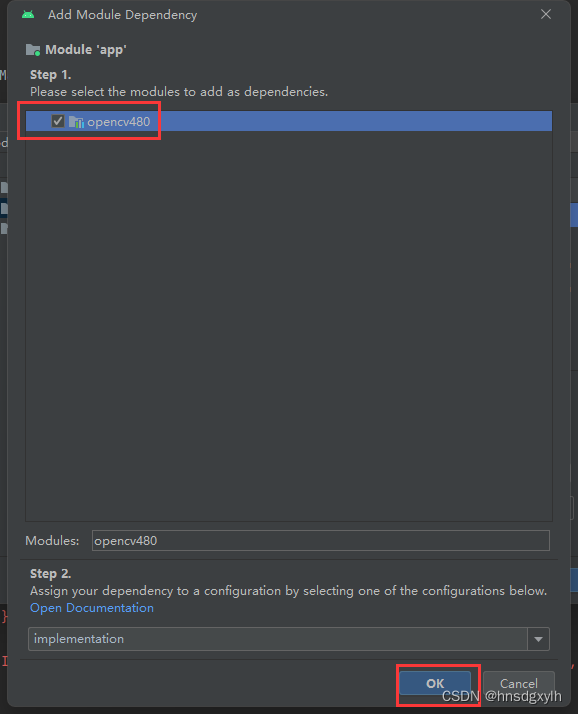
点击Dependencies,发现有app,opencv480,点击app,右上角+,点击添加module dependency,点击选中,然后点击ok。

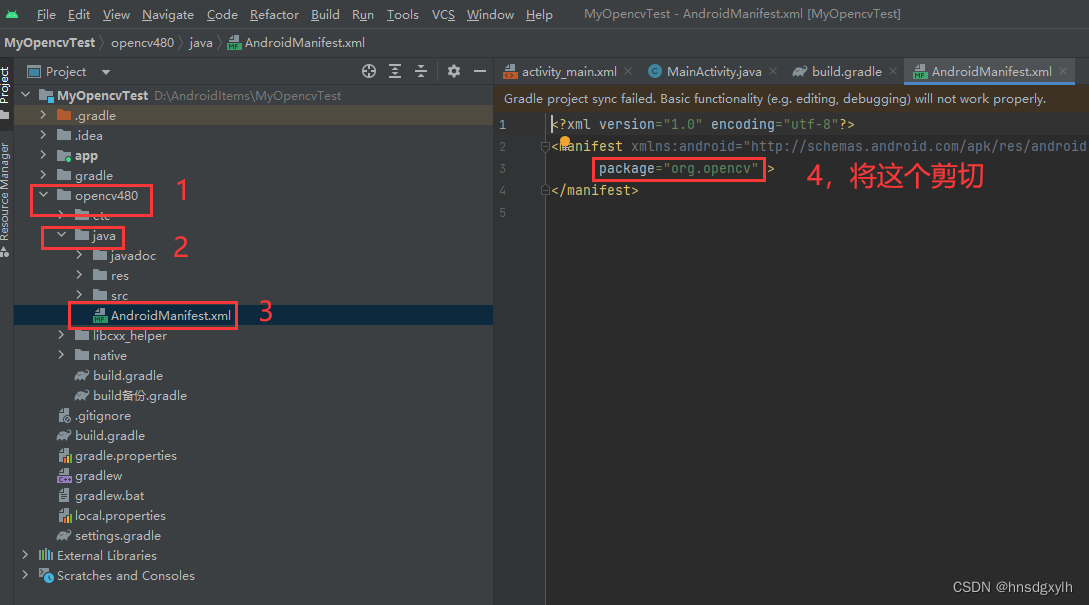
7,点击opencv480->java->AndroidManifest.xml,双击,将pack="org.opencv"删除,保存。
8,项目切换到Project模式,展开opencv480(自己命名的OPENCV工程名字),点击build.gradle,双击打开。
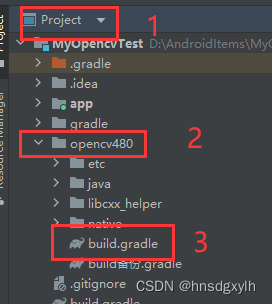
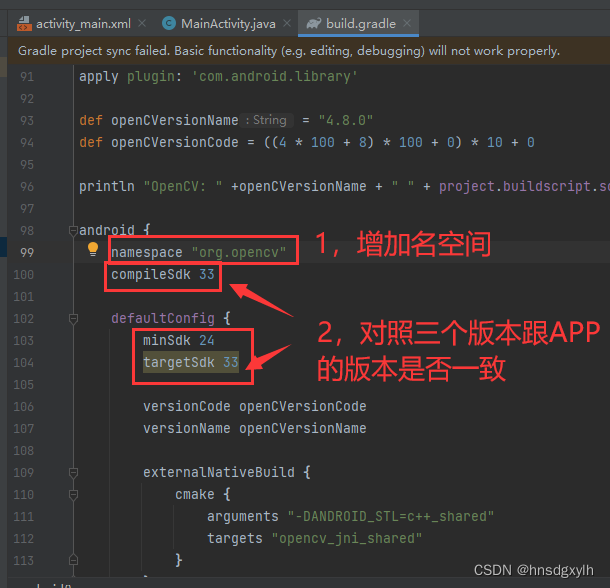
在android里面增加 namespace "org.opencv",防止报错
9,但是点编译会报错,看报错是找不到OpencvEngineInterface和BuildConifg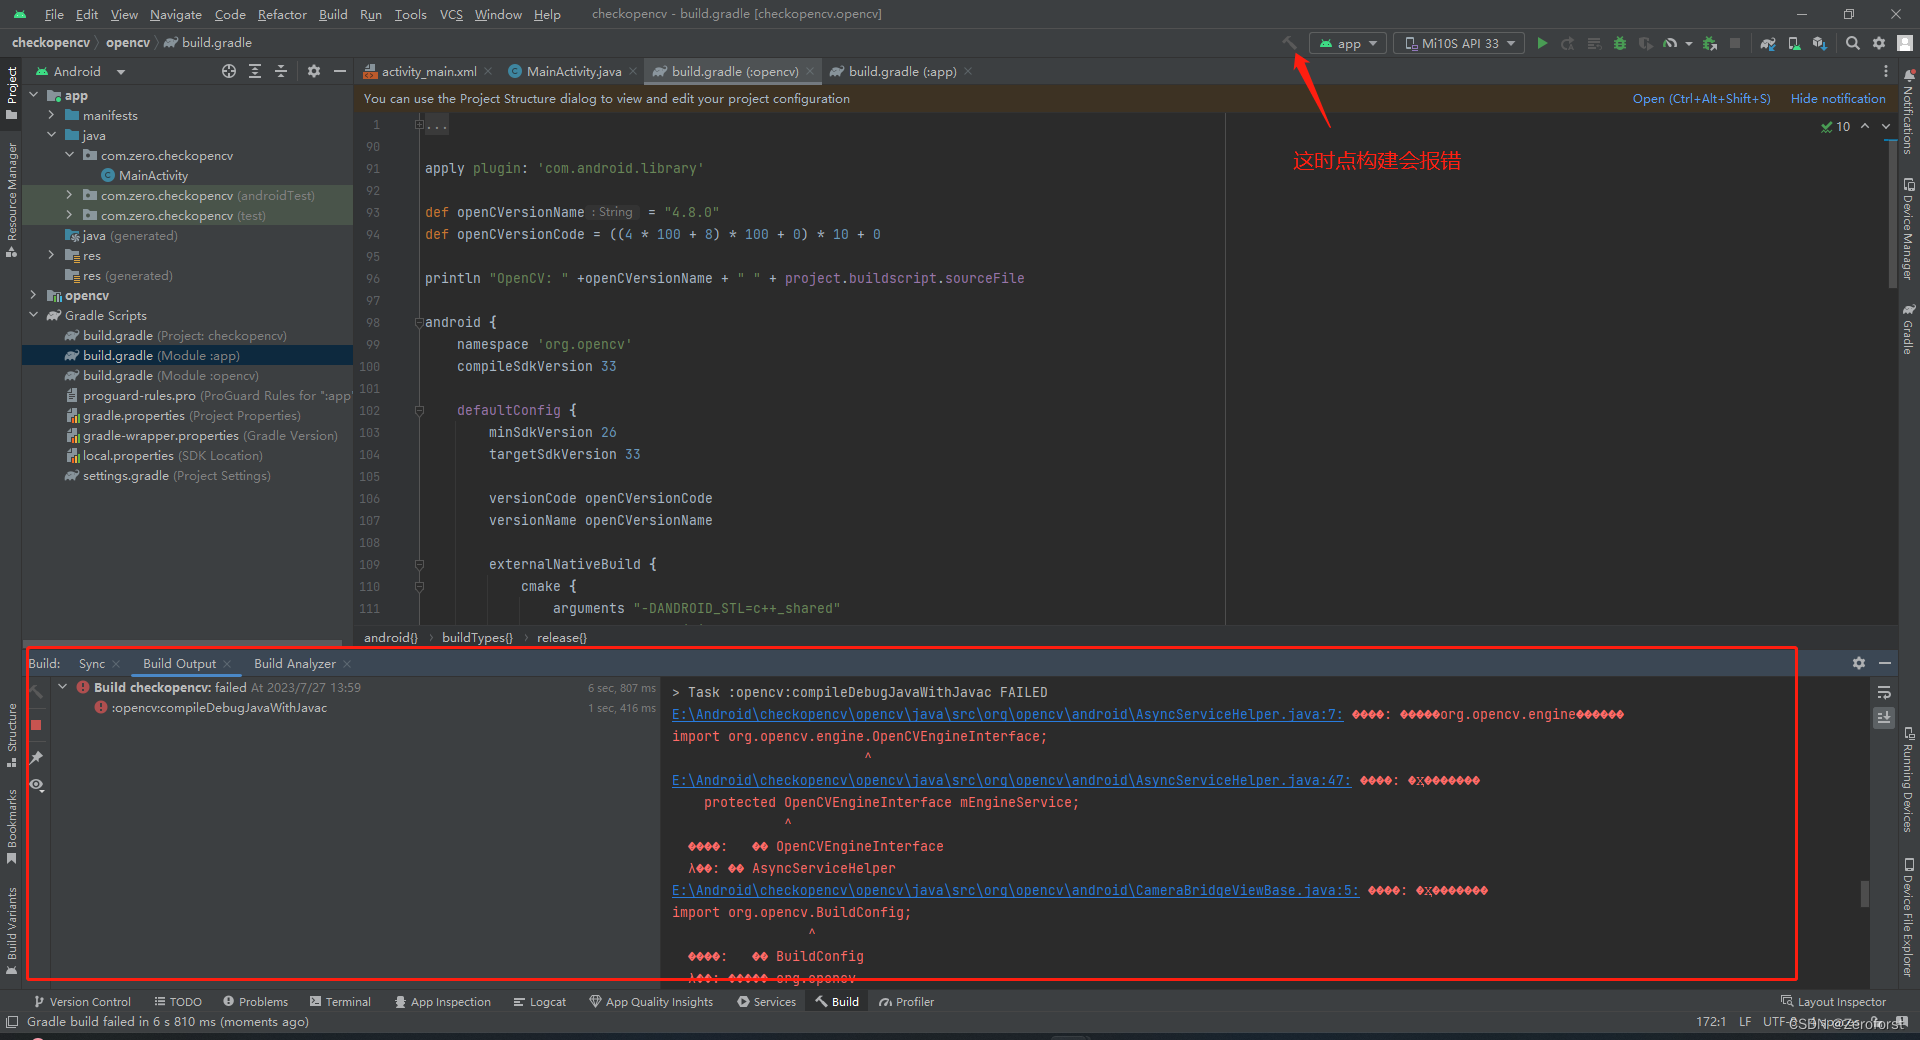
上面的原因是默认编译的时候没带aidl和buildConfig
回到opencv的build.gradle加上buildFeatures
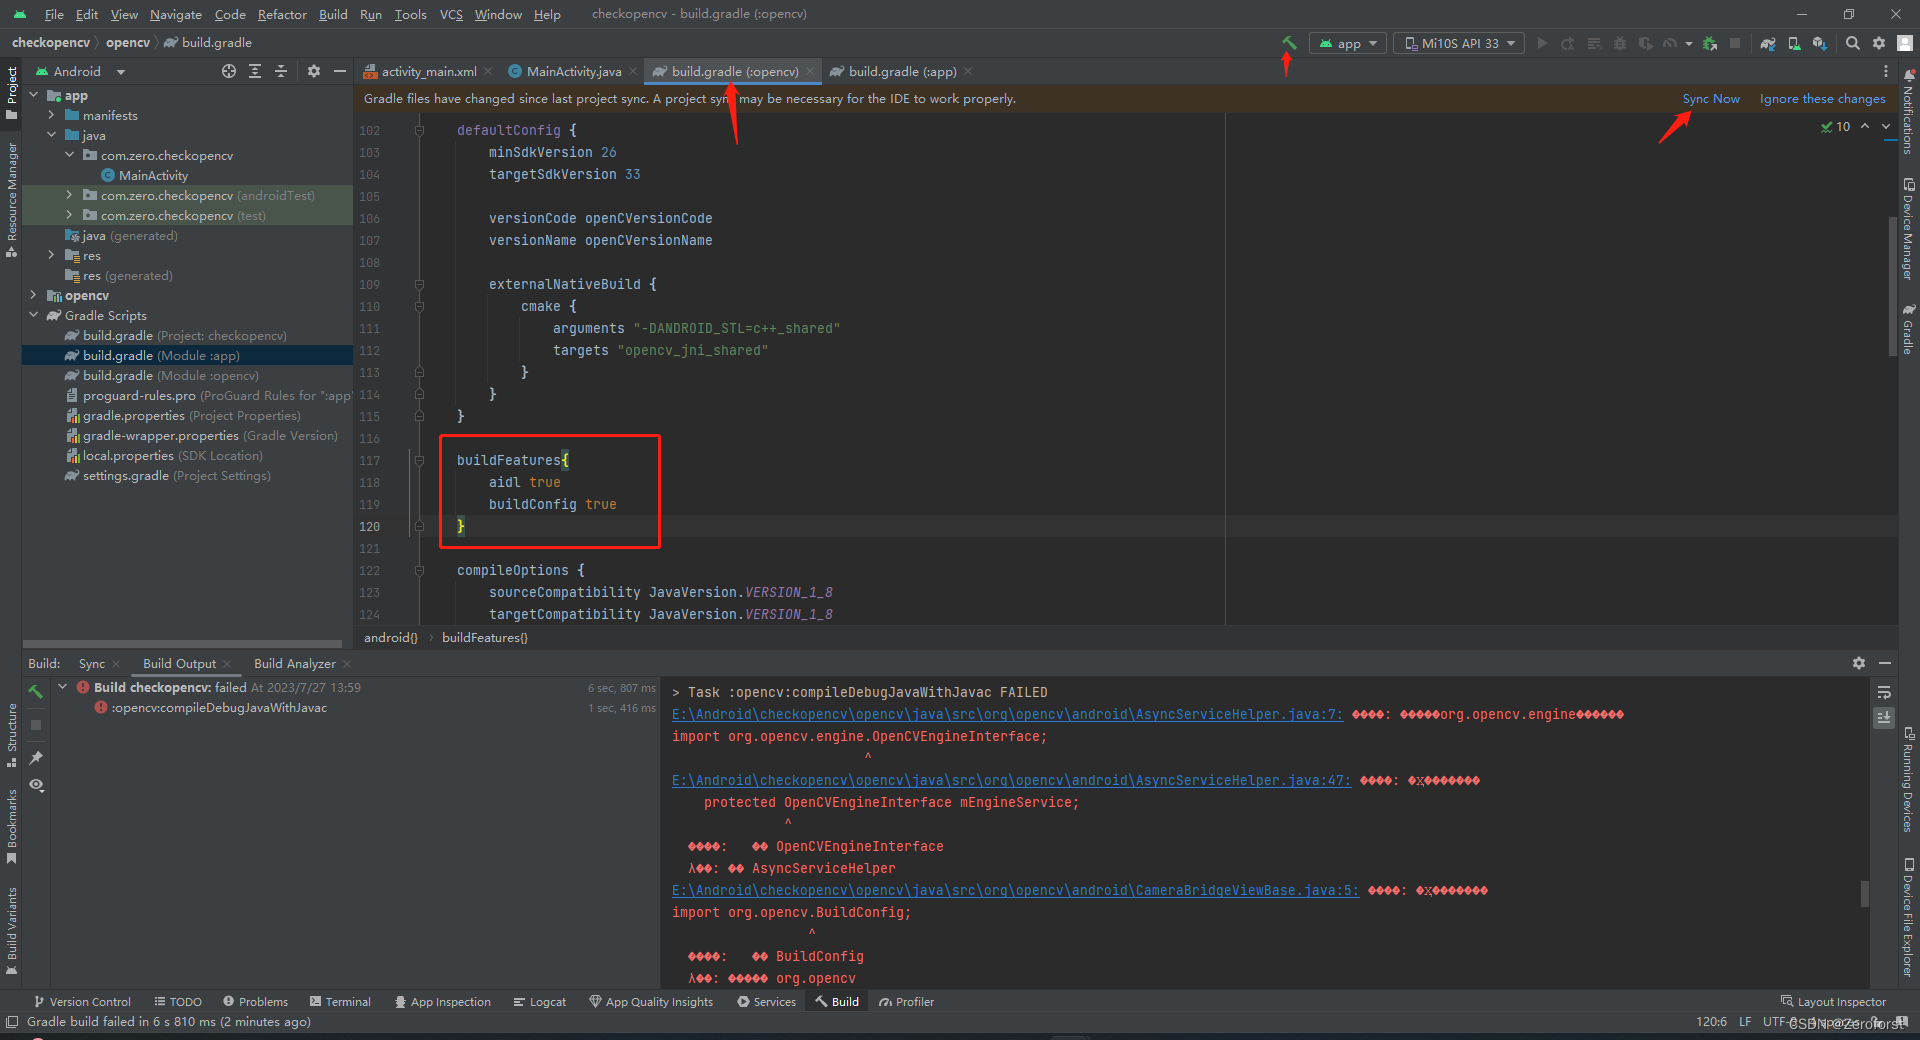
编译可以通过了
6,7,8,9步骤可以重复,将更改后的两个文件,AndroidManifest.xml和build.gradle,放到opencv4android解压后的相同地方,替换原来的,就行了,以后不用再配置了
给一段简单的界面和代码
<?xml version="1.0" encoding="utf-8"?>
<RelativeLayoutxmlns:android="http://schemas.android.com/apk/res/android"xmlns:tools="http://schemas.android.com/tools"xmlns:app="http://schemas.android.com/apk/res-auto"android:layout_width="match_parent"android:layout_height="match_parent"tools:context=".MainActivity"android:orientation="vertical"><Buttonandroid:id="@+id/button"android:layout_width="wrap_content"android:layout_height="wrap_content"android:layout_alignParentStart="true"android:layout_alignParentLeft="true"android:layout_alignParentBottom="true"android:layout_marginStart="80dp"android:layout_marginLeft="54dp"android:layout_marginBottom="80dp"android:text="灰度" /><ImageButtonandroid:id="@+id/imageButton"android:layout_width="500dp"android:layout_height="400dp"android:layout_alignParentEnd="true"android:layout_alignParentRight="true"android:layout_alignParentBottom="true"android:layout_marginEnd="6dp"android:layout_marginRight="6dp"android:layout_marginBottom="209dp"android:scaleType="centerCrop"app:srcCompat="@drawable/a1" /><Buttonandroid:id="@+id/button2"android:layout_width="wrap_content"android:layout_height="wrap_content"android:layout_alignParentEnd="true"android:layout_alignParentRight="true"android:layout_alignParentBottom="true"android:layout_marginEnd="80dp"android:layout_marginRight="80dp"android:layout_marginBottom="80dp"android:text="返回" /></RelativeLayout>
java代码
package com.example.myopencvtest;
import android.graphics.Bitmap;
import android.graphics.BitmapFactory;
import android.os.Bundle;
import android.view.View;
import android.widget.Button;
import android.widget.ImageView;
import android.widget.Toast;import androidx.annotation.Nullable;
import androidx.appcompat.app.AppCompatActivity;
import org.opencv.android.OpenCVLoader;
import org.opencv.android.Utils;
import org.opencv.core.Mat;
import org.opencv.core.Point;
import org.opencv.core.Scalar;
import org.opencv.imgproc.Imgproc;import java.io.IOException;public class MainActivity extends AppCompatActivity {private Button btn1,btn2;private ImageView img1;private Mat srcmat1,srcmat2;private Bitmap bitmap;@Overrideprotected void onDestroy() {super.onDestroy();srcmat1.release();srcmat2.release();}@Overrideprotected void onCreate(@Nullable Bundle savedInstanceState) {super.onCreate(savedInstanceState);setContentView(R.layout.activity_main);//OpenCV 初始化inLoadOpenCV();//按钮 初始化btn1 = findViewById(R.id.button);btn2 =findViewById(R.id.button2);img1 = findViewById(R.id.imageButton);srcmat1 = new Mat();srcmat2 = new Mat();try {srcmat1 = Utils.loadResource(this, R.drawable.a1);//图片名称} catch (IOException e) {e.printStackTrace();}
//        转成灰度图btn1.setOnClickListener(new View.OnClickListener() {public void onClick(View v) {
//                Toast toast = Toast.makeText(MainActivity.this, "Button被点击了", Toast.LENGTH_SHORT);
//                toast.show();//彩色转灰色Imgproc.cvtColor(srcmat1,srcmat2,Imgproc.COLOR_BGRA2GRAY);//Imgproc.putText(srcmat1,"I'm a cat" ,new Point( srcmat1.width()/2.,srcmat1.height()/3),2,2,new Scalar(0,255,0),3);bitmap = Bitmap.createBitmap(srcmat2.width(), srcmat2.height(), Bitmap.Config.ARGB_8888);Utils.matToBitmap(srcmat2, bitmap);img1.setImageBitmap(bitmap);}});//        返回原图btn2.setOnClickListener(new View.OnClickListener() {@Overridepublic void onClick(View v) {bitmap= BitmapFactory.decodeResource(getResources(),R.drawable.a1);//图片名称img1.setImageBitmap(bitmap);}});}//OpenCV库的加载private void inLoadOpenCV(){boolean success= OpenCVLoader.initDebug();if (success){Toast.makeText(this.getApplicationContext(),"成功",Toast.LENGTH_LONG).show();}else{Toast.makeText(this.getApplicationContext(),"失败",Toast.LENGTH_LONG).show();}}
}
同时,记得在res/drawable下面放一个叫a1.jpg的图片
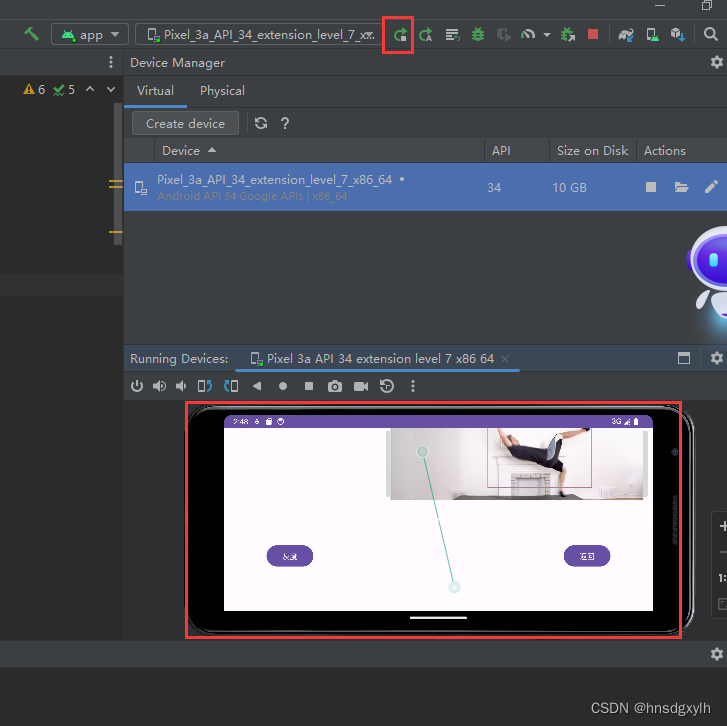
点击运行,就有结果
![河湖长制综合管理信息平台建设项目总体设计方案[507页Word]](https://img-blog.csdnimg.cn/img_convert/c641e5913afe69b78c320bed32186689.jpeg)



![[Linux]进程地址空间](https://img-blog.csdnimg.cn/img_convert/ed51984a4e3fa0f90d2c3d939a4b6291.png)


