目录
一、概述
二、安装
1、选择源
2、安装ansible
3、模块查看
三、实验
1、拓扑编辑
2、设置组、ping模块
3、hostname模块
4、file模块
编辑
5、stat模块
6、copy模块(本地拷贝到远程)
7、fetch模块与copy模块类似,但作用相反。用于把远程机器的文件拷贝到本地。
8、user模块
9、group模块
10、cron模块
四、yum_repository模块
五、yum模块
六、server模块
七、script模块
八、command与shell模块
九、playbook
YMAL格式
一、概述
Ansible是一种自动化工具,用于配置管理、应用程序部署和协调云部署。它是一个开源工具,使用Python编写,通过SSH协议与远程主机通信。
1. 相关介绍和同类平台:
- 相关介绍:Ansible是一种基于代理的自动化工具,它使用简单、轻量级的语法。它的主要目标是使自动化过程简单易用,同时提供强大的功能来管理大规模的基础架构。
- 同类平台:与Ansible类似的自动化工具包括Puppet、Chef和SaltStack等。这些工具都提供了类似的功能,但在语法、工作原理和部署模型上略有不同。
2. 为什么要用Ansible、它能做什么以及优点:
- 简单易用:Ansible使用基于YAML的语法,易于理解和编写,无需编程知识。它还具有良好的文档和活跃的社区支持。
- 无代理:Ansible使用SSH协议进行通信,无需在远程主机上安装任何代理程序,这使得部署和配置更加简单和安全。
- 基于剧本:Ansible使用基于剧本的方式来描述并执行自动化任务,使得任务的组织和管理更加灵活和可扩展。
- 高度可配置:Ansible支持各种平台和操作系统,并提供了丰富的模块和插件,可以管理各种类型的资源,包括服务器、网络设备、云平台等。
- 扩展性:Ansible具有强大的可扩展性,可以根据特定需求编写自定义模块和插件,或与现有工具和系统集成。
3. 工作原理:
- Ansible使用一个控制节点来管理多个远程主机。控制节点上的Ansible配置文件描述了需要执行的任务和相关主机的信息。
- 当控制节点执行Ansible命令时,它会通过SSH连接到远程主机,并在远程主机上执行相应的任务。
- Ansible使用基于模块的方式来管理和配置远程主机。它可以通过内置的模块执行各种操作,如文件管理、软件包安装、服务管理等。
- Ansible还支持使用剧本(Playbooks)来定义和组织多个任务,以及使用变量和条件来实现更复杂的自动化流程。
总的来说,Ansible是一个功能强大、易于使用和无代理的自动化工具,可以帮助简化配置管理和应用程序部署的过程,提高工作效率和可维护性。
核心组件:
• Inventory:Ansible 管理的主机信息,包括 IP 地址、 SSH 端口、账号、密码 等;
• Modules:任务均有模块完成,也可以自定义模块,例如经常用的脚本;
• Plugins:使用插件增加Ansible 核心功能,自身提供了很多插件, 也可以自
定义插件。例如 connection 插件, 用于连接目标主机。 callback 插件可以将 结果输出到其他地方。vars 插件将定义的比变量注入到Ansible 中运行。
• Playbooks:“剧本”,模块化定义一系列任务,供外部统一调用。Ansible 核心功能。
Ansible 可以在安装了 Python 2 (版本 2.6 或 2.7)或 Python 3 (版本 3.5 及更高版本) 的任何机器上运行(管理机器不支持 Windows)。
二、安装
在开始实验前我们先同步集群时间、进行ssh免密
##每台主机
ssh-keygen
ssh-copy-id 192.168.115.131
##在192.168.115.131
for i in 136 140 ;do scp /root/.ssh/authorized_keys 192.168.115.$i:/root/.ssh ;done
##同步集群时间
for i in 131 136 140 ;do ssh 192.168.115.$i yum -y install ntp;done
for i in 131 136 140 ;do ssh 192.168.115.$i systemctl restart ntpd;done
1、选择源
cd /etc/yum.repos.d
mkdir back
mv * bcak
yum clean all
yum makecache
yum update
wget -O /etc/yum.repos.d/CentOS-Base.repo https://mirrors.aliyun.com/repo/Centos-7.repo
curl-o /etc/yum.repos.d/CentOS-Base.repo https://mirrors.aliyun.com/repo/Centos-7.repo
yum makecache frist
yum update
2、安装ansible
yum -y install epel-release.noarch
yum -y install ansible
3、模块查看
###模块列表
ansible-doc -l###模块用法查看
ansible-doc 模块名
三、实验
1、拓扑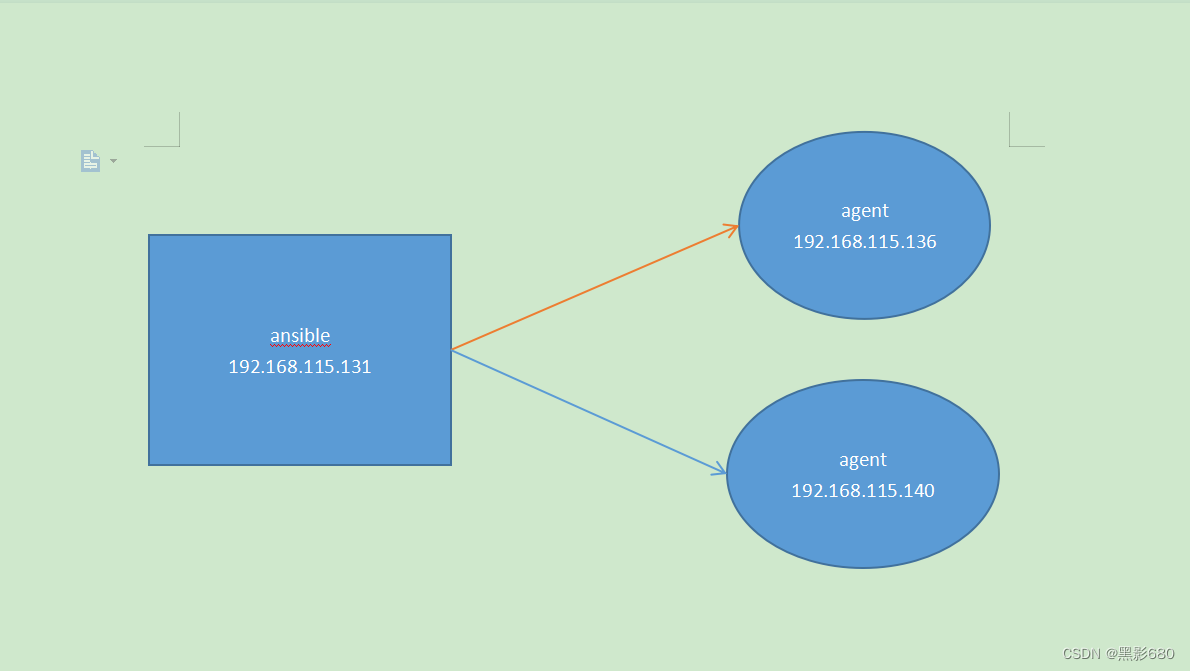
2、设置组、ping模块
绿色成功、红色失败
方式1
vim /etc/ansible/hosts
###插入
[group]
192.168.115.131
192.168.115.136
192.168.115.140
###利用模块ping
ansible -m ping group
方式2
#如果主机数量太多就这样表示
[group]
192.168.115.[136:140]
方式3
##指定端口
[group]
192.168.115.136:22
方式4
###别名
[group]
192.168.115.136:22
hy ansible_ssh_host=192.168.115.140 ansible_ssh_port=22

方式5
##没有ssh免密的也可以
[group]
ansible_ssh_host=192.168.115.140 ansible_ssh_port=22 ansible_ssh_user=用户名 ansible_ssh_pass="密码"
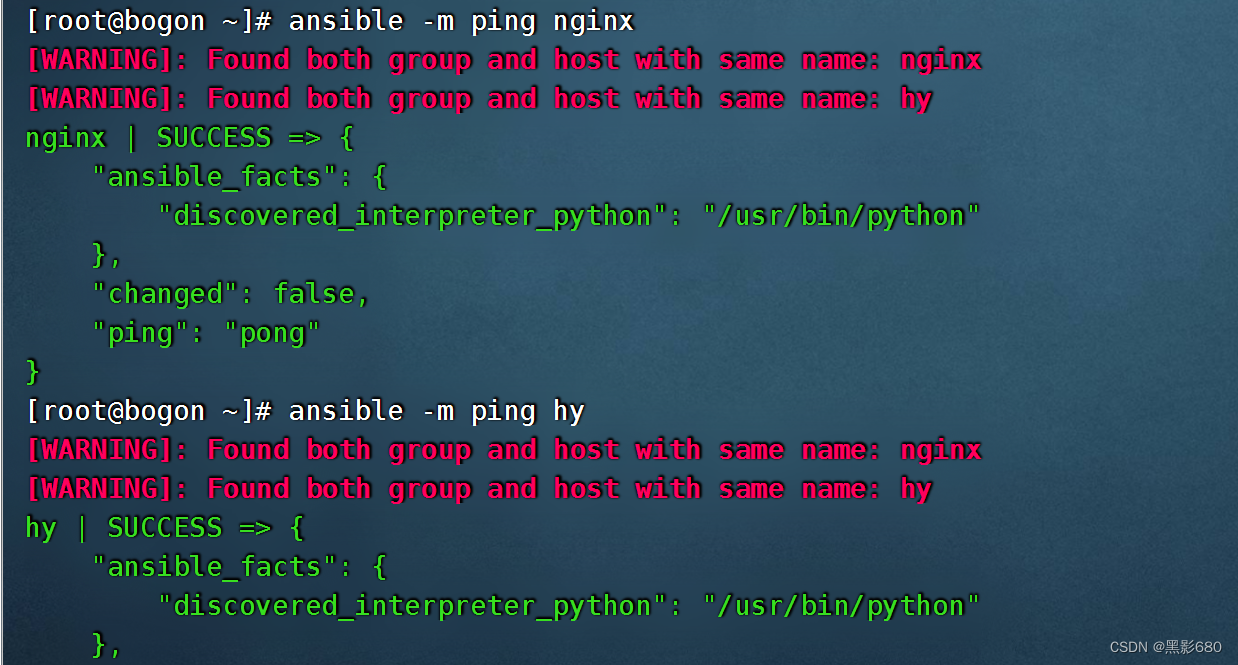
方式6
###利用别名分组
[group]
192.168.115.136:22
hy ansible_ssh_host=192.168.115.136 ansible_ssh_port=22 ansible_ssh_user=root ansible_ssh_pass="123.com"
nginx ansible_ssh_host=192.168.115.140 ansible_ssh_port=22 ansible_ssh_user=root ansible_ssh_pass="123.com"
[nginx]
nginx
[hy]
hy
3、hostname模块
基本格式为: ansible 操作的机器名或组名 -m 模块名 -a “参数1=值1 参数2=值2” argment
黄色表示成功
###修改192.168.115.136的主机名hy
###修改192.168.115.140的主机名nginx
ansible hy -m hostname -a 'name=hy'
ansible nginx -m hostname -a 'name=nginx'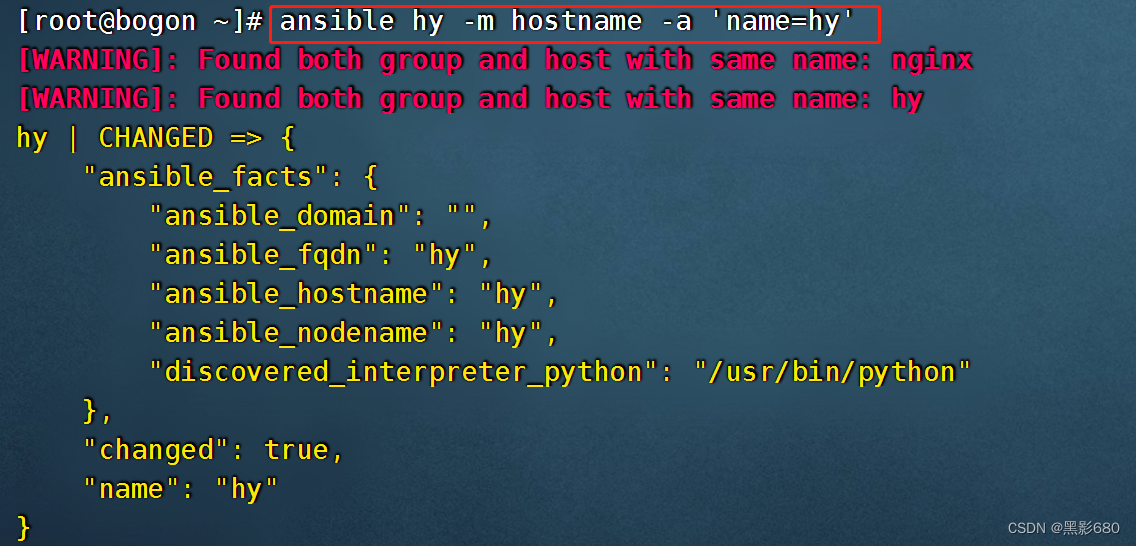


4、file模块
1、创建目录
##创建一个目录
ansible hy -m file -a "path=/opt/hy.txt state=directory"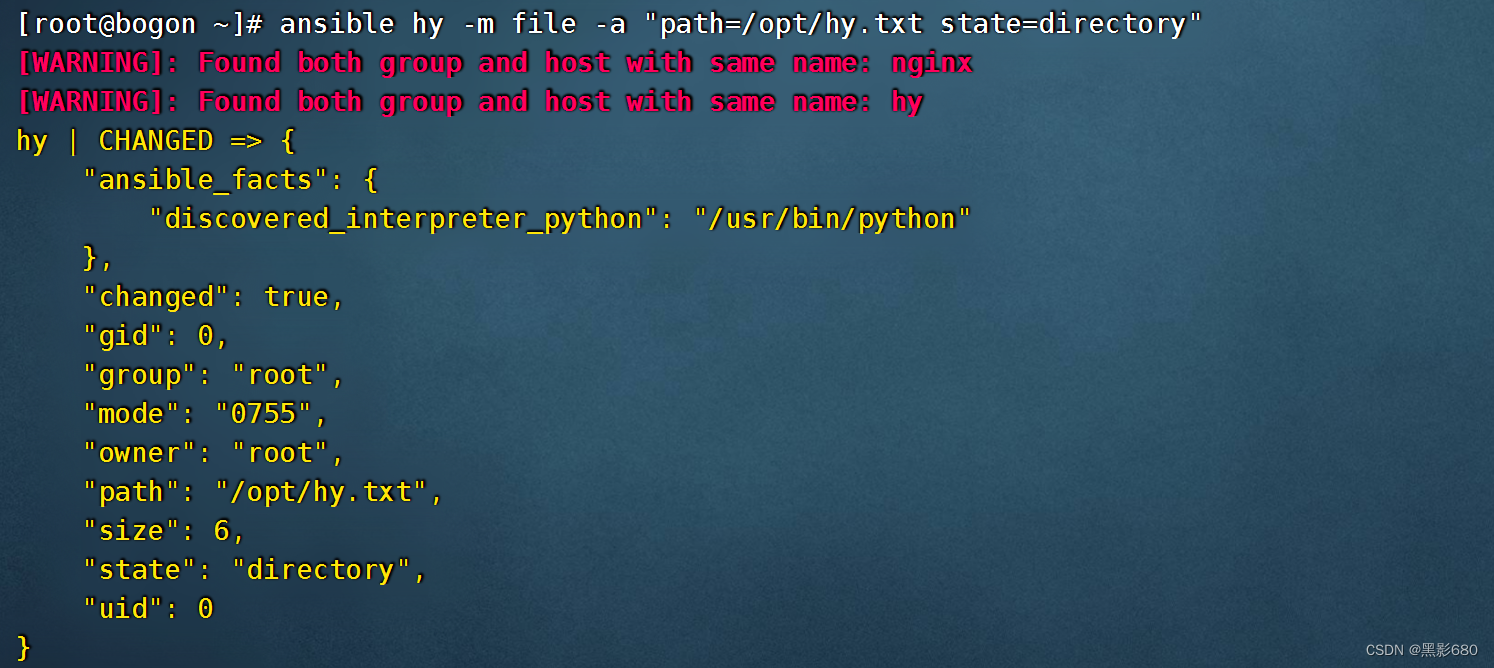

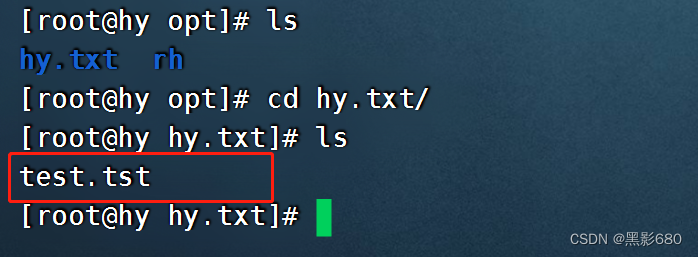
2、创建文件
ansible hy -m file -a "path=/opt/hy.txt/test.tst state=touch"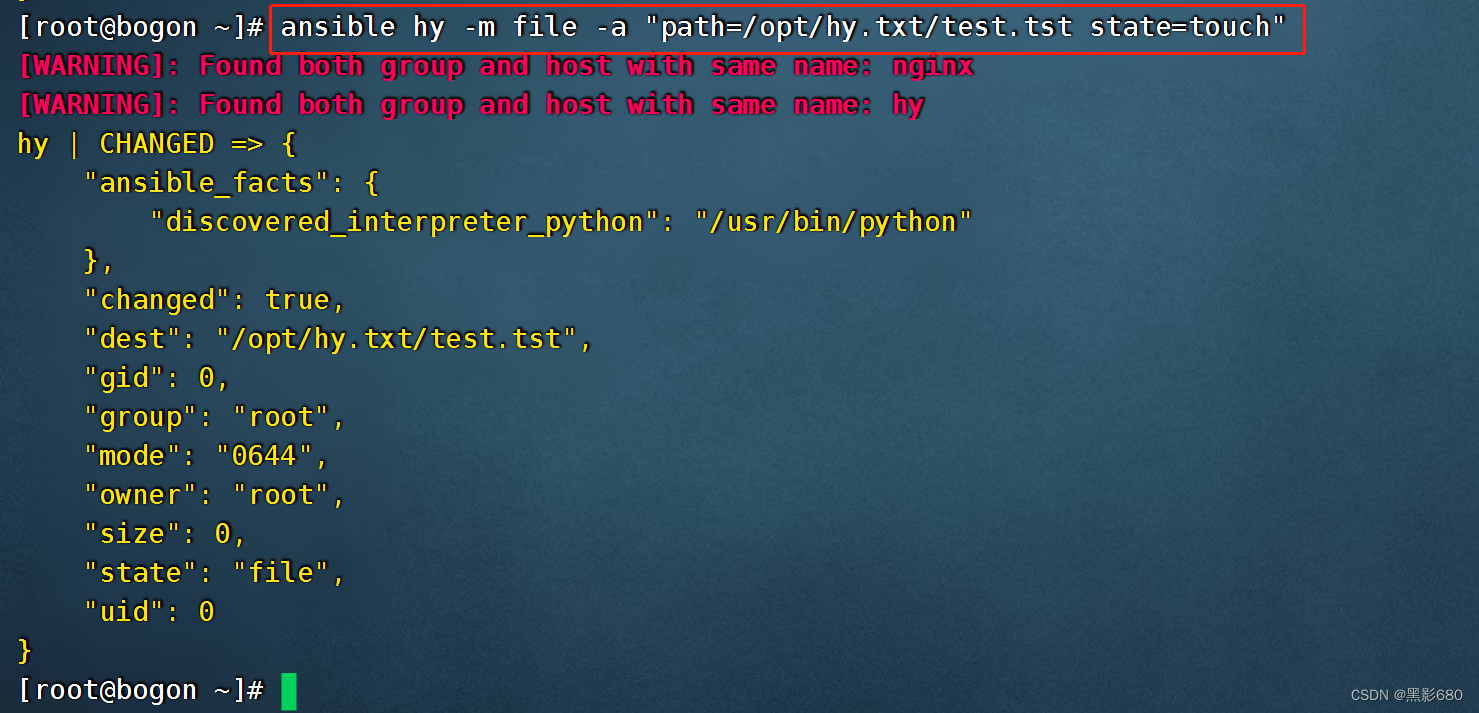
3、修改属主属组、权限

####修改属主为hy,属组hy 权限777
ansible hy -m file -a "path=/opt/hy.txt recurse=yes owner=hy group=hy mode=777"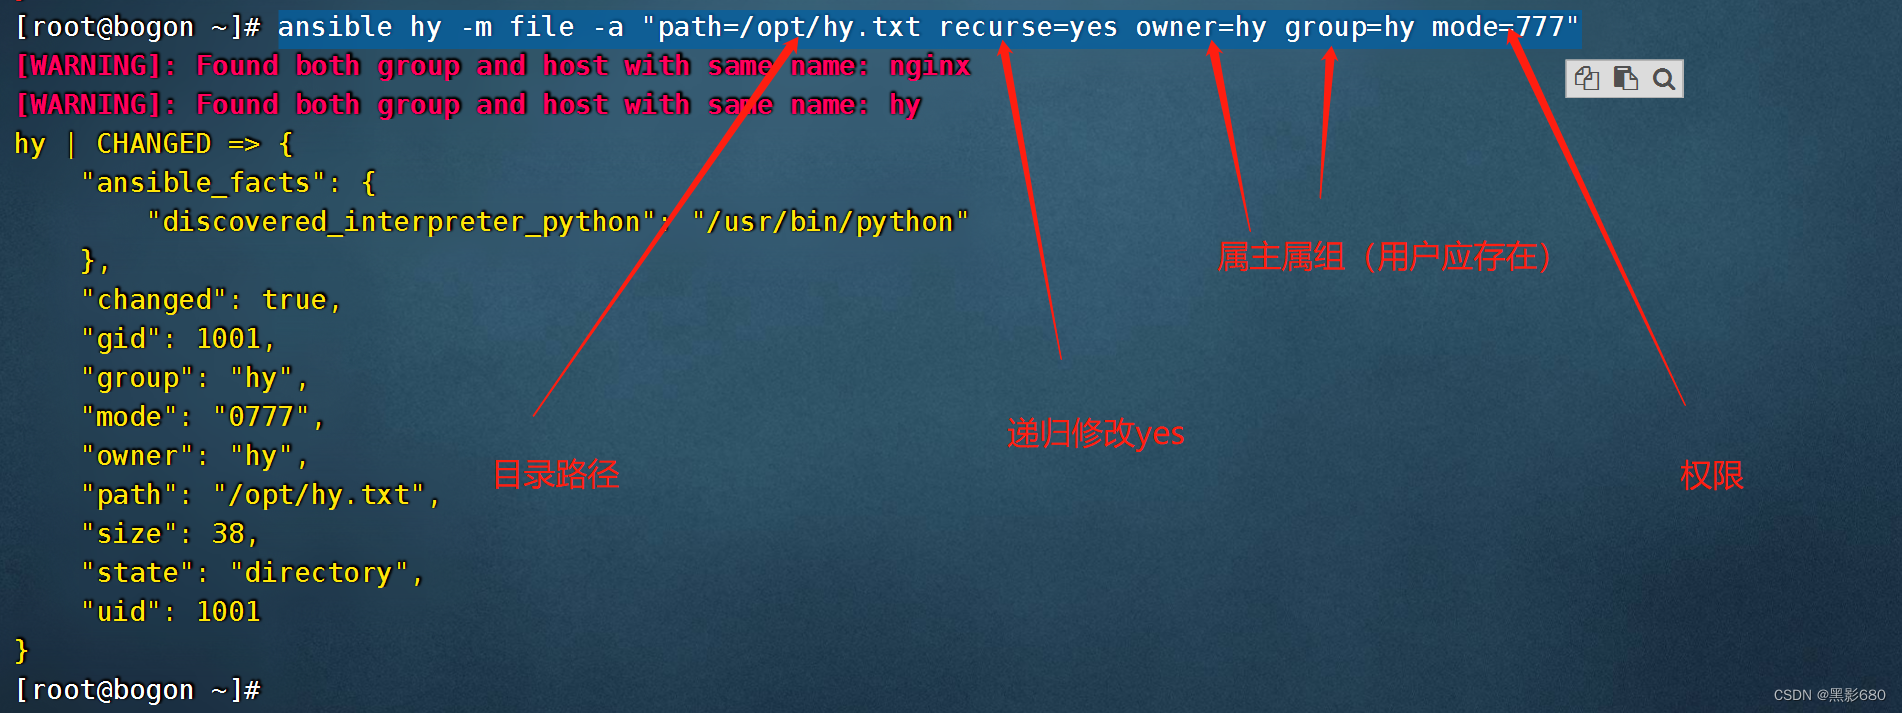

4、删除目录(包括目录中的文件)
###删除/opt/hy.txtansible hy -m file -a "path=/opt/hy.txt state=absent"


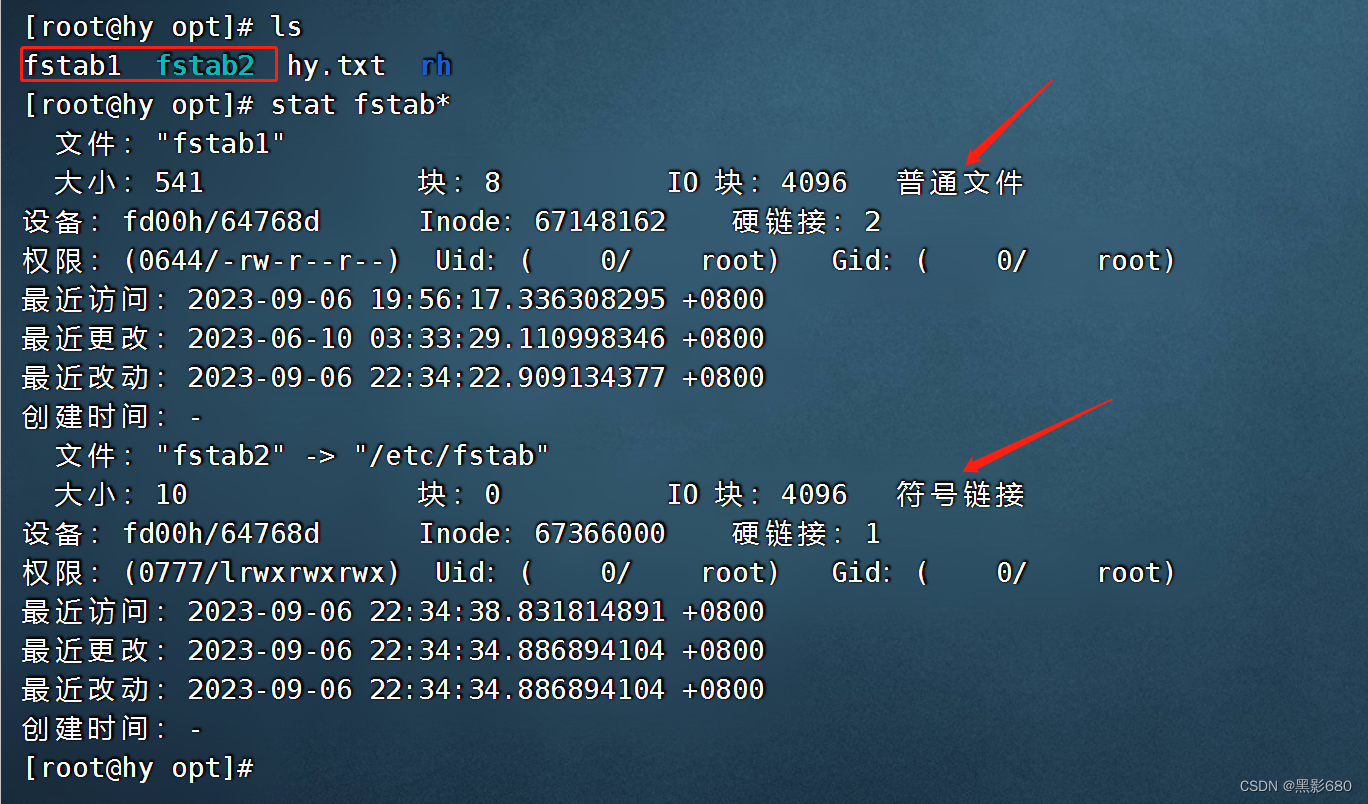
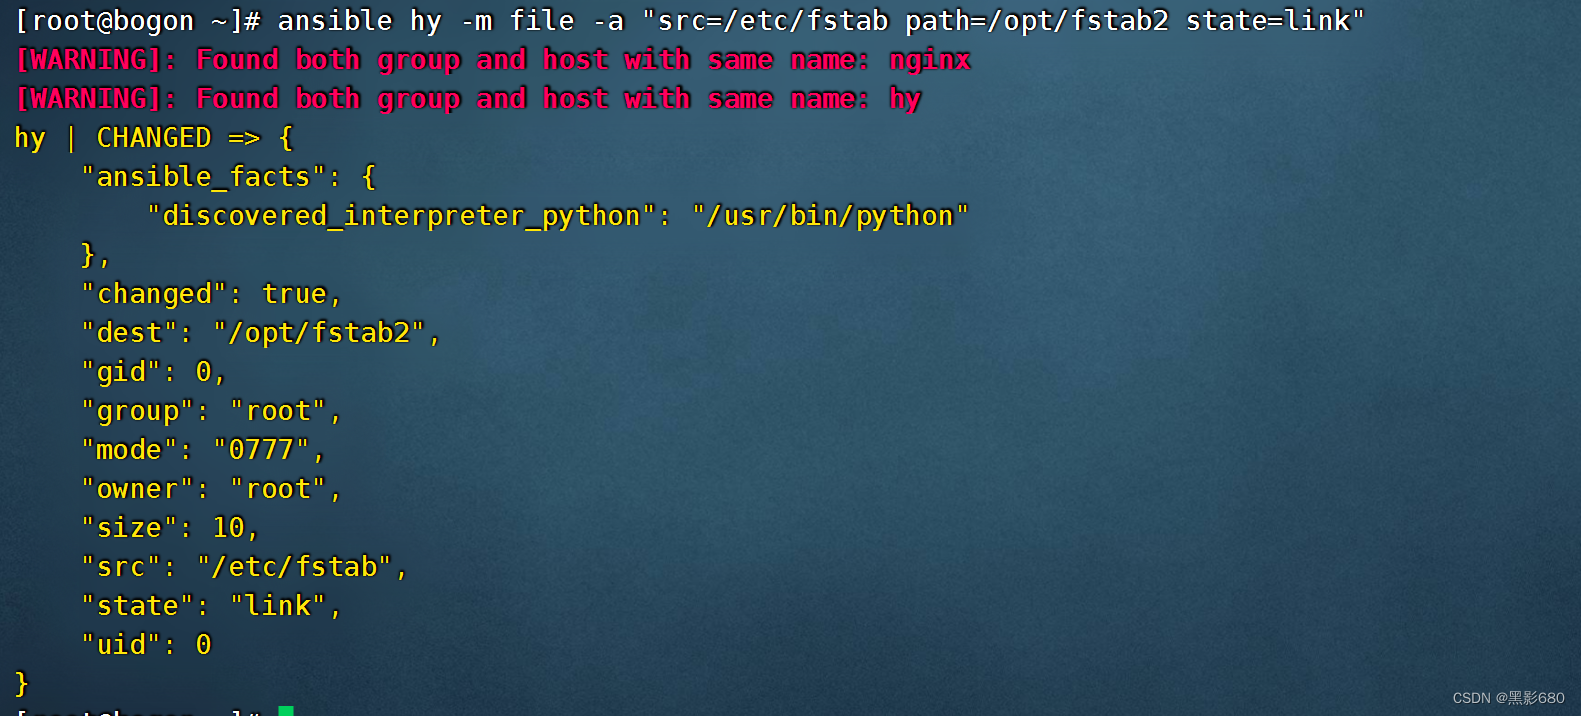
5、创建软、硬连接
#软
ansible hy -m file -a "src=/etc/fstab path=/opt/fstab2 state=link"
#硬
ansible hy -m file -a "src=/etc/fstab path=/opt/fstab1 state=hard"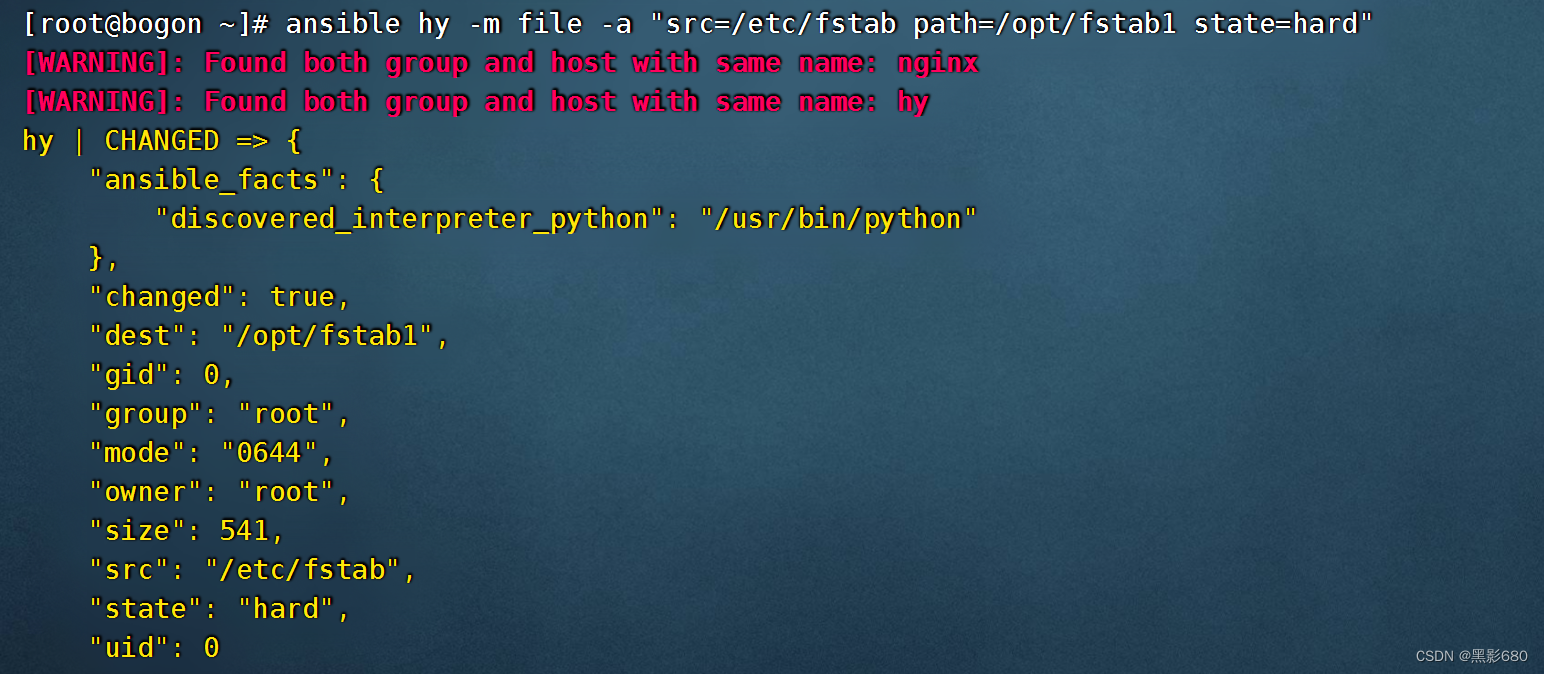
5、stat模块
###用来获取文件的信息状态
ansible hy -m file -a "path=/opt/hy.txt state=touch"
ansible hy -m stat -a "path=/opt/hy.txt"
6、copy模块(本地拷贝到远程)
在ansible上准备一个文件拷贝到2台agent
 echo 192.168.115.131 > 1.txt
ansible group -m copy -a "src=/root/1.txt dest=/opt"


使用content远程写入内容,并覆盖原内容
ansible group -m copy -a "content="hello\n" dest=/opt/1.txt"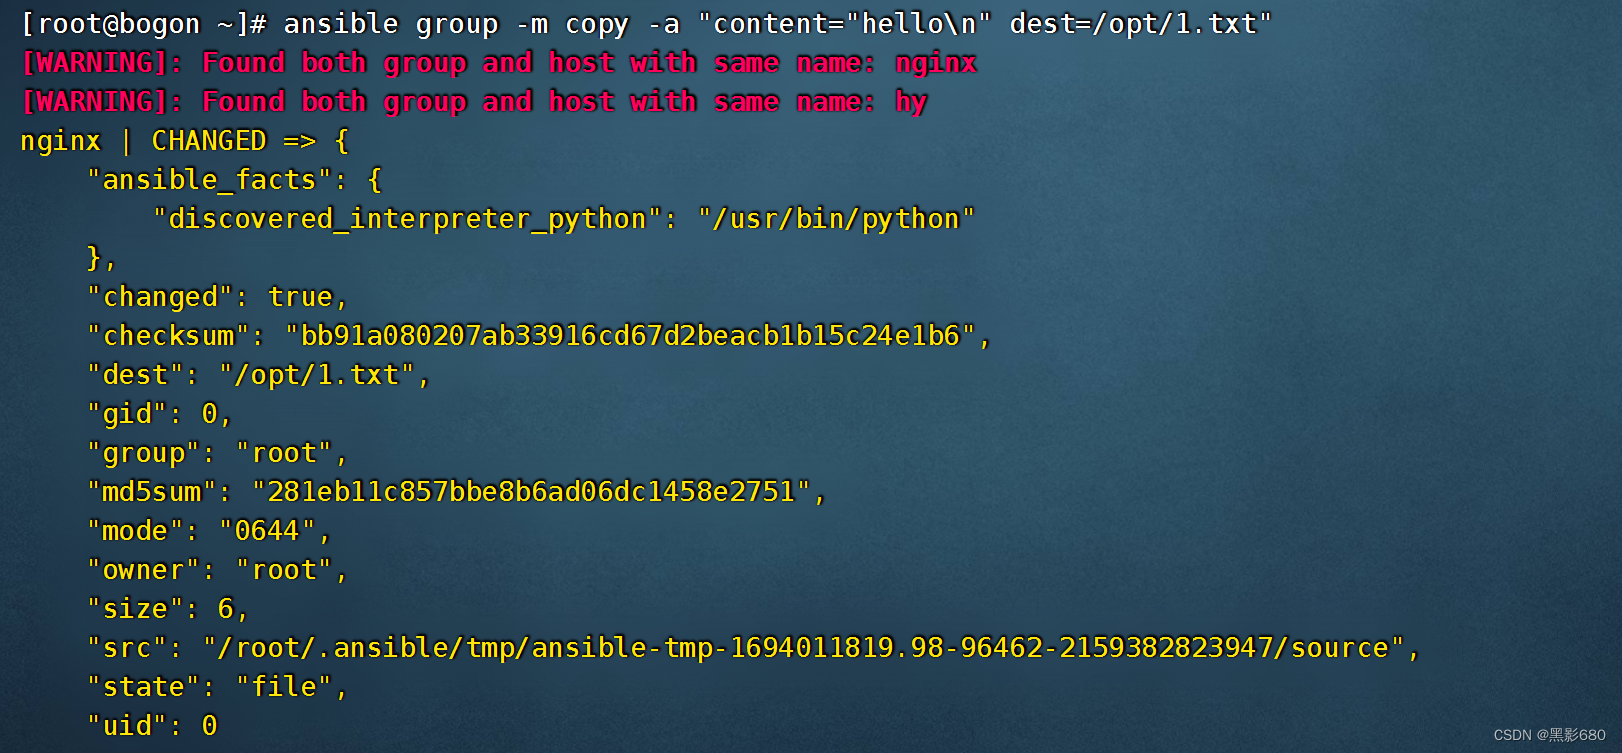

使用force参数是否强制覆盖
##写入
echo 192.168.115.131 > 1.txt
ansible group -m copy -a "content="hello" dest=/opt/1.txt force=no"#如果目标文件存在,不覆盖
ansible group -m copy -a "content="hello" dest=/opt/1.txt force=yes"#如果目标文件存在,覆盖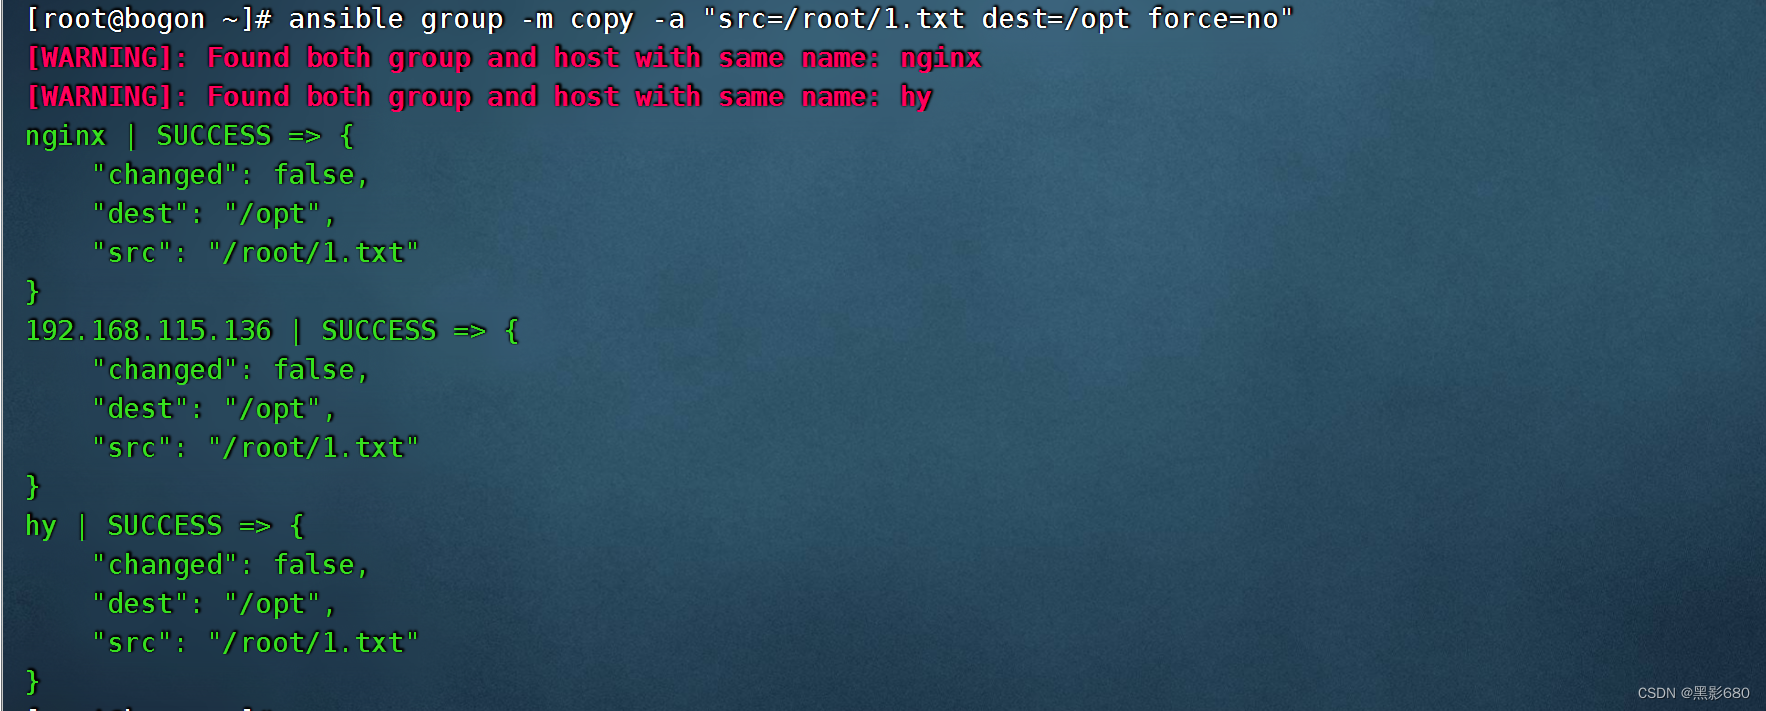


使用backup模块备份,把本机文件备份到远端
###把本机的文件备份到远端
ansible group -m copy -a "src=/root/1.txt dest=/opt/2.txt backup=yes owner=root group=root mode=644"

拷贝时/与没有/的区别
ansible hy -m copy -a "src=/etc/yum.repos.d dest=/etc/yum.repos.d"


ansible nginx -m copy -a "src=/etc/yum.repos.d/ dest=/etc/yum.repos.d"

7、fetch模块与copy模块类似,但作用相反。用于把远程机器的文件拷贝到本地。
注意: fetch模块不能从远程拷贝目录到本地
##两台agent上创建同名、路径文件
echo 192.168.115.136 hy > test.txt
echo 192.168.115.140 nginx > test.txt
###ansible上操作
group -m fetch -a "src=/etc/yum.repos.d/test.txt dest=/etc/yum.repos.d"

8、user模块
user模块用于管理用户账号和用户属性。
##创建aaa用户,默认为普通用户,创建家目录
ansible hy -m user -a "name=aaa state=present"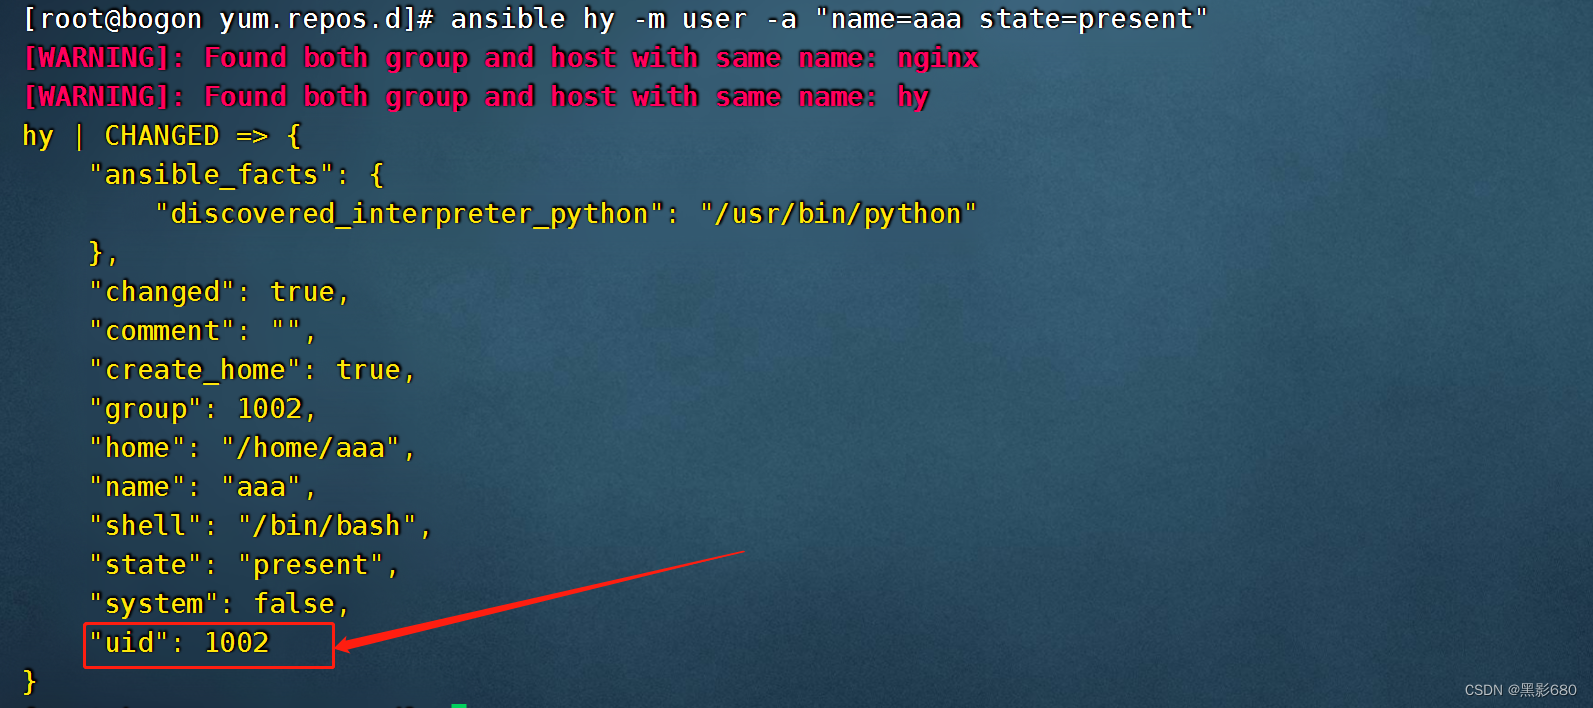

###创建系统用户
ansible hy -m user -a'name=bbb state=present system=yes shell="/sbin/nologin"'

##创建ccc用户, 使用uid参数指定uid, 使用password参数传密码
echo 123.com |openssl passwd -stdin
ansible hy -m user -a 'name=ccc state=present uid=6666 password="密码"'
##创建一个普通用户叫ddd,并产生空密码 密钥对
ansible hy -m user -a 'name=ddd state=present generate_ssh_key=yes'


##删除aaa用户,但家目录默认没有删除
ansible hy -m user -a 'name=aaa state=absent'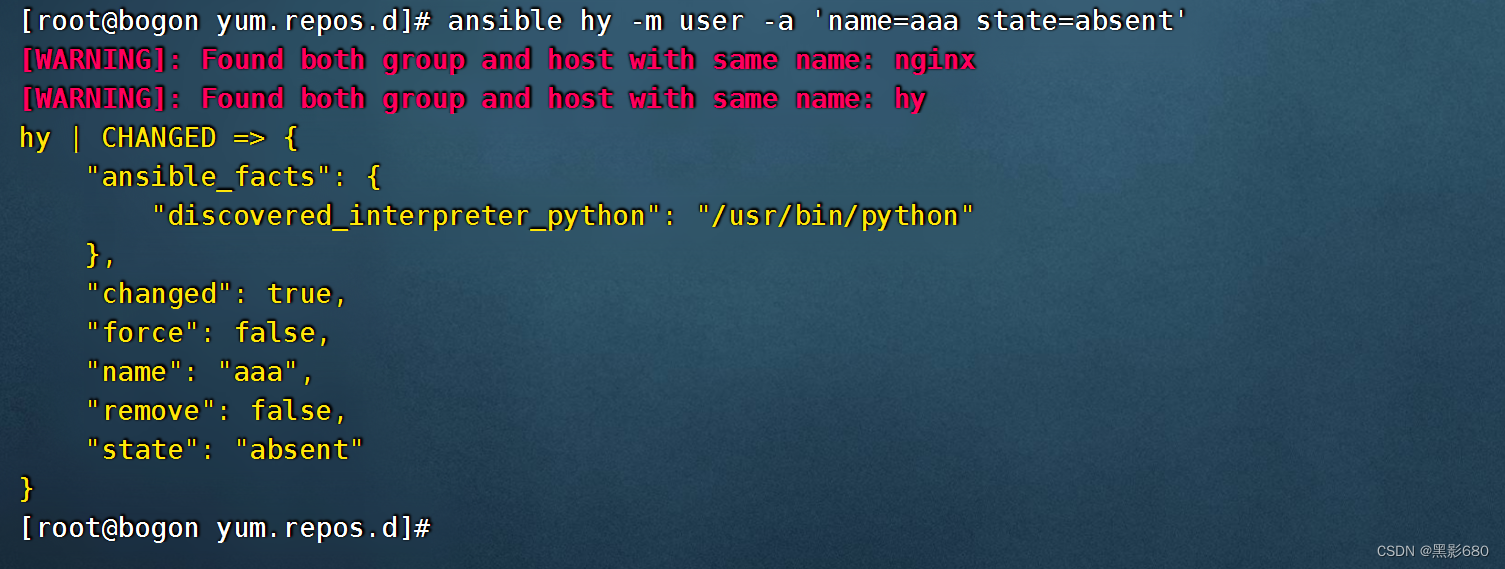
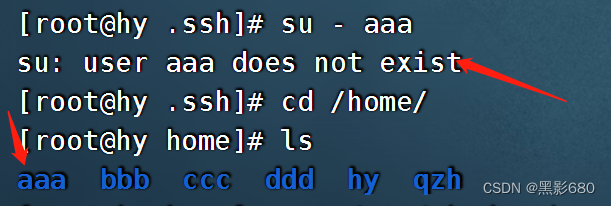
##删除aaa用户、家目录
ansible hy -m user -a 'name=aaa state=absent remove=yes'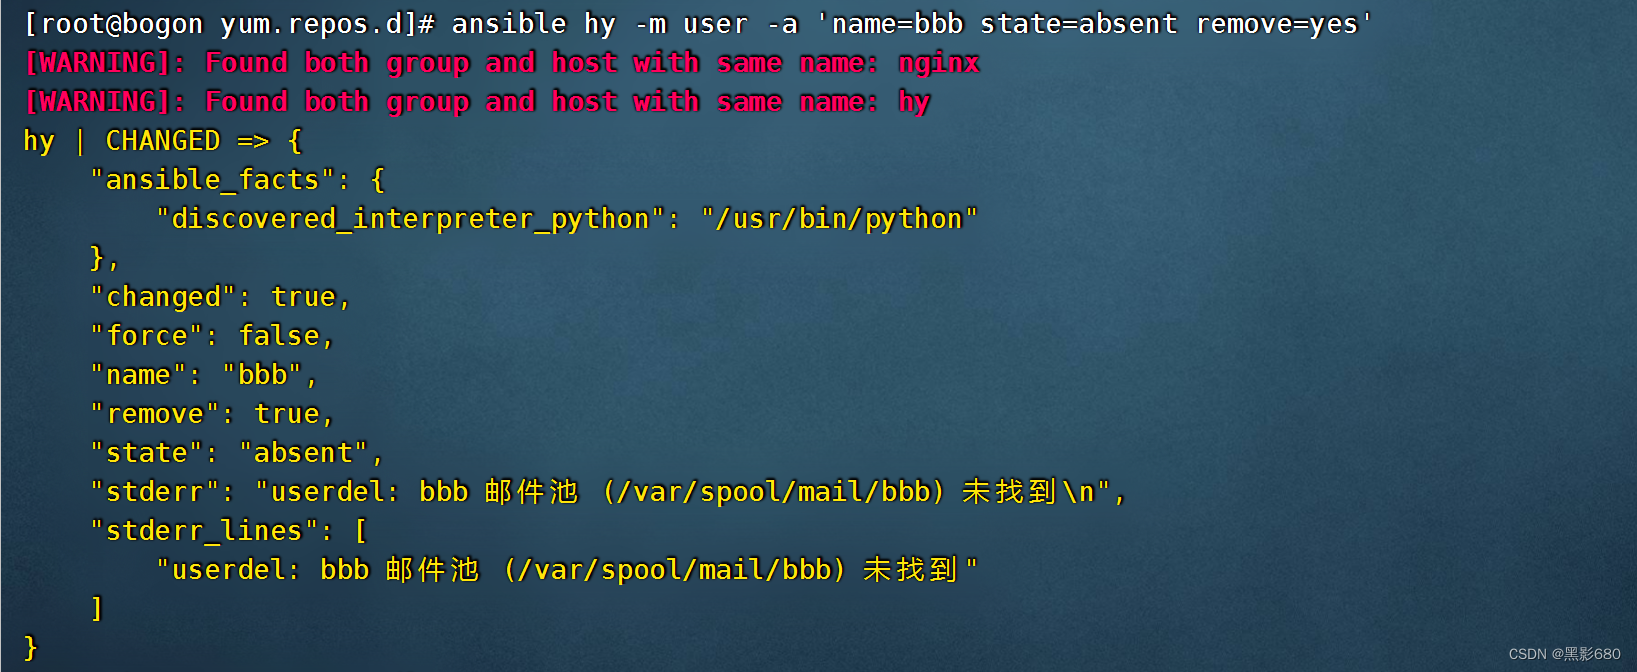

9、group模块
group模块用于管理用户组和用户组属性。
###创建组
ansible hy -m group -a 'name=web gid=2000 state=present'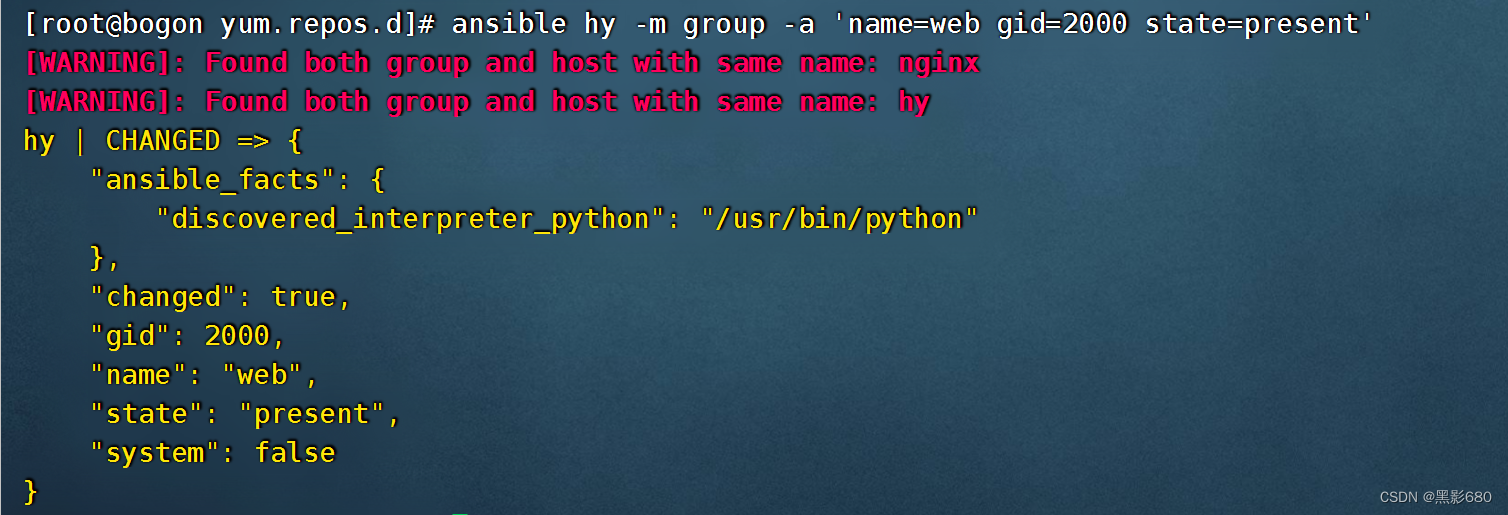

##删除组(如果有用户的gid为此组,则删除不了)
ansible hy -m group -a 'name=web state=absent'

10、cron模块
cron模块用于管理周期性时间任务
##创建一个cron任务,不指定user的话,默认就是root(因为我这里是用root操作的)。
如果minute,hour,day,month,week不指定的话,默认都为*
ansible hy -m cron -a 'name="test1" user=root job="touch /etc/6666" minute=26'

删除cron任务
ansible hy -m cron -a 'name="test1" state=sbsent'
四、yum_repository模块
yum_repository模块用于配置yum仓库。
### yum_repository模块yum_repository模块用于配置yum仓库。
注意:此模块只帮助配置yum仓库,但如果仓库里没有软件包,安装一样会失败。所以可以手动去挂载光驱到/mnt目录ansible hy -m yum_repository -a "name=local description=localyum baseurl=file:///mnt/ enabled=yes gpgcheck=no"##删除/etc/yum.repos.d/local.repo配置文件
ansible hy -m yum_repository -a "name=local state=absent"

五、yum模块
yum模块用于使用yum命令来实现软件包的安装与卸载。 前提:group的机器上的yum配置都已经OK ,如果是使用本地源的就需要挂载
##安装http
ansible group -m yum -a 'name=httpd state=present'
######使用网络源
##在ansible上安安装网络源
wget -O /etc/yum.repos.d/CentOS-Base.repo https://mirrors.aliyun.com/repo/Centos-7.repo
##copy到其他主机
使用yum安装httpd,httpd-devel软件,state=latest表示安装最新版本
ansible group1 -m yum -a 'name=httpd,httpd-devel state=latest'
使用yum卸载httpd,httpd-devel软件
ansible group1 -m yum -a 'name=httpd,httpd-devel state=absent'
六、server模块
### service模块(重点)service模块用于控制服务的启动,关闭,开机自启动等。
启动vsftpd服务,并设为开机自动启动
master# ansible group -m service -a 'name=vsftpd state=started enabled=on'关闭vsftpd服务,并设为开机不自动启动
master# ansible group -m service -a 'name=vsftpd state=stoped enabled=false'
我们安装一个mariadb服务,并设置为开机自启
ansible group -m yum -a 'name=mariadb,mariadb-server state=present'
ansible group -m service -a 'name=mariadb state=started enabled=yes'

七、script模块
script模块用于在远程机器上执行本地脚本。
在master上准备一个脚本
master# vim /tmp/1.sh
#!/bin/bash
mkdir /tmp/haha
touch /tmp/haha/{1..10}在group1的远程机器里都执行master上的/tmp/1.sh脚本(此脚本不用给执行权限)
master# ansible group1 -m script -a '/tmp/1.sh'
八、command与shell模块
两个模块都是用于执行linux命令的,这对于命令熟悉的工程师来说,用起来非常high。
shell模块与command模块差不多(command模块不能执行一些类似$HOME,>,<,|等符号,但shell可以)
ansible -m command group1 -a "useradd user2" ansible -m command group1 -a "id user2" ansible -m command group1 -a "cat /etc/passwd |wc -l" --报错 ansible -m shell group1 -a "cat /etc/passwd |wc -l" --成功 ansible -m command group1 -a "cd $HOME;pwd" --报错 ansible -m shell group1 -a "cd $HOME;pwd" --成功
注意: shell模块并不是百分之百任何命令都可以,比如vim或ll别名就不可以。不建议大家去记忆哪些命令不可以,大家只要养成任何在生产环境里的命令都要先在测试环境里测试一下的习惯就好。
九、playbook
playbook(剧本): 是ansible用于配置,部署,和管理被控节点的剧本。用于ansible操作的编排。
使用的格式为yaml格式(saltstack,elk,docker,docker-compose,kubernetes等也都会用到yaml格式)
YMAL格式
-
以.yaml或.yml结尾
-
文件的第一行以 "---"开始,表明YMAL文件的开始(可选的)
-
以#号开头为注释
-
列表中的所有成员都开始于相同的缩进级别, 并且使用一个
"- "作为开头(一个横杠和一个空格) -
一个字典是由一个简单的
键: 值的形式组成(这个冒号后面必须是一个空格) -
==注意: 写这种文件不要使用tab键,都使用空格==
## playbook实例先直接来看一个实例**第1步: 创建一个存放playbook的目录(路径自定义)**```powershell
master# mkdir /etc/ansible/playbook
```**第2步: 准备httpd配置文件,并修改成你想要的配置**```powershell
master# yum install httpd -y按需要修改你想要的配置(为了测试可以随意改动标记一下)
master# vim /etc/httpd/conf/httpd.conf
```**第3步: 写一个playbook文件(后缀为.yml或.yaml)**```powershell
# vim /etc/ansible/playbook/example.yaml
---
- hosts: group1remote_user: roottasks:  - name: ensure apache is at the latest version	yum: name=httpd,httpd-devel state=latest- name: write the apache config file		copy: src=/etc/httpd/conf/httpd.conf dest=/etc/httpd/conf/httpd.confnotify:- restart apache- name: ensure apache is running (and enable it at boot)service: name=httpd state=started enabled=yeshandlers:	- name: restart apacheservice: name=httpd state=restarted
```第4步: 执行写好的palybook- 会显示出执行的过程,并且执行的每一步都有ok,changed,failed等标识
- 执行如果有错误(failed)会回滚,解决问题后,直接再执行这条命令即可,并会把failed改为changed(幂等性)```powershell
# ansible-playbook /etc/ansible/playbook/example.yaml
```## Playbook常见语法**hosts:** 用于指定要执行任务的主机,其可以是一个或多个由冒号分隔主机组.**remote_user:** 用于指定远程主机上的执行任务的用户.```powershell
- hosts: group1			remote_user: root
```**tasks:** 任务列表, 按顺序执行任务. - 如果一个host执行task失败, 整个tasks都会回滚, 修正playbook 中的错误, 然后重新执行即可.```powershelltasks:- name: ensure apache is at the latest version	yum: name=httpd,httpd-devel state=latest- name: write the apache config file		copy: src=/etc/httpd/conf/httpd.conf dest=/etc/httpd/conf/httpd.conf
```**handlers:**  类似task,但需要使用notify通知调用。- 不管有多少个通知者进行了notify,等到play中的所有task执行完成之后,handlers也只会被执行一次.
- handlers最佳的应用场景是用来重启服务,或者触发系统重启操作.除此以外很少用到了.```powershellnotify:				  - restart apache- name: ensure apache is running (and enable it at boot)service: name=httpd state=started enabled=yeshandlers:- name: restart apacheservice: name=httpd state=restarted
```**练习:** 修改httpd的端口为8080,再执行playbook测试**variables:** 变量- 定义变量可以被多次方便调用```powershell
master# vim /etc/ansible/playbook/example2.yaml
---
- hosts: group1remote_user: rootvars:- user: test1tasks:- name: create useruser: name={{user}} state=present
~
``````powershell
master# ansible-playbook /etc/ansible/playbook/example2.yaml
```### 案例: playbook编排vsftpd写一个playbook实现 1. 配置yum
2. 安装vsftpd包
3. 修改配置文件(要求拒绝匿名用户登录)
4. 启动服务并实现vsftpd服务开机自动启动```powershell
---
- hosts: group1                 remote_user: root                     tasks:                                - name: rm yum repository      file: path=/etc/yum.repos.d/ state=absent- name: 同步master上的yum源到group1copy: src=/etc/yum.repos.d dest=/etc/- name: ensure vsftpd is at the latest version        yum: name=vsftpd state=latest- name: write the apache config file          copy: src=/etc/vsftpd/vsftpd.conf dest=/etc/vsftpd/vsftpd.conf notify:                             - restart vsftpd- name: ensure vsftpd is running (and enable it at boot)service: name=vsftpd state=started enabled=yeshandlers:                     - name: restart vsftpd              service: name=vsftpd state=restarted
```## **playbook编排多个hosts任务**~~~powershell
---			# ---代表开始(可选项,不写也可以)
- hosts: 10.1.1.12remote_user: roottasks:- name: 创建/test1/目录file: path=/test1/ state=directory
# 这里不能用---分隔,会报语法错误(后面课程玩k8s编排也写YAML文件,是可以用---来分隔段落的)
- hosts: 10.1.1.13remote_user: roottasks:- name: 创建/test2/目录file: path=/test2/ state=directory
...			# ...代表结束(可选项,不写也可以)
~~~### 案例: 编排nfs搭建与客户端挂载1, 在master上准备nfs配置文件~~~powershell
# vim /etc/exports
/share  *(ro)
~~~2, 编写yaml编排文件~~~powershell
# vim /etc/ansible/playbook/nfs.yml
---
- hosts: 10.1.1.12remote_user: roottasks:- name: 安装nfs服务相关软件包yum: name=nfs-utils,rpcbind,setup  state=latest- name: 创建共享目录file: path=/share/ state=directory- name: 同步nfs配置文件copy: src=/etc/exports dest=/etc/exportsnotify: restart nfs- name: 启动rpcbind服务,并设置为开机自启动service: name=rpcbind state=started enabled=on- name: 启动nfs服务,并设置为开机自启动service: name=nfs state=started enabled=onhandlers:- name: restart nfsservice: name=nfs state=restarted- hosts: 10.1.1.13remote_user: roottasks:- name: 安装nfs客户端软件包yum: name=nfs-utils state=latest- name: 挂载nfs服务器的共享shell: mount 10.1.1.12:/share /mnt
~~~3, 执行playbook~~~powershell
# ansible-playbook /etc/ansible/playbook/nfs.yaml
~~~