文章目录
- 基础环境搭建
- 创建项目
- 安装vscode插件
- 调试工具
- 基础语法
- 掌握React
- StyleSheet
- RN中的样式和CSS的不同
- 通过style属性直接声明
- 在style属性中调用StyleSheet声明的样式
- Flexbox
- 术语
- 属性
- 响应式布局
- 组件和API
- 简介
- 核心组件
- **最常用的一些核心组件**
- 各核心组件的演示代码
- Alert和Button(弹出框和按钮组件)
- Switch和StatusBar(开关和状态栏组件)
- ActivityIndicator和Platform(加载指示器组件和平台判断)
- Image(图片组件)
- TextInput(输入框组件)
- Touchable组件(触发触碰事件)
- ScrollView(滚动组件)
- SectionList(带分组效果的列表)
- FlatList(用来展示列表,不能进行分组)
- Animated(动画组件)
- 第三方组件
- 常用的第三方组件示例代码
- WebView(内置浏览器)
- Picker(下拉框组件)
- Swiper(轮播图组件)
- AsyncStorage(持久化存储系统)
- Geolocation(获取定位信息)
- Camera(调用摄像头)
- 自定义组件
- 路由和导航
- Stack导航(正常的点击跳转,带顶部标题,可去掉)
- BottomTab导航(底部导航)
- Drawer导航(可以展开/折叠侧边栏)
- MaterialTopTab导航(可以滑动导航)
- 路由嵌套
- 路由传参
- 状态管理
- 项目结构
- 1.src_redux/store.js代码如下
- 2.src_redux/reducers/typeuitls.js代码如下
- 3.src_redux/reducers/actionTypes.js代码如下
- 4.src_redux/reducers/Counter.js代码如下
- 5.src_redux/reducers/index.js代码如下
- 6.创建完在App.js使用Provider进行包裹
- 7.在user.js里面使用数据
本套笔记参考这个视频教程做的,需要看视频的可以点链接去看
基础环境搭建
-
安装nodejs
– nodejs的版本应该>=12(推荐安装LTS版本)
– npm config set registry https://registry.npm.taobao.org
至于安卓环境大家自行百度(这里也需要用安卓环境,过于复杂就不多说了,需要使用一下Android Studio配一下安卓环境)
-
安装Yarn
npm install -g yarn -
安装reactNative脚手架
npm install -g react-native-cli
创建项目
-
初始化项目
使用新命令,新版react-native所有原始的"react-native"命令前面都需要添加"npx"如下:
npx react-native init Demo
如果碰到了以下情况
$ react-native init AwesomeProject
...
/usr/local/lib/node_modules/react-native-cli/index.js:302cli.init(root, projectName);^
TypeError: cli.init is not a functionat run (/usr/local/lib/node_modules/react-native-cli/index.js:302:7)at createProject (/usr/local/lib/node_modules/react-native-cli/index.js:249:3)at init (/usr/local/lib/node_modules/react-native-cli/index.js:200:5)at Object.<anonymous> (/usr/local/lib/node_modules/react-native-cli/index.js:153:7)at Module._compile (node:internal/modules/cjs/loader:1256:14)at Module._extensions..js (node:internal/modules/cjs/loader:1310:10)at Module.load (node:internal/modules/cjs/loader:1119:32)at Module._load (node:internal/modules/cjs/loader:960:12)at Function.executeUserEntryPoint [as runMain] (node:internal/modules/run_main:81:12)at node:internal/main/run_main_module:23:47
使用 npm -g list 查看已安装的 react-native 库
$ npm -g list
/usr/local/lib
├── 。。。
├── react-native-cli@2.0.1
├── 。。。
卸载 react-native -cli 库
npm uninstall -g react-native-cli
npm uninstall -g react-native  // 如果有,也一起卸载了
使用 npx react-native init 重新初始化项目
npx react-native init AwesomeProject
成功
- 进入项目
cd 项目名
- 运行项目
npm android
//本人电脑使用下面命令启动成功的
npm run android
如果运行项目以后碰到如下报错
Installing APK 'app-debug.apk' on 'BAH3-W59 - 10' for :app:debug
Installed on 1 device.Deprecated Gradle features were used in this build, making it incompatible with Gradle 8.0.You can use '--warning-mode all' to show the individual deprecation warnings and determine if they come from your own scripts or plugins.See https://docs.gradle.org/7.5.1/userguide/command_line_interface.html#sec:command_line_warnings
说明Gradle版本不兼容,这里建议降低gradle的build版本,改为1.2.3
第二种方式升级你的React-Native至最新版本。(这种方式尝试过,没有测试出效果,依旧会提示)
打开 React Native 的项目, 修改Android/build.gradle 配置, 降低 gradle 的 build 为1.2.3版本.
buildscript {repositories {jcenter()mavenLocal()}dependencies {classpath 'com.android.tools.build:gradle:1.2.3' // 修改1.2.3classpath 'de.undercouch:gradle-download-task:2.0.0'// NOTE: Do not place your application dependencies here; they belong// in the individual module build.gradle files}
}
这个时候还是会报错,需要重新设置 Gradle 的 Wrapper , 修改为2.2版本.
Gradle version 2.2 is required. Current version is 2.14.1
修改Gradle的Wrapper版本,需要修改android/griddle/wrapper/grade-wrapper.properties文件:
distributionUrl=https://services.gradle.org/distributions/gradle-2.2-all.zip
安装vscode插件
-
插件名:
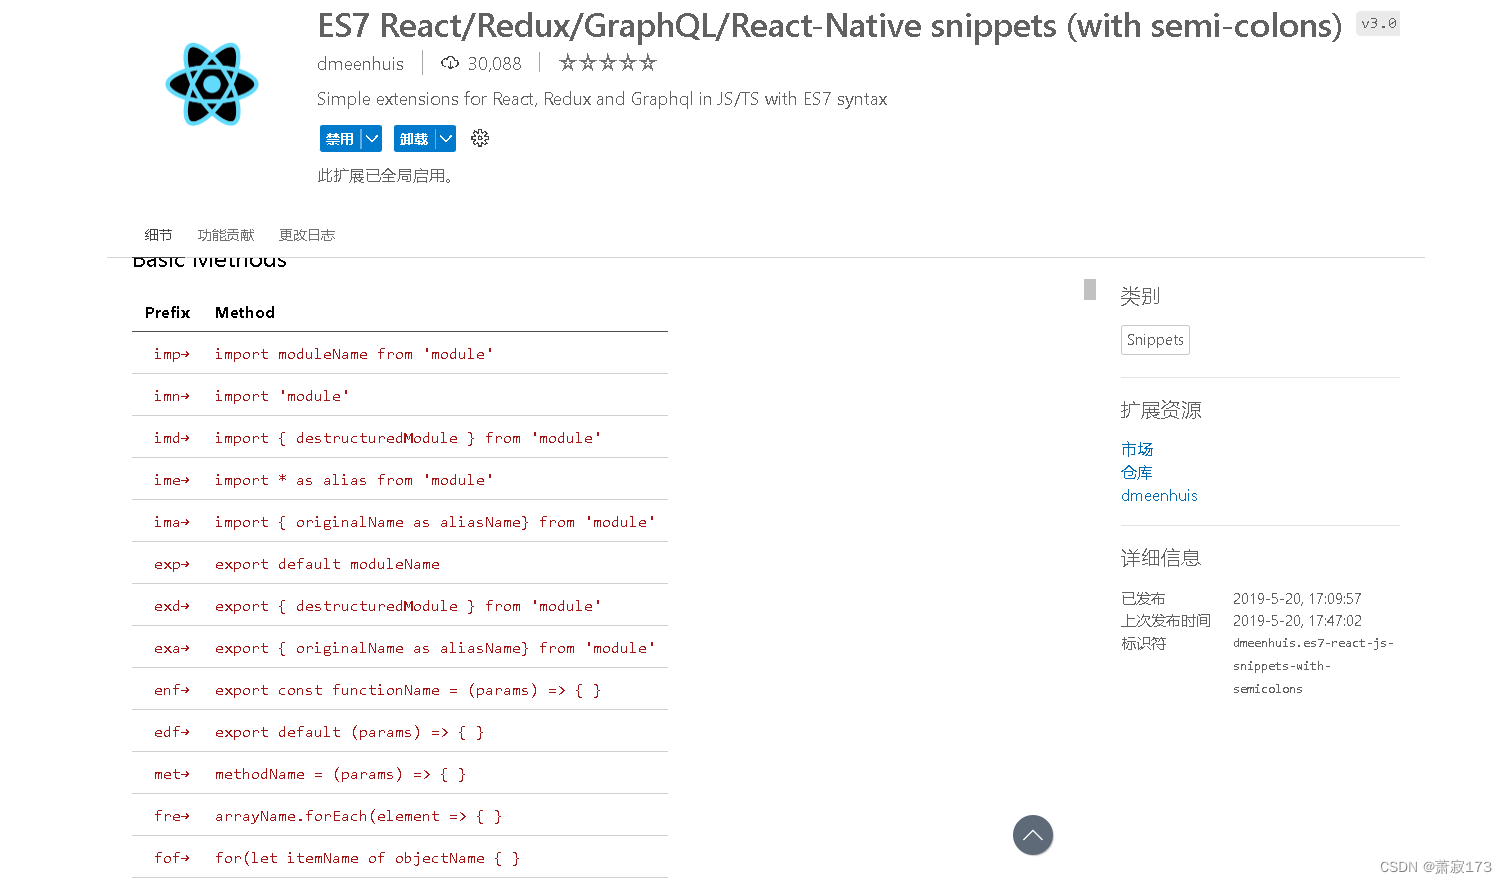
ES7 React/Redux/GraphQL/React-Native snippets (with semi-colons)

安装完输入rnc可以快速生成RN的类组件
安装完输入rnf可以快速生成RN的函数组件
调试工具
-
模拟器调试
– 模拟器都是安装到电脑上的,虚拟的手机界面
– 模拟器一般随着Android Studio和Xcode一起安装
– 启动应用,模拟器会随着一起启动
点击模拟器(使模拟器获取焦点)
快捷键ctrl+m
点选debug
自动跳转到浏览器上
-
真机调试
– 打开USB调试模式
– 通过USB线将电脑和手机连起来
– 启动应用,在手机上安装应用
-
查看连接状态
adb devices
出现以下情况
C:\Users\22560>adb devices
List of devices attached
127.0.0.1:5555  offline
emulator-5554   device
可以发现我们想要连接的雷电模拟器的5555端口目前没有连接,只有emulator-5554被连接了,此时我们需要关闭这个连接,让5555端口连接上,可以继续往下操作
-
执行端口号监控
不用特意明白下面两行代码什么意思,只需要知道执行下面两行代码可以关闭5554端口,连接上5555端口就行了
// adb -s 关闭的连接名 tcpip 指定连接的端口号 adb -s emulator-5554 tcpip 5555 // adb connect 连接的ip地址 adb connect 127.0.0.1 -
查看效果
C:\Users\22560>adb devices
List of devices attached
127.0.0.1:5555  device
emulator-5554   offline
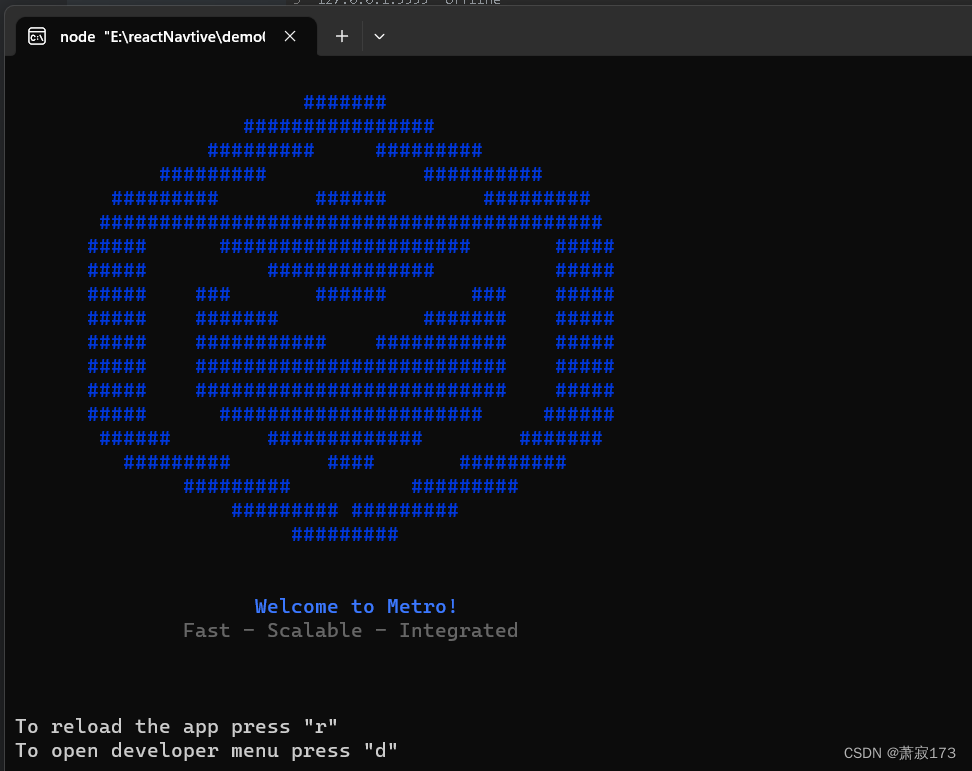
如果使用的是模拟器调试的话,发现ctrl+m不能打开调试窗口的话,可以去下面的窗口打个d再返回模拟器就可以调出窗口了
基础语法
掌握React
- JSX语法
- 组件(分类,传参,属性,状态)
- 生命周期
- Hook API
- Redux
- 常用安装包
StyleSheet
StyleSheet是RN中声明样式的API
RN中的样式和CSS的不同
-
没有继承性
- RN中的继承只发生在Text组件上
-
样式名采用小驼峰命名
- fontSize VS font-size
-
所有尺寸都是没有单位
- width:200
-
有些特殊样式名
- marginHorizontal(水平外边距)
- marginVertical(垂直外边距)
通过style属性直接声明
- 属性值为对象:<组件 style={样式}/>
- 属性值为数组:<组件 style={[{样式一},…,{样式N}]}/> 后面的样式会覆盖前面的
在style属性中调用StyleSheet声明的样式
- 引入:import {StyleSheet , view} from ‘react-native’
- 声明:const styles = StyleSheet.create({foo:{样式1},bar:{样式2}})
- 使用:< View style={[styles.foo,styles.bar]}>内容</ View>
案例代码
import React, { Component } from 'react'
// 1.导入StyleSheet(安装完上面的插件后可以通过rncs快速创建)
import { Text, View, StyleSheet } from 'react-native'export default class index extends Component {render () {return (<View><Text style={{ fontSize: 30 }}> textInComponent </Text>{/* 后面的样式会覆盖前面的 */}<Text style={[{ color: 'red' }, { color: 'blue' }]}> textInComponent </Text>{/* 3.使用StyleSheet */}<Text style={[styles.h1]}>Hello RN</Text><Text style={[styles.h2]}>Hello RN</Text></View>)}
}const styles = StyleSheet.create({// 2.声明StyleSheet的样式h1:{fontSize:40,fontWeight: 'bold'},h2:{fontSize:30,fontWeight: 'bold'}
})
Flexbox
术语
- 容器(container)
- 采用Flex布局的元素,称为Flex容器(flex container),简称’容器’
- 项目(item)
- 容器所有子元素,称为Flex项目(flex item) , 简称项目
- 主轴(main axis)
- 交叉轴(cross axis)
属性
- flexDirection
- 声明主轴方向: row(Web默认) | column (RN默认)
flexDirection属性使用的示例代码
import React, { Component } from 'react'
import { Text, StyleSheet, View,ScrollView } from 'react-native'export default class index extends Component {render () {return (<View><Text style={[styles.h2]}> 主轴方向 </Text>{/* View类似于div标签,只能显示固定区域内容,不可滚动,如果需要滚动需要引入scrollrow */}<ScrollView><Text style={[styles.h3]}>flexDirection:'column'(默认)</Text><View style={[styles.container]}><Text style={[styles.itemBase]}>刘备</Text><Text style={[styles.itemBase]}>关羽</Text><Text style={[styles.itemBase]}>张飞</Text></View><Text style={[styles.h3]}>flexDirection:'column-reverse'</Text><View style={[styles.container,styles.flexColumnReverse]}><Text style={[styles.itemBase]}>刘备</Text><Text style={[styles.itemBase]}>关羽</Text><Text style={[styles.itemBase]}>张飞</Text></View><Text style={[styles.h3]}>flexDirection:'row'</Text><View style={[styles.container,styles.flecRow]}><Text style={[styles.itemBase]}>刘备</Text><Text style={[styles.itemBase]}>关羽</Text><Text style={[styles.itemBase]}>张飞</Text></View><Text style={[styles.h3]}>flexDirection:'row-reverse'</Text><View style={[styles.container,styles.flexRowReverse]}><Text style={[styles.itemBase]}>刘备</Text><Text style={[styles.itemBase]}>关羽</Text><Text style={[styles.itemBase]}>张飞</Text></View></ScrollView></View>)}
}const styles = StyleSheet.create({container: {height: 150,margin: 10,borderWidth: 1,borderColor: '#ddd'},h2: {fontSize: 30,marginHorizontal: 10},h3: {fontSize: 24,marginHorizontal: 10},itemBase: {height: 30,borderWidth: 1,borderColor: 'red',backgroundColor: '#dff',padding: 2,textAlign: 'center'},flexColumn:{flexDirection: 'column',},flexColumnReverse:{flexDirection: 'column-reverse',},flecRow:{flexDirection: 'row',},flexRowReverse:{flexDirection: 'row-reverse',}
})
- justifyContent
- 声明项目在主轴上的对齐方式
- alignItems
- 声明项目在交叉轴的对齐方式
- flex
- 声明项目在主轴上的尺寸比例
响应式布局
两种方式:
- flexbox
- Dimensions
- import {Dimensions} from ‘react-native’
- const windowWidth = Dimensions.get(‘window’).width
- const windowHeight = Dimensions.get(‘window’).height
响应式布局案例代码
import React, { Component } from 'react'
// 引入DimenSions
import { Text, StyleSheet, View, Dimensions } from 'react-native'// 响应式获取手机宽高
export default class index extends Component {render () {return (<View style={[styles.container]}><View style={[styles.itemBase]}><Text style={[styles.h3]}> 扫一扫 </Text></View><View style={[styles.itemBase]}><Text style={[styles.h3]}> 付款码 </Text></View><View style={[styles.itemBase]}><Text style={[styles.h3]}> 卡包 </Text></View><View style={[styles.itemBase]}><Text style={[styles.h3]}> 出行 </Text></View></View>)}
}const styles = StyleSheet.create({container: {flexDirection: 'row',flexWrap: 'wrap',},itemBase:{justifyContent:'center',alignItems: 'center',backgroundColor:'#00b38a',width:Dimensions.get('window').width/3,  //获取屏幕总宽度,除以4就是每个宽度height:Dimensions.get('window').height/7,borderWidth:1,borderColor:'yellow',// fontSize:30 //在RN没有样式继承,这个属性不会给子元素text标签,因此不会生效,只能重新给text标签加样式},h3:{fontSize:30}
})
组件和API
简介
-
RN中的核心组件,是对原生组件的封装
- 原生组件:Androd或者ios内的组件
- 核心组件:RN中最常用的,来在react-native的组件
RN组件
作用 RN组件 安卓视图 ios视图 HTML标签 展示区块 View ViewGroup UIView div 展示图片 Image ImageView UIImageView img 展示文本 Text TextView UITextView p … … … … …
核心组件
- 基础组件
- 交互组件
- 列表视图
- ios独有组件
- Android独有组件
- 其他
最常用的一些核心组件
import {View,  // 视图组件Text,  // 文本组件Alert, //警告框组件Button, //按钮组件Switch, //开关组件ActivityIndicator, //加载指示器组件TextInput, //输入框组件Touchable, //触碰组件(共三个)ScrollView, //滚动视图组件SectionList, //分组列表组件FlatList, //高效性能列表组件Animated, //动画组件StatusBar, //状态栏组件Image, //图片组件TouchableOpacity,Dimensions,StyleSheet,ImageBackground
} from 'react-native'
各核心组件的演示代码
Alert和Button(弹出框和按钮组件)
import React, { Component } from 'react'
import {View,  // 视图组件Text,  // 文本组件Alert, //警告框组件Button, //按钮组件StyleSheet,
} from 'react-native'export default class alert01 extends Component {// 定义方法(这个方法里面定义两个按钮,分别为确认或者取消)createTwoButton = () => {Alert.alert('警告标题','警告内容',[{text: '取消',onPress: () => {console.log('点击了取消按钮')},style: 'cancel'},{text: '确认',onPress: () => {console.log('点击了确认按钮')},style: 'default'}])}// 定义三个按钮createTwoButtonAlert = () => {Alert.alert('更新提升','发现新版本,是否现在更新',[{text: '稍后再试',onPress: () => {console.log('稍后提醒我')},style: 'destructive'  //style有的手机能看到样式,有的看不到,这个可以省略},{text: '取消',onPress: () => {console.log('点击了取消按钮')},style: 'cancel'},{text: '确认',onPress: () => {console.log('点击了确认按钮')},style: 'default'}])}render () {return (<View style={[styles.container]}>{/* 按钮的title属性为展示的内容,onPress为点击事件,color为按钮背景色 */}<Button title='alart'onPress={() => {alert("我是一个按钮")}} />{/* 使用alert组件 */}<Button title='Alert.alert' onPress={() => {Alert.alert("我是按钮2")}}color={'red'}></Button><Button title='带确认和取消的按钮' onPress={this.createTwoButton}color={'blue'}></Button><Button title='带三个按钮的' onPress={this.createTwoButtonAlert}color={'tomato'}></Button></View>)}
}const styles = StyleSheet.create({container: {flex: 1,justifyContent: 'space-around',alignItems: 'center'}
})
Switch和StatusBar(开关和状态栏组件)
import React, { Component } from 'react'
import { Text, StyleSheet, View, Switch, StatusBar } from 'react-native'export default class SwitchAndStatusBar extends Component {// 定义一个函数,点击开关按钮控制状态条显隐constructor() {super()this.state = {hideStatusBar: false}}// 通过改变这个状态触发开关的功能和状态栏显隐toggleStatusBar = () => {this.setState({hideStatusBar: !this.state.hideStatusBar})}render () {return (<View style={[styles.container]}>{/*StatusBar: 状态条:hidden:控制状态条显隐,backgroundColor状态栏背景色(仅在安卓应用下有效),barStyle有三个值(代表状态栏图标的样式) */}<StatusBarhidden={this.state.hideStatusBar}backgroundColor={'red'}barStyle={'dark-content'}></StatusBar>{/* Switch:开关按钮,trackColor定义开关状态颜色,thumbColor定义小圆点颜色,value按钮状态值(默认按钮不可用,只有定义了状态通过切换状态才可以) */}<SwitchtrackColor={{false: 'red',true: 'green',}}thumbColor={'blue'}value={this.state.hideStatusBar}onValueChange={this.toggleStatusBar}></Switch></View>)}
}const styles = StyleSheet.create({container: {flex: 1,justifyContent: 'center',alignItems: 'center'}
})
ActivityIndicator和Platform(加载指示器组件和平台判断)
import React, { Component } from 'react'
// Platform平台(可以判断是安卓还是ios设备)
import { Text, StyleSheet, View, ActivityIndicator, Platform } from 'react-native'
// ActivityIndicator(加载指示器组件)
// 安卓和ios显示样式不一样(切记)
export default class ActivityIndicators extends Component {xj () {// 用来判断当前设备if (Platform.OS === 'android') {console.log('Platform',Platform);alert('当前是安卓应用')}}// 组件渲染完毕就执行componentDidMount () {this.xj()}render () {return (<View style={[styles.container]}>{/* ActivityIndicator加载指示器:color:圆圈的颜色,size:圆圈尺寸(参数只有两个,也可以使用0-100数字指定大小) */}{/*指示器默认是白色圆圈,切记看不到效果的可以加个背景色或者给指示器换个颜色就能看到了*/}<ActivityIndicator color={'blue'} size={'small'} /><ActivityIndicator color={'red'} size={'large'} />{/* 数字指定大小,只能在安卓应用下起作用,ios不起作用 */}<ActivityIndicator color={'#ccc'} size={70} /><ActivityIndicator color={'pink'} size={100} /></View>)}
}const styles = StyleSheet.create({container: {flex: 1,justifyContent: 'center',// alignItems: 'center'}
})
Image(图片组件)
import React, { Component } from 'react'
import { Text, StyleSheet, View, Image, Dimensions } from 'react-native'export default class image extends Component {render () {return (<View style={[styles.container]}>{/* source指定图片路径,require加载本地图片,uri加载网络图片/base64 */}<Image style={[styles.Item1]} source={require('./1.jpg')}></Image><Image style={[styles.Item1]} source={{ uri: 'https://img1.bdstatic.com/static/searchdetail/img/logo-2X_2dd9a28.png' }}></Image><Imagestyle={styles.Item1}source={{uri: 'data:image/png;base64,iVBORw0KGgoAAAANSUhEUgAAADMAAAAzCAYAAAA6oTAqAAAAEXRFWHRTb2Z0d2FyZQBwbmdjcnVzaEB1SfMAAABQSURBVGje7dSxCQBACARB+2/ab8BEeQNhFi6WSYzYLYudDQYGBgYGBgYGBgYGBgYGBgZmcvDqYGBgmhivGQYGBgYGBgYGBgYGBgYGBgbmQw+P/eMrC5UTVAAAAABJRU5ErkJggg==',}}/></View>)}
}const styles = StyleSheet.create({container: {flex: 1,justifyContent: 'center',alignItems: 'center'},Item1: {height: 200,width: Dimensions.get('window').width,marginVertical: 20}
})
TextInput(输入框组件)
import React, { Component } from 'react'
import { Text, StyleSheet, View, TextInput, Dimensions, Button } from 'react-native'export default class textInput extends Component {// 1.通过状态获取输入框内容constructor() {super()this.state = {username: '',password: '',phone: ''}}dologin = () => {// 获取输入框内容console.log(this.state.username, this.state.password, this.state.phone)}render () {return (<View style={[styles.container]}>{/* 直接写没效果,必须先给个样式 */}{/* 这里的value不能直接绑定修改,react为单向数据,不能双向绑定,只能通过onChangeText事件去改value的值,回调函数默认参数为输入框的值 */}<TextInputstyle={[styles.input]}placeholder='请输入用户名'value={this.state.username}onChangeText={(val) => {this.setState({username: val})}}></TextInput>{/* secureTextEntry代表不以明文格式显示(即密码格式) */}<TextInputstyle={[styles.input]}placeholder='请输入密码'value={this.state.password}secureTextEntry={true}onChangeText={(val) => {this.setState({password: val})}}/>{/* keyboardType键盘的类型,number-pad数字键盘 */}<TextInputstyle={[styles.input]}placeholder='请输入手机号'keyboardType='number-pad'value={this.state.phone}onChangeText={(val) => {this.setState({phone: val})}}/>{/* multiline值为true代表开启多行输入,numberOfLines限制行数为5行,textAlignVertical提示语在最顶部显示 */}<TextInputstyle={[styles.input]}placeholder='请输入自我介绍'multiline={true}numberOfLines={5}textAlignVertical='top'/><View><Button title='登录' onPress={this.dologin}></Button></View></View>)}
}const styles = StyleSheet.create({container: {flex: 1,justifyContent: 'center',alignItems: 'center'},input: {width: Dimensions.get('window').width - 20,margin: 10,borderWidth: 1,borderColor: 'red',paddingHorizontal: 5}
})
Touchable组件(触发触碰事件)
- TouchableHighlight
- 触碰后,高亮显示
- TouchableOpacity
- 触碰后,透明度降低(模糊显示)
- TouchableWithoutFeedback
- 触碰后,无任何响应
import React, { Component } from 'react'
import { Text, StyleSheet, View, TouchableHighlight, TouchableOpacity, TouchableWithoutFeedback } from 'react-native'export default class Touchable extends Component {render () {return (<View style={[styles.container]}><TouchableHighlightonPress={() => alert('触碰高亮显示')}><View style={[styles.Items]}><Text>触碰高亮显示</Text></View></TouchableHighlight><TouchableOpacityonPress={() => alert('触碰透明度变化')}><View style={[styles.Items]}><Text>触碰透明度变化</Text></View></TouchableOpacity><TouchableWithoutFeedbackonPress={() => alert('触碰无响应')}><View style={[styles.Items]}><Text>触碰无响应</Text></View></TouchableWithoutFeedback></View>)}
}const styles = StyleSheet.create({container: {flex: 1,justifyContent: 'center',alignItems: 'center'},Items: {marginBottom: 20,padding: 10,borderWidth: 1,borderColor: 'red'}
})
ScrollView(滚动组件)
当屏幕是刘海屏时,scrollview不会区分,直接显示,导致刘海屏那部分看不到效果,这时可以考虑使用安全视图SafeAreaView,这个可以自动识别是否为刘海屏,如果是的话不会在刘海屏显示,而是往下移一层
import React, { Component } from 'react'
import { Text, StyleSheet, View, ScrollView, Platform } from 'react-native'export default class scrollView extends Component {render () {return (<View>{/* horizontal水平滚动,showsHorizontalScrollIndicator={false}隐藏水平方向滚动条 */}<ScrollViewstyle={{ backgroundColor: '#dfb' }}horizontal={true}showsHorizontalScrollIndicator={false}><Text style={[styles.nav]}>新闻</Text><Text style={[styles.nav]}>娱乐</Text><Text style={[styles.nav]}>体育</Text><Text style={[styles.nav]}>财经</Text><Text style={[styles.nav]}>军事</Text><Text style={[styles.nav]}>新闻</Text><Text style={[styles.nav]}>时尚</Text><Text style={[styles.nav]}>科技</Text></ScrollView>{/* ScrollView属性:contentContainerStyle样式可以继承给子组件(可以对其内组件加样式),showsVerticalScrollIndicator={false}隐藏垂直方向的滚动条 */}<ScrollViewstyle={[styles.scrollview]}contentContainerStyle={{ margin: 30 }}showsVerticalScrollIndicator={false}><Text style={[styles.text]}> Lorem ipsum dolor sit amet consectetur, adipisicing elit. Amet dicta, enim molestias possimus ipsa unde labore eligendi quia omnis reiciendis similique consectetur nihil quam ab cupiditate dolores totam,laudantium hic sunt incidunt non nemo. Quidem maiores ex error quaerat dolores molestiae magnamfugiat laborum mollitia earum provident soluta natus iusto recusandae, optio excepturi! Laboriosam est cumque, ea inventore molestias quaerat! Aliquid delectus vero et tempora inventore blanditiis adipisci pariatur magnam expedita accusantium, distinctio quis? Fuga blanditiis, molestias commodi reprehenderit dolores ipsum voluptatem, pariatur sit, consectetur impedit tempore cupiditate? Mollitia,error veniam. Itaque porro vel rem nulla repellat. Eligendi, vitae laborum. </Text>{/* 这里有个bug,在安卓环境scrollview显示不到最下面内容,在ios环境可以完全展示,解决方式如下 */}<View style={{ height: Platform.OS === 'ios' ? 0 : 120 }}></View></ScrollView></View>)}
}const styles = StyleSheet.create({text: {fontSize: 50},scrollview: {backgroundColor: 'pink',marginHorizontal: 20},nav: {margin: 20,height: 50,fontSize: 30}
})
SectionList(带分组效果的列表)
import React, { Component } from 'react'
import {StyleSheet,Text,View,SafeAreaView,SectionList,StatusBar,
} from 'react-native'const DATA = [{title: 'Main dishes',data: ['Pizza', 'Burger', 'Risotto'],},{title: 'Sides',data: ['French Fries', 'Onion Rings', 'Fried Shrimps'],},{title: 'Drinks',data: ['Water', 'Coke', 'Beer'],},{title: 'Desserts',data: ['Cheese Cake', 'Ice Cream'],},
]class App extends Component {constructor() {super()this.state = {isFresh: false,}}loaddata = () => {this.setState({isFresh: true})// 模拟请求数据setTimeout(() => {this.setState({isFresh: false})alert('下拉刷新')}, 3000)}render () {return (// SafeAreaView避免刘海屏<SafeAreaView style={styles.container}><SectionList// sections定义的数据,keyExtractor唯一索引,renderItem渲染项目item渲染的组件,renderSectionHeader分组的头ItemSeparatorComponent声明项目间的分隔符sections={DATA}keyExtractor={(item, index) => item + index}renderItem={({ item }) => (<View style={styles.item}><Text style={styles.title}>{item}</Text></View>)}renderSectionHeader={({ section: { title } }) => (<Text style={styles.header}>{title}</Text>)}// 声明项目间的分隔符ItemSeparatorComponent={() => {return <View style={{ borderBottomWidth: 1, borderBlockColor: 'red' }}></View>}}// 列表数据为空时候的展示组件,看这个效果需要把DATA数据先注释ListEmptyComponent={() => {return <Text style={{ fontSize: 30 }}>空空如也</Text>}}// 下拉刷新,refreshing标记刷新状态(必须添加,否则报错),值为true那么刷新小动画会一直存在onRefresh下拉事件refreshing={this.state.isFresh}onRefresh={this.loaddata}// 上拉刷新(onEndReachedThreshold:设定触底比例,下面这个代表距离底部的距离就是列表的10%就触发)onEndReached上拉事件onEndReachedThreshold={0.1}onEndReached={() => {alert('到底了')}}// 声明列表的头部组件ListHeaderComponent={() => {return <Text style={{ fontSize: 40 }}>头部组件</Text>}}// 声明列表的尾部组件ListFooterComponent={() => {return <Text style={{ fontSize: 40 }}>尾部组件</Text>}}/></SafeAreaView>)}
};const styles = StyleSheet.create({container: {flex: 1,paddingTop: StatusBar.currentHeight,marginHorizontal: 16,},item: {backgroundColor: '#f9c2ff',padding: 20,marginVertical: 8,},header: {fontSize: 32,backgroundColor: '#fff',},title: {fontSize: 24,},
})export default App
FlatList(用来展示列表,不能进行分组)
import React, { Component } from 'react'
import {SafeAreaView,View,FlatList,StyleSheet,Text,StatusBar,TouchableOpacity
} from 'react-native'export default class flatlist extends Component {constructor() {super()this.state = {isLoadding: false,list: [{ id: '1', title: '头条' },{ id: '2', title: '娱乐' },{ id: '3', title: '体育' },{ id: '4', title: '军事' },{ id: '5', title: '科技' },{ id: '6', title: '财经' },{ id: '7', title: '时尚' },{ id: '8', title: '社会' }],seletedId: null}}renderItem = ({ index, item }) => {console.log('item', item)const backgroundColor = item.id === this.state.seletedId ? '#dfb' : '#f9c2ff'return (<TouchableOpacity style={[styles.item, { backgroundColor }]} onPress={() => {this.setState({seletedId: item.id})}}><Text style={styles.title}>{item.title}{item.id}</Text></TouchableOpacity>)}loadData = () => {this.setState({isLoadding: true})// 模拟网络请求setTimeout(() => {// 模拟请求数据alert('刷新请求数据')this.setState({isLoadding: false})}, 3000)}render () {return (<SafeAreaView style={[styles.container]}><FlatListdata={this.state.list}renderItem={this.renderItem}keyExtractor={item => item.id}// 将列表更改为水平方向 true水平/false垂直horizontal={false}// 指定默认置顶(默认滚动到某个位置,初始滚动索引)initialScrollIndex={1}// 默认先加载前四条再加载后面的(类似于懒加载,常用于第一屏默认加载)initialNumToRender={4} //指定初始渲染数据的数量,一般数量要填满一屏幕// 展示多列(参数为number几列),只能展示相同高度的元素,不支持瀑布流// numColumns={3}// 反转,数据反转显示// inverted={true}// 除了data数据外还有其他数据输入放到extraData// extraData={this.state.seletedId}ItemSeparatorComponent={() => {// 声明项目之间的分隔符return <View style={[styles.itemSeporetor]}></View>}}ListEmptyComponent={() => {// 列表数据为空展示的组件return <View style={{ fontSize: 30 }}>空空如也</View>}}// 下拉刷新refreshing={this.state.isLoadding}onRefresh={this.loadData}// 上拉刷新onEndReachedThreshold={0.01}onEndReached={() => {alert("到底了")}}// 声明列表的头部组件ListHeaderComponent={() => {return <Text style={{ fontSize: 40 }}>头部组件</Text>}}// 声明列表的尾部组件ListFooterComponent={() => {return <Text style={{ fontSize: 40 }}>尾部组件</Text>}}></FlatList></SafeAreaView>)}
}const styles = StyleSheet.create({container: {// flex: 1,marginTop: StatusBar.currentHeight || 0,},item: {backgroundColor: '#f9c2ff',padding: 30,marginVertical: 8,marginHorizontal: 16,},title: {fontSize: 32,},
})
Animated(动画组件)
- 组件必须经过特殊处理才能用于动画
- RN中可以直接使用的动画组件
- Animated.View
- Animated.Text
- Animated.ScrollView
- Animated.Image
如何创建动画
- 创建初始值
- Animated.value() 单个值
- Animated.ValueXY() 向量值
- 将初始值绑定到动画组件上
- 一般将其绑定到某个样式属性下,例如:opacity、translate
- 通过动画类型API,一帧一帧地更改初始值
- Animated.decay() 加速效果
- Animated.spring() 弹跳效果
- Animated.timing() 时间渐变效果
import React, { useEffect, useRef } from 'react'
import {Animated,Text,View,StyleSheet,Button,SafeAreaView,
} from 'react-native'const App = () => {// fadeAnim将用作不透明度的值。初始值:0const fadeAnim = useRef(new Animated.Value(0)).currentconst moveAnim = useRef(new Animated.Value(0)).currentconst fadeIn = () => {// Will change fadeAnim value to 1 in 5 secondsAnimated.timing(fadeAnim, {toValue: 1,duration: 5000,useNativeDriver: true, //启用原生方式渲染动画}).start(() => [// 动画结束的回调alert("我显示了")])}const fadeOut = () => {// Will change fadeAnim value to 0 in 3 secondsAnimated.timing(fadeAnim, {toValue: 0,duration: 3000,useNativeDriver: true,}).start(() => {// 动画结束的回调alert("我隐藏了")})}scanMove = () => {// 将moveAnim的初始值重新设置为0moveAnim.setValue(0)Animated.timing(moveAnim, {toValue: 200,duration: 3000,useNativeDriver: true}).start(() => {scanMove()})}useEffect(() => {scanMove()}, [])return (<SafeAreaView style={styles.container}><Animated.Viewstyle={[styles.fadingContainer,{// Bind opacity to animated valueopacity: fadeAnim,},]}><Text style={styles.fadingText}>Fading View!</Text></Animated.View><View style={styles.buttonRow}><Button title="Fade In View" onPress={fadeIn} /><Button title="Fade Out View" onPress={fadeOut} /></View><View style={[styles.scancontain]}><Animated.Viewstyle={[styles.border, {transform: [{translateY: moveAnim}]}]}></Animated.View></View></SafeAreaView>)
}const styles = StyleSheet.create({container: {flex: 1,alignItems: 'center',justifyContent: 'center',},fadingContainer: {padding: 20,backgroundColor: 'powderblue',},fadingText: {fontSize: 28,},buttonRow: {flexBasis: 100,justifyContent: 'space-evenly',marginVertical: 16,},scancontain: {height: 200,width: 200,borderWidth: 1,borderColor: 'red'},border: {borderWidth: 1,borderColor: 'red'}
})export default App
第三方组件
- 需要单独安装的组件
- 使用步骤
- 安装
- 配置
- 使用
介绍一下常用的
| 第三方组件 | 作用 |
|---|---|
| WebView | 相当于内置浏览器 |
| Picker | 下拉框 |
| Swiper | 展示轮播效果 |
| AsyncStorage | 持久化存储系统 |
| Geolocation | 获取定位信息 |
| Camera | 调用摄像头 |
常用的第三方组件示例代码
WebView(内置浏览器)
- 安装
- yarn add react-native-webview
- 配置
- 参考官网https://github.com/react-native-webview/react-native-webview
- 使用
- 直接指定uri地址
- 直接渲染html代码
// 直接指定uri地址
import React, { Component } from 'react';
import { WebView } from 'react-native-webview';class MyWeb extends Component {render() {return (<WebViewsource={{ uri: 'https://m.baidu.com' }} //直接打开软件进百度网页style={{ marginTop: 20 }}/>);}
}export default MyWeb
// 直接渲染html代码
import React, { Component } from 'react';
import { WebView } from 'react-native-webview';class MyInlineWeb extends Component {render() {return (<WebVieworiginWhitelist={['*']}source={{ html: '<h1 style="color:red">Hello world</h1>' }}/>);}
}
export default MyInlineWeb
Picker(下拉框组件)
- 安装
- yarn add @react-native-picker/picker
- 配置
- https:github.com/react-native-picker/picker
- 注意:不同版本配置方式不同
- 使用
- 参考官方示例代码
- 注意平台之间的差异(Android | ios)
import React, { Component } from 'react'
import { Text, StyleSheet, View } from 'react-native'
import { Picker } from '@react-native-picker/picker'
export default class picker extends Component {constructor() {super()this.state = {color: "white"}}render () {return (<View style={[styles.container, { backgroundColor: this.state.color }]}><PickerselectedValue={this.state.color}// 如果默认显示或者选中后显示结果为"...",就给style加一下宽高,可能的原因就是没有空间显示出来style={{ height: 100, width: 200 }}onValueChange={(itemValue, itemIndex) => {console.log('itemValue', itemValue)this.setState({color: itemValue})}}><Picker.Item label="白色" value="white" /><Picker.Item label="红色" value="red" /></Picker></View>)}
}const styles = StyleSheet.create({container: {flex: 1,justifyContent: 'center',alignItems: "center"}
})
Swiper(轮播图组件)
- 安装
- yarn add react-native-swiper
- 使用
- https://github.com/leecade/react-native-swiper
import React, { Component } from 'react'
import { Text, Image, StyleSheet, View, Dimensions, ScrollView } from 'react-native'
import Swiper from 'react-native-swiper'export default class swiper extends Component {render () {return (<ScrollView>{/* 写完下面代码发现没效果是因为图片超出屏幕导致不能显示,需要将外层的view组件改成scrollview组件就可以正常显示了 */}<Swiperstyle={[styles.wrapper]}showsButtons={true} //是否显示左右箭头autoplay={true} //设置自动播放><Imagestyle={[styles.slideImage]}source={{ uri: 'https://t7.baidu.com/it/u=2168645659,3174029352&fm=193&f=GIF' }}></Image><Imagestyle={[styles.slideImage]}source={{ uri: 'https://img1.bdstatic.com/static/searchdetail/img/logo-2X_2dd9a28.png' }}></Image><Imagestyle={[styles.slideImage]}source={{ uri: 'https://tenfei02.cfp.cn/creative/vcg/800/new/VCG41N1210205351.jpg' }}></Image></Swiper></ScrollView>)}
}const styles = StyleSheet.create({wrapper: {height: 200},slideImage: {height: 200,width: Dimensions.get("window").width}
})
AsyncStorage(持久化存储系统)
- 安装
- yarn add @react-native-async-storage/async-storage
- 配置
- https://github.com/react-native-async-storage/async-storage
- 使用
- 增删改查(使用方式和原生基本一致)
import React, { Component } from 'react'
import { Text, StyleSheet, View, Button } from 'react-native'
import AsyncStorage from '@react-native-async-storage/async-storage'
export default class storage extends Component {xj = async (value) => {await AsyncStorage.setItem('mytest', value)}xj2 = async () => {const value = await AsyncStorage.getItem('mytest')if (value != null) {alert(value)}}render () {return (<View style={[styles.container]}>{/* 存储和获取数据 */}<Button title='存储' onPress={() => { this.xj('Hello RN1') }}>  </Button><Button title='获取' onPress={this.xj2}>  </Button></View>)}
}const styles = StyleSheet.create({container: {flex: 1,justifyContent: 'center',alignItems: 'center',}
})
Geolocation(获取定位信息)
- 安装
- yarn add @react-native-community/geolocation
- 配置
- https://github.com/react-native-geolocation/react-native-geolocation
- 添加获取定位信息的授权许可
- 使用
- 通过手机调用api,获取经纬度信息
// 安装完找到android/app/src/main/AndroidMainfest.xml,在这个文件第4行下面插入下面代码,就获取到定位权限了
<uses-permission android:name="android.permission.ACCESS_FINE_LOCATION" />
import React, { Component } from 'react'
import { Text, StyleSheet, View } from 'react-native'
import Geolocation from '@react-native-community/geolocation'
import AsyncStorage from '@react-native-async-storage/async-storage'
export default class geolocation extends Component {componentDidMount () {// 如果本地存储中没有位置信息,就需要获取地理位置信息if (AsyncStorage.getItem('coords') === undefined || AsyncStorage.getItem('coords') === '') {// 组件加载获取地理位置信息// getCurrentPosition的回调函数默认三个参数(成功,失败,配置项[timeout(超时时间ms),maximumAge(最大值时间),enableHighAccuracy(高精度)])Geolocation.getCurrentPosition(info => {//成功回调函数,这里面就包含地理位置信息// 获取地理位置成功后将其保存下来,避免每次打开都弹出获取信息AsyncStorage.setItem('coords', JSON.stringify(info.coords))},error => console.log(error), //失败回调函数{timeout: 5000,  //超时时间maximumAge: 10000,  //最大时间enableHighAccuracy: true //启用高精度})}}render () {return (<View><Text> textInComponent </Text></View>)}
}const styles = StyleSheet.create({})
Camera(调用摄像头)
- 安装
- yarn add react-native-vision-camera
- 配置
- https://github.com/mrousavy/react-native-vision-camera
- 添加使用摄像头的授权许可
- 使用
- 拍照、扫码、人脸识别、…
这个Camera比较麻烦,没做笔记,所以没有代码演示了,抱歉
自定义组件
- 这里演示一个自定义下拉加载更多组件
组件代码
import React, { Component } from 'react'
import { Text, StyleSheet, View, ActivityIndicator } from 'react-native'export default class oneself extends Component {render () {return (<View style={[styles.container]}><View style={[styles.loading]}><ActivityIndicator color={"white"}></ActivityIndicator><Text style={[styles.loadingtitle]}> 加载中... </Text></View></View>)}
}const styles = StyleSheet.create({container: {flex: 1,justifyContent: 'center',alignItems: 'center'},loading:{backgroundColor:'#999',height:100,width:150,borderRadius:20,padding:20},loadingtitle:{textAlign:'center',color:'white',}
})
使用方式
import React, { Component } from 'react'
import { Text, StyleSheet, View } from 'react-native'
//导入自定义组件
import Oneself from './oneself'
export default class index extends Component {render () {return (<View style={[styles.container]}>// 使用自定义组件<Oneself></Oneself></View>)}
}const styles = StyleSheet.create({container: {flex: 1,justifyContent: 'center',alignItems: 'center'},
})
路由和导航
-
简介
- RN中的路由导航是通过React-Navigation来完成的
- React中通过React-Router实现路由
- RN0.44之前,React-Navigation在核心中维护,0.44之后,独立维护
- 本次演示使用React-Navigation5.X版本(建议大家都去官网用最新版本,因为本人用低版本过程碰到了诸多错误,换到新版本就好了)
- 官网:https://reactnavigation.org/
- RN中的路由导航是通过React-Navigation来完成的
-
基础组件
-
安装
- yarn add @react-navigation/native@^5.x
- 除此之外还要安装一些必要的依赖,下面是依赖安装命令
- yarn add react-native-reanimated react-native-gesture-handler react-native-screens react-native-safe-area-context @react-native-community/masked-view
- react-native-reanimated动画增强组件,react-native-gesture-handler手势处理导航,react-native-screens屏幕处理相关组件,react-native-safe-area-context针对除刘海屏的安全区域进行处理
-
链接
-
RN 0.60后安卓环境自动链接路由(Android无需任何操作)
-
ios下需要手动链接路由(npx pod-install ios)
-
添加头部组件
- 将如下代码,放到应用的头部(例如:放到index.js或App.js文件的头部)
- import ‘react-native-gesture-handler’
-
添加导航容器
-
我们需要在入口文件中,把整个应用,包裹在导航容器(NavigationContainer)中(例如:在index.js或App.js文件中)
-
示例代码:
import 'react-native-gesture-handler'  //这行代码本人放到了index.js里面,下面所有代码还是在App.js里面
import * as React from 'react'
import { NavigationContainer } from '@react-navigation/native'export default function App(){return (<NavigationContainer>{/*具体的应用代码*/}</NavigationContainer>)
}
-
-
-
总结以上内容
index.js
/*** @format*/
import 'react-native-gesture-handler';
import { AppRegistry } from 'react-native'
import App from './App'
import { name as appName } from './app.json'AppRegistry.registerComponent(appName, () => App)
App.js
import React, { Component } from 'react'
import { NavigationContainer } from '@react-navigation/native'
import { Text, View } from 'react-native'// 下面的注释都是练习的各部分代码片段
// import Index from './src_01_StyleSheet/index';
// import Index from './src_02_StyleSheet/index'
// import Index from './src_03_StyleSheet/index'
// import Index from './src-zujian/SwitchAndStatusBar'
// import Index from './src-zujian/ActivityIndicator'
// import Index from './src-zujian/Image'
// import Index from './src-zujian/TextInput'
// import Index from './src-zujian/Touchable'
// import Index from './src-zujian/ScrollView'
// import Index from './src-zujian/SectionList'
// import Index from './src-zujian/FlatList'
// import Index from './src-zujian/Animated'
// import Index from './src_other_zujian/picker'
// import Index from './src_other_zujian/swiper'
// import Index from './src_other_zujian/storage'
// import Index from './src_other_zujian/geolocation'
// import Index from './src-zujian/1' //自定义组件使用
// import Index from './src_router/demo01-stack'
import Index from './src_router/demo02-BottomTabs'export default class App extends Component {render () {return (<NavigationContainer><Index></Index></NavigationContainer>)}
}
总体来说就是
1.在终端安装
yarn add @react-navigation/native@^5.x
yarn add react-native-reanimated react-native-gesture-handler react-native-screens react-native-safe-area-context @react-native-community/masked-view
2.执行完以上命令后在index.js最上面一行加入下面这个导入命令
import 'react-native-gesture-handler'
3.最后在App.js加入以下代码
import * as React from 'react'
import { NavigationContainer } from '@react-navigation/native'export default function App(){return (<NavigationContainer>{/*具体的应用代码*/}</NavigationContainer>)
}
执行完以上三步,基本配置完成,可以看下面的继续学习
Stack导航(正常的点击跳转,带顶部标题,可去掉)
-
官网
- https://reactnavigation.org/docs/5.x/hello-react-navigation
-
简介
- RN中默认没有类似浏览器的history对象
- 在RN中跳转之前,先将路由声明在Stack中
-
安装
- yarn add @react-navigation/stack@^5.x
-
使用
- import { createStackNavigator } from ‘@react-navigation/stack’
- const Stack = createStackNavigator();
-
导航属性
- <Stack.Navigator …属性/> 作用于整个导航(包含多个屏幕)
- Navigator属性
- initialRouteName
- 初始化路由,即默认加载的路由
- headerMode
- float: IOS头部效果
- screen: Androd头部效果
- none: 不显示头部
- screenOptions
- initialRouteName
- Navigator属性
- <Stack.Screen …属性/> 仅仅作用于当前屏幕
- options
- title 声明页面标题
- headerTitleStyle 声明标题的样式
- headerStyle 声明页头样式
- headerLeft 声明左侧内容
- headerRight 声明右侧内容(例如分享按钮)
- headerTintColor 声明标题颜色
- options
- <Stack.Navigator …属性/> 作用于整个导航(包含多个屏幕)
Stack代码演示
import React, { Component } from 'react'
import { Text, StyleSheet, View, Button, TouchableOpacity } from 'react-native'
// 导入stack
import { createStackNavigator } from '@react-navigation/stack'// 创建stack
const Stack = createStackNavigator()// 创建组件
// 组件默认接收接收prop
const HomeScreen = (prop) => {return (<View style={[styles.container]}><Text style={[styles.text]}>HomeScreen</Text>{/* 组件默认的prop内包含navigation.navigate,通过navigation.navigate可以实现导航跳转 */}<Button title="点击跳转新闻页面" onPress={() => prop.navigation.navigate('News')}></Button></View>)
}const NewsScreen = (prop) => {return (<View style={[styles.container]}><Text style={[styles.text]}>NewsScreen</Text><Button title="点击跳转首页" onPress={() => prop.navigation.navigate('Home')}></Button></View>)
}export default class index extends Component {render () {return (// initialRouteName代表初始化默认页面// headerMode代表默认标题,none代表没有,float: IOS头部效果  screen: Androd头部效果<Stack.Navigator initialRouteName='News' headerMode={'screen'}>{/* name和component为重要必填属性,component为组件 */}{/* 只有一个option属性,接收多个参数 */}{/* - title  声明页面标题- headerTitleStyle  声明标题的样式- headerStyle  声明页头样式- headerLeft   声明左侧内容- headerRight  声明右侧内容(例如分享按钮)- headerTintColor   声明标题颜色 */}<Stack.Screen name='Home' component={HomeScreen}options={{title: '首页',headerStyle: {backgroundColor: "tomato" //标题栏背景色},headerRight: () => {return (// 这里实现右侧分享按钮<TouchableOpacity onPress={() => { alert("Hello") }}><Text>分享</Text></TouchableOpacity>)}}}></Stack.Screen><Stack.Screen name='News' component={NewsScreen}></Stack.Screen></Stack.Navigator>)}
}const styles = StyleSheet.create({container: {flex: 1,justifyContent: 'center',alignItems: 'center'},text: {fontSize: 40}
})
BottomTab导航(底部导航)
- 官网
- https://reactnavigation.org/docs/5.x/bottom-tab-navigator
- 安装
- yarn add @react-navigation/bottom-tabs@^5.x
- 使用
- import { createBottomTabNavigator } from ‘@react-navigation/bottom-tabs’
- const Tab = createBottomTabNavigator();
矢量图标库
React-native-vector-icons(图标组件库)
-
安装
- npm install --save react-native-vector-icons
-
将图标链接到应用(环境问题较多)
-
https://github.com/oblador/react-native-vector-icons
-
Android/app/build.gradle最后一行放入链接
-
apply from: file("../../node_modules/react-native-vector-icons/fonts.gradle")
-
-
使用
-
引入
- import Ionicons from 'react-native-vector-icons/图标集名字
-
需要到具体的图标库官网查看
-
例如:Ionicons , FontAwesome , AntDesign
-
示例代码
import React, { Component } from 'react'
import { Text, StyleSheet, View, Button } from 'react-native'
import { createBottomTabNavigator } from '@react-navigation/bottom-tabs'
import Ionicons from 'react-native-vector-icons/Ionicons'
// 创建组件
// 组件默认接收接收prop
const HomeScreen = (prop) => {return (<View style={[styles.container]}><Text style={[styles.text]}>HomeScreen</Text></View>)
}const NewsScreen = (prop) => {return (<View style={[styles.container]}><Text style={[styles.text]}>NewsScreen</Text></View>)
}// 创建tab
const Tab = createBottomTabNavigator()export default class index extends Component {render () {return (// screenOptions是一个回调函数,函数默认有个参数,route代表当前导航的所有信息// tabBarIcon代表底部导航图标,也是回调函数//默认接受的参数里面的focused:代表判断当前菜单是否处于活跃状态,即是否获取焦点,color:设置当前导航颜色,size:设置字体大小<Tab.NavigatorscreenOptions={({ route }) => {return ({tabBarIcon: ({ focused, color, size }) => {let iconNameif (route.name === 'Home') {// 选中为实心图标,不选中为空心图标iconName = focused ? 'add-circle' : 'add-circle-outline'} else if (route.name === 'News') {iconName = focused ? 'person' : 'person-outline'}return <Ionicons name={iconName} size={size} color={color}></Ionicons>}})}}tabBarOptions={{activeTintColor: 'tomato', // 选中状态下的颜色inactiveTintColor: 'gray', // 非选中状态下的颜色}}>{/* name和component为必填 */}<Tab.Screen name='Home' component={HomeScreen}></Tab.Screen><Tab.Screen name='News' component={NewsScreen}></Tab.Screen></Tab.Navigator>)}
}const styles = StyleSheet.create({container: {flex: 1,justifyContent: 'center',alignItems: 'center'},text: {fontSize: 40}
})
Drawer导航(可以展开/折叠侧边栏)
-
官网
- https://reactnavigation.org/docs/5.x/drawer-navigator
-
安装
- yarn add @react-navigation/drawer@^5.x
-
使用
- import { createDrawerNavigator } from ‘@react-navigation/drawer’
- const Drawer = createDrawerNavigator()
- 声明Drawer.Navigator和Drawer.Screen
-
配置
- Navgator属性
- drawerPosition:菜单显示位置,left(默认) | right
- drawerType: 菜单动画效果, front | back | slide | permanent
- drawerStyle: 菜单样式
- backgroundColor , width…
- drawerContentOptions: 选中菜单项样式
- activeTintColor: 当前选中菜单字体颜色
- itemStyle: 所有菜单项样式
- Screen属性
- options
- title: 菜单标题
- drawerLabel: 替代title, 返回复杂的组件. { focused:boolean , color:string }
- drawerIcon: 返回图标的函数. { focused:boolean , color: string, size: number }
- headerShown: 是否显示header. 布尔型, 默认false不显示
- headerLeft: 函数, 声明header左侧的显示内容
- headerRight: 函数, 声明header右侧的显示内容
- options
- Navgator属性
示例代码,这里说一下,代码我没跑起来,报错了,但是代码没问题,好像跟reanimated版本有关,报错内容贴下面了,仅供参考
Error: [Reanimated] `valueUnpacker` is not a worklet, js engine: hermesERROR Invariant Violation: Failed to call into JavaScript module method AppRegistry.runApplication(). Module has not been registered as callable. Registered callable JavaScript modules (n = 10): Systrace, JSTimers, HeapCapture, SamplingProfiler, RCTLog, RCTDeviceEventEmitter, RCTNativeAppEventEmitter, GlobalPerformanceLogger, JSDevSupportModule, HMRClient.A frequent cause of the error is that the application entry file path is incorrect. This can also happen when the JS bundle is corrupt or there is an early initialization error when loading React Native., js engine: hermes
import React, { Component } from 'react'
import { Text, StyleSheet, View, Button } from 'react-native'
import { createDrawerNavigator } from '@react-navigation/drawer'
import Ionicons from 'react-native-vector-icons/Ionicons'// 创建组件
// 组件默认接收接收prop
const HomeScreen = (prop) => {return (<View style={[styles.container]}><Text style={[styles.text]}>HomeScreen</Text>{/* 组件默认的prop内包含navigation.navigate,通过navigation.navigate可以实现导航跳转 */}<Button title={"打开 Drawer"} onPress={() => prop.navigation.openDrawer()}></Button><Button title={"切换 Drawer"} onPress={() => prop.navigation.toggleDrawer()}></Button></View>)
}const NewsScreen = (prop) => {return (<View style={[styles.container]}><Text style={[styles.text]}>NewsScreen</Text><Button title="点击跳转首页" onPress={() => prop.navigation.navigate('Home')}></Button></View>)
}// 创建Drawer
const Drawer = createDrawerNavigator()export default class index extends Component {render () {return (<Drawer.Navigator// 定义侧边栏样式drawerStyle={{width: 180,backgroundColor: '#bfc'}}drawerPosition={'right'} //drawerPosition定义菜单位置drawerType={"slide"} //滑动效果,不是覆盖了,默认的是覆盖的,permanent:一直存在drawerContentOptions={{activeTintColor: '#blue', //当前选中菜单的颜色itemStyle: { //设置菜单项的样式marginVertical: 20}}}><Drawer.Screen options={{title: '首页', //设置菜单标题drawerIcon: ({ focused, color, size }) => {  //图标let iconNameif (route.name === 'Home') {// 选中为实心图标,不选中为空心图标iconName = focused ? 'add-circle' : 'add-circle-outline'} else if (route.name === 'News') {iconName = focused ? 'person' : 'person-outline'}return <Ionicons name={iconName} size={size} color={color}></Ionicons>}}} name='Home' component={HomeScreen}></Drawer.Screen><Drawer.Screen name='News' component={NewsScreen}></Drawer.Screen></Drawer.Navigator>)}
}const styles = StyleSheet.create({container: {flex: 1,justifyContent: 'center',alignItems: 'center'},text: {fontSize: 40}
})
MaterialTopTab导航(可以滑动导航)
-
官网
- https://reactnavigation.org/docs/5.x/material-bottom-tab-navigator
-
安装
- yarn add @react-navigation/material-top-tabs@^5.x react-native-tab-view@^2.x
-
使用
属性
- Navigator属性
- tabBarPosition: Tab显示位置.默认为top , 可设置为bottom
- tabBarOptions: 包含tabBar组件属性的对象
- activeTintColor: 当前菜单的标题或图标颜色
- inactiveTintColor: 非当前菜单的标题或者图标颜色
- showIcon: 是否显示图标,默认是false
- showLabel: 是否显示文字,默认是true
- tabStyle: 标签样式对象
- labelStyle: 标签文字样式对象. 这里指定的颜色, 会覆盖activeTintColor和inactiveTintColor的值.
- iconStyle: 图标样式对象
- Screen属性
- option: 设置Screen组件的对象
- title: 设置显示标题
- tabBarIcon: 设置标签图标(需要先在Navigator中指定showIcon:true)
- 其值为函数,包含两个参数: { focused:boolean, color: string }
- focused用来判断标签是否获取焦点, color为当前标签的颜色
- tabBarLabel: 设置标签文字内容(当未定义时,会使用title)
- 其值为函数,包含两个参数: { focused:boolean, color:string }
- focused用来判断标签是否获取焦点,color为当前标签的颜色
- option: 设置Screen组件的对象
具体代码演示
import React, { Component } from 'react'
import { Text, StyleSheet, View } from 'react-native'
import { createMaterialTopTabNavigator } from '@react-navigation/material-top-tabs'
import Ionicons from 'react-native-vector-icons/Ionicons'
// 创建组件
// 组件默认接收接收prop
const OrderrunpayScreen = (prop) => {return (<View style={[styles.container]}><Text style={[styles.text]}>待付款</Text></View>)
}const OrderPaidScreen = (prop) => {return (<View style={[styles.container]}><Text style={[styles.text]}>待发货</Text></View>)
}const OrderSentScreen = (prop) => {return (<View style={[styles.container]}><Text style={[styles.text]}>待收货</Text></View>)
}const OrderFinishScreen = (prop) => {return (<View style={[styles.container]}><Text style={[styles.text]}>待评价</Text></View>)
}
const Tab = createMaterialTopTabNavigator()
export default class index extends Component {render () {return (<Tab.NavigatortabBarPosition="bottom"tabBarOptions={{tabStyle: {borderWidth: 1,borderColor: "red"},labelStyle: {fontSize: 20},activeTintColor: 'red',inactiveTintColor: "#666",showIcon: true}}><Tab.Screenoptions={{title: '待付款',tabBarIcon: ({ focused, color }) => {return (<Ionicons name='hammer-outlint' size={20} color={color} />)}}}name="OrderrunpayScreen" component={OrderrunpayScreen}></Tab.Screen><Tab.Screen name="OrderPaidScreen" component={OrderPaidScreen} options={{ title: '待发货' }}></Tab.Screen><Tab.Screen name="OrderSentScreen" component={OrderSentScreen} options={{ title: '待收获' }}></Tab.Screen><Tab.Screen name="OrderFinishScreen" component={OrderFinishScreen} options={{ title: '待评价' }}></Tab.Screen></Tab.Navigator>)}
}const styles = StyleSheet.create({container: {flex: 1,justifyContent: 'center',alignItems: 'center'},text: {fontSize: 40}
})
路由嵌套
-
官网: https://reactnavigation.org/docs/7.x/nesting-navigators
-
在一个导航内部,渲染另一个导航
-
实例:
- Stack.Navigator
- Home (Tab.Navigator)
- Feed(Screen)
- Messages(Screen)
- Profile(Screen)
- Settings(Screen)
- Home (Tab.Navigator)
- Stack.Navigator
代码演示
import React, { Component } from 'react'
import { Text, StyleSheet, View, Button } from 'react-native'
import { createStackNavigator } from '@react-navigation/stack'
import { createBottomTabNavigator } from '@react-navigation/bottom-tabs'
const Stack = createStackNavigator()
// 底部导航栏组件
const Tab = createBottomTabNavigator()const FeedScreen = (prop) => {return (<View style={[styles.container]}><Text style={[styles.text]}>FeedScreen</Text>{/* 组件默认的prop内包含navigation.navigate,通过navigation.navigate可以实现导航跳转 */}<Button title="点击跳转Profile页面" onPress={() => prop.navigation.navigate('Profile')}></Button><Button title="点击跳转Settings页面" onPress={() => prop.navigation.navigate('Settings')}></Button></View>)
}const MessagesScreen = (prop) => {return (<View style={[styles.container]}><Text style={[styles.text]}>MessagesScreen</Text></View>)
}const ProfileScreen = (prop) => {return (<View style={[styles.container]}><Text style={[styles.text]}>ProfileScreen</Text></View>)
}const SettingsScreen = (prop) => {return (<View style={[styles.container]}><Text style={[styles.text]}>SettingsScreen</Text></View>)
}function Home () {return (<Tab.Navigator><Tab.Screen name="Feed" component={FeedScreen} /><Tab.Screen name="Messages" component={MessagesScreen} /></Tab.Navigator>)
}export default class index extends Component {render () {return (<Stack.Navigator><Stack.Screenname="Home"component={Home}options={{ headerShown: false }}/><Stack.Screen name="Profile" component={ProfileScreen} /><Stack.Screen name="Settings" component={SettingsScreen} /></Stack.Navigator>)}
}const styles = StyleSheet.create({container: {flex: 1,justifyContent: 'center',alignItems: 'center'},text: {fontSize: 40}
})
路由传参
-
官网
- https://reactnavigation.org/docs/7.x/params
-
传递参数
navigation.navigate('路由名称',{KEY:123}) -
接收参数
// 类组件
this.props.route.params.KEY
// 函数组件
route.params.KEY
示例代码
import React from 'react'
import { View, Text, StyleSheet, Button } from 'react-native'
import { createStackNavigator } from '@react-navigation/stack'// 下面两个组件从官网粘贴来的
// 点击HomeScreen的按钮会传递参数
// DetailsScreen页面接收参数并显示到页面上
function HomeScreen ({ navigation }) {return (<View style={{ flex: 1, alignItems: 'center', justifyContent: 'center' }}><Text>Home Screen</Text><Buttontitle="Go to Details"onPress={() => {/* 1. 点击跳转并携带参数 */navigation.navigate('Details', {itemId: 86,otherParam: 'anything you want here',})}}/></View>)
}function DetailsScreen ({ route, navigation }) {/* 2. route.params里面就是传递过来的参数 */const { itemId, otherParam } = route.paramsreturn (<View style={{ flex: 1, alignItems: 'center', justifyContent: 'center' }}><Text>Details Screen</Text><Text>itemId: {JSON.stringify(itemId)}</Text><Text>otherParam: {JSON.stringify(otherParam)}</Text><Buttontitle="Go to Details... again"onPress={() =>// 每次点击按钮都会回到详情页并随机传递一个值navigation.push('Details', {itemId: Math.floor(Math.random() * 100),})}/>{/* 返回Home组件 */}<Button title="Go to Home" onPress={() => navigation.navigate('Home')} />{/* 下面这个是返回上一层 */}<Button title="Go back" onPress={() => navigation.goBack()} /></View>)
}const Stack = createStackNavigator()
export default function index () {return (// 注册组件<Stack.Navigator><Stack.Screen name="Home" component={HomeScreen}></Stack.Screen><Stack.Screen name="Details" component={DetailsScreen}></Stack.Screen></Stack.Navigator>)
}const styles = StyleSheet.create({})
状态管理
- Redux
- 安装
- yarn add redux
- yarn add react-redux
- yarn add redux-thunk //为了支持异步操作
- 创建Store
- 将Store挂载到App组件上
- 在组件内部使用Redux数据
- 安装
这里是步骤和具体代码
先安装以上三个依赖,再按下面步骤看
项目结构
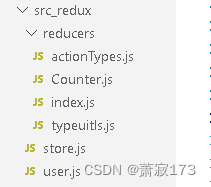
user.js为使用数据的组件,其余的都是store的代码
根目录下创建src_redux
1.src_redux/store.js代码如下
import { createStore,applyMiddleware } from "redux";
import reducers from "./reducers";
import reduxThunk from 'redux-thunk'// 创建store,声明reducer
const store = createStore(reducers,// 声明中间件applyMiddleware(reduxThunk)
)//导出reducers
export default store
2.src_redux/reducers/typeuitls.js代码如下
export default  {// 定义类型COUNTER_INCREMENT: "COUNTER_INCREMENT",COUNTER_DECREMENT: "COUNTER_DECREMENT"
}
3.src_redux/reducers/actionTypes.js代码如下
// 引入类型
import actionTypes from './typeuitls'// 递增
export const increment = (value) => {return {type: actionTypes.COUNTER_INCREMENT,payload: value}
}// 递减
export const decrement = (value) => {return {type: actionTypes.COUNTER_DECREMENT,payload: value}
}
4.src_redux/reducers/Counter.js代码如下
// 引入类型
import actionTypes from './typeuitls'const initState = {num: 2
}// 导出是有两个参数的
export default (state = initState, action) => {// action.payload就是reducer方法里传的参数// 通过循环判断类型console.log('action', action.type)switch (action.type) {case actionTypes.COUNTER_INCREMENT:return {// 这里是逻辑代码...state,num: state.num + action.payload}case actionTypes.COUNTER_DECREMENT:return {// 这里是逻辑代码...state,num: state.num - action.payload}default:return state //当匹配不到值时,将数据原封不动返回}
}
5.src_redux/reducers/index.js代码如下
// 将多个模块合并起来
import { combineReducers } from "redux";
// 引入模块
import Counter from "./Counter";
// import home from "./home"  //这里没有home.js,做下笔记,当多个组件存在时就是这样引入的export default combineReducers({Counter,// home
})
6.创建完在App.js使用Provider进行包裹
import React, { Component } from 'react'
import { NavigationContainer } from '@react-navigation/native'// 1.引入Redux
import { Provider as StoreProvider } from 'react-redux'
// 2.引入store
import store from './src_redux/store'import { Text, View } from 'react-native'
import Index from './src_router/demo06-luyouchuancan/index'export default class App extends Component {render () {return (// 3.传递数据,就是将我们写的store数据挂载到StoreProvider的store属性上<StoreProvider store={store}><NavigationContainer><Index></Index></NavigationContainer></StoreProvider>)}
}
7.在user.js里面使用数据
import React, { Component } from 'react'
import { Text, StyleSheet, View, Button } from 'react-native'
// 1.导入redux
import { connect } from 'react-redux'
// 2.引入在store定义的逻辑
import { increment, decrement } from './reducers/actionTypes'
// 3.使用全局状态
const mapStateToProps = (state) => {return {num: state.Counter.num}
}
class user extends Component {render () {return (// 这里使用方法 <View style={[styles.container]}><Button title='-' onPress={() => { this.props.decrement(1) }}></Button><Text> {this.props.num} </Text><Button title='+' onPress={() => { this.props.increment(1) }}></Button></View>)}
}
// 4.将全局状态挂载并使用高阶函数形式将user包裹一下(参数一:定义的使用全局状态的函数,参数二:定义的Reducers)
export default connect(mapStateToProps, { increment, decrement })(user)
const styles = StyleSheet.create({container: {flex: 1,flexDirection: 'row',justifyContent: 'center',alignItems: 'center'}
})
- 路由鉴权
- 用户登录
- actions
- reduces
- connect
- 已登录,跳到首页
- 未登录,跳转到登录页
- 用户登录
在src_redux/reducers/typeuitls.js添加登录成功或者失败的类型
export default {// 定义类型COUNTER_INCREMENT: "COUNTER_INCREMENT",COUNTER_DECREMENT: "COUNTER_DECREMENT",// 登录成功/失败LOGIN_SUCCESS: "LOGIN_SUCCESS",LOGIN_FAILD: "LOGIN_FAILD"
}
后续不写了,主要就是还是写两个reducer方法,分别为登录成功或者失败,通过调用方法修改isLogin(默认为false)的值,通过判断值确定是否登录,然后在别的页面通过判断isLogin这个值使用三元运算符,如果为true就显示页面,否则不显示页面








![[React源码解析] React的设计理念和源码架构 (一)](https://img-blog.csdnimg.cn/75242141fe5646f2a123486823875d6a.png)
