1 安装必要依赖
2 配置GitLab软件源镜像
3 下载安装GitLab
4 查看管理员root用户默认密码
5 登录GitLab
6 修改密码
7 gitlab相关命令
1 安装必要依赖
sudo yum install -y curl policycoreutils-python openssh-server perl
sudo systemctl enable sshd
sudo systemctl start sshd # 开启 http 端口:GitLab 默认端口
# 开启 https 端口:GitLab 默认端口
sudo firewall-cmd --permanent --add-service=http
sudo firewall-cmd --permanent --add-service=https # 重载防火墙
sudo systemctl reload firewalld# 查看防火墙已开放的端口与服务
sudo firewall-cmd --list-all
2 配置GitLab软件源镜像
curl https://packages.gitlab.com/install/repositories/gitlab/gitlab-ee/script.rpm.sh | sudo bash3 下载安装GitLab
--注意1:IP地址为虚拟机的IP地址
sudo EXTERNAL_URL="http://10.0.0.203" yum install -y gitlab-ee--注意2:出现下面这个说明安装成功

4 查看管理员root用户默认密码
# 用户名为 root
# 使用如下命令查看密码:
sudo cat /etc/gitlab/initial_root_password
5 登录GitLab
登录地址:http://10.0.0.203/users/sign_in

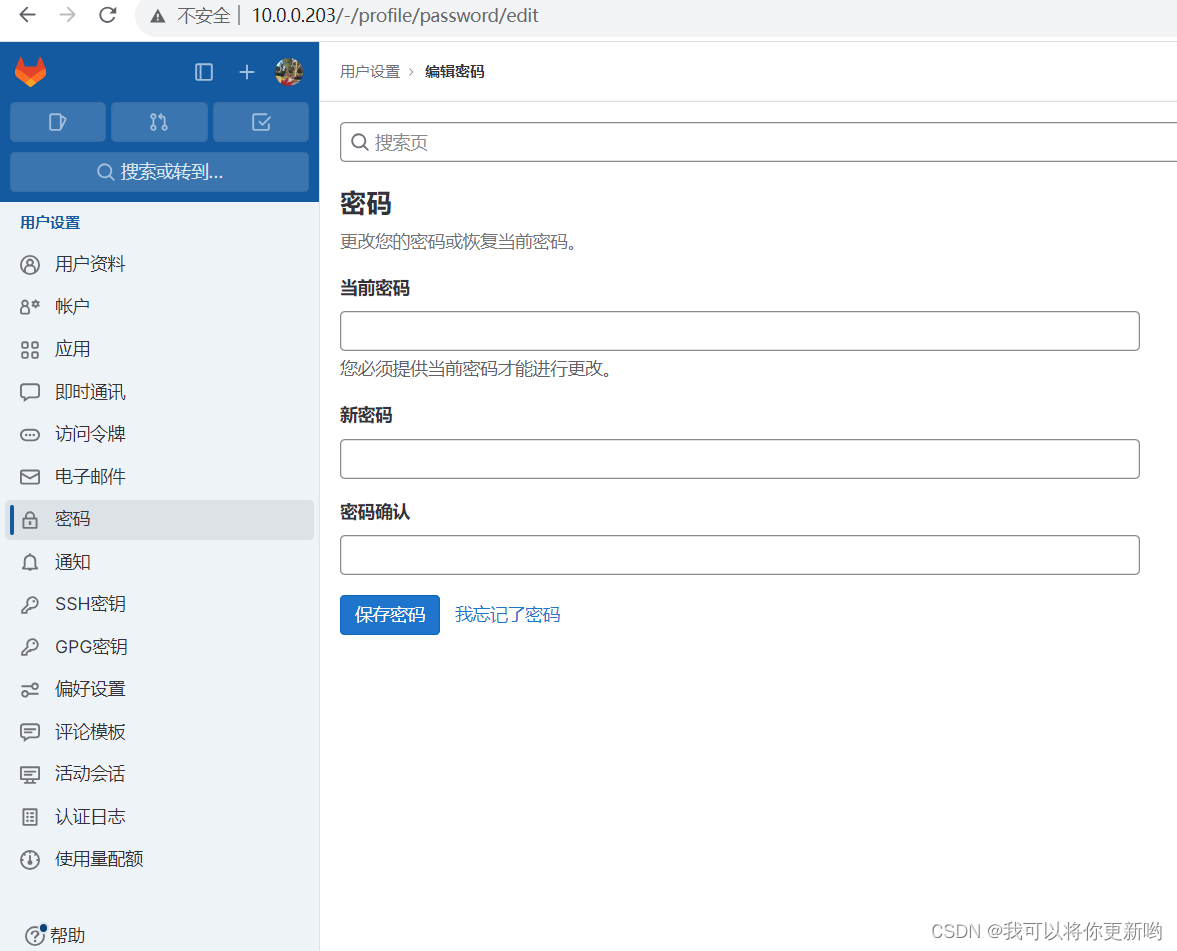
6 修改密码
http://10.0.0.203/-/profile/password/edit
7 gitlab相关命令
#查看GItLab状态
sudo systemctl status gitlab-runsvdir.service#停止GitLab
sudo systemctl stop gitlab-runsvdir.service#GitLab开机自启状态
sudo systemctl list-unit-files | grep gitlab-runsvdir.service#关闭GitLab开机自启动
sudo systemctl disable gitlab-runsvdir.service#开启GitLab开机自启动
sudo systemctl enable gitlab-runsvdir.service#查看GitLab各服务状态
sudo gitlab-ctl status





![[Python]图片转字符画——这就是我的表情!!!!!!](https://img-blog.csdnimg.cn/1098c418b146421d8c16a51c242cc537.png)
