Centos7安装配置Redis7
安装redis
#安装gcc
yum -y install gcc gcc-c++
#安装net-tools
yum -y install net-tools
#官网https://redis.io/
cd /opt/
wget http://download.redis.io/releases/redis-7.0.4.tar.gz
解压至/opt/目录下
tar -zxvf redis-7.0.4.tar.gz -C /opt/
#编译安装
make
make install
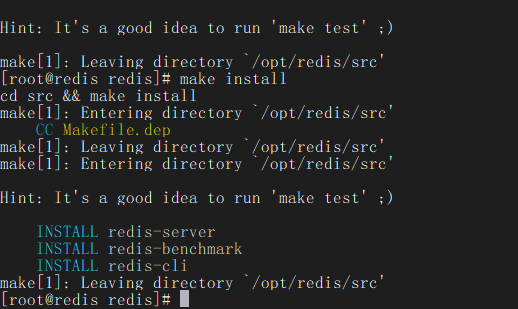
INSTALL redis-server
INSTALL redis-benchmark
INSTALL redis-cli
//启动redis
redis-server 或 nohup redis-server &
//配置后台启动
redis-server /opt/redis/redis.conf
//停止redis
redis-cli shutdown#daemonize配置该为yes
vim redis.conf

#配置redis开机自启
vim /etc/systemd/system/redis.service[Unit]
Description=redis-server
After=network.target
[Service]
Type=forking
ExecStart=/opt/redis/src/redis-server /opt/redis/redis.conf
PrivateTmp=true
[Install]
WantedBy=multi-user.target
//重载系统服务
systemctl daemon-reload
systemctl start redis
systemctl status redis
systemctl restart redis
//开机自启
systemctl enable redis
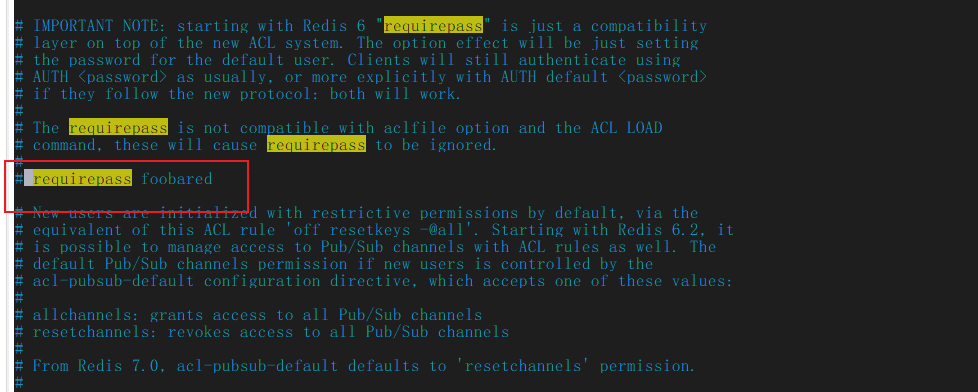
#修改配置密码(根据个人需求修改密码)
find / -name redis.conf
vim redis.conf
#创建 redis 命令软链接
find / -name redis-cli
ln -s /usr/local/bin/redis-cli /usr/bin/redis
redis
//登录redis
redis-cli
auth 密码redis-cli -h 127.0.0.1 -p 6379
redis-cli -h 127.0.0.1 -p 6379 -a 密码
redis-cli -a 密码

#查看所有6379端口使用情况
netstat -ntulp |grep 6379
netstat -ntulp |grep redis
连接配置
vim /opt/redis/redis.conf
注释 bind
#注释
#bind 127.0.0.1 -::1 //bind 127.0.0.1 -::1表示只本机使用 ,注释后表示任意连接

关闭保护模式(自己访问自己)

命令重命名
flushall与flushdb根据项目情况使用
flushall删除所有
flushdb删除当前数据库
rename-command flushall "" #表示flushall不能使用
rename-command flushdb ""

Redis客户端
命令行客户端
redis-cli -h 127.0.0.1 -p 6379
redis-cli -h 127.0.0.1 -p 6379 -a 密码
图形化桌面客户端
8.8版本后商业化收费
RedisDesktopManager
官网:https://resp.app/
GitHub - RedisInsight/RedisDesktopManager
链接:https://pan.baidu.com/s/1y3cdOqS1E2UIGW22nr9zNQ?pwd=QGS1
提取码:QGS1
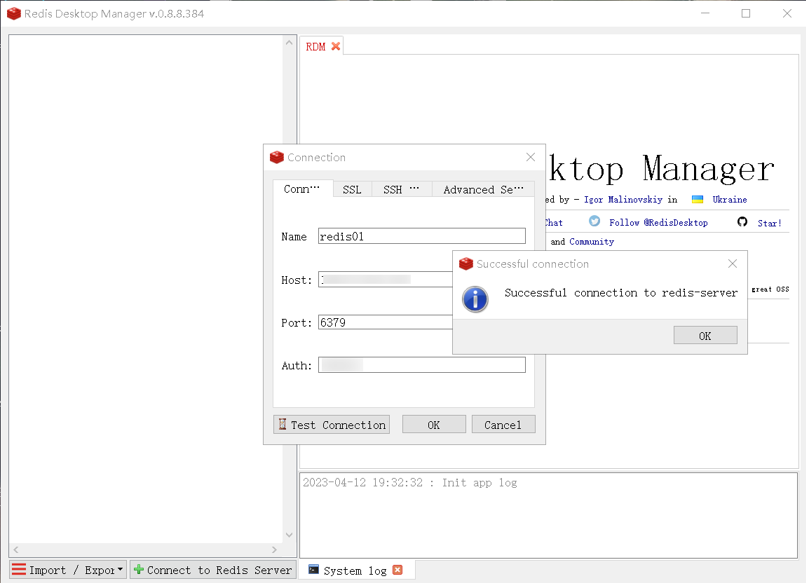
RedisPlus
RedisPlus: RedisPlus是为Redis可视化管理开发的一款开源免费的桌面客户端软件,支持Windows 、Linux 、Mac三大系统平台,RedisPlus提供更加高效、方便、快捷的使用体验,有着更加现代化的用户界面风格。
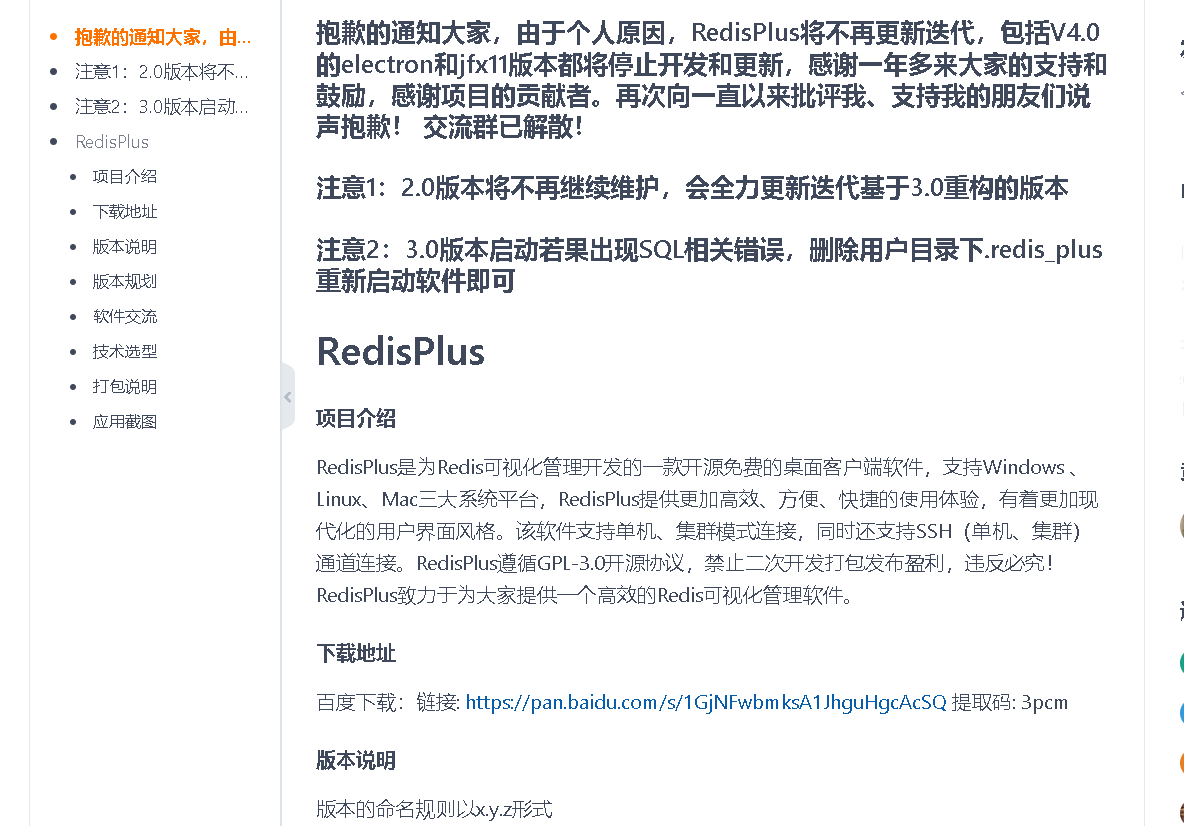
RedisDesktopManager-Windows
Releases · lework/RedisDesktopManager-Windows · GitHub

zabbix5.0配置监控redis7
关闭防火墙
sed -i 's/SELINUX=enforcing/SELINUX=disabled/' /etc/selinux/config
systemctl disable --now firewalldyum install ntpdate -y
同步时间,和时区
ntpdate -u ntp.huaweicloud.com
或ntpdate -u ntp.aliyun.com
查看时间
date
时区统一
mv /etc/localtime{,.bak}
ln -s /usr/share/zoneinfo/Asia/Shanghai /etc/localtime
zabbix-agent2(go语言)
部署zabbix-agent2(go语言)
在操作一遍,安装 zabbix rpm 源(使用华为云zabbix源或者阿里云zabbix源)
#用华为云zabbix源rpm -Uvh https://mirrors.huaweicloud.com/zabbix/zabbix/5.0/rhel/7/x86_64/zabbix-release-5.0-1.el7.noarch.rpmsed -i 's#http://repo.zabbix.com#https://mirrors.huaweicloud.com/zabbix#' /etc/yum.repos.d/zabbix.repo
或#是用阿里云zabbix 源rpm -Uvh https://mirrors.aliyun.com/zabbix/zabbix/5.0/rhel/7/x86_64/zabbix-release-5.0-1.el7.noarch.rpm sed -i 's#http://repo.zabbix.com#https://mirrors.aliyun.com/zabbix#' /etc/yum.repos.d/zabbix.repo安装azbbix-agent2
yum install zabbix-agent2
ls -l /etc/zabbix/zabbix_agent2.conf
#开机启动 zabbix-agent2
systemctl enable --now zabbix-agent2
yum -y install net-tools
查看端口
netstat -tnlp|grep zabbix![]()


查看验证zabbix-agent2.service文件
ls /lib/systemd/system/zabbix-agent2.service
需要详细也可以cat查看
配置并修改文件
clear
grep -Ev '^#|^$' /etc/zabbix/zabbix_agent2.confcat /var/run/zabbix/zabbix_agent2.pid  (源的不同,可能有些变化)
ps -ef|grep zabbix
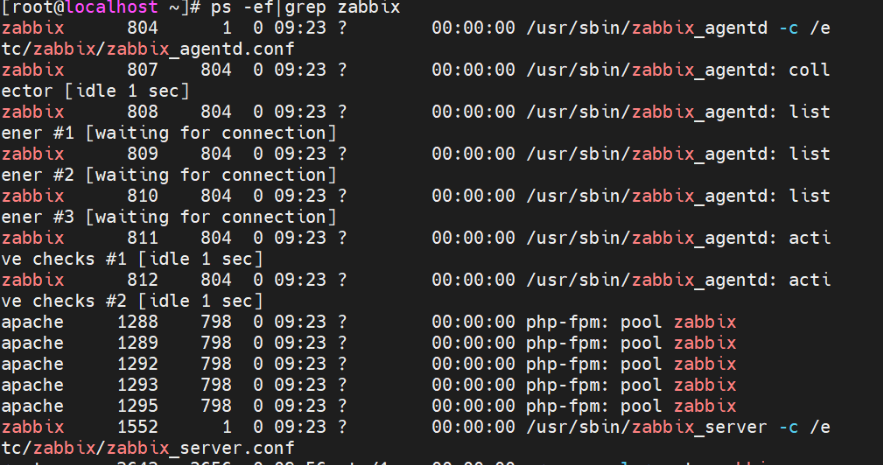
主动模式和被动模式

server和serverActice填写服务端ip地址
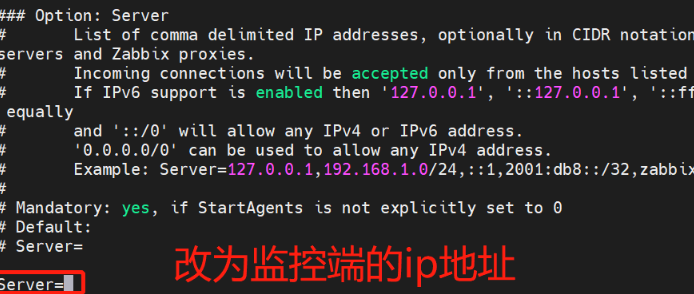
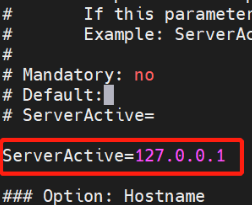
查看本机主机名或重新命名
重新命名c1
hostnamectl set-hostname c1

检查并查看修改了什么
grep -Ev '^#|^$' /etc/zabbix/zabbix_agent2.conf
重启zabbix_agent2
systemctl restart zabbix-agent2
试试zabbix-agent2是否接通监控端
方式1(监控端) 主动获取被监控端数据
yum install zabbix-get -y
redis-cli -h 127.0.0.1 -p 6379
redis-cli -h 127.0.0.1 -p 6379 -a 密码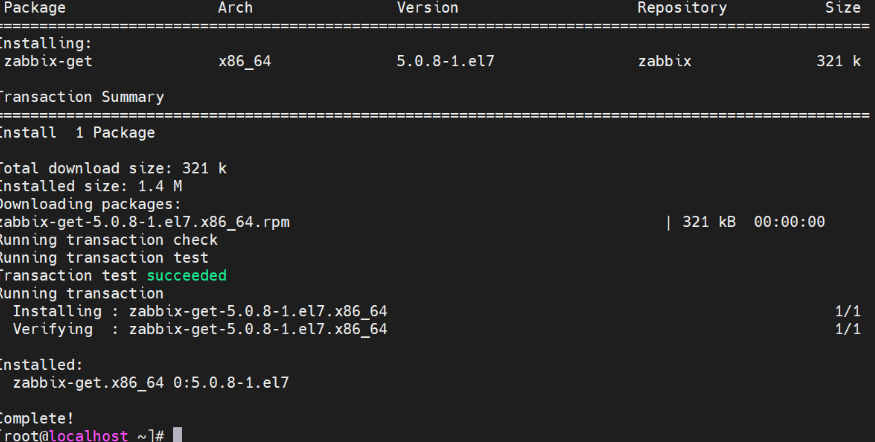
zabbix_get -s 'IP' -p 10050 -k 'agent.ping'
zabbix_get -s 'IP' -p 10050 -k 'system.hostname'
http://EIP/zabbix/zabbix.php?action=dashboard.view (将EIP改为自己的IP地址)
配置主机
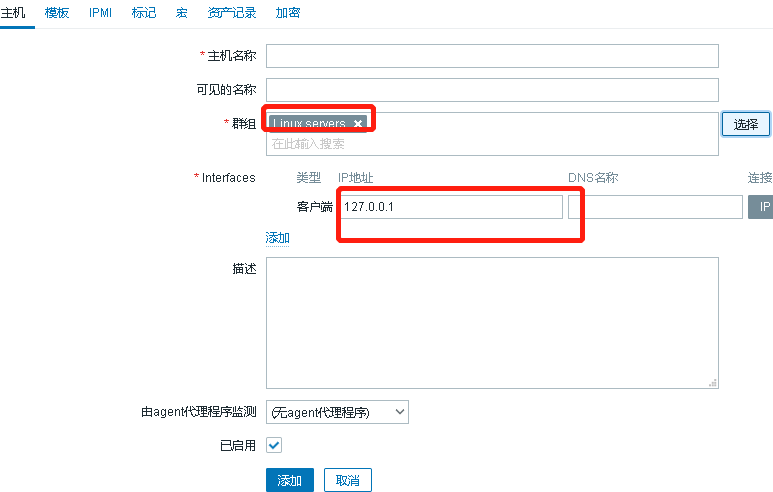
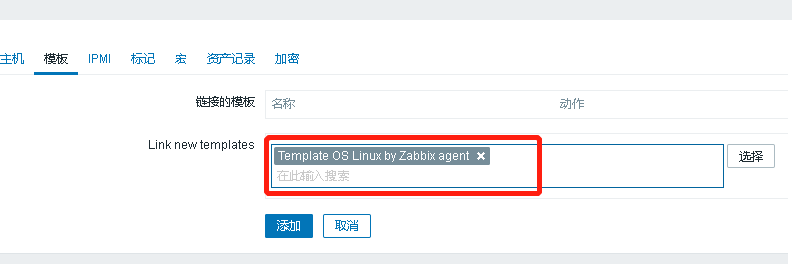

添加redis模板


若添加有密码则添加宏
{$REDIS_PASS}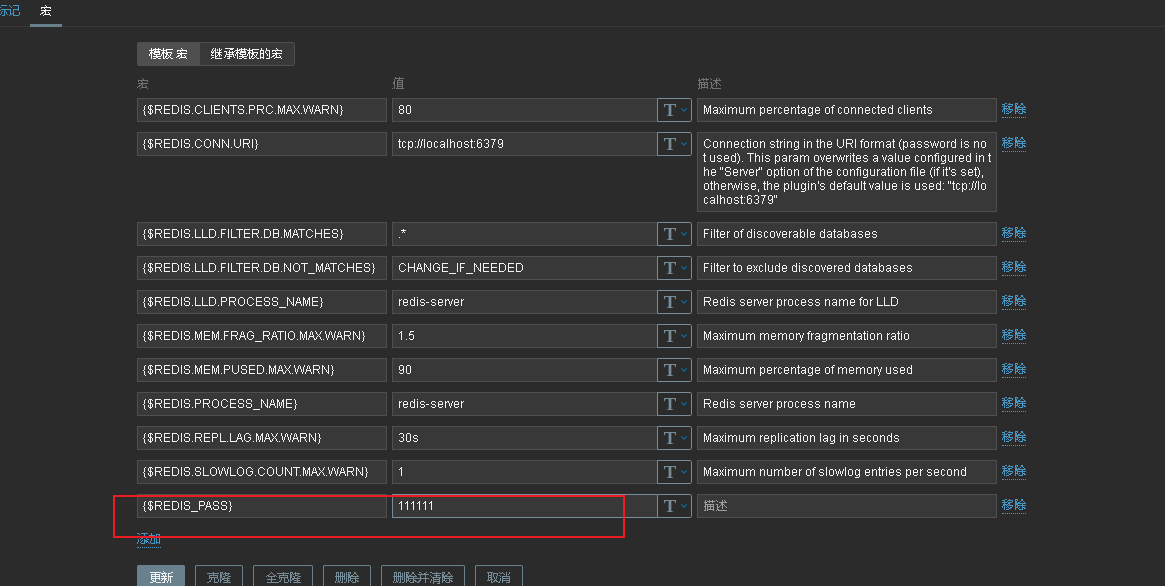
redis压力测试
redis目录下执行压力测试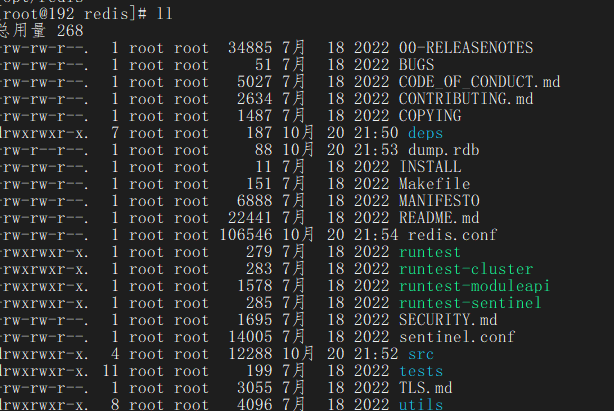
redis-benchmark -q -n 100000
redis-benchmark -t set -n 100000 -q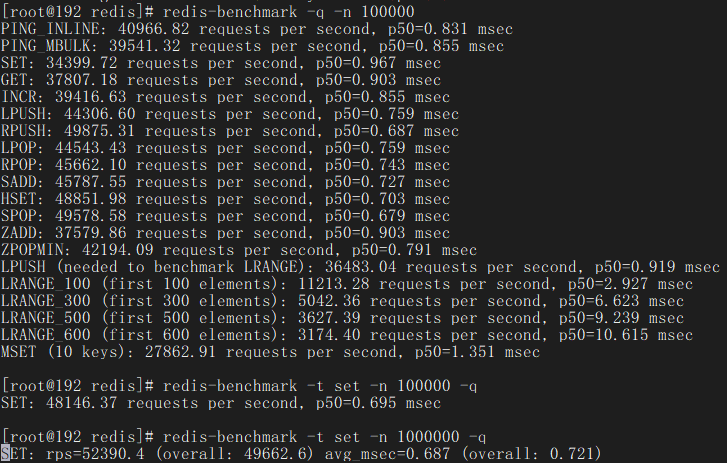
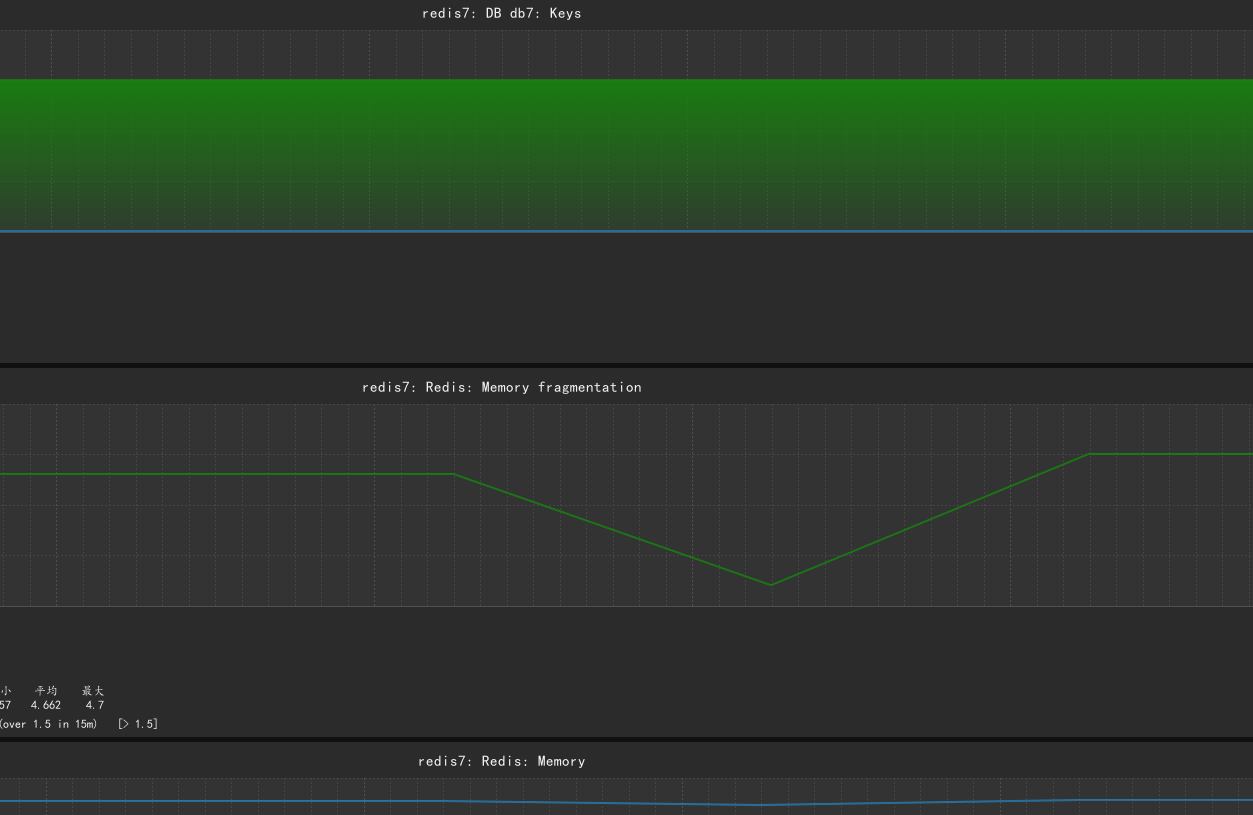
效果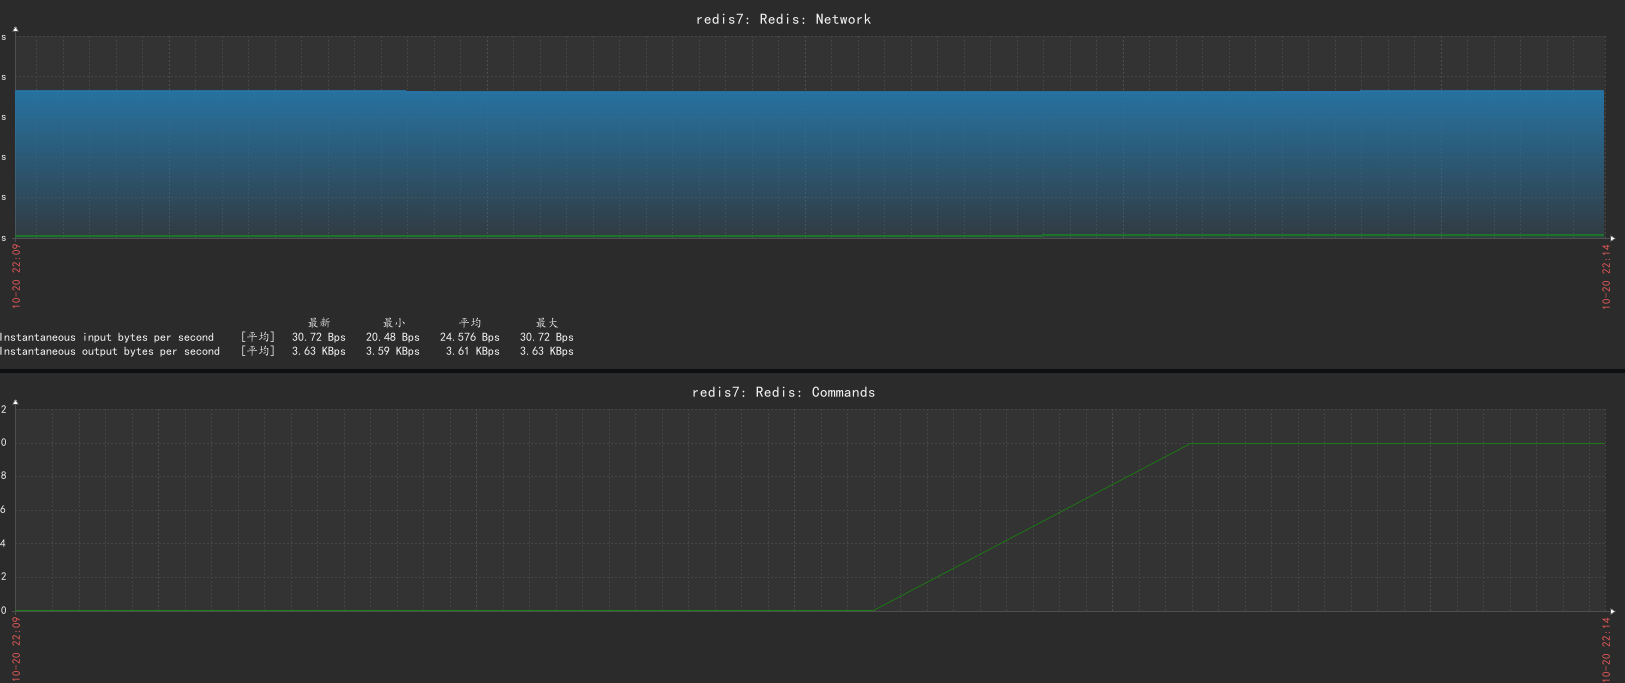
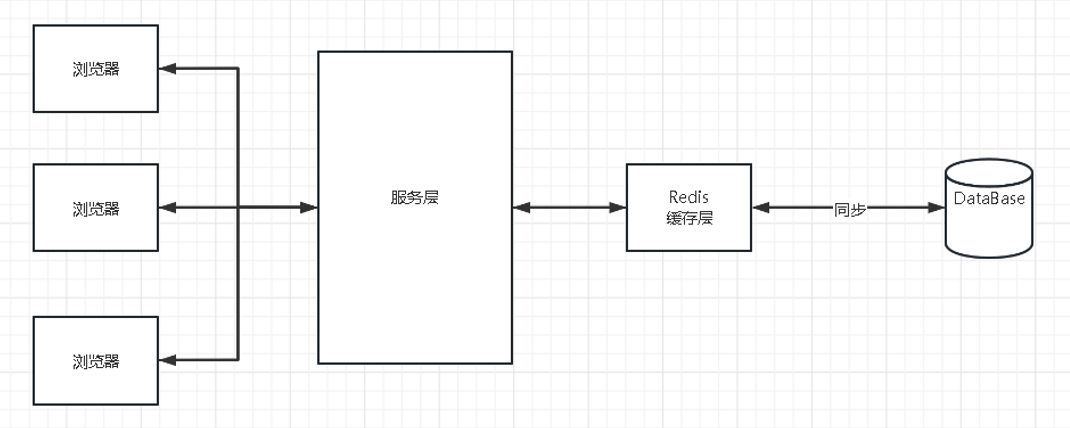
Redis(Remote Dictionary Server ),即远程字典服务,是一个开源的使用ANSI C语言编写、支持网络、可基于内存亦可持久化的日志型、Key-Value数据库,并提供多种语言的API。
Redis是一个NoSQL数据库,常用缓存(cache)
Redis数据类型:string(字符串)、list(链表)、set(集合)、zset(sorted set --有序集合)和hash(哈希类型)
Redis是一个中间件
同步数据(实时性同步数据、阶段性同步数据)
