目录
一、Nginx概述
1. 什么
2. 背景
3. 作用
二、Nginx负载均衡
1. 讲述
2. 使用
1. 下载
2. 安装
3. 负载均衡
三、前端部署
1. 准备
2. 部署
一、Nginx概述
1. 什么
Nginx是一个高性能的开源Web服务器和反向代理服务器。它具有轻量级、高并发、低内存消耗的特点,被广泛用于构建高性能的Web应用和服务。
Nginx最初是由俄罗斯的工程师Igor Sysoev开发的,于2004年首次发布。它的设计目标是解决C10k问题,即同时处理上万个并发连接的问题。相比传统的Web服务器(如Apache),Nginx采用了事件驱动和异步非阻塞的处理方式,能够更高效地处理大量的并发请求。
2. 背景
Nginx的背景可以追溯到2002年,当时俄罗斯的工程师Igor Sysoev开始开发这个项目。他当时是一家俄罗斯的在线广告公司的系统管理员,面临着处理大量并发连接的问题。他发现传统的Web服务器(如Apache)在处理大量并发连接时性能下降严重,无法满足需求。
为了解决这个问题,Sysoev开始着手开发一款高性能的Web服务器。他采用了事件驱动和异步非阻塞的处理方式,以及采用单线程模型来处理并发请求。这种设计使得Nginx能够高效地处理大量的并发连接,而无需为每个连接创建一个新的线程或进程。
在2004年,Nginx首次发布,并迅速获得了广泛的关注和使用。它的高性能、低内存消耗以及简单的配置语法使得它成为了很多网站和应用的首选。随着互联网的快速发展,Nginx逐渐成为了最受欢迎的Web服务器之一。
Nginx的成功也得益于其开源的特性,使得开发者可以自由地使用、修改和分发它。这促进了Nginx的快速发展和持续改进。如今,Nginx已经成为了全球最流行的Web服务器之一,被广泛应用于各种规模的网站、应用和服务中。
3. 作用
Nginx的主要功能包括:
-
静态文件服务:Nginx可以快速地处理静态文件的请求,通过将文件缓存到内存中,减少了对磁盘的访问,提高了响应速度。
-
反向代理:Nginx可以作为反向代理服务器,将客户端的请求转发给后端的多个服务器,实现负载均衡和高可用性。
-
动态内容处理:Nginx支持通过FastCGI、uWSGI和SCGI等协议与后端应用服务器(如PHP、Python、Java)进行通信,实现动态内容的处理和渲染。
-
SSL/TLS加密:Nginx支持SSL/TLS协议,可以提供安全的HTTPS连接,保护数据的传输过程。
-
缓存:Nginx可以使用内置的缓存模块,将经常访问的内容缓存到内存中,减少对后端服务器的请求,提高性能。
-
URL重写和重定向:Nginx提供了强大的URL重写和重定向功能,可以根据规则修改URL,实现URL的美化和重定向。
-
日志记录:Nginx可以记录访问日志和错误日志,方便进行故障排查和性能分析。
总之,Nginx是一个高性能、可扩展、灵活的Web服务器和反向代理服务器,适用于构建高性能的Web应用和服务。它的简单配置和高效处理能力使得它成为了很多大型网站和应用的首选。
二、Nginx负载均衡
1. 讲述
Nginx作为一个反向代理服务器,可以实现负载均衡,将客户端的请求分发给后端的多个服务器。下面是Nginx负载均衡的一般过程:
1. 客户端发送请求:客户端发送请求到Nginx服务器。
2. Nginx接收请求:Nginx服务器接收到客户端的请求。
3. 选择后端服务器:Nginx根据一定的负载均衡算法选择一个后端服务器来处理请求。常见的负载均衡算法有轮询(round robin)、IP哈希(ip_hash)、最少连接(least_conn)等。
4. 转发请求:Nginx将客户端的请求转发给选中的后端服务器。
5. 后端服务器处理请求:选中的后端服务器接收到请求后,处理请求并生成响应。
6. 响应返回给Nginx:后端服务器将处理完的响应返回给Nginx。
7. Nginx返回响应给客户端:Nginx将后端服务器返回的响应转发给客户端。
通过这个过程,Nginx可以将客户端的请求分发给多个后端服务器,实现负载均衡。这样可以提高系统的性能和可靠性,避免单个服务器的过载和故障对整个系统的影响。
需要注意的是,Nginx还可以进行健康检查,定期检查后端服务器的状态,如果发现某个服务器不可用或负载过高,会自动将请求转发给其他可用的服务器。这样可以进一步提高系统的可用性和稳定性。
2. 使用
打开虚拟机【Linux】-Centos,进行登入,并且使用MobaXterm进行连接。
如有不清楚可以看我博客 :
【Linux】安装配置解决Centos&MobaXterm的使用及Linux常用命令&命令模式
https://blog.csdn.net/SAME_LOVE/article/details/134091961?spm=1001.2014.3001.5501
1. 下载
输入命令 : cd javaCloudJun/software 进入到资源文件目录
安装 Nginx 的4个依赖
输入命令 : yum -y install gcc zlib zlib-devel pcre-devel openssl openssl-devel
安装时需要稍等片刻。。。

安装完成后,下载Nginx 然后复制到虚拟机【Linux】-Centos中
Nginx 官网
https://nginx.org/en/download.html之后进行解压使用 。
输入命令 : tar -xvf nginx-1.13.7.tar.gz ( 解压 Nginx)
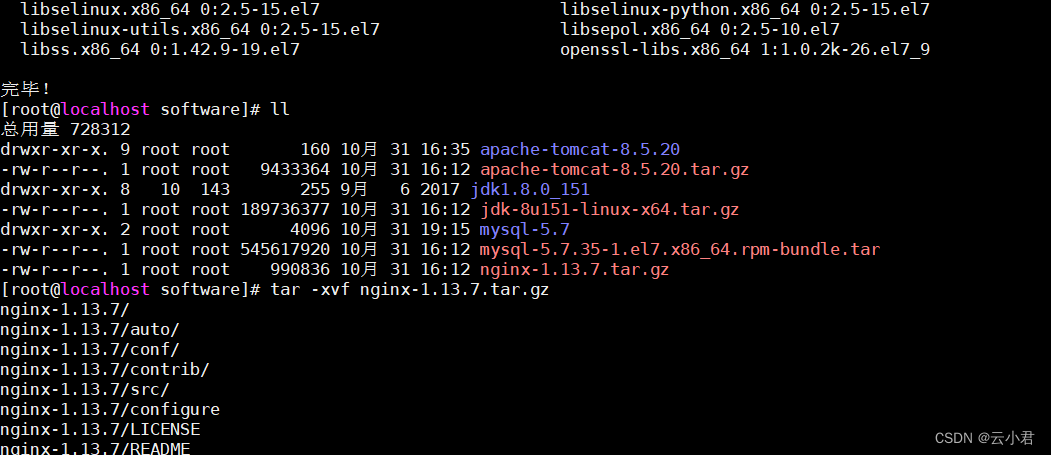
解压后进入其文件
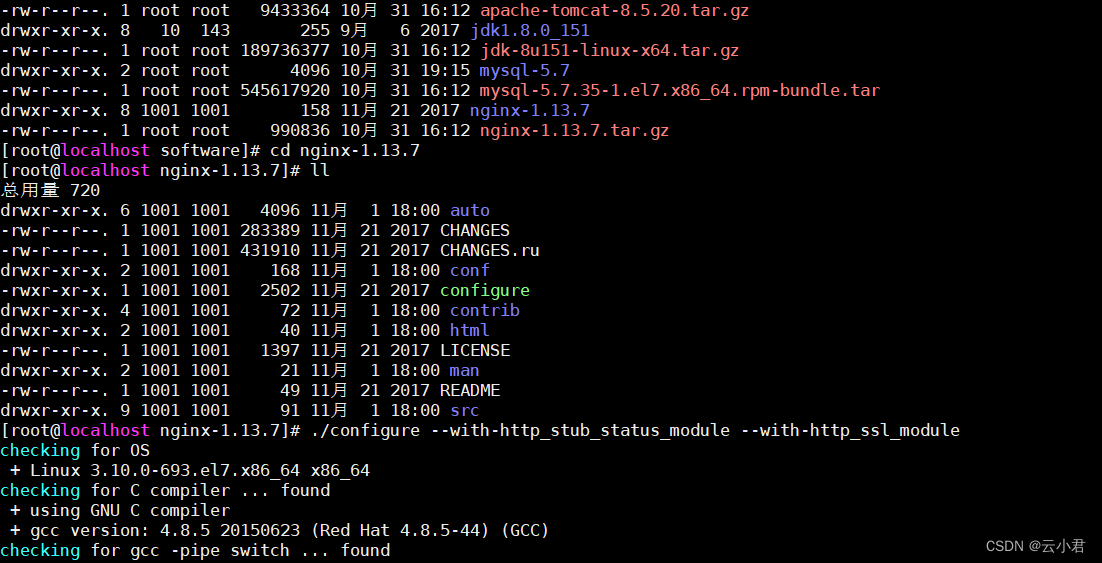
命令 : cd nginx-1.13.7
编译,执行配置: 考虑到后续安装ssl证书 添加两个模块
命令 : ./configure --with-http_stub_status_module --with-http_ssl_module
2. 安装
之后进行安装
命令 : make && make install

安装完后,进入该目录
输入命令 : cd /usr/local/nginx
进入 /usr/local/nginx/sbin 目录下启动:
输入命令 : cd sbin/
启动前安装 lsof 命令
输入命令 : yum install -y lsof
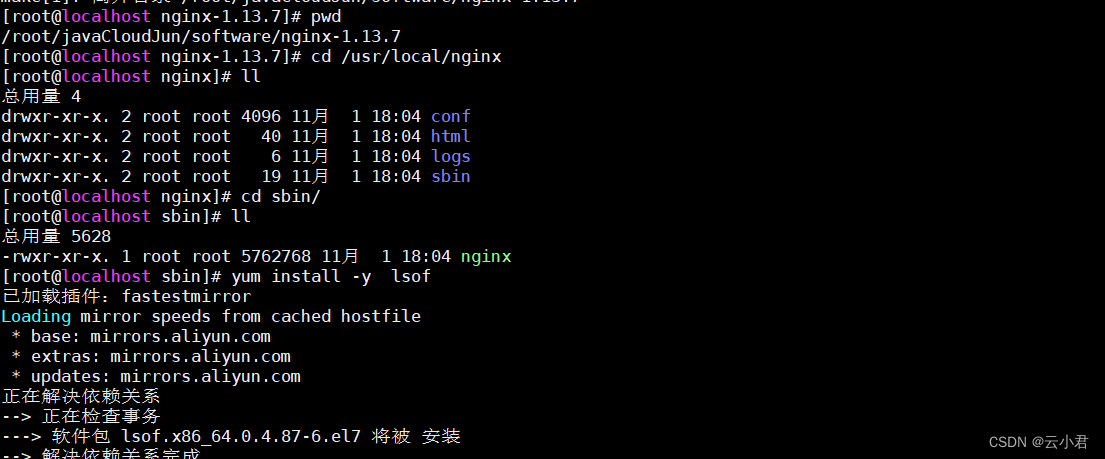
设置防火墙 开放 80 端口
输入命令 : firewall-cmd --zone=public --add-port=80/tcp --permanent
更新防火墙的端口并且查看已开放的端口
输入命令 : firewall-cmd --reload && firewall-cmd --list-port

# 启动
命令 : ./nginx
#查看
命令 : lsof -i:80
在浏览器中,输入虚拟机【Linux】-Centos的IP地址进行搜索
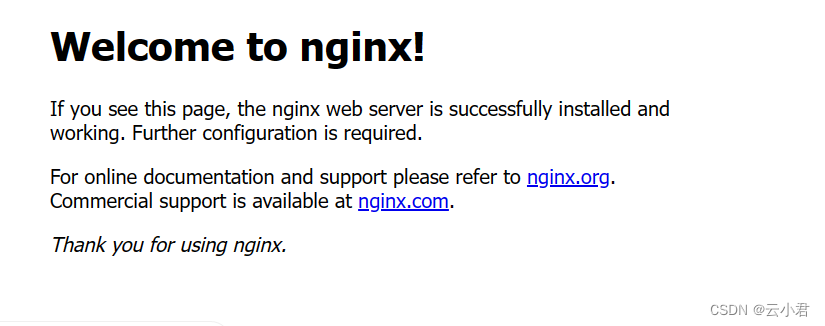
以上就是Nginx 的使用配置并且开启完成了。3.
3. 负载均衡
在资源文件夹中,创建一个tomcat文件夹,来存放Tomcat
输入命令 : mkdir tomcat
并且将tomcat服务解压到指定目录,刚刚创建的tomcat文件夹中。
输入命令 : tar -xvf apache-tomcat-8.5.tar.gz -C tomcat

进入tomcat文件夹中
命令 : cd tomcat/
复制一个tomcat,准备2个tomcat
命令 : cp -r apache-tomcat-8.5.20/ apache-tomcat-8.5.20_8081/
查看命令 : ll

将其中的一个tomcat修改端口,避免两个服务同时开启时端口被占用的情况。
命令 : cd apache-tomcat-8.5.20/conf ( 进入到tomcat的conf文件中 )
找到server.xml 文件进行修改端口
命令 : vim server.xml ( 编辑文件修改端口 )
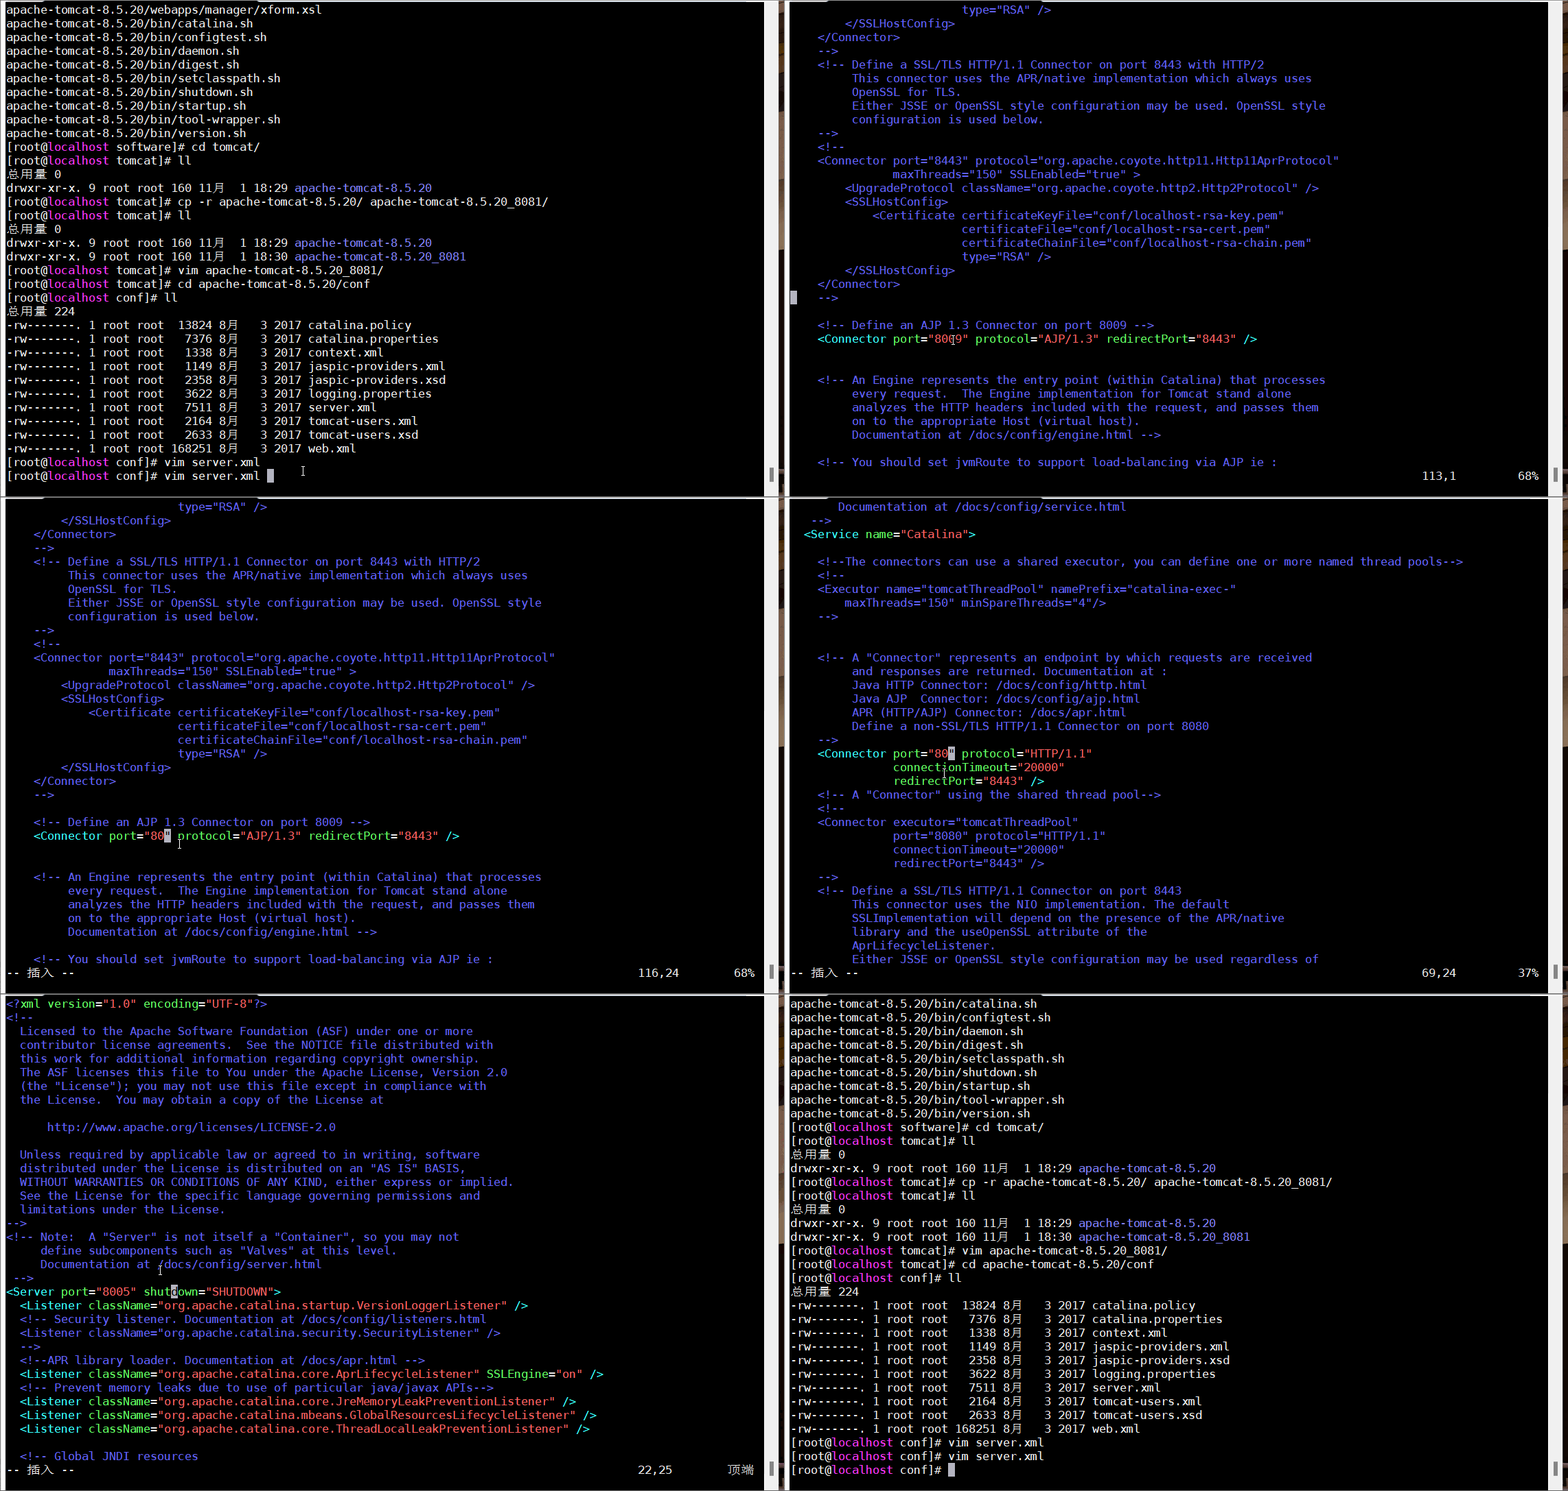
修改后的所以代码 :
<?xml version="1.0" encoding="UTF-8"?> <!--Licensed to the Apache Software Foundation (ASF) under one or morecontributor license agreements. See the NOTICE file distributed withthis work for additional information regarding copyright ownership.The ASF licenses this file to You under the Apache License, Version 2.0(the "License"); you may not use this file except in compliance withthe License. You may obtain a copy of the License athttp://www.apache.org/licenses/LICENSE-2.0Unless required by applicable law or agreed to in writing, softwaredistributed under the License is distributed on an "AS IS" BASIS,WITHOUT WARRANTIES OR CONDITIONS OF ANY KIND, either express or implied.See the License for the specific language governing permissions andlimitations under the License. --> <!-- Note: A "Server" is not itself a "Container", so you may notdefine subcomponents such as "Valves" at this level.Documentation at /docs/config/server.html--> <Server port="8006" shutdown="SHUTDOWN"><Listener className="org.apache.catalina.startup.VersionLoggerListener" /><!-- Security listener. Documentation at /docs/config/listeners.html<Listener className="org.apache.catalina.security.SecurityListener" />--><!--APR library loader. Documentation at /docs/apr.html --><Listener className="org.apache.catalina.core.AprLifecycleListener" SSLEngine="on" /><!-- Prevent memory leaks due to use of particular java/javax APIs--><Listener className="org.apache.catalina.core.JreMemoryLeakPreventionListener" /><Listener className="org.apache.catalina.mbeans.GlobalResourcesLifecycleListener" /><Listener className="org.apache.catalina.core.ThreadLocalLeakPreventionListener" /><!-- Global JNDI resourcesDocumentation at /docs/jndi-resources-howto.html--><GlobalNamingResources><!-- Editable user database that can also be used byUserDatabaseRealm to authenticate users--><Resource name="UserDatabase" auth="Container"type="org.apache.catalina.UserDatabase"description="User database that can be updated and saved"factory="org.apache.catalina.users.MemoryUserDatabaseFactory"pathname="conf/tomcat-users.xml" /></GlobalNamingResources><!-- A "Service" is a collection of one or more "Connectors" that sharea single "Container" Note: A "Service" is not itself a "Container",so you may not define subcomponents such as "Valves" at this level.Documentation at /docs/config/service.html--><Service name="Catalina"><!--The connectors can use a shared executor, you can define one or more named thread pools--><!--<Executor name="tomcatThreadPool" namePrefix="catalina-exec-"maxThreads="150" minSpareThreads="4"/>--><!-- A "Connector" represents an endpoint by which requests are receivedand responses are returned. Documentation at :Java HTTP Connector: /docs/config/http.htmlJava AJP Connector: /docs/config/ajp.htmlAPR (HTTP/AJP) Connector: /docs/apr.htmlDefine a non-SSL/TLS HTTP/1.1 Connector on port 8080--><Connector port="8081" protocol="HTTP/1.1"connectionTimeout="20000"redirectPort="8443" /><!-- A "Connector" using the shared thread pool--><!--<Connector executor="tomcatThreadPool"port="8080" protocol="HTTP/1.1"connectionTimeout="20000"redirectPort="8443" />--><!-- Define a SSL/TLS HTTP/1.1 Connector on port 8443This connector uses the NIO implementation. The defaultSSLImplementation will depend on the presence of the APR/nativelibrary and the useOpenSSL attribute of theAprLifecycleListener.Either JSSE or OpenSSL style configuration may be used regardless ofthe SSLImplementation selected. JSSE style configuration is used below.--><!--<Connector port="8443" protocol="org.apache.coyote.http11.Http11NioProtocol"maxThreads="150" SSLEnabled="true"><SSLHostConfig><Certificate certificateKeystoreFile="conf/localhost-rsa.jks"type="RSA" /></SSLHostConfig></Connector>--><!-- Define a SSL/TLS HTTP/1.1 Connector on port 8443 with HTTP/2This connector uses the APR/native implementation which always usesOpenSSL for TLS.Either JSSE or OpenSSL style configuration may be used. OpenSSL styleconfiguration is used below.--><!--<Connector port="8443" protocol="org.apache.coyote.http11.Http11AprProtocol"maxThreads="150" SSLEnabled="true" ><UpgradeProtocol className="org.apache.coyote.http2.Http2Protocol" /><SSLHostConfig><Certificate certificateKeyFile="conf/localhost-rsa-key.pem"certificateFile="conf/localhost-rsa-cert.pem"certificateChainFile="conf/localhost-rsa-chain.pem"type="RSA" /></SSLHostConfig></Connector>--><!-- Define an AJP 1.3 Connector on port 8009 --><Connector port="8010" protocol="AJP/1.3" redirectPort="8443" /><!-- An Engine represents the entry point (within Catalina) that processesevery request. The Engine implementation for Tomcat stand aloneanalyzes the HTTP headers included with the request, and passes themon to the appropriate Host (virtual host).Documentation at /docs/config/engine.html --><!-- You should set jvmRoute to support load-balancing via AJP ie :<Engine name="Catalina" defaultHost="localhost" jvmRoute="jvm1">--><Engine name="Catalina" defaultHost="localhost"><!--For clustering, please take a look at documentation at:/docs/cluster-howto.html (simple how to)/docs/config/cluster.html (reference documentation) --><!--<Cluster className="org.apache.catalina.ha.tcp.SimpleTcpCluster"/>--><!-- Use the LockOutRealm to prevent attempts to guess user passwordsvia a brute-force attack --><Realm className="org.apache.catalina.realm.LockOutRealm"><!-- This Realm uses the UserDatabase configured in the global JNDIresources under the key "UserDatabase". Any editsthat are performed against this UserDatabase are immediatelyavailable for use by the Realm. --><Realm className="org.apache.catalina.realm.UserDatabaseRealm"resourceName="UserDatabase"/></Realm><Host name="localhost" appBase="webapps"unpackWARs="true" autoDeploy="true"><!-- SingleSignOn valve, share authentication between web applicationsDocumentation at: /docs/config/valve.html --><!--<Valve className="org.apache.catalina.authenticator.SingleSignOn" />--><!-- Access log processes all example.Documentation at: /docs/config/valve.htmlNote: The pattern used is equivalent to using pattern="common" --><Valve className="org.apache.catalina.valves.AccessLogValve" directory="logs"prefix="localhost_access_log" suffix=".txt"pattern="%h %l %u %t "%r" %s %b" /></Host></Engine></Service> </Server>注 : 将该服务器tomcat的所以端口都进行了修改,以免其他所有端口也有冲突。
并且将这个服务器的页面显示内容进行修改,访问时容易分辨是哪个tomcat端口进入的
在tomcat根目录的webapps中的ROOT目录中,找到index.jsp文件,在MobaXterm工具的左边选中这个文件,右键点击第二个进行打开文件,并且修改编辑文件。
编辑后的所有内容如下 :
<%--
Licensed to the Apache Software Foundation (ASF) under one or more
contributor license agreements.  See the NOTICE file distributed with
this work for additional information regarding copyright ownership.
The ASF licenses this file to You under the Apache License, Version 2.0
(the "License"); you may not use this file except in compliance with
the License.  You may obtain a copy of the License athttp://www.apache.org/licenses/LICENSE-2.0Unless required by applicable law or agreed to in writing, software
distributed under the License is distributed on an "AS IS" BASIS,
WITHOUT WARRANTIES OR CONDITIONS OF ANY KIND, either express or implied.
See the License for the specific language governing permissions and
limitations under the License.
--%>
<%@ page session="false" pageEncoding="UTF-8" contentType="text/html; charset=UTF-8" %>
<%
java.text.SimpleDateFormat sdf = new java.text.SimpleDateFormat("yyyy");
request.setAttribute("year", sdf.format(new java.util.Date()));
request.setAttribute("tomcatUrl", "http://tomcat.apache.org/");
request.setAttribute("tomcatDocUrl", "/docs/");
request.setAttribute("tomcatExamplesUrl", "/examples/");
%>
<!DOCTYPE html>
<html lang="en"><head><meta charset="UTF-8" /><title><%=request.getServletContext().getServerInfo() %></title><link href="favicon.ico" rel="icon" type="image/x-icon" /><link href="favicon.ico" rel="shortcut icon" type="image/x-icon" /><link href="tomcat.css" rel="stylesheet" type="text/css" /></head><body><h1>8081</h1></body></html>
返回到tomcat目录,并且开其两个服务(tomcat)
命令: cd apache-tomcat-8.5.20/bin ( 进入到tomcat的bin目录中 )
命令: ./startup.sh ( 开启服务 )

再到 nginx的目录中
命令: cd /usr/local/nginx

并且进入 : sbin目录
输入 : cd sbin
命令 : ./nginx -s reload
注 : 重新开启nginx
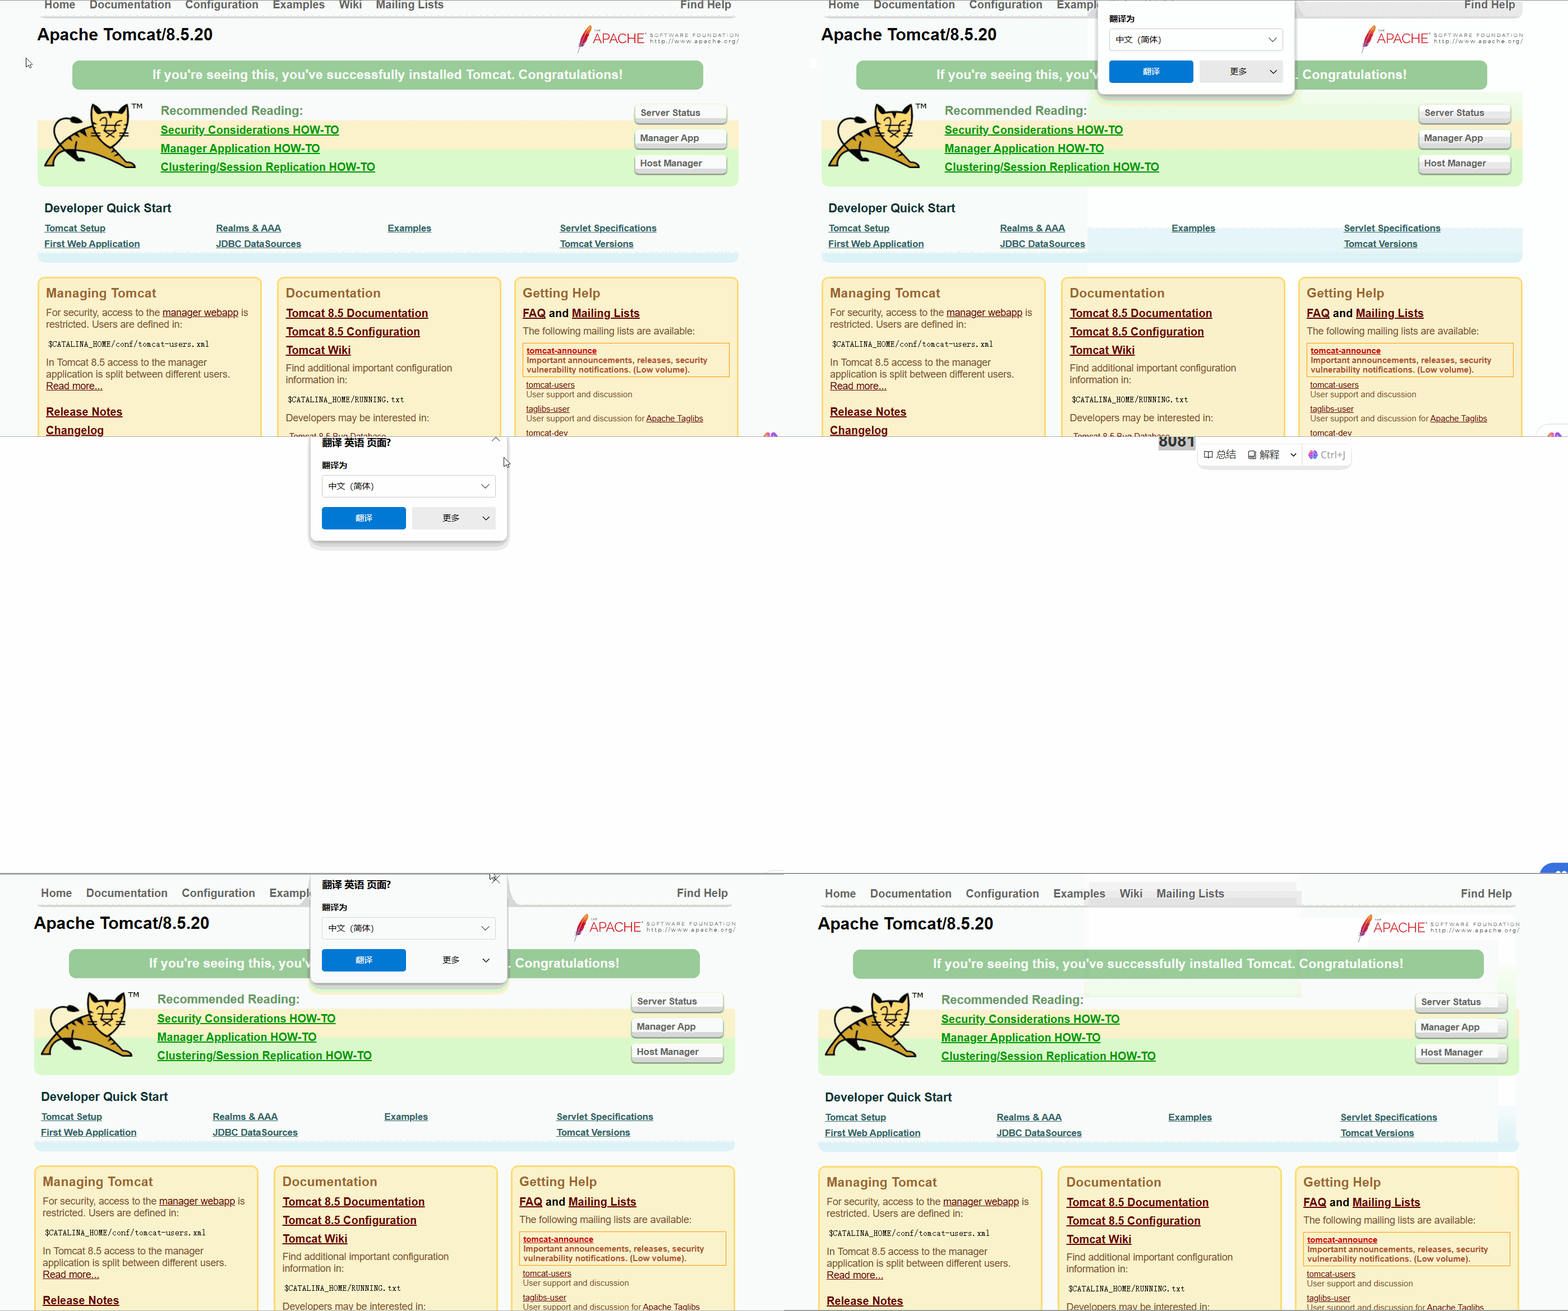
之后在浏览器中访问,就有两个服务在运行用一个了
如图 :
三、前端部署
1. 准备
前端项目打包之前需要增加以下的设置
在前端项目中 config文件下的index.js中要增加以下代码 :
assetsPublicPath: './',//修改后
如图:
在前端项目中 build文件下的 utils.js 中增加以下代码 :
// 解决icon路径加载错误
publicPath:'../../'
如图:
在前端项目的跟目录中,cmd打开命令窗口
输入命令 : npm run build ( 进行前端项目打包 )
如图 :
命令执行后,会出现如图中以下文件 dist
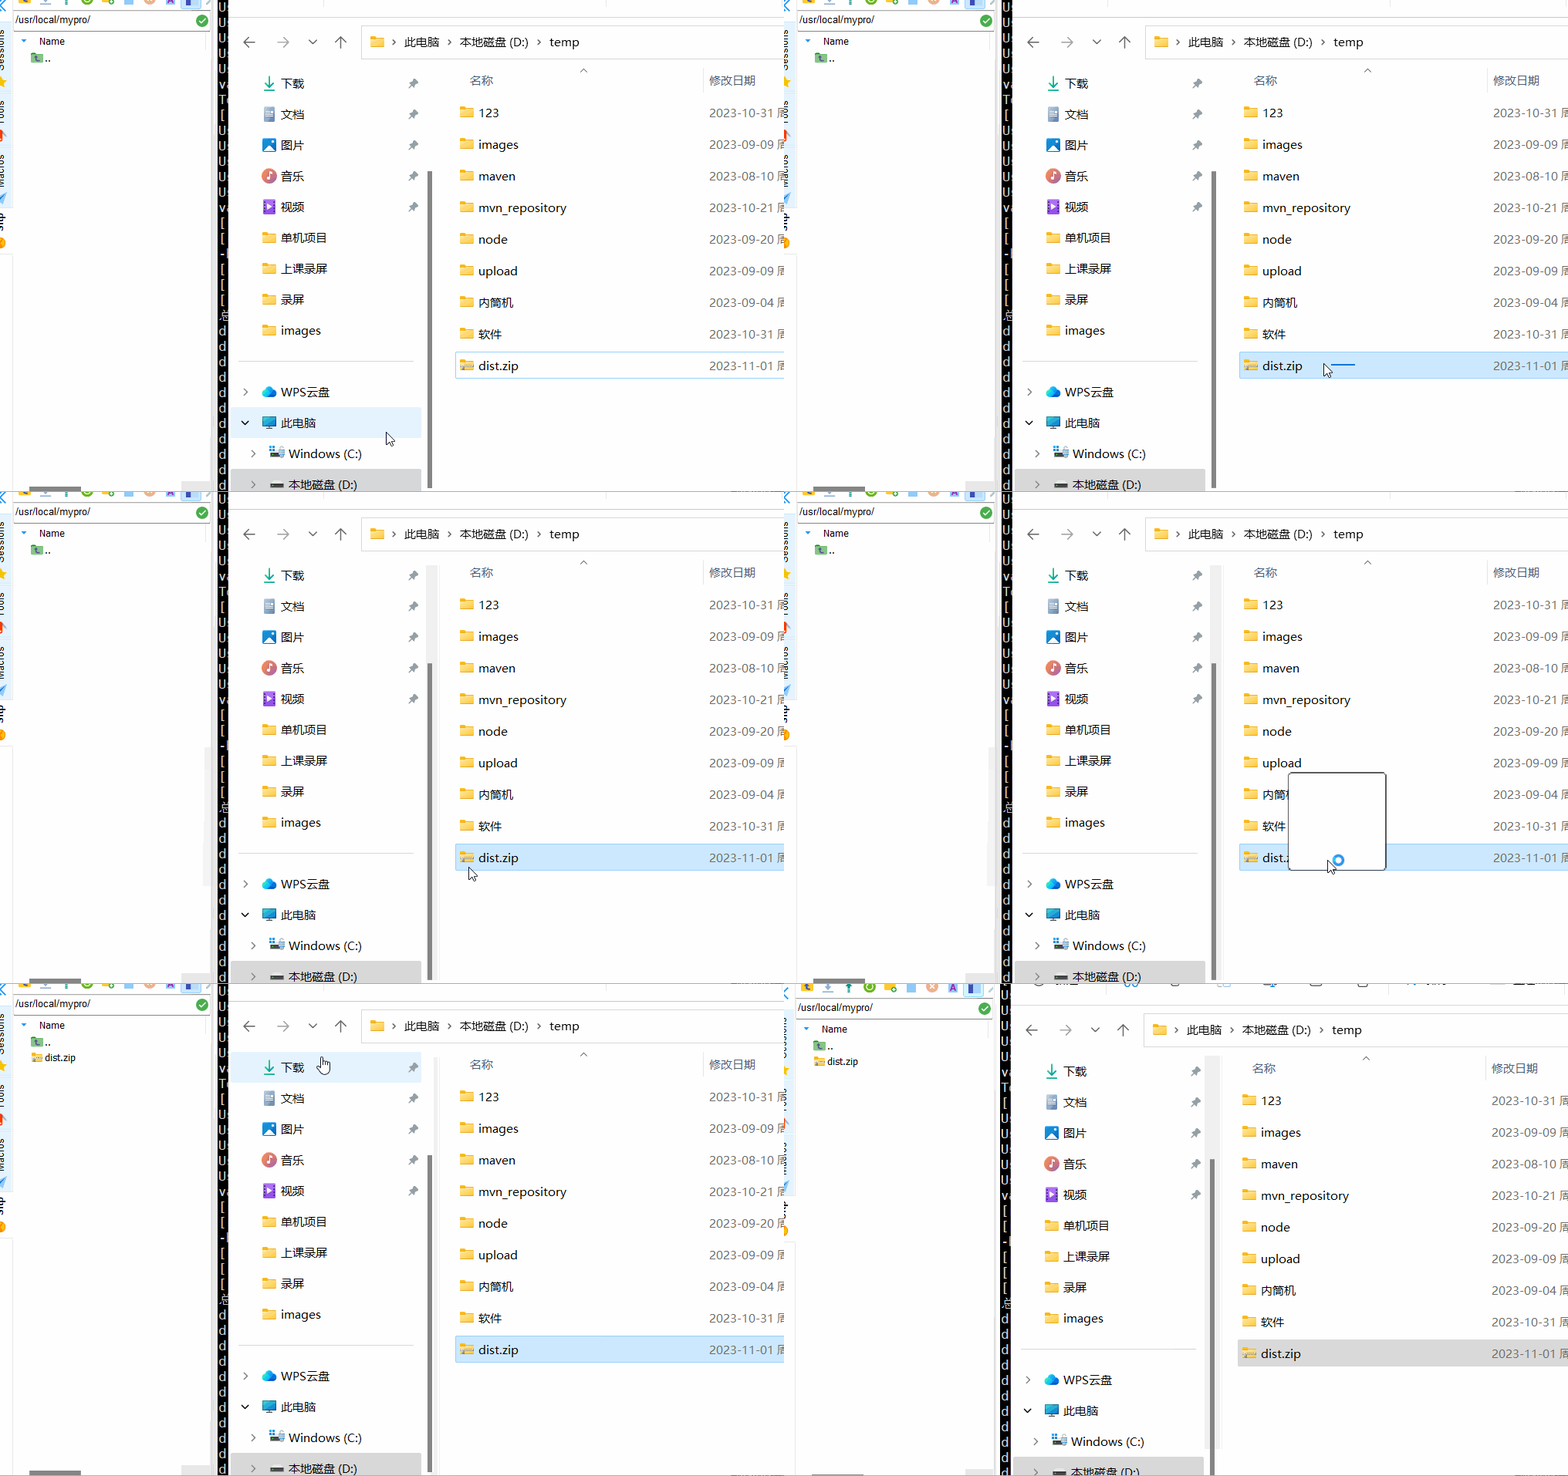
在 /usr/local/ 目录下创建一个文件夹,为mypor ,并且进入文件夹,之后将dist文件拖入mypor文件夹中
并且选中zip解压的命令 : yum install -y unzip

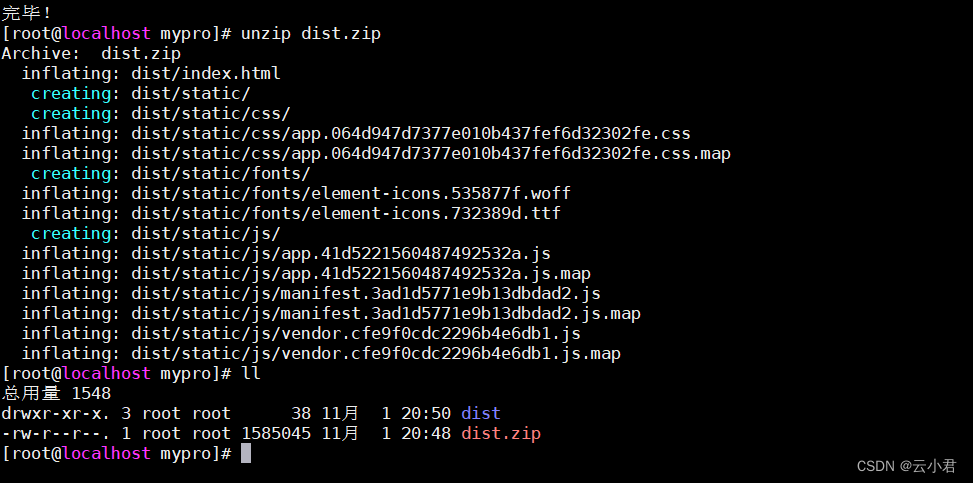
将该文件进行解压
输入命令 : unzip dist.zip
2. 部署
输入命令 : cd /usr/local/nginx/conf/ 找到nginx.conf进行编辑
以下是所有代码 :
#user  nobody;
worker_processes  1;#error_log  logs/error.log;
#error_log  logs/error.log  notice;
#error_log  logs/error.log  info;#pid        logs/nginx.pid;events {worker_connections  1024;
}http {include       mime.types;default_type  application/octet-stream;#log_format  main  '$remote_addr - $remote_user [$time_local] "$request" '#                  '$status $body_bytes_sent "$http_referer" '#                  '"$http_user_agent" "$http_x_forwarded_for"';#access_log  logs/access.log  main;sendfile        on;#tcp_nopush     on;#keepalive_timeout  0;keepalive_timeout  65;#gzip  on;#服务器的集群upstream  tomcat_list {  #服务器集群名字server    127.0.0.1:8080  weight=1;   #服务器1   weight是权重的意思,权重越大,分配的概率越大。server    127.0.0.1:8081  weight=2;   #服务器2   weight是权重的意思,权重越大,分配的概率越大} server {listen       80;server_name  localhost;#charset koi8-r;#access_log  logs/host.access.log  main;location / {root   /usr/local/mypro/dist;#proxy_pass   http://tomcat_list;index  index.html index.htm;}location  ^~/api/ {#^~/api/表示匹配前缀是api的请求,proxy_pass的结尾有/, 则会把/api/*后面的路径直接拼接到后面,即移除apiproxy_pass http://tomcat_list/;}#error_page  404              /404.html;# redirect server error pages to the static page /50x.html#error_page   500 502 503 504  /50x.html;location = /50x.html {root   html;}# proxy the PHP scripts to Apache listening on 127.0.0.1:80##location ~ \.php$ {#    proxy_pass   http://127.0.0.1;#}# pass the PHP scripts to FastCGI server listening on 127.0.0.1:9000##location ~ \.php$ {#    root           html;#    fastcgi_pass   127.0.0.1:9000;#    fastcgi_index  index.php;#    fastcgi_param  SCRIPT_FILENAME  /scripts$fastcgi_script_name;#    include        fastcgi_params;#}# deny access to .htaccess files, if Apache's document root# concurs with nginx's one##location ~ /\.ht {#    deny  all;#}}# another virtual host using mix of IP-, name-, and port-based configuration##server {#    listen       8000;#    listen       somename:8080;#    server_name  somename  alias  another.alias;#    location / {#        root   html;#        index  index.html index.htm;#    }#}# HTTPS server##server {#    listen       443 ssl;#    server_name  localhost;#    ssl_certificate      cert.pem;#    ssl_certificate_key  cert.key;#    ssl_session_cache    shared:SSL:1m;#    ssl_session_timeout  5m;#    ssl_ciphers  HIGH:!aNULL:!MD5;#    ssl_prefer_server_ciphers  on;#    location / {#        root   html;#        index  index.html index.htm;#    }#}}
输入命令 : cd /usr/local/nginx/sbin/
输入命令 :./nginx -s reload 重启nginx
在将后端的war包 传入tomcat服务器中。
并且输入命令 : ./startup.sh (开启访问)

在浏览器中进行访问 使用虚拟机的IP加tomcat的端口
在到文件资源管理器中进入到 以下本地目录
C:\Windows\System32\drivers\etc
找到 hosts 文件进行修改IP的请求
如图 :
在进浏览器中进行访问 使用虚拟机的IP加tomcat的端口,即可。。













![移动路由器Cellular Router命令执行漏洞复现 [附POC]](https://img-blog.csdnimg.cn/67e6655d0ece448aa7d362fcbcf4a8fc.png)
